Top 7 Best Chimineas For Your Backyard in 2021

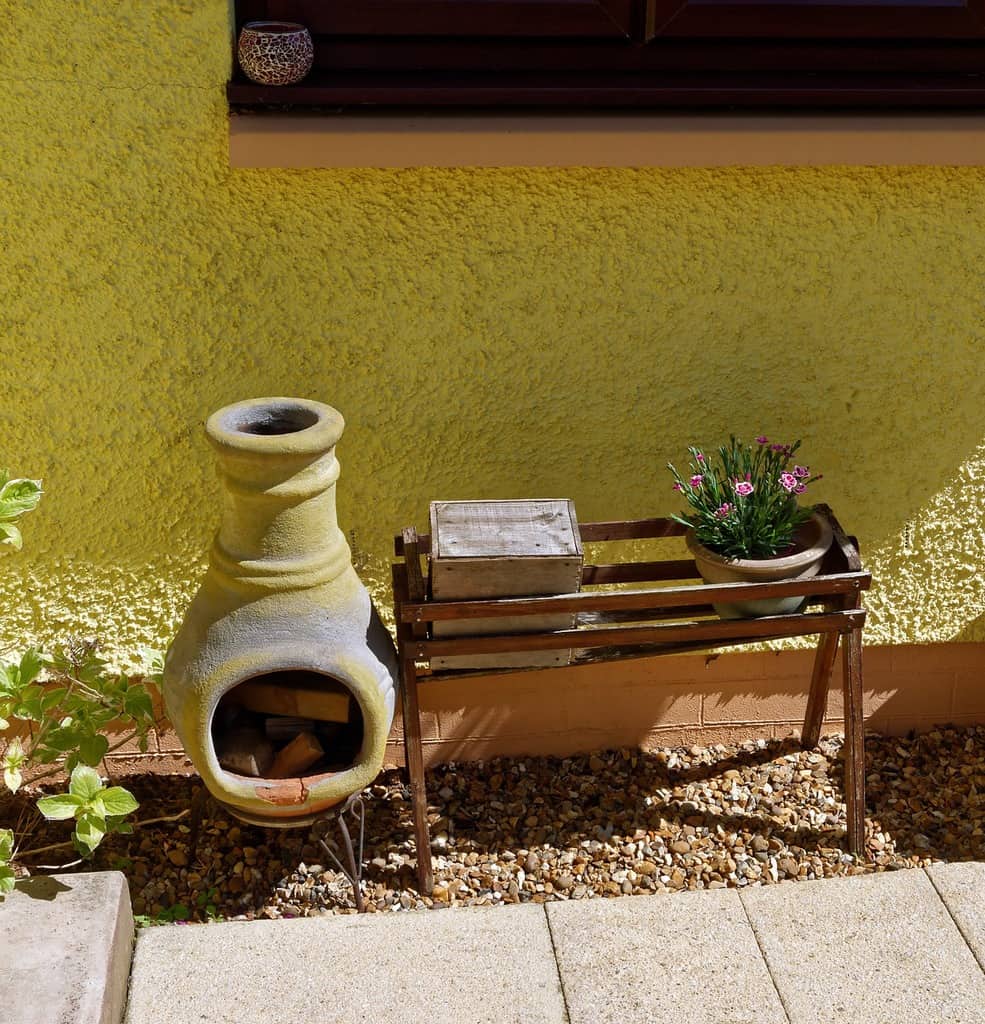
Add a bit more authenticity, sophistication, and rustic atmosphere to your garden with a chiminea fire pit. This pear-shaped outdoor fire pit has been used for warmth and cooking for over 400 years, with origins tracing back to Spain and Mexico. These days chimineas are gaining even more popularity because of their exquisite looks that add character and authenticity to your garden or a backyard. Take a look at our list of the top 7 best chimineas for your backyard in 2021 to find the perfect option for your garden.

What to Consider Before Buying a Chiminea?

Size and Shape

Chiminea on patio
Txspiderman81, CC BY-SA 3.0, via Wikimedia Commons

Depending on your needs, you might want a larger or smaller chiminea. If you’re looking for a cozy night outside on your patio with your significant other, then a small chiminea is perfect. If you’re looking to provide warmth for a group of friends, go for a chiminea with a larger base so it would fit more fuel. Larger chimineas are quite similar to big wood-burning fire pits with mesh on top, except the pits don’t have chimneys to collect some of the smoke. Just remember, the larger the chiminea, the more care and maintenance it might need.

Design

Joe Mabel, CC BY-SA 3.0, via Wikimedia Commons

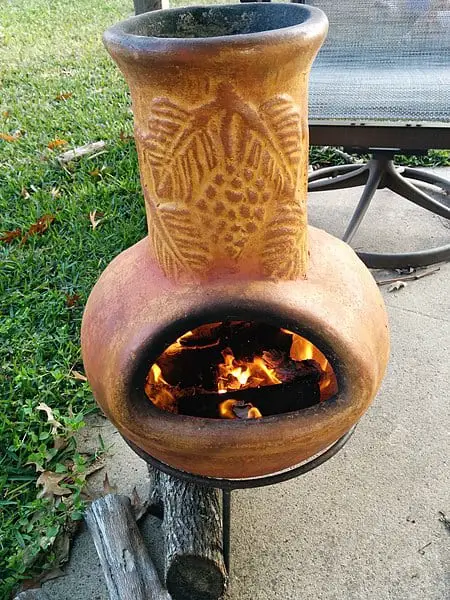
Chimineas are all about the looks! Traditional-looking ones are pear-shaped with a bubbly bottom and chimney going upwards. They are excellent if you’re looking for something rustic and need to provide heat to a smaller area. If you want to do some grilling and provide heat for a larger area, you might want to go for a chiminea with a mesh. It will provide a 360 degrees view of the fire and usually has more space for grilling. However, you’ll have more smoke coming through the mesh instead of going out the chimney, and if the steel supports rust away, you will be left with an open fire pit.

Material

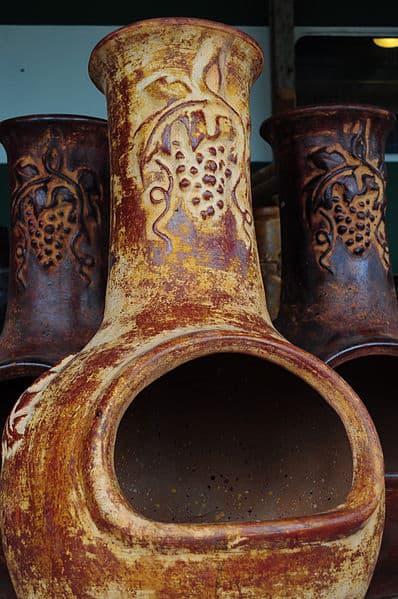
Traditional chimineas are made out of clay, usually by hand. These authentic chimineas are much heavier than most metal ones and require a lot of maintenance and care. For first-time buyers, we suggest staying away from clay chimineas. They look amazing but are extremely fragile, heavy, expensive, and require a ton of care.

The most common choice these days are metal chimineas. You’ll be able to find cast iron, cast aluminum, steel, or even copper chimineas. If you want something very sturdy, go for cast iron or cast aluminum. Steel and copper chimineas are very easy to move around if you decide to rearrange your backyard, but they are also prone to corrosion and rust.

Accessories

Chimineas usually don’t have a lot of accessories. A chiminea might have a wood grate at the bottom to provide more airflow for your fuel, but it is not a necessity since most chimineas usually have an air vent. If you want to cook, grill or smoke something, look at a chiminea that allows inserting a grilling grate. Some chimineas have mesh in the build to protect you from jumping embers.


Top 7 Best Chiminea Reviews

Esschert Design FF109 Small Terrace Heater

Esschert FF109 is a genuine cast iron chimenea for people looking to add extra coziness and a small fire source on their patios. Its dimensions are 15.75 x 14.96 x 27.95 inches and weighs 46 lbs. since it’s made from cast iron. Yes, it weighs quite a bit and is not very portable, but the whole cast iron construction is exceptionally sturdy and durable. It also comes with a lid for the top to protect against rain and unnecessary debris falling inside.

Don’t be mistaken and think that it won’t produce enough heat. This black beauty might be petite, but it packs a punch. When you have a proper fire going, cast iron gets really hot and will heat 6-8 feet around the chiminea. Depending on your patio or backyard layout, that might be enough to heat 4-8 people around the chiminea. If you want, you can also pop a grill grate on the tube top and cook some food.

The 14-inch mouth on this chimenea and a smaller chamber does limit the size of logs and kindling you can use. Anything over 8 inches in length will be hard to fit inside.

Other than that, the FF109 is one of the best small chimineas currently on the market that will add a rustic look and exclusive style to your outdoor living space.

Key features:

  • Cast iron construction
  • Sturdy and durable
  • Authentic design
  • High heat output
  • Cheap

Weaknesses:

  • The small body requires short logs.

B H & G C0. Antique Bronze Cast Iron Chiminea

If you’re looking for something more elegant and sophisticated than a simple firewood burning fire pit, B H & G chiminea might be a perfect option for you. The 46-inch height chiminea has a 360 degrees view of the fire through a thin mesh. A large 28-inches width chamber allows you to hold a lot of wood and provide heat for your whole patio.

This antique-style chiminea is made of cast iron and has a bronze finish. Compared to other cast iron chimineas B H & G Antique chiminea is much cheaper. We can see that the construction is a bit thinner than you would expect, so the longevity might be shorter than thick and heavy cast iron chimineas. However, it does come with a poker, lid on top, and even a nylon cover to protect against rain, snow, or other debris when not in use.

This large 360 degrees chiminea is the best budget chiminea on our list today and a perfect addition to any lounging area if you want something different but don’t want to spend a fortune.

Key features:

  • Cast iron construction
  • Large capacity
  • Nice bronze finish
  • 360 degrees view of the fire
  • Cheap
  • It comes with a lid and cover

Weaknesses:

  • Thin metal construction

BALI OUTDOORS Outdoor Fireplace Wooden Fire Pit, Chimenea

We have already reviewed a bunch of wood-burning fire pits from Bali Outdoors, so it’s no surprise to see their product on the best chimineas list too. Their cast iron chiminea has a black matte look to represent classic authentic chiminea and features a ton of accessories for easy use and care.

The 22 x 22 x 45 inches cast iron construction weighs almost 53 lbs. and stands on three sturdy legs to elevate the chiminea from the ground. A wide 22-inch cage has plenty of room for 16-inch firewood logs. The whole middle sectioned has fine mesh for a nice view of the fire all around the chiminea. A wide sliding door provides easy access to add more fuel or when using a grill grate for food. We love the small sliding ash drawer at the bottom for an easy clean-up after use.

As mentioned above, if you want, you can grill or cook food in this chiminea with the included grill grate and a convenient poker. The best part is that this lovely looking, high-quality, and nicely designed chiminea is not expensive at all! For this reason, it takes the overall best chiminea spot on our list today.

Key features:

  • Cast iron
  • Sturdy construction
  • Beautiful classic look
  • Large capacity
  • 360 degrees fire view
  • It can be used to grill, cook, or smoke.
  • Easy clean-up
  • Lid

Weaknesses:

  •  None

Kotulas Cabin-Style Outdoor Cooking Steel Chiminea

Love grilling but want something different than a regular fire pit? Kotulas Cabin-style chiminea is an amazing heat and fire source that looks like a small cabin. You’ll have plenty of space for grilling, while the small chimney will protect you from the pesky smoke.

The 0.8 mm – 1 mm thickness gauge steel construction is sturdy enough to stand firmly on any surface. The whole chiminea has a high-temperature finish and lovely deer engraved at the front to add some Northwoods vibes. You’ll also have poker and an ash shovel included in the purchase.

The chiminea’s unusual design makes it the center of entertainment during gatherings with friends and family. The opening and inside are big enough to add a grill grate for 4-6 people or use it for a cozy fire and marshmallow roasting.

The only disadvantage with this great-looking chiminea is the steel construction that is much more prone to rusting. Make sure to get a cover for it or add an additional heatproof paint coat.

Key features:

  • Exceptional design
  • Gauge steel construction
  • Large enough to grill food
  • Poker and shovel included.

Weaknesses:

  • Prone to rust

Deckmate Sonora Outdoor Chimenea Fireplace Model 30199

Standing at over 4 feet tall, Sonora is the best chiminea from Deckmate to date. Not only that the tall tube will protect everyone around from the smoke, but the build itself is remarkably sturdy with an alluring rubbed bronze finish.

The 21 x 21 x 51.6 inches chiminea weighs 75 lbs. making it very stable on any surface. It features a fine wire mesh body to provide an all-around view of the fire. The big chamber can easily fit 16-inch logs and even some 18-inch ones. A sliding door will give easy access to add firewood, while the ash drawer makes it easy to clean up after every use with the provided poker.

We love the construction of the chiminea and the whole build in general; however, the grate to hold burning wood seems to lack quality. Other than that, Sonora is the best large chiminea on our list in 2021.

Key features:

  • Large capacity
  • Cast iron construction
  • Rubber bronze finish
  • Tall tube for smoke
  • Can fit large logs
  • Ash drawer
  • Poker with hanger

Weaknesses:

  • Grate quality seems sub-par.
  • Quite expensive

Venetian Grill Wood Burning Chiminea Charcoal Color

Blue Rooster is one of the top chiminea manufacturers you can find. They strive to engineer their chimineas to last a lifetime and put their money where their mouth is with a lifetime warranty! If you are willing to splurge and want a product to last you a lifetime, then Blue Rooster Venetian chiminea is the best luxury chiminea for you.

The large opening allows you to easily add firewood logs of up to 16 – 18 inches. The company says the chamber easily fits up to 20-inch logs, but we think they’re pushing it a little bit, but you probably could fit one or two such length logs.

Ok, so the chiminea is for a lifetime and is big enough for big parties, but for us, the best part is the stunning Venetian-style exterior. The black matte finish with engravings mimicking old Italian Gothic-style columns will be an eye-catcher, and you’ll definitely get a ton of compliments. Even if you don’t use the chiminea often, it will be a fantastic addition to your outdoor living space style and decor.

Key features:

  • Cast aluminum construction (will not rust)
  • Large capacity
  • Amazing Venetian style
  • Very durable and rust-resistant
  • Lifetime warranty

Weaknesses:

  • Expensive

Sunnydaze Modern Chiminea

Tight on space but want a bigger fire source to heat up the patio? Sunnydaze heavy-duty cold-rolled steel chiminea is large enough to heat big spaces but doesn’t take half of your patio. The 18-inch wide chiminea body (22-inch width legs) and large opening easily fit standard-sized logs. The sturdy steel provides a lot of heat around the chiminea, making it a perfect lounging spot during cold nights.

You can use the chiminea for grilling if needed. Just remove the wood grate and add your own grilling grate (not included).

This chiminea is made from a bit thinner steel compared to other chimineas; that’s why it weighs just 30 lbs. On the one hand, yes, it’s a bit more portable, but on the other hand, it’s not as sturdy and might rust faster. Sunnydaze does give a 1-year warranty in case of any early malfunctions or breaks. There is also no lid or cover with chiminea, so if you want it to last more than a year, make sure to get a cover that protects chiminea from rain and moisture in general.

Key features:

  • Cold-rolled steel construction
  • Space-saving design
  • 1-year warranty
  • Lightweight
  • Easy to assemble
  • The rustic, old-school log cabin design

Weaknesses:

  • A bit flimsy
  • No chimney lid
  • No spark guard

Frequently Asked Questions

Which is better: clay or metal chiminea?

Clay chimineas usually are a bit more expensive (thick cast iron chimineas come close), but they do provide an exceptionally authentic, rustic, and warm atmosphere to your backyard. Clay can deteriorate over time, and you really shouldn’t try to move a clay chiminea once it’s been used for a while. The combination of extreme heat, outdoor moisture, and freezing may cause the clay to crack and fail. If it fails while you have a fire burning, it could be a real hazard.  Metal chimineas come in many varieties.  Sheet steel is light, cheap, portable, and prone to rust through.  Cast iron are very heavy and durable.  Cast aluminum are probably the best chimineas out there as they will not rust like steel, they will not break apart like clay, and they aren’t as heavy as cast iron. 

If you want a short-term chiminea that is portable, go sheet steel.

If you want a chiminea to last a lifetime, go with cast aluminum.

Is a chiminea better than a fire pit?

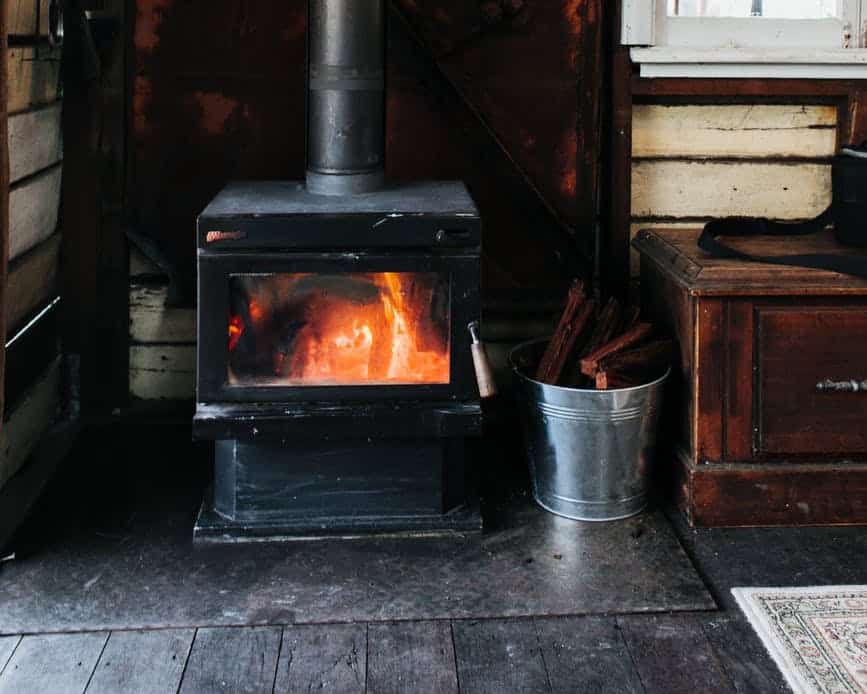
Not necessarily; it depends on how you want to use it.  Wood-burning fire pits are better for big open fires that everyone can gather around and see.  Chimineas are better for smaller fires for several people with less smoke and more heat holding capability due to the chimney and surround.  Chimineas are a bit safer because a strong wind won’t blow hot embers across your yard.

Will chiminea produce enough heat to keep people warm in the backyard?

The bigger space you are trying to heat, the bigger fire you will need.  To warm a large group, you will need a larger chiminea.  You will never warm the yard with any size fire (unless you have a small yard and a large bonfire).  If you are trying to warm a circle of friends gathered around the chiminea on a chilly evening, then yes, any of these will work.

If you want to heat a larger area of your patio or backyard, take a look at the Best Patio Heaters in 2022.[1] 

Can I put my chiminea on a wood deck?

Yes, you can put your chiminea on a wood deck; just keep in mind that there might be sparks and embers shooting out. To protect your deck, you can put chiminea legs on bricks or other non-combustible surfaces and have mesh grates so falling sparks won’t cause damage. If your budget isn’t too tight, we advise getting a heatproof fire pit mat[2] ; it’s an easy option to keep your deck safe.

Do I need a cover for my chiminea?

Some chimineas have lids for the chimney, but only a few include a cover. In general, all chimineas, no matter if they are made of clay, cast iron, steel, or copper, should be covered from rain or snow. A clay chiminea must be kept dry in freezing temperatures, or it will crack. The more you protect your chiminea, the longer it will last.  Sheet metal chimineas are prone to rust, so covering them will extend their lifespan.  Covers also help you avoid having a fire pit full of rainwater the next time you want to start a fire.


place to interlink future article on best patio heaters.

interlink fire pit mat article

Top 7 Ash Buckets for 2021

If you have a fire pit in the backyard or a fireplace of any kind that burns wood, you know the hassle of dealing with hot ash and embers. You probably even ruined one or two plastic containers thinking the ash was already cool, just to find the side of the bucket with a hole the next morning. Maybe it’s finally time to get a proper ash bucket that won’t warp, melt, or damage your floor? Today, we’re looking at the top 7 ash buckets for 2021. 

What is a Good Ash Bucket?

ash bucket next to a wood stove
used ash bucket

It’s a bucket; it shouldn’t be complicated, right? 100%! Ash buckets should be able to hold hot ash without breaking or damaging the surface it’s set on. A good ash bucket’s main features should be proper material like galvanized iron so it won’t warp, a handle to carry the bucket, and a double-layered bottom to prevent burn through. 

Best Ash Bucket Reviews

Amagabeli Bucket for Fireplace

The Amagabeli ash bucket has a durable construction of a 0.4 mm thick iron plate layer and a beautiful black finish. This allows holding cooled ash and embers from your fireplace, carrying kindling, or even hot charcoal. Just don’t keep hot embers or charcoal for a long time, this will damage the paint, and your bucket might start to rust.

The bucket comes with a 0.7 inch raised bottom to protect your surface from heat damage. However, you should always place it safely outside or on a fireplace hearth to be extra safe.

Finally, the bucket has a very large spout, flexible handle, and a pocket on the side to conveniently and neatly pour out the ashes.

A beautiful bucket that is not only easy to use but looks great on your fireplace hearth. If you’re not too price-sensitive, Amagabeli is one of the best ash buckets on our list.

Key Features:

  • Beautiful looks
  • Raised bottom
  • Thick iron plate layer
  • Large spout for easy pouring

Weaknesses:

  • A bit expensive
  • No lid

Panacea 15343 Ash Bucket with Shovel

This Panacea bucket comes with a small shovel for easy ash collection and keeping your fireplace clean and tidy. You’ll also have a bucket lid to protect the ash from being blown out if you place your bucket outside and a comfortable wood handle for transportation.

This heavy-duty steel bucket is 12.5-inch diameter and 13-inch in height with a powder coat to prevent rust and paint flaking. Panacea 15343 doesn’t have a double or lifted bottom, so make to keep it on your fireplace hearth or other non-combustible surfaces.

All in all, it’s a lovely set that can be used inside or outside for easy cooled ash collection and disposal.

Key Features:

  • Powder-coated
  • A lid to keep the ash from spilling
  • Shovel included
  • Wood handle

Weaknesses:

  • No double or lifted bottom

Smedley and York Coal and Ash Bucket 

Keep your fireplace tidy with Smedley and York ash bucket. This classic-looking black bucket comes with a metal shovel and a broom. It has a 2-gallon capacity to store logs, coal, ash, or pellets.

The bucket is made from galvanized iron, so it’s safe to shovel warm ash, but not advised to store hot coal since it doesn’t have a double bottom.

This set is perfect to have near your fireplace as you don’t need to use your house shovel or broom to collect the ash, and the bucket itself can hold ash from 2-3 fireplace burns. Additionally, the beautiful design and classic black color will fit nicely with most fireplaces and hearths.

Key Features:

  • Classic look
  • It comes with a shovel and broom.
  • Made from galvanized iron
  • Has a lid

Weaknesses:

  • A bit expensive

Vestil PAIL-STL-RI Steel Open Head Pail

Vestil steel open bucket is the best budget ash bucket on our list. If you don’t need anything fancy and just want a simple steel bucket to transfer cool ash from your fireplace, Vestil might be your best option.

This 5-gallon bucket measures 13-3/8 x 11-7/8 inches and is coated with rust inhibitors to prevent corrosion. This pail is made from thin steel, making it super lightweight. However, this also means it should not hold any hot ash or embers for any period of time; otherwise, it may warp, melt, or damage the surface beneath it.

It’s a nice, cheap option if you want a simple bucket for your ash, coal, pellets, or don’t have a firewood rack.

Key Features:

  • Inexpensive
  • Large capacity
  • Lightweight

Weaknesses:

  • Not suitable for hot ash
  • No lid

Minuteman International Scoop Coal Hod Pellet Bucket

This large pail from the Minuteman company is great for holding pellets, kindling, coal, and of course, ash. The 14-inch diameter and 14-inch height is large enough to scoop out ash from 3-4 fireplace burns or 30-40 lbs. of pellets.

This bucket, being constructed of galvanized steel with a double bottom for insulation, can hold hot ash without warping or damaging your floor (we still advise keeping it on your hearth).

A large spout is helpful to easily pour out any contents without making a mess. There is also a black metal scoop, but it felt a bit flimsy and lacked sturdiness.

If you don’t mind the shovel, the bucket is of excellent quality, easy to use, can hold hot ash, and looks good, making it the best large ash bucket on our list.

Key Features:

  • Stylish design
  • Made from galvanized steel
  • Double bottom
  • Large capacity
  • Large spout
  • Metal scoop

Weaknesses:

  • Scoop is a bit flimsy.

Plow & Hearth Double Bottom Metal Fireplace Ash Bucket

Plow & Hearth ash bucket is overall the best ash bucket for your fireplace on our list. It has a double bottom to hold hot ash, 3-gallon capacity, 28 gauge galvanized steel, and a beautiful charcoal black finish to match your fireplace.

The bucket has a 10-inch diameter and 13-inch height with a lightweight powder-coated steel lid and a handle with a wooden grip for comfortable handling inside or outside.

Beautiful finish, high-quality construction, and easy handling are worth every dollar.

Key Features:

  • Sturdy build
  • Beautiful modern design
  • Made from galvanized iron
  • Powder-coated
  • It comes with a lid
  • Wooden handle
  • Perfect for inside or outside use

Weaknesses:

  • None

Hisencn Wider Fireplace Ash Bucket

To end our list, we have another large ash bucket that can also be used for pellets, coal, or storing kindling. Hisencn fireplace ash bucket’s opening mouth is 16.1 x 13.9-inches with 11.8-inches in height. The large spout and a side pocket allow you to easily pour out the contents without making a mess. Additionally, you can store quite a bit of tinder or kindling in this bucket.

The strong galvanized iron is heat resistant, so you can scoop out warm ash without damaging the bucket, while the lifted support base will protect your wooden flooring if you forget to place your bucket on the fireplace hearth.

Overall, a high-quality large multipurpose ash bucket for any fireplace, grill, wood oven, or other miscellaneous landscaping tasks.

Key Features:

  • Large capacity
  • Large spout
  • Side pocket for easy pouring
  • Made from galvanized iron
  • Lifted bottom

Weaknesses:

  • No lid

Frequently Asked Questions

hot coals

Where Should I Store My Ash Bucket?

Even when handling barely warm or cool ashes and embers, take extra safety and store your ash bucket at least 3 feet away from any combustible material or surface. If your bucket doesn’t have a double or raised bottom, keep it on a non-combustible surface like cement or bricks; if you’re storing your ash bucket indoors, keep it on your fireplace hearth.

Why Do I Need an Ash Bucket? Why Remove Ash at All?

Everyone knows that burning solid fuels like wood, pellets, or coal will leave a bunch of ash behind. The ash leftovers can dramatically reduce the performance of your fire pit, fireplace, or stove by reducing air intake.

Ash build-up will also collect moisture, which will cause a metal fire pit to rust over time.

More importantly, ashes act as an insulator and stop hot coals from burning out. Hot embers insulated with ash can stay dormant for up to 4 days! This might be a fire hazard and a danger to unsuspecting people later using the fireplace or children playing around it. 

That’s why it is always important to remove ash after every burn and make sure all the embers burn out. Let the fire burn out, and give the embers a few hours to cool before you go after them.  Large piles of scorching embers makes the job much more dangerous.  Let them cool a bit and then scoop the ashes into your ash bucket and keep it in a place away from combustible material.

How to Safely Dispose of Fire Pit Ashes?

If your fireplace has finished burning, use your poker and look for any hot embers; if you find any, push them to the side and let them cool. It’s best not to put hot embers in an ash bucket, at least not for a long time, especially if it is not made from galvanized iron.

When there are no more hot embers, you can collect the ash into your ash bucket and store it away from anything flammable for extra safety. If possible, store your ash bucket outside on a non-combustible base.

The danger when disposing of your ashes is hot embers.  Dumping them out in the tall grass or below trees is dangerous because organic material could easily catch fire.  The safest option for your ashes is to mix them into the bare soil of a garden and water them down.  This will ensure that all of the hot embers have been extinguished, and it will help to fertilize your garden.

If you don’t have a garden, you can dig a small depression in the ground near the corner of your yard, dump the ashes in and water them down.  At the end of the burning season, you can cover the ashes with soil.

Top 5 Landscaping Themes for Your Yard

Anyone planning to design a new landscape for their yard understands how challenging it can be to get started and how challenging it can be to create a consistent look.  With so many options available to you, it just might make your job a whole lot easier if you decide to stick to one of our top 5 landscaping themes for your yard.

Landscape Themes Vary

We know that themes vary widely, and only our imagination can limit our vision. However, you shouldn’t worry so much about the challenges of picking a theme because once you’ve finally decided on it, all the great ideas will flow naturally.

You should also be aware that while choosing a theme may help you decide on certain elements that you want to incorporate into your landscape, it isn’t necessary to select a specific theme and adhere strictly to it. You can always create your landscape the way you envision it. 

Choosing a theme simply helps you make decisions and helps keep the look of your property more consistent.  We’ve all seen the properties that are just a jumble of plants and beds with no real order or theme.  This can detract from your yard’s value and be very visually distracting.

Add Your Own Personality

A beautiful landscape is an excellent addition to your already beautiful home infrastructure. With a theme, a personality will be added to the garden as it sets the property’s tone.

Here we have a carefully crafted list of the top 5 most popular themes that will help you envision the future landscape of your dreams.

1. Mediterranean style

If you love the styles of Greece, Italy, and Spain and if you have wanted to move to these places but can’t, why not decide to bring these countries right to your backyard? You can create a landscaped garden that resembles a lot of the places mentioned, and the theme that is perfect for that is the Mediterranean style.

Mediterranean-style gardens scream elegance. Landscapes in this theme are inspired by combining laid-back softscapes with formal accents. Some of the Mediterranean garden’s popular features are the tiered fountains, bocce ball courts, Roman columns, herb gardens, and terra cotta pots and colors.

The most common softscapes used in this theme are plants that provide vibrance, texture, and structure. You can pick out citrus trees alongside cypress trees and ornamental grasses for your Mediterranean property.

The people in the Mediterranean love to socialize, dine outdoors, and do gardening. With that, bocce ball courts are prevalent in this style. This is an Italian game that can be traced back to the Roman Empire.

Rome is well known for its majestic Trevi fountain, which has inspired many landscapes in European courtyards to have tiered fountains of their own. These tiered fountains are usually situated mid-yard and become the center of attention with their carvings and statues.

With Italian and French people preparing such scrumptious meals, it is not surprising that they grow herb gardens in their backyards. In the past, the people near the Mediterranean use to grow herbs for culinary purposes and medicinal reasons.

With the greenery from the softscapes and the terra cotta colors’ warmth, this theme will surely make you feel like you live in the Mediterranean regions.

2. Tropical style

Many of us dream of tropical beaches when we think of vacations.  If your climate will allow it, why not bring the vacation to your yard? Tropical-themed backyards will make you feel like it’s summer all year long.

A tropical-themed landscape’s fundamental elements are foliage, vibrant colors, and any form of water feature.  A beautiful pond surrounded by colorful blooms and lush greenery sounds about right.

Be aware that you need to keep your climate at the top of your mind when considering this garden theme.  It does you no good to dream tropical if you live in Zone 5.

Lush foliage is the most popular feature of a tropical garden. Large leaves of many beautiful and healthy-looking shades of green, along with contrasting textures of both large-leafed and long-stemmed plants.

It is crucial to break up the lush green foliage with bright shots of color by using large bloomed flowering plants.  Fill the area with plants of varying heights to create that lush, full tropical feel.

You can pick out palm trees to provide shade in your garden. There are many tropical garden plants to choose from to achieve the rainforest or jungle-themed look that you desire.

You can start with planting caladiums as they are vibrantly colorful and will add a pop of color to your lush and lavish greenery. Hostas are also a great option as they are colorful and are, most importantly, considered to be hardy plants thus making it a perfect and safe choice for a tropical garden in colder areas. Cold hardy plants with broad and lush leaves can give you a tropical garden look even if you are on the fringes of an area considered semi-tropical.

Should you wish to have plants native to tropical regions and your climate won’t support them, you can pick out garden plants that can be wintered indoors. Plumeria, cannas, colocasia, and lilies are some examples. You can simply return them to your garden in spring.

It is also essential to remember that colors should be kept vibrant. Bright yellows, oranges, and reds should be used as accents to your garden as they resemble the tropical birds in rain forests. You should pick out Japanese and Siberian iris plants, which have slender leaves with flowers that highly resemble butterflies.

It is also vital to add water elements in a tropical-themed garden. Depending on your property’s size and layout, you may want to consider a pool, pond, waterfall, or even a fountain.  The sound of flowing water will spread relaxation throughout your garden.

3. Japanese Zen Style

The Japanese love to meditate so much that they bring meditation to their backyard. Nothing else says calm better than a Japanese zen-inspired garden. Since it focuses on minimalist designs, it is arguably the most straightforward garden style to maintain

.Japanese zen gardens are designed for peaceful thinking. They are traditional gardens from Buddhist, Taoist, and Shinto philosophies and beliefs that can provide a spiritual haven for those who wish to visit.

You can add a Karetaki, or dry waterfalls, to your garden to create a Japanese zen look. A Karetaki can be created by designing and arranging stones, gravel, and sand to symbolize a waterfall but without the water.

 To build on the waterfall idea, you can incorporate a dry stream bed at the end of the dry waterfalls. A layer of white sand or gravel can create the dry stream. This is called Karenagare, which means raked sand.

Kogetsudai can be placed in your Japanese zen garden. This is gravel shaped into cones that represent the mountains of Japan.

 Rock sculptures, or Karensusai, are also important in a Japanese zen garden. Rocks can symbolize the five elements: metal, water, wood, fire, and earth.

Reisho rocks can be used to symbolize the firmness of metal.

Taido are tall rocks that stand for wood and are often designed and arranged with reishoi.

Earth can be symbolized by kikyakui rocks, which are turned onto their sides on the ground.

Flat shintai rocks will represent flowing water.

Shigyo rocks symbolize fire.

To create a contrasting effect to the gray tones of the earlier mentioned features, moss and evergreens can be added to create a pop of green color. Japanese maple trees and azaleas are great accents also.

It is important to pick perspective and focal points in Japanese zen gardens. Be aware of where you will view your garden from and what elements your vision will be drawn to.  Plan ahead and create sitting areas in just the right spots to place your guests at the absolute perfect location to view and enjoy your Zen creation.

4. Italian style

Italian-themed landscapes are loosely based on the Renaissance to blend drama and elegance. Italian landscaping features classic and theatrical elements. Symmetry and order are essential characters in an Italian-themed garden. They are termed “formal” gardens and have heavily influenced the French-themed landscaping style.

You can use heavy iron gates to create a dramatic entrance.  This will provide a formal, structured look and give you much-needed privacy and security.

Upon entering your garden, noticing a citrus scent will engrain the memory of your Italian garden on your guests’ olfactory memory, ensuring that they will envision your masterpiece every time that they catch that scent. The smell of sweet oranges, lemons, and grapefruit can add a wonderful fragrance to the air.

Italian-themed gardens heavily follow geometric and linear styles. Everything must be planned out, from the rows and columns of bushes down to the placement of statues and other hardscapes.  Ars topiaria (topiary) is an essential element of Italian gardens. This is the art of cutting plants such as shrubs and hedges to create precise shapes. They can turn it into classic shapes or even animals to use as decoration in the garden.

It is best to use yews, cypress, and boxwood plants for pruning because they are well suited to shearing and will last for a very long time if cared for properly. Through ars topiaria, the garden can be divided into symmetrical areas, private rooms, and even mazes that lead to secret gardens.

Another vital element is the pergola. This is a space designed for relaxation while being at least partially shaded from the harmful rays of the sun.  Climbing and blooming plants can make for a stunning sun shade that will also provide a soothing fragrance. You can choose to plant roses or evergreen ivy with lavender also.

While the typical Italian gardens are traditionally not surrounded by four walls because they are in open countrysides, you can undoubtedly make a very similar design work within the confines of your own yard. 

Remember to use strategically placed romantic and classic statues in your garden to provide focal points and intriguing corners. You may also add water elements such as stone pools, fountains, and elegant canals. This water element will create a calm vibe to soften the heavy symmetry.

5. Xeriscape Style

Xeriscape landscaping has been gaining popularity nowadays. This type of landscaping is used in places where water conservation must be followed, such as drought-susceptible states and countries. Because of climate change, a lot of households have switched to xeriscaping.

An essential element in this landscape theme is using less lawn grass. Lawn grasses don’t do well in arid climates without supplemental irrigation, making them ill-suited for xeriscaping.

Instead of having a lawn, you can create walkways made of stone and rocks. Native plants must also be used since they are already used to the local climate and have already adapted to the environment, thus needing less water than foreign plants.

Rock walls and terraces make great ways to break up a landscape comprised of mostly dry-loving plants.  Rocks are very eco-friendly as they look beautiful all year round, regardless of the precipitation.  The rock walls are great spaces for growing plants as the rocks will trap moisture in their crevices.

 Over time, these plants will grow and spill over the rock surfaces. This will form an artistic look and create a beautiful, flowing rock garden. Thyme, campanula, and lamium are some of the many plants that can thrive in rock gardens.

Succulents are also a great addition to your plant collection in your xeriscape-style garden. They require very little water and do not mind being under the hot sun.

It is best to place them in terra cotta pots for better moisture retention. However, clay and ceramic pots work well too. Putting them in containers will allow you to redecorate easily.

Mediterranean plants can also be included in your list of plants to collect as they enjoy plenty of sun and love being in sandy soils. Not only do they look pretty, but Mediterranean plants also provide other practical purposes, such as for your culinary needs. Thyme, rosemary, and oregano can be added to your herb garden.

Aside from picking out the right plants that will thrive in water conservation areas, it is imperative to plan out an effective water irrigation system if one is required. A well-built drip system buried in the ground will stay cool and conserve water.  A drip system can use up to 70% less water than a broadcast system.

The drip irrigation system is highly efficient as it drips water where it is needed at the plant’s roots rather than spraying the water through the air. 

This is Only a Taste

This is just a small taste of themes that you can choose from and remember that you don’t necessarily need to follow a theme; you can create the landscape in your own style, but be sure that as you plan your gardens, you keep consistency in mind.  Using similar and consistent looks throughout your garden will give it a calming and complete look rather than a confusing, cluttered look.

The Therapeutic Effects of Gardening

Natural spaces, such as gardens and national parks, have been linked to positive mental health effects. Exposure to nature has been associated with enhanced cognitive function, relaxation, mood, managing trauma, and healing of specific attention deficit disorder symptoms in children. Humans come from nature, and taking the time to get back to nature through gardening and landscaping can be very therapeutic. We all know that it feels good to be out in nature, but what are the therapeutic effects of gardening?

Gardening is Healthy

Gardening is a healthy hobby that anyone with a bit of space can develop and nurture. The early days of Covid-19 pandemic in the United States forced many to stay indoors and not be able to go to work, school, or even the market. The lockdowns led many Americans to pick up their rakes and spades, to engage in something that they may not have taken part in for a while. Many got outdoors and began gardening.

This epidemic’s silver lining has been the increased awareness of family and getting back to the basics of spending time at home with loved ones and nurturing our outdoor space through gardening. When was the last time in recent history that the entire family, both parents, and children, have had the pleasure of staying home and working in the garden together?

Our jobs and busy lifestyle keep many of us only dreaming of a few moments at home with family having a deep discussion about anything other than perhaps re-hashing the daily news. This pandemic has given time for deep thoughts and family projects.

For those who do not have a green space that they can actively garden in, perhaps taking part in a community garden or green space clean-up project can provide similar opportunities to get back to the earth and implement a bit of green therapy.

Working the Earth

For generations, gardeners have been tending their gardens and working the earth in a sort of rudimentary hobby or talent that gets handed down from old to young more out of the need for help than any dream of long-term continuity or a yearning for therapy.

Heading out to the garden expecting a therapeutic value is not the point. The therapeutic part comes from the labor that it takes to transform our land into the state that we want and the satisfaction that comes from the many future triumphs.

I believe that the therapeutic part comes in the stillness and toil that is needed when working with Mother Nature. While co-workers, friends, and family members might be persuaded or guided through force and aggression to bend to our desires, mother nature is not the same.

Mother nature makes the rules, and we all just work within her framework to see what we can accomplish. A hard day of toil and dirt under our fingernails may not be our goal; it is part of the therapy. Giving yourself physically to create the change you want to see is part of the therapy. There is no way around some physical exertion to get your garden into the shape you envision.

Two Different Things

While the therapy happens every time you are working in the yard, the deep calm and satisfaction likely occur when, over time, you finally see the fruits of your labor. Being in nature and working with nature are two different things. While sitting in a park, enjoying the sunshine, and listening to the birds can be relaxing and enjoyable, it is not the same as hiking through the mountains or turning a patch of lawn into a new flower bed. Part of the therapy is in the labor.

Whether one has a few plants on a windowsill, containers arranged on a deck, flower beds in the yard, or a vegetable garden, large or small, gardens have numerous benefits for families and family members. There are many ways that gardening is therapeutic, especially the process involved in landscaping the earth, planting the plants, and watching them grow. Some of the ways that gardening has been therapeutic are as follows:

Outdoor Gardening Helps Fight Disease.

Benefits From the Sun

Human beings share many similarities with plants, one among them is getting benefits from the sun.

While plants produce their food using sunlight, human skin uses sunlight to produce vitamin D in the body. The amount of vitamin D produced is dependent on the amount of sun exposure and the color of the skin—Vitamin D aids in numerous body functions, strengthening bones and the immune system. Low vitamin D levels expose humans to many unfavorable conditions such as dementia, fractures, and rickets. Of course, one must balance the benefits against the risks associated with overexposure to the sun, but a little sunshine in the garden has a therapeutic and healing effect on the body.

Reduces Stress

Reduction of physiological and psychological stress levels

Working and sitting in the garden can reduce our stress levels, which will reduce our adrenaline levels, leaving us feeling calm and relaxed. Working with plants can be an intuitive and nonverbal action that offers psychological peace and comfort, stimulating a human’s four senses in ways that many of us do not get in our daily lives. Gardening is an overall mood booster that reduces anxiety and depression levels.

Positive Outlook

Gardening tends to have a positive influence on people’s outlook on life. The hard work and graded accomplishments that one will experience in the garden will increase positive attitude, a sense of pride, and a motivation to do more to step further. Many long-time gardeners have always gone to the garden for relaxation and alone time, but it can also be a great family and friends event, showing the younger generation what it means to work the earth and produce a crop.

Meditative

Exposure to the natural environment restores a person’s ability to focus on tasks that require high concentration levels. Gardeners often speak of their time in the garden in the same way that others might speak of their yoga or meditation experiences.

Oftentimes a struggle for people in meditation and yoga is to calm and clear their minds in an effort to center themselves. Gardeners have long known that keeping your hands busy in the dirt is a sure way to clear your mind and allow it time to explore subjects that may get pushed aside in the hustle and bustle of everyday life.

Time to Reflect

Gardening allows time to reflect on the past and plan for the future, not just the future of the garden but the future of your life in general.

While we often feel that our efforts are going unnoticed or that we have wasted days of work where we just didn’t seem to get anything accomplished, a day in the garden always provides the satisfaction of looking back at our work and seeing the results. Also, there is nothing like a full day outside working the earth to invoke a deep and peaceful sleep later that evening.

Gardening is Exercise.

Think about all of the different poses, stretches, and work that goes into gardening. Standing, walking, crouching, kneeling, pushing, pulling, lifting, digging, etc. These are all the types of work that our bodies have been doing for generations prior to our world’s mechanization and computerization. These are the types of things that the settlers of this earth took part in every day out of necessity. There was no such thing as overstimulation or boredom when your entire existence was getting or growing enough food every day to feed the family.

The many bodyweight movements required for gardening closely resemble many of the exercises you might find happening at any fitness club. Exercises such as burpees, farmers carry, deadlift, squats, lunges, pushing, and pulling are all very similar to what a good day in the garden will provide for you. Not only are you taking part in these body movement exercises, which will build muscle and improve flexibility and balance, you are also burning a ton of calories. If more people were avid gardeners, we could cut down on our gym memberships.

Gardening Helps Manage Eco-Anxiety.

Many people feel a certain worry for and anxiousness about the current global pollution and decimation. If they sit down and think about it, most people understand that humans have been mistreating our planet for quite some time now, so they feel a bit of guilt and frustration due to their perceived inability to change anything. Well, gardening and landscaping as a whole can provide a significant step in the right direction when it comes to rebuilding our world.

The work that you are doing to improve your green space can help to improve our environment:

  • By planting plants and keeping our gardens lush with greenery, we help remove pollution from both the air and the soil.
  • Growing our food helps to minimize our carbon footprint.
  • Plants help to shade the earth and reduce evaporation.
  • Trees can help shade our houses and protect them from wind, lowering heating and cooling requirements.
  • Plants help to stabilize the soil and prevent erosion.
  • Our green space is the home for many animals.

The complex concept coined as eco- anxiety has many feeling helpless, but not the gardeners; the gardeners can rest easy, knowing that they have done their part to help our earth. It’s a pretty simple concept, actually; the greener our earth, the healthier it is, so your gardening efforts are definitely helping.

To maximize the amount that you are helping, you can do the following things:

  • Use only organics in your yard. Organics add to our soil diversity and reduce chemical pollution.
  • Layer organic mulches and composts rather than tilling.
  • Try to minimize your waste in all aspects of your life.
  • Save your rainwater to irrigate your plants.
  • Use hand tools rather than motorized tools.
  • Compost as much household waste as possible and use it to enhance your garden soil.
  • Look into designating your yard as a “Certified Wildlife Habitat.”
  • Encourage family, friends, and neighbors to garden.

Conclusion

It is a curious phenomenon that humans tend to avoid hard work and toil out of a perceived need to keep our bodies in a perpetual low-key and relaxed state. Somewhere along the line, we have been taught that hard work is bad and sloth is good. While staying at rest is always the easy choice, I don’t believe it is the best. Our bodies need to get out and move. We aren’t built to be still. While it may be hard to get started, working outside in the garden will prove to be very therapeutic overall, offering countless health benefits for you and your friends and family as well.

Whether digging, weeding, hauling, or plucking flowers, your physical strength, emotional wellbeing, and immune systems will reap the benefits. Gardening cultivates positive feelings of empowerment, connection, calmness, and appreciation for a beautifully landscaped garden. Whether the patch is tiny, medium, or huge, a raised bed, a window box, or a single garden pot, getting dirty and enjoying the natural setting is therapeutic in every sense. Gardening is the perfect way to heal therapeutically, regardless of age, time, space, or environment setting.

Get out there today and start your garden!

Professional Landscaping Tools And Equipment That You Must Have

If you have just started landscaping your property and want to become a bit more efficient and professional or you have decided to start landscaping as a profession, you must have professional landscaping tools and equipment. Trying your hand at landscaping is a great idea, but doing it without the proper tools will only make you suffer needlessly.

If you want to become a great landscaper, you must invest in professional landscaping tools and equipment to get decent results. Without these professional landscaping tools, it would be challenging for anyone to master their landscaping.

How Do You Landscape Like a Professional

Well, let’s set aside the obvious traits, like old worn-out jeans, the unkempt, dirty appearance, and the zeal for a few well place profanities when the going gets tough.  What does it really take to landscape like a professional?

Landscaping gets expensive!  Unless money isn’t a problem and you just hate hard work, you might want to consider doing your landscape work yourself.  Most of it is not too technical.  You will need a bit of common sense, a good strong back, and a few essential tools to get started. 

Before we get into the tools, here is a list of things that may not seem obvious but that I have learned over a lifetime of professional landscaping.   

  • You must invest in those plants that bloom throughout the year. Any landscaper will tell you that every client wants flower beds that bloom all year round.  Your first order of business is to figure out how that is possible and which plants you need to do this.  Good luck with this one.
  • Corners in your lawn and grass right up to the house are a pain in the rear.  Cut bed edges to allow for long sweeping curves and beds along all walls of the house.  Landscapers want it to look smooth and nice but also don’t want to get off that riding mower to trim any darn corners.  Make sure that there aren’t any!
  • Don’t haul out any debris.  Mulch your lawn clippings right into the lawn, mulch leaves into the lawn until they are just too thick, then blow them into the beds.  Put all twigs and leaf debris into planting beds to act as a mulch.  The only reason that landscapers are charging you to haul all of your leaves, twigs, and lawn clippings away is because you asked them to and because if they didn’t, they couldn’t sell you all of that mulch in the spring.  Save all organics, use them as mulch, keep it simple and easy.
  • Forget about installing an irrigation system.  Once your plants and lawn are established, you won’t ever need it again, and they are a pain in the rear and expensive.
  • Keep landscape lighting to a minimum and always use LED lights.  Any other bulbs burn out way too often, and a complex lighting system is a waste of money and hard to maintain.  A few well-placed spotlights will do.
  • Don’t ever install metal or plastic lawn edging.  It will pop up out of the ground over time, get hit by the mower, and look like crap.  Just cut a natural bed edge and save yourself a ton of headaches.
  • Don’t waste your money on landscape fabric or weed barrier.  It only works for a couple of years before the weeds grow on top of it, and it is useless.  It is a colossal pain to rip it out at that point, and it keeps you from being able to easily make changes in your plantings.  It also stifles the spread of perennials.
  • Unless you are an avid gardener who loves weeding, keep your garden beds to a minimum.  Large beds require more plants and more weeding.  Mowing is much easier than weeding, so plant lawn and keep beds only big enough for the plants that you really want.
  • Plant groundcovers.  Groundcovers spread readily and keep the weeds out.  Beautiful!
  • Plant only hardy plants that are a zone lower than what you think you are.  This will almost ensure that they will survive without a lot of pampering from you.  Live plants that are easy to care for are good.  Dead plants are a waste of money.
  • Never plant a tree or any plant deeper than it was in the pot or nursery, and be aware that many balled and burlapped trees you get from the nursery have extra soil mounded on top of the ball.  Plant these a bit high.  Most of the time, when I find a dead tree, it is because a homeowner or rookie landscaper planted it too deep and suffocated it.  Plant roots need oxygen, plant them too deeply, and they will die.
  • Don’t stake newly planted trees.  If you bought a decent plant and it has a decent root ball, don’t bother staking it.  People forget about the stakes, and the ropes girdle the trees; the tree roots don’t develop as well because the tree does not sway in the breeze, and it is just a waste of time. 
  • When planting a balled and burlapped tree, always create a soil ring around it to hold water for the first couple of years and always cut the twine away from the trunk, or you will never remember to come back and do it later, and it will girdle the tree.
  • When you are digging a hole for anything, think about where the soil will need to be when you are done.  Don’t just throw it around anywhere; put it where it should be so that you only need to move it once.
  • When you order materials and have them dumped on-site, think about where to put them.  Again, a truckload of anything is heavy.  You don’t want to move it any further than you need to.  Maybe the truck driver can dump half on each side of the house if that would be easier.
  • On a similar note, avoid dumping crap into the grass.  Mulch, soil, gravel, and rock will mess up the lawn and be a pain to dig out every time.  If you can keep these materials on a hard surface, please do.
  • Mulch around all trees.  Don’t mow lawn right up to the trunk.  You are compacting the soil over the roots, and I don’t care how careful you think you are for the first few years; you will hit that tree with the mower or string trimmer eventually.
  • When mulching around your trees and shrubs, keep the mulch thin near the trunks or stems.  Thick mulch at the stem will only promote rot and encourage mice to live in there and chew on the tree.
  • Look at the shrubs and trees near your house at least once every year in late winter.  Prune them if they are getting too big.  Don’t wait five years and then hack the hell out of them.  A bit of pruning every year as needed is much easier to do and will result in healthier, more attractive plants.

Alright, now that I got that off of my chest, let’s get on to the tools.  This article is about the tools, right?

Professional Landscaping Tools and Equipment

Whether you’ve decided to start your own landscape business or just want to landscape your yard, you will always want to look for professional quality landscaping tools and equipment.  The cheap crap never lasts, and it will break at the absolute worst times.  Spend a few extra bucks and get the good stuff.  Take it from a guy that knows.

Check out our list of professional landscaping tools.  These are the basics that are in the truck every day.  With this assortment, you will be able to do just about any landscape task.

Spade Shovel

The digging spade is the base tool for all landscaping.  If there is one tool that gets used the most, this is it.  From digging a pond to planting a perennial, this is your tool.  It is pointed to dig quickly and comes in many styles. 

Pay attention to handle quality; this is the most important part. Nice thick wood or fiberglass? It is a personal choice. I prefer the wood handle’s feel and contour, but the fiberglass ones are darn sturdy.  I stay away from the steel handles simply because this is the all-day shovel.  You don’t want the extra weight for your all-day shovel, nor do you want to catch a jolt if you happen to cut that old lamppost wire that someone forgot to tell you about.

Most of the time, I will choose a long-handled shovel over a short D-handled shovel, just because it’s easier on the back.  Remember, this is not a pry bar.  Using your shovel as a pry bar is the quickest way to separate the handle from the spade.

Here is one that I would buy.

Flat Shovel

The flat shovel is great for scooping on flat surfaces.  You will use it for cleaning up debris from driveways or scooping soil off the bed of your truck.  Not as often used as the spade, but nice to have for clean-up for sure.  Check this one out.

Edging Shovel

You will need this shovel any time you are cutting a bed edge.  It also works excellent as a root chopper when you are digging out a tree for transplant.  Contract diggers will use these shovels when balling and burlapping trees.  These are also great for picking up sod.  I like the steel handles for these because they take a lot of pounding, and you are less likely to be digging deep with these, so you probably won’t hit electricity.  I have one short and one long handle edger.  The short ones are better cutting sod; the long-handled ones are better for all-day edging if you want to make it easier on your back.  Here is one.

Steel Rake

A good steel rake is a must for any raking of soil, heavier debris, mulch, or when you need to dig some gravel out of the grass.  Again, wood or fiberglass is a personal preference.  Check this one

Plastic Rake

Some call it a leaf rake.  Great for just that, raking leaves and debris from your lawn.  These are usually relatively lightweight and probably the most disposable hand tool that we have.  It’s not unusual to burn through several of these each year.  They must be flexible to work well, making them prone to wear and fairly easy to break.

Pitch Fork

There are different tine patterns and widths.  If you do a lot of mulch, you may want the big wide hayfork; otherwise, it’s nice to have the regular six-tined pitchfork for moving mulch, straw, piles of grasses, twigs, etc.  Try picking up a pile of twigs and grasses from a spring clean-up with your shovel, and I assure you, you will be reaching for your pitchfork in short order. 

Digging Fork

These are great for working up garden beds.  No other tool can bust-up and turn over a bed quicker than this one.  I usually go for the D-handle on this one because it is aggressive work, and the D makes it quicker.

Pry Bar

Every landscaper needs to have a pry bar in the truck.  This tool will be with you for the rest of your life and will save you a bunch of money in shovel handles.  Sometimes, there is just no other way to pop out that rock, root, or stump, and if you set any sort of boulders or flatstone, they are great to help with leveling.

Sledge Hammer

I would buy a small one to start.  If you aren’t pounding in fence posts, you aren’t likely to need a big one, but having a sledge is great for pounding in any stake.

Axe

An axe comes in handy any time that you have roots to cut. I wouldn’t even try to cut out a stump without a good axe.

Push Broom

Growing up, we called this a barn broom because every farmer had one to sweep out the barn.  Get a stiff-bristled one, and it will be great for sweeping sidewalks, patios, driveways, and your garage.  The soft-bristled ones seem pretty useless.

Whisk Broom

This one won’t be used much and could possibly be left off of this list, but if you have stepping stones or a narrow walkway, this is the only way to do it.

Wheel Barrow

This is the workhorse of landscaping.  We only buy the absolute toughest ones made because they will last for years, and you can haul anything from wet concrete to mulch.  You can certainly buy the lighter-weight homeowner models, but you want a heavy-duty wheelbarrow if you are going really heavy.  The lightweight plastic ones are fine for mulch, but they will flex under heavy loads.  Many homeowners buy the dual-wheeled ones, but if you are doing anything other than straight line wheeling across your lawn, these are a pain in the rear. This one is my favorite, but get it with the pneumatic wheel.

Pruning Shears

These will be used for 90% of your pruning, so buy the best one that you can find.  Even the good ones will dull with time, so use it carefully and buy a spare set of blades or a sharpener.  Don’t use your pruning shears for cutting dirty roots or branches that are too big and never twist while cutting.  This is the quickest way to ruin a pruner.  I have purchased all of the cheap ones out there, and you get what you pay for; none have lasted a season.

Lopping Shears

Get the biggest and strongest one that you can.  These are what you reach for when you need to cut the branches too big for your pruning shear.  These are bigger, but once again, the quickest way to ruin them is to twist while cutting.

Hand Saw

This is what you reach for when the limb is too big for your lopping shears.  Get a good one because cutting through thick branches can take a long time with a cheap, dull saw.

Pails

It sounds silly, and you probably have something around the house, but if you don’t, two five-gallon pails to carry with you when pruning or weeding are a big help so that you don’t need to backtrack and pick up after yourself.  It’s back to efficiency; only touch it once if you can.

 Wrapping it Up

That’s about it.  There are thousands of tools to consider, but the landscape tools listed above are the backbone of everything you will do in your landscape.  Buy good quality tools, and you will not be disappointed when it comes time to do your work.  Buy cheap crap, and they will break at precisely the wrong time.

Principles of Good Landscape Design

There isn’t a specific manual to a perfect landscape, but certain principles of good landscape design guide beginners and experienced professionals alike.

Landscaping is an art based on creativity and function. A creatively designed landscape that doesn’t function well for the occupants is no better than a very functional space with little creativity. You need to create the perfect blend of the two, realizing that not only must you create a visually appealing picture, it must also be comfortable and inviting to the user.

This article will discuss various principles of effective landscape design that I hope will help guide you to the landscape of your dreams.

Unity

The principle of unity emphasizes harmony across the landscape. There must be a smooth interconnection of all elements of the landscape. To achieve a unified landscape, make sure your patios, walkways, and sidewalks are all planned and positioned in a way that both complement and are complemented by the plantings.

Repetition

Repetition is a common way to achieve unity. Repeating various elements throughout the landscape in such a way that instills a sense of familiarity while not an obvious sense of repetition. There is comfort in familiarity, but too much comfort creates boredom and a lack of desire to explore further.

Consistency

Consistency unites all aspects of the design to achieve the desired theme. Observe the color, texture, height, and shapes of all the elements used to create the design. Strive to create a design consistent enough to not appear fragmented while varied enough to provide a continual sense of interest from one end to the other.

Balance

Balance is another essential principle of landscaping. It improves the landscape’s aesthetics by stabilizing all aspects incorporated in a landscape. A balanced landscape unifies all elements into one seamless lot. Balance gives us comfort and calm. The feeling that it is done completely and properly but not overdone.

I believe this to be the overall most important aspect of all landscape design. Balance is about a feeling more than it is about specific weights and measures. To feel the balance of a property, you must almost squint as you enter to take in the entirety and judge its completeness without being distracted by any one element.

Having said that, there are specific elements of balance that can be very important in certain portions of the landscape. They are as follows.

Symmetrical Landscape Balance

To create symmetric balance, you should have two sides with similar elements and designs—for instance, the same type of flowers or shrubs with the same shapes and sizes. In short, one side of the landscape should be a mirror image of the other/opposite side. Purely symmetrical balance is mainly used in a more formal design, while a combination of symmetric and asymmetric balance is a more common approach to creating a visually appealing landscape.

You must be aware that symmetry is only realized from one or two viewpoints, and you mustn’t strive to create complete symmetry even in the most formal designs; there are apt to be viewpoints from which symmetry is lost.

Asymmetrical Landscape Balance

The balance is achieved using various elements and components of a landscape with a unifying factor like the shape, size, or texture. While the landscape is not a mirror image as it is in the symmetrical design, it does appear to be equally weighted while using differing components.

Revisit the notion of consistency to be sure that you don’t create a jumbled mess.

Simplicity

Simplicity means different things to different people, and the same landscape will be interpreted differently depending on a persons’ personality. While one person might see a big garden of mixed flowers as simple because it is merely one big bed, another might see it as complex due to the many varieties of plants within the bed.

Simplicity can be hard to pin down, but you will know it when it is no longer there.

Simplicity in a landscape will have a calming effect. For a simple landscape design, avoid too many colors, textures, and shapes. Simple does not mean monotonous.

Color

The colors present set the mood and feel of the landscape. Bright colors make objects seem closer, while cool colors make an object seem farther from you. A combination of the bright and cool colors brings out a striking look that is more appealing and satisfying. Keep in mind simplicity and balance. A jumble of too many colors is typically unappealing but can be fun and exciting in small doses.

Texture

Different plants will have different textures; some will be thick while others will be thin, some will be very coarse while others smooth. You must also consider that different textures will be apparent from different viewpoints and distances. While the bark of an oak may not register from across the yard, and a bed of small flowers may appear smooth at a distance, it will be a different feel up close.

Textures create interest in a similar way that colors do; it’s usually just a bit more subtle. Always keep in mind how the most prominent aspects of the yard, such as outcroppings, walls, or even the house, create a sort of textured appearance from a distance.

Form

The form or shape of the plants used in a landscape can heavily influence a design. Consider how a bed full of pyramidal evergreen shrubs would give an entirely different feel than a bed full of mounded shrubs. One would look jagged and sharp, while the other more flowing and smooth. Use the forms of the elements to create interest within the landscape. Having too many similar forms will appear boring, while too many differences might again seem cluttered. Once again, it is about balance.

Scale

The proportions and scale of your landscape components and how they relate to each other will significantly impact how the final design is perceived. Scale is hard to pin down, as it changes with time. Differences in scale is why so many landscapes get planted too tightly and end up as one big mass over time.

The designer may not have accounted for growth when considering scale.

It is a very hard concept to embrace because when planting a new landscape, especially one on a tight budget, the small plants will leave you wanting more and feeling unsatisfied with your design. This will often lead to crowding to achieve a better initial look.

You need to be able to project your vision into the future to ensure that your plantings will be in scale with each other and the surrounding hard structures long term. The alternative to this would be to over plant to achieve the desired scale now with the intention to remove certain plantings over time to reset the scale as things grow.

Sequence

Creating a sequence of the elements used in your landscape can result in visual rhythm. The rows, lines, and columns of the landscape can be presented to create a sequence that achieves harmony, interest, and a desire to continue on to see the next element.

Emphasis

There is often one part of the yard, one prize plant, one area of the patio, or one corner of the house that needs some emphasis. The feature can be emphasized by allowing the design to lead the eye to it or perhaps by framing it in such a way as to make it stand out.

On the opposite side, sometimes there is one feature that overwhelms the view and needs to be hidden or softened a bit to allow the design to feel complete. This is often the case when the home is new and “sticks out like a sore thumb” because there are no plantings around it. It is often the landscape that will de-emphasize the house to bring the view into balance.

Variety

Too many similar elements in a landscape can be boring while using too many different varieties can lead to clutter. A big part of your struggle is to provide enough variety to keep the viewer interested while not making it appear so cluttered that it distracts from the yard’s overall feel. Combine elements that complement each other and their surroundings.

Lines

Lines can be straight, curved, horizontal, or vertical. Choose the ideal lines to use, taking into consideration the theme of the landscape and the flow of the yard. The lines used will create different effects from different perspectives. Straight lines are formal and direct, while curved lines are more adventurous with a flowing effect.

Once again, variety can be attractive when lines are appropriately used but distracting when varied too much. One thing that I see over and over again is the use of too many small-radius turns or using a curve, then straight, then curve in the same view.

Useability

In my opinion, this is the most important yet often overlooked factor that can make or break a great landscape design. I believe that far too many designers have their style or their favorite ways of doing things, and they apply them repeatedly to landscape after landscape which results in more of a one size fits all concept of landscaping.

While this approach may be efficient and may be a good start for many homeowners, I believe that, first and foremost, useability must be considered. A comfortable and useable landscape for one person may stymie and irritate another.

Your landscape should meet and blend with your life and your routine. Creating a pretty design on paper is far from creating an outdoor living space that makes the occupants feel comfortable and fulfilled. This is why I firmly believe that a person who enjoys spending a good deal of time in their yard should design their own landscape or at least have a critical role in the design.

At the very least, the ebb and flow of the driveway, walkways, patios, gardens, and lawn areas should be outlined and reviewed by the property owner prior to many of the design elements being added.

Final Word

Whether you are starting from scratch or refreshing an old design, try to keep some of the above concepts in mind while building your landscape. While vague and hard to envision, to be sure, the principles discussed above should help guide you to a landscape that will suit your lifestyle.

It will always be easier for a new designer to take a portion of an existing landscape and redesign it rather than starting with a blank slate. Going from the blank slate to the finished product is always the most challenging design unless, of course, you are simply dropping in a cookie-cutter design similar to others with the assumption that we all like approximately the same elements in our landscapes.

If you are a homeowner trying to design your landscape, I feel that a few rough sketches of the overall concepts are likely helpful, but I wouldn’t waste too much time on detailed drawings.

While a landscape architect may be able to envision a landscape from a paper drawing, it is very difficult for a homeowner to do the same. Countless times a homeowner has paid a landscape architect to create a pretty plan and then, once it was getting installed, decided to make changes and revisions on site where they could actually understand what it would look and feel like.

This is the value of the new digital renderings and video walk-throughs that are possible with today’s technology. While not true to life, they are often very accurate and can give the inexperienced homeowner an authentic feel for what it will be like to interact with their landscape.

If you are doing your design, spending more time walking the property and viewing areas from varying angles will be better than spending a good deal of time on detailed drawings.

Spend time doing research, pic out a bunch of pictures of things that you like the look of, then walk your property and take the time to envision how to make these desired elements work in your yard.  Feel free to stake it or paint it out and live with it so that you can get the feel of your ideas before you actually install them.

Plant Hardiness Zones and Why They Are Important

If you are considering buying some plants for your yard, it would be nice to know whether or not they are likely to survive, wouldn’t it? This is why the United States Department of Agriculture has developed the plant hardiness zones map and why this map is so important to our landscapes.

Here’s the Scenario

Okay, so let’s say you plan to revamp the landscape at your home. You’ve spent a few days on the internet looking at plant pictures, and you’ve decided that you love the look of palm trees. You have always loved Palms; you watched Beverly Hills 90210 and Californication, and you love the look of palm-lined streets. You’ve decided that you want to have them along the walk to your porch, on both sides. You have found them on google, and you are pretty sure that they are called the Washingtonia Filifera. You found a place that will ship them to you, and you are all set to get them delivered to your home; when your significant other walks in, realizes what you are doing, and says, “What are you nuts? Those will never grow in our zone!”

Our Zone?

We live in Denver, Colorado, and it seems like it would be sunny enough. What’s the big deal? A plant is a plant, right?

Right, but wrong! A plant is a plant, and before men started digging them up and moving them around, the plants didn’t know anything about zones. But, men in their infinite knowledge have decided that there should be some sort of a rating system for plants and locations so that we can all figure out where those palms will and will not grow.

So, What Happened?

Like everything else in nature, plants have evolved and adapted to their specific climatic conditions of their particular area where they grow. We humans love a moderate temperature with humidity. If we spent our entire lives outside in the elements the way the plants do, we would only be able to survive in a small portion of the world. We can’t just take a plant and stick it in the ground wherever we please and expect it to grow.

We have evolved to create fire, shelter, and air conditioning, which allows us to live in climates way outside of our outdoor comfort zone. Plants do not have this luxury. They are pretty much stuck where we put them or where they have grown.

Plants have evolved and adapted to the areas in which they have always grown. Just like in the days before horses, buses, cars, and planes, if we were born in an area, we were likely to stay in that area. Well, plants have always stayed where they were. Until, of course, we came along and decided to dig them up and move them around the world to make our surroundings look just the way we like them.

The Plant Hardiness Zone Map

We have been moving plants around for so long and pushing the boundaries of where they will and will not survive for so long; we have developed a system so that we can tell whether or not any particular plant is likely to grow in our area long before we decide to transplant it.

At least, that is the premise.

This system of classifying plants and where they are likely to survive is called the Plant Hardiness Zone Map, which is comprised of plant hardiness zones. This map is now updated and controlled by the United States Department of Agriculture (USDA)

The USDA Plant Hardiness Zone Map

Once we determined a plant’s ability to bear cold and heat, we created a map. The map uses the minimum temperature of a place in the last 30 years and averages it.

Each zone has a number and sometimes a letter for a sub-zone. The zones in the United States run from Zone 1 being the coldest and Zone 13 being the warmest. In Southeastern Wisconsin, we are in zone 5b, which is the same zone as Denver, Colorado. I can tell you from experience that if you want a plant to grow really well in my area, you will pick a plant that is zone 4 or less. Sure, a zone 5 might make it, but select a lower zone if you want to be sure.

How Can I Use Plant Hardiness Zones?

Now that the lowest temperatures of any area in the United States have been allocated a zone, it is easier to figure out which plants can grow in your area. Keep in mind that just about any plant will grow in the hot summer months in most zones, so while it won’t make it through the winter, I could enjoy my California Palm tree for one summer.

Pushing the Limits

Many people love to push the limits and plant more exotic plants in their yard than what will survive. This is fine, as long as you understand that you need to stick to your zone, or maybe a bit colder if you really want that plant to live for years to come.

Being a landscaper for most of my life, I have become very familiar with the plants in my zone and have used this map extensively to help plan out successful landscapes and gardens. What I’ve learned about this map and about contracting, in general, is that it is all about expectations.

More often than not, homeowners want pretty, blooming plants in their yard, and they want something to be blooming all year round.

I can’t tell you how many times I have been shown web pages or magazine articles with pictures of what appears to be zone 6-10 and asked,” can you make my yard look like this?” The simple answer is no; I cannot.

Set Your Expectations

If you are choosing plants for your landscape or someone else’s landscape, you need to have clear expectations. The hardiness zone map can help you know what to expect, but that doesn’t stop plants from being classified incorrectly.

You must always use your judgment and ask yourself if you’ve seen that plant growing in your area.

You are stuck in your zone, so unless you are going to move, don’t expect to have plants rated for the next zone higher to survive in your yard. Again, it’s about expectations. If you love that zone 6 plant and you must have it at all cost, then feel free to plant it in the most protected, sunny corner of your yard where the sun shines bright and hot, and the wind is entirely blocked. Then, before winter comes, go out there and mound the entire area thick with mulch and leaves and blankets. Then build a structure around it to protect the delicate branches and leaves from freezing, and you might have a chance to keep that plant alive.

That is, until the first year that you forget to do all of these things.

The Easy Way

Suppose you want a vibrant, healthy landscape that is low maintenance and pretty all year round that doesn’t need much help from you. In that case, plant only plants well suited for your zone and plant a wide variety of plants so that if any one type of plant gets a disease or ends up dying, it doesn’t affect your whole yard.

Humans always want to push their limits, and gardeners are no different. This is why so many people struggle and fight with their landscapes, trying to keep things alive that shouldn’t survive here. This is why people are fertilizing, watering, pruning, and protecting their plants like crazy people because they are trying to push the envelope.

Take my advice and keep it simple. Pick plants a zone lower and enjoy your yard rather than struggle with it.

Pitfalls

So, you check the map carefully, and you see that the California Palm (Washingtonia) will not survive the winter in Denver, Colorado. The California palm grows in the Hardiness Zone 10 while Denver is in Zone 5a with a lowest temperature difference of 40 degrees (give or take).

So your dreams are shattered, but with a bit more searching, you find the Needle palm. Now the Needle palm doesn’t look much like the California Palm, but it is a palm tree, and low and behold, it says that it is cold hardy, and will grow outdoors in zones 5-10.

Heck, they even have a picture of it with snow on its leaves! You think to yourself, “Here it is; this is the palm for me!” You order up that palm tree, and you plant it in spring. It does fine all summer, but it isn’t looking so good next spring. Maybe you had a colder than usual winter? Perhaps you should have watered it again before winter hit? Or maybe, the people selling these plants realize that if they call it zone 5, they will sell more of them than if they call it zone 6 or 7, which is probably closer to what it really should be.

Lesson Learned

Either way, you might get some life out of it this second summer if you’re lucky, but chances are better that it will just slowly fade away, and you will have hopefully learned a lesson on plant zones.

Look at the map, but use some common sense. If you see a picture of that palm and think, “strange, this is a zone 5, yet I’ve never seen anything like this growing around here,” stick with your instincts.

If it is a neat-looking plant and it will grow in your area, chances are you would see it growing in your area, and chances are, the local landscapers would be planting it. There is a reason that you see the same sort of plants growing in every strip mall parking lot in your area. Because that is what survives the abuse of a barren cold parking lot full of ice, snow, and salt all winter or whatever the conditions are in your zone.

By the way, a quick search will show that the needle palm is native to coastal margins of the subtropical eastern Gulf and south Atlantic states of the United States. Yet they call it zone 5? As far as I know, palms are mostly in the Florida area and southern California; that’s about it. Why they would ever sell this palm as a zone 5 is beyond me.

Check out this map of where palms grow in the US: http://bonap.org/2015_SpecialtyMaps/Density%20Gradient%202015/original/2tax22_Palms.png

Now compare that to the hardiness zone map above. It looks to me like if that needle palm is the hardiest palm around, it should probably be rated down to maybe zone 7.

So, use your common sense when picking plants and realize that the less you push the limits, the happier you will be next spring when you take that first walk around the yard to see what survived.

California Palm (Zone 10)

Needle Palm (Zone 5?)

Are Plant Hardiness Zones Enough?

Here are a few things to note about hardiness zones. They are based on the lowest temperatures only. And as we discussed, it is not just the lowest winter temperature that affects plant growth, but also the soil, the highest heat temperature, the rainfall patterns, amount of sunlight, etc. So, while the hardiness zones give us an idea of the plant’s hardiness, there are many other elements to consider. Use your common sense and consider what is important to this plant you are choosing. How many hours of sun per day does it prefer? Does it prefer a wet or dry location?

Even if you choose a zone 4 plant for your zone 5 location, you still need to plant it in a spot in your yard where it will be happy. Too much sun will kill a shade-loving plant, and too much shade will kill a sun lover. The same holds true for soil moisture. If you plant in the proper zone and the appropriate location in your yard, you will likely have no problems and a happy plant.

Keep in mind that you can always press your luck and bring those tropical plants into the house for the winter, but that entails quite a bit of work, and it doesn’t always work out as planned. The safest way to do it is to have a large heated sunroom or greenhouse. Then you can probably keep them happy. Otherwise, in the corner of your house with a small window for light is not likely to cut it. At least in my house, light sunlight becomes the limiting factor.

What is the Plant Hardiness Zone of My Area?

USDA has provided a simple tool to punch in your ZIP Code and get your Hardiness Zone.

Try the Tool here.

[https://planthardiness.ars.usda.gov/PHZMWeb/Default.aspx]

Want to know which plants are the best for your zone?

Check Here

[https://www.gardenia.net/guides/plant-selection-guides]

Outdoor Oasis Landscape Ideas

One sunny morning, you were peacefully sitting by the garden, looking at all the greenery while sipping hot coffee, when suddenly a thought comes knocking- why don’t I update my yard and create an outdoor oasis?

After years of having your yard look the same, you have finally come to terms with the idea of revamping it. However, you find yourself getting lost in all the possible designs and styles you can have on your property.

With that in mind, we have prepared a carefully crafted list of 15 beautiful ideas to help you transform your garden into an outdoor oasis.

1. Multiple Levels

You should consider creating multiple levels in your garden using terraced patios. Not only does this add aesthetics to the architectural design of your home, but it also creates an illusion of an even bigger area. This technique can work in many different landscapes; just be sure that you are not causing any drainage issues when terracing.

2. Firepit

Who doesn’t’ enjoy a crackling fire. The sites, sounds, and smells of a crackling fire can really enhance our outdoor time. Besides, who doesn’t enjoy a few Smores now and then? Make sure that you put it far enough away from the house and foliage to avoid any fire issues, but place it close enough to enjoy it. When the sun goes down and the night gets chilly, this will be the new hangout spot in your yard.

3. Outdoor Dining / Living Area

This might be upon your existing deck or patio, or you may want to create an entirely separate dining or living area. Outdoor living rooms and kitchens have become more popular over the years. What used to be only in tropical climates has spread worldwide, and the possibilities are endless.

The installation of patios, grilling areas, refrigerators, couches, tables, lamps, and even fireplaces can be accomplished in all climates. A mid-garden dining or living area in your yard will certainly change up the flow and feel of your landscape. Whether it be a long wooden table for a feast of family, a small round table with a few chairs for a cozy cup of coffee, or a full-blown kitchen and living room, a new outdoor dining area might be just the thing your yard needs.

4. Treehouse

Everybody loves a sturdy treehouse! Both kids and adults will surely enjoy this and consider it a wonderful retreat. The kids will turn it into a play area, and the adults can enjoy hanging out while reminiscing about their childhood. I know, A bit out of the ordinary, but just think of the possibilities!

5. Water Fountain

The calming and enticing sounds of running water will fill visitors’ minds with curiosity and interest. We just can’t resist running water. Humans are drawn to it. Whether it be a small garden fountain in the corner or a large fountain display in the patio center, a fountain can be created to fit any yard and lifestyle.

Fountains come in all shapes and sizes, from large ornamental concrete structures to a small bubbling boulder. There is sure to be a fountain to fit your style. They are easy to install and low maintenance, so they can be a relatively economical option for any yard! A water fountain of any sort will also attract the birds, so if you love the site and the sounds of our feathered friends, a fountain may be in your future.

6. Plant Walls

You can use plants to break up a dull yard, creating hidden spaces and interest at every corner. Plant walls can add privacy from neighbors, can hide mechanicals, and can be used to create separation anywhere in your yard. Many different plants are well suited for this.

Whether you are looking for a tall hedge or a line of shorter shrubs, you can create some great interest by adding a few walls. Be sure to choose plants suited for your environment and size requirements. Climbing vines can be used on existing fences and walls to change your yard’s look and feel. Some new vines in your landscapes can provide a touch of green or a bright pop of color to any vertical surface.

8. Pool

If you own a large property, do not miss out on installing a swimming pool! A formal in-ground swimming pool is an entirely different vibe than the other smaller, more natural water features.

A pool somehow conveys affluence, elegance, and an air of relaxation. Floating in or relaxing next to a well-designed pool will make you feel like your yard has become a fancy resort. Now, all that you need is someone to bring you frosty drinks from time to time, and you are all set. Your yard may just become the neighborhood hotspot, so if you don’t like crowds, you may want to install that plant wall at the property line first.

9. Pond

If having a pool is a bit too much for your budget or just doesn’t fit with your yard’s natural look, consider the possibility of installing a pond. Ponds can range from very small with a tiny little sprinkle of water to colossal swimming ponds that can be used as a natural alternative to the swimming pool. Most end up somewhere in the middle.

A nicely sized pond that sits next to your deck or patio with a small waterfall or stream can add interest and life to your yard. A pond full of beautiful koi, goldfish, and frogs will provide hours and days of relaxation and entertainment while you sit and gaze into the cool, clear water. The pond will also allow you to experiment with some plants that would otherwise be impossible to grow in your yard. Water lilies and marginal aquatic plants can bring a whole new look to your yard.

10. Front Cozy Space

Having a cozy patio in front of your property can be a great spot to welcome guests or just hang out reading a book or keeping an eye on the neighborhood. We often frequent the backyard, but hanging out in the front yard on a cute little patio is a sure-fire way to get to know more of your neighbors.

11. Dramatic Trees

Maybe the “bones” of your landscape are good, and all that it needs is one or two big dramatic trees to add that unique look. You can definitely change the feel of a yard with a few well-placed trees. Imagine a massive pair of cypress trees towering over your yard or a large and sprawling Oak to provide shade and a place for a swing.

I know some of these ideas will be hard to attain given some trees’ slow growth. But, depending on your budget, there are many options for planting very large trees using equipment. Look for a tree mover in your area. You will be surprised how large they can go.

12. Herb Garden

Having your own herb garden is a good idea. This is one of those plant groups that are easy to maintain and provide a look and smell like no other garden. You can place them inside a planting bed or create a separate planter for them. Either way, going out to the backyard to pick some fresh herbs for your evening meal sounds delightful.

13. Gravel Garden

Are you tired of grass and plants? Why not choose gravel instead? Minimalism has become a trend nowadays. Creating flowing patterns of various sands, gravels and stones might just be a way to add a bit of out-of-the-ordinary flair. Add a few larger accent boulders, and you could have an exciting design concept.

14. Adding Topiary

Nothing screams fun like topiary. Topiaries are perennial plants that are trained and shaped into fancy elements. Although they require extra care and maintenance, they will add that extra wow factor and add a playful ambiance in your front or backyard. You can shape these plants into dogs, rabbits, birds, and even human characters!

You need to have the patience for this or a big pocketbook; good topiary takes a whole lot of time, and buying a large established topiary can be quite expensive.

15. Zen Garden

This is another addition that can be similar to the popular minimalist trend. The Japanese have created such a beautiful theme. The Zen garden is designed for flow and meditation.

The addition of rocks to signify the water, earth, wood, metal, and fire elements is an important feature. Dry waterfalls and sand can also be added. Don’t forget the small wooden rake so that you can change the sand patterns as you see fit.

Wrapping it Up

There are a wide array of choices for creating your backyard landscape oasis. My advice would be to take some time to visualize the different accents and get a feel for how they will change your yard. Once you have the ideas, try to lay them out on-site using boards, stakes, string, garden hose, paint, or whatever you need to do to give yourself the rough feel for the project. Walk it and live with it a bit before deciding to go ahead.

Landscaping can be expensive and hard work that is hard to change once it is installed. You want to be sure before you commit to these new design ideas.

Most people don’t need to hire a designer. Most people know what they like; they have simply never taken the time to dream. Dream it and then make it a reality. Believe me, creating your own dream will be more satisfying than creating the vision of someone else. Best of luck with your oasis landscape! Revamp your yard and create the best outdoor oasis for you and your family.

Landscape Masonry A Closer Look at Your Yard’s Hardscape

Understanding the role that landscape masonry plays in creating a functional and appealing outdoor space is an essential aspect of your overall landscape plan.  Below is a guide that will take a closer look at your yard’s hardscape and all of the different landscape masonry types and how you can incorporate them into your yard’s design.

Many of us have found more time at home lately.  Some have learned new skills such as painting, baking, and sewing, while others started growing plants and tidying up their yard.

If you are one of the thousands of people who are currently invested in the beautification of your outdoor space, you must have also thought of building additional structures like a kitchen, grill station, pool, patio, and walkway. These hardscape elements are typically constructed using landscape masonry.

What is Landscape Masonry?

Landscape masonry is a term used to address many hardscape features like walkways, patios, dry streams, columns, etc. Traditionally, the term masonry has been used more to describe stone, brick, block, or concrete work held together with mortar or cement.  Lately, it has been used to include all types of hardscape installations, including dry-laid walls and flatwork.

Unlike other construction techniques used in our landscapes, like carpentry and earthwork, masonry is considered highly durable and permanent because of the materials used in the construction process. These structures, which are usually made from stones, bricks, or concrete, can withstand just about any weather event that may occur.

If you want to add some more hardscape features to your yard, you have the option of doing it yourself or hiring a professional.  The materials aren’t particularly hard to obtain, but the work is rather technical and laborious, so if you do not like details and back-wrenching work, masonry may not be for you.

Two Landscape Masonry Techniques

When it comes to masonry, especially in the landscape, there are two basic construction techniques.

Wet-laid

This technique is also referred to as mortared.  The masonry structure is built adhering the stone or brick to each other using mortar or cement.  While typically considered its own category and product, concrete could also be regarded as a wet-laid technique since it is gravel and sand held together by a lime cement slurry.

Wet-laid structured are typically seen as more durable than dry-laid because individual pieces are less prone to move with little force.  When we are using stone and brick for home construction, it is almost exclusively wet-laid.

Wet-laid walls and patios will typically require a footing that extends down below the frost zone to avoid frost heave and cracking or a flat foundation.  In cold climates, when the ground freezes, it heaves.  It may only move slightly, but if your wet-laid patio or wall does not have a sturdy foundation below it, the mortar and stone will easily crack and shift with the force of the frozen ground. 

This same freeze and thaw cycle forces boulders to the surface of the earth over time, so don’t disregard its power.

A wet-laid wall will typically have a footing that extends below the frost line.  Here in Wisconsin, that is four feet below the surface.  This foundation is what the wall is built upon, and it will ensure that the wall does not heave and crack because it is built low enough that the ground below it will never freeze.

On the other hand, a wet-laid patio is typically built upon concrete flatwork.  Just like when laying concrete sidewalks and patios, concrete flatwork always has crack joints cut in it so that the walkway or patio will crack where we want it to crack as it moves with the surface of the earth.  Using this method, we can adhere stone or brick to the top of this concrete flatwork so that it has mortar joints over the crack control lines so that the movement doesn’t damage the stone and mortar.

Wet-laid masonry is always more expensive due to the extra time and materials needed to build it properly.  Even in warm climates where freezing is not an issue, wet-laid masonry takes more time to install.

Dry Laid

This technique is the most widely used method of wall building and patio and walkway building in America.  The technique involves removing any soft topsoil, compacting a flat base of crushed stone, and then laying or stacking the stone or brick on top of that.

Dry laid boulder or stone walls and patios are quite different in construction, but both rely on the same principles.  We are using gravity to keep our project intact.

A dry-laid patio or walkway will have brick or stone laid flat on top of the crushed stone base.  The stone or brick are set tight together with minimal gaps, and they are all set in one plane to create a pleasing flat surface.  They are held there by gravity and backfilled with sand to fill the gaps.  These patios and walkways will move with the freeze and thaw of the ground below, but as they are not mortared together, cracking is not an issue.  The rustic old European cobblestone roads were built with this technique, so we know it stands the test of time.

On the other hand, a dry-laid wall uses gravity to keep it together by stacking the rock or brick to always bear on the course below in such a way that the gravity will keep it in place.  This is why many dry-laid stone walls are wider at the bottom and more narrow at the top because the stones are leaning in toward the center of the wall to keep it standing.  Once again, these walls will move with the freeze and thaw, but if built correctly, it will not damage the construction as there is no mortar to crack.

Side note:  A retaining wall is typically a wall built to retain the soil behind it.  Retaining walls are most commonly dry laid.  Whether dry or wet-laid, a retaining wall’s durability lies in its drainage.  When you see a retaining wall leaning out and looking like it might fall over, that is due to the ground behind the retaining wall pushing out on the wall.  This can be from frost or simply from water and soil flowing down the hill that is being retained.

Two Wall Styles

The following terminology for the two styles is used more in home construction than landscaping, but the concepts might still apply if you create a mortared stone wall.

  • Rubble Masonry: This uses undressed, natural stones set in mortar.  This would be a natural fieldstone mortared wall, for example.
  • Ashlar Masonry: This type of stone masonry is more expensive as it requires sizing, shaping, and smoothing the stones to create the desired appearance. This would be a mortared wall constructed using square-cut stone pieces.  This is much more formal and stable due to each stone’s squaring.

Masonry Options

Gone are the days when landscape masonry only focused on natural stonework. Now there is a dizzying array of materials and options that would beautify any backyard, so it can be tough to narrow down your choices.  The list below is intended to help you choose what might be right for your landscape.

Natural Stone Masonry

Even though natural stone masonry is tagged as the oldest masonry technique, it still works in imbuing different structures with lots of sophistication.  Natural stone is more earth-friendly as it is naturally occurring, but it is typically more costly.

There are many natural stone options that you can choose from if you prefer stone masonry. Some of the most popular choices are granite, limestone, bluestone, and sandstone.  Typically, depending on the look that you want, you will be better off using a stone that is local to your area. Rock is heavy, so trucking it across the country can get costly.

Using a stone native to your area will better ensure its longevity.  I have too often seen landscapes where people used sandstone in a northern climate only to realize that it quickly breaks down when exposed to freezing temperatures when wet.  This is why you don’t find a lot of sandstone in Wisconsin.  The seasons’ freeze and thaw turn it into sand in short order.

The most natural look for dry-laid freestanding or retaining walls is the fieldstone boulder retaining wall.  These are natural stones taken from the earth and stacked to build the wall.  The boulders are typically sized to match the wall’s scale, and they are generally dry-laid (stacked).

Many natural stone walls are built using outcropping stone.  Outcropping stone is typically blasted out of rock quarries and fractures into rectangular blocks, making it ideal for stacked stone walls.

Many patios and walkways are created using natural stone that has been cut or fractured to a specific size or shape.  Limestone is a very popular option for patios, walkways, and stepping stone paths because when it is blasted out of quarries, it will often fracture into thin layers that are ideal for these uses.  Flat, natural stone is often referred to as flagstone.  Flagstone is a style of stone, not a particular type.

Brick Masonry

Historically, bricks have been used to build walls and flat surfaces for many years because they can be made out of clay in areas that do not have access to flat stone material.  Bricks are traditional rectangular and are relatively easy to use, laid flat, or stacked.

Although bricks won’t typically last as long as natural stone, there are many products on the market today that will get close.

Brick has been traditionally made using clay, so the brick’s color and durability were primarily tied to the region and soil structure from which it came.

More recently, the concrete industry has been making remarkable brick products in many shapes and sizes.  These concrete products are very durable and can be made to resemble clay brick or even natural stone, so they are a very popular choice for many homeowners.

Brick can be dry laid or wet-laid when used in patios but would typically be wet-laid when used in walls as their small size does not give them great stacking ability when dry.

A Few things to consider when choosing brick:

  • Natural clay brick can absorb water, leading to cracking and deterioration in colder climates.
  • Because they are absorbent, natural clay bricks will often grow moss in shaded areas.
  • The newer concrete bricks are generally very good, but some tend to fade in color.
  • Some concrete bricks are colored throughout, while some are only colored on the outside, which means that any chip will reveal a different color.

Block Masonry

There are many different concrete block products used in construction.  The tried and true cinder blocks have long been a staple in the home construction industry and are often used as the foundation for wet-laid brick and stone walls.

Concrete retaining wall blocks are widely used to retain the earth in residential and commercial settings.  These blocks come in many shapes, sizes, textures, and colors and can be small to create a pretty little garden or seat walls, or they can be quite large to hold back mountains of earth.

The retaining wall blocks are engineered specifically to fit their application and typically constructed so that they will tie into each other or be adhered to each other using construction adhesive.

Concrete Masonry

Concrete may not be your best choice if you are looking for pretty, but you can’t argue with its adaptability, strength, and longevity.  Poured concrete is used in both vertical and flat applications and can be engineered and reinforced to withstand almost any force.

Poured concrete has long been an easy and economical choice for landscape walls, flatwork, footings, and foundations.  If you are looking for an economical patio or walkway at your home, you won’t find a better price than a poured concrete application.  It can be formed to fit any space and will last many lifetimes.

If you have a bit extra to spend, you can look into colored and stamped concrete, which is poured concrete that is colored and/or stamped to have a particular look.  Some stamped concrete patios could be mistaken for natural stone.

Poured concrete or modified concrete that can be blown in against the walls is a primary construction method for in-ground swimming pools.  The two types of concrete used for pool construction are usually called shotcrete or gunite.  Both types are blown onto a vertical surface and would definitely need a professional’s touch and equipment for application.

Stone or Brick Veneer Masonry

Veneer masonry uses a thin layer of stones or brick for decorative purposes and not for load-bearing. Usually, the thin layer is stacked against and tied to a poured or block concrete wall.  While you will find some walls and pillars like this in landscapes, this technique is typically used in home construction.

Veneers can vary in their thickness and uses.  A full-bed stone or brick veneer uses pieces that are four to eight inches thick. A thin or sawn veneer, on the other hand, uses natural stones or brick that were sawn down to create the ideal one-inch thickness. These days, they are becoming increasingly popular since they can be used in areas where full bed stone veneers won’t fit, and they are more economical.

Ways to Incorporate Masonry in Your Landscape Designs

There are several ways to include masonry in your landscape, and here are they:

Walkways

Walkways enable you and your visitors to move through your landscape without damaging all your softscape. You can use pavers, poured concrete, or stonework to create this, but pavers are much preferable since they come in different tones that can be integrated into your landscape.

Stepping Stone Paths

Flat pieces of stone, large or small, can be laid in any design needed to allow for a very informal walkway through your lawn or garden.

Patios

Patios are perhaps the most common application of masonry in a landscape. You can use whatever sort of masonry material and technique you choose and create a very long-lasting patio of any shape or size.

Entryways

Want to create a great first impression among your guests or create a security gate? Then you might want to build masonry pillars at the end of your driveway.  This will make a formal entrance, and the pillars can support a gate.

Driveways

Many driveways are constructed using concrete, but they can also be built with brick or stone.

Retaining Walls

Utilizing masonry to add retaining walls is quite practical as it provides structural support and aesthetically pleasing planting areas and terraces.  These walls can be created using many different materials and techniques.

Fireplaces

Wouldn’t it be fun if you have a fireplace that can provide your outdoor space with a warm ambiance? Natural stone or brick masonry can be used in conjunction with a masonry product called fire brick (used to line the inside of the fireplace) to build a fireplace out in your yard, just like one that you may see inside a home.

Outdoor Kitchens

Outdoor kitchens seem to be gaining popularity and can be built using dry-stacked walls or wet-laid walls to create counters, cabinets, and enclosures for sinks, grilling areas, refrigerators, and more.  Often concrete or granite can be used for countertops.  Couple this kitchen with a fireplace, a table and chairs, and some new patio furniture, and you’ve got a full-scale living area outdoors!

Dry Stream Bed

A dry stream bed or dry creek bed is one of the most straightforward masonry applications in your landscape. All you have to do is line stones in a gully or trench for better drainage, to prevent soil erosion, and to add an artistic flair.

Garden Walls

Garden walls can be created to frame in a special garden, or they can be used at the edge of a patio to separate it from the rest o the yard.

Benches and Seat Walls

Benches and seat walls can be constructed in many different ways to suit your needs. Creating a nice solid spot to sit and view your garden can be a nice touch in many gardens.

Pools

Whether you live in a tropical climate or not, constructing a pool to complete your landscape is a good idea. Pools can be created in any style you might like to suit your yard and lifestyle.  Bring the vacation to your yard by giving yourself a beautiful swimming pool where you can enjoy the hot sun or a cool dip.

Columns

As mentioned before, columns can be built at the entrance to your home, or they can be used at the ends of walls or to draw attention to certain areas of your garden.  Due to their height, columns will typically require a foundation. They can be used to create height in the garden and can have lights mounted on them if desired.

Archways

Another wall addition that will certainly add flair to your garden would be a masonry archway.  Archways have long been used in more formal walled gardens and require a skilled craftsperson to build, making them a bit on the pricey side of things.

Water Features

Many beautiful gardens have a masonry water feature.  These can range from concrete reflecting ponds to fountains to large cascading waterfalls.  No matter how you do it, a masonry water feature can be the life of your landscape.

Fire Pits

Masonry has long been used to create enclosures for our fire.  You can create a fire pit of many different materials and in many styles and sizes, although you should avoid using very absorptive stone as it may pop when heated if it has moisture in it.

Outcroppings

Stone can be used to create outcroppings in your yard that can retain soil or be used as a backdrop or accent to a garden bed.

Final Thoughts

Masonry is the foundation of hardscaping. You won’t find a garden or a yard without stones, bricks, or concrete because they are the primary materials used for most landscape features.  Whether you hire it done or do it yourself, landscape masonry will be the backbone of your landscape.  It will likely endure for the life of your home, and your gardens will grow and change around your masonry features as the years roll by.

Landscape Lighting Installation

Landscape lighting installation is an easy way to highlight and beautify your garden structures, statues, paths, patios, aquatic environments, and pools and it is the only way to beautify your landscape at night.

With professional-grade landscape lighting, you can harmonize the illumination to create smooth transitions between plants and accentuate what is needed. For instance, you might have a crystal clear, cool fountain you need to add some sparkle to, or you may need to illuminate a shady corner of the yard. Landscape lighting is one of the easiest methods to beautify your space.

Moreover, according to the Appraisal Institute, it is proven that good landscape lighting increases the value of a property. The long-term investment in an expertly built, correctly designed landscape lighting system would seem that it would pay off in the long run while you get to appreciate the short-term satisfaction.

Landscape Lighting Design & Installation

Landscape lighting is a significant factor in the attractiveness of your home. When you rely solely on landscaping, your work may be impressive but only during the daytime. The allure of your yard is no match for the surrounding darkness come nighttime.

For this reason, you should make use of a well-executed landscape lighting plan to let the intricate designs of your plants and yard shine in the spotlight. You didn’t spend all that time maintaining your flowers, trees, and other greenery for them to hide in the dark.

Furthermore, installing a decent landscape lighting system is a big plus for safety. By having lighting on your pathways or walkways, you can stop worrying about guests or family members tripping over unseen obstacles.

Voltage Considerations

When considering landscape lighting, you should probably start by deciding whether to go with a low voltage system or a line voltage system. The landscape industry is predominantly installing low voltage systems, and for a good reason. Historically, before readily available transformers and lighting systems, your outdoor lighting would have been installed by an electrician and would have been line voltage. Below we will walk you through the Pros and Cons of both systems:

Low Voltage (Usually 12 volt DC, just like the electric in your car)

Pros

  • Easy to install – Plug a transformer into an outlet and run the wires.
  • Economical – There are systems and options in all price ranges
  • Suitable for Do it Yourselfers – no need for an electrician
  • The wire doesn’t need to be deeply buried.
  • No one dies from low voltage.
  • The wire is easy to repair if cut with a shovel or lawnmower.
  • Many fixture choices
  • Minimal tools needed
  • Many different control options
  • Fixtures are easy to place and adjust.
  • New LED bulbs last a long time.
  • High-end fixtures can have adjustable output and beam angles.
  • Great for wet locations such as ponds and waterfalls

Cons

  • Wires are shallow and get cut often.
  • Wire runs are crucial – the longer the run, the more voltage is lost.
  • Fixtures often move out of place.
  • Fixtures tend to be more short-lived than line volt.
  • The old halogen bulbs burn out yearly.
  • Some LED lights have an odd, unnatural color.
  • Need more maintenance – generally speaking, low volt systems require at least yearly adjustments, and the timers and transformers are more prone to failure.

Line Voltage (120 volt AC, this is the electricity in your house.)

Pros

  • It can be as bright as you want it to be
  • Wires are buried deep and to code.
  • Fixtures are permanently installed and typically don’t move around.
  • Bulbs can be bought at the local hardware store.
  • Can have regular light switches in your house or can be on timers.
  • Can be LED
  • Very low maintenance and long-lived.

Cons

  • It should be installed to code by a licensed electrician.
  • More costly
  • If you do cut a wire, you could get electrocuted.
  • Not great for in waterfalls and ponds due to electrocution.
  • More chance for danger – outside is often wet. If a bulb gets broken or fixture damaged, it could be dangerous.
  • Typically uses more electricity.
  • They are not easily adjusted or changed.

Types of lighting

Functional lighting

These types are used to light the areas of your outdoor living space that need to be lit for safety’s sake so that people can see what they are doing. They come in many varieties and can be set in many locations.

  • Wall lights
  • Pathway lights
  • Stairway lights
  • Driveway lights
  • Deck/Patio lights
  • Yard Floodlights
  • Security lighting

Accent Lighting

Accent lighting is used to highlight and present particular features of your yard at night. By using light wisely, you can paint a stunning nighttime portrait of your yard. These lights aren’t necessarily placed so that you can see better at night; they are simply used to create the look. These lights come in a wide array of different functions and styles, so you’ll need to do your research.

  • Downlights – often hung on posts, on the house, or from trees. These lights can be bright to highlight features or dim and subtle to appear more like dappled moonlight.
  • Uplights – placed on the ground pointing up at particular trees, plants, or objects that need to be highlighted. These can be bright or subtle and can come in many different beam widths.
  • Submerged lights – Typically used in ponds and water features. While all outdoor fixtures are designed to get wet, only some are designed to be submerged in water.
  • String lights: These have become very popular to use for lighting above your deck or patio.

There are plenty of outdoor lighting options that, while not unpleasant looking, are unimaginative and nothing special. You need to find lighting that will add flair to your space. There is a vast difference between buying a cheap kit at the local big box store, lighting a few trees, and designing an all-encompassing landscape lighting plan to showcase your home and yard. There are practically unlimited options for beautiful lighting effects.

Advanced LED Systems

LED (Light Emitting Diode)-based landscape lighting is a practical, energy-saving way to bring your yard, pathway, or garden to life. Compared to halogen lamps, these lighting systems are a valuable addition to any home due to their low-energy costs, longer lifespan (up to 50,000 hours), less heat output, and wide color selection.

If you want to liven up your yard in a surprising and less conventional way, then an electronically controlled LED system may be right for you. These systems can be set to cycle through different lighting effects automatically, or you can change effects with a remote control. It can be as simple as adjusting brightness or color or as complex as having the lighting change to the beat of the music. It’s all up to you. You can change your yard’s look with your mood or with the seasons!

Conclusion

A well-thought-out and designed landscape lighting system can make a world of difference to your yard. The difference can be quite literally night and day. Landscape lighting can enhance your property’s look, value, safety, and useability if appropriately done and with an eye for aesthetics.