
Installing landscape edging is not an easy task no matter where you are doing it, but if you are installing landscape edging on a slope, you are in for a real challenge. To be able to install landscape edging on a slope, you will need to follow some specific guidelines if you want even half a chance of this edging lasting longer than one season.
Any time that extreme slopes are involved in landscaping projects, things get a lot more difficult. Don’t get me wrong, rolling hills, berms and general yard contours add much interest and variety to a yard, but as far as erosion is concerned, slopes will be some of your biggest landscape challenges.
Installing landscape edging around your lawn, beds and walkways is a fairly common practice, and it has it’s advantages. I’m going to lay out some of my best edging installation advice in this article.
General Considerations for Slope Edging
Any time that you are working on a slope, your major concern should be erosion. Whether you are putting in a few accent rocks, shrubs, flowers or a waterfall, you need to consider how running water will affect your installation.
Edging, no matter which type you choose, can exacerbate or minimize any water erosion problems that you already have. Water flowing downhill on exposed soil will wash it downhill every time. the worst thing that you can do on a steep slope would be to concentrate the water in a narrow area. Installing edging up or down the hill will make your erosion problem worse, while running your edging across the slope can help to slow down water flow and reduce erosion.
In general, when working with slopes, one of the most important aspects to help keep your valuable soil in place will be plant cover. No matter what type of edging you install, it is going to be important to plant and protect the surrounding soil as soon as possible after the installation of the edging.
Types of Edging – No matter where you install it
Brick, Stone, Concrete Paver Blocks
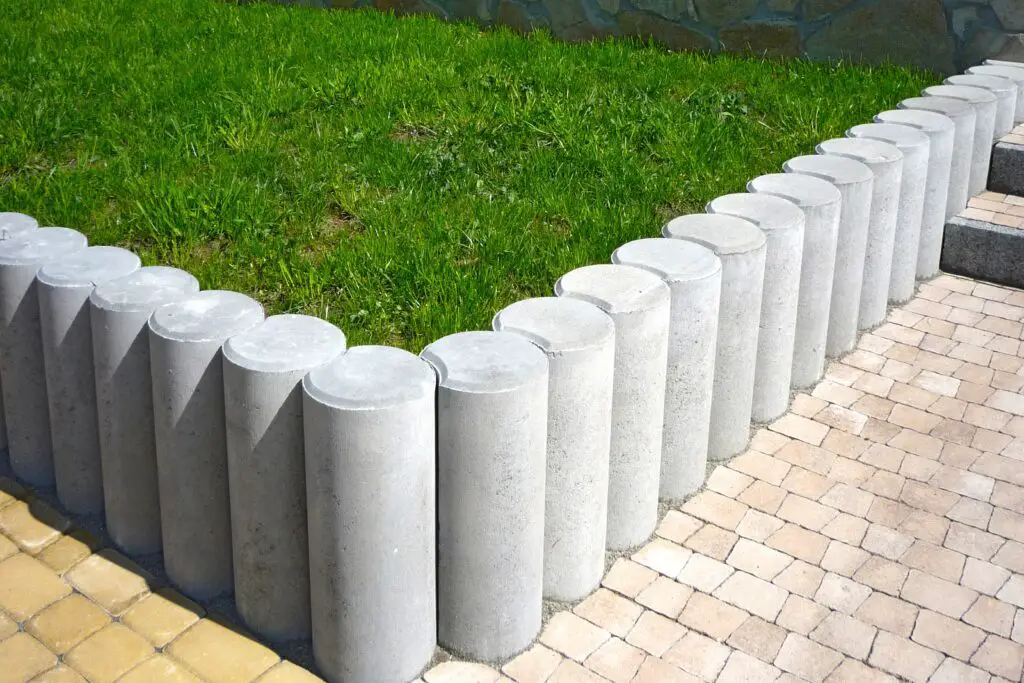
Stone, concrete and brick paving blocks are fairly straightforward to install, but are likely the most expensive edging that you can choose for your yard. The fact that they are block-shaped and heavy might help keep them on the slope, if they are set into the soil deep enough. While these block shaped pieces typically stay in place fairly well when installed properly on flat ground or slowly rolling hills, installing them on a steep slope is asking for trouble.
If you choose to install the block shaped stone or brick edging, make sure to buy the taller sizes, such as maybe 6 inches to 12 inches tall, depending on the steepness of your slope. The more stone or brick block that you can bury in the ground, the more likely it is to stay where you put it.
As was mentioned above, installing your stone edging across the hill can act as a small retaining wall or dike which can help to hold back soil and stabilize the slope.
Another aspect of installing stone edging on a slope is that the entire installation will be more solid, the more it is tied together. Setting the stones tightly together and in an arch is one way to use friction and gravity to your advantage to help keep the stone blocks in place.
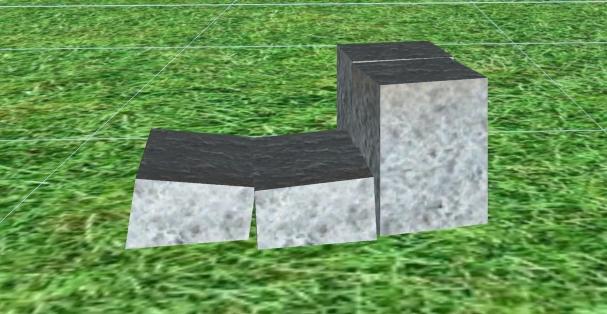
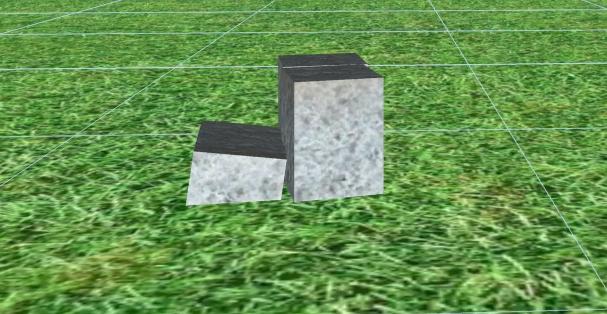
Another nice method is to toe-in the edging using mortar. Mortar, especially fiber reinforced mortar will act as a bonding agent to help bond the blocks together as well as provide more weight. Certainly in extreme slope situations, you could over dig the depth of your edging trench and pour an actual reinforced concrete footer to set the stone or brick blocks on, but that will not typically be necessary. If you set your block nice and tight and then toe them in with mortar on one side or both, it should be plenty strong to hold for many years. To toe in, simply mix mortar and trowel it against the block edge in a triangular slant with the mortar mostly on the ground and slanting up onto the block as in the picture below.
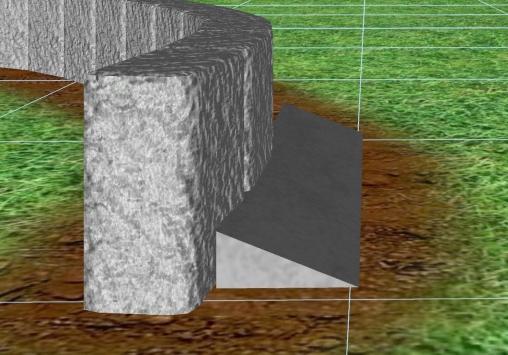
This will help to anchor the blocks to the ground and tie them to each other. Obviously, the mortar toe would be installed lower than the existing grade and covered with soil.
While installing stone or brick block edges may be more labor intensive and more costly, these classic stone borders ar emuch higher quality and more stable than any plastic or steel edging choice.
Poured Concrete Edging
Poured concrete edging can be installed in several different ways. You can install traditional concrete forms, mix and pour the concrete yourself in any shape or form that you desire. You can also install the forms and then order the pre-mixed concrete and install it yourself. The latest trend in concrete curbing is the use of a mechanical concrete edging machine.
The advantage to forming and pouring your own concrete edging would be the ability to customize the curbing in any way that you see fit. I would always recommend choosing a curbing profile that is easy to keep consistent throughout the yard. I would not recommend altering the curbing profile throughout the yard as too much variation in materials and look will typically make a yard look more cluttered and unprofessional.
When I talk about the ability to customize your poured edging, I am talking about the profile of the curbing in and under the ground. The ability to form an pour a standard curb on flat areas and an enhanced curb on slopes can be quite helpful. You can shape the buried base of your curbing to better stabilize it on the slope and you can even reinforce it using rebar, steel mesh or even cable. This would be one way to ensure that your edging stays on the slope where you want it and still looks the same as the rest of the edging in your yard.
Using a mechanical concrete curbing machine (similar to the one pictured below) gives you the advantage of being able to create your own curbing with the help of a machine which eliminates the need for forming. These machines are primarily designed to be used on flat surfaces, so using them on a slope will not be easy to do, and they do not offer a way to alter the curbing for different slopes. I’m sure that it can be done, but I would guess that using a machine such as this would be very difficult on a steep slope.
Landscape Timber Edging
You can certainly use landscape timbers when installing edging on a slope, but due to their length (unless you cut them short) they don’t do well on changing grades. Imagine trying to cut an eight foot timber into a slope with undulations. The longer the pieces are that you choose to use, they harder it will be if there is any ground contour.
Timbers can certainly be used cross-slope to help reduce erosion and keep the slope in place. An advantage to using timbers is that they can be fastened together using long screws, spikes or lag bolts. This will help to tie the edging together and make it stronger. Another advantage is that you can drill holes and anchor the timbers to the slope using large spikes or rebar.
These two advantages will make the landscape timber option attractive, but remember that all wood will decay over time, so it is likely that eventually you will be left with a bunch of rotting wood and rebar sticking out of the ground. Another disadvantage to using landscape timbers as edging, is the fact that wood is light and it will tend to move quiet a bit, especially in areas where the ground freezes.
Metal and Plastic Edging
There are many commercially available metal and plastic edging systems in the market today. Most of these are a simple and cheap way for a homeowner or landscaper to edge a bed or the lawn. From my experience, none of them look nice for long if at all.
Most of the plastic and metal edging choices are simply a flat piece that is cut and staked into the ground to provide an edge between two surfaces such as between the grass and flower beds. There are also plastic edges that look like stone and brick or have other contours, but none of them are long lasting and none of them look very realistic.
As with any light material, metal and plastic edging tends to move with time. I will say that the steel edging will stay in place better than the plastic will, simply due to its rigidness and its weight, but it will still pop out of the ground and get hit by the lawnmower eventually.
Like the timbers, these plastic and metal edges come in long lengths, so setting them on ground with contours is difficult if not impossible.
Natural Bed Edging
While some will say that the natural cut bed edge is the highest maintenance choice, I would disagree. The natural edge certainly needs to be recut every few years, but there aren’t any pieces to move out of place or heave up and get hit by the lawn mower.
The natural bed edge looks classy and simple and will help to separate your various beds and the lawn. This edge should be cut using an edging shovel. Your goal is to cut straight down on the lawn side of the edge and cut it sloping back at an angle into your bed as in the example below.
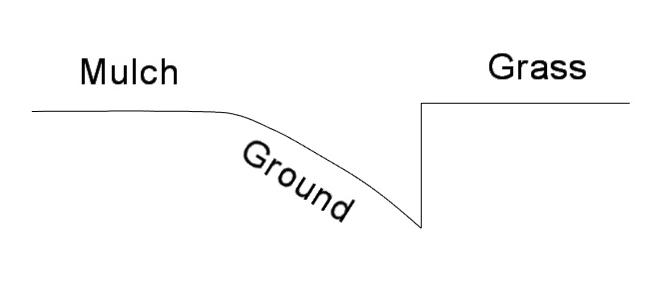
By cutting down 6-8 inches at the lawn edge, you are creating a great barrier to discourage the grass roots from growing into the bed and when you mow lawn, the edge of the mower deck will nicely hang over this edge, so there will be no need to use a string trimmer.
There are v-shaped edging machines available at local rental yards, but in my experience, they are typically not work the effort unless you are cutting your entire lawn edge and you have a good sized yard. When using these machines, the correct edge is cut, but a pile dirt and sod is left in the bed which needs to be cut out anyway, so you are not saving much time or effort.
Edging on a Slope Techniques
There are some crucial concepts to understand whenever you are installing landscape edging on a slope. one is to be sure that your edging material is installed correctly and firmly anchored to the slope to be sure that it won’t move with time. The other is to ensure your edging layout and design helps the slope erosion instead of making it worse.
When edging on a slope, you will want to catch and slow the waterflow, not concentrate it and speed it up. Sections of edging that slope downhill will concentrate the waterflow and speed it up which will increase the effects of erosion. Sections of edging that run across the hill will slow down and spread out waterflow which will reduce the effects of erosion. Check out the picture below.
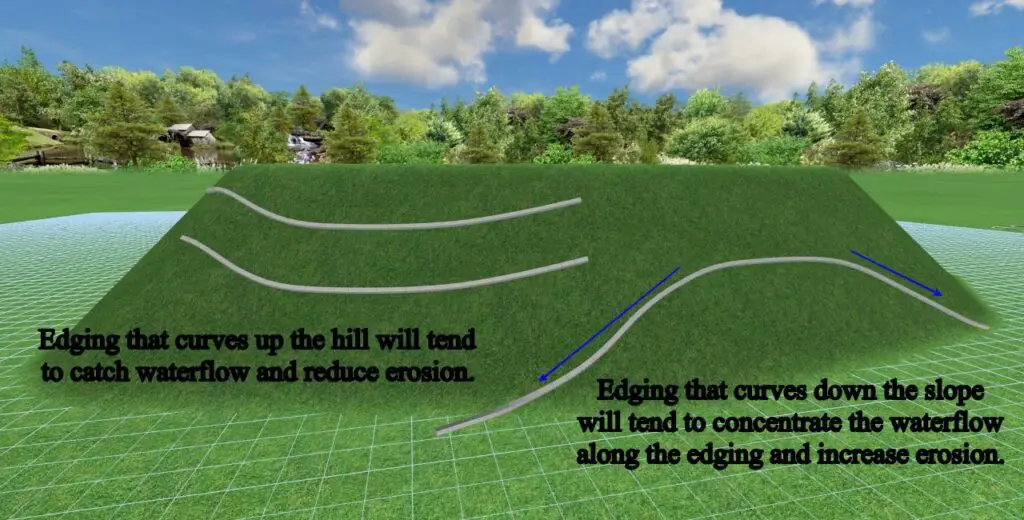
No matter which type of edging you choose, it is important to keep this concept in mind as you begin your project.
Sometimes, you will have no choice but to run your edging down a slope. In this case, depending on your edging type, you can create a gutter for the water to flow in using your edging material. This doesn’t work with a natural bed edge or with plastic or metal edging, but if you are using bricks or stones, it will certainly work.
Simply install the brick or stone gutter on the uphill side of the edging where the water will be concentrated and tilt it to control where the water flows. The uphill edge of the gutter must be a bit below the height of the ground so that it allows to water to enter. If you have a lot of water flow, you may want to install a double stone gutter, but most of the time a simple single stone gutter will work well. By keeping the water on the stone, we can eliminate the erosion on the slope.
Keep in mind that simple edging techniques like this can be used to control slope erosion even if you don’t really need a landscape edge to seperate beds or plants. Be installing multiple edges on a slope, you are in effect creating small terraces on the hillside. Hillside terraces have long been used to control erosion and create planting areas.

Installing landscape edging on a slope does not need to be extremely difficult, although the steeper the slope, the more difficult it will become. Always remember that safety comes first, so call to have public utilities located before you dig and use caution when working on a slope. Carrying heavy brick or rock up a slope can be dangerous, especially when things get a bit wet and slippery.