Use of Herbs Instead of Insecticides

herbs instead of Insecticides

Home gardening has long been very popular. Nowadays, people want to grow vegetables on their own, but sadly many turn to hazardous chemicals to control insects.

This is unfortunate since there are many natural ways to control insects without harming our health or the health of our planet. Learning to use herbs instead of insecticides greatly contributes to restoring the health of both humans and the soil.

Beginning gardeners often need to be made aware of the organic practices to control garden plants’ associated problems like insect pests, diseases, soil infertility, drainage, etc. We will provide gardeners with highly beneficial knowledge to improve their gardening skills and keep them natural.

5 Natural Pesticides:

Neem Leaf (Azadirachta indica):

It is considered a key substance in non-pesticidal management (NPM) for its natural insect-repellent characteristics. It is very important to understand the Neem plant’s action. It does not ever kill the insects directly; it acts as a repellent, antifeedant, and egg-laying deterrent in defense of your precious plants. 

Neem leaf, bark, fruit, and stem contain a Phytochemical “Azadirachtin” that is the actual pest-controlling ingredient. Almost 2 kg seeds of neem make 5 g of Azadirachtin. You can use neem leaves too; crush 50 – 60 leaves, keep dipped in water overnight, pour in a spray bottle, and spray on the plants you want to protect from pests. Then, regularly spray after every 10 – 20 days to eliminate the insects from your garden. (Shah, F. M., Razaq, M., Ali, Q., Shad, S. A., Aslam, M., & Hardy, I. C. (2019).

Garlic:

Garlic presence is mandatory in every house. However, the most important role of garlic may be unknown to many of us. Garlic is a natural insect repellent that protects your garden plants from all kinds of flying and crawling insects. One dose of garlic spray is enough for more than one month.

Garlic bulbs contain an amino acid known as “Allicin” that is absorbed by plants, which brings about chemical changes to activate the plant’s natural mechanism to repel insect pests. It is a long-lasting garlic breath for the plants and does not harm the pest, beneficial microbes, and humans in any way. (Anwar, A., Groom, M., Arbach, M., & Hamilton, C. J. (2014).

Eucalyptus Oil:

Natural oils like eucalyptus oil, olive oil, etc., are biodegradable, very cheap, and have no harmful effects on the soil and plants. Eucalyptus oil protects your garden from mushroom flies, moths, and weevils. It contains a mixture of compounds (unlike chemical pesticides, which have only a single formula) so that the insect pests would not become resistant to it. 

Eucalyptus oil vaporizes very quickly, so it needs to be sprayed soon after the previous dose. It has a powerful smell to keep bugs and other insects away from your precious commodity. (Batish, D. R., Singh, H. P., Kohli, R. K., & Kaur, S. (2008).

Chrysanthemum Flower Tea:

Chrysanthemum flower contains a chemical known as “Pyrethrum.” It is a potent insect-repellent ingredient. You have to boil some chrysanthemum flowers in a water-filled pan, strain it, and spray it on your plants. Regular use of this homemade tea will eliminate the insect population from your garden. The pyrethrum is known to damage the nervous system of insects, quickly preventing them from reproducing. (Shahrajabian, M. H., Sun, W., & Cheng, Q. (2020).

Four Smart Garden Pest Control Strategies:

1: Timely Planning

Identification and differentiation between harmful and beneficial insect pests are very important. The first step is to identify the number and kind of insects, take a picture of each and compare them with “the Common Garden Insects” on the internet. It will resolve the confusion between what to protect and what to remove from your garden.

2: Encourage Biological Control by introducing Beneficial Herbs and Bugs

  • Plant Catmint and Allysum near or around the Roses; it will protect them from Lacewings and Ladybugs.
  • Ground Bugs are the beneficial insect predators of many beetles, aphids, and those pests that are not active during the night.
  • Pesky Caterpillars and aphids are the favorite food of parasitic wasps. You can invite wasps into your garden by planting a few umbrella-shaped flowering plants, such as Yarrow. 
  • Non-beneficial pests usually hate fresh-smelling herbs. For example, mint, basil, dill, lavender, thyme, parsley, fennel, coriander, sage, and lemon balm are insect-repellent herbs.
  • Border planting of Marigolds will keep the aphids, plant lice, and many other flower-damaging insects away from your precious flowers. Farmers use marigolds as an insect repellent due to their strong smell (that insects do not like), annual nature, and hardiness characteristics.

3: Improve your Garden Soil:

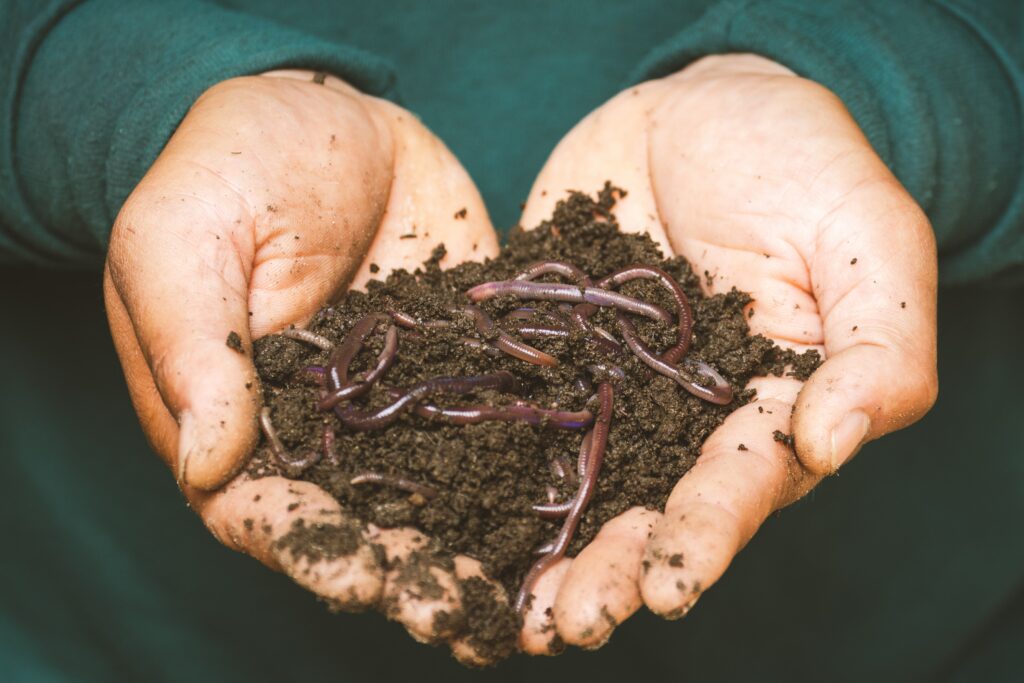
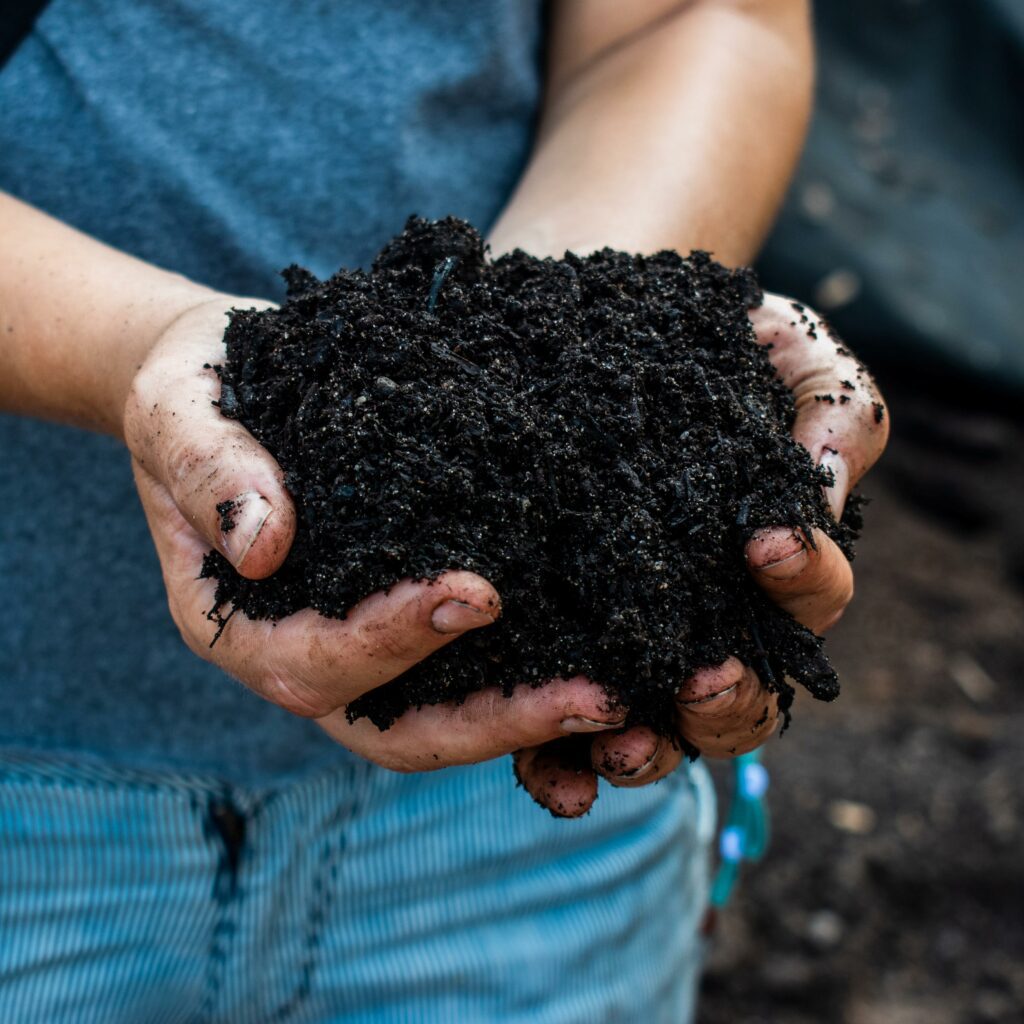
All of the beneficial insects love compost-rich soil. Homemade Compost, Vermicompost, and Organic Mulch are the wisest decision you can make for your garden. Healthy soil produces healthy plants, and healthy plants can fight off pest attacks. A soil rich in microbes has good drainage, water, and nutrient-holding capacity. Targeting each pest individually will be easier than trying to rid your garden of all pests at once. 

Over time, with regular applications and efforts, natural pest control can be attained.

4: Seasonal Home-made Remedies:

The effectiveness of homemade products is always uncertain, but if we only use safe and natural ingredients, we will be doing no harm by experimenting a bit.

Two proven insect-repellent concoctions are listed below:

  • Crush ten garlic cloves, keep them dipped in water for 24 hours, and strain out the liquid extract. Now mix 1 cup of vegetable oil and a shaker of hot chili pepper and let the mixture settle for one day. This is a very effective extract to help protect plants against egg-laying pests and predators. It will keep the pests away from your plants without causing any damage to them. Owusu-Akyaw, M. (2011)
  • Collect the essential oils of lavender, peppermint, tea tree oil, rosemary, citronella, avocado, hazelnut, and olive oil. Take one tablespoon of each and mix them to get a highly efficient natural pest remover product. (Arnason, J. T. (2012)

Advantages of using Herbs instead of Chemical Insecticides or Pesticides:

Environmental Friendly:

Every single plant we grow consumes carbon dioxide and adds oxygen to our environment. Whether or not it has any other benefits, such as being edible or ornamental. On the other hand, chemical pesticides are the quickest in action and damage, leaving behind drastic soil and health issue. Biological control is the only way to keep our air safe for ourselves and the coming generations.

Least Expensive and Cost-Effective:

Five or six perennial herbs are enough to control garden pests. Annuals are usually cheaper, and homemade herb mixtures are all cost-effective ways to protect your precious commodity. 

The eco-friendly way that promotes biodiversity:

In controlling pests through plants and natural predators, you are protecting the atmosphere from getting polluted and promoting biodiversity by using environmentally friendly practices. Your garden is the habitat of many lives, contaminant-absorbing sources, and hope for a better future. Save it from damage as much as you can.

FAQs related to Natural Pests Control/Biological Control:

Q: What can I practice to protect my plants from insects?

A: Various biological, cultural, and mechanical practices are adopted depending upon the type of pest, crop, and soil conditions. However, planting select herbs along with your main crop or plant is the cheapest and most consistent pre-control.

Q: What kind of herbs/plants keep pests away from vegetables?

A: Many plants can keep pests away from vegetables; some of the commonly grown are listed below:

  • Citronella grass
  • Mint 
  • Lavender
  • Basil,
  • Parsley 
  • Rosemary 

Q: How to keep bugs away from eating my Herbs?

A: identify the kind of bug, its predators, and natural plant predator if available. In organic gardening, crop rotation, companion planting, neem oil, natural traps, soap spray, garlic, and soap mixture, are usually recommended.

Q: How to identify garden pests?

A: every insect could be a pest for your garden plants, and some may be less harmful and some more. Aphids, mites, bugs, weevils, caterpillars, slugs, Japanese beetles, etc., are some of the most common garden pests. The best way to control them is to practice manual picking, killing, and crop rotation.

Q: What is Biological control?

A: Biological control is using living organisms or natural enemies (plants or animals) to control harmful living organisms. It is the environment-friendly and most effective means of managing insect pests. 

References:

Batish, D. R., Singh, H. P., Kohli, R. K., & Kaur, S. (2008). Eucalyptus essential oil as a natural pesticide. Forest ecology and management256(12), 2166-2174.

Shahrajabian, M. H., Sun, W., & Cheng, Q. (2020). Chinese star anise (‘Illicium verum’) and pyrethrum (‘Chrysanthemum cinerariifolium’) as natural alternatives for organic farming and health care-a review. Australian Journal of Crop Science14(3), 517-523.

Anwar, A., Groom, M., Arbach, M., & Hamilton, C. J. (2014). How to turn the chemistry of garlic into a ‘botanical’pesticide. In Recent Advances in Redox Active Plant and Microbial Products (pp. 323-341). Springer, Dordrecht.

Shah, F. M., Razaq, M., Ali, Q., Shad, S. A., Aslam, M., & Hardy, I. C. (2019). Field evaluation of synthetic and neem-derived alternative insecticides in developing action thresholds against cauliflower pests. Scientific reports9(1), 1-13.

Mochiah, M. B., Banful, B., Fening, K. N., Amoabeng, B. W., Offei Bonsu, K., Ekyem, S., … & Owusu-Akyaw, M. (2011). Botanicals for the management of insect pests in organic vegetable production.

Regnault-Roger, C., Vincent, C., & Arnason, J. T. (2012). Essential oils in insect control: low-risk products in a high-stakes world. Annual review of entomology57, 405-424.

Enviroscaping an Environmentally Friendly Landscape

Enviroscaping

Enviroscaping is the art and science of establishing and maintaining an environment-friendly, more sustainable landscape, conserving and recycling the available natural resources. It is designed and established keeping in view the specific environmental issues associated with an area of land. Enviroscaping is a low-impact landscape that conserves energy and supports natural resources.  

Aspects of Enviroscaping

In short, enviroscaping aims at conserving energy/resources. it has the following environmental aspects:

Energy conservation

Increasing heat directly impacts the overall global temperature. There is a need to conserve energy as much as possible to make the earth survivable for the coming generations. Planting shade trees, groundcovers, and windbreaks to make the surrounding environment a little bit cooler is an old and valuable practice. Trees and ground covers are the commodities that require the least maintenance. Once established, they will keep growing without demanding much attention. They provide shade, shelter, oxygen, and absorb carbon dioxide, air pollutants, unpleasant sounds, wind-shelter, and much more. Native plants are usually preferred in enviroscaping; however, some non-native plants grow better in local climates as compared with the native ones (Buffington & Black, 1985).

Soil conservation

Soil conservation means keeping it healthy. Healthy soil can produce healthy plants that directly impact people’s lives and health. Soil filters the water and passes it into the natural waterways preventing soil erosion by conserving a seamless vegetative soil cover and providing life to the terrestrial animals. 

Air quality

Polluted air is the cause of numerous diseases and disorders in both humans and animals. Air quality also affects climate; for example, it can alter the precipitation level, which is directly related to rain patterns. Plants, either trees, shrubs, grass, container plants, or even indoor plants, can bring slow but impactful changes in the air quality. Plants constantly absorb carbon dioxide (which is one of the major gases among greenhouse gases), release oxygen, transpire one-third of the water they absorb, phytoremediation of the pollutants in the air and soil, and provide shelter to the wildlife, conserve biodiversity, and a lot more. 

  • In enviroscaping, evergreen plants, either trees or shrubs, are preferred. 
  • Native plants which require less water and maintenance and have less susceptibility to insect pests attack are given preference.
  • The aim of planting trees in enviroscaping should be to bring positive changes in the air, soil, water quality, and health. 

Solid waste management

Recycling is the best solution for managing solid waste. There should be a proper system to recycle the household waste at the house or town level so that it can be convenient to manage and redeliver. An enthusiast of enviroscaping would not let a single material go wasted that is of any use whatsoever. You can make compost, vermicompost, containers, and decorative materials for the plants from the solid waste. 

Noise abatement

Noise pollution disturbs wildlife, mating schedule, sense of hearing, etc.; plants absorb the sound waves and deflect them. In enviroscaping, plants are established in eye-catchy patterns to not only give an attractive view but also absorb unwanted sounds (Botteldooren, 2008).

ENVIROSCAPING FUNCTIONS

Improving wildlife habitat

With the decrease in the trees and shelter places for the animals and birds and with the increase in the water, air, and noise pollution, wildlife is under serious threat. There is a need to conserve the wildlife in their natural and also outside their natural habitats to conserve the food chain. This is possible by establishing botanical gardens, gene pools, DNA banks, zoos, wildlife parks, etc.

Creating open-air living spaces

Decorating the outdoor spaces with plants and plant materials beautifies the environment and cleans the outdoor air. 

Making home and work green places/value-addition

Creating patios, decks, and outside seating enhances the value of your property. Enviroscaping aims at establishing low-impact landscapes and gardens that conserve energy and natural resources. Backyard landscaping is one of the best parts of enviroscaping.

Filtering and reusing the drinking water

“If there is magic in nature, it is in the water.”

Water is the main driving force behind every life and mechanism. According to the WWF report, more than 1.1 billion people do not have access to fresh water, and 2.7 billion people face water scarcity for at least one month/year. It has been predicted that by 2025, 2/3rd of the world population may face water shortage problems. 

Therefore, there should be a proper mechanism to harvest the rain and irrigation water. Catchment areas should be converted into vegetable gardens to not let even a drop of water go to waste. 

Cleaning and filtering the outdoor and indoor air

There are many air cleaning machines, but none as efficient as plants. Plants have built-in mechanisms to take in the gases that are harmful to humans and the climate. The most dangerous gases present in indoor and outdoor air are carbon monoxide, methane, benzene, toluene, and many air pollutants like oxides of nitrogen and Sulphur. Not a single plant can absorb all pollutants; however, every single plant absorbs pollutants. If we can efficiently plant enough trees, keeping in mind their specifications, it is possible to control air pollution. We just have to take the initiative, and the plants will play the next role!

Conservation of natural resources

“If we fail in conserving our natural resources, we can never succeed in any field of life” Natural resources include water, soil, fossil fuels, minerals, and animals. Everything from food to fuel that human beings consume has a direct or indirect link with natural resources. The question is, how can we conserve these natural resources through enviroscaping?

  • Recycle, reuse the water, plant trees that absorb minimum water from the soil, efficiently utilize the rainwater, build ponds and small dams to store excess water, etc.
  • Plant trees and cover crops to prevent soil erosion, build soil’s organic matter, and restore soil biota.
  • Fossil fuels come at the top of the list of causes of global warming and climate change. There is a need to switch to less destructive and more environment-friendly sources of energy, for example, solar cars, electric vehicles, etc. 

Books and Publications on Enviroscaping

  • Meerow, A. W., & Black, R. J. (1993). Enviroscaping to Conserve Energy: Guide to Microclimate Modification. University of Florida Cooperative Extension Service, Institute of Food and Agriculture Sciences, EDIS.
  • Sharath, M. K., & Peter, K. V. (2019). Enviroscaping: An environment friendly landscaping. In Sustainable Green Technologies for Environmental Management (pp. 1-27). Springer, Singapore.
  • Baruah, N., Sarkar, S., Roy, B. C., & Sinha, R. C. (2019). Quantitative analysis of sound absorption properties of plants in indoor environment for enabling sustainable practices. International Journal of Environmental Technology and Management, 22(4-5), 223-235.
  • Buffington, d., & black, r. (1985). Plant materials for residential energy conservation–life cycle costing. In passive and low energy ecotechniques (pp. 795-805): Elsevier.
  • Botteldooren, D., De Coensel, B., Van Renterghem, T., Dekoninck, L., & Gillis, D. (2008). The urban soundscape–a different perspective. Sustainable mobility in Flanders: The livable city, 177-204.

Vermiponics

Vermiponics

What is Vermiponics?

Vermiponics is a combination of two techniques, “Hydroponics or Aquaponics” and “Vermiculture or Vermicomposting.” It involves the utilization of diluted worm tea (water run through the worm poop), which is a nutrient-rich material as the source of nutrients for growing plants. The difference between aquaculture and vermiponics is that the vermiponics technique utilizes vermicompost as a nutrient source instead of using fish waste as they do in aquaponics.

Vermiponic Garden Establishment

A vermiponic garden is a great idea for anyone who doesn’t have the space or the soil quality to grow a conventional vegetable garden. By creating a somewhat closed system of water circulation and worm composting, we can create a system that can grow vegetables for the family, regardless of local rainfall, soil fertility, and water restrictions.

 Most folks who hear the term worm tea get a bit turned off at first, but once they realize the growth potential and environmental benefits of this system, they understand the value.

There isn’t much information out there about creating your own vermiponics setup, so we will do our best to get you the essential information you need to get started. The beauty of a system like this is that it doesn’t need to be built in any particular way; you can use whatever resources you can get your hands on, as long as they serve their purpose.

The Advantages of Vermiponics

  • Use yard and kitchen waste to create nutrients for your vegetable garden.
  • The water used in the system is recycled over and over again.
  • As long as you don’t add anything weird to your compost, the” worm tea” will be organic.
  • The system is contained, so it can function almost anywhere that it can get sun.
  • The system is contained, so it won’t make a big mess and can sit in a driveway or on a patio.
  • The system can help collect rainwater to be even more efficient.
  • The worm tea is very rich and beneficial for plant health and growth.
  • The entire system can be run on solar energy if you would like.
  • The system can be built using salvaged parts if you are clever and creative.

The Basic Concept

  • One tank up high – Water from the bottom tank (worm tea) is slowly pumped into this upper tank. When the tank fills, a bell siphon is used to draw the nutritious water from this tank and sprinkle it on the mid-level tank.
  • One tank down low – This bottom tank collects and holds the worm tea (mix of water and worm poop). A small pump in this tank (can be solar if you like) slowly pumps the tea into the top tank to fill it.
  • Middle tank or tanks – There are three ways to approach the middle. You can use one tank with a perforated bottom, fill it with compost and worms, and plant right into it. When the water from the upper tank gets sprinkled on this tank, it will drain through and fall back into the bottom tank. Or, you can use two or three middle tanks. In addition to the compost and plant tank, an upper middle tank with gravel or some other fast-draining material that you plant into and a lower-middle that holds only compost and worms.

The one middle tank setup is the quick and dirty approach which may not be ideal. With this approach, compost, worms, and plants are in the same tank, so adding and stirring compost will be tricky when it is full of plants.

The two or three middle tank setups separate the plants from the worms and compost, making it easier to manage the vermicomposting activities without disturbing the plants.

This entire system is very experimental, so if you are going to attempt this, you should do so with the understanding that it will take a bit of trial and error before you get it right.

Design Considerations

  • Having the tanks stacked makes it easy to have water draining from one tank to the next using gravity and very little plumbing but makes tending the plants and compost more difficult as stacked tanks are hard to work with.
  • Having each tank separate will take up more room and require more elaborate plumbing but will make planting, harvesting, and working the compost much more manageable.
  • Realize that any time that you have plumbing fittings entering and leaving tanks, you have the potential for leaks.
  • Consider placing the upper tank somewhere where it can collect rainwater to lessen the need to fill the tank.
  • This system can also be built without the upper tank and simply have a pump on a timer to move water from the lower tank to sprinkle the middle tanks. The use of the upper tank allows for constant slow pumping, simplifying the system (maybe).
  • Different plants will want different growing mediums. While lettuce will do well in gravel washed in water, other plants such as vine crops might need some soil to grow in.
  • Make sure that the middle tanks have excellent drainage on the bottom. Usually, washed stone covered by a geosynthetic cloth will do.
  • Understand that with any water flow system, composting, and plants, it will take some time to get the correct water flow and media for the system to work correctly.
  • Pipe sizing, perforation sizing, siphon construction, media type, tank size, and plant type will all vary depending on your individual needs and wants.
  • The material added to the compost tank will determine the nutrients in the worm tea, so be sure to add a wide variety of compostable materials and make sure that they are all organic.
  • It is always beneficial to aerate water, so adding a small aerating diffuser to the bottom tank will help to keep the water healthy.
  • Adding goldfish to the bottom tank can help keep the water healthy and alleviate any concerns about mosquitoes.

Building a Vermiponic System

1: Material required for Vermiponic garden establishment:

  • Tanks – These can be any sort of tank, barrel, IBC(intermediate bulk) containers, storage bins, or any other kind of vessel that you can get your hands on. You are the designer and the builder, so feel free to use whatever you think will suit your needs the best.
  • Growing medium – This can be plain compost or any smooth gravel, husks, clay balls, perlite, coco coir, etc.
  • Pump – The pump should be small and submersible. The size of this pump will depend significantly on the size of your system. More water flow will require a bigger pump. It can be 110 volts, but running it on solar might be more earth-friendly.
  • Fittings – These are usually either plastic or PVC. Choose fittings that match the rest of your materials. Mixing different plastics, etc., will often result in leaks.
  • Piping – pick what is easiest to work with for you. Many people choose PVC for its rigidity and ease of coupling, while others select poly for the ability to curve and flex.
  • Fabric – This must allow water to pass readily and should not decompose. It will be used above the drainage stone to keep the soil separate. Geosynthetics are typically chosen for their economy and longevity.
  •  Drainage stone – You will need this on the bottom of the middle tanks to make sure that water flows freely out of the bottom of the tank. Typically a few inches of 1″ washed stone will work. Without the stone, the perforations on the bottom of the middle tanks will get plugged with soil, and the tanks will stop draining.

2: Assembly

I will not give you specific building instructions but rather some basic diagrams to illustrate the concepts. The exact layout and design will be dictated by your abilities, the availability of materials, and your project’s scale. I would recommend getting the system working before planting to ensure the health of the plants.

The five-tank stacked vermiponics system – This system will work well once the proper water flow is established.

Five Tank Stacked Vermiponics System

The four-tank stacked vermiponics system – This one is just a bit more simple, removing the lower plant tank; otherwise, all of the same concepts apply. You can simplify it further by planting directly into the worm and compost tank, turning it into a three-tank system.

Four Tank Stacked Vermiponics System

The four-tank horizontal vermiponics system – This is the same concept, just spread out horizontally to make it easier to work with each tank. This will simply take more structure and plumbing.

Four Tank Horizontal Vermiponics System

The three tank and trough vermiponics system – This system works just like traditional hydroponics where the worm tea is run through planting troughs. These work well for leafy plants like lettuce.

Three Tank and Trough Horizontal Vermiponics System

Benefits of Vermiponics

  • Enhanced Plant Growth and Development – Earthworms partially digest the organic matter and excrete that partially digested food without absorbing its nutrients. That is the secret behind the nutrient status of worm castings. Vermiwash or worm tea is composed of micronutrients (Ndegwa and Thompson, 2000), Cellulose and Amylase, Vitamins, Phosphate (Das et al., 2014; Tripathi et al., 2005), and decomposer bacteria involved in growth, solubilization of minerals, soil buffering, and pathogen control respectively. That should about cover it!
  • Easy to Maintain and Grow – Worms are easy to keep alive compared to fish. They can withstand wide changes in alkalinity and acidity, reproduce rapidly, and have a longer life span than fish. Earthworms, specifically red wigglers, tolerate extreme summer and winter temperatures, while fish cannot withstand such large temperature fluctuations. Earthworms have an average life span of 7-10 years, so one investment in worms can mean a whole lot of worm poop. This system will take care of itself for years to come.
  • Sustainable Gardening Practice Growing vegetables sustainably can benefit people of all lifestyles and help our earth at the same time. Imagine all of the additional plants and healthy people we would have if this idea caught on and became popular. Aquaponics is an expensive investment and more challenging to manage, while hydroponics usually relies on the purchase of synthetic fertilizers, which are much less earth-friendly than worm poop. Neither of these can hold a candle to vermiponics.
  • Organic Food Supply – From preparation to harvest, everything is natural. Vermiponics is a sustainable source of food production that utilizes earthworms to convert waste into nutrient-rich fertilizer. People usually confuse Vermiponics with vermicomposting. Vermicomposting is a natural organic compost prepared by feeding the earthworms upon organic waste, whereas, Vermiponics is the production of plants by utilizing the worm tea as a source of nutrients.
  • Waste/Pollution Control – According to the EPA statistics, an average American produces almost 4.40 pounds of solid waste per day, and that is a lot! If every 4 out of 10 persons started utilizing at least some of their waste in a Vermiponics system, we could sure grow a lot of yummy vegetables.
  •  Vermiponics is Economical – You have to make an initial investment and get food at home for the next ten years with minimal to no effort. Singh, R. P., Singh, P., Araujo, A. S., Ibrahim, M. H., & Sulaiman, O. (2011)
  • Suppression of Soil Diseases – Earthworm castings are antibiotic containing several phenolic compounds that are very useful against soil pathogens and insect pests. They establish a symbiotic relationship with the soil microbes, producing plant growth hormones and suppressing plant rot diseases. For example, Fusarium fungi are damage-causing pathogens of all winter vegetables, cereals, etc. and earthworms are suitable in controlling Fusarium infection (Hendrix, P. F., & Bohlen, P. J. (2002)
  • No Watering or Weeding – Compared to your conventional vegetable garden that takes hours of weeding and many gallons of water to maintain, this system practically takes care of itself. Even if you have a vast tract of land, you may still be interested in vermiponics for these two reasons alone.

Conclusion

Creating a vermiponics system that suits your lifestyle isn’t necessarily an easy or straightforward endeavor, but it certainly has the potential to pay big dividends over time. Keep in mind that we are trying to get the best that nature has to offer in a small space. We need to take care to ensure the plants and worms in our system stay healthy. Circulating too much or too little water through your system can undoubtedly influence the health of both. It is up to you to take the time to experiment with different variations until you find the proper balance. Start small and grow the system as your comfort and knowledge grow.

FAQs:

Question: what is the difference between Aquaponics and Vermiponics?

Answer: Aquaponics is the production of plants by utilizing the farmed fish or other aquatic animal waste (nutrient-rich) as a nutrient source for the plants. While in Vermiponics, worm castings or worm tea (and not fish waste) is utilized by the plants as a source of nutrients for their growth and development.

Question: Why prefer Vermiponics over Aquaponics?

Answer: Vermiponics has many advantages over aquaponics. For example, earthworms are tolerant to wide temperature fluctuations; hence, they are easy to keep alive. They have a life span of more than eight years, while fish are challenging to raise and maintain. Worm castings are wholesome food for the plants, while fish waste is not a complete plant food.

Question: Which species of earthworms are suitable for Vermiponics?

Answer: The following 4 are the most commonly used earthworm species by gardeners and Vermiculturists:

  • Red Wiggler (Eisenia fetida)
  • European Night-Crawler (Eisenia hortensis)
  • African Night-Crawler (Eudrilus eugeniae)
  • Blue-worms (Perionyx excavates)

Question: How do you practice Vermiponics?

Answer: Vermiponics is not difficult to establish and maintain, and it just needs a few types of equipment, e.g., containers, soil, compost, and most importantly, “earthworms.” You can seek help from the above article to establish and maintain your very own vermiponics system.

References:

Gudeta, K., Julka, J. M., Kumar, A., Bhagat, A., & Kumari, A. (2021). Vermiwash: An agent of disease and pest control in soil, a review. Heliyon, 7(3), e06434.

Roy, R., Singh, S. K., Chauhan, L. K. S., Das, M., Tripathi, A., & Dwivedi, P. D. (2014). Zinc oxide nanoparticles induce apoptosis by enhancement of autophagy via PI3K/Akt/mTOR inhibition. Toxicology letters, 227(1), 29-40.

Singh, R. P., Singh, P., Araujo, A. S., Ibrahim, M. H., & Sulaiman, O. (2011). Management of urban solid waste: Vermicomposting a sustainable option. Resources, conservation and recycling, 55(7), 719-729.

Hendrix, P. F., & Bohlen, P. J. (2002). Exotic earthworm invasions in North America: ecological and policy implications: expanding global commerce may be increasing the likelihood of exotic earthworm invasions, which could have negative implications for soil processes, other animal and plant species, and importation of certain pathogens. Bioscience, 52(9), 801-811.

Sustainable Agriculture

sustainable agriculture

Sustainable agriculture is the implementation of wise agricultural methods now to fulfill our present needs for food and fuel without compromising the needs of future generations of people. Sustainable farming methods not only provide sustainability to the food systems but also to the economy of a country.

Methods of Sustainable Agriculture

Intensive soil cultivation using synthetic chemicals and fertilizers destroys soil through soil erosion, nutrient deficiency, and uncontrollable plant diseases. The sprays used to control plant diseases affect human, animal, and environmental health. Sustainable Agriculture provides various flexible ways to restore soil fertility, plant immunity, and ecosystem health.

Sustainable Intensification

Sustainable intensive farming utilizes various mechanisms, including improved cultivars, decreased frequency of fallow years, alternative ways of disease control, crop rotation, highest crop yield per area of land, etc., to best develop food and animals.

Sustainable Intensification has become popular among the United Nations because it mainly focuses on sustainable energy flow, nutrient recycling, water cycle, and productivity. Intensive farming can be accomplished through the use of intercropping, crop rotation, and permaculture.

Zero-Waste Agriculture

Zero-waste agriculture involves planting cover and legume crops during fallow periods to improve the soil’s nitrogen and other nutrient levels. Another example is the introduction of ornamental flowers in commercial crops to suppress the pest population and improve pollen availability rate.

Vertical Farming

Vertical farming is of great importance in urban areas where space and water availability are the primary issue. Production of vegetables, low-calorie plants, lettuce, etc., can be easily and efficiently (soil-less farming methods are usually adopted) grown through vertical farming.

Multi-trophic Aquaculture

In Integrated multi-trophic aquaculture, the waste from one side is utilized as a fertilizer or compost on another side; for example, the nutrient-rich wastewater from aquaculture can be utilized as irrigation water in vertical farming.

Soil Nutrients

“The soil is our eternal metabolism. It must be free of herbicides and pesticides, or the body cannot heal”. The use of compost, Vermicompost, Farmyard Manure, Biofertilizers, etc., to improve soil fertility instead of continual chemical applications are organic ways to heal our soil, plants, humans, and environment. Organic fertilizers ad microorganisms into the ground, which are the essential elements that give life to the soil. They improve soil aeration, decompose the substances to convert nutrients into plant’s available forms, and develop a symbiotic association with the plants that benefit both of them.

Pests and Weeds

Common garden pests, including aphids, mites, moths, bats, snails, etc., can be easily controlled using homemade garlic soap solutions, appropriate cultural practices, and aspirin solutions for various common fungal diseases. In the same way, all kinds of garden weeds can be easily controlled using corn gluten (acts as a pre-emergence herbicide), vinegar-soap solution (having acidity 5), and hoeing.

Using disease resistant and stress tolerant plants is a sure-fire way to allow nature to care for itself. By planting hardy native plant varieties, we eliminate the need for us humans to interfere on behalf of the plant.

Wendell Berry says that “A Sustainable Agriculture depletes neither the People nor the Land.” The only investment we can make for a better future is in agriculture. The key factors in sustainable agriculture are the time of sowing, sowing of perennial crops, crop rotation in commercial farming, efficient irrigation practices, suitable harvesting methods, and creating no waste or utilizing every kind of waste.

In modern agriculture, various disease resistance and stress-tolerant varieties have been planted to minimize pesticide usage and compete with climate changes. If you are not harming your environment, you can grow whatever you like (every kind of plant is a contribution to sustainability); either you want to opt for kitchen gardening, ornamental plants, or turfgrass only on your property. (dos Santos, de Moura Régis, & do Nascimento, 2021) 

Indigenous Agriculture

Native Americans have been practicing sustainable farming for decades. They grow their indigenous plants and use them as food, animal feed, and soil composts production. They produce a variety of seasonal crops to avoid the dependence on a single crop throughout the year. In indigenous farming, farmers plant the native varieties to ensure minimum disease and maximum yield. They practice crop rotation by planting leguminous crops in between every commercial crop or seasonal vegetable to replenish the soil nutrients harvested. They perform zero-waste farming by manufacturing compost from every kind of field waste, crop by-product, animal manure, etc. And, they practice Intercropping by planting an additional short-term crop within a standing crop to get additional income or food.

“Anishinaabe” is a tribe in the US that follows the ideology of “Honorable Harvest.” This ideology emphasizes that “People should take only what they need and consume and utilize properly what they take.” They further explain it as never harvest more than you need, never harvest more than half of the plant, and never harvest the first plant to keep it growing in the future. (Frandy & Cederström, 2017)

5 Key Principles of Sustainable Agriculture

  1. Sustainable Food and Agriculture
    • According to the Food and Agriculture Organization of the United Nations (FAO) vision, sustainable agriculture is one in which food is available for everyone without compromising the availability to the coming generations and must be obtained by natural means.
    • Under this vision, the foresters, farmers, gardeners, fisherfolk, and rural dwellers must have equitable rights, access to the resources, have their voices heard, have financial stability, and enjoy decent employment because No Farmers means No Future.
  2. Protection of Natural Resources
    • You can say that sustainability is directly related to protecting our natural resources. We must protect our soil from erosion and degradation, and we must protect and conserve our water. We are protecting our native plants and our population from extinction by protecting these natural resources. Over the last fifty years, the rampant use of chemicals has degraded soil, made the pests more resistant, and polluted the groundwater in a way that is not likely to be recovered even in the coming fifty years.
  3. Stability of the Farmer ensures the Stability of Farming
    • “Farming is a Profession of Hope.” Farmers are the backbone of agriculture. The only source of income for the farmers is their land and what it can produce. They are often pressed to grow as much as possible regardless of the side effects. There is a need to educate the farmers about pesticides and herbicides’ damaging effects and teach and inspire them to conserve natural resources. Many of the destructive farming practices of today stem from government policy and incentives, so turning the tide back toward nature will need to start there.
    • Farming is not the stable, hard work that it used to be. Nowadays, it is very expensive and risky, and more and more, the smaller, more natural farmers are being overtaken by the large, industrialized commercial farms. If we want stability and sustainability, we must move away from chemicals and invest effort into nature.
  4. Introduction of Drought and Salt tolerant Plant Varieties
    • “Profit is yours, and Loss is ours” farmers hesitate to plant new varieties due to the fear of unknown results. In developed countries, the government facilitates the farmers through subsidies to build their confidence to adopt the new plant varieties and methods of farming. Recourse conservation, increased yield, a healthy environment, and biodiversity are the principles of sustainability. (Sullivan, 2003)
  5. Regenerative Agriculture
    • Regenerative agriculture is the recycling of resources as much as possible. It also involves the protection of topsoil, water, biodiversity, and climate. How can a farmer do this? He cannot do all this alone; everyone has to contribute in the same way as all the body parts contribute so that we become able to perform a task. (Rhodes, 2012)

Advantages of Sustainable Agriculture

  • Economic Stability – More than 40% of the world population is directly or indirectly involved in agriculture. Increased crop productivity provides more raw material to the industries associated with agriculture. The export rate of major crops also directly benefits a country’s economy.
  • Healthy food – I am sure that if we were all educated on organic food’s value and healing effects, we would make wiser choices at the market. Misleading advertising and packaging and government agencies selling to the highest bidder have led us to believe that chemically treated and overprocessed foods are the norm. Society, as a whole, must stand up and insist on organic, healthy food. Our lives depend on it.
  • Conservation of Nonrenewable Resources for Future – The principle of sustainability is to provide food for the present without compromising the needs of the future. Conservation of nonrenewable resources is the need of the day.
  • Pollution Reduction – When humans aren’t physically or chemically destroying natural resources, the environment can maintain itself. All that we need to do is get out of the way. Adopting biological pest control and fertilization methods and the conservation of native species are all methods of sustainable farming that will allow nature to heal itself over time.
  • Urban Pollution Reduction – Urban areas worldwide are the most polluted areas in terms of air, water, noise, and soil pollution. Sustainable gardening and environmental cleaning methods such as vertical farming, aquaculture, and wetland filtration systems are all applicable in urban areas where land and water depletion are significant issues.
  • Biodiversity Conservation – Native plants and conventional organic farming methods promote biodiversity. Stable biodiversity ensures an undisturbed food chain.
  • Elimination of Soil Erosion – Continued harvesting and chemical fertilization deprives our soils of beneficial microbes and organic nutrients, causing the loss of topsoil. Soil erosion is a serious threat to future crops. Planting beneficial and native vegetation and practicing permaculture will eliminate this threat, but soil restoration is a slow process. 

Conclusion

There is no model where the current destructive and toxifying practices of commercial, industrialized farming can be sustained for the long term. Our current consumptive mindset and methods serve this generation, but at severe cost to the next generation. Our only hope for sustained, long-term use of this earth and its valuable, nurturing resources is to educate the population to support sustainable agricultural processes exclusively. Every time you buy industrially processed foods from large agriculture, you are casting a vote to destroy this earth. This needs to stop, so that future generations can enjoy the natural world that we have been enjoying.

References:

Avgoustaki, D. D., & Xydis, G. (2020). Indoor vertical farming in the urban nexus context: Business growth and resource savings. Sustainability, 12(5), 1965.

Besthorn, F. H. (2013). Vertical farming: Social work and sustainable urban agriculture in an age of global food crises. Australian Social Work, 66(2), 187-203.

dos Santos, L. S., de Moura Régis, M., & do Nascimento, A. P. B. (2021). Community gardens: contribution to food safety and social inclusion. Revista Nacional de Gerenciamento de Cidades, 9(69).

Frandy, T., & Cederström, B. M. (2017). Sustainable power: Decolonising sustainability through Anishinaabe birchbark canoe building Going Beyond (pp. 217-230): Springer.

Rhodes, C. J. (2012). Feeding and healing the world: through regenerative agriculture and permaculture. Science progress, 95(4), 345-446.

Sullivan, P. (2003). Applying the principles of sustainable farming. National Center for Appropriate Technology, http://attra. ncat. org/attra-pub/PDF/Transition. pdf (accessed January 2011).

Vermicomposting

Vermicomposting Worms

Vermicomposting is a bio-oxidative, non-thermophilic process in which earthworms and soil microbes are employed to decompose the organic waste to yield the biofertilizer named vermicompost. Vermicomposting is a non-zero, non-toxic, eco-friendly, and sustainable source of organic fertilizers. Okay, so I don’t know about you, but I am no scientist, and that sounds really complex. I will try to simplify this concept a bit in the following article.

What is Vermicompost?

Earthworms eat the organic matter, partially digest it and egest it in the form of small, round balls called worm castings. These worm castings are further decomposed by the soil microbes converting them into the product named vermicompost. A well-prepared Vermicompost possesses soil reclamation, fertility enhancement, plant growth, protection from diseases, insect pests, nematodes, and agricultural sustainability characteristics. (Chaoui, Edwards, Brickner, Lee, & Arancon, 2002).

Put simply; the earthworms are breaking down and improving our soils. This is an entirely natural process that is happening all day, every day, whether we know it or not. Vermicomposting is simply us humans putting the worms into our compost to help speed up the process.

What is Needed to Vermicompost?

Composting, in general, is a very natural process that happens all around us without our help, but we can use it to help create better soils and as a way to keep yard waste in our yard and out of landfills.

Any type of composting requires the following:

  • Green organic material – Grass clippings, live tree leaves, flower trimmings, manure, food scraps, etc. Anything that contains a bunch of nitrogen and will break down over time.
  • Brown organic material – Twigs, dead leaves, mulch, cardboard, paper, etc. Anything that contains a bunch of carbon but very little nitrogen.

Mixing these two materials together and turning them every so often is the basis of composting. Even if we do nothing, the above-listed materials will turn into dirt eventually. Getting the amounts of each type of matter in the correct proportions and having them in the right environment will determine how quickly the composting process happens.

What else does composting require?

The actual process of breaking down these materials into nutrient-rich soils is accomplished by many different types of macro and microorganisms that are at work tirelessly maintaining our earth. Exactly which of these are in your compost is not important; what is important is that you treat them well and give them an environment that they can thrive in.

Macro-organisms such as worms, beetles, centipedes, and any other creepy crawlies work in conjunction with the microorganisms such as bacteria, fungi, and other tiny things we can’t see.

To make our composting as efficient as possible will take some experimenting and practice on our part. We need the correct levels of the brown and green materials and the proper oxygen, water, and heat levels.

If our compost is too dry or too wet, too hot or too cold, it will not compost as efficiently as it could. Also, if there is not enough air getting into our compost pile, it will not decompose as efficiently as it could.

This is where the experimentation comes in. We need to experiment in our yard to figure out what we can do to encourage this efficient decomposition process. Each environment will be a bit different; there is no one-size-fits-all approach.

One thing that we can do that will definitely increase the speed at which our compost is breaking down is to add more worms. Their only job is to eat through our pile of compost and poop out their casting. This process will speed up any composting operation, but we need to be nice to the worms.

Large scale Vermicomposting

Vermicomposting is successfully practiced in Canada, Japan, Italy, India, the US, and the Philippines at a commercial scale for farming, compost tea making (this isn’t the kind of tea that you are thinking about), and export purposes.

Two methods are currently being used for the commercial production of vermicompost:

  • The Windrow Method – The worms and compost are piled into long and tall windrows, which are periodically turned to improve the composting process. Specially designed windrow turning machines are used to manufacture vermicompost. This system is cost-efficient and easy to maintain for farmers to manage animal manure at the farm or for large-scape compost manufacturers. While this method is considered large-scale, it can be accomplished at home, given you have a bit of land and a strong back.
  • The Raised Bed or Flow-Through system: The earthworms are introduced from the top of the bed, eat the litter, continuously burrow the waste layers and reach the bottom where they are harvested to reuse. This system is indoor, therefore, preferred in cooler climates. This is a nicely contained way to compost that just about anyone can accomplish with a bit of ingenuity.

Small Scale Vermicomposting – Container Method

Small scale vermicomposting is well-suited to best utilize the kitchen waste, lawn waste (grass clippings, pruned stems, fallen leaves, etc.), newspaper, wooden pieces, and any kind of waste that the tiny soldiers can decompose. The example below uses a small bin which helps to keep the entire process neatly contained.

Red Wigglers and associated symbiotic microbes such as Rhizobium, Azospirillum, Clostridium, etc., are the best combos for small-scale vermicomposting.

How to Prepare Vermicompost at Home?

  1. Select a Suitable Worm Bin: You can reuse any old container such as a drawer, fish tank, bucket, drum, etc. It must not contain any hazardous materials that may harm the worms. Depending on your home and your ambition, starting in the 10-gallon size might be good.
  2. Prepare the Bedding: Earthworms like to live on strips of newspapers to provide air, water, and food, just as the soil provides all these to plants. Add 2-3 handfuls of rich garden soil to your container. This will contain soil microbes and create a favorable environment for the worms.
  3. Add the Worms: Some folks who have this down to a science weigh out their worms to determine precisely how many worms are needed to compost how much material. Weighing out your worms also helps when it comes time to harvest them at the end of the process.
  4. Add the Worm Food: Add your compost blend to the container and keep an eye on it to ensure that the worms have enough to eat. Typically, Red Wigglers caneat three times their weight in a week.
  5. Aerate the bin Periodically: This process needs air to work. Make sure that your container doesn’t get too wet, and turn over the compost every so often to increase airflow and efficiency. This step is why many people use the commercially available composting bins, which allow you to crank a handle to turn the bin.
  6. Harvesting the Worms or Compost: Once your compost is mostly all broken down with no large pieces of uncomposted material and the remaining soil is rich and black, you can either pull out all of the worms to use again in another bin, or you can scoop out the soil, being careful not to hurt the worms,  and start a new batch of compost. By leaving some of the existing compost and the worms, it will be easy to get a new batch started. The average life span of an earthworm is 5-7 years, so you can easily get rid of a whole lot of waste and create a whole lot of rich soil in that amount of time.

Small Scale Vermicomposting – Ground Method

Above, we talked about the very small-scale process of vermicomposting in a container. If you have more space and more waste, you will likely want to try this on a larger scale.

Vermicomposting can be done almost anywhere as long as your environment is conducive to the process. In the more extreme regions, this gets more challenging.

Remember, we are not only composting anymore, but we are also keeping live animals, so we need to care for them and the process.

If your area is very dry, you may need to add moisture to your compost to get the worms to thrive and the composting process to work.

If you are in a very wet area, you may need to vermicompost on a high spot and protect the pile from rain.

If you are in a very hot location, the compost pile might need a bit of shade,

If you are in the colder regions where the ground freezes, you will struggle to keep your worms alive for the winter. Some people will bring a small-scale version of their vermicomposting operation into the basement for the winter. Other folks have had good luck keeping their vermicomposting in trenches dug into the ground or in big thick piles, which can retain heat in the center even when the outer crust is frozen.

In any event, once you have figured out the requirements of your area, you can begin your vermicomposting. In general, this will mean a pile or windrow of compost that gets turned regularly to increase oxygen levels and move some of the drier materials low and wet materials higher.

Having some organization to your method is important, as eventually, you will want to harvest the nutrition-rich soil. If you begin your pile in one area and then, over time, only add more compost to one side of the pile, the worms will tend to follow the food source. So, over time, the original pile will be all composted material ready to harvest, and the leading edge of the pile will be the actively composting side with the vast majority of the worms.

Suitable Species of Earthworms for Vermicomposting

Some earthworm species speed up the composting process and make your operation more efficient. The most commonly used earthworm species are:

  • Red Wiggler (Eisenia Andrei)
  • European Night-Crawlers (E. hortensis)
  • African Night-Crawlers (Eudrilus eugeniae)
  • Blue-worms (Perionyx excavates)

Advantages of Using Vermicompost

Restores Soil Fertility

  • Earthworms are often referred to as “Ecosystem Engineers” and “Nature’s Plowman.” They reduce soil erosion by binding the soil particles with their damp, mucus-containing particles. They can convert organic waste into useable compost much more rapidly than traditional composting.                              
  • Vermicompost is a partially decomposed product, i.e., the earthworms do not absorb all of the nutrients from the food they eat; instead, they egest the partially eaten food in the form of worm castings. This is useful because the nutrients are now available in the soil for our plants to absorb. Vermicompost prepared from food and animal manure is a rich source of all the macronutrients and micronutrients needed for plant growth.
  • When added to soil, vermicompost improves its buffering capacity, water, and nutrient holding capacity and aeration. It also enhances the soil pH through mineralization.
  • It improves the biological fertility of the soil. Mucus, secreted by the earthworm’s digestive system, speeds up the decomposition of organic matter and stimulates competition among the soil microbes to further perform decomposing, and the process continues.

Nutrient Status of Vermicompost:

  • Organic Carbon: 9.15 to 17.98 %
  • Total Nitrogen: 0.5 to 1.5 %
  • Available Phosphorus: 0.1 to 0.3 %
  • Available Potassium: 0.15 %
  • Available Sulphur: 128 to 548 ppm
  • Calcium and Magnesium: 22-70 mg/ 100g
  • Copper: 2-9.3 ppm
  • Zinc: 5.6-11.5 ppm

Control of Solid Waste/Biosolids:

  • Uncontrollable waste production is a serious challenge that every country is facing. An average family in the US creates almost 18 pounds of waste daily. This is 6570 pounds of waste annually! If we seriously want to control this mass waste production, Vermicomposting is the best way. The earthworms not only decompose almost every kind of waste (except solids like glass, plastic, etc.), but they also add long-lasting benefits to the soil.
  • Earthworms are capable of converting “Garbage into Gold.” Sewage sludge, biomedical waste, and biosolids could be managed and converted into Biofertilizers through vermicomposting. Earthworms surprisingly remove Salmonella spp. from 3MNP to <1 MNP/g and coliforms (39,000 MNP/g to 0 MNP/g) from the fecal matter.
  • Vermicomposting municipal waste with Lampoti Mauritii removes Escherichia coli and Salmonella spp. from the sludge, making it safe to use as an organic fertilizer. (Pathma & Sakthivel, 2012)

Control of Plant Diseases:

Healthy soil produces a healthy plant. Whenever soils or plants are deficient in a required substance, nutrient, or growth condition, this opens the door for disease. Earthworms release phenolic compounds that keep the pathogens and most of the insect pests away from the soil and even from the plants.

  • Vermicompost slowly releases the nutrients into the soil, balancing the amount of N-fixation, P, and K availability, keeping enough for the plant itself but not enough for pathogen regeneration.
  • Earthworms’ biochemical activities reduce the plant pathogens, especially Verticillium dahliae and Fusarium spp. These are responsible for most fungal diseases in food crops.
  • Earthworm’s presence decreases the root diseases of cereals and stimulates immunity in Grapes against the diseases caused by Rhizoctonia spp.
  • Vermicompost discourages the growth and attack of tomato fungus, i.e., F. oxysporum and P. nicotianae.
  • Potato and cabbage treated with a mixture of vermicompost and clay do not remain susceptible to P. infestans and P. brassicae, respectively.

Alternate Potting Material

Vermicompost has become a very popular potting material due to its all-in-one properties, containing everything required for optimum growth and development. It releases nutrients gradually, is porous, well-aerated, and possesses excellent water holding capacity. It can be used for indoor and outdoor pots, planters, and containers with garden soil or clay.

  • Significant suppression in the fungal disease Verticillium wilt in strawberries has been noticed by applying 10 t/ha food and 5 t/ha paper Vermicompost. {Chaoui, 2002 #357}
  • The addition of vermicompost during soil preparation has been noticed to enhance the growth, disease resistance, and nitrogen fixation in Cucumber and Tomatoes. {Gutiérrez-Miceli, 2007 #362}
  • The addition of vermicompost (5% and 10% v/v as soil amendment and three doses of 40 mL in drench after 14, 21, and 28 days of transplant) in spinach enhanced the leaf production, delayed senescence, improved the leaf succulence, carotenoid, protein production, and reduce flavonoid content in soil balanced the antioxidant capacity. {Xu, 2016 #359}
  •  Vermicompost addition at the rate of 20% during soil reparation enhanced the Ca and Mg concentration in leaf prompted flower production in Petunia Hybrid “Dream Neon Rose.” {Chamani, 2008 #363}

Conclusion

If there is one thing that I know about humans, it is that they typically won’t continue doing something if it isn’t in one way or another somewhat rewarding to them. If you are getting into vermicomposting, I commend you; this is an excellent step to helping balance the damage done by humans.

When you are planning out your vermicomposting operation, no matter how big or small, be sure that it is in some way rewarding to you and not overly challenging to do. It doesn’t need to be perfect; the breakdown of compost will occur any time that different materials are together outside in the dirt, whether we work at it or not.

Create your vermicomposting area so that it is easy and practically takes care of itself. This way, even if you don’t find the time to work it as often as you should, it will still function, and the worms will still be alive. In general, a larger operation is less susceptible to small changes, but on the other hand, a large operation might just be too overwhelming for you.

Build your vermicomposting operation to fit your personality and your lifestyle.

Q: What does Vermicompost mean?

A: Vermicompost means an organic product prepared by the earthworms by feeding upon the organic waste.

Q: Are worm castings organic?

A: Yes. Earthworms are provided with a controlled diet of organic substances. However, the readymade Vermicompost or worm castings may be organic or inorganic.

Q: Are worm castings or vermicompost safe to touch?

A: Unlike the chemical fertilizers, worm castings or vermicompost are non-flammable safe to touch, handle, and use. It is the safest soil supplement available in the market.

Q: Can I use too many worm castings or vermicompost at once?

A: No, unlike chemical fertilizers, you can’t add too much vermicompost to your garden. You can grow directly into the vermicompost since it is essentially just rich soil.

Q: What is the difference between worm castings and vermicompost?

A: Worm castings are the tiny round balls excreted by the earthworms, i.e., earthworm’s poops, while vermicompost is a decomposed organic fertilizer prepared by earthworms by feeding upon the organic matter. Castings are part of the vermicompost.

Q: Can I use Vermicompost on Flowers?

A: Of course, vermicompost is a nutrient-rich and safe product for growing any kind of plant.

References

Chaoui, H., Edwards, C., Brickner, A., Lee, S., & Arancon, N. (2002). Suppression of the plant diseases, Pythium (damping-off), Rhizoctonia (root rot), and Verticillium (wilt) by vermicomposts. Paper presented at the Brighton crop protection conference pests and diseases.

Pathma, J., & Sakthivel, N. (2012). Microbial diversity of vermicompost bacteria that exhibit useful agricultural traits and waste management potential. SpringerPlus, 1(1), 1-19.

Xu, C., & Mou, B. (2016). Vermicompost affects soil properties and spinach growth, physiology, and nutritional value. HortScience51(7), 847-855.

Gutiérrez-Miceli, F. A., Santiago-Borraz, J., Molina, J. A. M., Nafate, C. C., Abud-Archila, M., Llaven, M. A. O., … & Dendooven, L. (2007). Vermicompost as a soil supplement to improve growth, yield, and fruit quality of tomato (Lycopersicum esculentum). Bioresource Technology98(15), 2781-2786.

 Chamani, E., Joyce, D. C., & Reihanytabar, A. (2008). Vermicompost effects on the growth and flowering of Petunia hybrida’ Dream Neon Rose’. American-Eurasian Journal of Agricultural and Environmental Sciences3(3), 506-512.

How to use Biochar

Biochar

Biochar is a charcoal-like material made by burning forestry or agricultural wastes in the absence of oxygen. The process of manufacturing biochar is called pyrolysis. In the absence of oxygen, organic matter burns slowly without releasing the contaminating fumes and stored carbon during the process. Due to the lack of oxygen involved in pyrolysis, we are left with hard, porous black, carbon-rich material rather than the soft white ash that we get with an oxygen-rich burn. Biochar is lightweight, similar in appearance to ordinary coal, and is an environmentally friendly material that is mostly carbon. Biochar can be bought commercially, but the best part about biochar is that you can easily make it yourself using your waste twigs and wood.

Applications of Biochar

Soil Amendment

Biochar is a healthy soil conditioner that improves the physical as well as chemical properties of the soil. It helps soil in two ways; its physical presence will help to increase the porosity and water holding capabilities of the soil, while its nutrient properties will leach into the surrounding soils and improve their ability to sustain and nourish plant material. Biochar will also increase the soil pH, and biochar will contribute Nitrogen, Phosphorous, Potassium, Magnesium, and Calcium.

Biochar works best with the inorganic fertilizer as it absorbs the nutrients first from the soil. Recently, it has been found that biochar improves the microbial life of soil as well (NAJAR, GANIE, & Tahir, 2015). When soil’s physical, chemical, and biological life improves, water retention capacity also improves. The pore size of biochar is also important as bigger pores will retain water for longer time periods (Guo, 2020).

Slash-and Char

Slash-and Char instead of Slash-and Burn is a comparatively better technique adopted in Brazil to get the better crop yield, protect the Amazon basin from deforestation, and reduce carbon dioxide emission. Slash-and Char has the ability to retain more than 50% of the organic carbon from the organic materials into the soil, while slash-and-burn retains only 3%. It slowly releases the nutrients creating a long-term and beneficial investment for the farmers (Lehmann et al., 2002).

Far too often, vast piles of hard to dispose of branches, twigs, bark, and leaves are burned in open pile fires to dispose of the material perceived as waste when land is cleared, and trees are cut. By implementing a system for instead creating biochar from this “waste material,” we can store carbon instead of releasing it into the atmosphere. Then we can blend it into the existing soils, dramatically increasing future crop yields.

Carbon Sink

The burning of fossil fuels releases a tremendous amount of carbon dioxide that eventually becomes the source of global warming. Biochar manufacturing also releases carbon dioxide; however, less than half as much when compared to fossil fuels, and the remaining carbon becomes indefinitely stable. It sequesters carbon for hundreds of years. Climate change experts report that the continuous use of biochar could decrease the carbon dioxide, nitrogen oxides, and methane emissions up to 1.8 billion tons (Abagandura, Chintala, Sandhu, Kumar, & Schumacher, 2019).

Stock Fodder

An Australian farmer has reported that biochar mixed with molasses can be used as livestock fodder. He claims it improves metabolism and milk production with reduced odor and has no negative impact on the health of animals. Please use caution and start very slowly when experimenting with alternate uses of biochar. As with any new process, great care and patience should be exercised.

How to use biochar in your garden?

Charge Your Biochar

Charging the biochar simply means that by mixing biochar with organic compost, the biochar will soak in some of the nutrients from the compost and make it ready for the soil. This is beneficial because biochar is so porous and absorptive on its own that it will pull nutrients out of the soil at first. By charging it with compost, you allow the biochar to charge itself with nutrients from the compost rather than the topsoil. By doing this first, you can alleviate the short-term adverse nutritional effects that pure biochar will have on garden soil.

An excellent charging mix is to use half biochar and half compost, mix it and allow it to sit for ten days or so before adding it to your planting soil.

Be aware that biochar can be hot and flammable for a long time, even if it is cool to the touch on the outside. Experts suggest wetting your biochar when removed from the cooker and never storing it indoors or near any flamables.

Application Method

Seeding your soil with biochar is a great way to guarantee that the coming generations will have clean air and healthy soils.

You can apply biochar in the following three ways:

  • Topdressing: as the term indicates, you simply lay down a layer of your biochar and compost mix and wet it down.
  • Tilling: with the help of a tiller machine, you can easily till in the compost and biochar mixture as you would any other soil amendment.
  • Soil Mix: in the case of containers and pot plantings, you can simply blend the biochar mix you’re your planting soil and use it as you would any other planting medium.

Why do we use biochar in home gardens?

  1. Non-Toxic: increased carbon sequestration decreases its concentration in the atmosphere. Biochar will help our environment, and it sequesters carbon and releases it very slowly compared with the other organic fertilizers, thus reducing the greenhouse effect.
  2. Improves Plant’s Growth: the structure of biochar is the actual nutrient holder. It was a living tissue that got burned, so it contains carbon and magnesium, nitrogen, calcium, and other minor nutrients.
  3. Habitat for the Soil Biota: Biochar is manufactured by a process known as pyrolysis. This creates many microscopic spaces in the structure of the charcoal-like material, which provides a very favorable environment for the soil microbes to thrive.
  4. Buffer for the Soil: Biochar effectively reduces the toxicity of heavy metals present in the ground. A scientific study reveals that the green bean plants grown in biochar-amended soil did not show the heavy metal toxicity (lead, arsenic, cadmium, mercury, etc.) compared to the plants grown in non-amended soils  (Prapagdee, Piyatiratitivorakul, Petsom, Tawinteung, & Pollution, 2014).

Question: How can I make my own biochar?

Answer: To make the perfect biochar, sources will tell you that you should build an outer drum with high and low holes and then insert an inner drum into it with low holes. Fill the inner drum with twigs, branches, and wood debris, cap the inner drum, fill the areas between the two with wood to burn. Light the entire top and edges above the drum and then cap it with the drum lid with a chimney. This lets the outer drum burn and heat the inner drum to create biochar but not burn.

In reality, you can create some form of biochar without all of the contraptions by simply creating a hole in the ground or using a drum and placing wood in it to start it burning and then lay on layers as it begins to charcoal. Add more and more layers as the burn progresses. The idea is to snuff out the oxygen from the lower layers before they entirely burn and turn to ash. Once your hole is full of slowly smoldering wood and the top is starting to look like charcoal, douse it with water to put it out, let it sit for a day or two, dig it out, mix it with aged compost and let it sit for ten days or so.

Any biochar-making process will take some time to perfect, and you are sure to make some ashes in the process, but stick with it, and you will come up with a process that works for you.

Question: Is making biochar dangerous?

Answer: Making biochar is essentially playing with fire, so yes, it is potentially very dangerous. If you create a biochar cooker out of drums, the steel will get very hot and dangerous. The flames and sparks from biochgar making can certainly start houses, grasses, trees, and any flammable matter on fire. You must always use caution to only create biochar in areas where there are no dry materials to catch fire and always keep ample water available to quench your fire.

Question: How much biochar will be good annually?

Answer: This all depends on your soil. You could plant right into your compost and biochar mix, so it is not a problem. Be aware that it is essential to mix the compost and biochar and let it sit for at least ten days. You will see good results if you make a 50/50 mix of compost and biochar and then mix that at about 20% bichar mix/80 soil. There is really no need to be so precise, just spread your mix over the ground and blend it in. Adding more mix year after year is also a good practice.

Question: Is biochar good for the garden soil?

Answer: Biochar is absolutely good for garden soil. Adding this to your already established gardens will improve yields. Using biochar in any soil can help you create a vibrant, nutrition-filled garden almost anywhere.

Question: What is the difference between Biochar and Compost?

Answer: Biochar is made under controlled conditions by heating and essentially cooking the moisture out of plant-based products to produce the charcoal-like substance. Compost is simply organic matter mixed together over time and allowed to begin to decompose naturally. Biochar mixed with compost is your best option. Both get better with age. Fresh biochar can pull nutrients away from plants, and fresh compost can be too rich and can burn plants. A nice mixture of both that is well-aged is always best.

References:

Abagandura, G. O., Chintala, R., Sandhu, S. S., Kumar, S., & Schumacher, T. E. J. J. o. E. Q. (2019). Effects of biochar and manure applications on soil carbon dioxide, methane, and nitrous oxide fluxes from two different soils. (6), 1664-1674.

Guo, M. J. S. S. (2020). The 3R principles for applying biochar to improve soil health. 4(1), 9.

Lehmann, J., da Silva Jr, J. P., Rondon, M., Cravo, M. d. S., Greenwood, J., Nehls, T., . . . Glaser, B. (2002). Slash-and-char-a feasible alternative for soil fertility management in the central Amazon. Paper presented at the Proceedings of the 17th World Congress of Soil Science.

NAJAR, G. R., GANIE, M. A., & Tahir, A. J. P. (2015). Biochar for sustainable soil health: a review of prospects and concerns. 25(5), 639-653.

Prapagdee, S., Piyatiratitivorakul, S., Petsom, A., Tawinteung, N. J. W., Air, & Pollution, S. (2014). Application of biochar for enhancing cadmium and zinc phytostabilization in Vigna radiata L. cultivation. 225(12), 1-13.

Erosion Control Plants for Your Landscape and Slopes

Soil Erosion

Soil erosion can act slowly but steadily, washing away topsoil over time or abruptly during extreme rain events. In whichever case, significant natural resources can be transported across great distances.

Maintaining a permanent surface cover on the soil surface and a dense web of healthy roots in the soil, such as in a meadow or pasture, is the most efficient approach to control erosion. Thus, soil conservation options, such as erosion control plants, should be considered in regions particularly vulnerable to water or wind erosion.

Shrubs or ground covers that are strong, beautiful, and have a root structure capable of stabilizing soil on a hill are the ideal plants for erosion control. To decrease the speed of heavy rain, they must have widespread foliage. They should also be deer-resistant plants if you live in deer territory.

First, Why Does Soil Erosion Occur?

Soil erosion can occur whenever we get heavy rainfall or strong winds. These forces move soil particles as they travel across the earth’s surface. In the grand scheme of things, if humans weren’t present on this earth, erosion would simply be moving particles from one place on earth to another, and the plants and animals would adjust to these changes and live on. Since we humans are here, we exacerbate these problems with our use of the land, destruction of vegetation, installation of impervious surfaces, and use of motorized vehicles, to name a few. As humans, we don’t like to see change, and we like to think that we can control nature, so we look for ways to prevent erosion.

Wind erosion is more of a problem in areas that are dry and have soft, sandy soils. Think of deserts where the wind moves large mountains of sand over time. Think also of man-made occurrences like the dust bowl when humans had cleared millions of acres of semi-arid land for crops, and then a drought came, and large swirling clouds of soil were swept across the Southern Plains of the United States by the winds that followed the drought. Wind can have great force when it is left to flow unimpeded.

Water erosion occurs when water flows over the ground and moves soil particles as it travels. The combination of steep slopes and exposed soil make for some of the worst erosion. Water erodes by the force of each droplet of water and its ability to move particles of matter. The faster the water moves, or the further the water falls, the more force it has and the more matter it can move. One fine example of the power of water erosion would be the Grand Canyon in the United States, where the Colorado River has carved out over 200 miles of the earth, creating canyons up to 18 miles wide and a mile deep in some spots. When large amounts of water get moving, they can move great mass.

You may have seen erosion occurring along stream and riverbanks where the ground is different from season to season in your own life and landscape interactions. You can often see erosion on bare slopes of construction sites after a rain event. You can see erosion in your flower beds or around your trees; whenever you get heavy rain or wind and soil particles get moved, that is erosion. Anyone who has ever seeded a brand new lawn may know firsthand how heavy rainfall can move bare dirt areas.

Why is Erosion Control Important?

As I mentioned before, erosion is a part of nature and has been happening long before humans were around to try to stop it. Erosion on its own is simply distributing the particles of the earth, and if it weren’t for humans, it wouldn’t be a problem. Let’s take the example of the Grand Canyon. This huge erosion event occurred millions of years ago, and the earth simply adapted to it. If we humans were here when it started, we would have surely researched and found ways to prevent it because we like to think that we can control nature, and we like for things to stay the same and not change. Had we been around to see this erosion starting, we would have surely been upset. Surely someone would have owned the property that was being eroded, and surely someone would have owned the property downstream of the area. Everyone who was anywhere near this incredible erosion event would have been up in arms about the potential destruction of their property and way of life.

It is hard to wrap your head around what we humans think is important or why, but in today’s world of property ownership and densely populated areas, soil fertility and where that soil is or is not located is of great importance to us.

If the unprotected soils move from one spot to the other, they may be taking pollutants and nutrients with them and depositing these on someone else’s property or into someone else’s waterway, which could have significant impacts on their way of life. This is the reason that we care about erosion. It is often sold to us as a way to conserve nature and its resources, but in truth, it is about preserving our resources and not adding to or taking away from our neighbors’ resources.

How Do We Control Erosion?

Wind and water erosion can be somewhat controlled by reducing the speed of both of these forces as well as increasing the resistance of the soil to these forces. For the scope of this article, we will mostly be discussing things that property owners can do to solve some of the erosion problems that we may come across.

Physical Barriers

If you have an area in your yard with consistent erosion problems, you can construct or install physical barriers to prevent this. If wind erosion is your problem, installing fencing or shrubs can be an effective wind barrier.

There are undoubtedly mechanical ways to slow or prevent erosion, but nothing as simple or effective as plants. We have developed ways to use solid materials such as concrete and rock to slow down wind and water movement. Think about sea walls and drainage swales. We can use our technology to use solid matter to help restrict and guide water flow, which will affect erosion. One way to really control water erosion is to slow down the movement of the water so that it can sink into the earth rather than run across it. We do this through the use of retention and detention ponds.

If you have water erosion in a particular flow area, you can install landscape fabric covered by rocks to prevent the erosion from occurring. This is a very effective way to protect the soil. The other thing that you can do would be to re-grade the area to slow down and spread out the water flow. A slower, more widespread flow will tend to move less soil. Often, temporary erosion control products such as straw bales or sediment control fabrics can be installed as a temporary barrier while we work to establish plant material to solve the problem long term. Sometimes, installing berms can help hold some of the water, allowing it to soak in rather than run off.

Other than introducing some sort of material or strategy to slow down the wind or water, the only great way to control erosion is by using plants. Once again, plants come to our rescue.

Vegetative Barriers

To reduce both types of erosion, plants are truly the answer. Isn’t it funny how so many of our problems, from global warming to world hunger, to water pollution, to soil particles moving when we don’t want them to, can be solved by plants? Nature would take care of itself if we were to only get out of the way.

Plants can block some of the force of wind and water by slowing down the movement of both. The foliage of the plants can slow wind and can slow water. The foliage of the plants can also reduce the impact of these forces by blocking them from coming into contact with the soil. If a raindrop falls and lands on a leaf, it is not moving any dirt. This answer may seem simplistic, but it is the basis of all erosion control.

The roots of plants also help to control erosion. Plant roots growing in soils tend to bind the soil together and restrict movement. Anyone who has attempted to dig out a shrub or a tree can attest to the fact that plant roots make moving the soi more difficult. Having lush, thick plants growing in the soil will slow down and may prevent most soil erosion.

Here is a list of Common Erosion Control Plants to Stabilize Your Landscape Slopes

Creeping Junipers (Juniperus horizontalis)

Creeping junipers are a very low-growing shrub that thrives in direct sunlight. They remain short and close to the ground, and they are pretty tough, drought-tolerant, and cold-hardy. They grow well in zones 3 to 9. Because Juniperus plants are evergreen, they provide year-round color to your landscape. These are often planted in dense groupings on hillsides as an easy way to help prevent erosion. Juniper are prickly, so they are not favorites of deer, but rabbits and mice will chew the bark.

Rockspray Cotoneaster (Cotoneaster horizontalis)

The Creeping Cotoneaster is another excellent low-growing shrub that will help to control soil erosion. Like the juniper, this plant is relatively hardy, grows low to the ground, and has a good root system for holding soil. Unlike juniper, it is a deciduous plant, so it loses its leaves in the winter. Cotoneaster is a slow-growing plant that will do well in zones 5 to 7. The branches of this plant will root into the ground where they touch, which tends to produce a very fibrous and dense mat of spreading roots and branches over time.

English Ivy (Hedera helix)

Ground cover plants, such as English Ivy, help to keep the surface from eroding similarly to the above-listed shrubs, but instead of one larger plant with thick roots, groundcovers are comprised of many smaller plants growing en masse. Groundcovers are typically faster to grow and develop than shrubs, so they effectively hold soil more quickly than shrubs. English Ivy is a vine, so it will spread and grow up vertical surfaces as well. Be aware that it may climb your structures and trees. Ivy grows well in the shade or full sun, so it is a versatile plant for erosion. The plants don’t do very well in drought conditions, and the leaves can be toxic if ingested.

Dwarf Coyote Bush (Baccharis pilularis)

Coyote brush (or bush) is a straightforward plant to cultivate in the landscape. It might take up to a week of summer water, but it also naturalizes quickly. It’s claimed to be fire-resistant. Baccharis’ Pigeon Point’, one cultivar of Baccharis pilularis, is a dense, deep-green groundcover that develops to be a foot tall and twelve feet wide. This is the favored type of Dwarf Coyote Brush for slope stability and beautification in virtually all places. These plants will only survive in zones 8-10, so they are unsuitable for colder regions.

Buckwheat (Eriogonum spp.)

These hardy perennials are drought tolerant and bloom for a long time from summer to fall, making them a valuable addition to your landscape. Aside from being effective for erosion control due to its dense, fibrous root system, buckwheat is an excellent choice for suppressing weeds because of its quick germination. Best of all, they’re easy to grow. Though many will accept some shade, they like well-drained, gravelly soil and full sun in hot environments. Buckwheat flowers are small but striking since they grow in clusters on long stalks and come in various colors, including white, pink, yellow, and red. Buckwheat has many varieties and can be perennial or annual.

Apache Plume (Fallugia paradoxa)

Apache plume is a showy plant that you can use for erosion control. It has a distinct look, as you’ll notice in its rose-like, white flowers with fluffy, thready, pink seed heads. This plant naturally grows in dry settings such as desert woods and scrub in the southwestern United States and northern Mexico. Apache plume is a simple to grow plant that blooms the year it is planted. Because of its drought tolerance and rapid seeding, it is effective for erosion control. However, it might become too aggressive if its ideal conditions are met. To renew, cut the oldest woody stems.

Periwinkle (Vinca minor)

Common Periwinkle is grown in many areas across the United States as a very effective groundcover. Periwinkle or creeping myrtle (Vinca minor) is a shade-tolerant, drought-resistant, short, evergreen ground cover. It grows three to six inches tall and can form dense protective mats in zones 4-8. Vinca minor spreads quickly throughout the forest floor through rhizomes, displacing native herbaceous and woody species of plants in the process.

Creeping Boobialla (Myoporum parvifolium)

Creeping boobialla (as it’s called in Australia) or Dwarf Native Myrtle is an Australian-native plant, where you will find it growing on clay soils and sandstone. It is an excellent, rapidly growing evergreen ground cover commonly developed for that function. It’s a fantastic groundcover for blending with other taller shrubs on slopes or as a sturdy groundcover that may suffocate weeds, and it’s especially beneficial on slopes. It grows up to 18 inches in height, and it can spread 8 to 15 feet. On stolon-like, prostrate branches, it forms adventitious roots. It favors a sunny, well-drained location but is adaptable to most conditions.

Interrupted Fern (Osmunda claytoniana)

Try a wild plant on your shaded slopes for a refreshing change. Osmunda claytoniana, a Missouri native fern, has good soil retention and prevents erosion thanks to its rhizomes. It tolerates wet soils and is an excellent choice for moist hillsides. Interrupted Fern grows in a spreading vase form two to three feet tall, in zones 3 to 8. You can find it naturally growing in counties north of the Missouri River, on damp sandstone ledges, wet, forested ravine slopes, and wet woods. The common name comes from its broad fronds being “interrupted” in the middle by spore-bearing leaflets (pinnae).

Autumn Sage (Salvia greggii)

Salvia greggii is a soft, dense shrub with bright clusters of mainly two-lipped red flowers, although the blooms can also be pink, purple, orange, white, or yellow. This plant is a hummingbird and butterfly magnet. Autumn sage can grow up to 2-4 feet, and its width can reach 3-4 ft. It’s a relatively small plant that will set up tough root systems and grow quickly. Autumn sage requires a well-drained setting and cannot tolerate clay soils that shrink and swell. Work in organic matter and amendments to promote drainage in clay soils and plant on a slope if possible.

Common Yarrow (Achillea millefolium)

Common yarrow is a remarkable plant, whether you’re growing it for its erosion control capabilities, medicinal use, garden advantages, lovely blooms, or a mix of all of these. Milfoil, as it’s sometimes called, grows in USDA zones 4b to 8b. It blooms in late summer and fall with fragrant white or pink flowers and grows under 3 feet tall. It may grow in partial shade or full sun and thrives in dry and wet environments. It is particularly beneficial for preventing erosion, and the roots of this plant are deep, drawing nutrients from well underground.

Forsythia

Like Cotoneaster horizontalis, another shrub option is Forsythia, a deciduous shrub that produces bright yellow flowers in springtime. Forsythia is a plant that grows four to six feet tall, and it’s suitable for zones 5 to 8. The weeping variety (Forsythia suspensa) is very useful for retaining soil on a slope because the tips of its branches that touch the soil take root, effectively functioning as ground cover.

Ostrich Fern (Matteuccia struthiopteris)

Matteuccia struthiopteris, often known as ostrich fern, is a clumping, rhizomatous, deciduous fern that grows two to three feet tall in cultivation but up to six feet tall in damp, cold regions. The prominent features of this fern are the finely divided, green vegetative leaves, which have a feathery look that resembles long ostrich plumes, as its name indicates. In damp, shaded forest regions, natural gardens, or wet zones near streams or ponds, you’ll find many ostrich ferns. When it lives in an area with the best conditions for growing, it spreads via subsurface rhizomes to produce dense colonies. Ostrich fern is easily cultivated in partial shade to absolute shade on average, medium to wet soils. Rich soils with a regular supply of moisture are ideal for this plant.

Creeping Phlox (Phlox subulata)

Aside from erosion control, Phlox subulata, when in bloom, will beautify your landscape with its field of vibrant blooms and its cushions of hairy, needle-shaped leaves. It is one of the most stunning plant species for erosion control when in bloom. This short plant (six inches) will certainly brighten up your day. It requires full sun and well-drained soil and is quite hardy, surviving temperatures as low as -4 °F. It is appropriate for USDA hardiness zones 3 to 9.

Beach Strawberry (Fragaria chiloensis)

This evergreen ground cover, usually known as Beach strawberry, or Chilean strawberry, is native to California, and It thrives in locations with part-sun to shade and well-drained soil. You will see beautiful, five-petaled white flowers on this plant in the spring and summer, while in the fall, you’ll love picking its edible strawberries! It is fairly easy to grow and nicely expands to form a thick ground cover that’s excellent at stabilizing slopes and dunes—perfect for erosion control. It has a spread of 12 to 18 feet and remains under 1 foot tall.

Japanese Spurge (Pachysandra terminalis)

Pachysandra terminalis, or Japanese spurge, is a short, broadleaf, evergreen ground cover that helps stop erosion. Japanese spurge creates a glossy, broadleaf, evergreen mat that minimizes soil erosion in deeply to partially shaded regions. It grows to be under 10 inches tall, grows well underneath trees but does not climb, and blooms in early summer with a light show of creamy white flowers. USDA zones 3 through 9 are acceptable for this plant.

Shrubby St. John’s Wort (Hypericum prolificum)

Shrubby St. John’s Wort is native to eastern North America, where it usually grows in sandy or rocky open forest areas, meadows, bogs, seepages, and riverside prairies. It is tolerant to a broad range of soil conditions but performs exceptionally well on wet slopes or where flooding happens regularly. It develops into a low 3-foot mound with dense, glossy, blue-green leaves and stunning yellow flowers when planted in part sun to shade.

Black Mondo Grass (Ophiopogon planiscapus Nigrescens)

Ophiopogon planiscapus Nigrescens is a plant tolerant of sun or partial shade. It grows up to six inches tall, and you’ll instantly recognize it for its black, grass-like blades. This zone 6-to-9 plant is a uniquely colored plant that will surely stand out in your landscape while helping with erosion control. Plant this in partial sun to partial shade on rich, moist, slightly acidic, well-drained soils. It prefers a constantly wet environment. Use as edging, border, groundcover, or along the edges of streams and ponds.

Creeping Plum Yew (Cephalotaxus harringtonia ‘Prostrata’)

One of a few shade-tolerant conifers is the Japanese Plum Yew or Creeping Plum Yew. This low-growing, spreading evergreen shrub grows to be one to two feet in height and three to four feet in width in just a season or two. It has thick growth that creates a dense bulk of glossy, dark green, fern-like leaves that wonderfully fill landscape beds. This plant grows in USDA zones 6 through 9. For effective erosion control, plant four feet apart. They can grow in a variety of soils and require very little upkeep. Plant in full or part shade; however, well-established plants may thrive in full sun.

Spotted Dead Nettle (Lamium maculatum)

The combination of attractive leaves and attractive blooms distinguishes Lamium maculatum from most plants that only have one or the other. Spotted deadnettle has beautiful, trailing, heart-shaped, white-variegated, or silvery leaves. Lamium maculatum is hardy in zones 4 to 8 and tolerates full shade, which means it can cover spacious areas pretty quickly and densely. This plant’s ideal growing conditions are in moderate moisture, well-drained, humus-rich soils in part shade to full shade. It is deer and rabbit resistant, making it perfect if these visitors frequent your area.

Indian Mint or Yerba Buena (Satureja douglasii)

Satureja douglasii is a member of the Lamiaceae (mint) family of plants. Indeed, you’ll notice a spicy, citrusy scent, especially when you crush this plant. It grows well in the shade and moisture of its natural environment, the coast of California’s forest understory. Thus, it will certainly thrive in shaded regions. Yerba buena is a lovely, non-invasive ground cover, for it does not grow more than six inches tall with a three ft. spread. This delicate, fragrant plant is deer-resistant and blooms white in the spring. It can tolerate sand and clay.

Muhly Grass (Muhlenbergia capillaris)

Muhly Grasses are among the most stunning grasses in the United States. They provide a fantastic combo of drought resistance and excellent, attention-grabbing aesthetics for modern settings. They thrive in harsh environments and adapt well to zones 6-10. Muhly grass is a common native North American perennial plant with exciting, cotton candy-like pinkish flower spikes that emerge above the leaves in the fall.

Border Grass (Liriope spicata)

Although Liriope spicata appears to be ornamental grass, it is not. This perennial, growing in zones 4 to 10, is a member of the asparagus family. Liriope spicata is suitable as an erosion control plant, especially on banks, and it makes a dense, even ground cover and spreads quickly by rhizomes. Another plus of this plant is its high salt tolerance and mild resistance to deer.

Crown Vetch (Coronilla varia)

Crownvetch is a very hardy and fast growing member of the pea family that has been widely used to control slope erosion along the highways and byways of The United States since the 1950’s. It grows well in many different soil and light conditions and thrives in zones 3-10. It has few insect predators and can spread quickly forming dense, thick mats of plant material. While it is great to control erosion, it can be it’s own control problem as it tends to be quite invasive and can overtake many native plants.

REFERENCES

Pond Water Aquaponics – Growing Food in Your Water Garden

pond water aquaponics

What else could be more beneficial than growing vegetable/food crops using the water existing in your own backyard? This smart technique is known as Pond Water Aquaponics. You do not need to fertilize your crops or water them periodically because they will receive the nutrients and water from the pond. The most important output of small-scale aquaponics production is vegetables.

Over the past 30 years, the use of pesticides and synthetic chemicals has increased so much that it seems the growers have started thinking it’s impossible to grow something or anything without applying chemicals. This makes it hard for folks to even purchase vegetables without wondering whether they are poisoning themselves in the process. Luckily for us, it is possible to grow our very own vegetables in our yard by using our pond or water garden.

The System Required For Pond Water Aquaponics:

People having backyard ponds are rarely aware of the concept of growing veggies using that pond water. Ponds are the ideal source of nutrients, especially if they contain freshwater fish. 

To have a successful pond aquaponics system, you need two parts:

  • Aquaculture for aquatic animals – if you have a pond with any animals, you already have this part. This is where we will get the needed water and fertilizer for the plant.
  • Hydroponics for growing plants – This is the part where we need to get creative and find a way to grow food sources in the water from our pond.

Typical Components of an Aquaponics System: 

  • Rearing tank – This is traditionally where the fish are raised. For us, it is the pond.
  • Settling basin – This area is used to collect the uneaten fish food and remove biofilms and any other kind of sand, rock, or waste in the water. For us, the pond bottom or perhaps an intake basin will do.
  • Biofilter – A system that uses living elements like nitrifying bacteria to decompose the pollutants and nutrients and convert them into food for the plants. This might be a wetland filter, floating island, or any sort of strata that will encourage bacteria colonization.
  • Sump – The last and the lowest part of the system collects the additional water to recirculate it back to the tank or pond.

Typical Components of a Hydroponic System:

  • Media bed using cotton wool –  Often used by home gardeners. It contains a rectangular tray with compartments and holes at the bottom. The spaces are covered with wet cotton wool to conserve moisture. These are often used to start seeds inside the home or a greenhouse before it is warm enough outside to plant. Although the root areas will overgrow the containers, they can also be used as long-term planting structures for this system.
  • Nutrient film technique – This consists of a net cup filled with gravel or any other growing media, an extender, and a grow tube. The system works well for ponds and streams because it is easily installed, provides proper air and water circulation, and produces healthy plants.
  • Deep water culture – Utilizes no medium, just a mesh cup or pot with gravel to support the seedling. This can be used individually or within a tray system for multiple plants.

The Potential of a Constructed Wetland Filtration System:

Constructed wetland filtration systems are typically installed in or near bodies of water to utilize marginal aquatic plants to filter and clean the water. Water is pumped from the body of water, and either pushed up through the filter from the bottom or simply ran over the system’s top. We can utilize the wetland filter model to grow our vegetables rather than merely cleaning water using pond plants.

  • The pond water cleaning plants are now your vegetables
  • You might want to continue to use aquatic plants and simply add your vegetables to areas not already crowded with aquatic plants
  • You may need to clear aquatic plants and their roots out of the areas where you would like to grow your vegetables
  • Wetland filters are typically already in full sunlight areas, so they are great for vegetables
  • The vegetables never need water and get their fertilizer from the pond water.
  • They work very well for leafy vegetables like Lettuce, Spinach, Cabbage, Kale, Coriander, etc.
  • Wetlands are typically topped with small gravel just below the water level. For growing vegetables, you will likely need to add more gravel. The system is areas to create growing conditions suitable for your veggies. Aquatic plants typically like 1 “-10” of water over their roots, which is not the case with vegetables.
  • For the best results, you will want to start with seedlings rather than sow seeds into the gravel.

The Potential to use the Pond Edge or Border

Not every pond will have a constructed wetland filter, and not every homeowner will want to spend the time and money to build a wetland filter, so the previous section may not apply to you. One thing that every pond owner has is a pond edge or border. 

  • You will want to start with seedlings rather than seeds.
  • You will need to use some sort of container or gravel to hold the seedlings at the proper level at the edge of the pond.
  • Different plants will tolerate different exposure to water, so this is something that you will need to experiment with.

Vegetables and Herbs that are Good to Grow In and Around Ponds:

  • Lettuce, Tomatoes, Basil, Spinach, Okra, Coriander, Cucumber, Red Salad Onion, Peas, Cauliflower, Cabbage, Eggplant, Parsley, Sweet Potato, Kohlrabi, Reddish, Turnips, Melons, Capsicum, etc.
  • Basil (Ocimum basilicum), Chamomile (Matricaria chamomilla), Hedgehog coneflower (Echinacea purpurea), Feverfew (Tanacetum parthenium), Johnny Jump-up (Viola tricolor), Parsley (Petroselinum crispum), etc.

Benefits of Pond Water Aquaponics:

  • Sustainable integrated aquaculture and food production –  The world population is increasing at the rate of 1.05% annually, and freshwater availability in every region of the world is decreasing day by day. Using the pond aquaponics technique, you are conserving water, and you can grow protein-rich fish and organic veggies simultaneously.
  • Increased productivity and efficiency – You can produce everyday food in your place, saving trips to the market and using the existing water at your home to create edibles. The plants growing in your pond system are also helping to take nutrients out of the pond water, which will decrease the unsightly algae growth in the pond.
  • Organic Food – The vegetables and fish in your pond are entirely under your control. You will be able to ensure that no chemicals or additives are in your water, so you will never need to question the quality of the food you produce. Be sure not to use chemicals anywhere in the watershed of the pond, and you are all set. Gowing your own organics will be very invigorating and will save you money. The prices of organic products are 100-600% higher than the inorganic ones. It could be a profitable business at the same time as you might be able to sell some of your edibles.

Water Conservation:

Pond aquaponics is a new technique in Olericulture in terms of the use of minimum water instead of flood irrigation. Water resource shrinkage is one of the major global issues. Pond aquaponics and wetland-associated food production are conserving the water and purifying the used water. 

Aesthetic Value and Monetary Opportunities:

Almost one century back, there were no supermarkets where fresh fruits, vegetables, or ornamentals were available for sale. Everybody was dependent upon the food they used to grow on their land, the climate was the healthiest, and the pollution was minimum. Pond aquaponics provides the same opportunity with the least effort.

Additional Benefits of Constructed Wetlands:

“Plants will clean the water to be used for other plants” this is the formula behind growing food crops in the constructed wetland filtration system in your garden. There will be no need to add fertilizers to your plants as the water will supply all they need. Constructed wetlands are the absolute best water filters that we can have for our pond. Using them to grow some veggies is a no-brainer.

Control of Soil-Borne Diseases:

Growing your veggies in your aquatic environment will remove the need for any pesticides or insecticides as there will be no soil-borne diseases to disturb your crop.

Closed-loop, Low Maintenance System:

A well-thought-out and constructed pond aquaponics system can be the ultimate closed-loop, low-maintenance growth system that you can find. Over time, with a bit of upfront experimentation, you can develop a system that pretty much takes care of itself other than planting and harvesting.

Research-Based Evidence Regarding Pond Aquaponics:

  • Experiment for Nitrogen Transformation in Aquaponics using the two plants: Tomato (Lycopersicon esculentum) and Pak-Choi (Brassica compestris subsp. Chinensis). The Nitrogen Utilization Efficiencies (NUE) of both plants were compared symmetrically. The tomato plant NUE was 41.3% (due to the higher root surface area), and that of Pak-Choi was 34.3%. The abundance of the Nitrifying Bacteria in Tomato-plant aquaponics was 4.2 folds higher than Pak-choi. The third parameter measured was water quality. The water quality of tomato-based AP was better. The contribution of the tomato-based aquaponics into the environment, in the form of N2O, was 1.5-1.9%, determining the potential anthropogenic (N2O emission into the atmospheric) ability of aquaponics. (Hu et al., 2015)
  • A 54 days experiment was conducted at the “AIT, Thailand” to determine the impact of pond-water filtration effect on the following:
    • Growth media: lettuce grown on sand media followed by gravel was found to have the highest yield and head weight compared with the control treatment.
    • Yield of Lettuce: the partially filtered pond water supports an 87% higher yield compared with that of unfiltered water. (Sikawa & Yakupitiyage, 2010)

References:

Blidariu, F., & Grozea, A. (2011). Increasing the economical efficiency and sustainability of indoor fish farming by means of aquaponics-review. Scientific Papers Animal Science and Biotechnologies, 44(2), 1-8.

de Farias Lima, J., Duarte, S. S., Bastos, A. M., & Carvalho, T. (2019). Performance of an aquaponics system using constructed semi-dry wetland with lettuce (Lactuca sativa L.) on treating wastewater of culture of Amazon River shrimp (Macrobrachium amazonicum). Environmental science and pollution research, 26(13), 13476-13488.

Hu, Z., Lee, J. W., Chandran, K., Kim, S., Brotto, A. C., & Khanal, S. K. (2015). Effect of plant species on nitrogen recovery in aquaponics. Bioresource technology, 188, 92-98.

Palm, H. W., Knaus, U., Appelbaum, S., Goddek, S., Strauch, S. M., Vermeulen, T., . . . Kotzen, B. (2018). Towards commercial aquaponics: a review of systems, designs, scales, and nomenclature. Aquaculture International, 26(3), 813-842.

Pantanella, E. (2008). Pond aquaponics: new pathways to sustainable integrated aquaculture and agriculture. Aquaculture News, May.

Rakocy, J., Masser, M. P., & Losordo, T. (2016). Recirculating aquaculture tank production systems: aquaponics-integrating fish and plant culture.

Salam, M., Asadujjaman, M., & Rahman, M. (2013). Aquaponics for improving high-density fish pond water quality through raft and rack vegetable production. World Journal of Fish and Marine Sciences, 5(3), 251-256.

Sikawa, D. C., & Yakupitiyage, A. (2010). The hydroponic production of lettuce (Lactuca sativa L) by using hybrid catfish (Clarias macrocephalus× C. gariepinus) pond water: Potentials and constraints. Agricultural water management, 97(9), 1317-1325.

Somerville, C., Cohen, M., Pantanella, E., Stankus, A., & Lovatelli, A. (2014). Small-scale aquaponic food production: integrated fish and plant farming. FAO Fisheries and Aquaculture Technical Paper(589), I.

The Complete Beginner’s Guide to Soil Augmentation

Soil Augmentation

The sad state of soil is the common cause of failure in vegetable gardens, herb gardens, secret gardens, and even rain gardens. So whether you are a gardener, a professional landscaper, or a farmer, improving the soil is your number one priority in growing a healthy garden or maintaining an attractive landscape. The soil is the lifeblood of your plant’s health. Though not everyone is blessed with good soil, everyone can improve their soil fertility.

Soil augmentation, soil amendment, or soil conditioning are synonymous and mean the same thing. If your goal is to recover or improve the soil quality, structure, nutrients, and pH by adding organic and inorganic materials to make it fertile and conducive for growing plants, you’ve come to the right place. That is the true definition of soil augmentation. This article will teach you all you need to know to get your soil back into tip-top shape. We will use soil augmentation to describe this action throughout this article for commonality.

Before diving right in on what organic and inorganic materials we can use, let us first cover soil basics. By having a basic understanding of soil, we will know how to augment or treat our soil to bring it back closest to its ideal condition. But if you are already familiar with soil, feel free to skip this section and jump right into the soil augmentation topic.

In this article, we will talk about:

  • What is ideal soil?
  • Understanding the properties of soil
  • Soil Augmentation: The secret to regaining your soil’s fertility
  • Types of Soil Augmentation
  • Soil Augmentation Application

Shall we dig in?

What is an Ideal Soil?

The soil is the foundation of every successful sustainable garden, and it’s also the key to the most successful and breathtaking landscapes. Vegetables, perennials, shrubs, and trees grow best when the soil is fertile.

The soil supports and creates an environment for plants to grow by providing:

  • water to carry nutrients to the plants
  • air needed by the roots for respiration
  • nutrients such as Nitrogen, phosphorus, potassium, sulfur, calcium, etc.
  • microbes that feed on water, air, and nutrients and in-turn aid the roots in absorbing the nutrients
  • serves as a base or anchor for the plants

For optimum plant growth, the soil should ideally contain 50% solids and the remaining half a combination of air and water. The solids contain 45% minerals: sand, silt, or clay or their combination, and 5% organic matter, which is residue from plants, animals, and other organisms.

The other half, consisting of 50% water and 50% air, creates the “pore space.” The pore space affects the plant’s ability to take up nutrients and grow its roots. For example, the pore space is compressed if the soil is compacted, limiting the roots’ movement, which affects their ability to get nutrients from the soil. Understanding the concept and their relationship will help us balance what contributes to healthy plant growth.

In reality, most of us don’t have this ideal soil mixture due to topography, climate, existing soil texture, and even soil management practices. Soil texture refers to the size of the particles that make up the soil and determines whether it is sandy, silty, clayish, or loamy. Soil management may refer to tilling practices that increase pore space or poor drainage, leading to soil compaction and reducing the pore space.

Understanding the properties of soil

Soil has several properties such as its physical makeup, chemical and biological content, color, etc. But our focus will only be on properties that influence plant growth. This will help us understand and appreciate the areas where we can intervene and help restore the soil’s fertility through soil augmentation methods.

Physical Properties

This is the physical makeup and attributes of soil. The essential characteristics that contribute to plant growth can be classified under soil texture and soil structure. Soil texture influences its nutrient contents and ability to hold and drain water. Soil structure also affects the soil’s ability to hold and drain water, the movement of air and water, its ability to absorb nutrients, and how easy it is for the plant roots to grow.

Texture

As mentioned, soil texture pertains to the relative size of the particles that comprise the soil’s minerals, which also determines the soil type.

  • Sand (2.0 to 0.05mm in size) – is porous (water and air can pass easily), cannot hold nutrients, is light, and feels gritty when rubbed between fingers.
  • Silt (0.05 to .002mm in size) is more fertile than sand and clay, adds body to the soil, and feels smooth to the touch like flour.
  • Clay (less than 0.002mm in size) – is heavy and retains nutrients and moisture (and does not drain well); it is sticky to the touch and can be molded.
  • Loam – the combination of sand, silt, and clay that offsets their adverse effects. This is the type of soil every gardener would like to achieve because it is fertile, easy to work with, and has good drainage.

Structure

Soil structure describes the soil particles’ arrangement how they clump together and form aggregates. The aggregates are held together by organic matter such as decaying plants and animals. The arrangement of the soil particles creates spaces or pores in between. The pores’ size influences air and water movement in the soil structure. This movement is also called “aeration.”

A well-structured soil is friable or crumbly to the touch, and it is easy to work with. The well-structured soil is perfect for seedlings as it allows the tender roots to establish a robust rooting system. A well-structured soil can be achieved by the proper mixture of solids (sand, silt, and clay), good tilling practices, and soil augmentation.

A poorly structured soil is compact and tends to collect water. Because the pores are tight, it creates poor drainage and aeration. The result is soil that stunts or prevents plants from growing.

Chemical Properties

The soil’s chemical properties are essential to soil fertility and plant growth, and it influences the soil’s capacity to store and release nutrients such as Nitrogen, phosphorus, potassium, etc.

The soil’s pH level determines the soil’s chemical property, and the soil pH affects the availability of nutrients to the plant. The soil can be acidic (pH less than 7), neutral (pH of 7), or alkaline (pH more than 7). While most plants grow best in a neutral pH environment, certain plants still prefer an acidic or alkaline habitat. To know which plants grow at a particular pH level, you may download The pH Reference of Plants by the Hawaii Cooperative Extension Service of the University of Hawaii.

The soil’s pH level may change over time as minerals are leached away.

When this happens, the soil may become more acidic. Or because of conditions where the soil is often dry, high soluble salt content develops, making the soil alkali. In both cases, soil augmentation comes in to correct the pH imbalance.

Biological Properties

The soil’s biological properties cover the microbes and other living organisms in the soil’s organic matter. The organisms break down the organic matter, the decaying plants, and animals and make the nutrients available for uptake by the plants. The soil organisms also store the nutrients in their bodies, preventing nutrient loss by leaching. Other organisms, such as the earthworm, help rework the soil through burrowing, ingestion, and defecation of sediment grains.

Soil Augmentation: The secret to regaining your soil’s fertility 

Soil degrades and loses its fertility over time due to excessive rainfall that causes flooding or erosion, drought, improper use of pesticides or fertilizers, and unsustainable farming practices that deplete the soil nutrients or affect the soil structure. The soil’s pH may also change, which affects the type of plants that can grow in your landscape or garden.

This is where soil augmentation comes in. Adding organic and or inorganic material to the existing soil will improve soil properties such as:

  • water holding capacity
  • drainage
  • aeration
  • availability of nutrients and
  • living conditions of soil organisms

All these contribute to plant growth. Almost all types of soil can be made fertile using this method. The amendment factors can be applied to the soil locally and by anyone who can handle a shovel.

Types of Soil Augmentation

Soil augmentation can either be organic or inorganic matter. Sometimes it can be a combination of both.

An organic matter comes from something living, such as a decaying plant, animal, or organism. This can be humus, compost, mulch, aged manure, biosolids, peat, wood chips, hardwood bark, sawdust, shavings, and wood ash.

Inorganic matter is mined or man-made. This includes sand, profile soil conditioner, peat gravel, lime, sulfur, vermiculite, and perlite.

Organic Augmentation

Organic matter is the most effective and practical remedy for improving soil conditions. A small part of organic matter can significantly impact the soil’s physical, chemical, and biological properties. It provides aeration, better drainage, holds water well, and can keep nutrients. It addresses a lot of soil issues.

Humus

Humus is the black, spongy, and jelly-like carbon matter that remains after dead plants and animals have decayed and microorganisms have completed processing and breaking down the organic matter to its final state. This process takes a considerable amount of time or years to complete. Humus has many mineral nutrients that aid in soil health and fertility. Since hummus is rich in carbon, this makes it ordinarily acidic.

Benefits of hummus:
  • it retains the nutrients in the soil like Nitrogen, phosphorus, calcium, etc.
  • improves moisture retention making it more drought resistant
  • traps oxygen needed for respiration by the roots and microorganisms
  • feeds and protects microbes
  • prevents erosion by helping bind the soil particles
  • helps root structure by improving soil porosity
  • stabilizes temperature and
  • corrects soil PH.

Compost

Also called “black gold,” compost is decomposing organic materials recycled from kitchen waste or plant scraps, dried leaves, branches until it is crumbly and looks and smells like soil and not rotted vegetables. Compost adds nutrients and aids in microbes’ activity to release more nutrients to the soil, and compost can balance the soil’s pH level.

Benefits of compost:
  • retains moisture
  • encourages microbial growth that produces humus
  • suppresses plant disease and pests with the help of beneficial microorganisms
  • Reduces the need for fertilizers

Mulch

Dried leaves or cuttings, shavings, or any organic material placed as a layer or covering on top of the soil. Realize that when applying fresh cuttings, they will compete with the plants in taking up the Nitrogen in the soil as the cuttings decay. To address this, supplement the soil with Nitrogen. Most mulches tend to raise the pH level of the soil slightly.

Benefits of mulch:
  • improves soil moisture by reducing evaporation and water run-off
  • regulates soil temperature
  • reduces soil erosion and compaction
  • helps in soil nutrition as it decomposes
  • acts as a weed control

Aged Manure and Biosolids

Aged manure is animal dung from cows, horses, goats, sheep, chickens, and even bats composted for 4-6 months. Aged manure is a good source of Nitrogen, Phosphorus, and Potassium, and it is also sometimes mixed with the compost. Animal manure tends to raise soil pH because it contains calcium and magnesium.

Fresh manure is not advisable as it contains high uric acid levels, which may burn the roots. It may also have pathogens that may contaminate the plant and make it harmful for human consumption, especially when eaten raw.

Biosolids are sludge recovered from sewage treatment plants that have been physically and chemically treated. Biosolids are often high in salts and may have the potential for heavy metals, and it is not advisable for use in the vegetable garden. Biosolids also have a high chance of raising the soil’s pH level, especially with those treated with lime at the processing stage to stabilize the organic matter and reduce pathogens.

Benefits of manure and biosolids:
  • adds nutrients such as Nitrogen, phosphorus, potassium, and other micro-nutrients
  • conditions the soil by loosening compacted soil
  • reduces run-off or leaching of nitrates

Peat

Peat is known as “turf,” which are brown deposits of partially decomposed organic materials formed in wet, acidic conditions of bogs, peatlands, mires, moors, or muskegs. It is acidic (low pH level) and ideal for acid-loving plants like blueberries. It is an excellent amendment for sandy soil because of its water-retention property.

Benefits of peat:
  • helps in nutrient retention
  • increase in water retention makes it ideal for sandy or rocky soil; also stabilizes clay soil
  • provides good aeration

Wood Chips, Hardwood Bark, and Shavings

Wood chips and shavings are the small excess pieces or waste materials resulting from cutting or chipping trees, branches, lumbers, or other wood materials. Hardwood barks are the outer covering of hardwood trees discarded when cutting tree logs to make lumber.

Wood chips, hardwood barks, and shavings are applied as layers over the soil top like mulch. But they are denser and take longer to compact and break down. Note that wood chips, hardwood bark, and shavings need Nitrogen to decompose. Because it is competing with the plant in using up this nutrient, this may result in nitrogen deficiency to the plant. To avoid this, a nitrogen supplement may be required. Like mulch, it tends to raise the pH level of the soil. But using pine bark may cause it to be more acidic.

Benefits of wood chips, hardwood bark, shavings:
  • improves soil moisture
  • regulates soil temperature
  • reduces soil erosion and compaction
  • helps in soil nutrition
  • acts as a weed control

Inorganic Augmentation 

Because inorganic matter is extracted or processed, they are not as sustainable and more expensive than organic augmentation. They also need large volumes to make significant changes to the soil’s physical properties. Inorganic matter is used to increase aeration and drainage, decreasing the water-holding capacity.

Sand, Profile Soil Conditioner or Pea Gravel

Sand is a granular mineral particle in size, profile soil conditioner is a ceramic-type particle that is porous, and pea gravel is a smooth small rounded stone the size of a “pea” vegetable.

Benefits of sand, profile soil conditioner, or pea gravel:
  • improves water and nutrient holding capabilities at the root zone
  • improves aeration
  • reduces compaction

Lime

There are two types of lime used for soil augmentation, agricultural lime and dolomite lime. Both limes contain calcium, with dolomite lime having extra magnesium. Lime is generally used to correct the pH of acidic soil.

Benefits of lime:
  • improves pH of soil by making them less acidic
  • aggregates soil particles and improves aeration

Sulfur

A mineral that, when in contact with soil bacteria, changes to sulfuric acid and lowers the pH of the soil—used to either bring soil with an alkaline pH to neutral levels or make a neutral pH soil become acidic.

Benefits of sulfur:
  • makes the soil more acidic
  • reduces the sodium content of the soil

Vermiculite

A mineral that resembles mica in appearance that is dark brown to golden brown in color. When heated, it forms flakes with a pH of 7.0 and can soak up 3-4 times its volume in water, making it ideal for water-loving plants. It is generally used with potting-mix soil.

Benefits of vermiculite:
  • Improves aeration
  • aids in water retention
  • increase oxygen levels at the root zone
  • reduce compaction
  • ease drainage when soil is saturated

Perlite

Perlite is an amorphous volcanic rock which when heated, expands like popcorn. It is whitish in color with micro air bubbles making it light and able to keep moisture. It has a pH of 6.6 to 7.5. Best for indoor cactus plants. It cannot be used with garden soil since it will be crushed. Best used with a potting mix like peat moss.

Benefits of perlite:
  • improves aeration and drainage
  • keeps the soil loose
  • prevents compaction

Soil Augmentation Application

It is not realistic to change the texture of the soil. A large volume of a soil type (sand, silt, or clay) will be needed to achieve an ideal soil condition. Focus instead on improving the soil structure. Do this by addressing the organic content, which will impact the soil’s porosity. Soil porosity is ideal at half pore space and half solids, with the pore space being filled by half air and half water. This change will also influence the nutrient uptake and microorganisms living in the soil.

Of the organic matter mentioned, humus, compost, aged manure, and biosolids are often used to condition the soil and bring it to its fertile state and neutralize the pH. Do not use peat, sand, vermiculite, or perlite. Peat makes the soil acidic; sand will harden the soil like concrete, and vermiculite and perlite are expensive. Most inorganic matters are generally used in potting mixes or seedling beds.

When doing soil augmentation, work on the top 6 to 8 inches deep of your soil. Place 2 to 3 inches of organic matter or 1 inch if it’s manure or biosolids and thoroughly mix into the soil to distribute evenly. Simply dumping or burying it in the soil will not work, and it may interfere with air and water movement and root growth. It has to mix with the existing soil to allow the organic matter to clump and achieve aggregation. If mulches, wood chips, hardwood bark, and shavings will be used as an organic matter mix, it must be composted first. Otherwise, it is suitable for surface application only.

Because organic matter such as compost, humus, and manure breakdown easily, it is best to apply and till the organic matter yearly at the start of the planting season. This ensures that your soil maintains its fertility throughout the season.

To get a clear picture of your soil’s health, you may conduct your test based on the Soil Testing Methods Manual by FAO. Or, for a more thorough analysis of your soil pH and nutrients, you may take a soil sample and send it to the nearest soil testing lab.

The pH level can be corrected using lime or sulfur following the procedure used when applying the organic matter. Note that it may take six months for the lime to react to the soil. The best time to apply lime is during fall. For nutrients lacking in the soil, this can be supplemented by applying the corresponding fertilizer. It is recommended to do a soil test at least once every 2 to 3 years.

With these recommendations and incorporating soil augmentation into your workflow, you can provide a healthy environment for your vegetables, perennials, shrubs, and trees to grow. This also raises your chances of success in any garden or landscaping project you plan to undertake.

Xeriscaping

Xeriscape dry landscape

Xeriscaping or Smart Landscaping is the movement to minimize the need for irrigation in the regions where fresh water or excessive water is not accessible. Many temperate, tropical, and sub-tropical plants have very low water requirements, ideal for xeriscaping. This environmentally friendly gardening method is gaining importance in other regions where fresh water is available, but access to fresh water is becoming limited.

The Principles of Xeriscaping:

The principles of xeriscaping are to conserve water and plant waste, promote biodiversity, and decrease reliance on fertilizers and pesticides. 

Map Out your Landscape Essentials: 

Choosing the proper plant for the environment is the most important aspect of your xeriscaping plan. You should create an overall base plan, laying out the micro-climates in your yard and their soil and sun exposures. Once you have the base map of your yard or planting area, you can get more specific and layout stylized planting concepts for each location. While it will be tempting to specify some plants that may not be ideal for the climate to add diversity or color at a particular time of the year, don’t be tempted into this shortcut. Always plan your plants to match the environment you are planting them in. This will minimize the amount of input from us in the form of water or chemicals. Try to choose the most environmentally friendly and broad-leaved plants to contribute maximum oxygen production and pollutant removal. (Mandă & Salahoru, 2018)

Soil Improvement:

It is advisable for both native and non-native plants to amend the soil with compost and or manure. One to two inches of manure/compost mixed well in the upper six inches of the soil will improve the fertility of the soil and give the new plants a good start. It will also increase the soil’s water-holding capacity and cation exchange capacity. It is not necessary to only grow native plants; well-suited non-native plants can also be used to help promote biodiversity.

Systematic Irrigation:

It is always best to plant so that your property doesn’t require any irrigation. This is, without a doubt, the goal to strive for. But, if you do need to irrigate and you just can’t break away from the need to have some specific plants that will not otherwise grow, do so sparingly to limit the amount of water used. Drip and soaker irrigation are a much more conservative approach than broadcast sprinklers that blast water into the air just to have it evaporate.

Key Irrigation Ideas:

  • Deep and intermittent watering only when absolutely necessary will promote stronger, deeper root systems that are more drought tolerant.
  • Irrigate after sundown to avoid water loss through evaporation.
  • Don’t plant turf grass if it will need to be watered more than a few times a season. If you need to water more than that, choose a different plant.

Plant Zones Grouping:

Grouping together the plants having similar light, moisture, and soil requirements is always wise. For example, shade-loving, low-growing shrubs should be placed in the shade of trees and far from the hoses, while the bright light and heavy irrigation demanding plants can be planted in the open sun near the hoses. 

A Xeriscape with flowering annuals in beds, trees in the corners, shrubs along the boundary, and limited turf along the walkways will give the impression of an organized, attractive, ecologically sound landscape. This design filled with well chosen plants for our climate will result in a fabulous, easy-to-maintain landscape.

Benefits of Mulching:

  • Water conservation
  • Soil moisture retention
  • Keeping roots cool
  • Preventing soil crusting
  • Discouraging weed growth
  • Adding nutrients to the soil as mulches decompose

Mulches may be Organic and Inorganic. 

Organic mulches include wheat straw, bark chips, chopped leaves, decomposed kitchen waste, paper, compost, pine needles, and sawdust. These are added in the upper 2-4 inches of soil.

 Inorganic mulches include plastic/synthetic landscape fabrics (let water through but help retain moisture), rubber chips, rock, etc.

Turf Alternatives:

Regular mowing and continuous regeneration are the necessities of turfgrasses, and that is why they need more nutrients and water than any other plant type. Xeriscapers recommend limiting the turfgrass area as much as possible or not establishing turf at all. Native grasses consume less water than non-native varieties. 

Maintenance of a Xeriscape:

Plants do not speak and depend on the grower for their everyday needs. The best care of your plants can be to simply keep an eye on them, and they will tell you if they are suffering and need your help. You don’t need to check a maintenance chart to know when a plant is getting too much sun or needs more or less water, and it is really pretty intuitive. 

Xeriscape Plants:

Planting trees and perennial shrubs is a long-term investment, so selecting your plants with your local climate in mind is advisable. What may be considered a xeriscape plant in one part of the world may not last a week in your neighborhood. Do your research and always lean toward the hardiest plants you can find for your area.

Catalpha speciosa (Bait Tree):

  • A fast-growing, deciduous plant tolerant of high ph levels is native to North America and an excellent hardwood.
  • It has white flowers with yellow strips and purple spots inside, green-colored leaves.

Celtis occidentalis (Common Hackberry): 

  • The upper side of the leaf is bright green, and the lower side is pale green.
  • Has greenish flowers.
  • A deciduous, shade-loving plant tolerant of a wide range of alkaline and acidic soils.

Gymnocladus dioicus (Kentucky Coffee-tree):

  • Greenish-white foliage
  • A popular US street tree, used as an indicator of calcareous soils, tolerant to drought and poor soil.

Robinia pseudoacacia (Black Locust):

  • Creamy white and sometimes pink or purple, dark-blue green leaves are scented.
  • Fast-growing, spreading, shade-intolerant tree thrives best in dry soils. 

Acer tatricum (Tatar maple):

  • It has reddish foliage in fall and creamy white flowers.
  • Deciduous and spreading, it can be raised as a bush or small height tree.
  • It is often grown as an ornamental tree throughout the US and Europe.
  • Well suited to dry, alkaline soils.

Quercus gambelii (Gambel Oak, White oak):

  • Deep green-colored leaves turn orange-yellow in autumn.
  • Drought tolerant needs richer soils and rapidly re-establishes itself from the root sprouts, a food source for animals browsing.

Cupressus arizonica (Arizona Cypress):

  • Greyish-green to Bluish-green foliage
  • Evergreen, beautiful ornamental cone-shaped canopy, resistant to cypress canker disease.

Atriplex canescens (Saltbush):

  • Greenish, gray-yellow foliage
  • Tolerant to alkaline soils
  • Native to the Western US with an upright spreading habit.

Berberis thunbergii (Japanese Barberry):

  • Deciduous plant with pale yellow flowers in spring, tenacious berries, and deep red/purple leaves in autumn.
  • Very thorny and hard to work with.

Caryopteris clandolensis (Blue-Beard, Blue-Mist-Spirea or Dark Night):

  • Blue, Purple, Violet flowers attract bees.
  • Aromatic foliage
  • It prefers bright sunlight and neutral-acidic soil

Fendlera rupicola (False Mock-Orange/Cliff Fendler bush):

  • Creamy-white, Fragrant flowers
  • Deciduous, glossy foliage
  • Tolerant of semi-arid conditions.

Holodiscus dumosus (Rock spiraea):

  • Pinkish-white to creamy-white flowers
  • Deciduous, aromatic leaves
  • Survives in dry habitats, moist-cool mountain forests, and shady locations.

Dasiphora fruticosa (Cinquefoil):

  • White, Pale-to-bright yellow, orange-reddish flowers
  • Thrives in well-drained rocky areas
  • Low-maintenance and hardy plant.

Rubus deliciosus (Snowy bramble, Boulder raspberry):

  • White, Fragrant blooms in May-June
  • Native to the US belongs to the rose family.
  • Deciduous while flowering stems are perennial, prefer full sun, propagated by cuttings in early spring

Shepherdia argentea (Silver buffalo-berry):

  • Pale-yellow, no petals flower
  • Food for mule-deer and sharp-tailed-grouse
  • Has dye and medicinal values
  • Tolerates drought, poor soil, full sun, and acidic/basic/neutral soils

Xeriscaping in Action

Metropolitan Phoenix is one of the most rapidly urbanizing cities in the US. As a result, the urban heat island (UHI) of this city was significant. Low-water demand, x xerophytic trees with large, spreading canopies were planted in the city, residential yards, road-sides on a large scale to reduce the thermal discomfort. Compared to existing circumstances, a 2.5 degree Celsius decrease in temperature had been noticed. (Ch w & Brazel, 2012) 

The Path to a Healthier Planet

People of the US and other European countries really seem to appreciate the green of a traditional turfgrass lawn. They consider dark green lawns and garden beds filled with color to symbolize prosperity. It has, of course, become so since it takes a good deal of free time and extra resources to maintain such a display.

In areas of the world that get ample rainfall and have rich soils, such a display can be almost effortless if the correct plants are planted. These areas and the world benefit from the air cleaning and heat-absorbing properties of the lushly planted gardens and lawns.

These spots where native plants grow lush and full are not the trouble spots. The areas of the world that are not suited to grow lush, green, and colorful plants are the areas that will benefit most from xeriscaping. In these areas where humans have been irrigating and fertilizing for generations to keep up the lush appearance, it would be much better served with xeriscaping.

We need to stop fighting mother nature and instead take her lead and follow obediently. If your plants aren’t growing where you planted them, it is not nature’s fault; it is your fault for planting a plant that is not well suited for its environment. If we would only learn to choose the correct plants for our environment, we could all live on a healthier, easier-to-maintained, naturally balanced planet.

References:

Çetİn, N., & Mansuroğlu, S. (2018). Determination of plant species can be used in Xeriscape design under Mediterranean conditions: the sample of Antalya/Konyaaltı. Ege Üniversitesi Ziraat Fakültesi Dergisi, 55(1), 11-18.

Chow, W. T., & Brazel, A. J. (2012). Assessing xeriscaping as a sustainable heat island mitigation approach for a desert city. Building and Environment, 47, 170-181.

Cinar, H., & AKTAS, N. K. (2018). Xeriscape Analysis: A Case Study In A Residential Garden In Istanbul. J Environ Prot Ecol, 19(4), 1904 

Klett, J. E., Wilson, C. R., & Carter, S. (2009). Xeriscaping: trees and shrubs. Colorado State University. Libraries.   

Mandă, M., & Salahoru, C. (2018). Xeriscaping. Analele Univer ității din Craiova-Biologi , Horticultura, Tehnologia Prelucrarii Produselor Agricole, Ingineria Mediului, 23, 144-149.

Mustafa, D., Smucker, T. A., Ginn, F., Johns, R., & Connely, S. (2010). Xeriscape people and the cultural politics of turfgrass transformation. Environment and Planning D: Society and Space, 28(4), 600-617.

Özyavuz, A., Özyavuz, M., & Kemal, N. ( 012). Xeriscape in Landscape Design. Landscape Planning, 353.

Welsh, D. F., Welch, W. C., & Duble, R. L. (2007). Xeriscape… Landscape Wat r Conservation. Texas FARMER Collection.