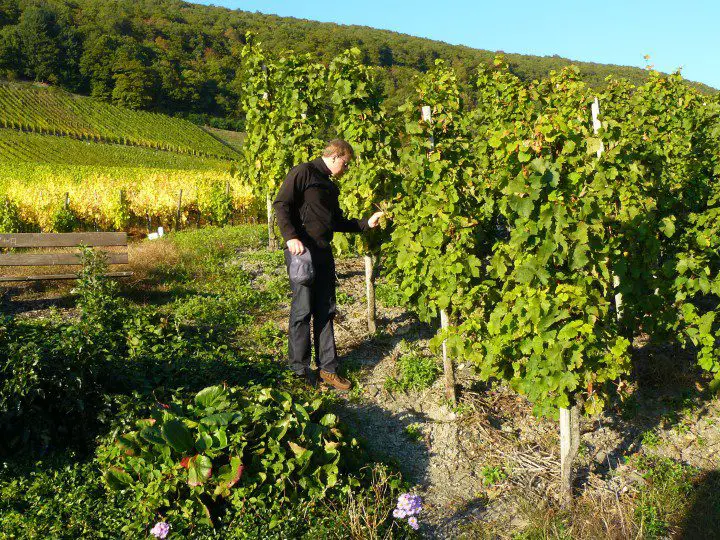
Today, I will discuss how you can grow grapes in your home garden.
Growing grapes in a home garden is a fun and pleasurable activity. With any luck, it will become even more enjoyable when you get the fruit of your efforts in the year following planting. Yes, grapes can indeed start bearing in the second year of growth!
There are hundreds of varieties of grapes that are grown in home gardens in the USA. They have many different growing requirements and bearing habits, so if you are planning to grow grapes in your home garden, it is essential to choose a suitable variety.
Quick Facts about Grapes
Grape vines are woody and perennials (evergreen).
Direct sunlight is crucial for fruit ripening.
A six-foot vine-to-vine distance is recommended for proper ventilation.
Canes (fresh branches) produce flowers and fruit.
The plant begins to produce fruit one year after planting.
Wind and insects are two important pollination factors.
The grape vines can be trained into many ornamental forms.
Yearly pruning is crucial for healthy, abundant fruit production as the grapes bear on new growth.
Trim the grape vines before the leaves appear in late February or early March.
Choose your Variety Carefully
The first and most crucial step in grape planting is to choose a suitable variety. The selection will depend upon how you plan to use the grapes and the climate that you live in. The following are some of the grape varieties recommended for USDA zones 3-4.
Bluebell
Used for fresh consumption, juice and jelly.
Harvested in mid-September.
Thrives in zones 3-4 and it tastes much like a concord grape.
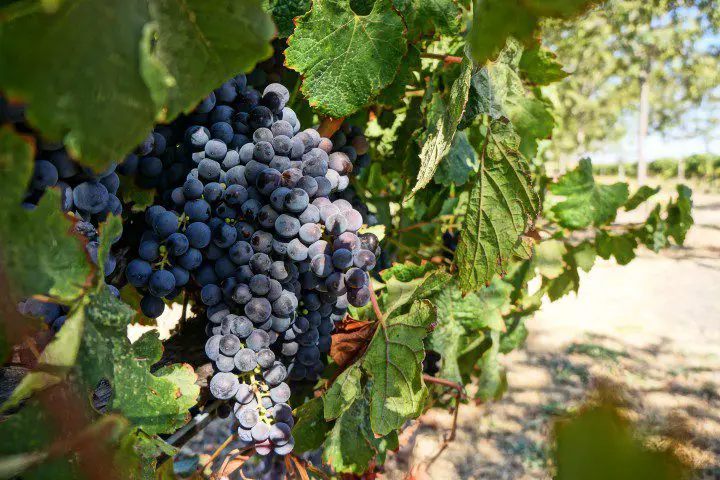
Frontenac
Used for fresh consumption and red, port and rose wines.
Harvested in late September to Early October.
Does well in zones 3-4.
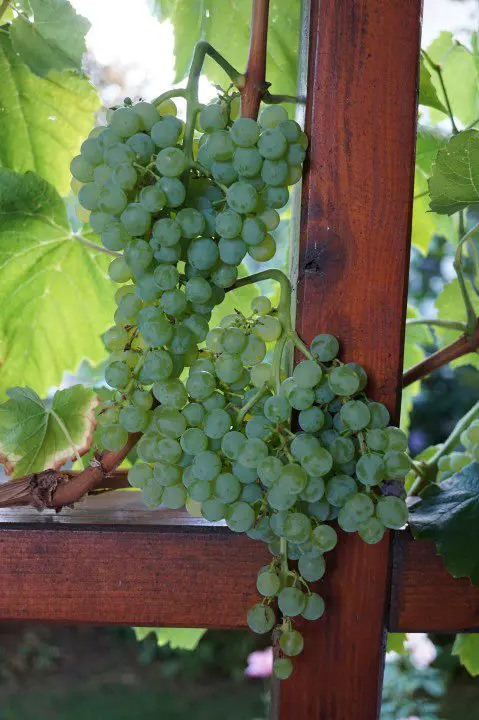
Edelweiss
Used for table grapes and sweet wine.
Harvested in late August to Early September.
Yellow-green in color, they have a floral aroma, and thrive best in zone 4.
St. Croix
Used for making wine.
Harvested in late August to early September.
Well known as a wine grape and can also be used for fresh consumption.
Muscadine
Used as table grapes and winemaking.
Can be harvested in early August to September.
It is native to North America and thrives in zones 7-9.
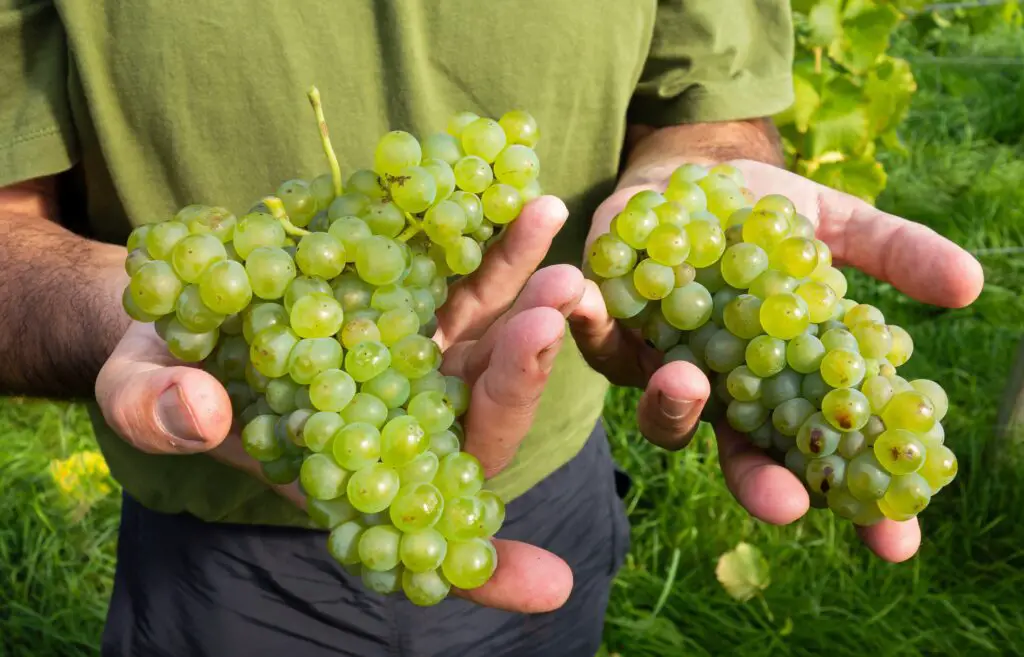
Planting Grapes in your Home Garden:
The easiest way to plant grapes is through cuttings. The best time for this is typically late February through early March. You can buy grape plant cuttings or cut them from the plants of friends and neighbors if you are so lucky to have friends like this. The other way is to buy one-year-old plants that go dormant in spring and can be replanted.
Pre and Post-Planting Practices:
Soak the roots in water for three to four hours.
Remove all canes, leaving the strongest one before planting.
While planting vines, keep the lowest cane bud just above the soil line.
Remove all the roots that are damaged or too long.
Create a hole according to the length of the roots.
Plant the cane into a very wet slurry of planting soil and water to eliminate any air pockets.
Mulch the plants to keep the soil cool and moist, allowing the plant to thrive.
Keep the plants moist for the first year of growth, watering deeply once a month to encourage deep root growth.
Train the vines over structure to keep them out of the weeds and to give them plenty of air and sunlight.
Pruning the Grape Vines:
Pruning a grape is mandatory for keeping it bearing and healthy in the coming years. As mentioned earlier, grapes bear fruit on new growth, so if you do not prune the plant, it will not produce abundant fruit.
Spring or Feb to March is the best time to prune grape vines.
Spring season is a crucial stage in grape bearing because it enables them to produce abundant fruit.
The type of pruning that a grape plant needs will depend on its growth purpose; is it planted for fruit, decorative purposes, or raising a nursery.
Prune grapevines to 1-2 trunks and 2-4 cordons (woody branches) and bud-containing spurs (spurs produce fruit in the next season).
Note: Grapes produce flowers and fruit on the buds from the previous year’s growth. Therefore, pruning to encourage new growth is recommended, but never prune the plant intensely.
Protection and Prevention of Diseases and Insects Pests of Grapes
Some factors can promote disease in grape vines, including improper air circulation, weather conditions, poor sanitary conditions, winter damage, etc. All these factors affect the plant’s bearing capability for the coming season.
Insect Pests:
Japanese Beetles
Spotted Wing Drosophila: It preferably attacks strawberries and raspberries. Do not plant grapes and berries together in the garden, and keep the surrounding area of vines clean
Multicolored Asian Lady Beetles & Yellow Jackets: Attack on ripening grapes can damage the entire plant in no time.
Diseases:
Powdery Mildew: It’s a fatal disease for grapes and attacks all parts of the plant. It is a fungal disease and prevails due to poor air circulation between the plants, insufficient light penetration, humidity, etc.
Downy Mildew: It’s a fungal disease; first signs appear as small lesions on the surface of leaves that later turn brown and wither.
Fruit Rot: Common types of grape fruit rot includes botrytis bunch rot, black rot, Phomopsis, anthracnose, sour rot, etc. This disease attack is so severe that it damages the whole plant in wet and humid conditions.
Herbicide Damage:
Grape plants are susceptible to herbicides, especially 2-4D, and Dicamba. Home gardeners using these dangerous chemicals to control weeds must realize that even a little bit of these harmful chemicals floating through the air can be very harmful to your grape plants.
Conclusion
Planting grapes in your own home garden can be a gratifying endeavor. While it is certainly not the easiest plant to grow, and it will take you a good long time before you get what you might consider a bountiful harvest, there aren’t many plants as versatile as the grape. The fruit can be eaten fresh, dried into raisins, made into wines, jellies, and jams, and the vines can be used as decorations and to create wreaths. Besides all of these benefits, the grape vines themselves, with their climbing and hanging tendrils can be quite beautiful.
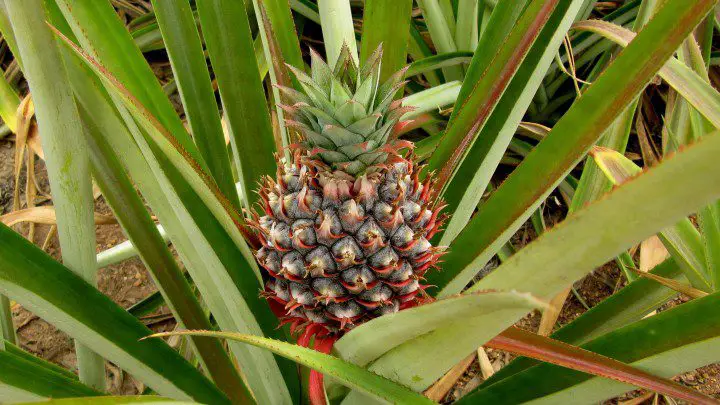
It is quite possible to grow your own pineapple plant at home. It is a bit easier if you live in a tropical climate, but it can be done almost anywhere, as long as you have a nice sunny, warm spot in your house where the plant can thrive.
Pineapple can be reliably grown outdoors in the USDA zones 11-12.
It requires 68 degrees F to 86 degrees F for healthy growth.
The best time to plant pineapple is late spring when the temperature stays consistently warm.
Winter frost is not tolerable for pineapple.
Pineapple requires at least 6 hours of indirect sunlight daily.
Pineapple should begin to produce fruit 2-3 years after being planted.
Materials required to grow Pineapple in Your Home Garden
Growing a pineapple in a home garden requires the following materials and tools:
One Fresh Pineapple – It all starts with a fresh pineapple. Choose a dark golden pineapple to ensure it is fully ripe. If you choose a green pineapple, it will take much longer to reproduce.
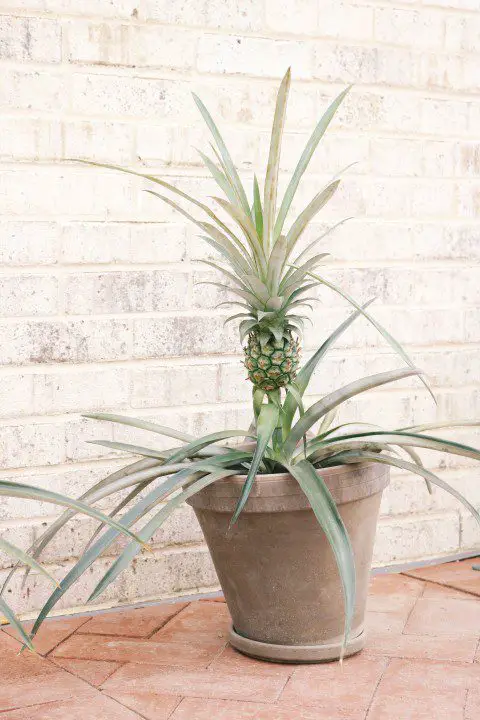
6-8 inch Pot – Pineapple should not be planted directly into your garden because it will be sensitive to frost and sunburn until it reaches maturity. Planting it in a pot will allow you to protect the young plant from harsh climatic conditions and insect attacks.
A Sharp Knife – A sharp knife is required to cut off the sword leaves of the pineapple fruit before soaking it in water.
A Glass Jar – A glass jar is required to soak the pineapple crown for rooting purposes.
Potting Soil Mix – Organic potting soil is an excellent choice for growing organic pineapple. It contains slow-releasing nutrients that support the growing plant throughout it’s potted life.
Obtain a Pineapple Crown
The easiest way to start a pineapple plant at home is by using a crown. The crown is the leafy top of the pineapple fruit that will be removed and used to grow a new plant. When selecting a crown, look for one that is fresh and has healthy, green leaves. It’s essential to leave a small amount of fruit flesh attached to the bottom of the crown, as this will be its food source and help it grow faster.
Plant the Crown
Once getting a healthy pineapple crown, the next step is to plant it. This can be done by placing the crown in a transparent water-filled jar. Make sure that the bottom of the crown is in the water and change the water every few days. The pineapple crown should start sprouting within 2-3 weeks.
Transplanting the Crown
Once the crown has developed enough roots (2-3 weeks), you can transplant it into the soil in your 6″-8″ pot. Make sure that the pot has good drainage and is filled with well-draining soil. Water the plant regularly, but do not over-water it, as pineapples are susceptible to root rot.
Ongoing Pineapple Care
Taking care of your pineapple plant is important to keep it growing. If you are a beginner in gardening in general, or are growing pineapple for the first time, here are some of the very useful tips for you to take care of your home-grown pineapple:
Watering: Pineapples need regular watering but do not overwater the plant. Overwatering can lead to root rot. You have to ensure that the soil remains consistently moist, but not wet
Fertilize: Pineapples are heavy feeders, so make sure to fertilize them regularly with a healthy and balanced organic fertilizer.
Protection from the cold: Pineapples are typically tropical and cannot tolerate winter frost or cold temperatures. If you live in a colder climate, you will need to shelter the plant in a sunny spot inside the house during the winter months.
Control pests and diseases: Pineapples can be prone to pests such as mealybugs and spider mites, as well as diseases such as root rot and pineapple wilt. Proper sanitation, ventilation, and feeding will eliminate half the disease or insect pest attack risk.
Harvesting Your Pineapple
Once your pineapple has grown to size and matured, simply hold on to the fruit of the pineapple or its spiked leaves above the fruit and snip the pineapple fruit away from the rest of the plant. Your pineapple will only usually bear one fruit, so you might want to save the top again so that you can start over.
FAQs:
Is it a good idea to grow pineapple in your home garden?
Pineapple (Ananas comosus) belongs to a flowering family (Bromeliads). It is commercially grown in the tropical regions of South and Central America, where the climate is quite favorable for its growth. Growing pineapple in a home garden is delicious and convenient, but it will take 3-4 years to yield fruit. If you live in a colder climate, you will need to keep the plant in a pot so that you can move it indoors when it gets cold.
How long it takes a pineapple to grow into a mature plant?
Growing pineapple can be time-consuming as it grows slowly and matures late. It is a 3-4 week deal, from soaking the crown to rooting. Then comes the transplantation stage. Pineapple is transplanted several times as it grows bigger and bigger. Once in a big enough pot and growing in favorable conditions, a pineapple plant reaches maturity in 3-4 years.
Do pineapple plants need full sunlight?
Yes. Warmer climatic conditions and bright sunlight are mandatory for proper pineapple growth and early maturity. It is one of the ideal plants to grow in home gardens as it requires little space, remains for 3-4 years in containers, and does not require much care for growth. Moreover, there is hardly a disease or insect pest known to be fatal for pineapple.
How many pineapples will grow from a single pineapple plant?
Pineapple is a herbaceous perennial plant that belongs to the family of succulents. It has sword-like leaves arising from the central stem in a spiral pattern. A single pineapple plant produces one pineapple fruit only.
If so, you should grow Papaya in your home garden because it’s literally a herculean task to grow Papaya at home.
If you are going to give it a shot, you should know all that you can before you start, so we will let you know what you need to do to understand how to grow Papaya in your home garden.
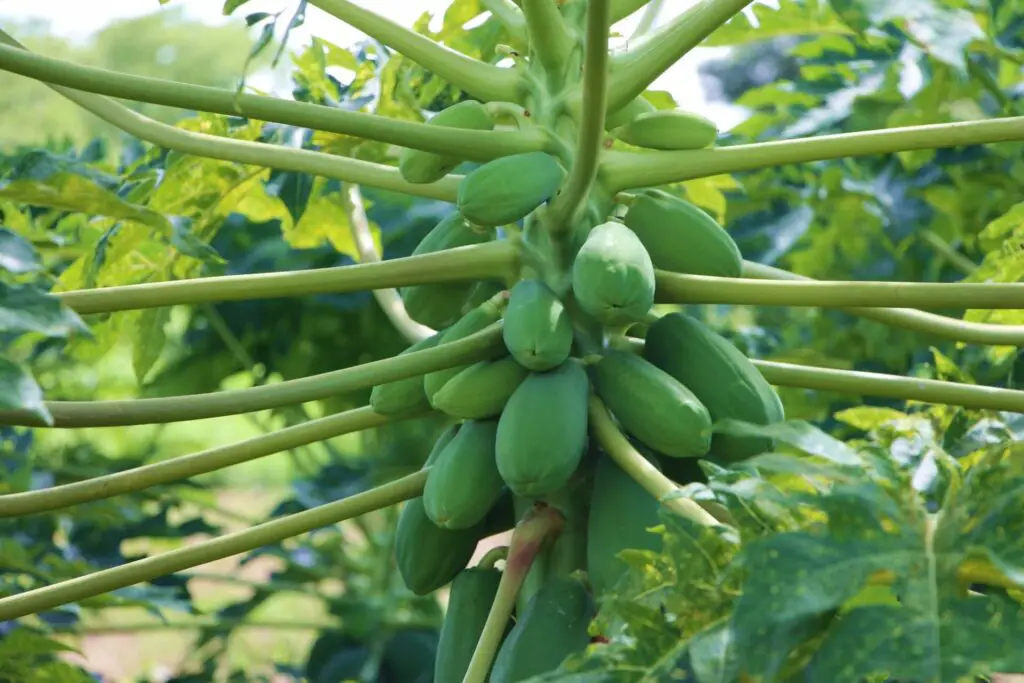
Papaya is grown from its black seeds, which take 1-2 weeks to sprout and reaches flowering maturity in 5-6 months.
One of the most important things about the Papaya plant is that it grows in similar conditions as required by Bananas.
In short, Papaya needs bright (direct sunlight), plenty of water, humidity, and fertilizers to grow happily!
Basic Requirements to Grow Papaya in Home Gardens | How to Grow Papaya Indoors
Carica papaya can be planted in containers as well as in soil, depending upon the space and location you have for this plant in your garden.
Following are the basic requirements that a papaya plant needs to grow and yield fruit.
Sunlight
Papayas are a fantastic summer patio plant for sunny locations.
For the best growth, place this plant in the brightest spot in the garden, as it requires 6-8 hours of direct sunlight per day. Rotate the plant occasionally to prevent leaning and help it grow straight and upwards in the pot.
Temperature
Papaya plants require temperatures up to 80 degrees Fahrenheit for sufficient growth. If you decide to retain the plant during the winter, try to maintain a warm, humid environment; this plant will not thrive in droughts.
Papaya in pots are frequently planted on patios in warm areas. However, any temperature below 65 degrees Fahrenheit will make them unresponsive.
Water Requirements
You can grow Papaya only if you have enough water to give this plant because it needs prodigious water to grow properly. Try to water the plant every 3 to 4 days as it grows. You should water it thoroughly, but never let the soil become saturated.
Fertilizers
It’s a food-loving plant! Give your papaya plant plenty of food. The papaya plant grows very quickly and requires fertilizers to maintain that growth, so give it a balanced fertilizer weekly.
Pruning and maintenance
Papaya plants cultivated indoors may quickly reach the ceiling in a handful of months due to their rapid growth. They are frequently cut off at the top to keep them in check because of their rapid growth habit. Trim the main stem to a height of a few feet.
In the initial growth years of Papaya, several new shoots emerge from the plant’s root system. You should choose the best shoot when it reaches a height of one to two feet and cut off the others, including the core stem.
à Give the plant a severe pruning before bringing it inside for the cooler months if you moved it outside for the summer.
How to Grow Papaya in Garden Soil?
The process of growing Papaya from the seeds is the same as we use to grow other fruit plants.
Here are the steps:
Take out the seeds from fresh, healthy papaya fruit and remove the pulp properly. Dip the seeds in water for a few minutes. Those seeds that will settle down at the bottom are worth growing and will germinate.
Prepare the potting mix in a small container and put all seeds at a regular distance in it. Water the pot and wait for the seeds to germinate
Transplant the seedling at the 4-5 leaves stage into a big container. Keep one seedling in 1 container.
Keep the container in a sunny spot and water the plant daily at the start, then with the 1-day gap.
If you find any insect pest attack, it is better to spread neem cakes on the soil. It is an effective way to control pest attacks.
Fertilize the plant regularly. If you have to add home-grown compost, the best time is the end of January or the beginning of February.
How to Grow Papaya in Containers?
Papaya can also be grown in containers if you do not have enough or proper space for it in the garden. Let’s see how!
Care instructions for Papaya
To be grown in a container means the plant will have limited space and will need more care to be kept alive and happy. On the other hand, container-grown Papaya is convenient to maintain because it will be easier to protect it from cold weather by moving it in and out of the house.
Container Size Required:
Start with a 15-20-gallon container with a diameter of at least 18 inches because Papaya may grow vigorously in the beginning. An excellent choice is a big pot made from an old barrel or sizable bucket.
Adequate Drainage:
Drainage is how excessive water moves out of the container or root zone, and it is one of the critical factors for plants to grow and remain alive.
Adequate drainage prevents the plant’s roots from rotting and drains out the excess water to ensure that the roots do not have standing water.
Potting Material:
Use a spongy, well-drained, extremely rich-in-nutrient potting mix when growing the papaya plant indoors. If the potting soil is overly thick and has poor drainage, root rotting issues will occur.
Potting & Repotting the Papaya:
One repotting (from a small-sized pot to a bigger container) is mandatory for papaya plants grown from seeds.
For the Gardeners living in the USDA Zone 9, their Papaya is a one-season novelty plant. Cut back the Papaya to the soil level at the end of the season to allow the other shoots to fill in.
Preventive Measures for Papaya Plant:
In Summer, the papaya plant requires heat, and humidity means asking for shifting them outdoors!
It gains a lot of weight, although it seems like a lightweight young plant. So be careful while moving it indoors or outdoors.
When the day temperatures start exceeding 70 degrees Fahrenheit is the correct time to bring the Papaya outdoors.
Select a humid and sunny (65-70 degrees Fahrenheit) spot for it to pass over the winters
Note: if you do not have a humid, sunny spot for Papaya inside, you should insulate its base with bubble wrap or aluminum foil.
FAQs
Q: What are the common Papaya pests?
Some of the typical indoor papaya plant pests are:
Aphids
Mealybugs
Mites
Note: The chances of attack of the above pests will be minimum if the papaya plant is given adequate drainage, fertilizer, humidity, and heat.
Q: How to grow Papaya from seed?
A papaya plant grows rapidly even when grown from the seeds taken from the papaya fruit sold in supermarkets.
To grow Papaya from seed, scoop the papaya seeds out, spread them out on a single piece of paper towel, and let them air dry for a week to prepare them.
Next is to roll the seeds to remove the dried husks covering them, then store them in a cold and dry place.
Place papaya seeds in seed-starting soil and keep them warm, wet, and dry to support sprouting (the most favorable temperature for the highest germination rate lies between 75 to 80 degrees Fahrenheit).
At this temperature, seeds germinate faster. Transplant the seedlings into larger containers when they are a few inches tall to let them develop into mature papaya plants.
Q: How and when to harvest papaya plants?
Generally, a papaya plant grown from seeds taken from a grocery store does not flower and yield fruits.
However, if you have raised it from an authentic fruit-yielding variety and given it adequate humidity and heat, it will surely yield fruit in 6-12 months.
The right time to harvest a papaya fruit from the tree is when it turns yellow completely. You can store it in the refrigerator for 2-3 days.
If you’re looking to add a little style and functionality to your garden, hardscape ideas can help. Designing and building any outdoor living area can be a long and tedious process, especially when it involves refreshing the hardscape.
But don’t let this discourage you; with the right design inspiration, patience, and hard work, you can put together a stunning DIY hardscape that looks great and performs even better.
If you are a homeowner, you will find that a do-it-yourself hardscape will be much more affordable than hiring a contractor to build it for you. Doing your hardscaping yourself is a great way to get exactly what you want because you can make it as simple or elaborate as you wish!
Here are some DIY hardscape ideas for effective landscape beautification.
DIY Hardscape for the Yard
It is possible to unleash your DIY creativity when hardscaping many parts of your landscape, including the patio dining setup, edging, planters, fireplace, pathways, and staircases. Hardscapes certainly don’t need to be boring and done properly; they can be beautiful and long-lasting.
A well-installed hardscape can last many lifetimes, depending on the materials used.
Keep these guidelines in mind whenever considering a DIY hardscape project:
DIY Project
Consider your budget – you don’t want to get halfway through your project only to realize that you don’t have the funds to finish.
Always assume that it will take longer, cost more and be more difficult than what you anticipate. It is human nature to optimistically view projects going smoothly, and we tend to quickly think through aspects that end up taking days or weeks. Even as a long-time contractor, I still find myself underestimating time and materials.
Take a good hard look at your skillset and mindset – some people are detailed and specific while others are more rough and quick. Make sure that your project suits your skill and commitment. Or find some friends with the skills needed to help out.
When contemplating laying a flat masonry surface, realize that laying the stone is the easy part. Prepping the base is the majority of the work, and the quality of your base prep will determine the quality of your finished product.
Don’t be afraid to hire some help. Getting help with some of the heavy labor can make for a higher quality project, because it allows you to pay more attention to the details of the project rather than how exhausted you are. Hiring a couple of laborers will still save you big bucks over hiring a contractor.
On a similar note, take some time checking out your local tool rental yard to see if spending a few hundred dollars on equipment might save you days of work and sore muscles.
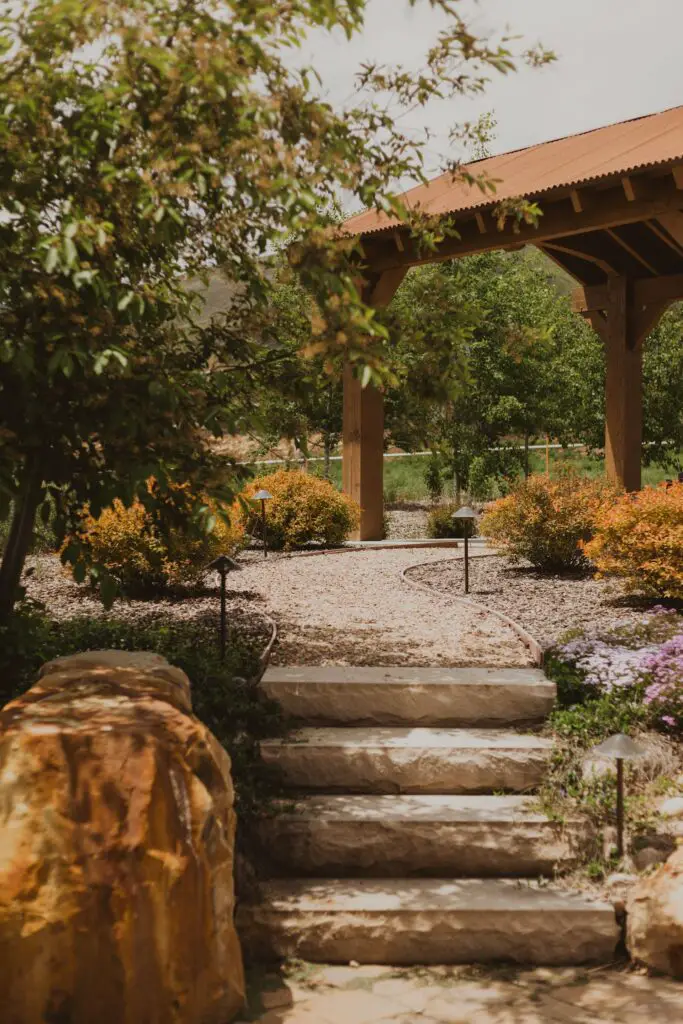
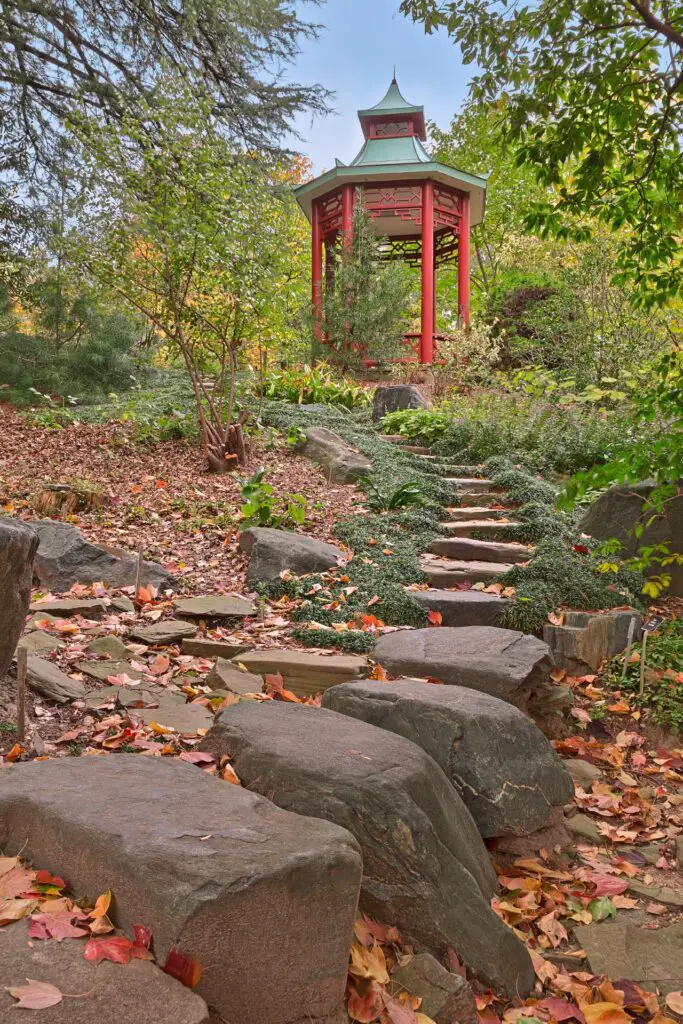
Stylish Outdoor Steps
Stylish outdoor steps
When considering hardscape design, you must always consider the elements that guide people into and out of spaces. A shining example of that is the staircase.
Outdoor steps can be created using pre-cut stone slabs, concrete, flat-placed landscape boulders, wooden timbers, dimensional lumber, or almost any other materials. The key to long-lasting steps is always a firm and solid base. Start at the bottom and work your way up to the top, keeping in mind that all of the steps should be the same height, or they will be uncomfortable to walk, and everything should be level.
Boulder steps
Your stairs can be as ornamental or rudimentary as your budget and skill set will allow.
Hardscape Classic: Backyard Alfresco Dining
Backyard dining
There are plenty of ways to create a beautiful backyard outdoor dining experience without hiring an expensive landscaper.
To have a comfortable eating area outside the home, you really only need a nice, flat, and stable surface. A nicely compacted gravel patio will do just fine, but a nice solid surface masonry patio will be the ultimate long-lasting hardscape dining area.
Of course, building a wooden deck is also a very popular DIY option for dining outdoors.
Whenever considering the installation of a patio or deck, realize that a nicely compacted patio of crushed gravel might take 1/8 of the time to install that it might take for a nice deck or masonry patio.
If you want your patio to feel like an extension of your living space—and not just some subtle patch of grass with a few chairs set out—you’ll want to consider adding some crafty hardscaping.
You can have a beautiful patio that defines a section of your land as an outdoor living room or dining room. And the outdoor dining area has always been about the furniture in backyard hardscape styling. Several ideas for finishing your DIY outdoor dining area include repainting or repurposing an old table and chairs or building some furniture out of harvested or salvaged wood.
Rustic Outdoor Design for the Yard
rustic outdoor design
A rustic outdoor design can be the perfect way to make your yard more inviting and cozy. It’s a straightforward yet powerful way to add a layer of nature to your home without going all-out on an elaborate landscaping project.
If you’re looking for a simple way to add some rustic charm to your yard, here are some ideas:
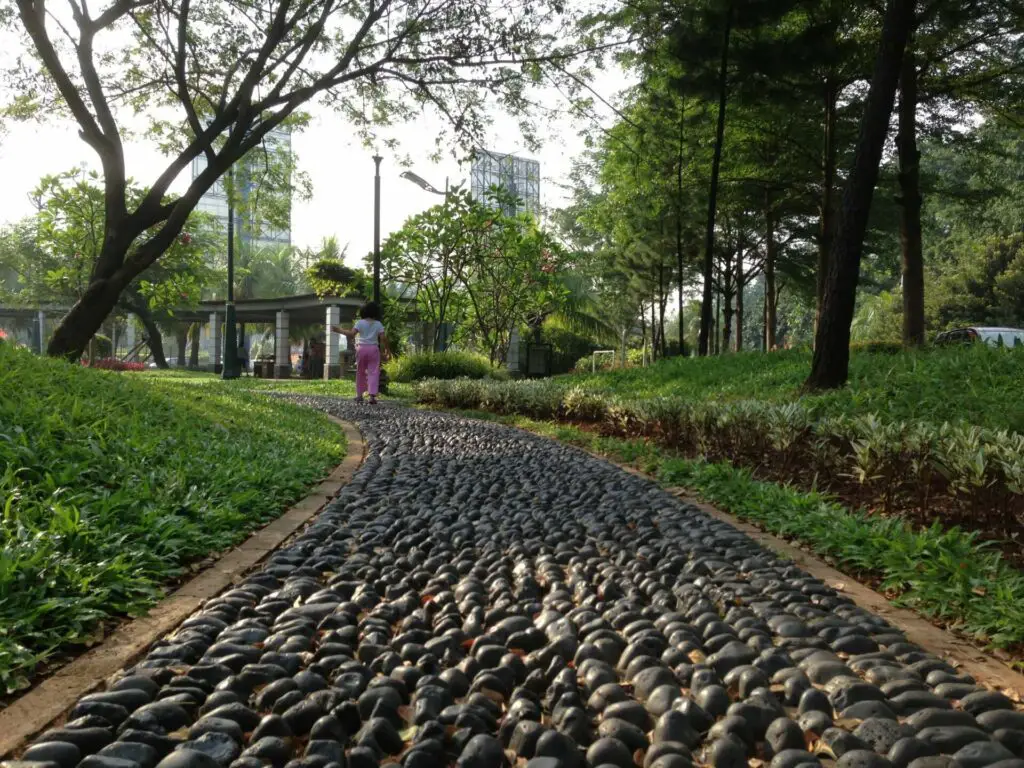
Create a rustic pathway with stones and cobblestones.
Add some rustic fencing – Cedar fencing is a great choice for adding texture and color to your yard. It comes in many different shapes, sizes, and textures, so it’s easy to find something that matches your needs. The wood has natural oils that help keep it looking good for years without maintenance!
Install wooden benches and planters that match the color of your home’s exterior.
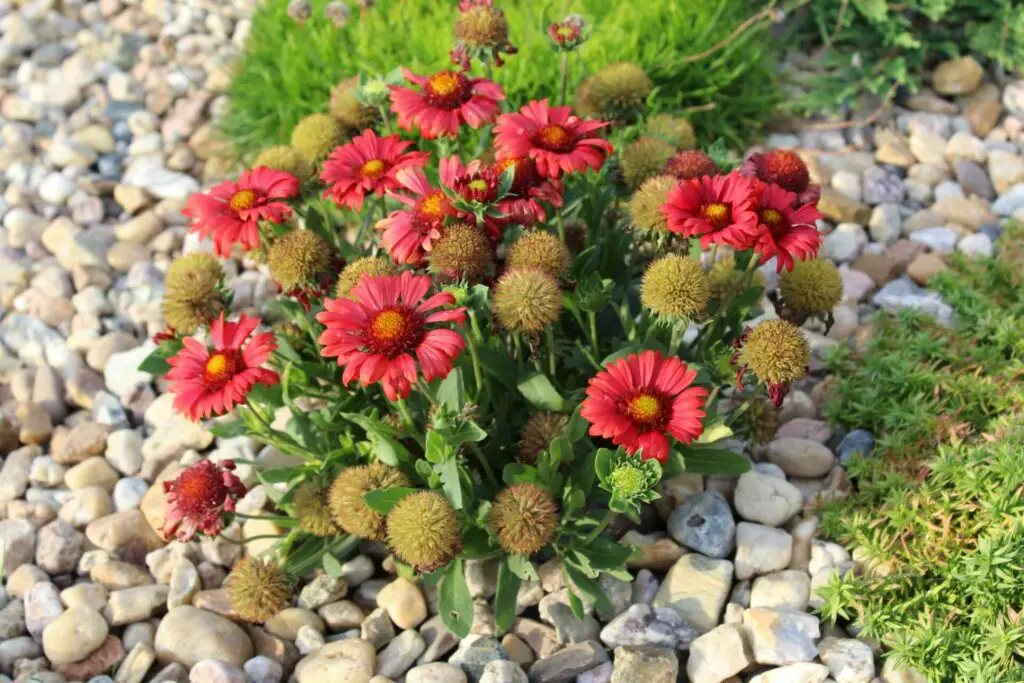
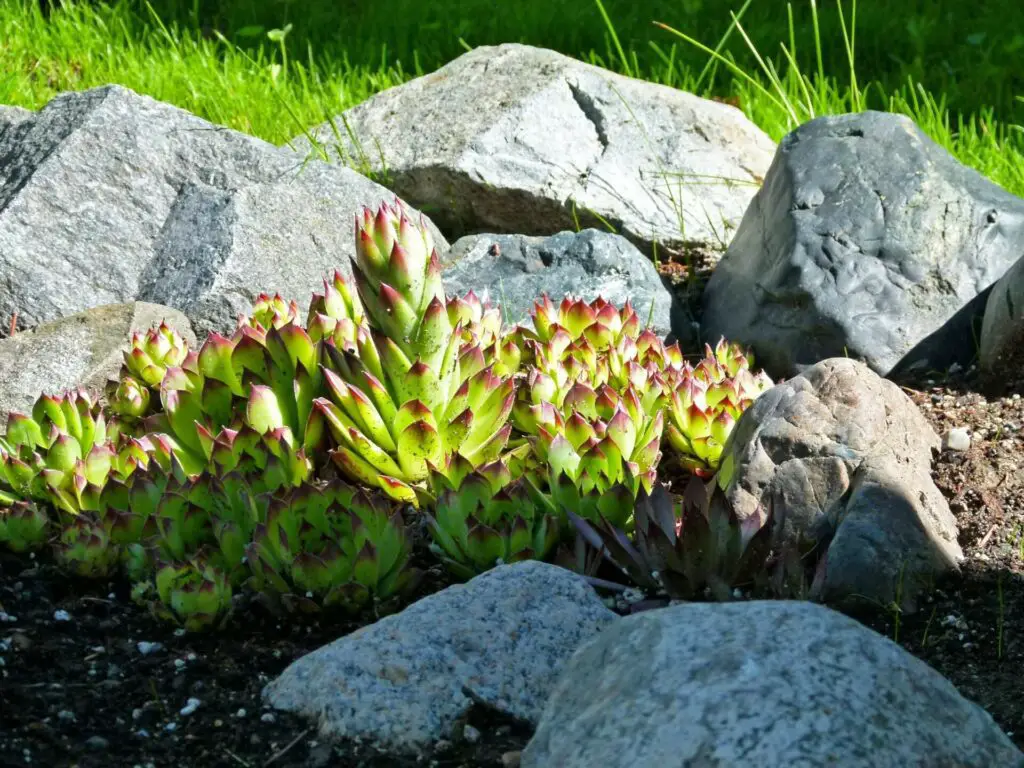
Beds of Rocks
rocks in a bed
Rock beds are a great DIY hardscape idea! River rocks or any small rocks are a natural and durable material that you can use in many ways.
It is easy to find, and it is also fairly inexpensive. You can use rocks for a wide variety of projects around your home, and they’re one of the most beautiful ways to add texture and dimension to an outdoor space.
You might want to consider laying landscape fabric below the rocks to minimize weeding for the first few years.
Consider that while the rocks are relatively easy to lay and only need a little prep work, they are not great for walking on unless you use very small rocks in the two-inch range.
Beds of rock can be used as a mulch below plantings to control water flow through your yard, or you can use varying types and colors to create distinct patterns in your landscape design.
Borders of Rock
rock bed border
Rock of varying size, shape, and color can be used as bed and walkway or driveway edging.
These are very easy to install and can give you a pretty and long-lasting border wherever you need one.
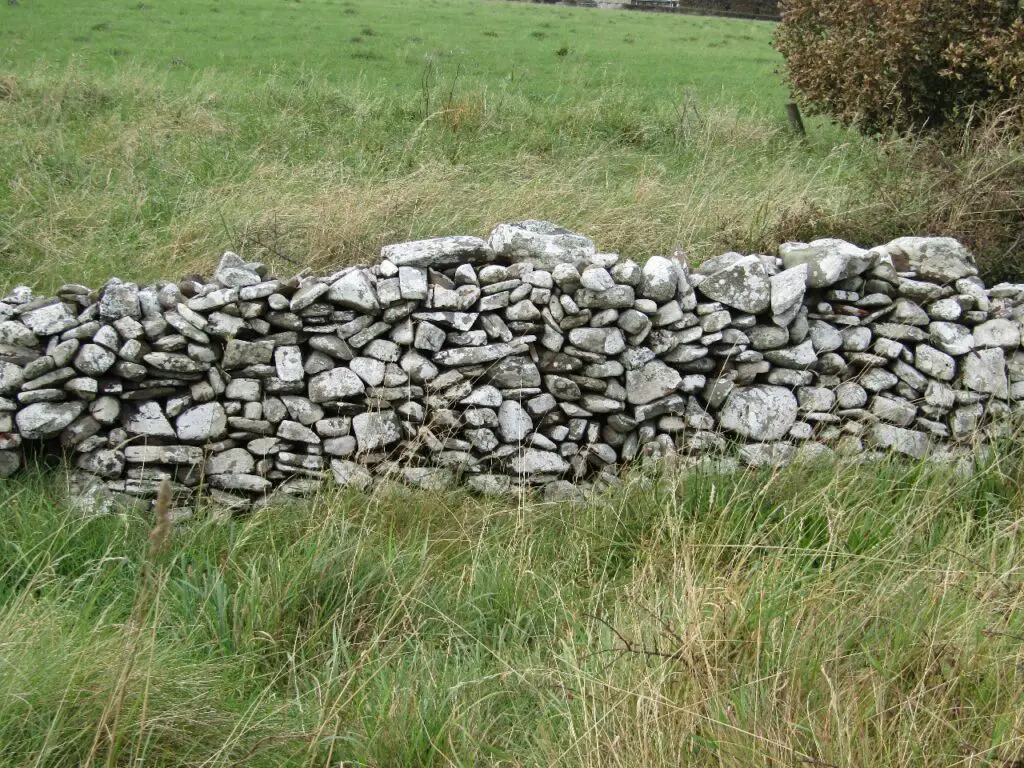
Rock Walls
stacked rock wall
Rock walls can be created to be freestanding or up against the earth as a retaining wall. Always remember that larger rocks must always be used on the bottom, with the rocks decreasing in size as the wall gets taller.
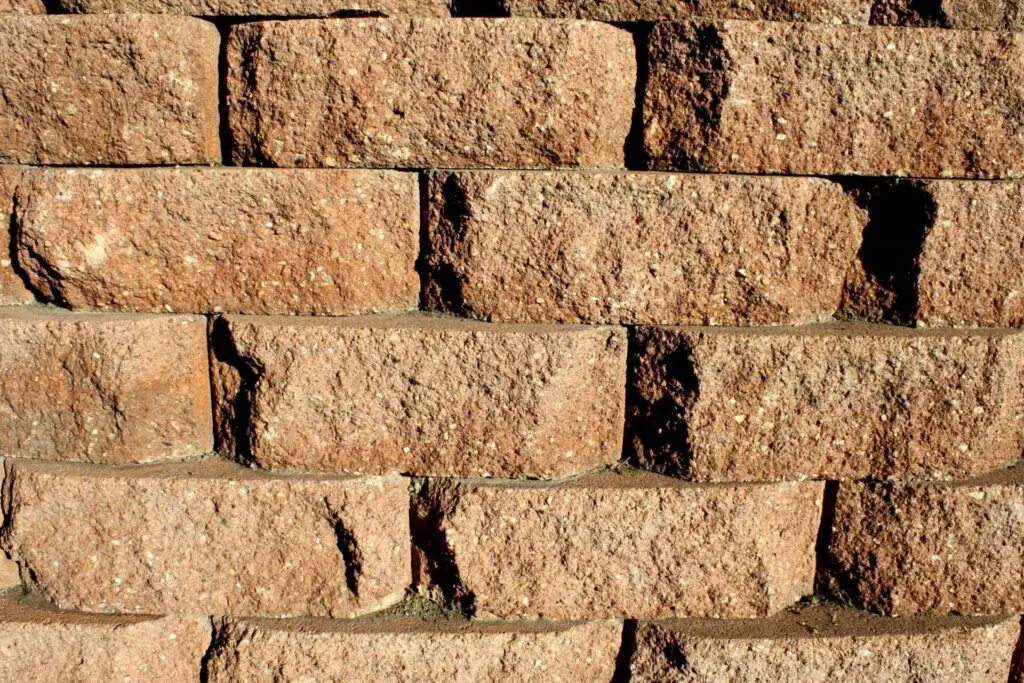
Concrete Block Walls
Decorative concrete block wall
Whether decorative or just plain concrete, stacked concrete block walls are straightforward to install and very long-lasting.
Once again, the base prep is the most crucial part. If you can excavate the loose soil and compact a 12-inch base of crushed stone, you can create a concrete block wall.
Once your base is solid and perfectly level, the rest is easy, just like stacking Legos. Be sure to add drain tile and washed stone behind your wall to be sure that you are not trapping water behind the wall.
Almost all of the failed stacked block walls you have seen are due to improper drainage. Water is a powerful force.
Concrete blocks are a great way to create separation areas and seating also.
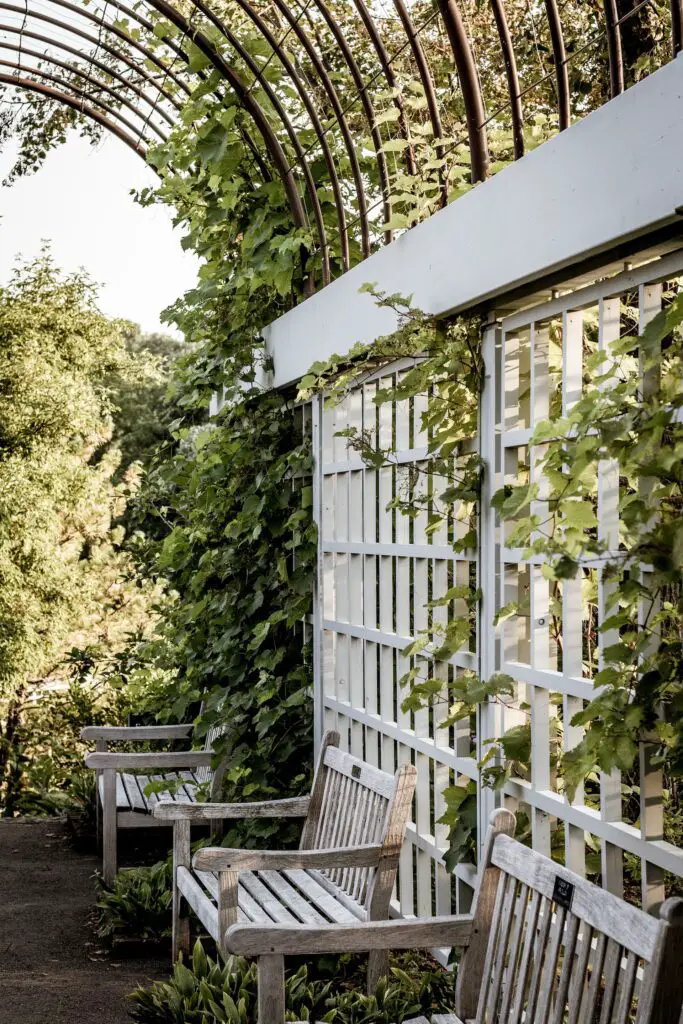
DIY Trellis Panels for Support & Privacy
Trellis
A trellis panel (or even just a single trellis!) can give a sense of dimension to your area while also beautifying it. So, f you’re looking for ways to add privacy and support to your outdoor landscape, look no further than DIY trellis panels.
The height of the trellis is a great way to give your garden some structure while still providing the privacy it needs. Trellis panels are also easy to install, meaning you can quickly create an attractive garden feature without needing professional help.
Trellis panels are usually made of wood and can be found at any home improvement store. They have a lattice design and are perfect for plants that always need support, such as climbing vegetables. You can also DIY them to turn them into a color you like.
Exterior Stone Pathway
rock walkway
Mixing and matching colors, sizes, materials, and textures to an outdoor path is one way to build a very economical dry-laid pathway.
Collect whatever small and flat rock materials you can, and then use your creativity to install them in such a way as to create a beautiful pattern and a solid walking surface.
Salvage small rock, flagstone, slate, concrete blocks, and gravel can all be used to create an interesting walkway.
A DIY stone pathway is an excellent way to add an elegant touch to the exterior of your home. If you can keep the walkway to only a few types of rock and install them in a uniform pattern, it will make it look more planned out and professional, but if unique and creative is your style, go ahead, live it up.
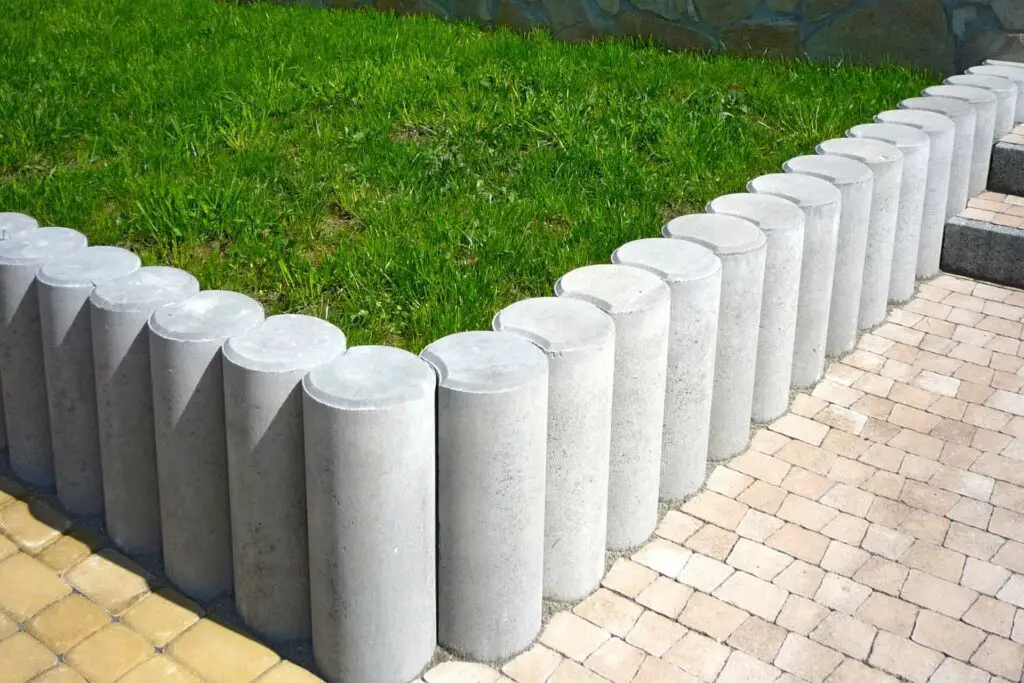
Brick or Concrete Edging
Concrete lawn edging
Edging is an essential part of creating a hardscape. It helps provide a clean, uniform look to your yard and also helps keep your landscaping in place, and prevents erosion.
Edging is a significant part of your landscape. You could have plastic or metal pound in edging, you could choose a naturally cut bed edge, or you could create edges using poured concrete or clay or concrete bricks or blocks.
Once again, this can be as easy or complex as you would like to make it. You can rent elaborate concrete edge laying machines and create a beautifully flowing concrete curbing wherever you would like it, or you could collect a bunch of old brick and block and just cut them into the ground.
Check out Craigslist, and you will find a good selection of people trying to get rid of old heavy things like rock, bricks, and blocks, so the material is readily available.
Whatever you choose, edging provides an important function and creates structure in your landscape design.
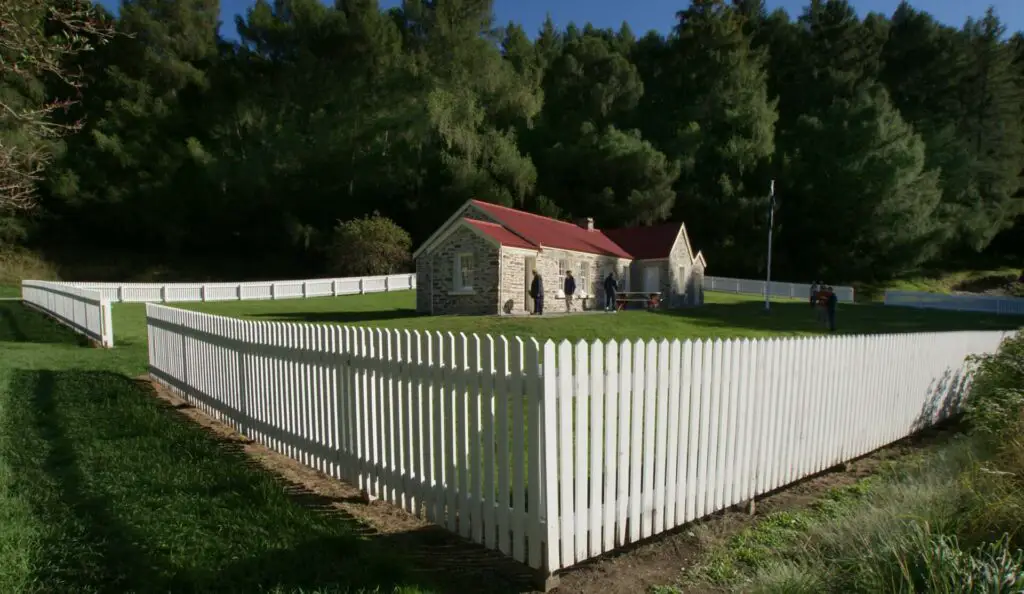
Fencing
Picket fence
Fencing can be used to decorate, delineate, or keep things in or out of areas.
Fencing can be beautiful or functional, or both.
There are many fence varieties, and once again, this project can be whatever you choose to make of it.
Some of the most simple fences are made from stacked or intertwined branches or split rails; others are built out of flat wooden planks or delicate and decoratively carved pickets.
You can create a steel fence with sturdy posts and rails or buy and install a chain link fence with barbed wire on top for the ultimate security statement. Again, your project, do it your way.
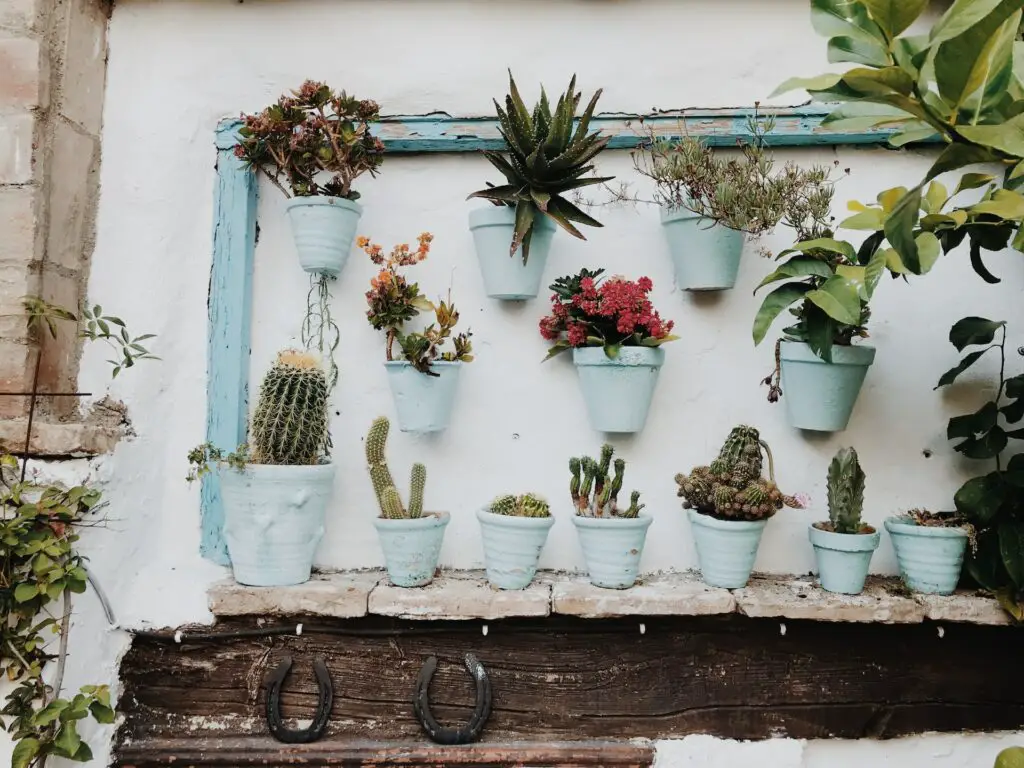
DIY Yard Pots
Yard pots
This one is an outstanding idea for those gardeners who only have a little space but want to grow their plants. Vegetables, herbs, and flowers in pots do not have to be absent from a hardscape structure in your landscape.
A stylish DIY plant container for your yard is a simple do-it-yourself task. You can go and buy pots or planters and place them in an aesthetically pleasing way, or you can repurpose any container for your plants.
Fireplace for the Outdoor Hardscape
outdoor fireplace
Who doesn’t like a warm, cozy fire on a cool evening?
s long as you create a fireproof and safe situation, you can have a fireplace or fire area at your home.
Keep in mind that some areas restict burning or open fires of any kind, so check your local regulations and plan your build accordingly.
A fire pit is usually more of an open or grated area for a fire, either in some sort of metal or masonry structure or can just be a pit in the ground lined with rock or brick.
A fireplace is typically more of an upright structure with a firebox and chimney.
Either of these can be a DIY project, with store-bought fire pits or complete masonry block fireplace kits. Either way, choose your project based on what you think you can complete, and remember that fire can be very dangerous. Make sure that you are protecting nearby structures, plants, etc., from the flames.
Keep in mind that what works on a calm night will be very different if the wind picks up. It doesn’t take long for a small fire to become deadly, so always have water or fire extinguishers handy.
You can use your fireplace as a focal point or anchor for other features like benches or stone walls.
A genuinely good outdoor fireplace offers your yard the sensation of a comfortable retreat. Hardscapes like this elevate the look of your living space by establishing outside zones for leisure and recreational activities.
The opportunity to use the outdoor fireplace in your property for social events well into the fall nights is a pleasant part of including it in your DIY outdoor hardscape plan.
Conclusion
By doing your hardscape project yourself, you will have the opportunity to create exactly what you want, at your budget, at your pace and you will have a great sense of satisfaction once it is done and you get the chance to stand back and admire your work.
The Italian Cypress tree is grown as a specimen and landscape tree. It is primarily used for privacy purposes and, due to it being a tall and thin tree, can make a dramatic statement in the landscape. By planting this classy-looking tree in appropriate areas and minding its care, you can have a fine-looking landscape.
Italian Cypress is an excellent addition to any home, so here are some tips on landscaping Italian Cypress trees.
Italian Cypress Tree in Landscaping
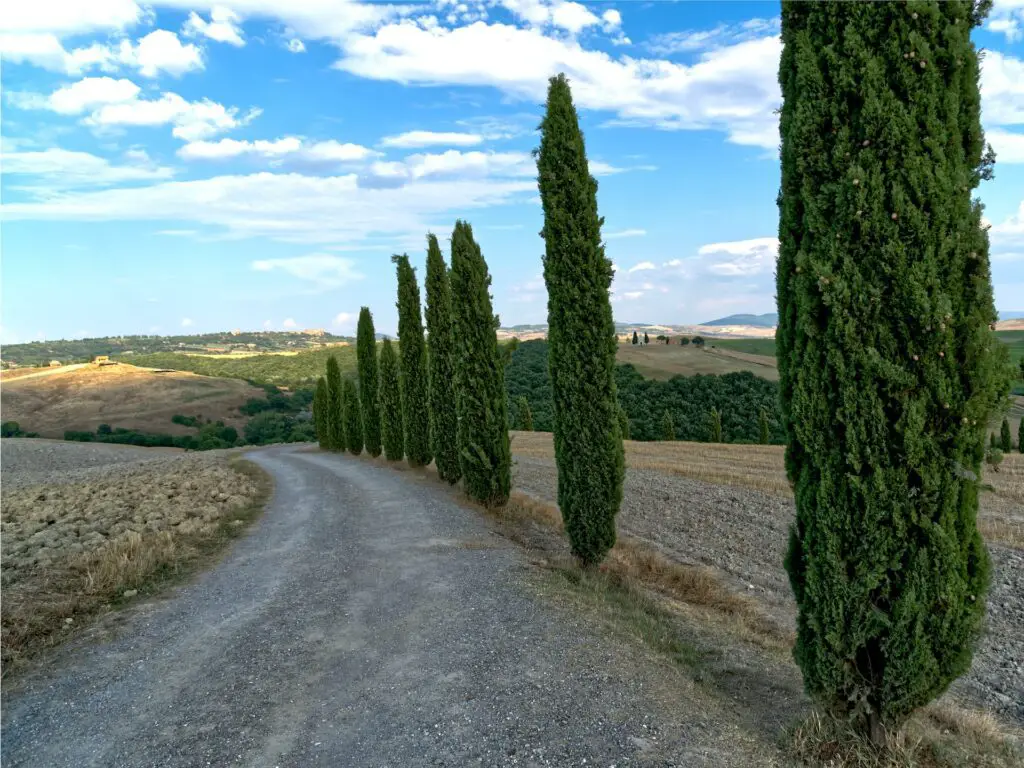
Italian cypress in the landscape
Italian Cypress (Cupressaceae sempervirens) are towering columnar trees. They are also called Tuscan Cypresses or Mediterranean Cypress and seem to belong in a classic Italian picture. These trees are evergreens native to Europe and Asia, but they are linked to Italy due to their prominent usage in landscaping. They are hardy in USDA zones 7–11.
They can grow up to 115 feet, but it’s quite common to see 50-foot trees almost anywhere. And its small width will not expand further than 4-5 feet, which, compared to its height, is a dramatic difference.
The tree’s exceedingly tall and compact structure enables it to fit in small areas, provide a lovely privacy screen, or be placed at a short distance from a house. It’s rare to see trees with the same opulent vibe as the Italian Cypress! This beautiful evergreen tree increases the value of your residence by giving aesthetic appeal, thus improving the appearance of your landscape.
How to Landscape with Italian Cypress
landscape with Italian Cypress
Italian cypress trees are perfect for bringing elegance to your garden. Even if you place one or a dozen of these slender evergreens, the effect is spectacular and will always look amazing. Italian cypresses are ideal for framing the entry to your driveway or house, lining a lengthy path, or separating two houses.
Moreover, if you want to put it as close as possible to your house, three feet from the house would be a minimum distance. Nevertheless, it would be best to leave adequate space between the house and the maximum diameter of the tree for optimal airflow.
Italian Cypress trees need approximately three feet of distance from each other in landscaping to form an effective and stunning barrier or privacy screen. On the other hand, you can space them about five to six feet if you wish to use individual trees for accent or a very classy effect. This tree will thrive in a huge container, but it will outgrow it over time.
Italian Cypress Trees for the Entryway
The Italian Cypress is a perfect choice for any entryway or front yard, as it features a tall, narrow shape that creates a beautiful silhouette against the sky. Columnar trees like this add a lovely pattern to the meandering stone entrance path, which leads to a fountain area. A relaxing combination of green and white flora would keep any space lush and calm.
Italian Cypress Against Clipped Holly Plants
Clipped holly plants add a rustic feel to the overall landscape design, but for something like an Italian feel, you can place Italian Cypress in three-piece groups on either side of neatly pruned holly bushes. By doing this, you can create a sensation of space and light for your landscape, creating a brighter area for your choice of flowering plants.
Italian Cypress Trees for the Poolside
If you want your pool landscape to have an extraordinary Mediterranean vibe, you can use the help of Italian Cypress trees for a great swimming refuge. Pot-planted Italian Cypress can offer visual intrigue. And if you mix in some neatly manicured boxwood bushes, they combine to make a beautiful but unified statement.
A Venetian-style residence
Italian Cypress trees can complement any beautiful Venetian-style property. These tall trees will add a great deal of height against the smaller bushes, brick or concrete structures, and brick pavers that lend color and texture to the landscaping. Altogether, these landscape elements will exude grandeur.
French Country Home
The French country home is an elegant and timeless style that has been popular in Europe for centuries. If you want to achieve that look, Italian Cypress and low-growing plants can frame the primary entryway of any French country-style home.
How to Maintain Italian Cypress Trees
Maintaining Italian cypress
The first step to landscaping with Italian Cypress is choosing the right location for the tree. Always remember that Italian cypress trees like direct sunlight but can take a little shade and that planting Italian cypress trees in the fall is a wise move. It’s best to make holes 3 to 5 times the diameter of the plant pots or root spheres to begin cultivating Italian Cypress.
Keep in mind that an Italian cypress in a container will not grow to the size of a tree established directly on land. Most importantly, when appropriately planted, Italian Cypress trees grow quickly and require little maintenance—they can grow in almost all soil types as long as it drains well.
Cypress trees require a lot of water when you first plant them, so you must thoroughly water them immediately after planting. Then include irrigation into your regular care regimen. Do not allow your young trees to dry out during the first few months of their life. And while Italian Cypress is hardy against heat and drought once planted, heavy irrigation every week during dry seasons will promote its growth and health.
You can add a couple of inches of mulch a few inches from the trunk of your Italian Cypress tree to support its water retention, root protection, and weed prevention.
Once a year in springtime, it would be best to use a suitable slow-release fertilizer to ensure your Italian cypress tree gets its proper nourishment.
To end this article, here’s a fun fact about Italian Cypress. Italian Cypress is a beautiful addition to any garden, but it has many uses other than being just another beautiful specimen of nature. The rot-resistant wood of the Italian Cypress tree is used to make furniture and other products like coffins, fence posts, musical instruments, and boats.
Do you love nature? Do you love the sweet and tangy taste of cherries?
If yes, then you must witness the beauty of a Cheery tree; it’s marvelous!
Not only that, you will get delicious and nutritious cherries at the end of the season. In addition, it is not challenging to grow a cherry tree in the home garden.
Being a cherry lover and a trained horticulturist, I would love to share with you complete guidance on how to grow a cherry tree in a home garden.
Let’s start by choosing the right cherry variety.
Cherry Variety Selection
Whatever variety of the cherry tree you select, it will take almost 3-4 years to reach a stage of being able to produce healthy edible fruits. Once it reaches maturity, a standard-size cherry tree will give you 30-50 quarts of delicious cherries annually, while a dwarf tree will be capable of producing 10-15 quarts.
The best time to plant a cherry tree is in spring or late fall when the soil has sufficient moisture, the soil is porous due to proper air circulation, and the weather is favorable to support tiny young seedlings.
Sweet Cherries
Early – Black Tartarian
Late – Stella
Midseason – Bing
This type of cherry is mainly seen in marketplaces to be consumed as fresh. It has a thick, rich, and somewhat plum-like texture and taste.
Sweet cherries are self-sterile and must be cross-pollinated; you’ll need several trees to get a good amount of fruit. Moreover, they thrive best in hardiness zones 5 to 7, where they grow best in an orchard or a sizable garden.
Sour Cherries
Early – Early Richmond
Late – Meteor
Midseason – Montmorency
Sour cherries cannot be consumed raw; therefore, they are used in preserves and other cooking purposes. If you have limited space in your home garden, consider planting the dwarf, self-pollinating cultivar Stella.
All sour cherries are self-fertile, substantially smaller than sweet cherries, and thrive best in zones 4 through 6.
How to Care For Your Cherry Tree
Cherry trees should not be planted close to larger trees or structures that will shade them; instead, choose a sunny location with sufficient air circulation.
Cherry trees should receive at least 6 hours of direct sunlight each day. In addition, deep, well-drained soil with a pH between 6.0 and 7.0 is ideal.
For the tall cherry tree variety, the plant-to-plant distance should be kept at 35-40 ft.; for a dwarf one, the distance will be 8-10 ft.
The favorable time for planting a cherry tree is early spring or late fall when the soil is relatively soft and has higher moisture content.
How to Plant Cherry Trees in Home Garden?
When planting the cherry tree with standard rootstock, the graft union should be a few inches below the soil’s surface.
On the other hand, when planting a tree on dwarf rootstock, the graft union should be placed a few inches above the soil line. Note: It will stop the graft from developing its roots and bypassing the rootstock’s roots.
Provide appropriate support when planting fan-trained trees. A distance of 12 to 15 feet plant to plant distance will be enough for them.
When planting bare-root trees, it is important to evenly distribute the roots down and away to avoid their bending.
You can place the rootstock on a small mound of earth in the center of the planting hole and add soil to fill the hole.
For container-grown transplant of the seedling or plants, take out the root ball first, then tip the tree over and remove the encircled or pot-bound roots using sharp shears.
Growing the Cherry Tree
Cherries (sweet and sour both) require the same level of attention, irrespective of their different growing habits.
Apply mulch to keep moisture in place and to give the plant a neutral and organic food source
Netting the young seedlings will keep the birds away from the fruit.
Water the newly planted cherry tree regularly, especially in dry regions.
Cherry trees don’t require fruit thinning because the tree naturally sheds unnecessary and unhealthy fruit in the first few weeks of summer.
To promote the development of new fruiting wood, it is important to prune the cherry tree each year in the late winter. But avoid pruning in the autumn.
A low-nitrogen dose (5-10-10) is best to be given to a cherry tree at the time of blooming or just before the tree is getting ready to bloom
Stop fertilizing the tree after mid-summer to let the new growth harden off before the fall and winter.
Harvesting Cherry Fruit
Fruits should only be picked when they are one of the three colors (dark red, black, or yellow).
Because the sugar content increases in the few days before full ripeness, you must be prepared to harvest at any time during this last week. They can be consumed fresh or cooked.
If you want to freeze the fruit, the right time to harvest the fruit would be when it is firm, i.e., a little earlier than fully ripened.
Harvest it along with the cherry stem to avoid damaging the cherry fruit.
On the other hand, avoid cutting the spur because it will bear fruit the following year.
Hand-picking could harm the shoots and spread infection; therefore, use sharp scissors to cut the stalks.
Keep in mind that cherry trees typically start producing fruit in their fourth year. After that, they ought to produce 30 to 50 quarts of cherries annually.
Pests and Diseases of Cherry Tree
A trained and responsible farmer knows that a plant grown in healthier conditions can better resist pest attacks. On the other hand, a plant suffering from malnutrition or environmental stresses will be more susceptible to disease and pest attacks.
Following are the common cherry tree diseases and insect pests:
Birds
Black Knot
Brown Rot
Bacterial Canker (timely removal of the diseased branches can prevent the spread of bacterial canker disease)
Caterpillars
Aphids
Japanese beetles
FAQs:
Can I grow a cherry tree close to my house?
A cherry tree requires 6-7 hours o direct sunlight, 2-6 ft. space to grow properly, and annual trimming to shape the spreading limbs. If you can provide all these mandatory things for the cherry tree next to our house,
go for it.
Why do I need two cherry trees to get fruit?
Cherry is a dioicous plant meaning that the male and female parts of the plants are found on separate trees, and the plant is self-sterile; a male plant alone or a female alone cannot bear fruit until both are planted side by side.
Is it difficult to grow a cherry tree in your home garden?
Cherry plants require a few environmental conditions for their development and fruiting:
good air circulation
well-drained soil with a sufficient amount of moisture and organic matter
annual fertilization
6-7 hours of direct sunlight daily.
How to know the age of the cherry tree?
A cherry tree’s appearance, growing habit, and height can show its age in case you forget when you planted it. For example, a 4-year-old cherry plant will have 3-3.5ft. height, will not bear fruit, etc., while a 6-7-year-old cherry tree will have 6-7 ft. height and will produce a nice amount of cherries.
Generally, people grow seasonal fruit trees in home gardens and do not prefer growing stone fruit trees such as almonds.
You might be surprised to know that almonds have great medicinal use, incomparable and wholesome nutritional value, and can be an impressive eye-catchy addition to your home garden.
Once you know the worth of an almond tree, you won’t go for any other tree except an almond and will be willing to grow it even in pots and containers mif necessary.
You can consume almonds as a whole or use them in preparing almond butter, almond milk, almond candies, and garnishing on different dishes such as baked cakes, etc.
I will discuss today the planting method and post-planting care and maintenance to enjoy your homegrown almond tree and almonds at home.
Almond Tree Growing Instructions
Keep in mind that growing almond trees in your home garden will be a challenge to your patience and resources. Initial time and resources are necessary for an almond tree.
Select a sunny location: Almond trees can reach a height of 30 feet; therefore, they require a lot of space to grow properly. Plant the almond trees by keeping 15-20 ft. plant to plant distance and away from other trees, buildings, and electricity lines. For optimum growth and disease-free plants, almonds require full sun and loamy soil that drains well.
Sapling preparation: Before your almond tree even touches the ground, you may prepare it for success. Spray the sapling’s root ball with a garden hose to ensure that it is well-hydrated and that the roots have made solid contact with the ground.
Planting time: Put your sapling in the middle of the hole, then cover it with dirt that drains nicely. While filling the hole, gently press the soil around the root ball to remove air bubbles and water it with at least one gallon of water. In addition, you can spread a layer of mulch around the root ball to keep the soil moist.
Trimming the stray twigs: Remove all the twigs close to the tree’s root. Pruning the young tree is necessary to direct its growth toward the trunk and branches.
Show patience: Don’t be disappointed if nuts don’t appear on your tree for the first few years. The almond tree’s juvenile stage (from planting to fruiting) lasts around five years.
Care and Maintenance of Almond Trees
Planting a tree is easy, but keeping it alive can be a never-ending challenge, like raising children.
To keep your almond tree healthy and happy, you need to provide it with its favorite things, such as food, sunlight, water, and timely pruning.
Sufficient Watering: Although the almond tree can survive during dry, scorching summers, it requires frequent irrigation for adequate growth and fruiting.
When your almond tree is young, make sure to water it at least once a week (only skipping it if it rains a lot).
Keep the soil evenly moist but not soggy; water logging will lead to root rot in your almond tree.
Apply spring fertilizer to your almond tree.
Don’t fertilize your tree before spring. On the other hand, older trees require the least amount of fertilizers, and small doses of nitrogen fertilizer (given frequently with a regular gap) will be enough for the young almond trees.
Once your tree has grown to maturity and started producing fruit, 2 pounds of urea will be a lifesaver and have a lasting effect on your tree’s health and developing capability.
Keeping an eye on the pest attack is the most important thing after fulfilling the basic requirements of the tree.
The “Navel Orange Worm” is the most dangerous insect pest of the almond tree. It settles on uncollected nuts left on the tree and not harvested or were inappropriate to harvest.
Peach Tree Borers (resemble grubs) attack almond trees by tunneling into the base of the trunk, which can also cause damage to almond trees.
Note: Apply Bacillus thuringiensis spray, often known as Bt spray, to eliminate bugs if you find that your tree’s growth has halted or if you see their excrement close to the base of the tree.
Best Almond Tree To Grow In Home Garden:
As you may know, we have two varieties of almonds – Bitter and sweet almonds. Bitter almond trees (which produce bitter almonds) are an excellent option if you want your tree to be solely decorative.
On the other hand, if you want to grow an almond tree for eating purposes, then the sweet almond might be right for you.
Caramel, Mission, Hall’s Hardy, and All-in-One cultivars are the most commonly grown and some of the best sweet almond varieties.
The All-in-One almond trees are self-pollinating, as suggested by their name. All-in-One is an excellent option if you’re unsure about what variety of almond trees to plant in your garden.
FAQs:
Can I grow an almond tree from sed at home?
A thriving, nut-bearing almond tree can be grown from seed, but starting with a seedling gives you the highest chance of success. Almond trees (like most nut trees do not self-pollinate; therefore, cross-pollination is necessary to grow an almond tree from a seed that bears nuts. However, starting with a sapling is ideal unless you have enough space to plant two or more trees.
What are the favorable climate conditions for an almond tree?
Being native to the Middle-East regions, almond trees flourish in Mediterranean temperatures. Its optimal growing environment is somewhere with long, hot, dry summers and adequate sunshine. A wet winter is beneficial for its developmental processes but is quite vulnerable to frost.
Which are the top producers of almonds in the USA?
California is the top producer of almonds in the USA for its favorable environmental conditions. Texas, Arizona, and Florida are a few additional favored regions for almond trees. Check your USDA Plant Hardiness Zone before deciding whether an almond tree will grow in your region; almond trees thrive in zones 7-9.
The front yard is the first impression your house makes on the world, and it must speak to guests in a welcoming and comfortable way. So, its hardscape design should balance functionality and beauty—it’s an asset for any landscape.
A front yard hardscape can also make a subtle statement vital to the property’s overall aesthetic. If you want to look at some front yard hardscape ideas that inspire you, check out the following ideas that are crucial for a beautiful, well-kept, appealing home.
Classic White Picket Fence
A classic white picket fence is a simple and elegant choice for a backyard landscape. A white picket fence can be used to create privacy and define boundaries, or it can be used to decorate an area with its classic look. The options are endless with this one!
With a white picket fence and pretty flowers in containers near the window, this charming front yard style exudes classy appeal. It is also a good choice for small yards, as it easily fits into tight spaces.
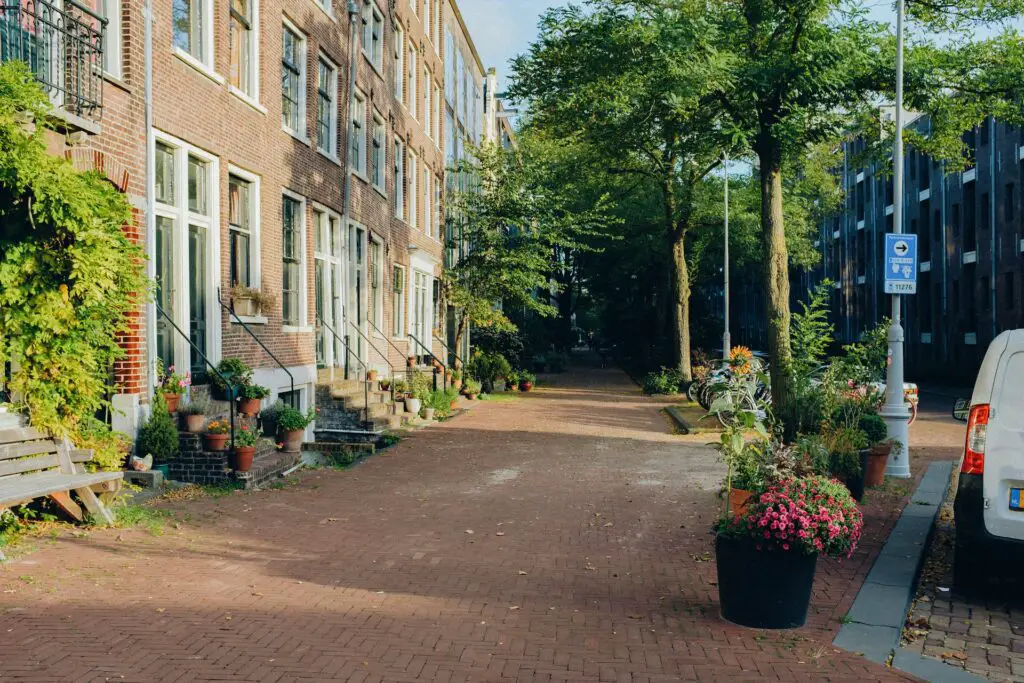
Attractive Stone Pathway
Adding stones along with other hardscape elements in your yard can make it feel like you have more dimension instead of looking flat—and that makes it feel bigger than it is. You can create a lovely stone pathway that blends in with its surroundings and adds an attractive touch of color. You can also use these paths for stepping stones that lead from one part of the yard to another, allowing you to make a natural border around your yard without putting up any fences or walls.
The best thing about these stone paths is that they are low maintenance, which means no fuss for your front yard. Another pro is that they will help keep weeds at bay since they don’t allow for much root growth or soil absorption. These are perfect for outdoor living spaces like patios or gardens, too.
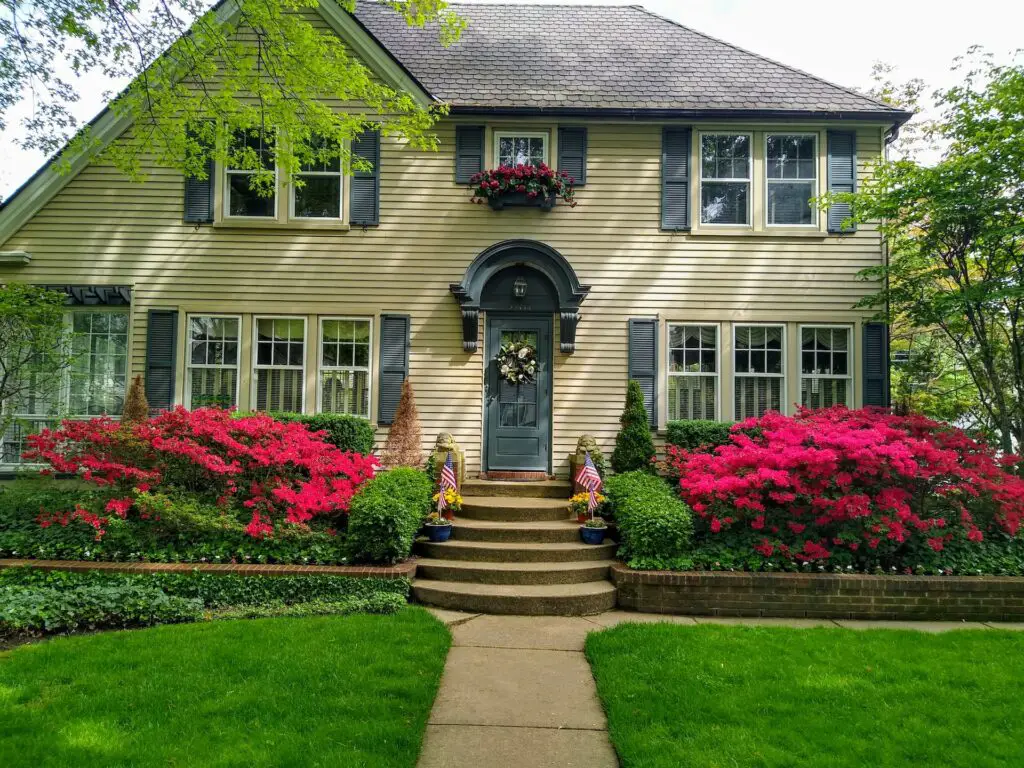
A Picturesque Front Yard
A photogenic front yard looks enchanting if you have your flowers contrasting with the colors of your shutters and doorway—altogether, it’s an eye-catching sight. With flowering annuals, you can rely on front yard planters, window boxes, and garden accessories to enrich the floral display.
You can also install a water feature, like a fountain or pond, to add another layer of interest without being too distracting from the rest of your property.
A Pretty Rosy Arbor
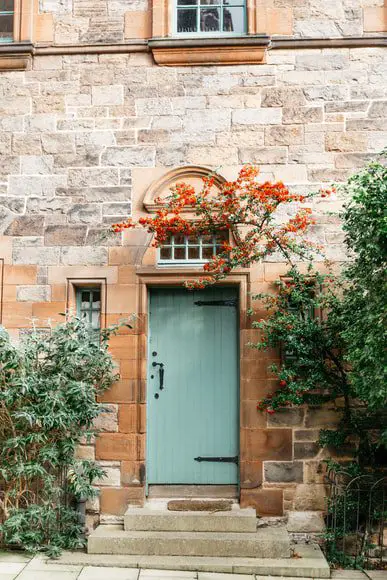
You use an arbor in the garden to designate a route or pathway and to give a gorgeous entryway when approaching a lovely, calm environment. Meanwhile, a flowery arbor transforms any entrance into something out of a whimsical storybook. You can apply this hardscaping style to display your roses without overwhelming the entryway with thorns.
The rose-laden arbor is a hardscape feature made of beautifully curved support for ornamental plants and can be designed to blend effortlessly with the rest of your outdoor space. The light pink blooms of climbing roses are sure to delight your eyes and the neighbors with their vibrant color.
Magnificent, Luxurious Landscape
Decorative concrete walls are among the best ways to have a luxurious-looking landscape, especially if you combine it with a gravel pathway and balance it out with fine flora, like decorative plants, in any modern residence.
Paver pathways are also great for creating smooth transitions between different areas of your yard, like from one side of the house to another or from one garden area to another. They’re also great for creating interesting patterns within your yard that would otherwise be impossible if you didn’t have this type of hardscape surface available!
There is also the option of creating a waterfall garden to achieve the look of a luxury landscape. It can be an eye-catching focal point in any backyard space and adds tons of character. It also gives your yard a refreshing feel that’s hard to beat!
Neat Container Garden
Container gardening is a great way to incorporate colorful plants in your home, and even the simplest plants may produce rich splendor if you know how to hardscape beautifully. For instance, you can have a sharp-looking container garden with a nice set of similarly colored planters comprising vases, oval pots, and window boxes, all of which you can pack with vibrant annuals. A modest landscape design fits the French Colonial house style, allowing the facade to shine. Certainly, container planting can help bring some life into an otherwise lifeless area.
Illuminate the Front Yard with Lights
Decorative lights are a great way to illuminate your front yard. They are inexpensive, easy to install, and can be used in many ways. For example, you could string them up on an archway or at the bottom of a fence.
The right type of light can help you create a warm and welcoming atmosphere that will encourage people to come and hang out. There are lots of different kinds of lights available, so you can find one that works for you.
When considering lighting, you should consider where you want your lights to be placed. If they are too bright, they may be distracting, so it’s important to consider how much light you need in different areas of your yard so that everything looks good from all angles. Landscape lighting should always point away from the viewer.
Low-Maintenance Front Yard Hardscape
Low-maintenance landscaping is a must for any homeowner. If you want to keep your front yard looking great for years to come, consider adding some of these low-maintenance ideas.
When choosing landscaping materials, make sure they are durable enough to withstand all weather conditions while still looking great in your yard!
If you like a low-maintenance front yard, keep it simple with compact, colorful planters that are easy to maintain.
Install stepping stones at the entrance of your garden.
Create a walkway through the garden using pavers or bricks.
Consider adding mulch around and under your plants to help retain moisture and reduce weeds. This also helps prevent erosion and keeps the soil from washing away when it rains!
Hardscape for good seating.
You must have good hardscaping to have comfortable seating in the front yard. This includes benches, planters, and other decorative pieces that will make your space pleasant and inviting.
A well-thought-out hardscape design for the front yard is especially essential if you’re hanging out there for a long time. There are so many ways to improve your outdoor seating experience, and if you’re looking to build a hardscape that’s comfortable, durable, and aesthetically pleasing, consider these ideas:
Ensure your porch furniture is made from durable materials that can withstand the elements.
Add some color. You can pick up a few different shades of flagstone or mulch to create a more exciting look.
Consider adding a pergola to provide shade in the summertime and offer privacy in the spring and fall.
Use concrete pads to refresh your front yard.
If you want an easy and quick upgrade for your front yard, you can use concrete pads to create a curving walkway through a bed or the lawn. The best part is that these concrete pads are easy to install, so you don’t have to worry about hard labor. The concrete pads provide the perfect surface for a variety of landscape projects.
Wind Chimes or Bells Hanging from Arbors or Pergolas
If you’d like to add movement, beauty, and sound to your yard, consider hanging wind chimes or bells from arbors or pergolas. These can add a beautiful musical touch to your front yard space. When two metal cylinders hit the percussion instrument, they produce a distinct sound, which you’ll appreciate whenever you want to calm your mind. They come in many different sizes and shapes, so you can find one that’s just right for your yard!
Plants contribute to landscape design by improving aesthetics and air quality. And believe it or not, they also have functionality when it comes to architecture and engineering! See how plants do all the work in a landscape?
Plants may take on the appearance of a piece of natural artwork. For instance, a single shrub or tree can make all the difference in a boring area; the interesting growth pattern, the intricacy of its branches, and the texture and seasonal color of the foliage look harmonious. Specimen plants (or accent plants) are perfect for this—they make a flat area pop.
Layering different plant types with varying texture qualities will significantly enhance the garden’s visual appeal.
Plants Influence the Climate and Improve Air Quality
plants improve air quality
Trees take in pollutants via their leaves, capturing (or “sequestering”) and removing them from the air.
They also consume carbon dioxide (a gas that contributes to global warming) and generate oxygen (a gas that we all need to survive) through photosynthesis (a process of food-making for plants). This is why forests are frequently referred to as the “lungs of the planet.”
Aside from the air we breathe needing to be clean, it also needs enough oxygen (19.5%). Anything lower than that, and humans would still live, but you’d likely lose consciousness when the air you breathe gets to 12% oxygen.
In contrast, air pollution is high with poor air quality and poses a health risk. You don’t want dirty, oxygen-lacking air entering your lungs.
Having plants in your space can help a lot—not just improve air quality but also boost your mood. Something is depressing about being stuck inside the home or office all day. Often, all we need to clear our minds is a short walk outside, and we’d feel alright again! Maybe it’s because of the calming presence of trees, plants, and the sky, or perhaps it’s just the extra oxygen.
The Use of Plants in Architectural Styles
plants in architecture
Plants are interesting. Plants have different growth habits, leaf features, and textures. Therefore, they can be useful as natural barriers, facades, canopies, and ground covers.
For instance, you can use vines to decorate the perimeters of walls. Sometimes you’ll need trellises to help the plants climb.
Commonly, flowering vines such as petunia and clematis will be desirable if you want to add color to an otherwise dull vertical space. And if you’re going to conceal an unappealing wall, you can go with quickly growing vines such as Virginia Creeper (it has beautifully colored, red leaves in the fall).
Wall-climbing plants or a row of trees or bushes can serve as privacy screens. The most common natural privacy fences are Arborvitae (Thuja orientalis), Boxwood (Buxus), Juniper (Juniperus), Lilac (Syringa vulgaris), and Cypress (Cupressus). Placing them in certain areas can help limit or obscure views.
Meanwhile, a canopy of tree branches can offer a sense of protection. The canopy layer can protect against severe gusts of wind while also blocking out sunshine and rainfall. When viewed from the sky, anything under them will be hidden from view.
Plants also serve a practical purpose in engineering.
For example, trees can block or soften sunlight before sunlight hits the soil. Have you noticed how nice it looks when sun rays get filtered through trees? Smoke or mist can enhance this effect. C.S. Lewis, the famous writer, referred to this as “shafts of delicious sunlight” or “Godlight.” Some plants have this kind of sunlight requirement. They need just the right amount of light—too much sun, and they wilt; too little, and they won’t grow—so they favor dappled light.
Plants can be used to screen or lessen the sun’s problematic bright light on water or smooth glossy surfaces. By covering the reflective surface, less sunlight can bounce off it, and it won’t look as annoyingly bright in the daylight.
When designing a landscape, you should consider places where car lights would beam straight into windows. You have probably encountered car glare from parking cars outside your window if you’ve experienced staying on the lower floor of a building. So, what can plants do to help? Huge trees placed near windows can help obstruct automobile lights or street lighting.
Plants can also slow down traffic; think of drivers driving more slowly in the presence of thick trees surrounding a lane. Trees with dense canopies add more volume or enclosure to a street, causing drivers to move more relaxedly.
When working on a slope prone to eroding, we often include both plants and other erosion control techniques to keep the soil structure intact until the plants establish themselves.
The usefulness and atmosphere of your landscaping may be determined by the plant life you choose for your backyard.
You may choose an unstructured garden with curving lines that follow the contours of the land and plants that are not evenly placed but balanced in color and size.
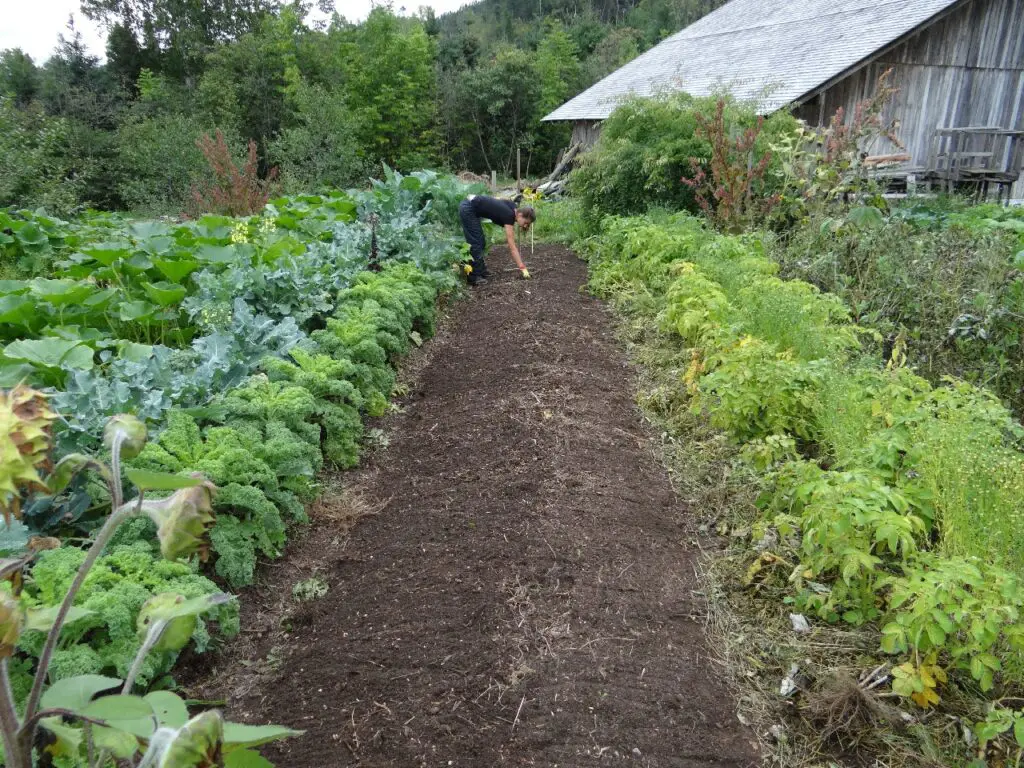
Home gardening has long been very popular. Nowadays, people want to grow vegetables on their own, but sadly many turn to hazardous chemicals to control insects.
This is unfortunate since there are many natural ways to control insects without harming our health or the health of our planet. Learning to use herbs instead of insecticides greatly contributes to restoring the health of both humans and the soil.
Beginning gardeners often need to be made aware of the organic practices to control garden plants’ associated problems like insect pests, diseases, soil infertility, drainage, etc. We will provide gardeners with highly beneficial knowledge to improve their gardening skills and keep them natural.
5 Natural Pesticides:
Neem Leaf (Azadirachta indica):
It is considered a key substance in non-pesticidal management (NPM) for its natural insect-repellent characteristics. It is very important to understand the Neem plant’s action. It does not ever kill the insects directly; it acts as a repellent, antifeedant, and egg-laying deterrent in defense of your precious plants.
Neem leaf, bark, fruit, and stem contain a Phytochemical “Azadirachtin” that is the actual pest-controlling ingredient. Almost 2 kg seeds of neem make 5 g of Azadirachtin. You can use neem leaves too; crush 50 – 60 leaves, keep dipped in water overnight, pour in a spray bottle, and spray on the plants you want to protect from pests. Then, regularly spray after every 10 – 20 days to eliminate the insects from your garden. (Shah, F. M., Razaq, M., Ali, Q., Shad, S. A., Aslam, M., & Hardy, I. C. (2019).
Garlic:
Garlic presence is mandatory in every house. However, the most important role of garlic may be unknown to many of us. Garlic is a natural insect repellent that protects your garden plants from all kinds of flying and crawling insects. One dose of garlic spray is enough for more than one month.
Garlic bulbs contain an amino acid known as “Allicin” that is absorbed by plants, which brings about chemical changes to activate the plant’s natural mechanism to repel insect pests. It is a long-lasting garlic breath for the plants and does not harm the pest, beneficial microbes, and humans in any way. (Anwar, A., Groom, M., Arbach, M., & Hamilton, C. J. (2014).
Eucalyptus Oil:
Natural oils like eucalyptus oil, olive oil, etc., are biodegradable, very cheap, and have no harmful effects on the soil and plants. Eucalyptus oil protects your garden from mushroom flies, moths, and weevils. It contains a mixture of compounds (unlike chemical pesticides, which have only a single formula) so that the insect pests would not become resistant to it.
Eucalyptus oil vaporizes very quickly, so it needs to be sprayed soon after the previous dose. It has a powerful smell to keep bugs and other insects away from your precious commodity. (Batish, D. R., Singh, H. P., Kohli, R. K., & Kaur, S. (2008).
Chrysanthemum Flower Tea:
Chrysanthemum flower contains a chemical known as “Pyrethrum.” It is a potent insect-repellent ingredient. You have to boil some chrysanthemum flowers in a water-filled pan, strain it, and spray it on your plants. Regular use of this homemade tea will eliminate the insect population from your garden. The pyrethrum is known to damage the nervous system of insects, quickly preventing them from reproducing. (Shahrajabian, M. H., Sun, W., & Cheng, Q. (2020).
Four Smart Garden Pest Control Strategies:
1: Timely Planning
Identification and differentiation between harmful and beneficial insect pests are very important. The first step is to identify the number and kind of insects, take a picture of each and compare them with “the Common Garden Insects” on the internet. It will resolve the confusion between what to protect and what to remove from your garden.
2: Encourage Biological Control by introducing Beneficial Herbs and Bugs
Plant Catmint and Allysum near or around the Roses; it will protect them from Lacewings and Ladybugs.
Ground Bugs are the beneficial insect predators of many beetles, aphids, and those pests that are not active during the night.
Pesky Caterpillars and aphids are the favorite food of parasitic wasps. You can invite wasps into your garden by planting a few umbrella-shaped flowering plants, such as Yarrow.
Non-beneficial pests usually hate fresh-smelling herbs. For example, mint, basil, dill, lavender, thyme, parsley, fennel, coriander, sage, and lemon balm are insect-repellent herbs.
Border planting of Marigolds will keep the aphids, plant lice, and many other flower-damaging insects away from your precious flowers. Farmers use marigolds as an insect repellent due to their strong smell (that insects do not like), annual nature, and hardiness characteristics.
3: Improve your Garden Soil:
All of the beneficial insects love compost-rich soil. Homemade Compost, Vermicompost, and Organic Mulch are the wisest decision you can make for your garden. Healthy soil produces healthy plants, and healthy plants can fight off pest attacks. A soil rich in microbes has good drainage, water, and nutrient-holding capacity. Targeting each pest individually will be easier than trying to rid your garden of all pests at once.
Over time, with regular applications and efforts, natural pest control can be attained.
4: Seasonal Home-made Remedies:
The effectiveness of homemade products is always uncertain, but if we only use safe and natural ingredients, we will be doing no harm by experimenting a bit.
Two proven insect-repellent concoctions are listed below:
Crush ten garlic cloves, keep them dipped in water for 24 hours, and strain out the liquid extract. Now mix 1 cup of vegetable oil and a shaker of hot chili pepper and let the mixture settle for one day. This is a very effective extract to help protect plants against egg-laying pests and predators. It will keep the pests away from your plants without causing any damage to them. Owusu-Akyaw, M. (2011)
Collect the essential oils of lavender, peppermint, tea tree oil, rosemary, citronella, avocado, hazelnut, and olive oil. Take one tablespoon of each and mix them to get a highly efficient natural pest remover product. (Arnason, J. T. (2012)
Advantages of using Herbs instead of Chemical Insecticides or Pesticides:
Environmental Friendly:
Every single plant we grow consumes carbon dioxide and adds oxygen to our environment. Whether or not it has any other benefits, such as being edible or ornamental. On the other hand, chemical pesticides are the quickest in action and damage, leaving behind drastic soil and health issue. Biological control is the only way to keep our air safe for ourselves and the coming generations.
Least Expensive and Cost-Effective:
Five or six perennial herbs are enough to control garden pests. Annuals are usually cheaper, and homemade herb mixtures are all cost-effective ways to protect your precious commodity.
The eco-friendly way that promotes biodiversity:
In controlling pests through plants and natural predators, you are protecting the atmosphere from getting polluted and promoting biodiversity by using environmentally friendly practices. Your garden is the habitat of many lives, contaminant-absorbing sources, and hope for a better future. Save it from damage as much as you can.
FAQs related to Natural Pests Control/Biological Control:
Q: What can I practice to protect my plants from insects?
A: Various biological, cultural, and mechanical practices are adopted depending upon the type of pest, crop, and soil conditions. However, planting select herbs along with your main crop or plant is the cheapest and most consistent pre-control.
Q: What kind of herbs/plants keep pests away from vegetables?
A: Many plants can keep pests away from vegetables; some of the commonly grown are listed below:
Citronella grass
Mint
Lavender
Basil,
Parsley
Rosemary
Q: How to keep bugs away from eating my Herbs?
A: identify the kind of bug, its predators, and natural plant predator if available. In organic gardening, crop rotation, companion planting, neem oil, natural traps, soap spray, garlic, and soap mixture, are usually recommended.
Q: How to identify garden pests?
A: every insect could be a pest for your garden plants, and some may be less harmful and some more. Aphids, mites, bugs, weevils, caterpillars, slugs, Japanese beetles, etc., are some of the most common garden pests. The best way to control them is to practice manual picking, killing, and crop rotation.
Q: What is Biological control?
A: Biological control is using living organisms or natural enemies (plants or animals) to control harmful living organisms. It is the environment-friendly and most effective means of managing insect pests.
References:
Batish, D. R., Singh, H. P., Kohli, R. K., & Kaur, S. (2008). Eucalyptus essential oil as a natural pesticide. Forest ecology and management, 256(12), 2166-2174.
Shahrajabian, M. H., Sun, W., & Cheng, Q. (2020). Chinese star anise (‘Illicium verum’) and pyrethrum (‘Chrysanthemum cinerariifolium’) as natural alternatives for organic farming and health care-a review. Australian Journal of Crop Science, 14(3), 517-523.
Anwar, A., Groom, M., Arbach, M., & Hamilton, C. J. (2014). How to turn the chemistry of garlic into a ‘botanical’pesticide. In Recent Advances in Redox Active Plant and Microbial Products (pp. 323-341). Springer, Dordrecht.
Shah, F. M., Razaq, M., Ali, Q., Shad, S. A., Aslam, M., & Hardy, I. C. (2019). Field evaluation of synthetic and neem-derived alternative insecticides in developing action thresholds against cauliflower pests. Scientific reports, 9(1), 1-13.
Mochiah, M. B., Banful, B., Fening, K. N., Amoabeng, B. W., Offei Bonsu, K., Ekyem, S., … & Owusu-Akyaw, M. (2011). Botanicals for the management of insect pests in organic vegetable production.
Regnault-Roger, C., Vincent, C., & Arnason, J. T. (2012). Essential oils in insect control: low-risk products in a high-stakes world. Annual review of entomology, 57, 405-424.
As an Amazon Associate I earn from qualifying purchases.