If you’re looking to add a little style and functionality to your garden, hardscape ideas can help. Designing and building any outdoor living area can be a long and tedious process, especially when it involves refreshing the hardscape.
But don’t let this discourage you; with the right design inspiration, patience, and hard work, you can put together a stunning DIY hardscape that looks great and performs even better.
If you are a homeowner, you will find that a do-it-yourself hardscape will be much more affordable than hiring a contractor to build it for you. Doing your hardscaping yourself is a great way to get exactly what you want because you can make it as simple or elaborate as you wish!
Here are some DIY hardscape ideas for effective landscape beautification.
DIY Hardscape for the Yard
It is possible to unleash your DIY creativity when hardscaping many parts of your landscape, including the patio dining setup, edging, planters, fireplace, pathways, and staircases. Hardscapes certainly don’t need to be boring and done properly; they can be beautiful and long-lasting.
A well-installed hardscape can last many lifetimes, depending on the materials used.
Keep these guidelines in mind whenever considering a DIY hardscape project:
DIY Project
Consider your budget – you don’t want to get halfway through your project only to realize that you don’t have the funds to finish.
Always assume that it will take longer, cost more and be more difficult than what you anticipate. It is human nature to optimistically view projects going smoothly, and we tend to quickly think through aspects that end up taking days or weeks. Even as a long-time contractor, I still find myself underestimating time and materials.
Take a good hard look at your skillset and mindset – some people are detailed and specific while others are more rough and quick. Make sure that your project suits your skill and commitment. Or find some friends with the skills needed to help out.
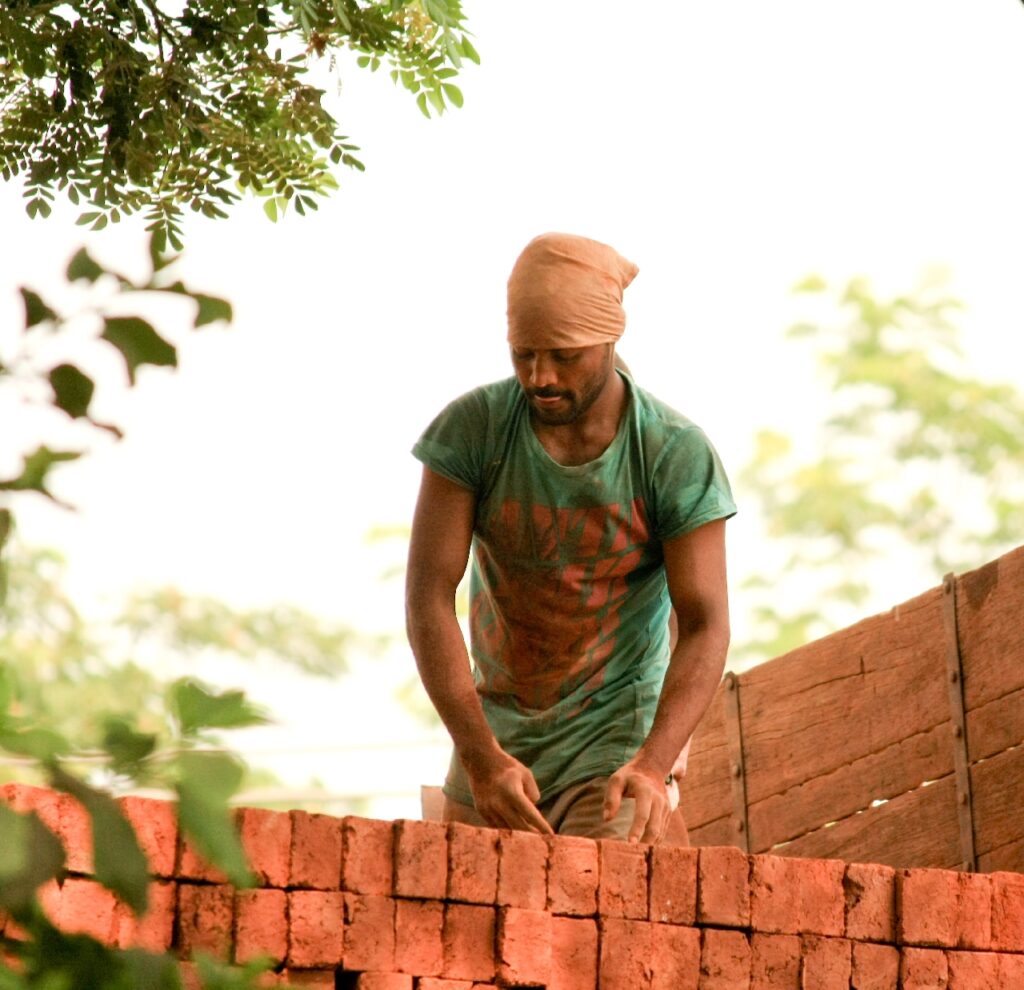
When contemplating laying a flat masonry surface, realize that laying the stone is the easy part. Prepping the base is the majority of the work, and the quality of your base prep will determine the quality of your finished product.
Don’t be afraid to hire some help. Getting help with some of the heavy labor can make for a higher quality project, because it allows you to pay more attention to the details of the project rather than how exhausted you are. Hiring a couple of laborers will still save you big bucks over hiring a contractor.
On a similar note, take some time checking out your local tool rental yard to see if spending a few hundred dollars on equipment might save you days of work and sore muscles.
Stylish Outdoor Steps
Stylish outdoor steps
When considering hardscape design, you must always consider the elements that guide people into and out of spaces. A shining example of that is the staircase.
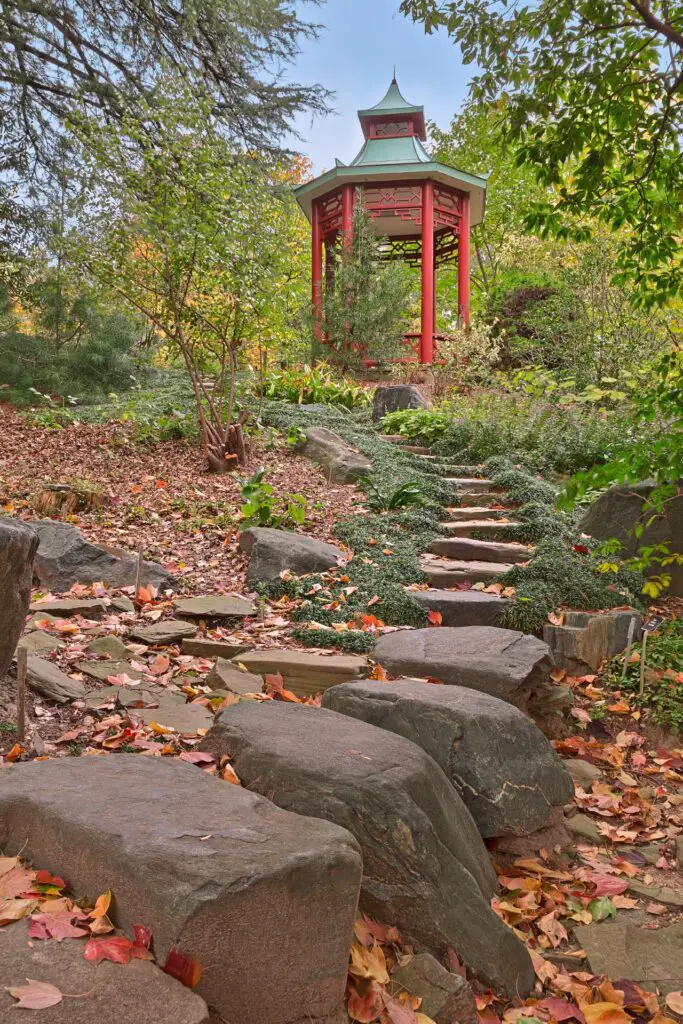
Outdoor steps can be created using pre-cut stone slabs, concrete, flat-placed landscape boulders, wooden timbers, dimensional lumber, or almost any other materials. The key to long-lasting steps is always a firm and solid base. Start at the bottom and work your way up to the top, keeping in mind that all of the steps should be the same height, or they will be uncomfortable to walk, and everything should be level.
Boulder steps
Your stairs can be as ornamental or rudimentary as your budget and skill set will allow.
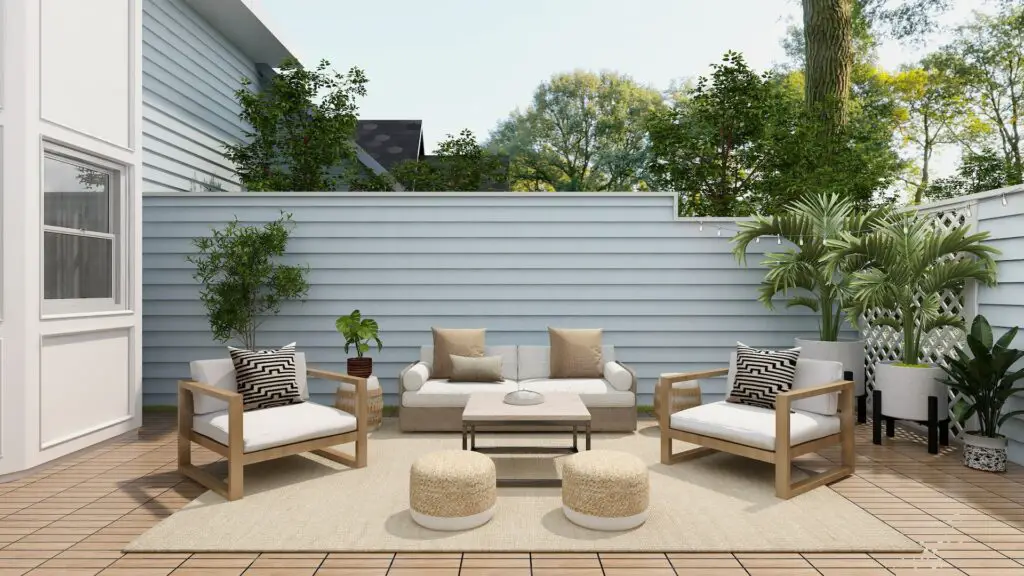
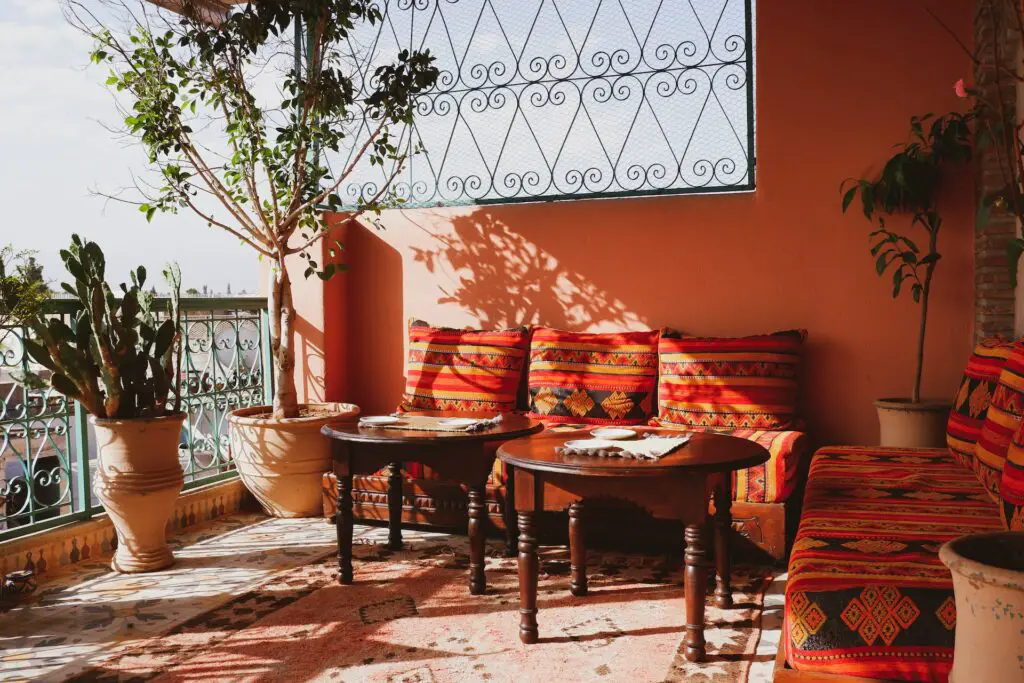
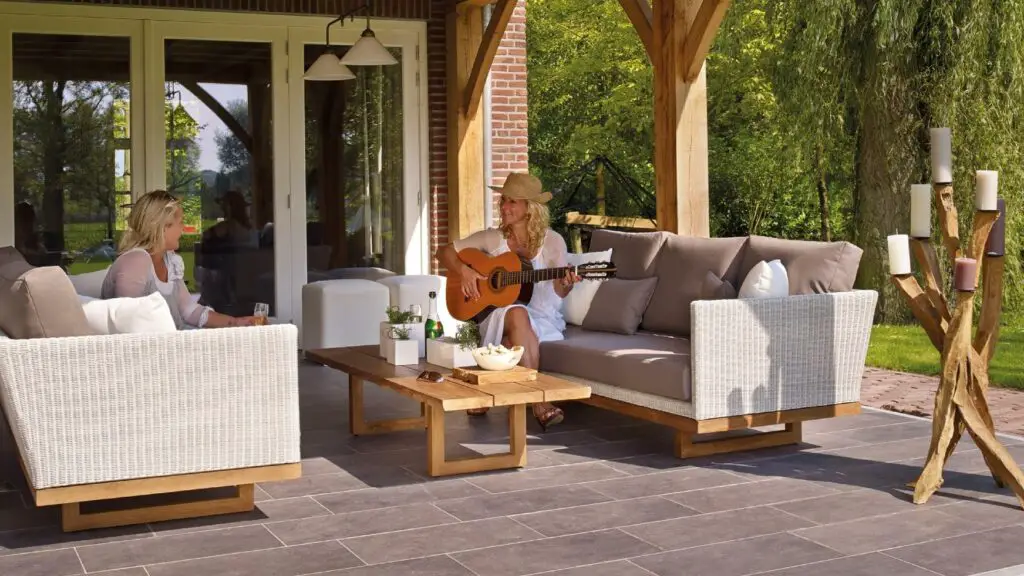
Hardscape Classic: Backyard Alfresco Dining
Backyard dining
There are plenty of ways to create a beautiful backyard outdoor dining experience without hiring an expensive landscaper.
To have a comfortable eating area outside the home, you really only need a nice, flat, and stable surface. A nicely compacted gravel patio will do just fine, but a nice solid surface masonry patio will be the ultimate long-lasting hardscape dining area.
Of course, building a wooden deck is also a very popular DIY option for dining outdoors.
Whenever considering the installation of a patio or deck, realize that a nicely compacted patio of crushed gravel might take 1/8 of the time to install that it might take for a nice deck or masonry patio.
If you want your patio to feel like an extension of your living space—and not just some subtle patch of grass with a few chairs set out—you’ll want to consider adding some crafty hardscaping.
You can have a beautiful patio that defines a section of your land as an outdoor living room or dining room. And the outdoor dining area has always been about the furniture in backyard hardscape styling. Several ideas for finishing your DIY outdoor dining area include repainting or repurposing an old table and chairs or building some furniture out of harvested or salvaged wood.
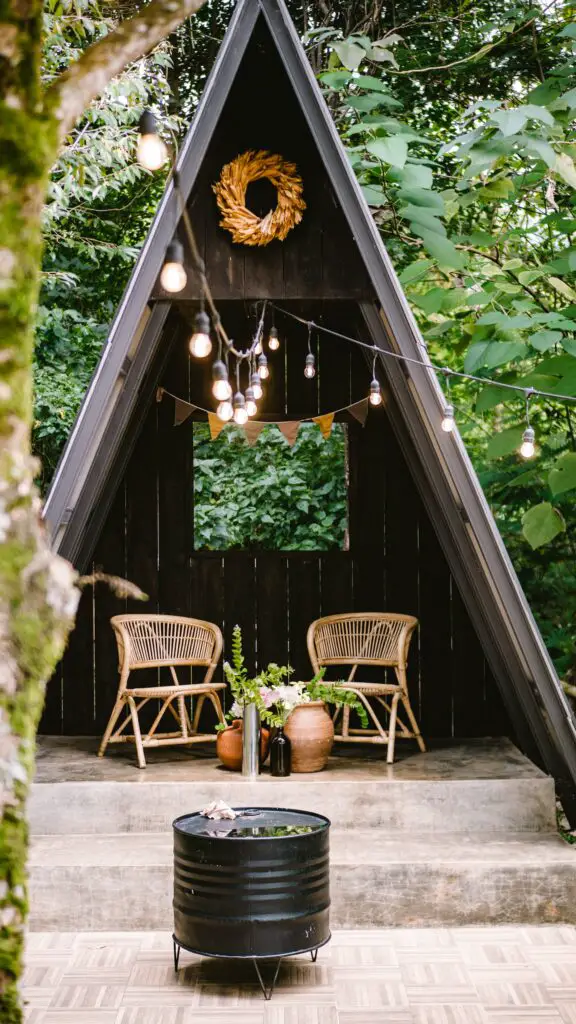
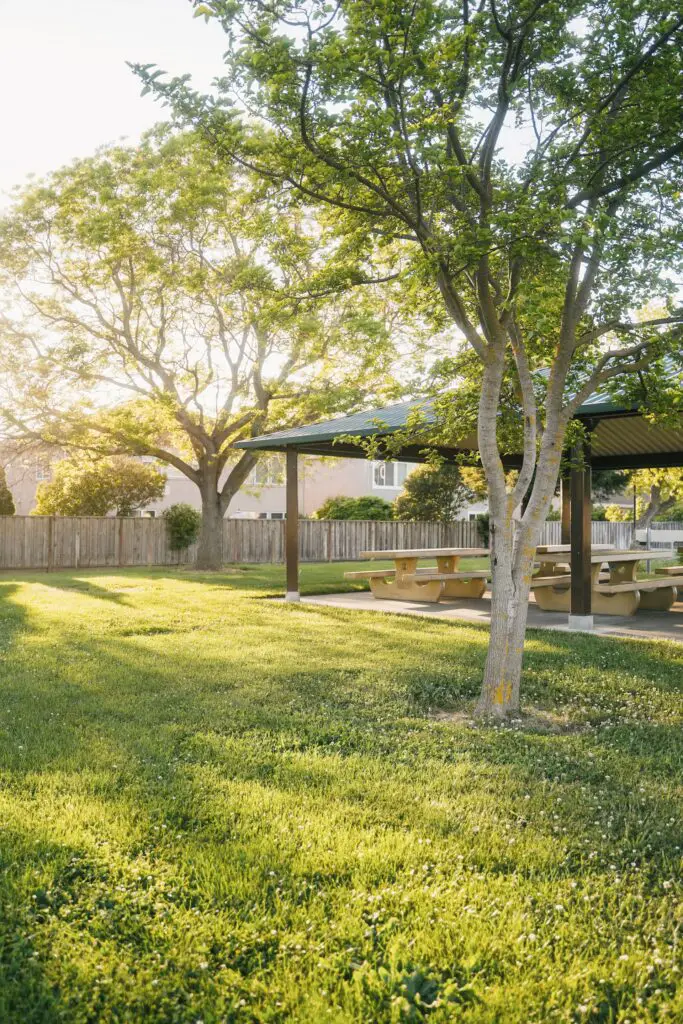
Rustic Outdoor Design for the Yard
rustic outdoor design
A rustic outdoor design can be the perfect way to make your yard more inviting and cozy. It’s a straightforward yet powerful way to add a layer of nature to your home without going all-out on an elaborate landscaping project.
If you’re looking for a simple way to add some rustic charm to your yard, here are some ideas:
Create a rustic pathway with stones and cobblestones.
Add some rustic fencing – Cedar fencing is a great choice for adding texture and color to your yard. It comes in many different shapes, sizes, and textures, so it’s easy to find something that matches your needs. The wood has natural oils that help keep it looking good for years without maintenance!
Install wooden benches and planters that match the color of your home’s exterior.
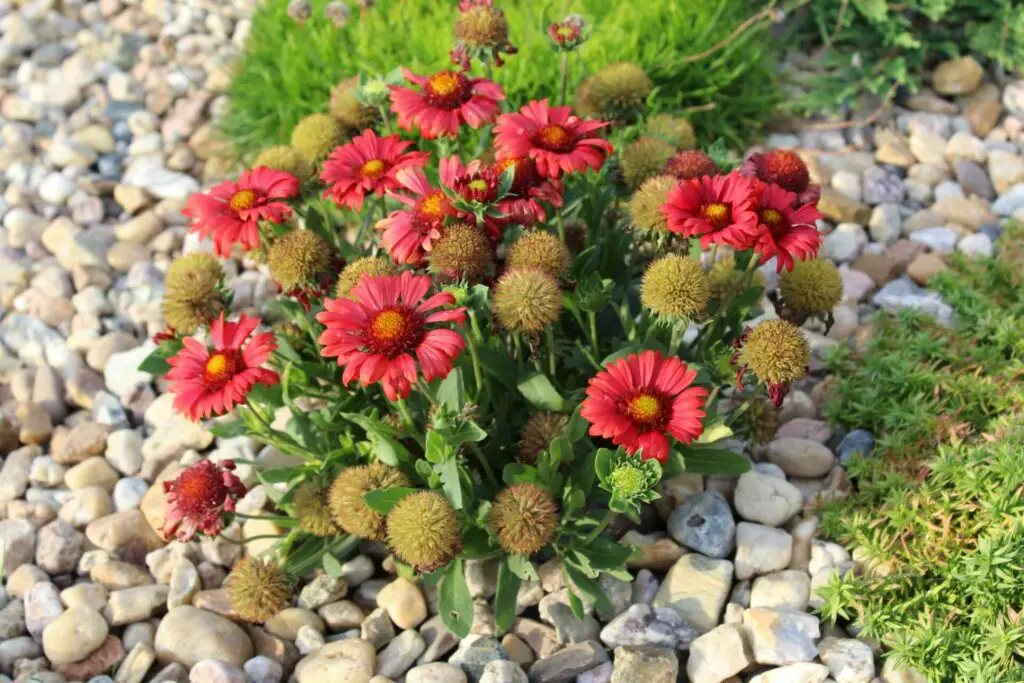
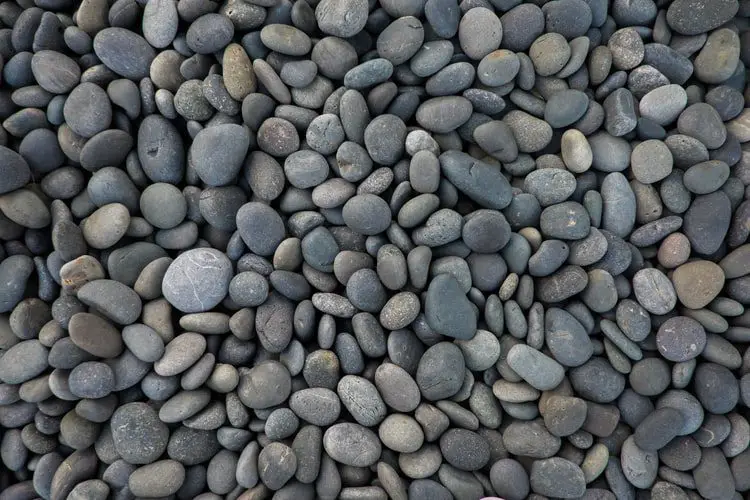
Beds of Rocks
rocks in a bed
Rock beds are a great DIY hardscape idea! River rocks or any small rocks are a natural and durable material that you can use in many ways.
It is easy to find, and it is also fairly inexpensive. You can use rocks for a wide variety of projects around your home, and they’re one of the most beautiful ways to add texture and dimension to an outdoor space.
You might want to consider laying landscape fabric below the rocks to minimize weeding for the first few years.
Consider that while the rocks are relatively easy to lay and only need a little prep work, they are not great for walking on unless you use very small rocks in the two-inch range.
Beds of rock can be used as a mulch below plantings to control water flow through your yard, or you can use varying types and colors to create distinct patterns in your landscape design.
Borders of Rock
rock bed border
Rock of varying size, shape, and color can be used as bed and walkway or driveway edging.
These are very easy to install and can give you a pretty and long-lasting border wherever you need one.
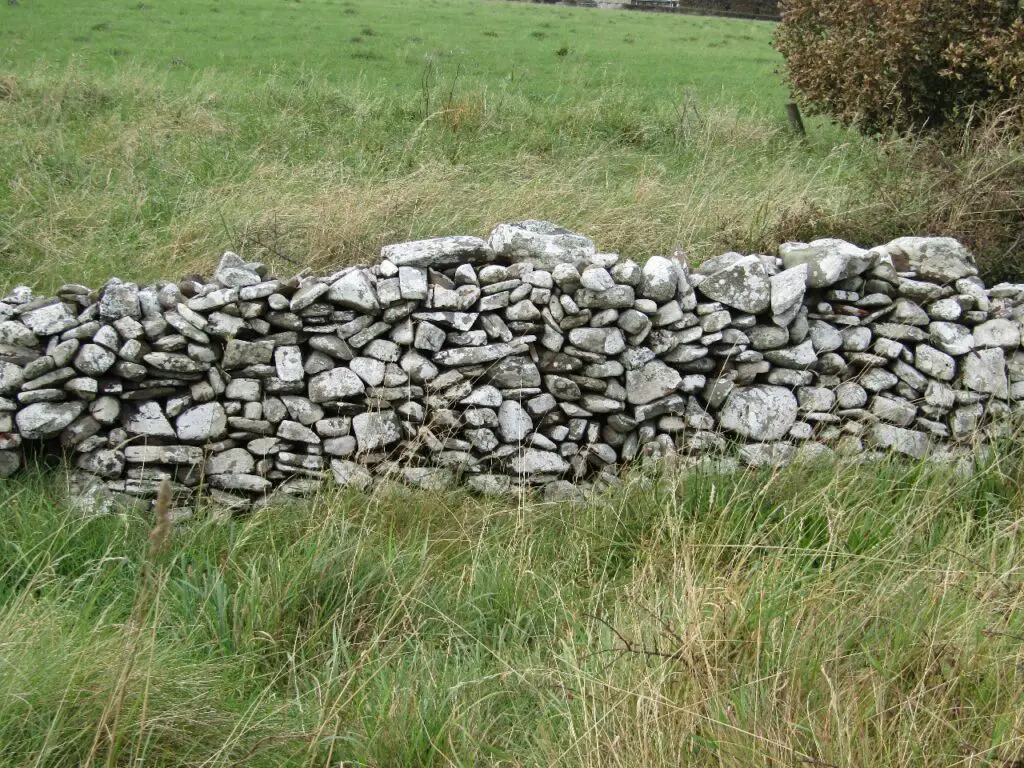
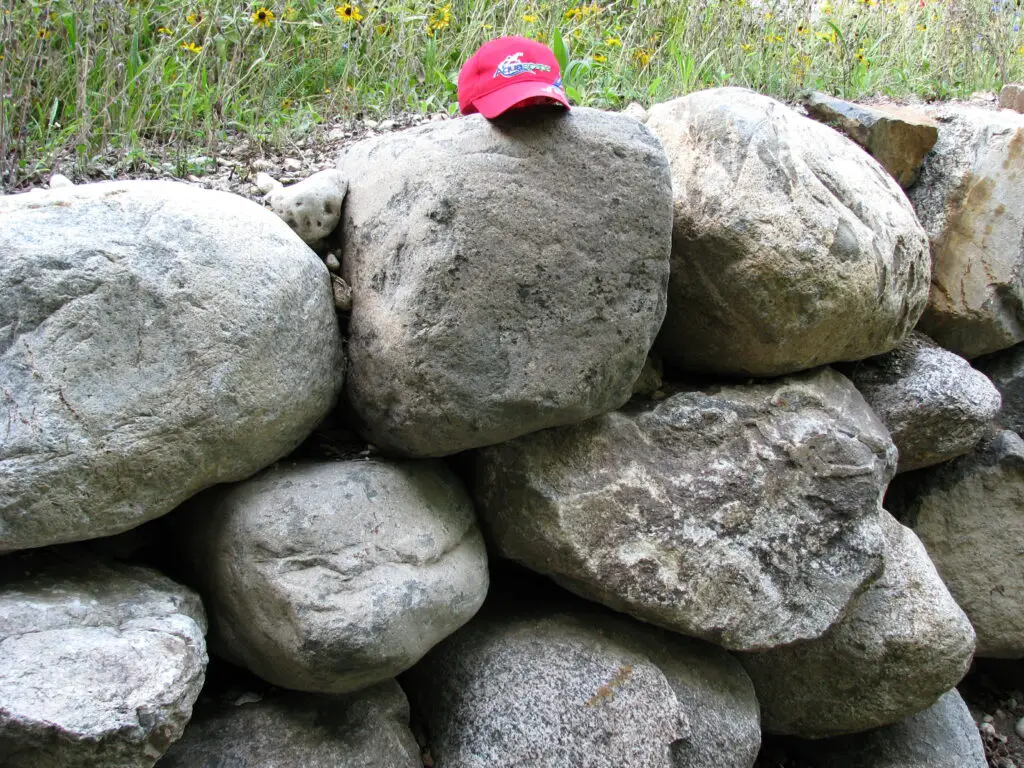
Rock Walls
stacked rock wall
Rock walls can be created to be freestanding or up against the earth as a retaining wall. Always remember that larger rocks must always be used on the bottom, with the rocks decreasing in size as the wall gets taller.
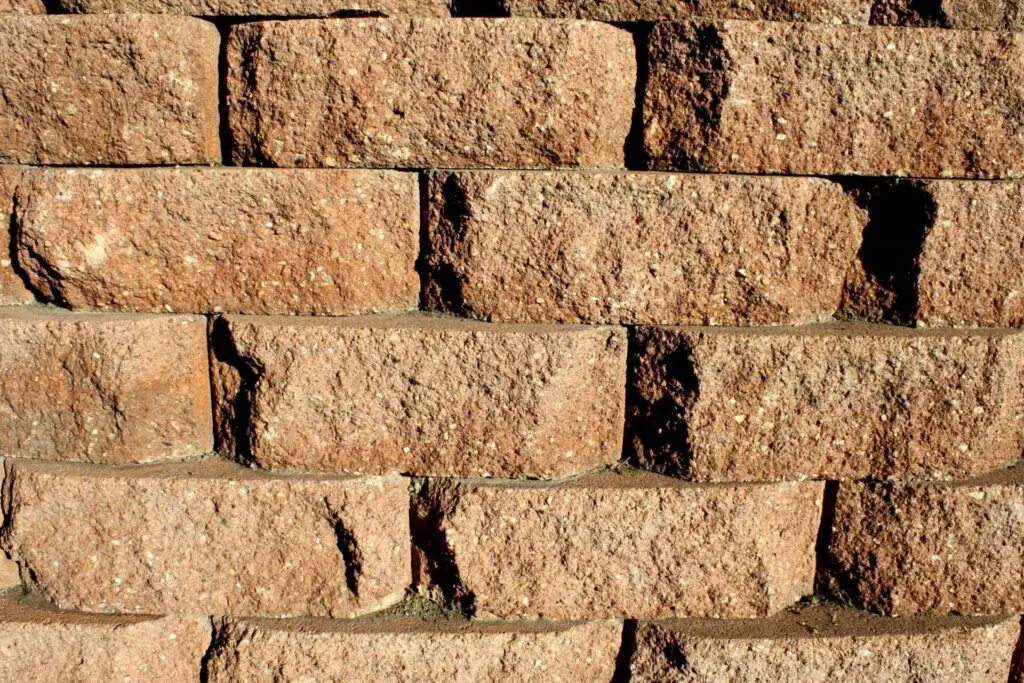
Concrete Block Walls
Decorative concrete block wall
Whether decorative or just plain concrete, stacked concrete block walls are straightforward to install and very long-lasting.
Once again, the base prep is the most crucial part. If you can excavate the loose soil and compact a 12-inch base of crushed stone, you can create a concrete block wall.
Once your base is solid and perfectly level, the rest is easy, just like stacking Legos. Be sure to add drain tile and washed stone behind your wall to be sure that you are not trapping water behind the wall.
Almost all of the failed stacked block walls you have seen are due to improper drainage. Water is a powerful force.
Concrete blocks are a great way to create separation areas and seating also.
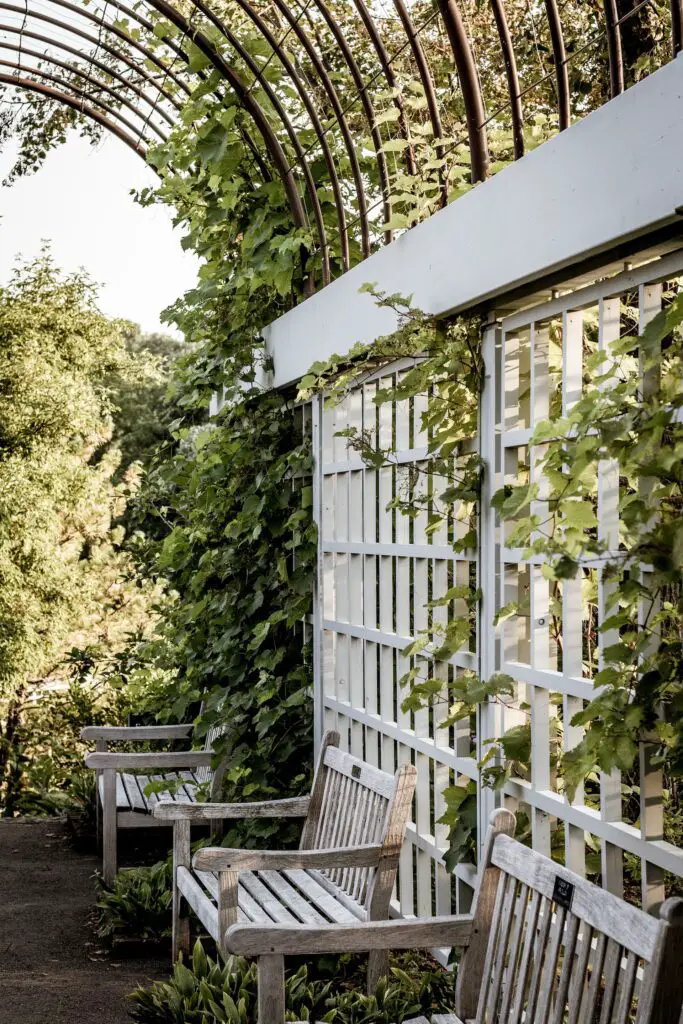
DIY Trellis Panels for Support & Privacy
Trellis
A trellis panel (or even just a single trellis!) can give a sense of dimension to your area while also beautifying it. So, f you’re looking for ways to add privacy and support to your outdoor landscape, look no further than DIY trellis panels.
The height of the trellis is a great way to give your garden some structure while still providing the privacy it needs. Trellis panels are also easy to install, meaning you can quickly create an attractive garden feature without needing professional help.
Trellis panels are usually made of wood and can be found at any home improvement store. They have a lattice design and are perfect for plants that always need support, such as climbing vegetables. You can also DIY them to turn them into a color you like.
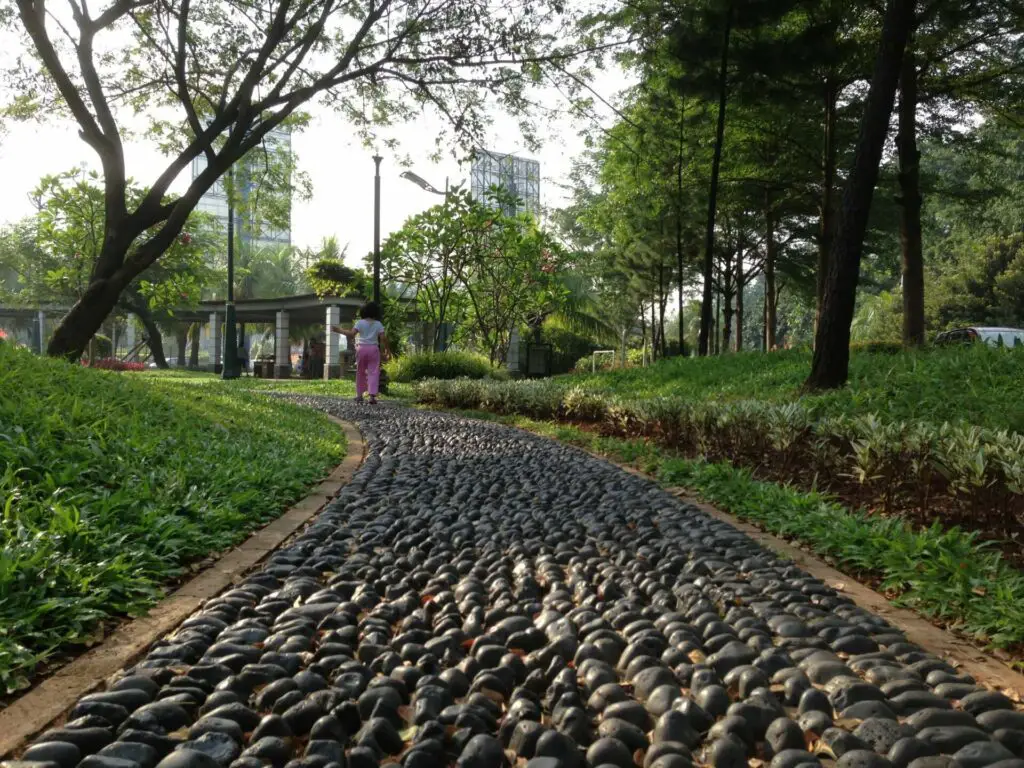
Exterior Stone Pathway
rock walkway
Mixing and matching colors, sizes, materials, and textures to an outdoor path is one way to build a very economical dry-laid pathway.
Collect whatever small and flat rock materials you can, and then use your creativity to install them in such a way as to create a beautiful pattern and a solid walking surface.
Salvage small rock, flagstone, slate, concrete blocks, and gravel can all be used to create an interesting walkway.
A DIY stone pathway is an excellent way to add an elegant touch to the exterior of your home. If you can keep the walkway to only a few types of rock and install them in a uniform pattern, it will make it look more planned out and professional, but if unique and creative is your style, go ahead, live it up.
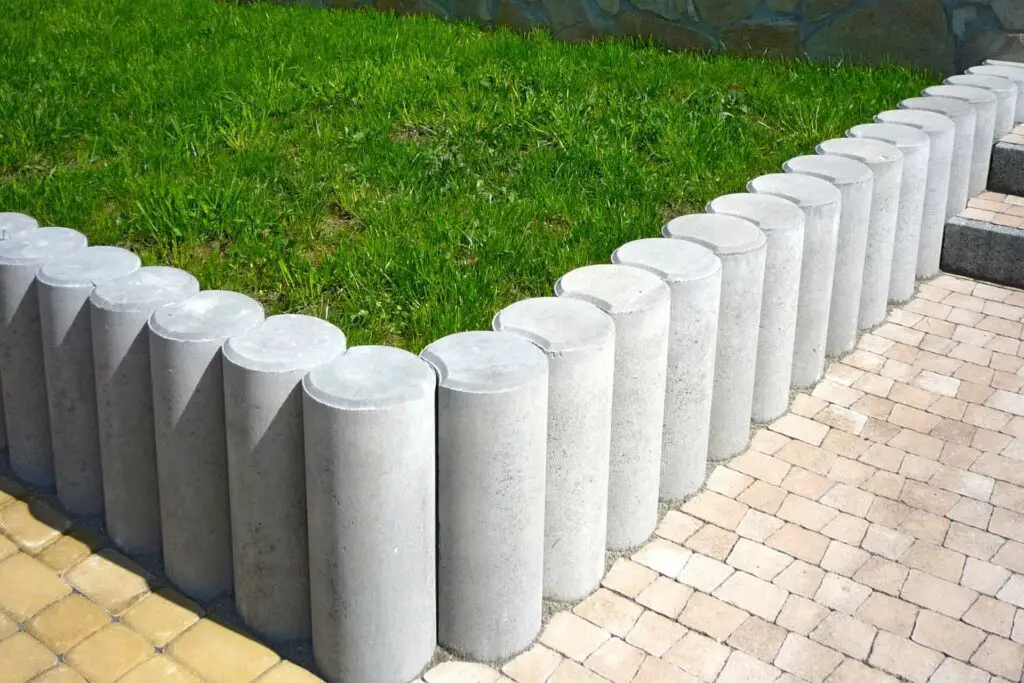
Brick or Concrete Edging
Concrete lawn edging
Edging is an essential part of creating a hardscape. It helps provide a clean, uniform look to your yard and also helps keep your landscaping in place, and prevents erosion.
Edging is a significant part of your landscape. You could have plastic or metal pound in edging, you could choose a naturally cut bed edge, or you could create edges using poured concrete or clay or concrete bricks or blocks.
Once again, this can be as easy or complex as you would like to make it. You can rent elaborate concrete edge laying machines and create a beautifully flowing concrete curbing wherever you would like it, or you could collect a bunch of old brick and block and just cut them into the ground.
Check out Craigslist, and you will find a good selection of people trying to get rid of old heavy things like rock, bricks, and blocks, so the material is readily available.
Whatever you choose, edging provides an important function and creates structure in your landscape design.
Fencing
Picket fence
Fencing can be used to decorate, delineate, or keep things in or out of areas.
Fencing can be beautiful or functional, or both.
There are many fence varieties, and once again, this project can be whatever you choose to make of it.
Some of the most simple fences are made from stacked or intertwined branches or split rails; others are built out of flat wooden planks or delicate and decoratively carved pickets.
You can create a steel fence with sturdy posts and rails or buy and install a chain link fence with barbed wire on top for the ultimate security statement. Again, your project, do it your way.
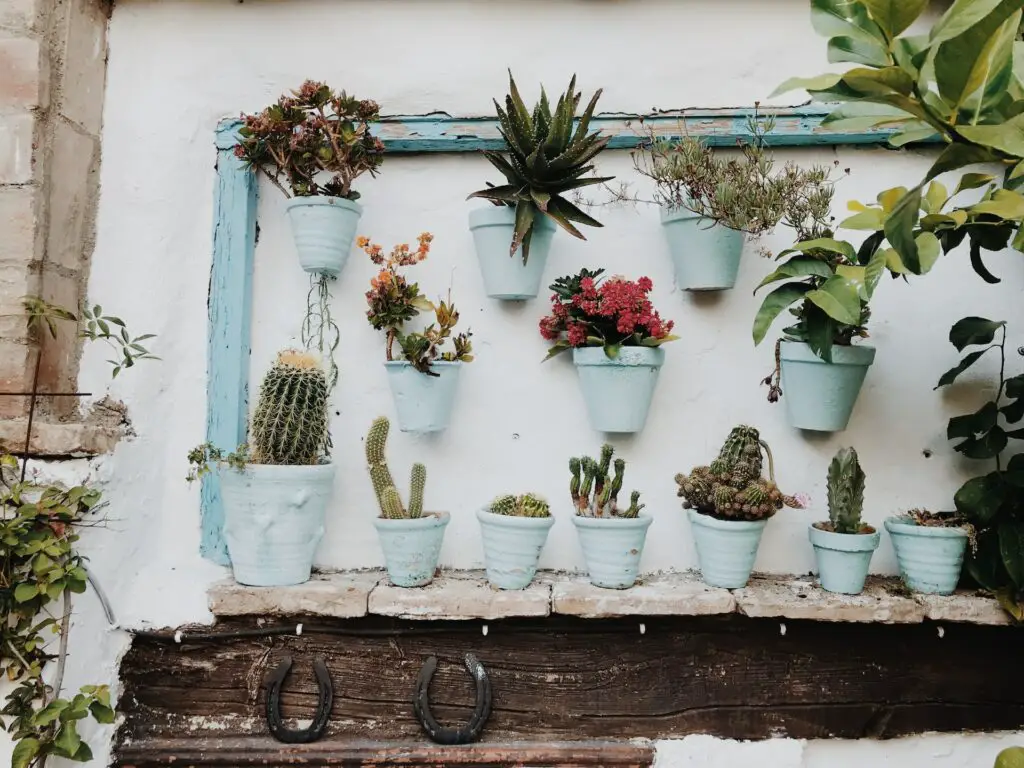
DIY Yard Pots
Yard pots
This one is an outstanding idea for those gardeners who only have a little space but want to grow their plants. Vegetables, herbs, and flowers in pots do not have to be absent from a hardscape structure in your landscape.
A stylish DIY plant container for your yard is a simple do-it-yourself task. You can go and buy pots or planters and place them in an aesthetically pleasing way, or you can repurpose any container for your plants.
Fireplace for the Outdoor Hardscape
outdoor fireplace
Who doesn’t like a warm, cozy fire on a cool evening?
s long as you create a fireproof and safe situation, you can have a fireplace or fire area at your home.
Keep in mind that some areas restict burning or open fires of any kind, so check your local regulations and plan your build accordingly.
A fire pit is usually more of an open or grated area for a fire, either in some sort of metal or masonry structure or can just be a pit in the ground lined with rock or brick.
A fireplace is typically more of an upright structure with a firebox and chimney.
Either of these can be a DIY project, with store-bought fire pits or complete masonry block fireplace kits. Either way, choose your project based on what you think you can complete, and remember that fire can be very dangerous. Make sure that you are protecting nearby structures, plants, etc., from the flames.
Keep in mind that what works on a calm night will be very different if the wind picks up. It doesn’t take long for a small fire to become deadly, so always have water or fire extinguishers handy.
You can use your fireplace as a focal point or anchor for other features like benches or stone walls.
A genuinely good outdoor fireplace offers your yard the sensation of a comfortable retreat. Hardscapes like this elevate the look of your living space by establishing outside zones for leisure and recreational activities.
The opportunity to use the outdoor fireplace in your property for social events well into the fall nights is a pleasant part of including it in your DIY outdoor hardscape plan.
Conclusion
By doing your hardscape project yourself, you will have the opportunity to create exactly what you want, at your budget, at your pace and you will have a great sense of satisfaction once it is done and you get the chance to stand back and admire your work.
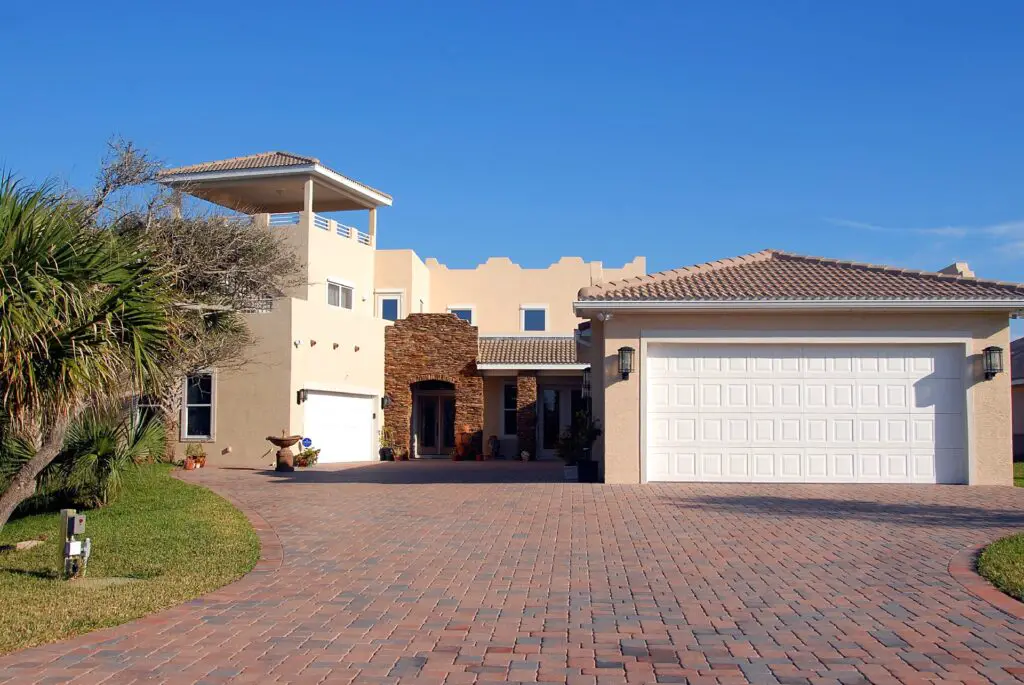
The front yard is the first impression your house makes on the world, and it must speak to guests in a welcoming and comfortable way. So, its hardscape design should balance functionality and beauty—it’s an asset for any landscape.
A front yard hardscape can also make a subtle statement vital to the property’s overall aesthetic. If you want to look at some front yard hardscape ideas that inspire you, check out the following ideas that are crucial for a beautiful, well-kept, appealing home.
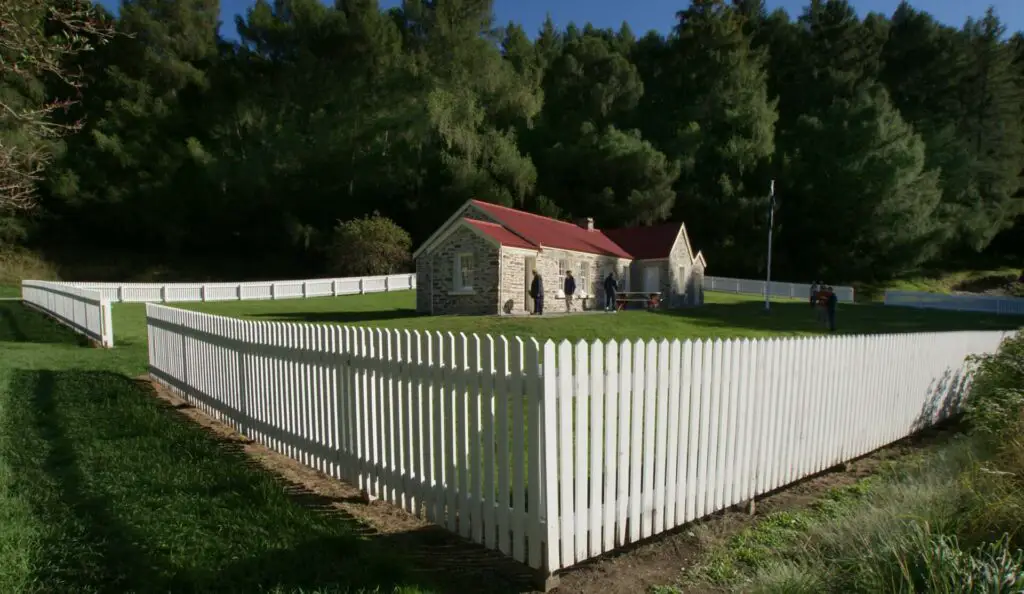
Classic White Picket Fence
A classic white picket fence is a simple and elegant choice for a backyard landscape. A white picket fence can be used to create privacy and define boundaries, or it can be used to decorate an area with its classic look. The options are endless with this one!
With a white picket fence and pretty flowers in containers near the window, this charming front yard style exudes classy appeal. It is also a good choice for small yards, as it easily fits into tight spaces.
Attractive Stone Pathway
Adding stones along with other hardscape elements in your yard can make it feel like you have more dimension instead of looking flat—and that makes it feel bigger than it is. You can create a lovely stone pathway that blends in with its surroundings and adds an attractive touch of color. You can also use these paths for stepping stones that lead from one part of the yard to another, allowing you to make a natural border around your yard without putting up any fences or walls.
The best thing about these stone paths is that they are low maintenance, which means no fuss for your front yard. Another pro is that they will help keep weeds at bay since they don’t allow for much root growth or soil absorption. These are perfect for outdoor living spaces like patios or gardens, too.
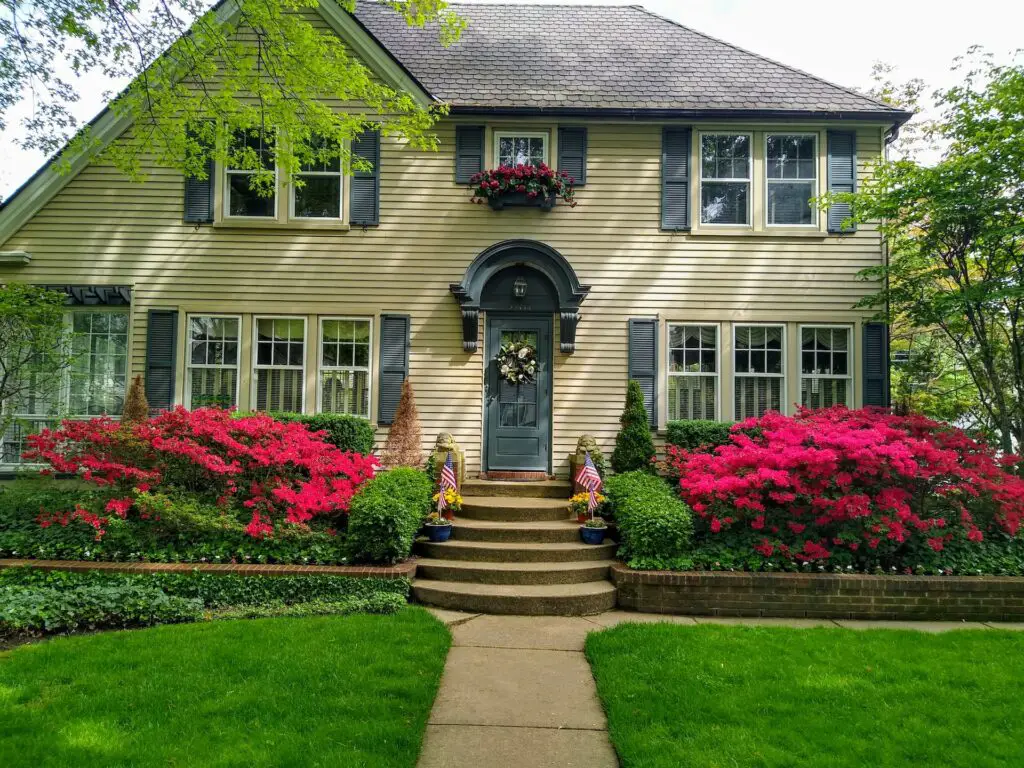
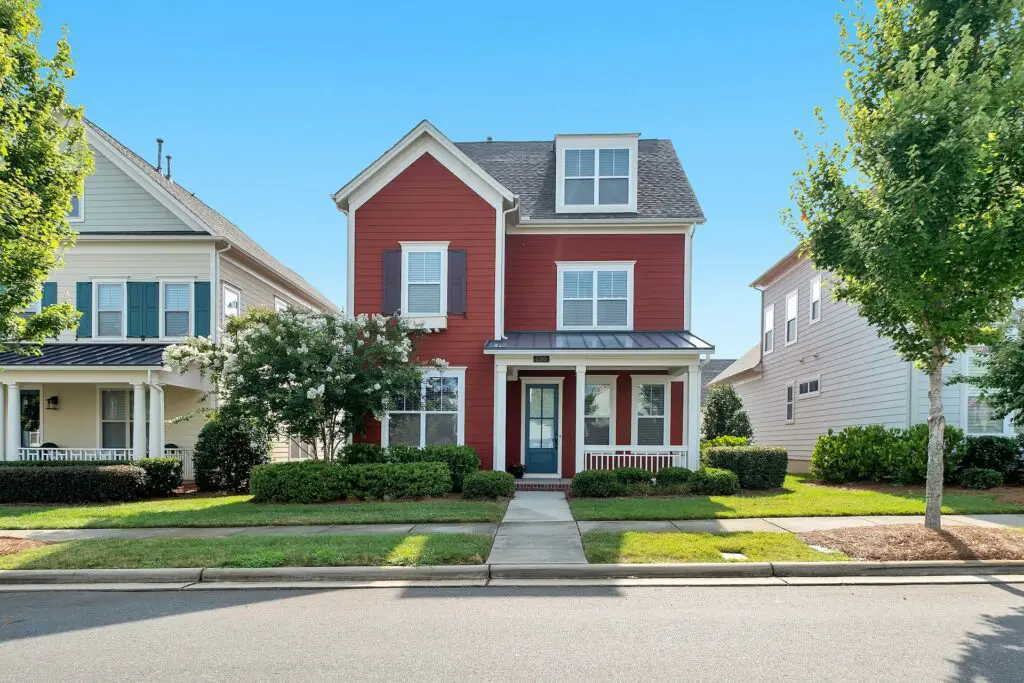
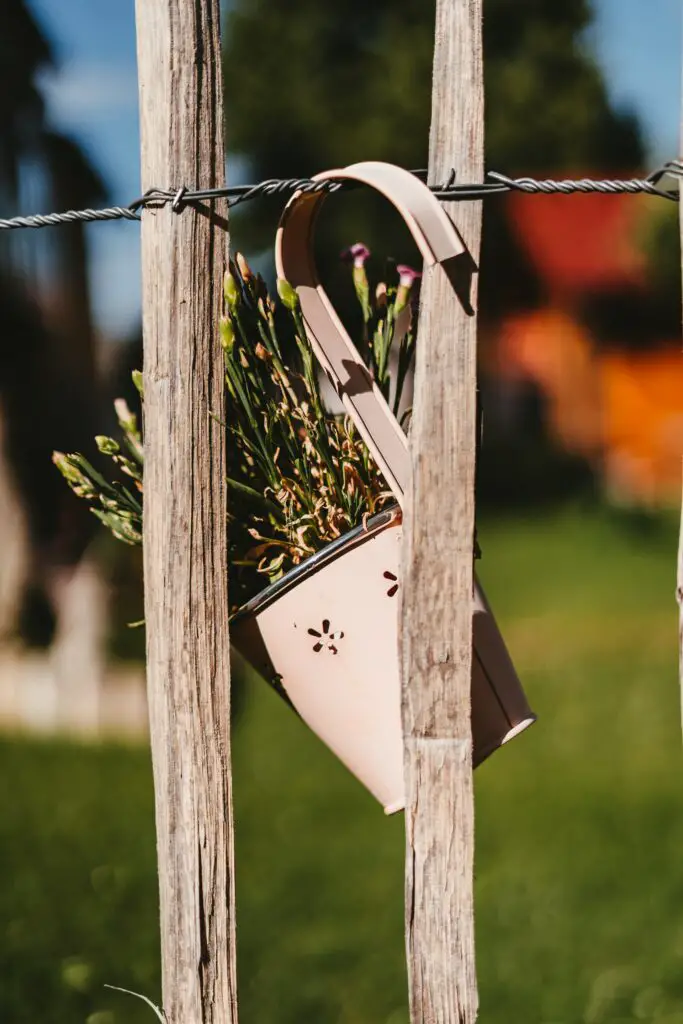
A Picturesque Front Yard
A photogenic front yard looks enchanting if you have your flowers contrasting with the colors of your shutters and doorway—altogether, it’s an eye-catching sight. With flowering annuals, you can rely on front yard planters, window boxes, and garden accessories to enrich the floral display.
You can also install a water feature, like a fountain or pond, to add another layer of interest without being too distracting from the rest of your property.
A Pretty Rosy Arbor
You use an arbor in the garden to designate a route or pathway and to give a gorgeous entryway when approaching a lovely, calm environment. Meanwhile, a flowery arbor transforms any entrance into something out of a whimsical storybook. You can apply this hardscaping style to display your roses without overwhelming the entryway with thorns.
The rose-laden arbor is a hardscape feature made of beautifully curved support for ornamental plants and can be designed to blend effortlessly with the rest of your outdoor space. The light pink blooms of climbing roses are sure to delight your eyes and the neighbors with their vibrant color.
Magnificent, Luxurious Landscape
Decorative concrete walls are among the best ways to have a luxurious-looking landscape, especially if you combine it with a gravel pathway and balance it out with fine flora, like decorative plants, in any modern residence.
Paver pathways are also great for creating smooth transitions between different areas of your yard, like from one side of the house to another or from one garden area to another. They’re also great for creating interesting patterns within your yard that would otherwise be impossible if you didn’t have this type of hardscape surface available!
There is also the option of creating a waterfall garden to achieve the look of a luxury landscape. It can be an eye-catching focal point in any backyard space and adds tons of character. It also gives your yard a refreshing feel that’s hard to beat!
Neat Container Garden
Container gardening is a great way to incorporate colorful plants in your home, and even the simplest plants may produce rich splendor if you know how to hardscape beautifully. For instance, you can have a sharp-looking container garden with a nice set of similarly colored planters comprising vases, oval pots, and window boxes, all of which you can pack with vibrant annuals. A modest landscape design fits the French Colonial house style, allowing the facade to shine. Certainly, container planting can help bring some life into an otherwise lifeless area.
Illuminate the Front Yard with Lights
Decorative lights are a great way to illuminate your front yard. They are inexpensive, easy to install, and can be used in many ways. For example, you could string them up on an archway or at the bottom of a fence.
The right type of light can help you create a warm and welcoming atmosphere that will encourage people to come and hang out. There are lots of different kinds of lights available, so you can find one that works for you.
When considering lighting, you should consider where you want your lights to be placed. If they are too bright, they may be distracting, so it’s important to consider how much light you need in different areas of your yard so that everything looks good from all angles. Landscape lighting should always point away from the viewer.
Low-Maintenance Front Yard Hardscape
Low-maintenance landscaping is a must for any homeowner. If you want to keep your front yard looking great for years to come, consider adding some of these low-maintenance ideas.
When choosing landscaping materials, make sure they are durable enough to withstand all weather conditions while still looking great in your yard!
If you like a low-maintenance front yard, keep it simple with compact, colorful planters that are easy to maintain.
Install stepping stones at the entrance of your garden.
Create a walkway through the garden using pavers or bricks.
Consider adding mulch around and under your plants to help retain moisture and reduce weeds. This also helps prevent erosion and keeps the soil from washing away when it rains!
Hardscape for good seating.
You must have good hardscaping to have comfortable seating in the front yard. This includes benches, planters, and other decorative pieces that will make your space pleasant and inviting.
A well-thought-out hardscape design for the front yard is especially essential if you’re hanging out there for a long time. There are so many ways to improve your outdoor seating experience, and if you’re looking to build a hardscape that’s comfortable, durable, and aesthetically pleasing, consider these ideas:
Ensure your porch furniture is made from durable materials that can withstand the elements.
Add some color. You can pick up a few different shades of flagstone or mulch to create a more exciting look.
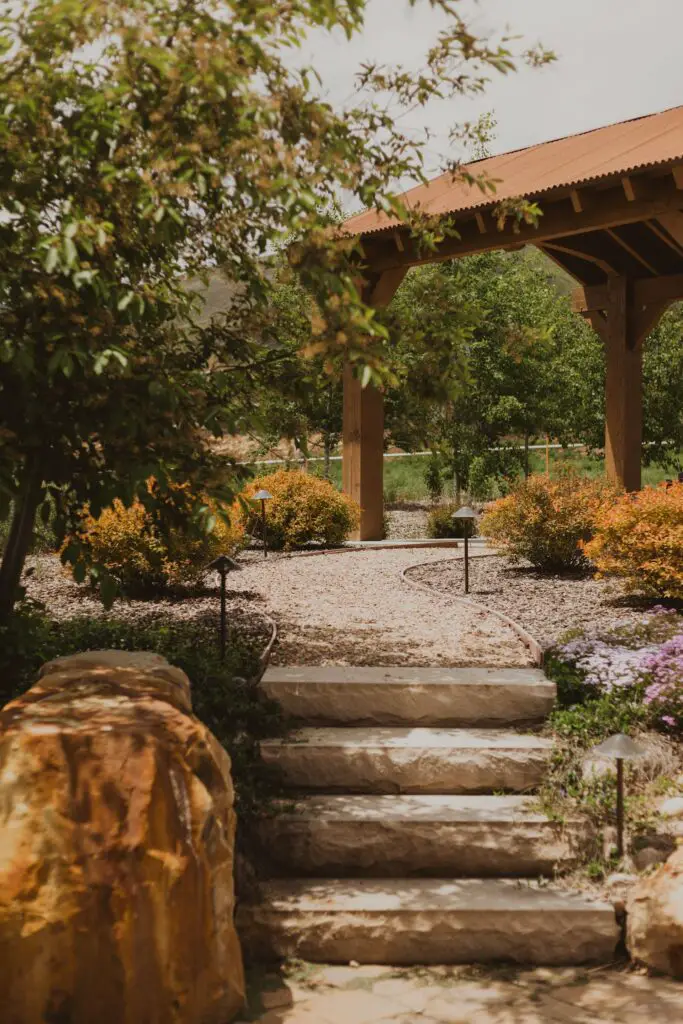
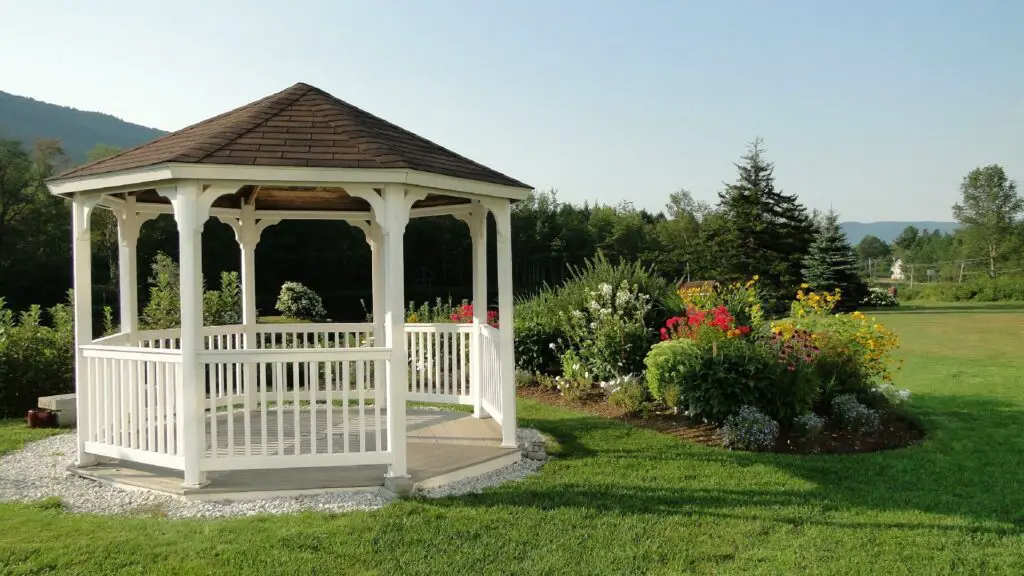
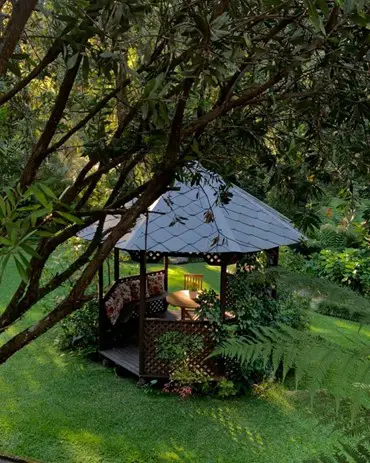
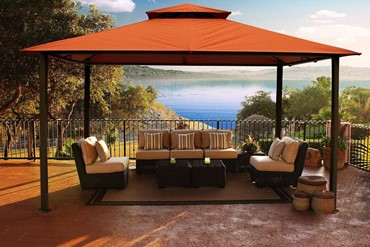
Consider adding a pergola to provide shade in the summertime and offer privacy in the spring and fall.
Use concrete pads to refresh your front yard.
If you want an easy and quick upgrade for your front yard, you can use concrete pads to create a curving walkway through a bed or the lawn. The best part is that these concrete pads are easy to install, so you don’t have to worry about hard labor. The concrete pads provide the perfect surface for a variety of landscape projects.
Wind Chimes or Bells Hanging from Arbors or Pergolas
If you’d like to add movement, beauty, and sound to your yard, consider hanging wind chimes or bells from arbors or pergolas. These can add a beautiful musical touch to your front yard space. When two metal cylinders hit the percussion instrument, they produce a distinct sound, which you’ll appreciate whenever you want to calm your mind. They come in many different sizes and shapes, so you can find one that’s just right for your yard!
After a while, your hardscapes may be showing their age, or you may just be tired of the look. For whatever reason, many people are interested in changing their hardscape. If hardscapes have a reputation, it is that they are heavy, durable, and expensive.
The good news is they can be fairly inexpensive if you have the right materials, ideas, patience, and aren’t afraid of a bit of work. There are many ways you can improve the appearance of your hardscapes without breaking the bank.
So, please read this article for a few cheap hardscape ideas that make it possible to create the look you want within a reasonable budget.
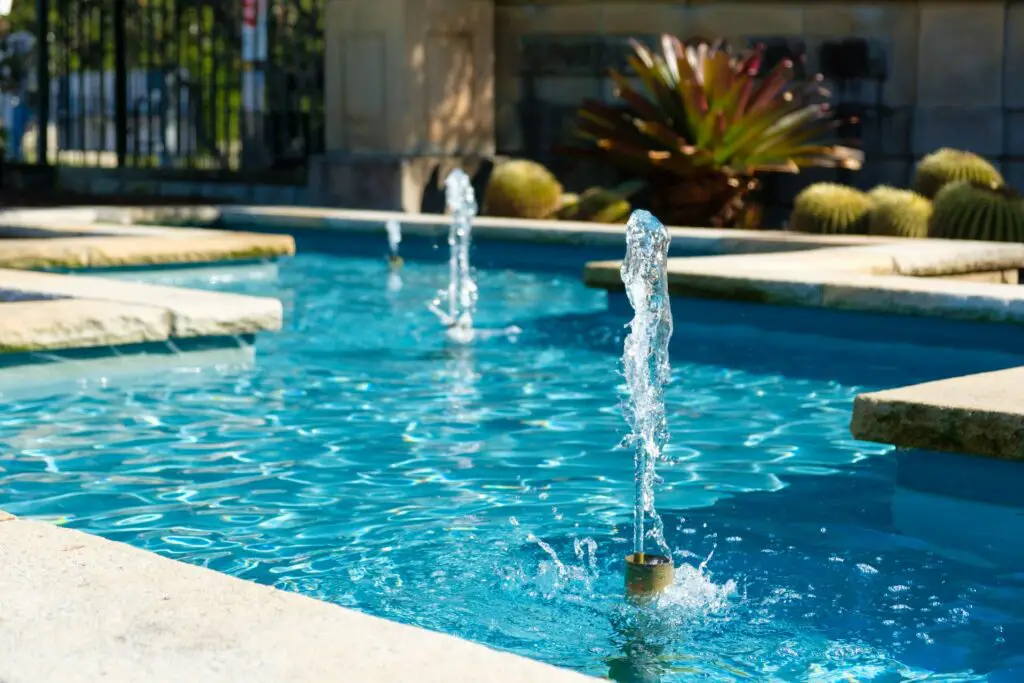
Affordable Water Feature for a Refreshing Look
an expensive water feature
A water feature is a great way to add a little more life and color to your garden, and it can also provide a relaxing atmosphere while you’re enjoying your outdoor space. The sight and sounds of water touch us in a way that no other hardscape can.
If you want an affordable water feature, your creativity and effort level are your only limits.
You can certainly find some used fountains and tubs in second-hand shops or at rummage sales; be aware that old, dried-out pumps are not likely to run too long, if at all.
You can create a basin that will hold water by using almost any material that holds water, such as plastic, rubber, concrete, or clay. You can easily find many different sizes and shapes of basins to hold the water, and after that, it is up to you whether or not you want to add a pump, rock, plants, fish, etc.
You can decorate a water feature using many types of materials, such as rocks, gravel, shells, driftwood, and plants.
Do-It-Yourself Garden Pathway
garden pathway
Hardscape path ideas for beginners do not need to be costly or time-consuming. There are a variety of quick and easy choices available, including pea gravel, pebbles, or some flagstones. Well-made stone paths certainly help you bring nature’s charm into your landscape without costing much.
Pavers are another excellent DIY yard walkway material. These are often cut rocks in the form of rectangular blocks that you align and closely pack to form a nice pathway. And if you want to add a new level to that rustic vibe, space out planks of wood along the stone pathway.
While new pavers and stones can get quite expensive, stones can often be harvested from your land, and there are also many options for purchasing used pavers and stone materials.
Elevate Your Garden Bed
cheap planting box
Raised-tier gardening beds will add a unique touch to your cheap hardscaping activities. Elevating your garden bed is a great way to add a little vertical interest and sometimes even privacy to your space. It’s also super easy to do!
If you want to elevate your garden bed, you can use various materials like bricks, stones, timbers, cinder blocks, old tires, or pre-made tubs. There are also a wide variety of raised planters available online that are relatively inexpensive.
Raised beds are designed to eliminate the necessity for people to get into them, giving easy access to all areas of the bed. According to the University of Georgia Extension website, it’s optimal to build elevated beds that are 4 feet wide and 36 inches above the ground (you can make them any length you want).
Recycle Old Things to Create New Hardscape Decor
recycle things
There is hardly a nicer method to display those old but charming vintage and thrift store purchases than in your garden scenery. Recycling materials is an excellent way to customize your outdoor retreat and give your hardscape some personality.
Making interesting backyard designs requires imagination, effort, and passion—you barely need to spend a penny! You can easily transform drab and uninspired places into eye-catching landscape areas by adorning your yard by constructing spectacular art pieces, making usable products out of cans and bottles, repurposing steel or plastic items, or even just repainting your fences a different shade. You can use almost any item, such as wood pallets, old doors and windows, barrels, tires, and more, to create a unique look for your garden or patio.
To make the most of your recycled materials, consider adding decorative touches to your planters or trellises to give those old hardscape features a bit of new interest.
Compartmentalize Your Landscape
compartmentalized garden
Using borders to improve front yard or backyard landscaping is an inexpensive strategy to enhance your hardscape. This technique can add to the landscape if you vary your materials and blend different materials to create one cohesive yet interesting look.
You may have an idea of what you want to do in the front yard, but you might need a clearer idea of what to do in the back or side yards. That’s why dividing your space lets you experiment with multiple projects, each with its design focus and budget. An inexpensive way to do it is to use big ornamental rocks to adorn your borders.
Gardeners often compartmentalize different areas of the yard into separate little “rooms” with the landscape.
Inexpensive Landscape Lighting
cheap outdoor lights
These inexpensive landscape lighting ideas will help you transform your yard into a stunning, dreamy sight in the evening. But if you’re on a budget, it can be hard to figure out where to start. Here are some ideas that may help you save money while illuminating your outdoor space.
String lights come in a variety of sizes, styles, and colors, making it hard not to get an outdoor space that looks fantastic. These are straightforward ways to add flair to a place without modifying much. Because most of them are now LED, they will also conserve electricity in the long term.
You may use landscape lighting to accentuate or highlight features of your landscaping or as a general lighting source in areas like pathways and steps. Either way, it can make a huge difference to the hardscape.
Cut Costs by Making Your Garden Furniture
diy garden accents
You can save money by building your wooden garden furniture. The materials are readily available, and you only need basic tools. Creating your outdoor furniture will add a unique touch to your garden and reduce costs for the summer months. Plus, you can create pieces that match existing house furniture or go in a completely different direction with a fun new look that reflects your personality. Once you get your projects going, it’s fun and satisfying to have a set of DIY garden chairs or tables and some simple shelving for your potted herbs.
You can always repurpose indoor tables and chair set that don’t get much use, or you may have some old cushions that you could make into pillows or seat pads. Just be aware that water absorbing materials are usually not the best choice for outdoor spaces unless you live in a very arid area. You could even take old pieces apart and build something new with them — like a bench or tabletop. The possibilities are endless when looking to make unique outdoor furniture!
Use Fancy-Looking Outdoor Rugs for an Inviting Patio
outdoor patio carpet
Instead of investing in a replacement patio, conceal a worn-looking deck or pavement with beautiful outdoor carpets, mats, or rugs. If you want to go the eco-friendly route, pick ones made of recycled plastic! You’ll be surprised at the variety of designs and colors. It’s a very affordable object that instantly makes a difference in the landscaping look.
Being cozy to the feel, they are the simplest and most effective method to incorporate your taste in design into your outdoor seating area and a useful centerpiece to organize pieces around. Furthermore, they are simple to maintain, may be left outside no matter the weather, and dry quickly.
Stylish Fencing for a Neat-Looking Perimeter
stylish fencing
If you’re looking to spruce up the exterior of your home, an easy way to add style and curb appeal is by getting a gorgeous fence. And if you’re on a budget, there are many ways to get creative with your fence design and materials.
Decorative fencing is available in many different styles and materials, including wood, metal, and vinyl, but you’ll want to choose one that complements your home’s architecture and style. You can also choose from an assortment of shapes, sizes, and heights when choosing attractive fencing.
Wooden fences are classic in design and come in many different styles and colors, including wood stain finishes, stain color options, natural wood finishes, and pressure-treated wood species such as cedar or redwood. Vinyl fencing is another popular choice for homeowners who want something durable yet still look modern or traditional in appearance, depending on their needs.
Many people have created their own fences using nothing more than intertwined branches, twigs, and vines.
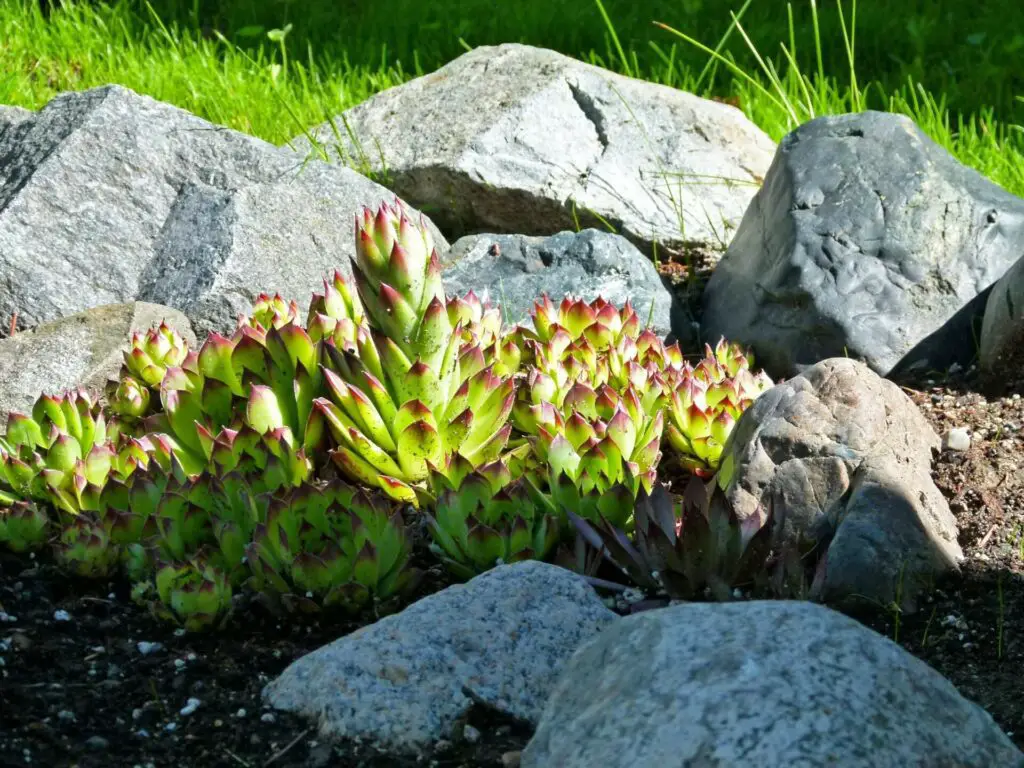
Modify the Borders Surrounding Your Backyard
modify borders
A great way to add interest to your backyard is to add some splashes of hard materials to the surrounding garden beds.
Having a large boulder or even a small section of fence in a bed full of plants will help draw your eye from one area to the next and add a bit of intrigue.
Doing this is an easy way to transform your backyard into something that feels more finished and is also an excellent option for those who don’t want to spend money on expensive materials.
The options are limitless, and constructing borders in any environment can also establish visible boundaries dividing flower beds, grass, and other plantings. It’s a terrific technique to make the best use of even a little area and make it fascinating.
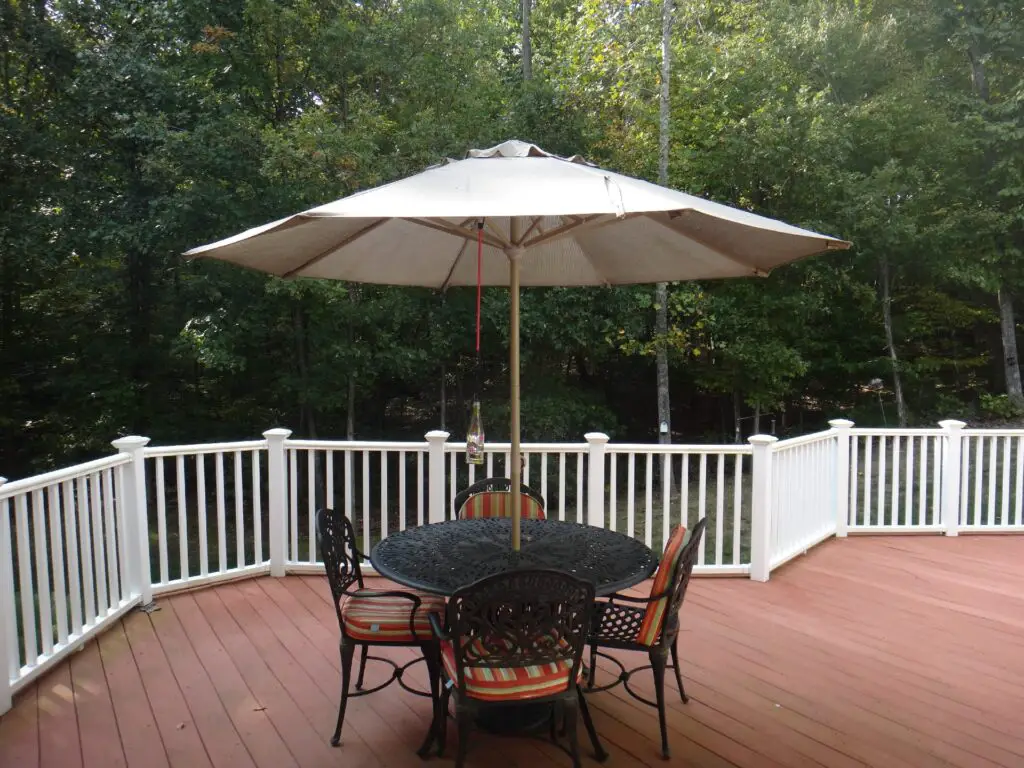
When it comes to backyard gathering areas, our choices are decks or patios. The term deck usually refers to a wooden structure raised off of the ground, and the term patio more often refers to a flat masonry surface installed in the ground.
There are definitely those who feel very strongly one way or the other, but many homeowners prefer to install a deck over a patio. We will explore this choice a bit further and try to figure out exactly why some people have such great admiration for their deck.
A well-built deck can transform your backyard into a cozy spot where you can host parties or private gatherings. It can also serve as an area where a family can relax after a stressful day at work.
Despite their popularity, many homeowners are still undecided and overwhelmed by the idea of planning and building a deck on their property. There are so many options to consider and decisions to make that it can seem like a daunting process.
If you’re one of these people that could use a backyard gathering space but are still on the fence when it comes to decks, let me help you decide whether a deck is the thing for you or not. I’ve listed every deck’s function and answered some frequently asked questions about this popular landscape feature.
What is a Deck?
A deck is a raised platform built from wood or a wood-like product that can be freestanding or attached to a house. Its primary purpose is to give you a comfortable and convenient place to sit and relax with your family. Decks can have many options, but most will have railings and stairs.
One of the most common materials used in building decks is natural wood. Pine, cedar, and redwood are popular choices, but composite wood materials and vinyl have gained popularity recently.
One nice aspect of decks is that you can easily add additional structure for some privacy or shade. If you’re not a fan of roofs, you can add a pergola that can make it look more natural and provide some shade while helping it blend with the surrounding landscape.
Similar to a patio, you have the option to add extra features to your deck, such as an outdoor kitchen and a firepit. However, this is a raised wooden platform, so it does have some inherent limitations to consider.
The Good Things About Owning a Deck
You may be thinking about decks and wondering if they are a good fit for you, your family, and your home. Here are some of the good things that come along with deck ownership.
Decks increase the value of your home
According to most experts, relative to their cost, decks can boost the value of your home more than adding other outdoor living spaces. Data suggests that you can expect a 100% return in value for your deck if you decide to sell your property in the future.
Apart from this, decks have a certain appeal to people, so you might be able to sell your house more quickly.
The increase in home value and desire to purchase a home with a deck only applies to homes with well-built and maintained decks.
A poorly built or worn-down deck can definitely lower your home value and make it a less appealing purchase because the potential buyer will see it as something that needs to be fixed.
The moral of the story is if you are going to install a deck, make it a nice one and plan to keep it well maintained.
Decks offer more functionality to your property
Outdoor living has become a popular trend, and decks make this possible. Adding chairs or a sofa on your deck can give you a space to relax and unwind when you feel like a bit of relaxation in the great outdoors.
What’s more, if you decide to add an outdoor kitchen or maybe a roof to your deck, you’ll be able to enjoy sumptuous meals with your family regardless of the weather.
The addition of a well-built, sizeable deck can allow you to do more in your outdoor living space than ever before.
Decks increase your living space.
Having an additional sitting or gathering area gives you more entertaining flexibility and more space for the family to spread out a bit.
When the weather is good, decks are a great family and friends gathering space unlike anything inside your home.
Decks can be gardening space.
Some homeowners also decide to use their deck for their container garden. They set out some decorative pots and grow some select veggies and herbs to use for cooking.
Decks enhance social gatherings
Decks are perfect if you like to stage parties and gatherings. It offers a less claustrophobic atmosphere, and your guests won’t need to worry about being in close quarters or needing to take off their shoes. Decks are also great gathering places for those who like to enjoy a good cigar from time to time. Now your cigar smoking guests don’t need to stand in the driveway to enjoy a smoke.
Your deck can be like a second kitchen
If you are having a party and the inside kitchen is full of cooks and food, your outdoor cooking area can be put into action to help take some of the load off the indoor oven. Fire up that grill, and let’s see what we can do.
If your deck is big enough to house an outdoor kitchen, it would be even better. Having all the features of a secondary kitchen out on your deck could be a very cool way to interact with your guests while cooking an excellent meal.
Your deck can have fire.
Another cool thing you can do on your deck is to gather your visitors around a fire pit for some effortless, cozy late-night chats. Of course, if you will be burning wood up on a wooden deck, you will need to be sure to have a high-quality fire mat below your portable fire pit. If you plan to use your deck in this way, be sure that there aren’t piles of leaves or woodchips below your deck that could catch fire should a hot ember drop down between the boards.
Decks improve the aesthetic appeal of your yard.
While adding flower beds, privacy fencing, and outdoor living rooms can dress up your yard, building a high quality, creatively designed deck can add some height and structure to your yard at a reasonable price.
With the wide variety of materials that you can use in your deck construction, you can really be creative and make this deck an integral part of your landscape design.
The height of the deck can add to the intrigue by offering multiple levels and differing viewpoints of the yard.
Decks can give you more privacy
If you want to enjoy your outside space without worrying about the prying eyes of your neighbors, then build a deck. The rails of the deck will already increase your feeling of privacy. Add to that the height difference, and your deck can be much more private than a patio in the same spot.
Many other privacy features can also be added to decks, such as latticework, pergolas, gazebos, seat walls, curtains, and privacy panels.
By having a deck, you can increase the private space in your yard in a comfortable way.
Decks can double as additional storage
Since decks are often elevated, the space below it can be used as dry or wet storage.
Dry deck storage requires a waterproof barrier between the space below and the decking board, and this would require an under-the-deck drainage system to keep your stuff dry and protected.
On the other hand, Wet deck storage doesn’t need protection from the elements. All the items you’re going to store here are weatherproof, and some great examples are kayaks, pipes, plastic toys, etc.
If you enclose the underside of your deck with latticework or privacy walls, you are essentially creating a storage shed on your property.
Decks can serve as a stage for kids
Consider the excitement of your children when they realize that they can perform a play up on stage in their own yard. I’ll be that you’ll have some fun and impressive performances if you have a well-built deck to use as a stage.
You can gather some blankets and lay them on the grass, so you have a seating space while your children are up on your deck performing whatever it is they want to perform.
Decks can be great play areas.
I know several people who have gates on their decks and can close them and use them as contained and controlled play areas for their toddlers. Now they have a space where the little tike isn’t going to wander off and will not come back into the house covered in mud since the deck is high and dry—no muddy mess to be found here.
Even when the kids get a bit older, the deck can be a great palace to play when the grass is wet. Because it is elevated and well-drained, the deck will be the first surface to dry off after a storm.
Decks can be a fun outdoor office
It can be difficult to stare at your computer monitor or your office wall for days on end. This is where decks become extremely helpful. By moving to your deck from time to time to work, your mind becomes more refreshed. The change of scenery encourages the production of serotonin in your brain, which makes you happier, and therefore, more productive. The deck can also be an excellent place for your teenager to get some homework done in an area away from the younger kids.
Decks are relatively inexpensive.
Compared to other similarly functioning features of your home, decks are relatively cheap. Building a deck can be much more economical than building a patio due to the materials’ ease of construction and economy.
Decks may be safer than patios.
No matter what you build on your property, there will always be codes to follow to ensure safety. Compared to patios, decks can be seen as safer because handrails are all around the deck. These rails can make walking sitting, and standing easier for the elderly and provide a barrier to the surrounding gardens for the young children.
Decks can be fairly low maintenance
There are a lot of landscape features that are high maintenance (fountains, ponds, outdoor kitchen, etc.) Luckily, decks aren’t one of them. Sure, you will need to clean it every once in a while to remove dry leaves and other air-born debris just like you would with a patio, but you won’t need to worry about pulling weeds and adding mortar or sand as you might with a patio.
Decks might require power washing, sealing, and staining every so often, depending on the type of wood and finish that you’ve chosen.
Decks provide peace and quiet
Living in a fast-paced world means we experience constant stress. The good thing about having a deck is that we have an area outside our home where we can have some peace and quiet when everything seems overwhelming. Just a few minutes spent lounging on your deck can significantly change your mood.
Decks allow you to be creative
Decks are among the most customizable home features. That being said, you can use your creativity to design one that fits your home. There are so many deck styles that one can choose from, such as single-step designs, multi-tiered, or those which have extra amenities like planters, seats, bars, fire pits, and hot tubs. Your options are practically limitless, and you can customize them according to your taste.
Decks are relatively fast and easy to install
Many homeowners delay the installation of their outdoor gathering space because they fear that it will be a long and drawn-out project. Compared to patios that can take weeks with heavy equipment and stone or brick dust, decks can be constructed in a shorter time period with less yard disruption.
Decks can be built where patios cannot
A patio requires excavation to hardpan and the installation of a base below the patio surface. We still need to excavate with deck construction to set the support posts, but there are only a few of them, and we can design the deck to place those support posts wherever we would like. We can design a deck to avoid buried utilities, tree roots or any other objects that may interfere. If you’ve got a prize tree in the area where you would like to have your living space, you can build the deck around it or right up close to it to take advantage of its shade without the fear of damaging its root structure.
Decks can be installed on uneven terrain
This is where the flexibility of deck design and construction can really shine! Decks are quite literally designed to be installed on uneven terrain. Decks can be installed practically anywhere as long as there is a suitable and durable foundation.
On a steeply sloped backyard where you would need to do a great deal of excavating and create multiple very expensive retaining walls to build a patio, a deck can be built with no problem at all.
In fact, decks become much more interesting in an interestingly sloped backyard. The deck and its potential for multiple levels and stairways can be your access to some areas of your property that might be otherwise inaccessible.
Decks make your place a little cooler during summer
Decks can literally make your yard cooler. Unlike brick and stone, which absorb the heat and then release it back into the yard as the night air cools, the deck boards do not take in as much heat, and they actually shade the ground to keep the overall yard temperatures cooler. The lighter the color of your deck, the more heat it will reflect rather than absorb.
Decks help improve health
Fresh air and sunshine will indeed do a body good, and more time outside will get you more of both of these vital elements. Especially if you have a deck that provides you with some shade, you will be able to spend long days out on the deck, which will lower stress levels as well as provide fresh air and sunshine.
The Bad Things About Owning a Deck
To be fair in our analysis, I need to let you know about some of the negative aspects of owning a deck.
Decks are made of wood or wood-like materials
The fact that the entire structure is made out of wood comes with some disadvantages.
Wood needs to be maintained – no matter the type; eventually, wood will need some maintenance.
Wood changes over time – Wood will move, crack, twist, and generally change over time.
Wood is flammable – The fact that your deck is flammable can limit how you are able to use it.
Wood can give you nasty splinters – If you’ve ever gotten a sliver of wood stuck into your foot, you know what I am talking about.
Wood can deteriorate over time, especially in wet areas or areas with termites and carpenter ants.
Squirrels and chipmunks can chew on wood.
Composite, wood-like materials tend to be really hot in the sun and tend to sag and fade over time.
Decks are raised off of the ground
The fact that your deck is off of the ground will come with some disadvantages
Because they are off of the ground, this will limit the type of products that you can use if considering building an outdoor kitchen. Most outdoor kitchens are constructed of masonry materials, which will not work on top of a deck. Large masonry structures need a solid footing on the ground, which means that masonry fireplaces would not work on a deck either.
Because they are raised off of the ground, a deck will usually need to have stairways and railings by code.
Because they are off of the ground, decks might increase falls – I know that this contradicts some of the safety aspects listed above, but the fact that a deck is raised off the ground means that it is possible to fall off the deck or down the stairs.
Decks can be cooler
Being raised off of the ground and allowing the wind to whip up underneath them can make a deck colder during the windy and cold times of the year. Decks can also be cooler simply because they may catch more wind being up higher in the yard.
Decks are constructed with metal fasteners
These metal fasteners, will loosen, crack and corrode over time, so one day, your deck may not be as strong as it once was.
Decks can be slippery
Depending on the wood that they are constructed of, and depending on whether or not they are finish coated, decks can be very slippery when wet. Also remember that a deck in the shade may grow some moss, which can be very slippery also.
Decks have space below
The fact that there is space below the deck means that you may need to close the area off using lattice or privacy walls. This space can be helpful for storage but can also be a place where animals make nests and leaves and debris can pile up. This area can be very difficult to clean out. If the underside of the deck is left open, it can look a bit messy. How can you landscape an area below the deck?
Most decks are mounted to the house
Most of these structures are connected to the house with a ledger board. This sometimes requires removing siding to mount it properly. The real struggle comes twenty years later when you decide to remove the deck and then need to find a piece of siding to match the house.
Frequently Asked Questions About Decks
What is the cheapest way to build a deck?
If you are on a budget and you don’t want to break the bank, it is still possible for you to have a beautiful deck. One way to build a cheap deck is to choose an affordable but durable material. Using pressure-treated pine rather than some exotic species will definitely save you a few bucks. Choosing to build a square or rectangular deck rather than some unusual shape will cut costs. Planning your deck to take full advantage of nominal board lengths is important so that you don’t end up with a bunch of useless cutoffs at the end of the project. If you are a handy person, you could always build your own deck. If you are planning to hire a contractor, take your time. Talk to a bunch of contractors and choose the one that you think is trustworthy. Then, ask the contractor if you can get any sort of discount if your deck were installed in the offseason.
Will adding a deck increase my taxes?
Property tax laws vary, but generally speaking, your property tax will likely increase when you do renovations or improvements to your home. In the case of decks, your choice between freestanding and standard styles will directly affect your property tax. Standard decks attached to your home can be considered improvements that increase your home value, and therefore, they can raise your property tax. Freestanding or floating decks may not require a building permit since they aren’t connected to your house.
Does homeowner’s insurance cover a deck?
Like property taxes, whether or not your deck is attached to your house may affect whether or not your homeowner’s insurance covers it. However, if it is freestanding and situated near a pool or other areas of your landscape, its insurance coverage may be limited. Usually, insurers approve a claim if your deck is destroyed or damaged by unpreventable incidents such as theft, fire, storm damage, vandalism, etc.
Can an amateur build a deck?
Technically, an amateur can build a deck given enough information. If you are a handy person who has the patience and ability to measure and mark accurately, dig holes, use a level, operate a saw and power drill, and generally maintain accuracy in your work, then you should be able to handle the project. Most DIY projects that look unprofessional are due to a lack of quality control and accuracy of work rather than lack of knowledge.
How long do decks usually last?
Your deck’s life will greatly depend on the material you use to build it. On average, natural wood can last from 10 to 30 years if you maintain it properly. Meanwhile, some claims state that cedar, mahogany, and pressure-treated lumber can last 40+ years.
Do I need to power wash my deck?
Most people power wash their decks to prepare them for painting or staining. While this method is quick and efficient, this is not always suggested. A pressure washer can do significant damage if your deck is made from softer wood. If you need to refinish your deck, you may want to simply sand it down. For simple maintenance, deck cleaning solutions are recommended since you only have to wash it with water and a hose.
How do I clean my deck naturally?
There are many types of deck washers and cleaners, and a good number of them are all-natural. Two of the top choices are borax solution and the mixture of dish soap, baking soda, and vinegar. Borax is a versatile cleaner that you can buy at local stores. The correct ratio is one cup of borax for every one gallon of water. Scrub the areas of your deck where you sprayed some borax solution in order to remove that unwanted mildew and algae. Another inexpensive and natural cleaning solution is the combination of baking soda, vinegar, dish soap, and water. All you have to do is sprinkle baking soda on your deck, and then apply the mixture of water, dish soap, and vinegar before you scrub.
What is a good deck size?
If you are looking at creating a small deck that can hold a round dining table and four chairs, you are looking at around 144 square feet. However, on average, a deck should be about 300 to 400 square feet for you and your family to be more comfortable using it. Some of the things to keep in mind are your personal preference in shape and layout, the amount of furniture you need on the deck, and its location. To get a good feel for your future deck, just take a long rope or garden hose out in the yard and lay it out on the ground. This will give you the opportunity to place tables and chairs and really get a feel for the size and useability of the deck.
Are pallets strong enough for decking?
Pallets are often used by homeowners who want to DIY their deck. And this makes sense since pallets are versatile and can be cheap or free. Pallets are also very strong, and they come in different sizes, but their slats are often not close enough together to walk on comfortably. You can use them to build a deck, but they will still need support beams to tie them together.
Can you build a deck directly on the ground?
Yes, it is possible to build a deck directly on the ground, but always use wood rated for ground contact. Keep in mind that no matter what wood you use, prolonged exposure to moisture is its worst enemy, aside from maybe termites.
Final Thoughts
The popularity of decks has been longstanding. Whether or not a deck is the right choice for your home has more to do with your home’s layout and your personal preferences. I personally prefer a patio over a deck because I like having a solid, hard surface dug into the ground, and I really dislike sanding, staining, and painting, so a deck is not for me.
When considering how the deck will fit with your home, a big decision is whether or not you will or can connect it to the house. If your rear yard entrance to your house is a step or more higher than the backyard, then a deck might work well as it could be fastened to the house just below the door. But, if your door is at ground level, an attached deck might be out of the question, in which case a patio might be a better choice.
By incorporating small river rock into your landscape, you will be able to add the beautiful colors and textures of this natural stone without breaking the bank. Many people find the versatility and durability of river rock to be a great benefit to their landscape.
Small river rock can be a great solution to many of your landscape problems. From aolving erosion problems to just accenting a plants, river rock can do it all.
We will detail the many uses, types, advantages and disadvantages of using small river rock in your landscape project.
What is River Rock?
My experiences have taught me that you can’t just start talking about river rock and assume everyone knows what you are talking about. Many of the people I have spoken with have very different ideas of what river rock looks like.
In general, when most people refer to river rock in my area of Wisconsin, they are referring to Mississippi stone. I presume that this type of river rock had originally come from the Mississippi river, but I am not even sure about that.
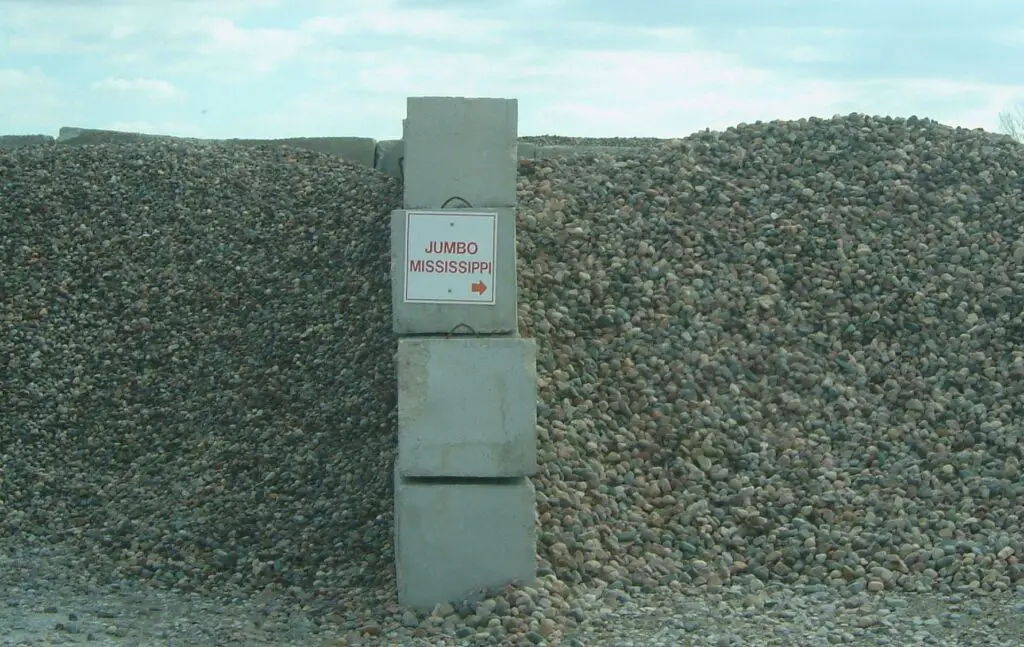
Large and Jumbo Mississippi
I firmly believe that if you are going to call it river rock, it needs to be smooth as a rock would be if it spent many years being washed down a river. If there is one thing for certain, water is a very powerful force and will erode all of the sharp edges off of stone given time. People referring to jagged, sharp rock as river rock, no matter what color it is, are simply wrong.
I would guess that most of these different varieties of what people refer to as river rocks actually come from a rock quarry or gravel pit. I would also assume that most of this rock and gravel that we are digging out of the earth, at one time, was deposited there by a river or maybe a glacier.
Smooth rocks like this can be found in many places, including stream beds, beaches, riverbeds, and even fields and fencerows. They usually have a diameter of 1 to 2 inches; however, this might vary. Although these rocks can be found in many readily accessible places, it is usually not legal to harvest large quantities of stone from public places, so i would recommend buying the stone that you need
Small river rock is going to be different colors depending on where it is found, but most of it will be earth tones for obvious reasons. Most river rock is clean and does not contain fines.
Differences in Rock Types and Names
I’m sure that there are many different types and colors of river rock, but just to clarify a bit, here are some examples of rocks that I have heard referred to as river rock.
Mississippi – This is the classic that most people are thinking about when they use the term river rock. The pile below seems to have more whites in it than I would expect.
3/8″ Mississippi Stone
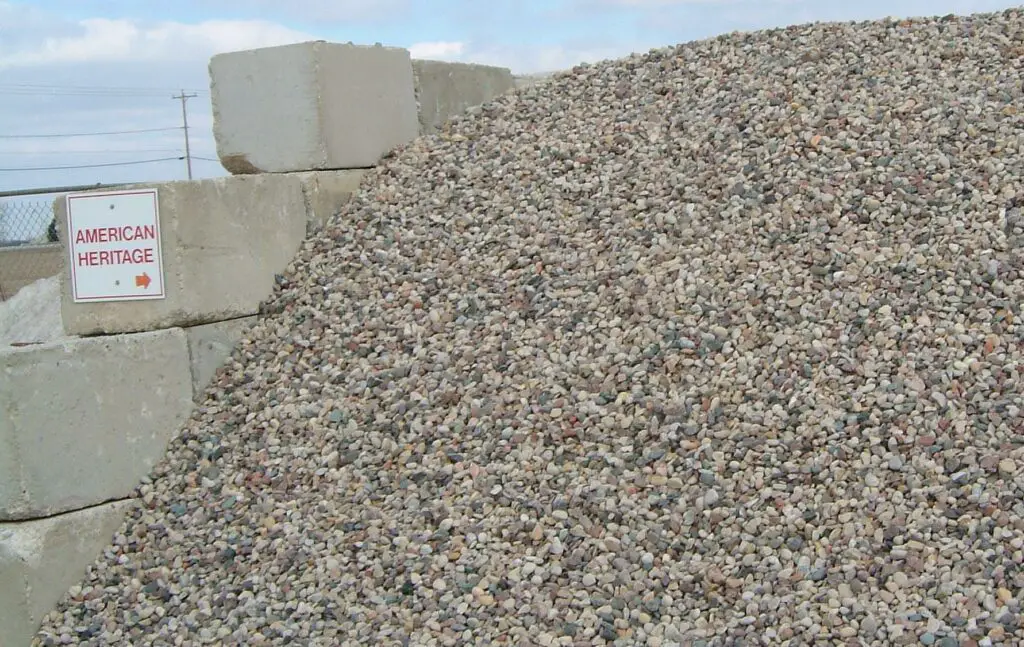
American Heritage – This rock is sized and shaped like river rock, but it contains more white shades of rock, so it is less expensive than the Mississippi stone.
American Heritage Stone
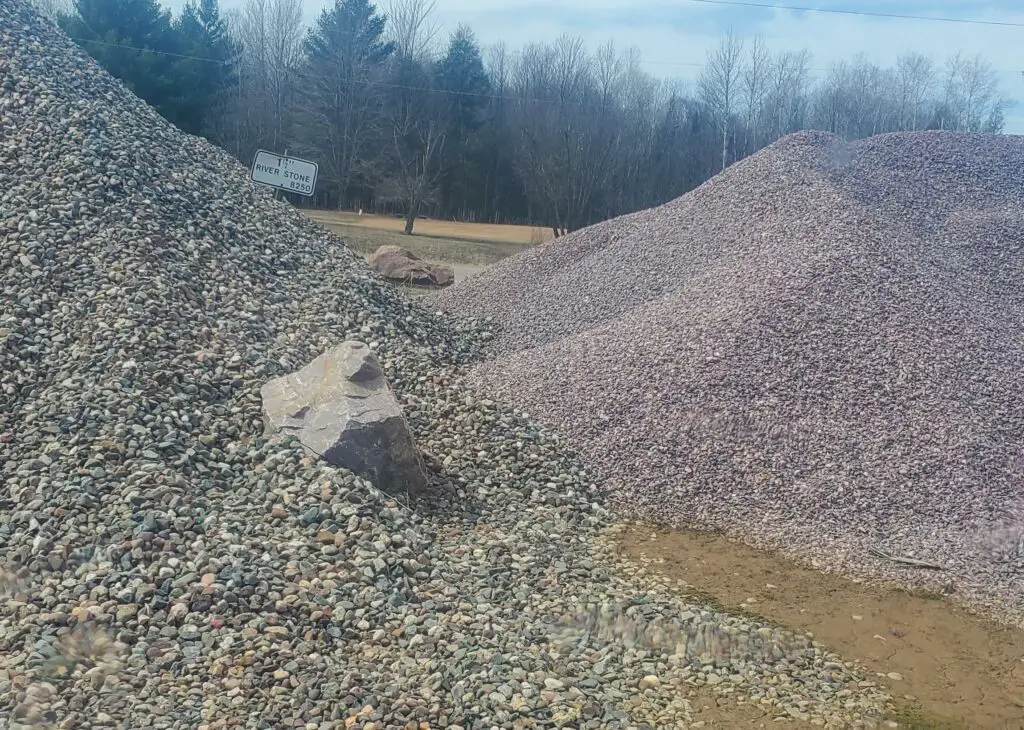
River Stone – This is a very generic term used to describe some smooth rock that is not really what I would call Mississippi, but it is close. If they could call it Mississippi they would, because they could charge more.
Two Piles of Differing River Stone
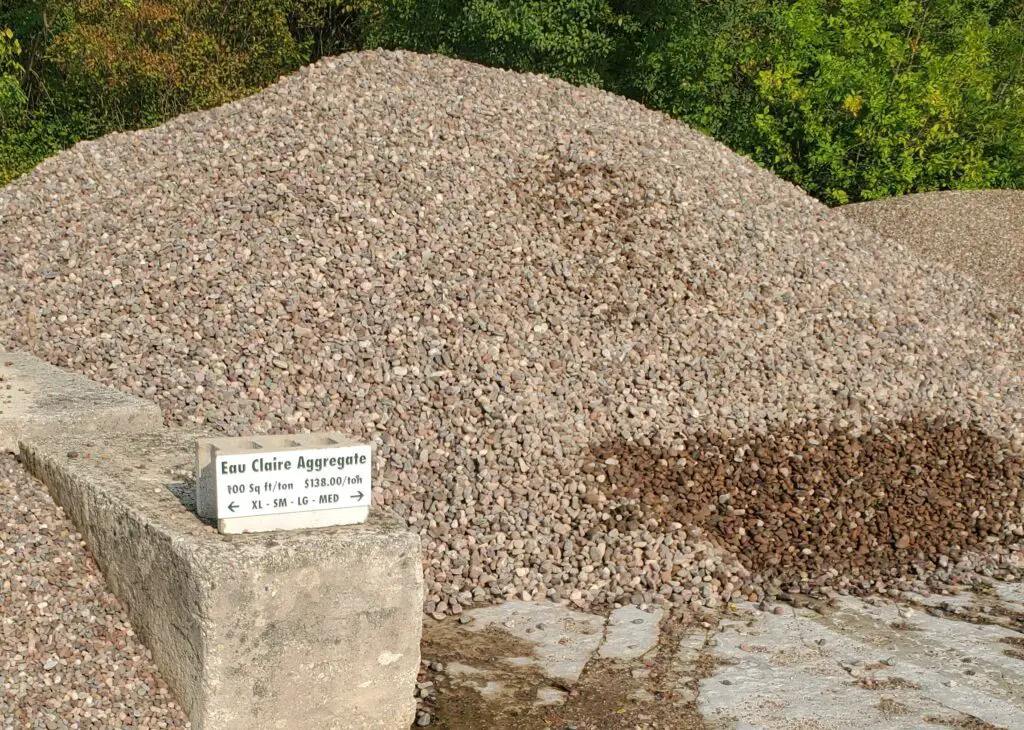
Eau Claire Aggregate – This is clearly not river rock, but it still gets called river rock by some.
Eau Claire Aggregate
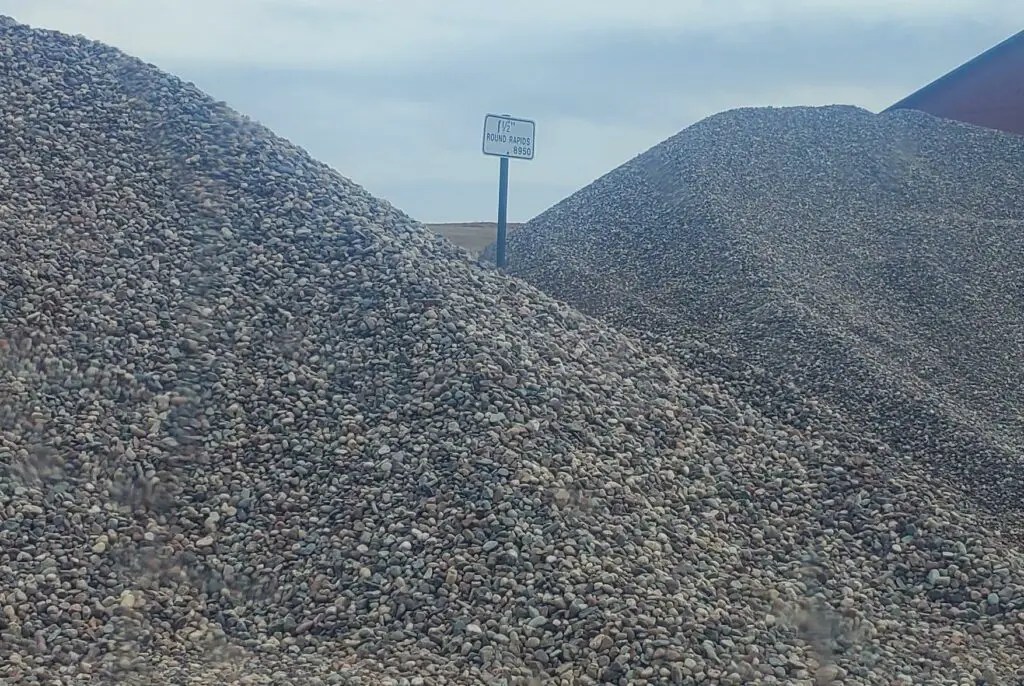
Round Rapids Stone – Once again, this is a generic name for a smooth somewhat colorful stone that is not Mississippi.
Round Rapids Stone
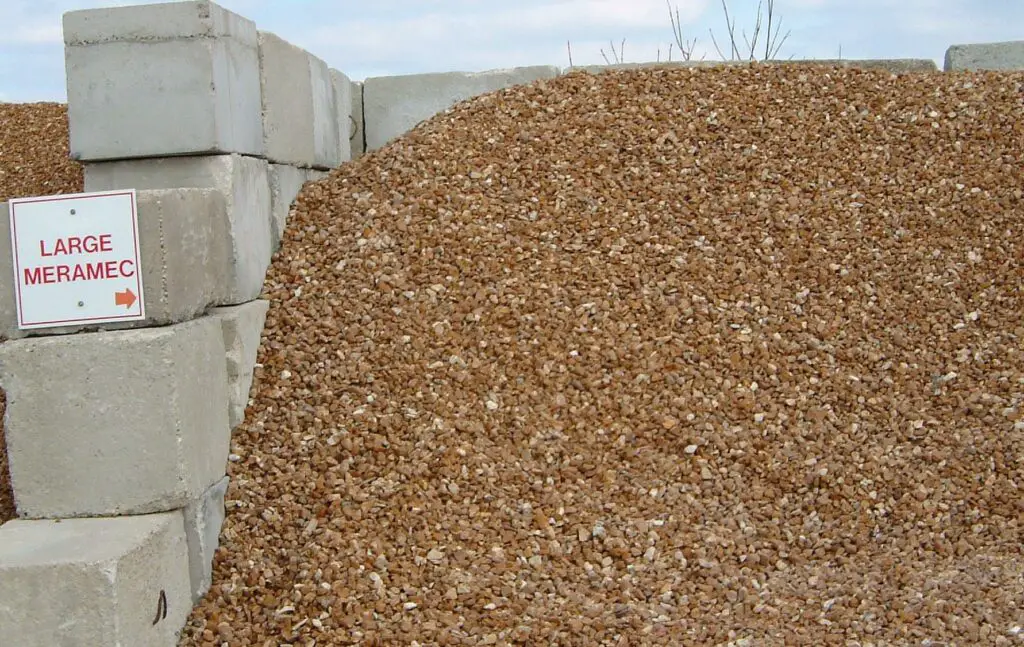
Meramec Stone – I have this referred to as river rock even though it clearly is not. This stone is much more orange and uniform in color.
Meramec Stone
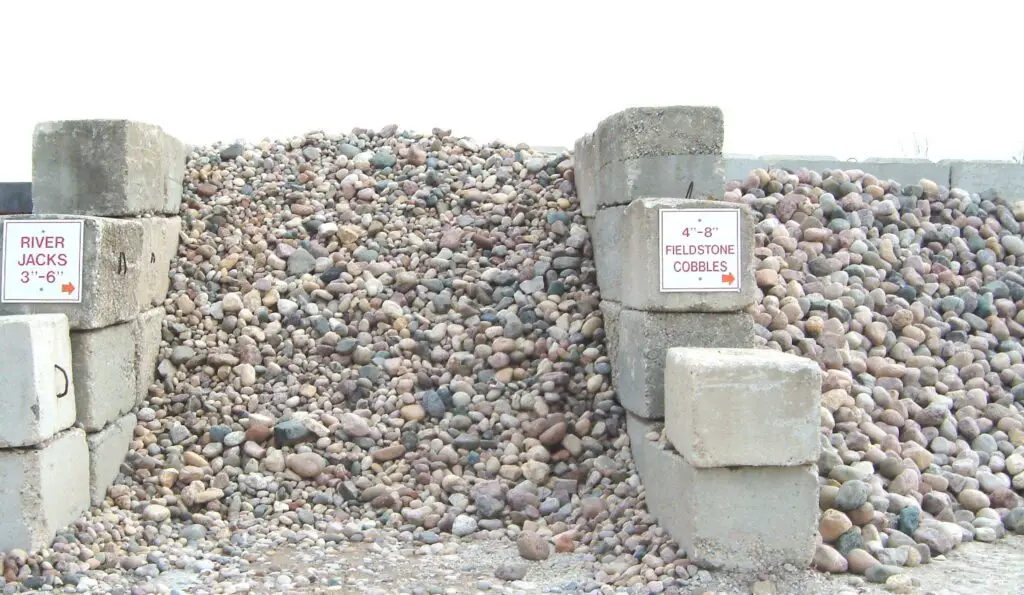
River Jacks and Cobbles – When you start to get out of the smaller sizes, people will often refer to these stones as both river jacks and or cobbles, although river jacks are usually more of a mix of sizes than the others.
River Jacks and Fieldstone Cobbles
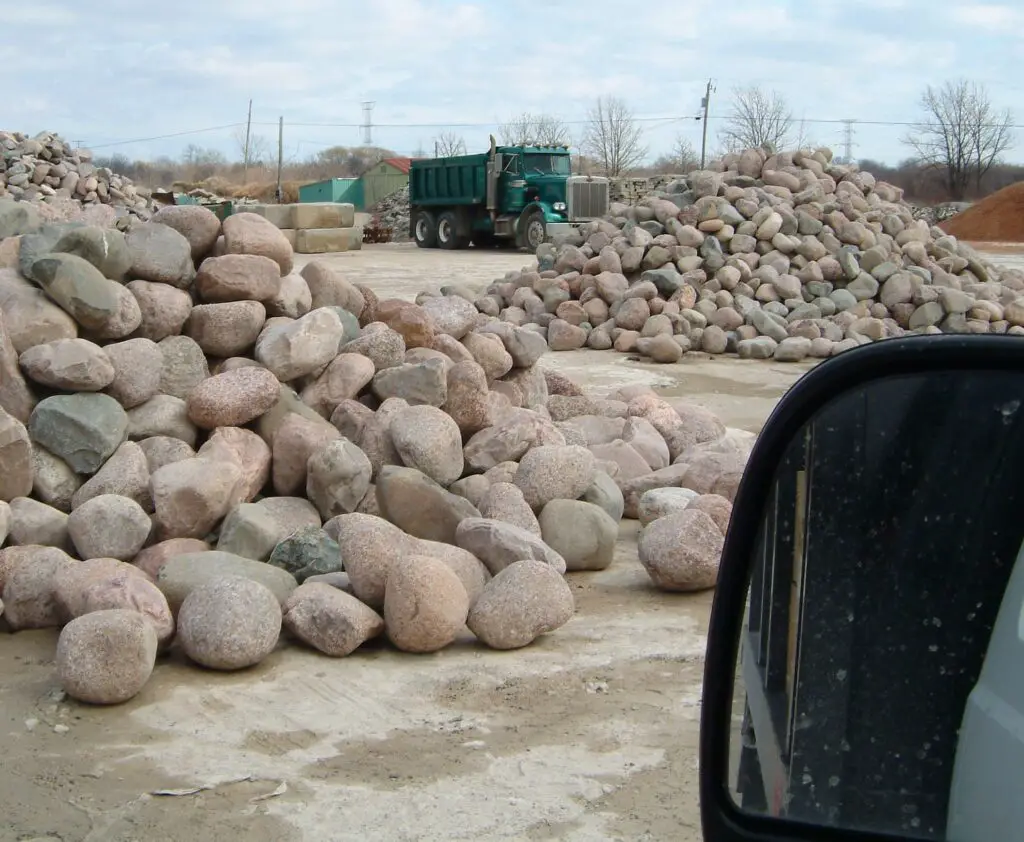
Fieldstone, Boulders, Cobbles – Once you get above the six inch size or so, people will typically start referring to these rocks as fieldstones, cobbles, cobblestone or boulders. But, I have heard people call these stones river rock also.
Fieldstone, Boulders, Cobbles?
Uses of Landscaping River Rock
With the multitude of colors and textures available, using rocks in your landscape may truly add another dimension and character to your scene. River rocks can be used to create or improve both land and water features.
River Rock in a Water Features
Water features and river rock go together like peanut butter and jelly; you can hardly think of one without thinking of the other. It is quite a natural look to have the smooth and colorful river rock in your pond, stream, and waterfall.
As mentioned above, these rocks were worn smooth by moving water or ice, so they fit quite naturally in a pond. The fact that they are smooth not only makes them look like the rock that you might see on the bottom of your local river, but it also means that they don’t have sharp corners and edges to cut through your pond liner.
River Rocks in Their Natural Setting
You might think that the sharpness of the rocks doesn’t matter in ponds, but I will tell you from experience that the majority of holes that I have created in pond liners have been from a sharp rock or sharp part of a rock being twisted or pushed into the liner with force. This typically happens when we have some river rock or boulders on the pond liner, and then we place a huge boulder, and while rolling and twisting it to get it set, we create a hole. So, sharp rocks do matter.
Whether you are building a Koi pond, Goldfish pond, or any other sort of pond or water feature for that matter, using natural river rock in the pond and the surrounding landscape will surely help it blend in and look more natural.
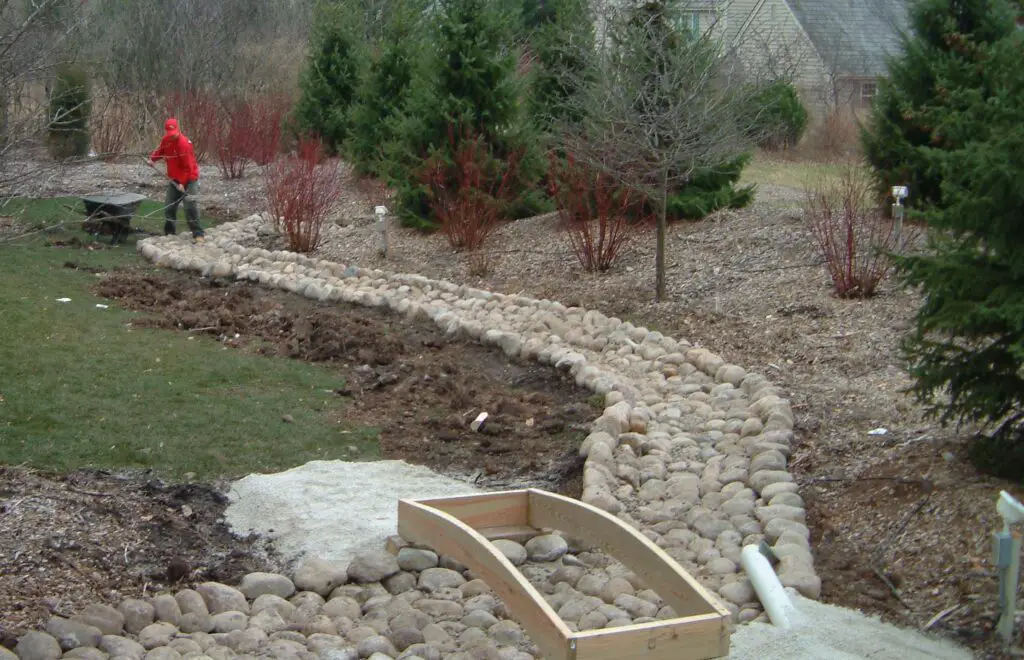
River Rocks used to Prevent Erosion
Over the years, we have often installed river rock of various sizes to channel, control, and move water. Once again, river rock makes it blend into the surrounding landscape.
To create dry or wet riverbeds through yards to direct stormwater where you would like it to go rather than just letting it flood your yard.
To line ditches and flow ways and protect them from erosion.
To fill in that spot in your yard that always seems to be too wet for the lawnmower.
To protect the edges of a natural stream, pond, or lake from water movement.
To protect your beds when placed under your downspouts.
River jacks / cobbles used in a dry stream bed to control storm water
When directing and controlling storm runoff water, it is always good to use larger-sized rock that won’t be easily moved by water flow. It is also a good idea to install a landscape fabric or synthetic liner of some sort under the rock to be sure that the water doesn’t erode the soil out from under the rocks.
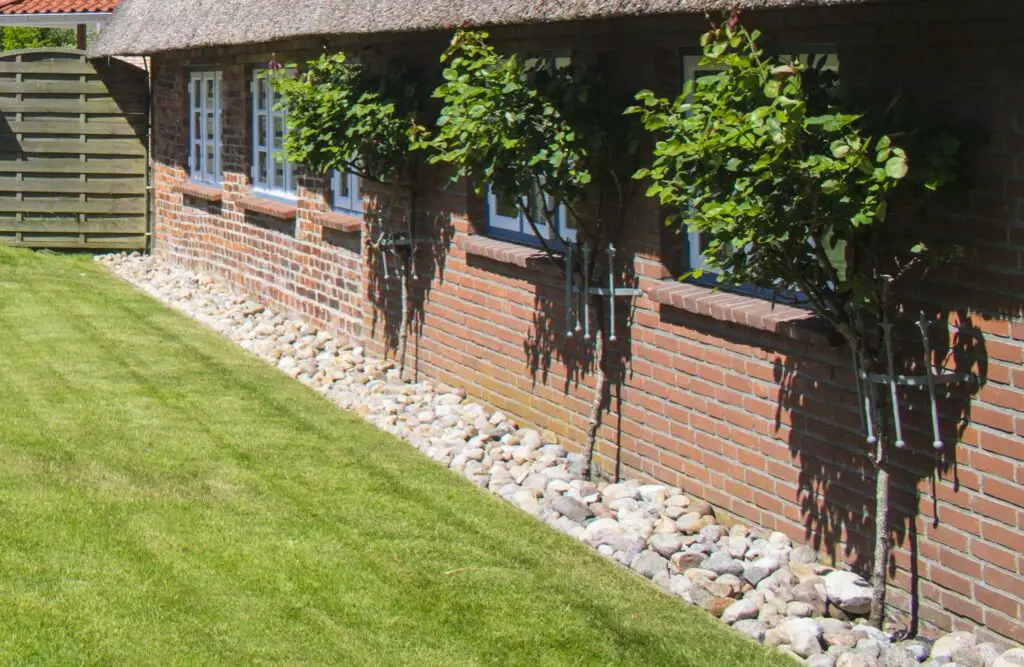
River Rock used as a Bed Cover
The most conventional bed covering materials are wood chips, bark mulch, pine straw, cocoa bean hulls, and other organic materials. There has also been a trend to use ground up, recycled, and colorized rubber to cover landscape beds and playgrounds.
The advantage of using organic products on your landscape beds is that the organic matter will decompose over time and provide nutrition for your plants. This advantage is also the downside. If you use organic mulches, you will invariably find yourself adding more every couple of years because it simply deteriorates over time and needs replacing.
The advantage of using recycled rubber products as mulch is that they don’t decompose like the organics, but the disadvantage is that wind and water can easily displace the rubber mulch. Remember, rubber floats.
This is where using small river rock to cover your landscape beds comes in. River rock will not decompose and never needs replacing, and it does not float or move with the wind. But instead, it actually prevents water and wind erosion.
River Rock on a Landscape Bed
When using small river rock to cover landscape beds, I would always recommend placing the rock on top of landscape fabric so that weeds won’t grow through. The last thing you want is to have a bed full of weeds coming up between your river rock. The rock will make it harder than ever to pull weeds.
This leads us to the two disadvantages of using river rock on your landscape beds. If you don’t do any upkeep to your yard and allow dirt and weeds to get into your river rock beds on top of the landscape fabric, and these weeds grow large and thick, it is almost impossible to fix the problem.
The few times that I have seen this, it has been in a neglected yard, and the easiest solution was to remove and dispose of all of the overgrown river rock and simply replace the rock and landscape fabric.
This, as you can probably imagine, is not an easy task. Installing river rock is hard enough since it is heavy, and taking it back out after many years along with the fabric below can be a truly miserable task.
River rock weighs about 2500lbs per square yard, so it is not light. If you plan to use it for your landscape, make sure that you plan it out so that you never need to remove it. Also, although the combination of river rock over landscape fabric is an excellent deterrent to any weed growth, there will be weeds that grow on top of the fabric over time, so it is important that you stay after these and pull them when they do arrive.
Another disadvantage of using river rock in your landscape is that you probably don’t want to use it in your perennial or annual flower beds. River rock will make it very difficult for flowers to grow and spread as they will tend to do. It will also make it very difficult to work the soil if you want to make changes in the future. Also, the river rock will absorb the heat from the sun, so it may not be the best for all plants. I would recommend organic mulches for annual or perennial flower beds.
River rock is great below shrubs and trees and in any spot where you want to absolutely minimize the required maintenance.
River Rock as a Path
For years, small river rock has been used as a decent surface for casual garden paths. As with any materials, river rock has its plusses and minuses for use on a pathway. Once again, it is great because it never decays, and set on top of landscape fabric, it will last and be weed-free for many years to come.
River Rock in a Path
The downside to using river rock on your path is that they are small, smooth rocks with no fines to tie them together. This means that the rocks will not really stabilize over time unless dirt gets in between the individual pebbles. Obviously, small river rock will be easier to walk on than larger river rock, but it will also move more with every step. This may not be a problem for slow strolls through the garden with comfortable shoes, but heals will be a problem, and running children will spread these small stones all over the place.
River Rock used at the Fire
Whether you have an in-ground fire pit or a freestanding fire pit, you will want to be sure that the surrounding area is protected and definitely not flammable. Large rive rocks have been used for many years to border campfires, and small river rocks can be a tremendous fire-proof surround for any type of fire pit.
Once again, the advantages of river rock are its weight and longevity. Using it for a play area will undoubtedly make for a long-lasting play area, but will this be because the stone is so durable or because it just isn’t that much fun to play in? If you are going to try river rock for a play area, I would again plan to put down landscape fabric first, and I would recommend making the stone six to ten inches thick to avoid bare spots over time as kids will move the small rocks. I would also recommend using the smallest river rock you can find; the smaller it is, the more comfortable it will be to play on.
River Rock in a Play Area
Before having river rock delivered to your house to create a play area, take the kids to your local rock yard and have them play in the river rock pile to see if they will even like it. You might decide that sand is a better material to play on that won’t decompose.
Also, keep in mind that neighbor kids who haven’t been taught not to throw stones might be a big problem if they are playing on a big mat of river rock. Plenty of ammunition there.
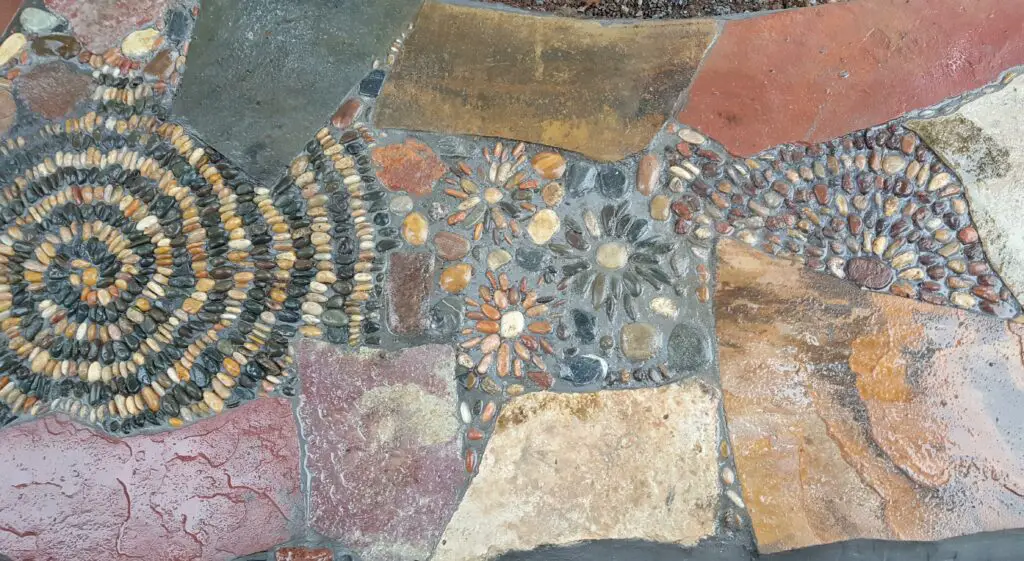
River Rock for a Mosaic
Did you know that you can also make a mosaic? Design a one-of-a-kind walking route in your front yard by creating a river rock mosaic placed in concrete. This type of application takes more than a bit of skill and creativity, but it can be very rewarding when finished.
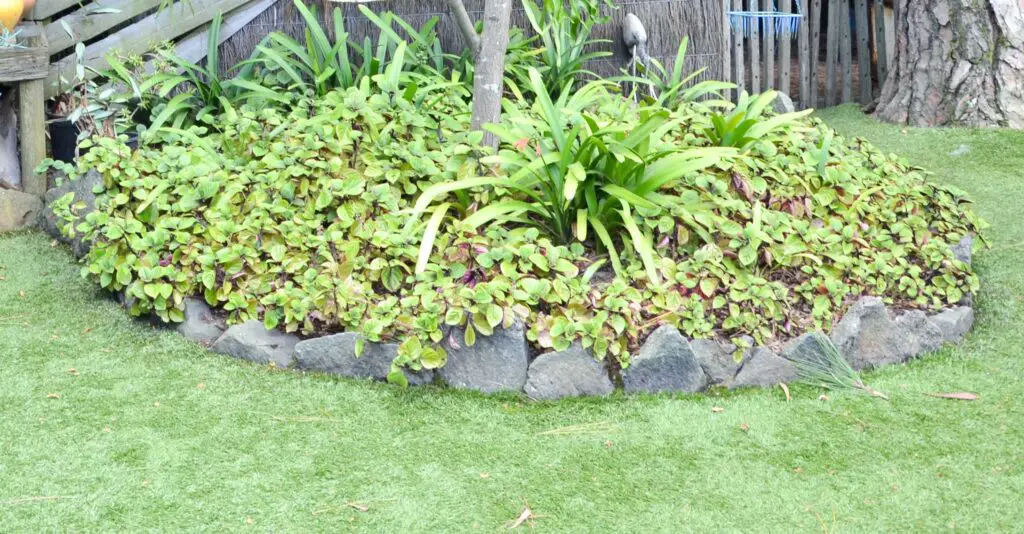
Here is where the definition for river rock becomes a bit hazy. Most folks in my area would refer to rock large enough to be used as edging as fieldstone or cobbles. But, in some areas, these mid-sized rocks might be referred to as river rocks, so I have included them here to be used as an edging stone. They can certainly be smooth and made of the same material, but most won’t call them river rock.
Not Quite River Rock, but a Rock Border
River Rock as an Accent
Whether you call them boulders, rocks, stones or river rock, you can definitely use them to help add interest to your garden as an accent.
River Rock as an Accent
Landscape River Rock Sizes
River rocks for landscaping are available to buy in bulk, by the truckload, or in bags at garden centers or rock yards. They are usually offered in a variety of sizes.
The scale of your project will largely determine the size of stone that you use for your project. A smaller stone is more suitable for a smaller application, while a larger stone will often look better in large spaces.
Below are some of the most common river rock sizes.
3/8-inch river rock – The smallest river rocks sold in stores are 3/8″ river rocks. These tiny, smooth stones are most commonly seen in and near playgrounds, walkways, or pond bottoms. These would typically not be suitable to use in a stream, as the water will readily push these tiny pebbles downstream.
3/4-inch river rock – Because of their size and smooth finish, these stones are also widely used in trails and pathways as well as pond and stream bottoms. The different colors of the rocks will add depth to your landscape and property’s overall appearance.
1-inch river rock – This size of river rock is often used to cover planting beds, waterfalls, and streams as it tends to show its shape and color from a distance and will tend to stay in place due to its weight.
1-3-inch river rock – These are sometimes referred to as river jacks for some reason, but this will vary within different regions. River rocks become increasingly adaptable as they grow in size, and 1-3 inch stones are ideal for accenting a focal point water feature for your landscape. These rocks may be used to develop or improve river beds, waterfalls, ponds, and other elements of your landscape. This river rock can also be used as a bed covering in larger areas. Sizes such as this should not be used in areas that get foot traffic as they are prone to causing ankle sprains due to their size.
3-5-inch river rock – This is the size where river rocks often start to be called cobbles, fieldstone, or boulders. These are great for borders, pond edges, drainage ways, ditches, and landscape plantings accents.
6 inch and up – Here is where the river rock name usually goes away, although I have certainly heard smooth roundish rocks of all sizes referred to as river rock, sizes this large are most often called cobbles, boulders, or fieldstone. Larger sizes such as these are often used as accents, edging, rock walls, and bordering ponds, waterfalls, and streams.
Some more River Rock Related Jargon
Pea Gravel – The term pea gravel is often used to refer to any pebble in the ¼” or smaller range that is smooth, is not crushed, and does not contain any fines. This is typically not river rock but can be very similar.
Chipped Rock, Crushed Stone, Gravel – This stone can be of many varieties but is typically not river rock. This stone can be bought in all sizes and is generally manufactured by crushing larger rocks using large crushing machines. Crushed stone will often contain the fine particles (fines) created when the stone is crushed. These are often used in pathways and driveways due to the angular chips and fines tending to compact and tie together better than the round, smooth river rock.
Conclusion
River rock, or whatever they call it in your region of the world, is durable, attractive, and very versatile. It can be used to help naturalize and beautify your yard in many ways.
It is very heavy to lift but relatively easy to work with other than its weight. If you are planning to do a bunch of river rock work around your home and landscape, I would recommend using the following tools:
Flat Shovel
Steel Rake
Push Broom (for cleanup)
Wheelbarrow
Landscape Fabric
Staples (for the landscape fabric)
Utility Knife (to cut fabric)
Heavy Hammer
FAQs
Which is cheaper: buying rocks in bulk or buying bags? – Buying rock in bulk is always cheaper than buying bags. Bagged rock is sold for its convenience of use.
How much are rocks and stones? – A ton will set you back $40 to $800, depending on the material you select. Size, color, form, and finish are all price variables. Furthermore, you will spend less per unit as the quantity increases, which means you’re better off making one big purchase. Trucking heavy rock is not cheap, so if the rock truck is driving to your house, you may as well order as much as you will need to finish your project.
Installing landscape edging is not an easy task no matter where you are doing it, but if you are installing landscape edging on a slope, you are in for a real challenge. To be able to install landscape edging on a slope, you will need to follow some specific guidelines if you want even half a chance of this edging lasting longer than one season.
Any time that extreme slopes are involved in landscaping projects, things get a lot more difficult. Don’t get me wrong, rolling hills, berms and general yard contours add much interest and variety to a yard, but as far as erosion is concerned, slopes will be some of your biggest landscape challenges.
Installing landscape edging around your lawn, beds and walkways is a fairly common practice, and it has it’s advantages. I’m going to lay out some of my best edging installation advice in this article.
General Considerations for Slope Edging
Any time that you are working on a slope, your major concern should be erosion. Whether you are putting in a few accent rocks, shrubs, flowers or a waterfall, you need to consider how running water will affect your installation.
Edging, no matter which type you choose, can exacerbate or minimize any water erosion problems that you already have. Water flowing downhill on exposed soil will wash it downhill every time. the worst thing that you can do on a steep slope would be to concentrate the water in a narrow area. Installing edging up or down the hill will make your erosion problem worse, while running your edging across the slope can help to slow down water flow and reduce erosion.
In general, when working with slopes, one of the most important aspects to help keep your valuable soil in place will be plant cover. No matter what type of edging you install, it is going to be important to plant and protect the surrounding soil as soon as possible after the installation of the edging.
Types of Edging – No matter where you install it
Brick, Stone, Concrete Paver Blocks
Stone, concrete and brick paving blocks are fairly straightforward to install, but are likely the most expensive edging that you can choose for your yard. The fact that they are block-shaped and heavy might help keep them on the slope, if they are set into the soil deep enough. While these block shaped pieces typically stay in place fairly well when installed properly on flat ground or slowly rolling hills, installing them on a steep slope is asking for trouble.
If you choose to install the block shaped stone or brick edging, make sure to buy the taller sizes, such as maybe 6 inches to 12 inches tall, depending on the steepness of your slope. The more stone or brick block that you can bury in the ground, the more likely it is to stay where you put it.
As was mentioned above, installing your stone edging across the hill can act as a small retaining wall or dike which can help to hold back soil and stabilize the slope.
Another aspect of installing stone edging on a slope is that the entire installation will be more solid, the more it is tied together. Setting the stones tightly together and in an arch is one way to use friction and gravity to your advantage to help keep the stone blocks in place.
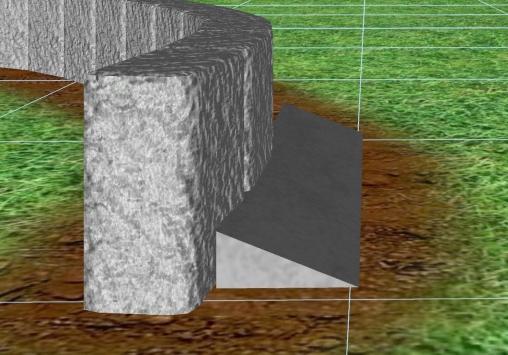
Another nice method is to toe-in the edging using mortar. Mortar, especially fiber reinforced mortar will act as a bonding agent to help bond the blocks together as well as provide more weight. Certainly in extreme slope situations, you could over dig the depth of your edging trench and pour an actual reinforced concrete footer to set the stone or brick blocks on, but that will not typically be necessary. If you set your block nice and tight and then toe them in with mortar on one side or both, it should be plenty strong to hold for many years. To toe in, simply mix mortar and trowel it against the block edge in a triangular slant with the mortar mostly on the ground and slanting up onto the block as in the picture below.
Stone Edge Toe In Example
This will help to anchor the blocks to the ground and tie them to each other. Obviously, the mortar toe would be installed lower than the existing grade and covered with soil.
While installing stone or brick block edges may be more labor intensive and more costly, these classic stone borders ar emuch higher quality and more stable than any plastic or steel edging choice.
Poured Concrete Edging
Poured concrete edging can be installed in several different ways. You can install traditional concrete forms, mix and pour the concrete yourself in any shape or form that you desire. You can also install the forms and then order the pre-mixed concrete and install it yourself. The latest trend in concrete curbing is the use of a mechanical concrete edging machine.
The advantage to forming and pouring your own concrete edging would be the ability to customize the curbing in any way that you see fit. I would always recommend choosing a curbing profile that is easy to keep consistent throughout the yard. I would not recommend altering the curbing profile throughout the yard as too much variation in materials and look will typically make a yard look more cluttered and unprofessional.
When I talk about the ability to customize your poured edging, I am talking about the profile of the curbing in and under the ground. The ability to form an pour a standard curb on flat areas and an enhanced curb on slopes can be quite helpful. You can shape the buried base of your curbing to better stabilize it on the slope and you can even reinforce it using rebar, steel mesh or even cable. This would be one way to ensure that your edging stays on the slope where you want it and still looks the same as the rest of the edging in your yard.
Using a mechanical concrete curbing machine (similar to the one pictured below) gives you the advantage of being able to create your own curbing with the help of a machine which eliminates the need for forming. These machines are primarily designed to be used on flat surfaces, so using them on a slope will not be easy to do, and they do not offer a way to alter the curbing for different slopes. I’m sure that it can be done, but I would guess that using a machine such as this would be very difficult on a steep slope.
Landscape Timber Edging
You can certainly use landscape timbers when installing edging on a slope, but due to their length (unless you cut them short) they don’t do well on changing grades. Imagine trying to cut an eight foot timber into a slope with undulations. The longer the pieces are that you choose to use, they harder it will be if there is any ground contour.
Timbers can certainly be used cross-slope to help reduce erosion and keep the slope in place. An advantage to using timbers is that they can be fastened together using long screws, spikes or lag bolts. This will help to tie the edging together and make it stronger. Another advantage is that you can drill holes and anchor the timbers to the slope using large spikes or rebar.
These two advantages will make the landscape timber option attractive, but remember that all wood will decay over time, so it is likely that eventually you will be left with a bunch of rotting wood and rebar sticking out of the ground. Another disadvantage to using landscape timbers as edging, is the fact that wood is light and it will tend to move quiet a bit, especially in areas where the ground freezes.
Metal and Plastic Edging
There are many commercially available metal and plastic edging systems in the market today. Most of these are a simple and cheap way for a homeowner or landscaper to edge a bed or the lawn. From my experience, none of them look nice for long if at all.
Most of the plastic and metal edging choices are simply a flat piece that is cut and staked into the ground to provide an edge between two surfaces such as between the grass and flower beds. There are also plastic edges that look like stone and brick or have other contours, but none of them are long lasting and none of them look very realistic.
As with any light material, metal and plastic edging tends to move with time. I will say that the steel edging will stay in place better than the plastic will, simply due to its rigidness and its weight, but it will still pop out of the ground and get hit by the lawnmower eventually.
Like the timbers, these plastic and metal edges come in long lengths, so setting them on ground with contours is difficult if not impossible.
Natural Bed Edging
While some will say that the natural cut bed edge is the highest maintenance choice, I would disagree. The natural edge certainly needs to be recut every few years, but there aren’t any pieces to move out of place or heave up and get hit by the lawn mower.
The natural bed edge looks classy and simple and will help to separate your various beds and the lawn. This edge should be cut using an edging shovel. Your goal is to cut straight down on the lawn side of the edge and cut it sloping back at an angle into your bed as in the example below.
Natural bed edge example
By cutting down 6-8 inches at the lawn edge, you are creating a great barrier to discourage the grass roots from growing into the bed and when you mow lawn, the edge of the mower deck will nicely hang over this edge, so there will be no need to use a string trimmer.
There are v-shaped edging machines available at local rental yards, but in my experience, they are typically not work the effort unless you are cutting your entire lawn edge and you have a good sized yard. When using these machines, the correct edge is cut, but a pile dirt and sod is left in the bed which needs to be cut out anyway, so you are not saving much time or effort.
Edging on a Slope Techniques
There are some crucial concepts to understand whenever you are installing landscape edging on a slope. one is to be sure that your edging material is installed correctly and firmly anchored to the slope to be sure that it won’t move with time. The other is to ensure your edging layout and design helps the slope erosion instead of making it worse.
When edging on a slope, you will want to catch and slow the waterflow, not concentrate it and speed it up. Sections of edging that slope downhill will concentrate the waterflow and speed it up which will increase the effects of erosion. Sections of edging that run across the hill will slow down and spread out waterflow which will reduce the effects of erosion. Check out the picture below.
Edging on a Slope Example
No matter which type of edging you choose, it is important to keep this concept in mind as you begin your project.
Sometimes, you will have no choice but to run your edging down a slope. In this case, depending on your edging type, you can create a gutter for the water to flow in using your edging material. This doesn’t work with a natural bed edge or with plastic or metal edging, but if you are using bricks or stones, it will certainly work.
Simply install the brick or stone gutter on the uphill side of the edging where the water will be concentrated and tilt it to control where the water flows. The uphill edge of the gutter must be a bit below the height of the ground so that it allows to water to enter. If you have a lot of water flow, you may want to install a double stone gutter, but most of the time a simple single stone gutter will work well. By keeping the water on the stone, we can eliminate the erosion on the slope.
Double Stone Gutter and Single Stone Gutter
Keep in mind that simple edging techniques like this can be used to control slope erosion even if you don’t really need a landscape edge to seperate beds or plants. Be installing multiple edges on a slope, you are in effect creating small terraces on the hillside. Hillside terraces have long been used to control erosion and create planting areas.
Terraced Hillside (probably a bit larger than your project)
Installing landscape edging on a slope does not need to be extremely difficult, although the steeper the slope, the more difficult it will become. Always remember that safety comes first, so call to have public utilities located before you dig and use caution when working on a slope. Carrying heavy brick or rock up a slope can be dangerous, especially when things get a bit wet and slippery.
Gazebos may not be as popular as patios and decks, but they sure offer your backyard a lot of character and functionality. They are a fantastic garden focal point, and they provide shade during the warmer seasons.
A quick online search would show you plenty of design options and shapes for your gazebo. The best part? Gazebo kits are available from Costco, Amazon, Home Depot, Lowes, Wayfair, and other home improvement shops. This will save you time planning, especially if you’re having difficulties designing your own.
To guide you in purchasing or building your own gazebo, I have listed every single fact about them, including their history, design considerations, types, materials used, and a lot more. I hope that by the end of reading this article, you have already decided whether gazebos are a worthy addition to your property.
A gazebo is an open garden structure that is often hexagonal or octagonal in shape. It can either be freestanding or attached to a house, just like patios and decks. However, unlike these structures, it has a roof that is traditionally made of wood.
The most common materials used for a gazebo construction are wood, metal, or vinyl. There is often built-in seating inside the covered area, making them very functional, especially during summer. Many homeowners also add outdoor curtains or drapes to make them more private.
There is quite a bit of confusion regarding the exact naming of gazebos and other outdoor yard structures. We’ve heard the following terms used at one point or another to mean a gazebo-like structure, so when talking to someone about their gazebo, be sure that you are both referring to the same type of structure.
belvedere
kiosk
alhambra
pagoda
pavilion
rotunda
shed
summerhouse
pergola
tea house
arbor
screen house
lookout
History of Gazebos
Gazebos have a fascinating history. They’ve been popular garden structures for centuries, and they were originally built on elevated areas with an attractive view. People use them to rest and gaze at the landscape around them.
The term gazebo was believed to be a combination of the word “gaze” and the Latin suffix “ebo” which translates to “I shall.” When put together, these words mean “I shall gaze,” which solidifies the claim that gazebos were primarily made to enjoy views.
On a similar note, the word gazebo is said to be synonymous with the French term “Que c’est beau,” which means “how beautiful.” This description proves that gazebos also served as an aesthetic addition to the earliest gardens in ancient cultures.
The oldest gazebo was found in Egyptian gardens some 5,000 years ago, and they were used as small temples to communicate with the gods. Most Egyptian royalty during that time believed that they could bring their gardens to heaven, including their gazebos; hence, they made them look like a paradise on earth.
Gazebos were also built like little temples in Rome and Greece to complement their cathedral structures. Gazebos became even more popular when the Greek and Roman aristocrats started building summerhouses near the Mediterranean coast. Later on, Gazebos became a common focal point for many public places and homes.
For years, gazebos were used for different purposes. Persian gazebos were developed from a form of Islamic architecture called “kiosks,” and they were added as colorful tents in their gardens. Some even use them as tombs.
Meanwhile, in Asia and parts of Europe, gazebos were intricately built to serve as teahouses and meditation areas. They are specifically situated in the middle of the garden, where one can find solitude and get in touch with their spiritual side.
Gazebos only gained popularity in America in the mid-1800s. They became a status symbol for the middle class and were used as a place for retreat in the household.
Today, modern gazebos are a pleasant addition to any landscape, and they serve different purposes depending on the owner’s needs. Some use them for weddings, while others use them as an area for spas, hot tubs, and many more.
Is a Gazebo a Permanent Structure?
A common question I encounter about gazebos is whether they are a permanent structure or not. The short answer is they can be both.
Some gazebos are built as permanent garden structures, and they are anchored in place to withstand different seasons. They are perfect for homeowners who have stable living situations and do not plan to move anytime soon.
Permanent gazebos are also ideal for people who want more structural stability. Since permanent gazebos are constructed using highly durable materials like metal and wood, they aren’t likely to be destroyed by above-normal wind speeds or storms.
On the other hand, portable gazebos are meant for owners who want more flexibility. This type of gazebo can be handy in the following situations:
When you realize your neighbor’s noise is louder in a particular area of your property and you want to move far from the source of the noise.
When you need extra space to entertain guests but do not want to build something permanent.
When you want to go on a camping trip and do not want to avail premium fees for permanent gazebos in the area.
The only downside of portable gazebos is that they are less stable, they are a lot smaller than permanent ones, and they require time and effort to build every single time you’re going to use them.
Design Considerations in Building a Gazebo
Gazebos these days come in every shape and design imaginable. You can easily find a design to suit your needs, from fully enclosed models to open-air lounge spaces.
However, before choosing a particular photo from Pinterest or Instagram to serve as your project inspiration, ensure that you have carefully considered certain aspects such as size, materials, and location, among others.
Below is a detailed list of all these factors that can directly affect how your gazebo will look:
Size and Shape
One of the primary considerations in building your gazebo is its scale and proportion. Does your target size and shape fit the size of your yard, or will it make it look cramped? Does the shape you are going for complement the other structures near your gazebo?
For permanent gazebos, the “bigger the better” really applies. In the long run, you’ll realize that it can double over as your family’s outdoor retreat or an area to entertain guests. If you are after these functions, the suggested size for your gazebo is 100 square feet.
The rule of thumb in choosing the size of a gazebo is this: For a small table, two chairs, and two people to fit, you will need an 8-foot square gazebo at a minimum. Once you add two more feet, two people can sit comfortably in it.
Location
There are really no hard and fast rules for choosing a location for your gazebo. You can build it in the center of your garden to serve as a focal point and draw your guests’ attention, or you can also design it to blend in your landscape and be like a secret hideaway.
Here are some tips to guide you in choosing the best location for your gazebo:
Avoid building your gazebo in low-lying areas where water can easily collect. As much as possible, choose a level or elevated area. This will keep your gazebo dry, and you’ll be able to maximize the view of your landscape.
Visualize how your gazebo will look in relation to your property’s other structures and features. The changing seasons may impact how your gazebo will look, so it’s best to ensure that it complements most of the structures near it.
Build your gazebo in a spot with the most fantastic view. Surely, you do not want to stare at the wall of your neighbor’s house while trying to meditate in your gazebo. An area where you can overlook a garden or pond is perfect, especially if you use your gazebo for relaxation purposes. Meanwhile, if you use it to entertain guests, you had better construct it near a pool or your outdoor kitchen.
Materials
The materials to be used for your gazebo are also something you should plan. Sub-par materials can cost you more in the long run as they have poor durability and need frequent maintenance.
Traditionally, gazebos are made of wood, so many homeowners’ go-to material is cedar and redwood. However, if you are on a budget, you can go for pressure-treated lumber, but you may want to coat it with a semi-transparent stain.
Other materials that you can use to create your gazebo are metal, vinyl, stone, and reinforced concrete. Just make sure that they match the exterior of the structures near your gazebo. This will be discussed in more detail later as we discuss the types of gazebos according to the materials used.
Style/Design
The number one rule in selecting the style or design of your gazebo is to ensure that it complements the exterior of your house or any other outdoor structure you have.
For instance, if your deck or outdoor kitchen looks very industrial and modern, adding a Victorian gazebo with a fountain in the center is not suggested. Similarly, if your house exterior looks very minimalist or Scandinavian, you shouldn’t add an urban-looking gazebo with many design elements.
Another thing that you might want to consider is designing a pathway that leads to your gazebo using flagstone and other similar paving products. This will make your gazebo more accessible, especially if you have guests.
If you are undecided as to how you want your gazebo to look, there are many manufacturers out there that offer various gazebo accessories and architectural details which you can choose. You can always contact them to see if they have a style that matches your taste.
Roof Options
When your gazebo is custom-built, you are allowed to choose the type of roofing material to use. Some of the most common options are the following:
Standard Asphalt Shingles: This is a popular choice among homeowners since they require minimal upkeep and come in different styles and colors. They can also withstand decades of weathering.
Cedar Shakes: If you want your gazebo to look elegant and timeless, then go for cedar shakes shingles. This material looks even better as they age in a gray coloration.
Metal Roofing: Metal roofs are also long-lasting, and they can still be in good condition even after 40 to 70 years, depending on the installation. You have two metal roofing options for your gazebo: standing seam or ribbed.
Rubber Slates: If you want to capture the beauty of slate shingles but in an easy-to-install way, then rubber slates are your best option. They are also eco-friendly, which is a big plus.
Lighting
Planning the light installation in your gazebo is best done before building. This will eliminate the presence of unsightly sockets or extension cords that can make your gazebo look too cluttered.
Also, ensure that you use ambient lighting so you’ll be more relaxed when staying in your gazebo. Adding daylights may be a bit harsh to the eyes and won’t achieve a great mood.
Gazebo lighting can be accomplished using low voltage landscape lighting fixtures or hard wired to your house’s line voltage. Using low volt lighting will undoubtedly be more economical and will provide plenty of light.
Railing
To the average person, when you mention a gazebo, they automatically think of a square or dodecagon pavilion. This is understandable since traditional gazebos are often built this way. However, if you want your gazebo to stand out, you might want to get more creative with its railings.
Two of the most common materials used for guard rails are wood and vinyl. But just recently, steel balusters that are fashioned to look like wrought iron are becoming more popular.
Another option that you might want to consider is glass. The main benefit of using this material is that it highlights the view from your gazebo, and it does not block any inviting landscape that you want your guests to enjoy.
Cost
The type of gazebo you’ll be able to build in your property depends on your budget. Before settling for a specific gazebo kit you saw online, visit a lot of local suppliers or online stores and compare prices and quality.
For customized gazebo kits that measure 6 to 8 feet, expect to pay $2,000 to $3,000. Of course, when you go for larger kits, the cost will be higher. Some kits even cost $10,000 and above.
Aside from the cost of the kit, you would need to spend $500 for the foundation and labor. It would be difficult to do this on your own unless you have experience doing so.
The above prices are for kits and relatively standard gazebos. Obviously, like any other structure, the larger you go, and the more customized and fancy you get, the higher the cost. A fully custom, large gazebo can easily run three times the prices above.
What are Gazebos Used for?
Some homeowners are still debating whether gazebos are functional or not. What they overlook is that the functionality of any home structure will depend on how their owners build them to suit their needs.
Listed below are the practical uses of gazebos in any property:
A place for relaxation – First and foremost, gazebos are made for relaxation. People gravitate toward them because they look very cozy. Since this is an open structure, you’ll be able to enjoy some fresh air without worrying that the sun rays will burn your skin. Remember that gazebos have a roof so that you can enjoy this area of your property any time of the day.
The focal point of a garden – With an ever-evolving landscape and garden, sometimes you end up with so much going on in your garden (plant beds, water fountain, pond, etc.) that it may be challenging to choose a focal point. By adding a grand gazebo in a centralized location, your guests can have a highlight to focus on, and you can add some organization and structure to your landscape.
Entertainment area – Gazebos are perfect areas to entertain, especially if they can accommodate many people. By installing mood lighting and speakers, they’ll be a favorite hangout place in your property and your living room might quickly be forgotten.
Shelter for spa and hot tubs – One of the ultimate ways to use gazebos for relaxation is by using them as cover for a spa or a hot tub. Of course, you would need curtains or some opaque material to serve as curtains, but this is definitely achievable. For convenient access, gazebos meant to be used like this should be located near your house.
Greenhouse – If you’ve been dreaming of having a greenhouse but don’t want anything permanent, then gazebos with transparent, removable walls can do the job. This is very useful to protect your fruits and vegetables during the winter season. However, you need to make sure that you keep your gazebo’s interior nice and warm.
Dressing room for swimming pools – A pop-up gazebo near a swimming pool can be used as a changing area or storage for the swimmer’s belongings. The curtains only have to be pulled for more privacy.
Temporary storage – Gazebos are ideal storage areas if you plan to renovate, redecorate, or fumigate your home. They are very convenient to access and can accommodate many household items. However, they aren’t ideal for storage during the winter season, especially if you will keep documents and other things that can be easily soaked.
Wedding tent – Casual weddings can be staged on gazebos, and all you have to do is add some decorations, and you’re good to go. This is a lot cheaper than renting a wedding venue that can cost you thousands of dollars.
Outdoor play area – Gazebos can also be used as an outdoor play area for families who have kids. This is better than allowing kids to watch television shows all day long or use their phones to play games. Set up some fun activities on your gazebo, and it will surely be a favorite hangout place for your kiddos.
Alfresco movie theatre – Tired of seeing the four walls of your living room while watching Netflix? Why not set up your audio-visual equipment on your gazebo and watch the latest series alfresco? There is no need to drive and visit fancy outdoor cinemas to enjoy this type of fun.
In designing the gazebo you want for your property, identify what types of activity you are planning to use it for. This will dictate the overall look of your gazebo and how purposeful it will be once it is installed.
Four Primary Types of Gazebos
The internet offers a wealth of information about gazebos, but it all boils down to four specific varieties. These are listed from the most durable to the least.
Permanent Gazebo – As discussed in one of the former sections, permanent gazebos are built in a specific area of your property for the long term. They are very durable since they are anchored to a foundation. If you decide to choose this type of gazebo, you should carefully plan how it will look and be sure to get a building permit.
Hardtop Gazebo – The roof and frame of hardtop gazebos are often made of wood, steel, vinyl, and aluminum. However, some also use polycarbonate for the roofs since it is very transparent and durable. Hardtop gazebos are technically temporary and portable because they aren’t built on cement foundations, but they can be built either way to suit your needs. For homeowners looking for gazebos that they can use year-round, hardtop gazebos are a top choice. Other outdoor features such as a fire pit and a grill can also be added in this type of gazebo, unlike soft top and pop-up.
Soft Top Gazebo – Soft top gazebos are highly recommended for renters or homeowners who do not plan to stay in a certain area for quite a long time. As you may have guessed, this type of gazebo does not use solid materials like wood, steel, or vinyl. Soft tops usually have a fabric roof, aluminum or plastic frames that are foldable, mosquito netting, and detachable mesh walls. Since they have a canvas top, it can be changed and accessorized according to your taste. Many people choose this type of gazebo because they are cheaper, lighter, and easily stored.
Pop-up or Camp Gazebo – Pop-up or camp is the least durable among the four main types of gazebos. They can be built anywhere with minimal effort, and you can take them down in a few minutes. Now, this begs the question: are they similar to tents? Although the materials used for pop-up gazebos and tents are essentially the same, tents are made for sleeping and therefore have a lower ceiling. Meanwhile, pop-ups can accommodate a standing adult and are relatively large in size. Compared to the other three types of gazebos, pop-ups aren’t meant to be used year-round because they can’t withstand weather changes. You also can’t add a fire feature to a cloth gazebo. What this gazebo is known for are its customizability and portability. You can change its wall panels and door, and you can pack it up inside a bag.
While the main types of gazebos are based on whether they are permanent or portable, another categorization is based on their style or design.
Join me as I discuss each of these types below:
Folly – A folly gazebo isn’t functional and is only meant to provide aesthetics to a garden. They were first built as a status symbol of wealthy estates several centuries ago, and that’s why they often look extravagant. Despite being purely ornamental, they also come in various shapes and designs. They are great backdrops for your flowers, but they aren’t that popular nowadays.
Rotunda – This gazebo style originated in Europe and is iconic for its large, circular design. It often consists of a domed roof supported by simple pillars. In planning and designing a rotunda, the focus is on its roof. You’ll find that this structure has an intricate roof very similar to the US Capitol Rotunda.
Pagoda – Pagodas are famous for their oriental style since they originally came from Japan. They are made of wood, and their pointed roof is either two or three-tiered. Traditionally, pagodas were used for religious purposes, but they became an ornament in the garden and a place for relaxation over time. They are intricately constructed, and this is visible in the lacy woodwork designs on the pillars and their sides.
Pavilion – This is probably the simplest type of gazebo with its rectangular shape. Only four pillars support the roof, and its functional space is way larger than the other types of gazebos. Many homeowners prefer pavilions since they are great for entertaining guests. That being said, this type of structure should be built near the house for ease of access.
Pergola – When it comes to adding character to your property, pergolas are probably at the top. This has a lattice roof where vines can climb and eventually provide shade. The roof is supported by sturdy pillars, which add aesthetic to the structure since plants use them to climb. Moreover, pergolas are perfect if you want a gazebo that offers a “nature” feel.
Victorian – Victorian gazebos are perfect focal points to your landscape with their post-and-beam design. They look very traditional with their double roof and ornate details. Their overall grandeur attracts many homeowners to install them at the center of their garden. They are perfect locations for casual weddings and any events that call for an elegant venue.
Types of Gazebo According to Materials Used
The functionality of a gazebo will also depend on the materials you used in building it. If you want it to be an all-season room, you should opt for highly durable materials that can withstand different natural elements.
Here are the common types of gazebos according to materials used:
Wood Gazebo – Wood gazebos can be considered classic American structures. They are often found in backyards and parks as a relaxation area and as an ornament. Usually, wood gazebos are made of pressure-treated pine, and it is stained or painted depending on the owner’s desires. However, some prefer cedar or redwood since they can resist water damage, bug infestation, mold, and mildew. They are also naturally beautiful woods, so there is no need to stain or paint them. The only downside of wood gazebos is that they will require some maintenance over time.
Metal Gazebo – Metal gazebos are built to last depending on their quality. Some models are made of galvanized steel roofs and aluminum frames, but some kits are made of steel frames that can be anchored to your patio or deck. Even though this type of gazebo is highly durable, it is still recommended to examine the wind rating in your area. Most of the time, metal gazebos cannot hold up during a hurricane or natural disaster, so if you expect it to remain in pristine condition after these events, you’ll be disappointed.
Vinyl Gazebo – Vinyl gazebos are perfect for homeowners after an elegant structure that needs very little maintenance. Since this type of gazebo is made of pressure-treated pine wrapped with a PVC vinyl sleeve, you can expect it to be durable and easy to maintain. Unlike wood gazebos that need to be stained or repainted after a few years, vinyl only needs power washing to make it look like a new structure. This will save you time, but you need to invest in a good power washer.
Canvas Gazebo – Canvas is the most expensive fabric used for a gazebo, but it’s well worth it. It is an excellent choice for those who don’t want any permanent structure but are also after something that can endure usage during regular changing seasons. Many homeowners prefer canvas gazebos since they are easy to install. They come in various colors, and they can be taken down during the winter months without any hassle. This may be expensive, but the cost is justified. Be aware that any canvas covering will deteriorate with time and will need to be replaced.
Ways to Build a Gazebo
There are three common approaches to building a gazebo, and which one you choose will depend on your skills, time, and budget. You can either build from a plan, put together a kit, or commission someone’s original design.
Building from a plan. This approach to building a gazebo would require carpentry skills and a good design/plan. While there are many downloadable plans on the internet, you cannot say for sure that they will work for you without a good understanding of construction techniques. You need to truly understand the design and materials needed to buy the materials for and build a gazebo from a purchased plan. Having said that, most lumber yards will give you a materials list if you provide them with an accurate plan.
Putting together a kit. The most straightforward approach to building a gazebo is putting together a kit. There are many available kits from Wayfair, Amazon, and other stores, which you can assemble on your own. The designs span from the hardtop to pop-up, so you’re sure to find the perfect fit for your needs.
Commissioning an original design. Contrary to what most people think, commissioning a design from an architect or a professional for your gazebo is not that expensive. The advantage of this approach is that someone can put your unique vision into a buildable plan that suits your needs exactly.
Frequently Asked Questions
What is the difference between a gazebo and a pergola?
Many professionals consider pergolas as modern gazebos, so technically, they pertain to a single structure. However, if we look at the design of the traditional gazebos and the more modern pergolas, certain differences are worth noting.
For one, a gazebo provides full coverage against the sun, while the pergola’s crisscrossed roof only allows partial shade. The pergola’s roof can also be optimized as a design element for your garden since it can hold vines and other climbing plants.
Another difference between the two is their shape. Gazebos are often round or octagonal, and meanwhile pergolas are always square and rectangular.
Apart from all these, the installation of a pergola from a gazebo also differs. Pergolas can be stand-alone, or they can link two structures in your property and serve as a walkway or passageway. On the other hand, gazebos are usually a freestanding structure.
Is it cheaper to build or buy a gazebo?
The answer to this question is relative. The price of a gazebo depends on its size and style, so it is possible to spend the same amount whether you build your own gazebo from scratch or a ready-made kit.
It is, however, suggested to buy kits instead of making a DIY gazebo. If you aren’t a pro in carpentry, chances are, you’re going to build and rebuild it, and this would cost you more in the long run. Meanwhile, when you buy a kit, you can hire someone to install it for you, and you’re all done. Some kits are really durable, so they are considered good investments.
What is a gazebo without a roof called?
Since pergolas are technically a type of gazebo, they are often called gazebos without a roof. A pergola is an open-air outdoor structure that is supported by columns. However, instead of metal roofing and other solid covers, it has a lattice roof where vines and plants can grow.
What is the best outdoor gazebo?
The best gazebo is relative to its owner. If the owner loves traveling, then a pop-up gazebo is highly recommended. Meanwhile, if they plan to stay at a certain place for a very long time, they may opt for a more durable type of gazebo like the hardtop ones or those built on foundations.
What is the best material for a gazebo?
The best material for an outdoor gazebo is wood, metal, and vinyl. All these offer longevity and durability, and they are also cost-effective.
Wood types like cedar and redwood are ideal for permanent gazebos because they are rot-resistant. Although they require more maintenance, their quality and sophistication are evident even after several years.
Gazebos made of steel, aluminum, or wrought iron are also very sturdy. They do not require intensive maintenance, and they are rot-resistant.
The last material suggested for a gazebo is vinyl. While vinyl lasts for a very long time and does not rot, many economical vinyl structures look a bit shabby over time.
What type of wood is best for a gazebo?
The best type of wood for a gazebo is cedar or redwood. These naturally protected woods can be more expensive than your other options.
Other types of wood that are great for a gazebo are pressure-treated pine, tropical hardwood, and modified wood. Among all these, the most budget-friendly is the pressure-treated wood.
Final Thoughts: Are They a Worthy Addition to Your Property?
Gazebos aren’t only meant to be an ornament in the garden, and they serve different purposes depending on the needs of the homeowner. Some use them as relaxation and viewing areas, while others make them more functional by using them as changing rooms, storage space, and even wedding venues.
Whatever your reason is for building a gazebo, remember that for it to be pleasing and useful to you for a long time, the design must fit your needs, and the materials chosen must be durable enough to stand the test of time. A gazebo is a large structure; you only want to do this once.
Having the perfect driveway is crucial if you want to leave an impactful first impression of your dream home on anyone visiting or passing by. However, many homeowners often overlook their driveway when doing remodeling projects. As a result, they settle for something dull and monotonous as long as it serves its purpose. We’re here to tell you it doesn’t have to be like that.
There is an excellent variety of driveway materials from asphalt to concrete, grass bed to mosaic glass to cater to your preference and design tastes without breaking the bank. This article will discuss the most popular driveway types and some necessary information every homeowner needs to know!
The Importance of Curb Appeal
First impressions are important, and the same applies to your dream home. A beautiful and well-maintained driveway can easily add style and improve your house’s curb appeal.
Different types of driveway surfaces can change the whole look of your home. In contrast, choosing the wrong style could make your house look unappealing, drab, and outdated.
Colors and exterior details need to match the period of your house, and it should be the same with your chosen driveway or walkway, given that it is what leads people to your home. Typically, you would want it to be attractive, homey, and welcoming.
If you have plans to sell your house sometime in the future, chances are any potential buyer will be discouraged to even step a foot inside if your home doesn’t look visually appealing from the outside. Keep in mind that your driveway plays a crucial role in their first impression of the property.
A driveway in poor condition will devalue your home, as potential buyers might see the extra cost involved in fixing the driveway and its needed extra maintenance right away. It is your responsibility to keep your driveway looking at its prime.
Types of Driveways
To give you a brief background, the trend of driveways began in the second half of the 19th century. Before, gravel was the most popular surfacing material, while brick, stone, and flagstone were popular alternatives.
When motorized vehicles became the norm in the 20th century, driveways and back alley access became needed in many homes. Asphalt and concrete grew to be widely popular choices shortly thereafter. Today, homeowners can choose from many types and materials for their driveway needs.
1. Concrete Driveway
Concrete, which is considered one of the most popular types of driveway, is costly, but you can count on its durability for a very long time. This means extra savings on your part as you won’t have to get repairs or have a new one installed for many years to come.
Appearance-wise, it also offers a variety of appearances as it can be stamped or dyed a particular color of your own choice. Concrete can be ground down and top coated to change color or texture in the future.
However, like most solid surfaces, concrete can be affected by the quality of installation. While a properly installed concrete slab will last a lifetime, a thin, uneven pour over a substandard base will be prone to crack and move over time. The base prep is critical in all solid surface applications.
Concrete is prone to staining. If you change the oil in your vehicle while it’s parked in the driveway, you need to be extra careful not to spill a drop. If you spill oil on a concrete driveway, it will leave a stain that is very difficult to remove.
2. Asphalt Driveway
Asphalt is another popular material for driveways as it can be installed relatively quickly by a professional crew, and it is cheaper than concrete. More so than with concrete, asphalt relies heavily on the base prep, so don’t cut corners when hiring a contractor; make sure that the base will be solid or your asphalt driveway will fail in short order.
Their vibrant black appearance also makes your driveway look neat and presentable. But do take note that asphalt only comes in one color, limiting your customization choices. The material needs to be resealed often, at least once every four years.
Fortunately, it isn’t too difficult to do minor repairs and seal an asphalt driveway yourself. If you are handy and don’t mind some outdoor work, you can surely handle asphalt maintenance yourself.
3. Clay Brick Driveway
Brick has been used as a paving material since ancient times and will undoubtedly give your driveway a classic, timeless look. It is available in a wide variety of colors, so you are free to customize it just the way you like!
Homeowners can also count on its durability for a long time, and it’ll look perfect in historical homes and high-end houses. However, keep in mind that bricks may cost you more than other materials.
The downside of brick is that each individual brick can move on its own, so base preparation is critical. Also, brick is not as well suited to freezing climates as freezing temperatures can damage the bricks, and the bricks can catch the edge of snowplows.
4. Gravel Driveway
A popular, inexpensive option, gravel driveways are readily available everywhere. Generally, they can be installed easily and quickly, so you can use them immediately. This rocky surface can also be the base, so installation can often be a one-step process.
Given that this material is available in a wide range of colors, you will have a sense of freedom in customizing your dream driveway. Gravel is dug out of pits and will vary depending on the source and location. It is typically a mix of sizes installed and compacted in the same form as excavated out of the ground.
Drainage is essential for gravel driveways, as is base prep. Any loose soils should be removed before gravel installation, or the soft ground will push up through the gravel over time.
Gravel driveways that are well-drained and compacted over hardpan are durable and long-lasting and will likely only need a bit of topdressing and re-grading over the years. On the other hand, gravel driveways built in wet areas or over a soft base will require regular dressing and grading to eliminate potholes.
Gravel can be problematic in snowy regions as snowplows and snowblowers tend to move the gravel.
5. Dirt Driveway
This is what you get in the absence of a driveway. Many a dirt driveway was started when the first automobile crossed a grassy field to get from the road to the house. It is the simplest and cheapest option as it takes no prep at all.
The only time a dirt driveway will serve you well is if you are out in the country where your neighbors won’t mind the look and if your ground is very firm and well-drained. Dirt driveways are very prone to rutting and erosion, so a light rain can turn your dirt driveway into a slip and slide.
6. Crushed Stone Driveway
While a crushed stone driveway is very similar to gravel in most ways, the stone used is a bit different. A crushed stone driveway is constructed using crushed stone. Rather than using gravel of various sizes and comprised of rounder stones, crushed stone drives are installed using a stone that is mechanically crushed to a particular size, which creates jagged shapes and dust.
Crushed stone driveways can be constructed using any stone that can be crushed, so limestone, granite, basalt of any other stone will work well.
As with gravel driveways, the crushed stone driveway is not particularly well suited for use in snowy areas where snow plows and snow blowers will tend to move the stone around.
7. Cobblestone Driveway
The sight of a driveway made of cobblestone is a tale as old as time. This classic material offers a variety of designs to choose from, which improves your home’s visual perspective appeal.
Homeowners can also count on cobblestone’s durability, given that it is made using natural stone blocks and will last indefinitely. As with other individual stone or brick driveways, the flatness and durability of the driveway will depend mainly on the base preparation.
No matter how good the base, like brick, individual cobbles can move independently of each other, so heaving in the wintertime and general movements can be expected. Also, like brick, cobbles will catch shovels and plows and may make snow clearing more difficult.
8. Green Lawn Driveway
Green lawn driveways are a popular alternative to traditional asphalt or concrete pavers. Typically, when you see a driveway that appears to be grass, it is actually grass growing through concrete or plastic blocks or gridwork that holds the soil in place and allows the grass to grow.
By providing a rigid structure to hold soil and take the weight of vehicles, these blocks will allow the grass to survive when an average lawn would simply turn to dirt.
Grass driveways are only recommended for light use areas, as daily heavy use will result in dead grass.
9. Interlocking Concrete Pavers Driveway
Interlocking pavers are composed of cement or concrete, shaped to fit together with other pavers of the same sort. As a result, they are as strong as concrete yet as easy to install as brick. The interlocking pavers come in a wide variety of colors and shapes and can resemble real stone or natural brick. Some are truly interlocking, which provides more stability, while others are simply brick or block-shaped.
As with brick or cobblestone, the finished driveway is only as solid as the base beneath. And like brick and cobbles, snow removal can be problematic.
10. Tar and Chip Driveway
While this material is not the most common pick, driveways made of tar and chip material are becoming more popular by the day. Also known as chip sealed driveway, this driveway type serves as a cost-effective alternative to asphalt paving, and it also gives homeowners an excellent surface for traction.
This type of paving appears similar to asphalt but with a different installation process. In particular, layers of gravel are arranged in a sequence, with hot liquid bitumen asphalt and more loose stone laid over the surface before being compressed. It also has other names, such as seal chip, macadam, chip-and-seal, or liquid asphalt and stone.
While you’re not required to spend a fortune on this driveway type, it needs more upkeep than other options. Consider covering your tar-and-chip driveway with a thin under-layer of concrete to boost longevity and possibly save money in the long run.
11. Recycled Glass Driveway
While a recycled glass driveway is an odd material choice, this makes for an attractive and handy solution. Don’t worry; it isn’t made of ordinary glass, so it won’t cut up your tires!
The recycled glass material will be professionally altered and resin-sealed, making it as strong as possible. When sealed with resin, your glass driveway can be used for a long time without recurring issues, and this makes it a cost-effective pick for many homeowners.
Given that it is made of recycled materials, your driveway will also be environmentally-friendly. Repurposing discarded glass from a local landfill is a great way to contribute to a greener planet.
Furthermore, this driveway type also requires little maintenance when installed properly. There are also several available color options, giving you the freedom to tailor a recycled glass driveway to your liking.
12. Exposed Aggregate Driveway
One of the biggest trends in modern driveways is exposed aggregate. This material is available in a variety of sizes and hues. With the wide range of choices, you will have a great selection of unique and attractive driveways to complement your property.
It also creates a non-slip sealed surface that requires little to no upkeep and can last for over a decade. Comprised of unique aggregates that are exposed on the surface with particular concrete mixes, the concrete surface has smooth-textured stones and pebbles. This is basically a poured concrete driveway with the aggregate exposed on the top layer to make it more interesting.
In comparison, a smooth concrete finish has a visible surface mostly made up of concrete fines or tiny concrete particles. Also, the typical dark grey of the exposed surface has the characteristic dull grey color of concrete.
13. Flagstone Driveway
Renowned for its distinctive appearance & unique look, this driveway type makes for a great choice if you want to improve the aesthetic appeal of your property. This material, however, requires more time and care to install than concrete or asphalt. Individual stones are placed together in a pattern, or a random puzzle piece look.
When building a driveway out of flagstone, the individual stone pieces need to be large and thick to avoid them moving around and cracking when cars drive over them. These would often be laid on crushed stone bases or can be mortared onto a concrete base.
Shapes of Driveways
Aside from choosing your driveway material, there are various things to consider, including your budget, intended purpose or usage, and the design or shape of your driveway.
Keep in mind that a well-designed and properly installed driveway will significantly improve not only your home’s curb appeal but also your property value.
Your preferred driveway design poses some practical implications. Hence, it’s best to decide after considering all the pros and cons.
Here are some helpful guidelines to help you choose the best driveway shape to fit your needs:
Straight Driveway – Straight driveways are the most common choice, and they give a direct route to the property. This type of driveway is straightforward to make, and you can even opt to lay and install it yourself as it doesn’t require much planning. It’s suitable for small properties without much room to spare. And when it comes to appearance, this design is geometric, clean, and modern. It’s the perfect choice for modern houses!
Circular Driveway – If you have extra space on your property, circular driveways may be the best choice! This design will take up a large area, so it’s best to ensure that you have the proper calculations and dimensions. A circular-shaped driveway means a steady flow of vehicles, and there’s no double parking or backing up near the door. The central area within a circular driveway can also be utilized in several other ways or landscaped– the possibilities are endless!
Semi-circular Driveway – Compared to circular driveways, semi-circular driveways take up less space while providing a stunning look at the same time. Semi-circular driveways are ideally suited for large properties situated on very busy roads. This design also provides a stronger safety guarantee, given that drivers won’t be required to back out right into a busy road. Instead, they can keep a clear view at all times.
L-shaped Driveway – The bottom segment of an L-shaped driveway can take the vehicle through the bottom and then straight up to the parking or garage area. This design is especially helpful if you have a long, narrow entrance to your property, with a garage on the left or right. Cars won’t be parked right in front of homeowners’ viewpoints, and they won’t take up valuable space that could be used for soft landscaping or a recreation area instead.
Curved Driveway – Curved driveways are probably the most aesthetically appealing type of driveway and are often necessary for properties with many trees or other obstacles to avoid. A well-planned curved driveway can add character and intrigue to a property. Whether your property is far away from the main road, or you simply want to use a curve for the added curb appeal, this design allows you to be as creative as possible!
U-Shape Driveway – U-shaped driveways are quite practical for daily use if you have extra space on your property. This design also has the potential to improve and transform the visual appeal of your front yard landscape. Given the driveway’s unusual shape, you will have a lot of room to work on getting creative and building eye-catching elements. Undoubtedly, this driveway shape will make your property stand out in the neighborhood.
S-shaped driveways – S-shaped driveways are convenient and serve as a safe solution for building a driveway on a gradual incline or downslope. Not only does it slow down the vehicle approach and ensure the safety of any oncoming pedestrian, but it will also create a beautiful approach to the property from a design standpoint. If your house has a sloping entrance, you should seriously consider a “stepped” or winding approach for vehicles and pedestrians. S-shaped driveways are suited to properties with large lots.
Y-Shape Driveway – As the name suggests, a Y-shaped driveway will take on the shape of its namesake letter. It will have a one-street entrance, with the driveway going two places. This is a less common driveway shape, but it has great use for homeowners. The Y-shaped driveway splits into two ways, one heading to the garage and the other to a walkway going to the front entrance. If you have more than one garage on your property or an extra space to park a boat or an RV, it’s best to consider installing this driveway shape. It could also be helpful if there is a natural or man-made feature in your way or when you need to break the driveway up.
Other Considerations
Aside from the layout and material choices, here are some other considerations every homeowner needs to keep in mind when installing a driveway:
Gradient and Width
The natural geography of your land will heavily influence your driveway’s gradient. If you’re planning to install a driveway, it’s best to strive for a slope that’s neither too steep nor too flat to ensure proper drainage.
A fully flat driveway may have poor drainage, resulting in water accumulating on the surface. On the other hand, a steep driveway may become overly slippery in inclement weather, especially if the surface isn’t properly designed. Curves can help minimize the slope, and filling in the middle of a level driveway allows water to run down on both sides.
Another important consideration is the width of your planned driveway. There are likely minimum and maximum requirements for each, so consult with your neighborhood first but then consider the vehicles that will be coming and going.
Installing a narrow driveway will save space and money, but a narrow curving drive will encourage careless drivers to drive off of the side of your driveway and create ruts.
Keep in mind that the safety of your property’s entrance is determined by the gradient and width of your driveway.
Ease of Access
Ease of access should be among the top considerations when planning a driveway for your home. Typically, you would want to install a driveway that creates a safe, convenient, and easy entry and exit.
Do note that this factor is especially important if your property is located on a busy or narrow street with limited visibility.
The size of your property will also have a significant impact on what you can do to improve access, but your chosen design can also help improve your home’s visual perspective.
Some methods to make your driveway safer are straying away from planting tall bushes and trees, lowering the height of your fence, and installing adequate lighting.
Trees, Shrubbery, and Utilities
Any driveway excavation may potentially damage existing roots, as well as any underground utility connections to your property. Always have the property marked for utilities before any excavation. It is also a good idea to plan your driveway around any important shrubs or trees that may be damaged during installation.
Adding biodiversity to your property will undoubtedly add more value and improve curb appeal. Fortunately, local experts can advise you regarding the correct planting for trees and shrubs that won’t send the roots into your new driveway.
Choosing a Local Contractor
In any driveway repair, repaving, or construction project, it is strongly advised to hire a professional contractor. A reputable company with strict design specifications, procedures, and trusted installation techniques can ensure high-quality results.
Other things you need to consider are obtaining several quotes for your driveway project, calling previous client references for validation, and visiting the previous installation and work sites by your chosen company if you have the time.
It’s also crucial to verify that the company offers proper liability insurance coverage in case of an accident or injury during the duration of the driveway project.
Subgrade Surface Preparation
The subgrade is an important part of any driveway project, as it acts as a foundation for whatever will go above it. The base must be dug down to hardpan To avoid movement in the solid surface in the future. This means that you must remove all soft friable soils until you reach a fairly solid surface.
This will vary greatly depending on your site. If your ground is very sandy and rocky, removing a bit of topsoil and compacting the base may be all that is needed. On the other hand, if you need your driveway to cross a wet, boggy area, it may require you to pump out all water and excavate deeply to remove the soft ground. Even then, there are some areas where your best bet is to lay down thick layers of geosynthetics under your base to keep the loose, wet mud from mixing with the base stone.
Adequate Driveway Drainage
Poor drainage will reduce the lifespan of your new driveway. As a result, you will be required to do frequent maintenance and repairs. Any permeation will eventually lead to cracks and holes, requiring you to spend money on driveway repairs too soon.
On flat ground, your driveway must have at least a 2% slope and a quarter-inch crown every foot for proper drainage. Drainage considerations also include assessing potential runoff from nearby structures, drains, sidewalks, and patios. Another special consideration is to install pipe cross drains beneath to channel the water under the drive rather than over.
Maintenance
Consider the expense and maintenance required in the upkeep of your driveway when choosing one. Gravel, for example, is less expensive than stone paving, but it will need more maintenance regularly. You might realize that the investment for a pricey yet less maintenance material is worthwhile in the long run.
Below are some general tips to help care for your driveway, regardless of its material or shape design:
Minimize water on the driveway surface – Clear the sides of the driveway from ground and debris to allow surface water to run off rather than soak in or freeze on your driveway. Also, be sure that runoff from your downspouts is not directed at the driveway.
Fill any cracks – If you see any cracks or holes in your solid surface driveway, opt to have them fixed right away. Remove loose pieces with a masonry chisel and brush off the debris before applying a crack filler and patching solution. Don’t forget to seal the entire driveway after the compound has dried as well. A well-maintained, smooth, and level driveway can help prevent untimely slipping or tripping accidents when visitors are around.
Make your driveway crack-proof – As the adage goes, prevention is better than cure. If you don’t want to go through the hassle of regularly filling the cracks on your driveway, you will need to ensure your driveway is built properly. To prevent water from entering, freezing, and cracking in driveways, seal concrete every year and seal asphalt every few years. Tree and plant roots can cause cracks, especially when pushing up from beneath the soil. With that in mind, any trees near driveways should be removed, or their roots clipped away as a remedy.
Be careful when plowing – Always be aware of your driveway surface to minimize snow removal damage. Areas of heavy snow and snowplows should expect to see plow marks over time, but smaller driveways that are hand cleared should not show wear from the shovel.
Clean your driveway regularly – Removing stains from solid surface driveways caused by engine oil, radiator fluid, and other similar chemicals can affect more than just your driveway’s appearance. For instance, motor fluids can penetrate concrete up to a quarter-inch and may soften asphalt. Scrub any old stain repeatedly using grease-cutting, biodegradable cleaners and a standard scrub brush.
Avoid using de-icing chemicals – Be aware that chemical deicers can cause damage to solid surface driveways. Various chemical products with ammonium nitrates and ammonium sulfates are particularly harmful since they chemically attack the concrete. Rock salt (sodium chloride) or calcium chloride might do less damage on your driveway surface, but they may harm live vegetation or corrode nearby metals. Stay away from using any deicers during the first winter after your driveway placement. Do note that new concrete is very susceptible to the harmful effects of salt. If you’re looking for an alternative, you can utilize sand for traction.
Make the most of your property by keeping your driveway clean and well-kept. Not only does it improve curb appeal, but it also makes your drive sturdier than those that are neglected. Remember that little regular upkeep can bring you significant returns later.
Frequently Asked Questions
What is the cheapest driveway material type?
Assuming that dirt just won’t do it, then gravel and crushed stone are by far the cheapest driveways that you can install for your driveway. They are also some of the quickest to install, and they can be used immediately after installation. Maintenance such as gravel replacement is just one of the few additional costs for using this material.
Despite being budget-friendly, there are still a few downsides to a gravel-made driveway. Gravel driveways produce noise that you or your neighbors may not like, and some of the stones may end up on the road or in your grass, causing more work for you.
What driveway surface is the most popular?
I would say that gravel is the most popular, but concrete is probably the most coveted due to its permanence and relative maintenance-free nature. Asphalt is arguably one of the best contenders for the title because it offers a smooth, hard surface for a lower price than concrete, but it lacks the timeless durability and ease of maintenance.
Will a driveway increase my property value?
Yes, a driveway can increase your property’s value making it worth the investment. If you’re looking for a rough estimate, paving a driveway may increase your home’s value from 5 to 10 percent.
Should base be installed before paving a driveway?
This all depends on the type of driveway you are installing. Obviously, a dirt driveway doesn’t have a base, and the gravel or crushed stone driveway is its own base. If you pour concrete thick enough, it can span almost any poor base material, just like a bridge spans a river, but the cost of concrete often makes this type of installation way too costly for the average homeowner. A solid base is required for a stable and long-term driveway installation for all other driveway materials. Having said that, if your native ground is gravel and sand, then you have a natural base.
How wide are residential driveways?
The width of a residential driveway will vary depending on if it is a single car or double car driveway. The standard width for a single-car driveway is 9 to 12 feet wide, while a double-car driveway is 20 to 24 feet wide.
Final Thoughts
The perfect driveway design starts with selecting the best material, shape, and other considerations that fit your needs. The drive is also likely to be used daily, so it needs to perform well and ensure optimal safety for everyone.
However, do keep in mind that whatever driveway layout you choose may significantly impact the property’s first impression and appearance.
Also, consider the lifespan you expect out of the driveway and how much maintenance and excess fees you are willing to commit. At the end of the day, it’s your responsibility to strike a balance between appearance, functionality, and safety in installing a new driveway.
Outdoor living rooms have become increasingly popular over the past few years. The combination of people stuck at home and wanting to get out of the house and a bunch of cool, outdoor-ready furniture has made the outdoor living room a must-have landscape feature for many homeowners. The designs and themes are practically endless so that each space can be customized according to its owner’s style and taste.
Not only will an outdoor living room increase your enjoyment of your backyard, but it will also increase the value of your home. The benefits will be more relaxation, more beauty, and more money. This sounds like a good combination. If you think it might be time to begin to consider an outdoor living room for your home, then you’ve come to the right place. This guide is chocked full of good advice and information. We will discuss design considerations, tips, and a few frequently asked questions.
What are Outdoor Living Rooms?
An outdoor living room is a more casual version of your indoor living room, and they serve as a destination point in your property where you can entertain guests or hang out with family. Often, this is set up on patios, pergolas, and gazebos with an extended dining area and an outdoor kitchen.
If you search Youtube for videos on how you can transform your patio into a cozy living space, you won’t be disappointed with the number of results you’ll get. These videos can help you get started in the right direction if you are handy and on a tight budget. However, if your finances permit and you aren’t quite as handy as you would like to be, it may be wise to interview a few contractors or designers before you begin.
As for the designs, you can always search Pinterest, Instagram, and other websites for inspiration. There is also the option of planning your outdoor living room by getting ideas from your housemates or family members. There is no right or wrong here as long as you follow proper building techniques, adhere to local ordinances, and end up with something you enjoy.
What is the Scope of Your Project?
When considering this project, the main questions are: What are you trying to accomplish, and what do you already have? Creating an outdoor living room can be as simple or as elaborate as you and your family would like it to be.
This doesn’t need to be a break-the-bank sort of project. If you already have a patio or deck and a bit of furniture, maybe you just need to add a few pieces of furniture, some speakers, and a bit of a roof? Heck, perhaps one large lounging couch and an outdoor television would suit your style.
On the other hand, if you’ve got bread to burn and want to go all out, you may want to start from scratch and get all the cool options.
Outdoor Living Room Options
Okay, let’s dig into some of the cool options that you have to choose from for your new outdoor living room.
Furniture
It’s about time you let go of those outdated lawn chairs that leave marks on your legs whenever you sit on them. Outdoor furniture has come a long way over the last few years, so take your time, do a bit of research and get what you need. Keep in mind that longevity and resistance to the weather are two of the most important qualities of outdoor furniture.
When choosing your pieces, consider the construction of the cushions. They should be light, airy, and made of materials that will dry quickly and will not decay with moisture. They make some outdoor couches that are pretty close to what you have inside, but you need to ensure that they shed the water or dry very quickly.
Another consideration is the framework. Most outdoor pieces are made from painted, thin tubular steel, which is light and cheap to produce. The downside is that the lighter the steel, the more prone to breaking. You can undoubtedly find aluminum pieces to avoid the possibility of rust, but again, thin aluminum will be prone to breakage. You can also find wooden pieces, but the type of wood will be very important to longevity.
While most of our shopping might be down online, your outdoor furniture might be something you want to see in person before you lay down your hard-earned cash. Get a feel for how heavy it is, whether it shifts around every time you sit on it, etc.
Below are a few pieces of outdoor furniture that can make your space look relaxing and elegant at the same time:
Lounge Chair: Lounge chairs are permanently reclined seating options primarily made for relaxing, and it would be hard to use them for productivity since their structure is for leisure and lounging. If you visit furniture stores of big-box retailers, you’ll find various types of lounge chairs, such as the classic chaise lounges, armchairs or recliners, and club chairs.
Sofa or Couch: Similar to lounge chairs, outdoor couches are meant to bring comfort and relaxation to you and your guests. If you want to lay down and take a nap in your backyard, this might be just the piece you are need.
End or Accent Table: End or accent tables are meant to be placed at the end of your couch to primarily hold some décor or perhaps an icy drink and some snacks.
Coffee Table: As its name suggests, this outdoor table acts as a surface to hold snacks and drinks or maybe a laptop or tablet. It is usually situated at the center of your outdoor living room and is often the same height as your sofa cushions.
Stacking Chairs: Stacking chairs are a must-have if you build an outdoor living room for big gatherings but don’t want to add any fixed features. These chairs can be stacked when not in use so that they won’t take up much space, and you can even store them inside.
Hammock: Hammocks not only serve as extra seating, but they also give your outdoor living room that very relaxed, “kick your shoes off and stay awhile” vibe. Unless you have big trees right there in your outdoor living room, you will need a hammock that comes with its own frame. Be aware that while hammocks can be the ultimate nap spot, they can be a bit treacherous for the elderly or the young who don’t have much hammock experience. We wouldn’t want to see grandma flipping out of the hammock when trying to sit down.
Cooler Table: A cooler table is a handy piece of furniture to add to your outdoor living space if you want to skip trips inside your home when you run out of drinks. It serves as a drink cooler and a table at the same time. How can you go wrong with that?
Patio and Deck Coverings
Covering your outdoor living space makes it possible to use it more since it allows you to control the environment a bit more. Keep in mind that anytime you are installing roofs, umbrellas, or awnings, you are basically setting a big sail in your yard to catch the wind. Consider your location and wind when deciding whether or not one of these solutions will work.
Umbrellas: The most common and straightforward solution to providing a bit of shade and maybe a windbreak would be an umbrella. There are many options and sizes to choose from, and they are very easy to install. They can often be freestanding, or they can fit into the hole in the center of the patio table. Either way, be sure to pick one with a heavyweight to hold it down.
Awnings: Awnings are retractable patio coverings that come in various sizes, materials, and shapes. They are often attached to an exterior wall and offer convenient protection from sun and rain, but you do need a solid structure to fasten them to.
Pergolas: Pergolas come in many shapes and forms and can be custom-made to suit your needs. It is a framework that can have vines growing over it or a roof installed. They can be very delicate and cheaply built and last a season or two or long-term built-in structures. Sinking heavy beams into the ground and installing a metal roof would be one way to give your outdoor space a proper living room feel. These structures can also be fitted with curtains and mosquito netting to keep out the sun and bugs. Again, consider the weight and quality of the structure. You don’t want to find this in your neighbor’s yard after a strong wind.
Entertainment System
Having a quiet, peaceful living room outside is one thing, but having an entertainment area will make it feel more like your living room than sitting out in the yard. Your outdoor entertainment will depend on your likes and how you intend to use your outdoor space. The more high-tech stuff you install, the more breakable this outdoor space will be. Will this area be for large gatherings and parties or just for you and the kids to hang out? Are you trying to get away and be in nature, or are you trying to bring all of the comforts of your living room outside? Be aware that televisions and speakers may require internet connectivity, so plan accordingly.
Television: Installing a television is a great way to create the proper living room feel. Outdoor televisions come in all different sizes and can be anything from weather-resistant to weatherproof. Be sure to choose the right technology for your sun exposure. There are different types of screens designed for different sunlight levels. You don’t want to spend the money on a television that no one wants to watch because it doesn’t look as good as the one inside. Also, consider the location. Will this television be freestanding on a table or hanging on the wall?
Projector and Screen: You might want a projector and a screen to achieve an outdoor theatre setup. These will never have the picture quality of a high-def tv, but it is a very cool way for a big group to watch a movie.
Speakers: Of course, your whole audio-visual setup won’t be complete with outdoor speakers. This can be as simple as a single Bluetooth speaker on a table to a complete surround sound system mounted into the rafters of your pergola. The sound is not likely to be as nice as indoors because there aren’t walls for the sound to bounce off of, but it can be pretty cool to watch your favorite movie in surround sound outside.
Fire / Heat
Adding fire or heat to your outdoor living room will give you the ability to make it more of a group gathering place, as well as take the chill out of those cool spring or fall evenings. Keep in mind that your choice of fire needs to fit with the type of living room you are creating. The more it resembles your indoor living room, the less likely it is to do well with an open fire pit.
Fireplace: An outdoor fireplace traditionally consists of a firebox and a chimney. However, there are now different heating sources aside from wood that you can use. These are natural gas, ethanol, and electric-powered fireplaces. The three latter options are best if you don’t want to deal with the mess.
Fire Pit: An outdoor fire pit is an excellent focal point for your outdoor living room since it is often situated in the middle of the seating area. It is very inviting, allowing for a more intimate bonding experience. Keep in mind that large open flames, nicely appointed furniture, and flat-screen televisions may not do well together.
Space Heaters: There are many shapes, sizes, and types of heaters that you can choose from. Some are much more portable than others, so choose wisely. Keep in mind that heating an outdoor space will work better if protected from the wind.
Lighting
What would your living room be like without lights? Well, if you are planning to use your new outdoor space as a living room, you will need some lights.
Freestanding: There are plenty of choices for freestanding outdoor-rated lights to choose from. These can be sitting on the end table or be all on their own in the corner.
Built-In: If you are creating a solid structure pergolas to house your outdoor living room, your lights can be built right into the structure to really make it feel like home. Everything from chandeliers to downlights and rope lighting can give this space accent and function.
String Lights: If you aren’t planning a structure, you may have nearby trees or shrubs that can be used to hang some rope or string lights. Maybe you can run strings of lights along cables that cross the patio from one tree to the next? There are many types of easy-to-install and economical LED color-changing light sets that can be controlled from your smartphone, so if you want to liven up the look, you might want to consider color.
Decorations
Your outdoor living room would not be complete without some decorations that can give it more character and make it look more “liveable.” Consider some of the following choices.
Outdoor Rug: Rugs enhance your outdoor living experience by adding color, patterns, texture, and comfort to your space. Unlike indoor rugs, which use light materials, outdoor rugs are often made of durable fibers that can withstand the elements. Some of the best choices for outdoor rug materials are plant fibers like jute, hemp, seagrass, and sisal. Aside from these natural fibers, man-made materials such as polyester and polypropylene can also endure the worst of weather.
Patio Plants: What’s an outdoor living room without plants, right? To create a lush outdoor space, you must choose the best patio plants. Fan flowers, chrysanthemums, begonias, Mandevilla, marigolds, and herbs top the list of homeowner favorites. Like the potted plant in the corner of your indoor living room, a potted plant can help create a living room feel outside.
Outdoor Curtains: Outdoor curtains are not only perfect decorations, but they can also serve a lot of functions. For one, if the sun is too hot, they can provide shade to you and your guests. They can also give you more privacy if your neighbors seem too close. Note that outdoor curtains are different from indoor ones. Their materials are mildew-resistant so that they can be used despite the changing weather conditions.
Throw Blankets: Aside from warming up your guests, throw blankets also add a layer of elegance to your outdoor space. If you plan to have throw blankets, you may also need to plan an area to store them while not in use. Maybe that coffee table can have storage beneath?
Outdoor Cushions and Pillows: The best outdoor cushions and pillows are made to lock out moisture. Even though they are more expensive than the usual cheap cushions, they are highly durable, so you’ll likely get your money’s worth. Keep in mind that more layers, pillows, and blankets will encourage more animals to create homes in your furniture when you are not using it.
Wall Accents: What living room would be complete without some art hanging on the walls. You can undoubtedly incorporate some pictures, paintings, or wall art if you have any structure.
Other Accessories:
I know that we are not talking about outdoor kitchens in this article, but everyone knows that a living room needs access to snacks and refreshments.
Bar Cart: If you’ve invited many people, a tiny cooler table won’t suffice to hold your drinks, and you would need a rolling bar cart to satisfy everyone. Of course, you need to stock it up with rums, flavored vodkas, wine, glasses, reusable straws, etc.
Refrigerator: Long warm days out in the new living room with easy access to cold beverages sounds like a great setup to me.
Trash Can: Having an animal-proof trash can will come in handy when having snacks and refreshments in your new living room.
Furniture Covers: This is one of those accessories that you will live to hate. Good furniture covers will protect your furniture from the elements, but they will also discourage you from using the space because you will need to uncover the furniture first. These covers also provide cover for animals, so don’t be too surprised when you pull off a chair cover to find an animal sleeping in your chair. Also, if you choose to have furniture covers, where will you put them when they are not on the furniture.
Cabinet/Storage: A weather and rodent-proof storage cabinet will come in handy for often-used items like cups, broom, blankets, furniture covers, etc.
Outlets: If you are bringing a bunch of technology and electrical devices out to your living space, don’t forget to install some extra outlets for devices and other un-thought of accessories.
12 Benefits of Adding an Outdoor Living Room to Your Property
Is it worth investing time and money into building an outdoor living room? This question is one that you will want to be answered before you begin. Here are a few of the obvious and not-so-obvious benefits of the outdoor living room.
Gives You More Space: The primary benefit you’ll get by setting up an outdoor living room is additional functional space. This means that you and your family will have an extra area where you can relax, share a meal, or make conversations. Since you can customize it according to your taste and needs, you can also make it child-friendly or senior-friendly. This way, your kids and grandparents can enjoy sitting outside to enjoy some fresh air and the comforting view of nature.
You can Express Your Creativity: What is often overlooked is that the process of building an outdoor living room lets you express your creativity. From planning the layout to choosing the furniture and adding some wall accents, your right brain is getting the stimulation it needs.
It can be a Stress Reliever: Having your own quiet, secluded outdoor space may be just what the doctor ordered to relieve the stresses of everyday life. Not to mention that if you build your outdoor living room yourself, you can get some great exercise in the process.
It can be Affordable: Many homeowners think that building an outdoor living room is expensive, but it is one of the cheapest landscape changes you can make. Buying furniture and an umbrella can be pretty cheap if you already have the yard, patio, deck, and trees. Consider checking online postings and local rummage sales in some nicer neighborhoods for lightly used furniture of good quality.
Increases Your Property Value: If you are planning to sell your property in the future, adding an outdoor living space can raise its value since it is highly functional and adds an aesthetic appeal to your home. Potential buyers always prioritize space whenever looking for properties to buy, so an outdoor living room might be just the thing that attracts them to buy.
Flexibility for Entertainment: Tired of entertaining your guests indoors where all you can do is watch Netflix or play some old board game? Well, outdoor living rooms provide more ways to have fun while remaining at home. Also, if you have a large gathering, a bit of extra gathering space is always welcome. From tossing around the football to curling up on the couch and watching a movie, the outdoor living room can be a versatile entertaining area where the kids don’t need to take off their shoes before entering. This can also be a place to invite some of your cigar-smoking friends to enjoy a smoke without worrying about indoor air quality.
Improve your Physical and Emotional Wellness: It probably won’t surprise you to hear that sunshine and fresh air can improve your health. Installing an outdoor living room gives you an excellent likelihood of spending more time outside.
A Safe Space: If your house isn’t huge, you and your kids may get tired of sharing the living room. If life in the house feels a bit cramped, the outdoor living room can be a safe space for you or your kids to get some alone time and still be comfortable. This could be an excellent place for you and your spouse to get away from the kids for a bit of quiet time while still being home to keep tabs on them. It could also be an excellent spot for kids to hang out with friends and talk about kid stuff away from the prying adult ears.
An Easier Entertaining Space: You might not always have the energy to throw a party, especially if it is inside your home. There is a bunch of prep and cleanup needed to throw a party. Well, if you have a well set-up outdoor living room, having a few of the neighbors over for an impromptu little get-together isn’t much of a bother at all.
The Perfect Nap Spot: There is nothing better than a quiet nap outside. Especially if no one is making noise and the hot sun is not beating down on you. Think of how nice it will be waking up from a warm afternoon nap in the summer.
Perfect Pet Spot: The outdoor living room can be great for your pets that may not be allowed to get close to you in your more formal indoor living area. They say that time spent petting your pets can lower blood pressure.
Increased Productivity: The outdoor living room might be just the answer for when you are trying to find a quiet spot in the house to do a bit of office work on your laptop. What could be more peaceful than the quiet outdoors?
7 Considerations Before Creating an Outdoor Living Room
Before you contact a contractor or follow the steps on a Youtube video you watched, you should carefully consider the purpose of your outdoor living room, its size, layout, and some other factors that can affect how it should be built.
Purpose: The primary thing that you should keep in mind during the planning phase of your outdoor living room is the purpose it will serve. Will this be for family use, or are you planning to invite many guests? Do you want it to be a quiet and relaxing spot, or do you want it to be the center of activity on your property? Do you have to childproof your outdoor living room or add a corner where kids can do some fun activities while you’re chilling on the couch? These are critical questions to ask yourself since they can significantly impact everything about your outdoor space — from materials used to layout and furniture choice.
Size and Shape: The size and shape of your outdoor living room will depend on the activities you plan to host there as well as the number of people you are planning to invite over. It may also be limited by your budget or by your existing landscape features and the size of your yard. You should also consider how this new living space will affect the view from your house. As for the shape, the general rule is to avoid odd layouts where your furniture won’t fit properly, and your guests would have problems navigating around.
Layout: Most landscape architects suggest that in designing an outdoor living room, you should exert the same effort as planning your home interior. Think about traffic flow and the usefulness and flexibility of areas. Consider how you and your guests will interact with the site and each other. Too much massive furniture on a small patio will not feel comfortable. Nor will a tiny furniture layout on a large patio.
Budget: One of the most common mistakes of many homeowners is not setting up a realistic budget before beginning any construction. Whether you are doing this project yourself or hiring it done, you want to know that costs before you start; it will do you no good to get started just to find out halfway through that you will not have enough money left to finish it properly. This is not to say that you can’t plan around budget shortfalls, but you need to know ahead of time. An outdoor living room can certainly be done in phases; heck, you aren’t tearing apart your house. You could expand the patio one season, add a fireplace and some furniture the next season, and add a television and sound system the third season. As long as you plan ahead, this won’t be a problem.
Placing the Room: The best thing about outdoor living spaces is that it allows an unobstructed view of nature or whatever a property has to offer. Thus, in designing your own, make sure that your sitting area can provide a perfect view of the sunrise or sunset, your landscape’s focal feature, or anything interesting that can relax the mind. Also, keep in mind the sun and wind exposure and place the room accordingly.
Protection from the Outdoors: Since an outdoor living room is an external area of your home, you must consider its orientation to prevent the harsh sun rays from damaging your furniture or from making it so hot that you can’t use it. You need to consider how to block the wind if that is an issue. You need to consider drainage; the last thing that you want is to put a bunch of new furniture into a spot in the yard that floods when it rains. You might also want to consider the bugs in your area and whether bug protection is necessary. If you have an unlimited budget, glass screens and stacking or bi-folding louvers can make this more like an indoor space if you want.
Privacy: Depending on your outdoor living room’s proximity to your neighbor’s home, you may want to build a privacy wall or plant some additional shrubbery. If you are not comfortable in your outdoor living room, you won’t use it, so ensure some privacy if that’s what you desire. Masonry seat walls or decorative walls are a great way to add a bit of solid structure and privacy to your outdoor space.
Common Design Mistakes That You Should Avoid in Creating Your Outdoor Living Space
Choosing between designs and creating an outdoor living room can be overwhelming, especially if there are too many ideas you want to incorporate into your space. To avoid some of the most common pitfalls, please read on. If you’re going to prevent your patio from becoming a mess instead of a liveable outdoor living room, you must be aware of the following mistakes that many homeowners make:
Making it look like indoors: Replicating your indoor living room in your outdoor space is going a bit far. You won’t feel that you are outdoors if you furnish it with furniture meant for indoor use and then wall it in with glass. A room like this would be better built onto the back of your home and called a sunroom.
Trying to DIY everything: If you are not the handiest person you know, you will probably want to hire a contractor if you plan a complicated structure or extensive masonry work. If you keep it simple and work with what you have, a handy person shouldn’t have a problem.
Too much or too little furniture: Adding too much furniture would make your outdoor living space like a yard sale. Meanwhile, being too minimalist in furniture selection can lead to a boring living room instead of a relaxing area.
Going overboard on decorations: Your space will look cluttered and busy when you hang or install too many decorations. For some reason, people tend to over decorate outdoor areas. If that is your style and that pleases you, then, by all means, live it up.
Not adding plants: Plants soften the look of your outdoor space. Not adding them can make your outdoor living room look a bit rigid.
Wrong color choice or combination: Just like inside your home, you will want the colors and textures in your outdoor living room to complement each other, not clash.
Overbuilding your Existing Structures: Sometimes, we will see the situation where a person decided to build an outdoor living area and made it very detailed and grand, but did it over a very old, cracking, and run-down patio or deck. Don’t sink a bunch of time and money into a failing structure. You want to have the solid structure proper before adding to it.
Frequently Asked Questions
How Much Does it Cost to Build an Outdoor Living Room?
The cost of building an outdoor living room would primarily depend on the hardscapes built, the furniture that will be bought, and some other decorations to make it feel homey and relaxing. There is no definite answer as to how much it costs to build an outdoor living space. However, Home Advisor claims that the average cost of creating an outdoor living space is around $7,670. This would be if you already have the structural elements in place and wanted to dress it up and get some furniture and accessories. For covered, natural stone patios and all of the goodies, you can easily spend $50,000+ depending on size.
How Can You Make Your Outdoor Living Room Look Bigger?
In making your outdoor living room look bigger, you must first and foremost remove all the unnecessary clutter. You can’t do anything with a space that has too much stuff. Once you’ve done this, proceed by moving larger furniture pieces to the outside of the living area to make the center seem more significant.
Can You Make an Outdoor Living Room on a Budget?
Of course, you can. This is assuming that you already have a pre-existing patio or deck that will work. The solid structures are the most costly. Simple furniture choices and umbrellas won’t break the bank, but $10,000 bright sunlight outdoor televisions will.
Is it better to have a deck or a patio for an outdoor kitchen?
This will depend on your budget and your desires. A concrete, stone, or brick patio will be longer-lasting, more formal, and more solid than a wooden deck. A wooden deck will typically be a softer and less harsh feel, since brick and stone are rough and hard. A deck will allow you to refinish it over time to change the look if you desire. A deck will let the wind come up from underneath the furniture, so the patio might be a more comfortable place on a windy, cool day. Most outdoor living rooms are built on a patio simply because the patio allows for installing a larger and more solid room structure.
Final Thoughts
An outdoor living room is a worthy addition to your landscape, especially since it has many proven benefits to your property’s resale value and your lifestyle and health. This space can be a favorite family gathering spot for many years with proper planning and creativity. Spend your efforts on the supporting structures like the patio, pergola, and walls at first. The rugs, furniture, and pillows are all wear items that will need to be replaced over time, so don’t prioritize them as they will be changing with time, while the solid structures will not.
There are so many landscaping elements that are thought to be similar but actually have very different functions. This is especially true for masonry features such as retaining and decorative walls. While this may not be the most exciting topic to explore, there are significant differences that are important to understand when planning out your landscape walls.
I prepared this detailed guide to help you identify a retaining from a decorative wall structure. We will cover their purpose, look, and some of the materials needed to build them. We will discuss the various types and some FAQs that can be useful to you if you are in the process or planning to build one.
Functions
First off, let’s talk about the role of retaining and decorative walls in landscaping. While their functions sometimes overlap, they are built for different reasons. Let’s take a closer look:
Retaining Walls
A Retaining wall is meant to keep the earth in place. As compared to other wall types, it is built to be stronger and sturdier so it can hold dirt and preserve the shape of your landscape. They can help stop erosion and can be used to convert slopes into useable spaces.
Below are some common uses for retaining walls:
Water Runoff Control: A retaining wall can be a very effective way to change the grades of your yard to channel the water where you want it to go rather than allowing it to take its natural course. Your retaining wall can divert water away from foundations and keep the rain from washing away garden dirt.
Slope Solutions: People who have steep slopes in their yard often struggle with getting plants to thrive on the hillside, which all too often results in erosion problems. Many times, a steeply sloped, unusable sloped area of the yard can be converted into a beautiful and functional terraced garden or even a sitting area.
Seating: If you are hosting a large gathering, you inevitably run out of seats. Retaining walls can serve as overflow seats depending on their location and height.
Visual Interest: Retaining walls can be used to create raised beds anywhere in your yard, so even if your yard is flat as a pancake, you can use a retaining wall to create a beautiful raised planting bed.
Lighting Solution: Retaining walls are an excellent way to set up lighting for your yard. It may not be economically feasible to install a retaining wall just to have some lights. But, if you need a wall anyway or already have a retaining wall, it’s fairly easy to add low volt or line voltage lighting to a retaining wall.
Maximizing Space: Installing berms and contours in your yard is an excellent way to enhance your landscape, but sometimes you just don’t have enough room to blend in a large berm. Never fear; a well-placed retaining wall can allow you to create a berm of any size and limit its spread on any side you’d like through the use of a retaining wall. Also, if your house is backed up against a slope with a sliver of a backyard, you can dramatically increase your living space by moving that hill back using a retaining wall.
Decorative Walls
Any other wall that is not retaining the earth is considered a decorative wall. This includes garden walls, seating walls, privacy walls, etc. Although each of these has its own purpose, if we think about it, they are primarily built to add character and visual appeal to your landscape.
Below are some common uses for decorative walls:
Privacy: When you throw a party or a family gathering, you surely do not want the prying eyes of your neighbors to make your guests uncomfortable. If your yard is wide open to the neighbors, a well-placed privacy wall can make all of the difference. Privacy walls are also a great way to block the prevailing winds and give yourself some nice calm, warm areas in your yard.
Mood and Aesthetic: A well-planned decorative wall serves as an aesthetic element to your lawn and can also be the focal point of your landscape. Depending on the theme you are going for, it can change the mood of your area.
Seating: Similar to retaining walls, decorative walls can also provide overflow seating once you invite friends over. Some great examples of these are low walls that accentuate your firepit or patio.
Division: Decorative walls can be a great way to segment your yard into separate and intriguing areas. Being able to view your entire yard is great for tossing around a football, but if you want an interesting yard, you need some division and intrigue. Use a gently curving wall to lead a path from one planting area to the next, use it to outline a special perennial bed, or use it to back a quiet seating area at the edge of the yard.
Vertical Gardening: Decorative walls can be more than just privacy or seating structure. They can also be used to garden vertically. Some homeowners opt to plant at its base for a more natural look, while others go for affixing planter boxes and baskets to the wall.
Retaining Wall Basics
Compared to decorative walls, retaining walls can be quite a bit more complicated to install. Here are some of the important basic rules that should be applied to any retaining wall construction.
Drainage: The most destructive force on a retaining wall is water. There are two ways that water can destroy a retaining wall.
Water Flow: Enough water flow can wash out the soil behind the wall and cause its failure. The ground behind the retaining wall must be graded to slope away from the wall. If you cannot pitch the soil away from your wall, then your wall is simply not high enough.
Freezing: Water held in the soil behind a retaining wall will freeze when the temperature drops low enough. When wet soil freezes, it expands. This expansion is a powerful force that will push any wall forward. This is not usually a one-season occurrence, but the wall will be pushed out a bit each time it freezes. Eventually, given enough time, the wall will fail. This is the most common failure that I see in retaining walls. To avoid this failure, you must pitch the ground away from the top of the wall, so water doesn’t flow behind the wall. In addition to this, every retaining wall must be installed with drainage behind it. Different walls require different drainage, but drain tile at the bottom behind the wall, backfill with washed stone, and geosynthetic fabric is pretty standard. Depending on the layout of the wall, it may also require seep holes out the front to alleviate the water. Adequate drainage behind a wall will remove the water to alleviate any freezing concerns.
Back Pitch: Most retaining walls other than some of the largest concrete and steel commercially installed walls need to be installed with a back pitch so that the weight of the wall material holds it in place.
Footings: Depending on the installation and your area, the wall may require some type of footing or bottom trench to help tie the wall into the existing soil. Like any patio or walkway, a retaining wall must be built on a solid foundation. All soft, friable material must be cleared away before construction, or the wall will move over time. If you are in an area of the world where the ground freezes, you will want to be sure that any mortar and concrete set walls that you build have a sufficient footing under them to avoid them being cracked by frost heave. It is usually recommended that this footing extend down below the frost line, and in my area of Wisconsin, this is four feet. Dry-stacked walls are often popular in colder regions because they will move with the frost, and no damage will occur.
Engineering: Most commercially available retaining wall blocks will require engineering plans if they reach over four feet high. Always follow manufacturers’ specifications for the wall that you are installing.
Limits: Under most conditions, a wall shorter than four feet won’t need special engineering specifications as long as it is built according to the water flow and drainage principles. There is really no limit to how high a retaining wall can be built, but an inexperienced wall builder should not cross the four-foot limit.
Height Matters: When planning and building a wall, material choice, proper drainage, and height are the most critical aspects. A typically constructed block wall above four feet will require a step-back greater than the height of the wall below and typically geosynthetics sandwiched between layers of the wall to tie it to the slope. Another way to offset wall height is to increase the size of the material. Enough mass and back pitch can also overcome height challenges
Decorative Walls
The appearance of a decorative wall will depend on its type. But as its name suggests, they are primarily installed for their aesthetic impact on the landscape. They are usually low walls measuring about 18 to 30 inches. They can be built using almost any material that will support its own weight. Since they aren’t holding back any soils, they only need to support themselves. Once again, the taller the wall, the more solid footing they will need.
Examples of Retaining Walls
There are as many types of retaining walls as there are possible materials.
Gravity Retaining Wall
This is considered the most basic type of retaining wall since it only uses weight and mass to keep the soil in place. These walls are based on logic. Enough mass in front of the soil will hold back the ground. It’s simple physics. Walls like this have been built for many generations. The most popular materials for these walls are whatever large stone materials are available locally. Historically, more than today, the weight of rock has limited the ability to move it, so large boulder and stacked rock walls were typically built using local rock. When installed properly, these walls are some of the most long-lived walls because they do not rely on man-made materials; they depend on rock and gravity. While most of these walls have been built of rock, gravity walls can and have been constructed using many different materials such as; large sandbags, stacked tires filled with soil, plastic drums filled with sand, and many more. These container-style materials are typically referred to as gabions. They don’t need to be fancy, just heavy.
Manufactured Block Retaining Walls
These have become very popular due to their simple building block style. Many are installed every year by homeowners and professionals alike. They are relatively straightforward to install, but the basic rules of wall building must be followed, and as stated earlier, manufacturers’ recommendations and specifications must always be followed. If these walls fail, it is almost always due to faulty installation methods, not due to product failure. Many are built using geosynthetics to tie them to the wall, and many are fastened together layer by layer using construction adhesive. While most of these are strong due to the engineering and correct installation, some commercial manufactured block walls are so heavy and large that they are basically gravity walls.
Cantilevered Retaining Wall
Cantilevered retaining walls are really only installed when a large amount of fill is being moved. They are made of steel-reinforced, poured concrete, and are L-shaped The bottom of the L is under the weight of the soil that the back of the L is supporting. The ground above holds the slab so that the wall won’t tip forward. The success of this wall depends on gravity, but mainly on the structure of the L. These walls can be poured on-site or manufactured off-site and transported to the site.
Sheet Piling Retaining Wall
Sheet piling retaining walls are historically constructed of contoured steel pilings. The steel pilings are driven into the ground with specialized heavy equipment, and they are interlocked with each other as they are installed. They can be installed to support almost any wall height as long as the pilings are built thick enough, and they can be driven into the ground far enough to offset the weight behind them. Because they are made from steel and are interlocking, the chance of them pushing forward is very limited. The weakness of these walls is that they are built from steel, which will eventually corrode and fail. It is possible to construct a driven piling wall using timbers and also vinyl, but timbers aren’t interlocking and are very difficult to drive accurately, while vinyl pilings are typically only used as break walls in areas where excavation can be used to install them, and they prevent erosion more than retain soil.
Timber Retaining Walls
These retaining walls were popular prior to the advent of the manufactured block walls. They can be built using any sort of wooden timbers, but the most prevalent wall materials were pressure treated timbers and re-purposed railroad ties. They were usually alternately staked and tied together using spikes and rebar for stability. Since they are not heavy, they rely on angles and buried wall sections to hold them in place. If a relatively straight timber retaining wall was created, “deadmen” were installed to tie the wall into the earth behind it. Deadmen are typically timber installed perpendicular to the wall, between layers, and spiked into the wall above and below it. The back of the deadman is dug into the ground behind the wall and would usually have a cross piece spiked to the end to ensure that it won’t pull out of the ground.
Poured Concrete Retaining Walls
Countless poured walls have been installed over the years, as concrete has been a go-to construction material for many years due to its design flexibility and extreme strength. Concrete walls can be engineered to retain any sort of wall. When in doubt, just add more concrete. Talk about the ultimate retaining wall; most dams are built using concrete.
Examples of Decorative Walls
Since decorative walls don’t retain the earth, there aren’t nearly as many rules or requirements. You can make a decorative wall out of almost any material you find attractive. Taller decorative walls, such as privacy walls, will be much more economical to build out of wood, steel, or vinyl, while the decorative short garden walls are typically made from stone, and patio walls are often built of the manufactured block. Decorative walls are usually constructed so that both sides are equally attractive since they can be viewed from both sides.
Garden Walls
This is the general, all-encompassing term for any free-standing, decorative wall built in the yard or garden. They can be used to divide certain landscape features or delineate beds and walkways and create structure in your yard. They are only meant to emphasize some landscape elements and not to withstand soil pressure. Decorative walls are also often used to delineate property lines and used in conjunction with pillars to create grand property entrances. While many garden walls are dry laid, simple, and rustic, formal garden walls can have footings and be constructed of concrete and brick or stone for a very formal, elegant look.
Seat Walls
Unlike garden walls, these often use double or single stacked manufactured blocks, and they usually have a cap to create a flat seating surface. While not as popular, seat walls can undoubtedly be built using natural stone, concrete, or brick. Seat walls are often accented with decorative planters and columns topped with lighting for the patio. While these seat walls can support people’s weight and often hold some garden soil, they are not designed to hold back the earth. They are stacked in a similar fashion to the manufactured block retaining walls and are often held together with construction adhesive.
Privacy Wall
Privacy walls are a worthy addition to your landscape since they can bring security and comfort to you and your guests. They are usually four to six feet tall and often built in a similar fashion to a short section of fence.
Materials Used for Walls
In building retaining and decorative walls, it is easy to get overwhelmed by the various materials you can choose from. Your budget, the wall purpose, and the look you desire should always be considered.
Manufactured Retaining Wall Blocks: These are probably the most popular type of retaining wall material right now. They are popping up in all sorts of neighborhoods and being used for soil support in road and sidewalk projects. There are varieties, colors, shapes, and sizes to fit any project and taste.
Concrete Block: This is often used for free-standing, decorative walls as the structural center, which is then covered with brick or stone. It has been used as a stacked structural building block used with mortar to build walls for houses and other structures for generations. It can be left bare but is not particularly attractive
Stone Veneer: This material allows a lot of flexibility since you can choose from various natural stones. Stone veneer is installed over a poured concrete, concrete block, or wooden framed base. It is typically applied using mortar and wall ties, just like brick veneers.
Poured Concrete: Poured concrete offers the ultimate flexibility of design and shape. You can pour any shape that you can form, and it is very durable. It is often installed as the footings and foundation of a veneer wall, but it can be used on its own, especially if stamped and colored.
Brick: If you have a traditional house design, using bricks can complement it. Walls can be built using layers of stacked brick as was done historically on brick wall houses, but are more commonly constructed nowadays using a brick veneer over a wooden, concrete, or concrete block foundation. Brick is typically more prone to absorb water than stone, so it may require a capstone to protect it, and it may be more inclined to crack in freezing areas.
Wood: Installing wood retaining walls is relatively straightforward, but it has sort of fallen out of style over the last ten years or so. I believe that it has lost its popularity for three reasons. The wood used must be pressure treated or creosote treated, so not great for the environment. Manufactured concrete block retaining walls of greater durability, easier installation, and many color and texture choices. The wood timbers can decay over time, regardless of the chemical treatment.
Dry, Stacked Stone: Dry stacked stone walls are probably the oldest type of walls. They can be built using flat stacked stone or round or jagged boulders. Since these walls are not mortared and rely only on gravity to hold together, they must be installed correctly. When using natural, local stone, these walls can look very natural and typically go well with any landscape design.
Gabion: Gabions are basically any sort of container filled with stone, concrete, or sand that is stacked to form a retaining wall. They can be very effective and quick to install. The downside is that if filled with anything other than concrete, you depend on the container’s material for the durability of your wall. These are often used along shorelines as they can be installed from the topside with little shore disruption.
Retaining Wall Frequently Asked Questions
Does a retaining wall add value to your home?
One of the advantages of adding a retaining wall to your landscape is that it increases your property’s market value. Any property with attractive and functional masonry features is more appealing to buyers and can be sold at a premium.
How do I know if I need a retaining wall?
If your home’s foundation or any part of your yard is threatened by soil erosion, then you can likely alleviate this threat through the use of a retaining wall. If you would like to alter slopes or add contours, retaining walls can be used to do this also.
What can I use instead of a retaining wall?
Just about any heavy and stackable material can be used to help retain soil, so be creative and use what you have.
How close to a boundary can you build a retaining wall?
There are specific regulations on how close you can build a retaining wall to your property’s boundaries. As such, you would need to consult your local city council or your area’s building and engineering department before you start constructing a retaining wall.
What is the cheapest type of retaining wall?
The cheapest type of retaining wall is dry stacked and uses readily available cheap materials. If you are a handy person, doing the job yourself will significantly reduce your costs. If you live anywhere near farmers, they often have large piles of stones that they remove from their fields. They may be interested in getting rid of these piles at a real bargain, especially if you will do all of the loading and hauling.
What is the easiest retaining wall to build?
Many do-it-yourselfers seem to prefer the manufactured block walls, and I believe that this is due to the building block style and perceived ease of installation. Personally, I believe that a natural boulder wall is much more attractive, easier to build, and will last forever if constructed properly.
What is the strongest type of retaining wall?
I would say that poured concrete has the absolute highest strength potential since it can be designed and reinforced to withstand any force. Look at the Hoover dam. It is built of poured concrete over 700 feet tall. Now that is an enormous retaining wall!
Do I need foundations for a garden wall?
This depends on the style of garden wall that you are building. Any dry-stacked wall will move with the frost /thaw cycle and should be a problem. Any time you put mortar or concrete into your wall, you will likely want a footing or foundation.
How tall should seating walls be?
For you to sit comfortably in a seating wall, its height should be 18 to 24 inches, and this height should include the capstone.
How do you make an old garden wall look good?
Often, old garden walls become overgrown with plant material, and rocks often shift. To freshen up a natural stone garden wall, remove any overbearing plants and restack any fall stone areas.
Final Thoughts
Both retaining walls and decorative walls are a worthy addition to your landscape. Although their functions sometimes overlap, knowing their differences is essential if you don’t want to waste your time and money using the wrong materials. Most of this retaining wall knowledge is common sense, and the best way to build a wall is using common sense and patience. A retaining wall is a long-term investment in your property, and it is a lot of heavy material. Take your time building it and always follow manufacturers’ recommendations. If you are new to wall building, a stacked block or boulder wall less than four feet tall should be doable. Anything over that, and you will want to hire a professional or really do your research.
As an Amazon Associate I earn from qualifying purchases.