Does your landscape need an update? Maybe you need more outdoor entertaining space, or just a few areas need something more than what is already there. If you’re looking for ideas, read on! I think you’ll find a few creative thoughts to get you started. We will give you 12 Creative Landscaping Ideas You Can Try This Summer.
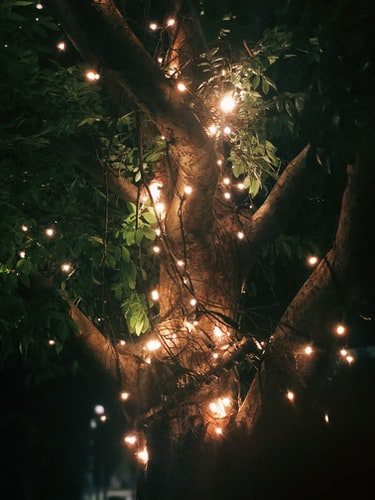
1. Make Use of Interesting Lighting
interesting lighting
Lighting doesn’t have to be solar lights along the edges of sidewalks and pathways. Add drama to the nighttime landscape with lights along stairs—especially beneath steps—or through backlit shrubs, highlight a particular tree, hang lights from trees to illuminate a garden walkway. If you want to light your walkways, opt for interesting light fixtures such as smooth and sleek fixtures for modern landscapes, or consider something styled like small lanterns hanging from cast iron hooks for more old-fashioned landscapes.
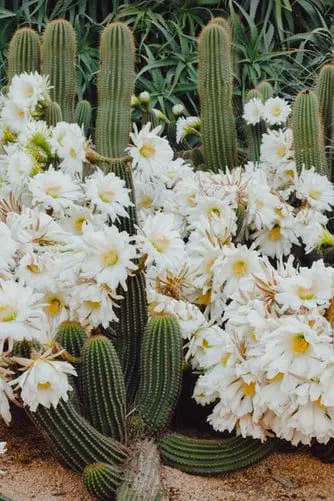
2. Xeriscaping can Make Landscaping Easy and Beautiful
xeriscaping
Xeriscaping is a technique gaining popularity in all regions of the world. When you create a landscape designed to reduce or eliminate the need for irrigation, you are xeriscaping. In practice, this can mean a few things. Using drought-tolerant plants that don’t require more water than what natural sources offer is a start. You can also consider landscaping with rocks. Beds filled with large river stones and boulders can add a lot of color and interest to the landscape—and they don’t need to be planted, weeded, or pruned. To build on the look, you can also add stone retaining walls, pathways, and more.
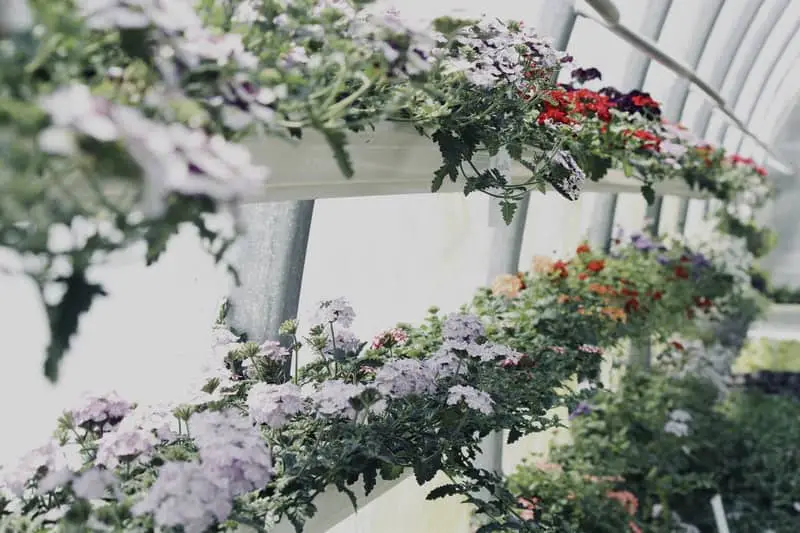
3. Hanging Baskets aren’t Just for Front Porches
hanging basket
Every landscape needs a little bit of verticality. If you don’t want trees or tall shrubs, try hanging baskets instead. You can add them to the landscape in a variety of creative ways. Attach plant hangers to a ladder or build a small wall in a spot that needs a little extra love so that you can attach hangers to that. You can string a light cable between posts or trees to allow you to hang your colorful baskets. At garden centers, you can find tall wrought iron hooks meant for hanging plants so that you can line walkways or create a focal point in one of your beds with a beautiful cascade of flowers and foliage.
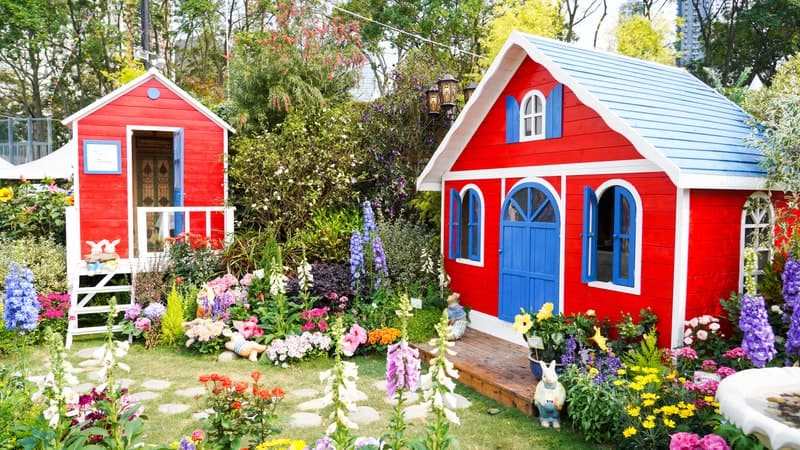
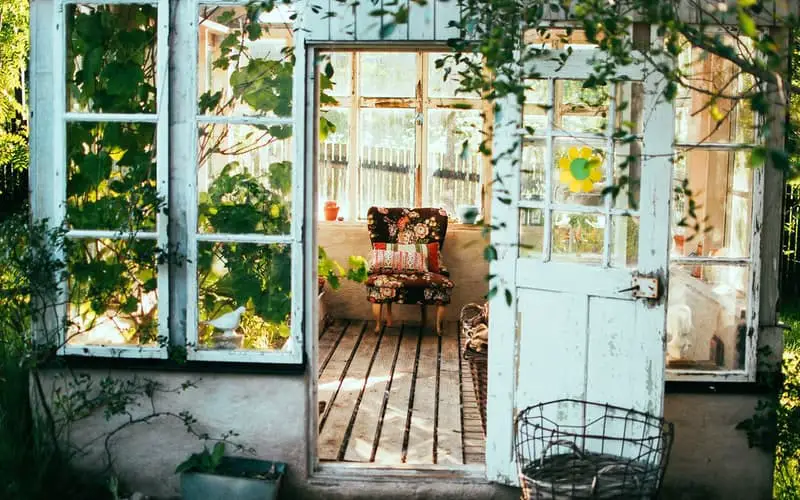
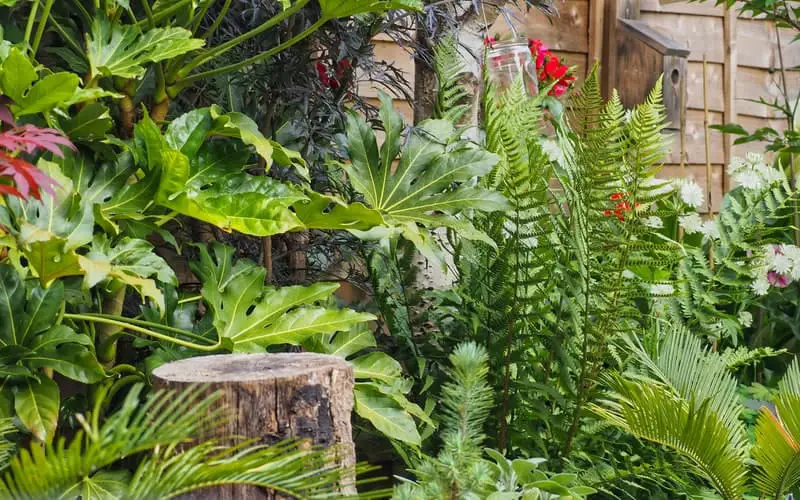
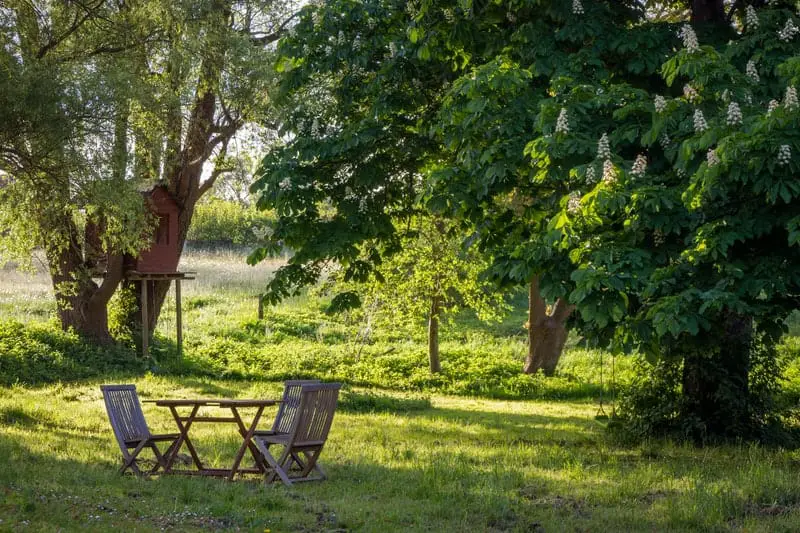
4. Create a Little Hideaway
Create a hideaway
Do you have a shady spot in the backyard that doesn’t get much attention? Turn it into the perfect place to enjoy the afternoon. Build a small patio in the shade; choose some shade plants to surround it. Ferns and hostas will work well here. Then place some comfortable seating in your new shade garden, and you’ll have a shady little escape to spend hot summer afternoons.
5. Indoors Outside
indoors outside
Outdoor living space is becoming a very hot trend lately. It used to be seen primarily in tropical climates where the temperatures are comfortable all year round, but now it seems to be gaining popularity everywhere.
The idea is to bring the indoors outside, essentially creating a beautifully landscaped backyard living room. There are all kinds of ways to get that “indoors outside” look.
Start with some comfortable, living room style furniture with upholstered seats that can withstand the weather will give you that cozy living room feel. If you have outdoor wall space, consider shelving where you can place planters or pots for decoration. A fire pit or fireplace can help you stay warm on those chilly evenings. A few well-placed pots of annual flowers will liven up the patio, and of course, you’ll want to landscape with plenty of green to build on that natural connection.
6. The Vertical Herb Bed
vertical herb bed
Many people love to landscape with edible plants, but not everyone has the space for big vegetable gardens or herb beds. Where herbs are concerned, though, you can always go vertical. With shelves or hangers meant to hold terra cotta pots, you can turn a wall or a privacy fence into a vertical garden lined with small pots that are perfect for your herb collection.
6. Go Wild
go wild
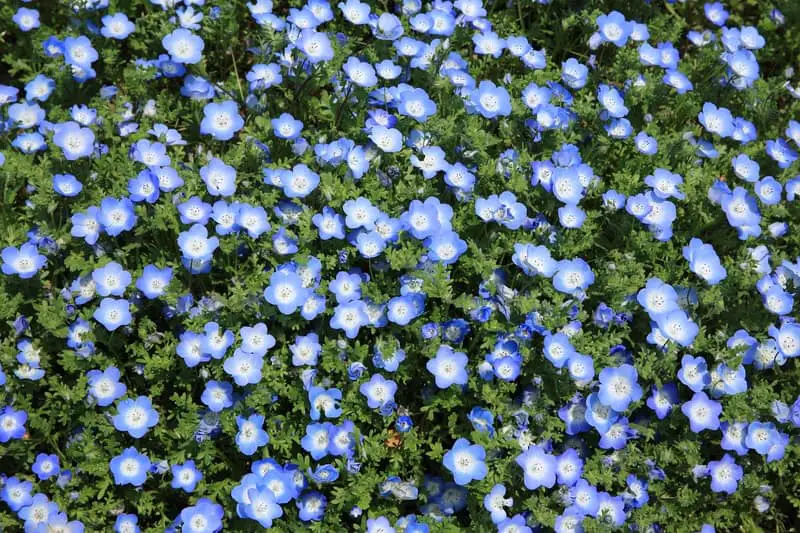
Wild gardening is another big trend. It involves gardening with species native to your area—and letting those species grow freely in garden beds. Native gardens typically require little maintenance since these plants are ideal for your particular climate, and they make excellent wildlife habitat, too, particularly for pollinators that rely on native flowers. There are many places to purchase a beautiful wildflower seed mix. Sprinkle this mix into a lightly cultivated bed and watch the pretty flowers bloom.
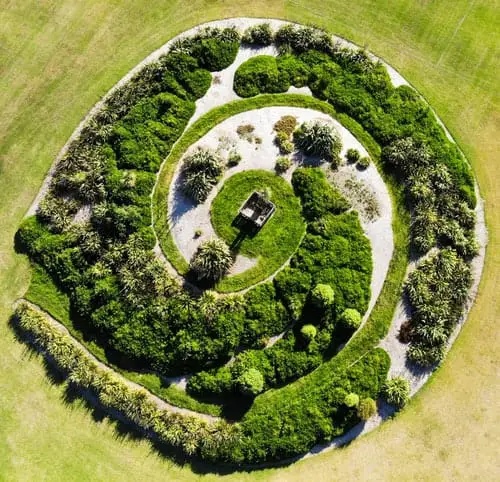
7. Play with Curves
curves in the landscape
In many landscapes, the walkways are straight and the garden beds square. It doesn’t have to be that way, though! You can add a lot of visual interest with a gently curving sidewalk leading from the driveway to the front door or a serpentine path winding through beautifully planted gardens. Beds surrounding the house look beautiful with a little bit of curve to them, too. Check out some of your favorite landscape pictures and notice that the curves are usually long and flowing. Many homeowners create sharp or tightly undulating curves which don’t look as natural to the eye.
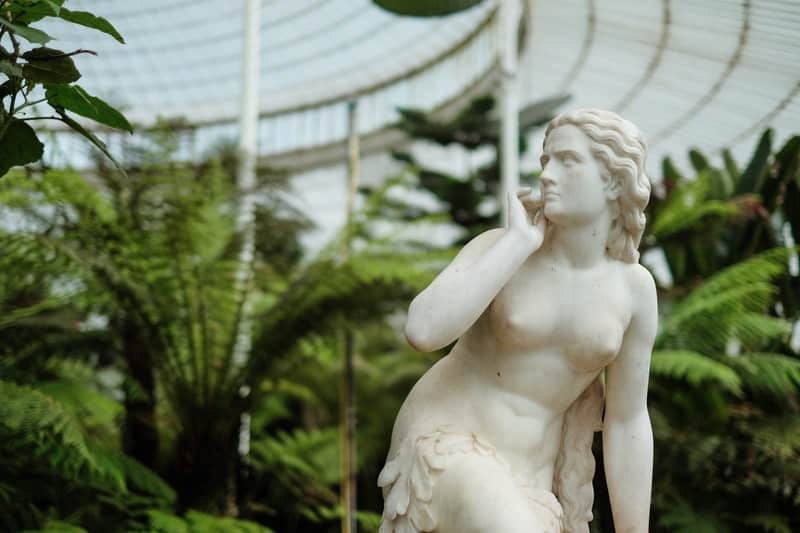
8. Stones, Statues, and More as Focal Points
stone statues and more
Need something that draws the eye to a particular part of your yard? Why not an interesting boulder? Statues can work, too, if you have a specific theme in mind. Choose something to complement your home’s style, or if you’re feeling creative, then go for contrast, like a large, perfectly round stone to contrast a home in a boxy contemporary style.
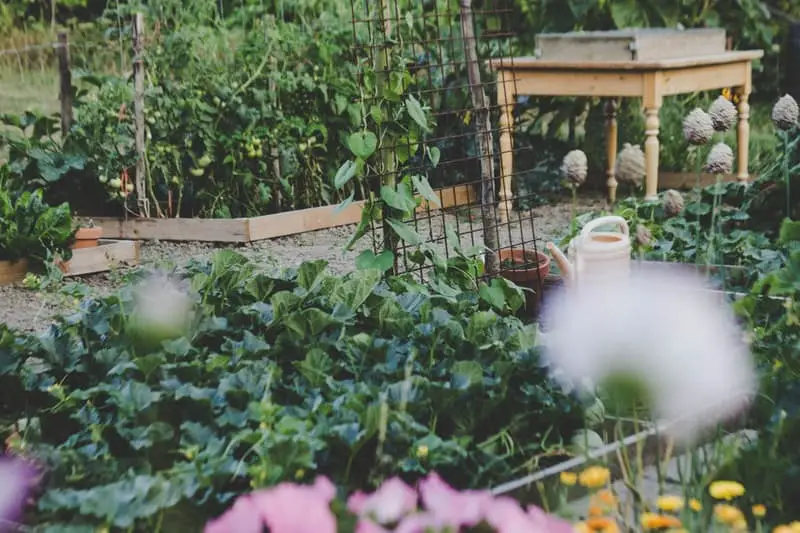
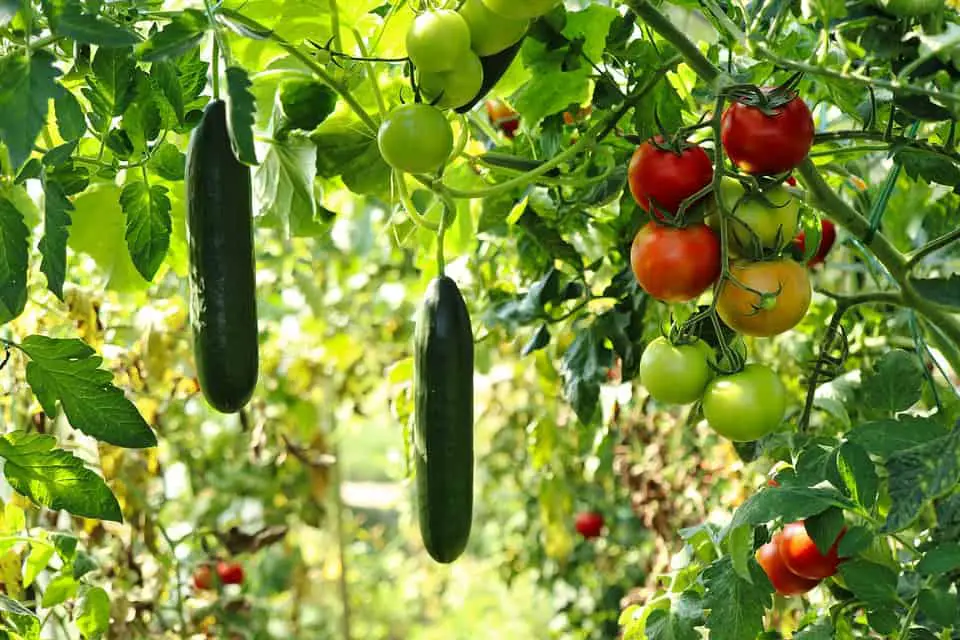
9. Turn Your Veggie Garden into a Garden Party
veggie garden
Vegetable gardens often have a utilitarian look, but it’s possible to turn them into a beautiful part of your landscape. One idea is to create raised beds around a patio. Plant your veggies in the raised beds for easy weeding and care, and move some seating out to the patio so that guests can enjoy the fruits of your labor. Or, plant some lavender or marigolds along the edges of your veggie garden for a bit of color and a bit of deer repellant.
10. Arbors are Making a Comeback
arbors
Arbors can support anything from grapes to clematis, morning glories, and other vining plants—and there are a lot of places to put them in a landscape. Build a big arbor to make a shady place to put some seating or opt for smaller arbors to go over pathways or to create archways from one part of your yard to another.
11. Ground Covers Can Solve a Lot of Problems
groundcovers
In any garden, you’ll have spaces that are prone to weeds. This includes beds where larger plants or shrubs are spaced relatively far apart and areas like walkways or pathways in which weeds can grow between paving stones. Or areas that are prone to erosion. Mulch and gravel are two of the most commonly used solutions to this problem, but you can also use a ground cover like sedum, creeping thyme, or periwinkle to fill in the gaps, keep weeds down, and add a bit more green to the landscape.
12. Fill Large Spaces with Geometric Designs
geometric designs
If you have a large garden bed and wonder how to landscape it, why not create a geometric design with the plants you choose? For example, a large square flowerbed could have petunias or another flower planted in diagonal lines or checkerboard patterns with contrasting flower colors. You can do the same with hostas in different colors and patterns in the shade.
The Sky is the Limit
These are just a few creative landscaping ideas, but where your backyard is concerned, the sky is the limit. Take some time and walk through your yard this spring. I’ll bet that you can come up with many ideas that will give your yard a bit of extra zing this summer!
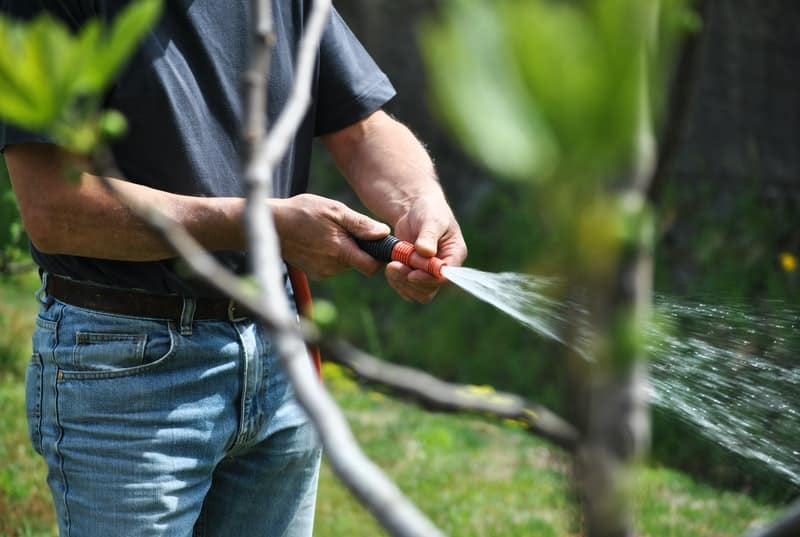
Being smart about how we use water in our garden is not only about preserving water; it is also about getting the most out of each plant through proper irrigation. This article will help guide you with 10 smart irrigation tips for your vegetable garden.
Proper irrigation will save you money and time, and your plants will be better–a win-win situation.
According to specialists, less is often more when it comes to irrigating your vegetables. New growers’ common mistake is irrigating too much in regions with a plentiful water supply.
Vegetable garden irrigating systems
You can irrigate your vegetable garden in several different ways. Basic irrigation methods for veggie gardens involve creating furrows and basins. Watering systems include sprinklers, regular or soaker hoses. The most challenging way to irrigate plants is to set up a drip system.
What are furrows?
Furrows
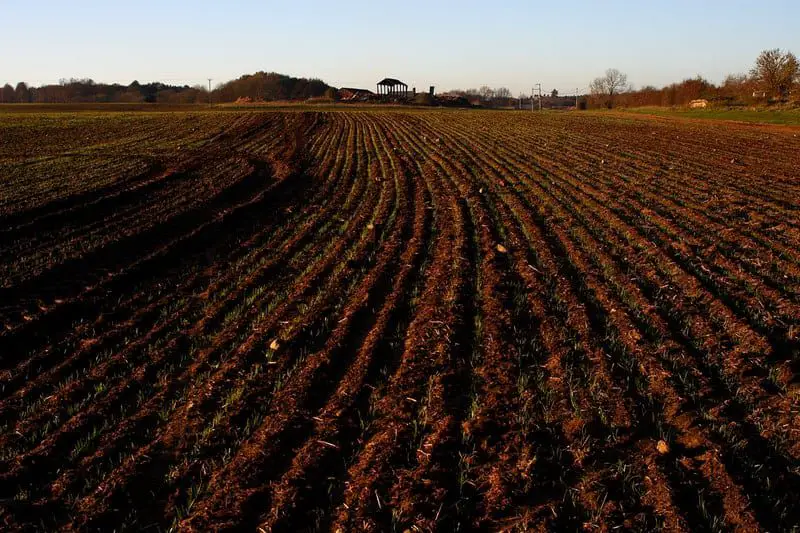
Furrows are shallow ditches running between garden rows, which bring water to the plant’s roots. This irrigation technique is based on the traditional farming methodology of sowing on narrow elevated piles or beds and then using furrows for water. The beds could be 1-3 feet away from each other.
When you’re prepared to irrigate, fill your furrows with water, wait a little while, and then feel around with your fingers to ensure the water has reached the plants. While this method has been used for many years for larger-scale agriculture, it is certainly not the most water-efficient method, as you need to flood quite a bit of water into the garden before it reaches the plants.
What are basins or soil rings?
Soil Rings
A basin or soil ring is a doughnut-like depression around a veggie plant that you fill with water. You make a basin around the plant in a 2-foot-diameter circle. Many people use this method for larger individual veggies like tomatoes.
Sprinklers
Sprinklers
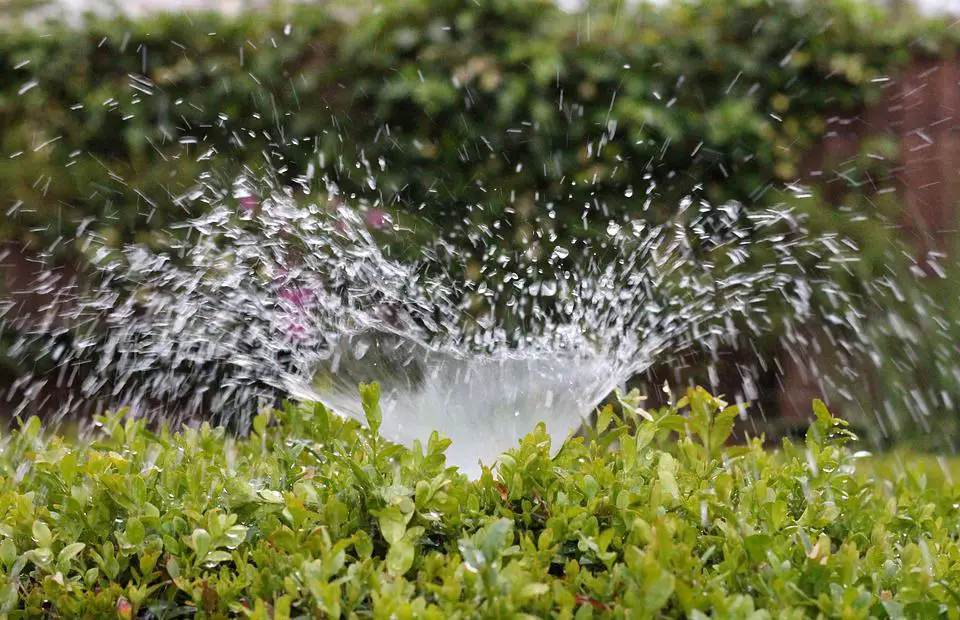
The sprinkler is efficient for irrigating vegetables cultivated in sandy soil that rapidly absorbs water. This method is also an efficient way to water a big garden if you’re pressed for time. Set sprinklers on timers to irrigate your garden as needed at the most advantageous times of the day for your particular site. If you have heavy clay soils or your vegetable patch is on a ridge, you may end up with more water running off than soaking in.
Hoses
Hoses
Watering with a hose by hand is not the most time-efficient irrigation system, but it is particularly well suited for irrigating pots and for selective watering.
Using hoses, you can be confident that you apply the required amount of water to each individual plant.
Drip irrigation
A drip irrigation system slowly supplies water through perforations in flexible plastic tubes. There are several different types of drip irrigation systems; they can contain a single tube with adaptable lines going off it, a tubing sequence, or just one continuous perforated hose that snakes through the garden and allows the water to soak into the soil. Drip irrigation may be the most efficient watering system, as the water soaks in slowly over a long period of time. Also, water is not lost to evaporation, wind, and runoff as it often is with sprinklers.
10 Smart irrigation tips for your vegetable garden
irrigation for your garden
Read on to see ten tried-and-tested tips that can help you conserve water without leaving your plants thirsty.
Water selectively – Irrigating by hand means that you can be more specific about which plants to water–only water if it’s needed. The best test is to simply push your finger into the ground near the plant’s root. If it is cool and moist, no water is needed.
Irrigate at the right time. – When you irrigate can make a significant difference in how much water your vegetables get. Watering early in the morning provides the plants with plenty of time to absorb water before the hot sun comes out and begins to evaporate it. Also, any moisture that gets on the leaves will have sufficient time to dry out before the nighttime, mitigating the chance of slugs and fungal infections.
Aim carefully – If you are watering by hand, be accurate. Water near the plant’s roots, but be sure not to wash the soil away. Bare roots dry out very quickly in the hot sun. While spraying the entire plant with water may not be a good idea in the hot sun of mid-day, a light spray in the early morning can wash off bugs and dust and allow the plant to soak in some topical water as well. Typically, a deep watering every once in a while is better than many light waterings as it encourages deep root growth, which will make for more drought-hardy plants.
Trap water – Plastic containers with many tiny perforations make superb mini water storage tanks. These containers can be purchased commercially or can be made at home. Bury them up to their edge near thirsty plants, then pour water into the container. This will allow the water to soak into the root area instead of running off on the surface. There are also above-ground water storage systems that allow the soil to soak in slowly.
Irrigate efficiently – If you want to optimize your irrigation, use drip irrigation and soaker hoses over broadcast sprinkler systems. Any system that shoots water into the air is most certainly wasting water by losing it to wind, evaporation, runoff, and simply missing the intended root zone. Put your irrigation system on a timer, and be sure to monitor the weather so that you aren’t watering needlessly.
Pick pots carefully – If your plants are in pots, it pays to consider the type of pot that you use. Clay pots are very porous, so they allow moisture to drain, and they can be cool depending on their color. Some of the newer style fiberglass or foam pots have the stone or ceramic look but have the advantage of keeping the plants cooler, and they are lightweight, which makes them easier to work with. Metal and black plastic pots heat up pretty quickly, speeding up the moisture loss and acting more like an oven for your plant roots. However, you can always keep the sun off of these pots by wrapping them in a lighter material or by gathering pots together, so they shade each other a bit and slow water loss.
Add organic matter – Soils with high organic content absorb and hold water quite easily. Add well-milled manure or compost to beds whenever you get the opportunity. Adding organic matter to your garden through the year in thin layers is an excellent way to keep plants fertilized and help conserve water.
Mulch regularly – Putting mulches over soil surface significantly slows down evaporation. You can use almost any porous material to shade and protect the soil, but it’s best to use well-milled organic material, like compost, leaves, and clippings which will also help supply the vegetables with nutrients as they develop. Applying mulches in two-inch layers will shade the soil to conserve moisture and will have the added benefit of discouraging weed growth.
Collect rainwater – Capturing rainwater not only saves valuable drinking water, but it’s healthier for your plants as well. Collecting rainwater from your roof and using it to water your vegetable garden is an excellent way to conserve water usage. There are many homemade and commercially available systems available. It doesn’t need to be complicated. Catch the water in barrels and run hoses out of the bottom of the barrel to water veggies.
Avoid weeds – Any weeds in your garden will compete with your veggies for nutrients and water. Keeping your garden relatively weed-free will help to conserve these resources. Avoid tilling as this breaks down soil structure. Instead, hand pull and mulch as described above.
Conclusion
Wise irrigation techniques can create wonderful results in your vegetable garden, lessening your work and creating vibrant and healthy plants with high yields.
Plant your garden with irrigation needs in mind and group similar plants together while leaving yourself plenty of room to work will also make life easier.
If you love to walk or spend time in the fresh air, it is great to have a backyard landscape that suits your needs. This article will talk about the 10 best backyard landscaping ideas to get that old backyard of yours whipped into shape. The backyard is the area of a house that the neighbors might not often see, so it may get neglected from time to time. But, if done correctly, your backyard can be a favorite relaxation spot whether you are by yourself or with the entire family.
A well-designed and well-maintained backyard is a perfect place to spend your relaxation time. If you’re planning to design your backyard landscape, you must define your choices first. Not everyone wants the same things from their backyard. Some might want room to move; others might want seclusion and privacy. First, consider how you will use your backyard, and then search online to find some ideas that look exciting and fun. Once you have some ideas, you can begin to piece them together to plan out your landscape.
How To Plan Backyard Landscaping
One thing that most people skip is planning for their landscape design. The majority of people head to the nearest garden store and get some beautiful plants for their backyard landscaping. They bring the plants home and then try to figure out where they should go. This approach will often lead to over-planted beds and plants in unsuitable conditions for optimal growth. Before purchasing anything for your backyard landscape, you must consider a few things.
Know Your Backyard
Know Your Backyard
Before planning changes to your backyard landscape, it is good to know the current condition. Spend some time in your yard. First, consider the big stuff like, do you need a new patio or deck? Do you need more lawn or more flower beds? Do you need trees for shade, or should some trees be removed to let in the sunlight?
You want to figure out the most significant changes first and then work your way down to the little stuff. It makes no sense to buy plants to fill in some garden spots when you don’t even have the big stuff figured out yet. Make a small sketch on paper so that you can keep your thoughts straight. A notepad and a tape measure are a great start. Get what you have now, roughly sketched, and then make any significant changes you desire on paper to see how it will all fit.
Before you make any real decisions, take some time to get to know your location and your yard.
How many hours of sunlight does each planting area get per day?
How dry or wet are the soils in each of these planting areas?
What is planted there now?
Is it an existing bed?
Is it lawn that will be converted to bed?
Are your underlying soils dark and soft, hard clay, gravel, and sand, etc.?
Are there drainage ways that run through the yard?
Are there areas that hold water when it rains?
Are there any electric, gas, water, telephone, or cable tv lines buried in any of these areas?
Figuring out the answers to these questions might seem tedious, but knowing this information will allow you to plan your landscape effectively, and it will help others provide advice. If you find yourself at the local garden center with your sketch in hand and you know your soils and sunlight, a horticulturalist will be able to guide you to pick plants that will thrive in your specific conditions.
Decide on a Theme for Your Landscape Design
I don’t mean that you need to pick an actual rigid theme to follow, but Here are some ideas if you do want a more formal theme. When I say theme, I am more referring to you getting an overall idea about how each part of your yard related to the other parts and how they will all relate as a whole. If you are not a designer, this will take some time out in the yard walking around and looking at the house and yard from all different angles. It will take some time to envision your plan, but it is worth the time so that you don’t end up with every corner of your yard being an unrelated piece that doesn’t seem to go with the last piece.
You can design your backyard as luxurious or straightforward as you’d like, depending on your yard and your budget. Having a theme does not mean that it must all be similar. You can create areas that are much different from the others, but the landscape should have a logical and comfortable flow from one end to the other. No matter which way you walk it, it should feel good. You should feel like it all fits together as smaller pieces of the greater whole. The cohesiveness of your chosen “theme” will make your landscape more appealing and more comfortable.
Plan for The Plants
Plants can be thought of as the glue that holds our landscapes together. Through the use of colors, textures, heights, and styles, we are using plant material to ease us from one view to the next or to hide an area from us only to surprise us as we come around the corner. We use the plants to soften the patio and tie the tall house down into the surrounding beds. The plants can highlight specific areas and downplay others.
Do you have a favorite window to look out of? Maybe you need a spectacular show of color outside that window. Does your driveway look too vast and expansive? Perhaps you need to hide parts of it with shrubbery and soften the edges with groundcover.
When planning your plantings, it is essential to look ahead into the future. You want to plan it out so that it looks good long-term. If you don’t consider the overall mature size of the plants you choose, you will end up with a terribly overcrowded landscape. Blank space is our friend. You need some contrast. You don’t want every square inch covered in plants that flow into each other. You need empty spaces to create contrast and interest.
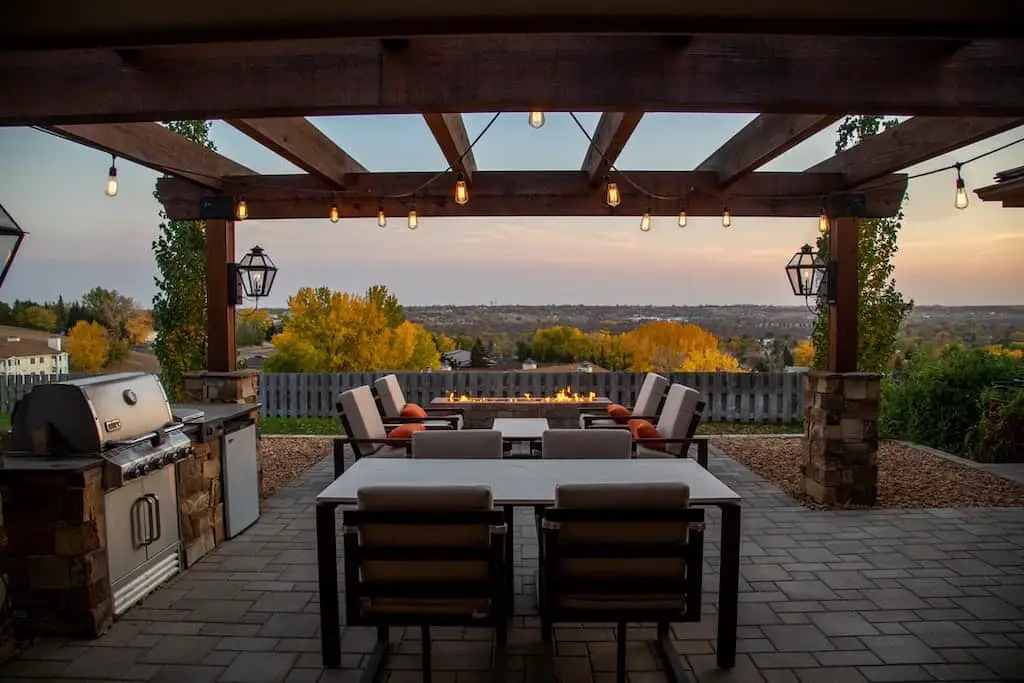
Backyard Landscape Designing Ideas
Backyard landscaping is much more fun if you do it yourself. However, if you don’t feel capable enough to design it yourself, you can hire professionals for your landscape design. Here, we will be discussing some unique backyard landscape design ideas from which you can choose according to your choice. Implement these into your backyard, and enjoy.
Lighten Up Your Backyard
Lighten up your backyard
Back yard landscape lighting will always add more glory to your landscape design. Usually, landscape lighting is for three primary purposes; security, enhancing your landscape features, and focusing on the hardscapes. Make your yard useable and welcoming at night by installing landscape lighting.
Even if you don’t have a big budget for landscape work, you can add a do it yourself landscape lighting kit, and it will make a huge difference to how you see and use your landscape at night.
Maybe you want some hanging lantern path lights along a dark path, or an up light to highlight that giant oak tree, or perhaps a few downlights to provide that moonshine glow.
Ideas for a Renter
Ideas for a Renter
If you are renting a home and have some space in the backyard but wouldn’t want to invest too much or wouldn’t want to worry about the landlord getting angry, you can always enhance your yard with temporary, movable items.
Using decorative pots and planters, you can create a lush garden atmosphere without it being permanent. By adding some landscape accent lights, you can light up a few key spots around your patio and easily take it down when you go. You can upgrade to a portable fire pit and some new lawn furniture or a garden bench to give yourself an outdoor living area.
Adding a veggie garden doesn’t need to be rectangular and industrial. Find a few sunny spots at the edges of existing garden beds and plant them with tasty vegetables to change to look of your yard and provide some delicious food for the table.
Organic landscaping is very popular and good for our earth, so taking advantage of it can provide you with homegrown organic produce. You can plant, tend and be absolutely sure that the vegetables you are feeding friends and family are completely safe and organic. They seem to taste a little better when they are homegrown and fresh.
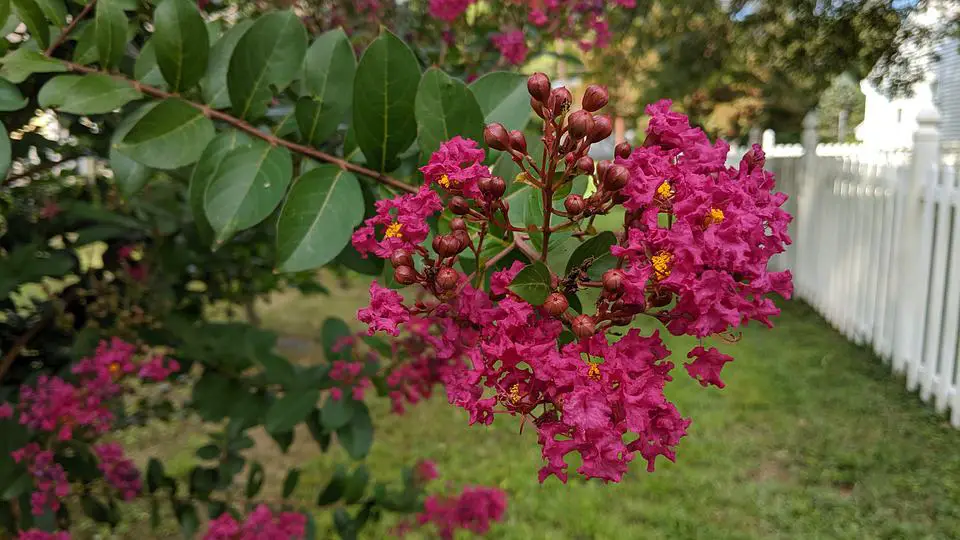
Add Some Color
Add Some Color
If you love to play with colors, then planting different flowers to your landscape design would be great for your backyard. You can choose to add some perennial flower beds with flowers that come back year after year, or you can plan some annual flower beds and fill them with new colors and textures every spring.
If you have an existing landscape and are a bit bored with it, but you don’t want to spend a bunch of money, pull out some old overgrown shrubs or a patch of perennials that you are tired of and plant a little splash of color. You don’t need a lot of space or deep pockets to liven up your yard with flowers.
Using small splashes of annuals is one of my favorite ways to make my old yard a bit more exciting in spring. It is so easy and carefree because it is a one-year commitment. If you don’t like it, you can pick something different next year.
If you have large expanses of groundcover, try planting a random assortment of one foot by one foot little splashes of annuals throughout the beds to break up the monotony.
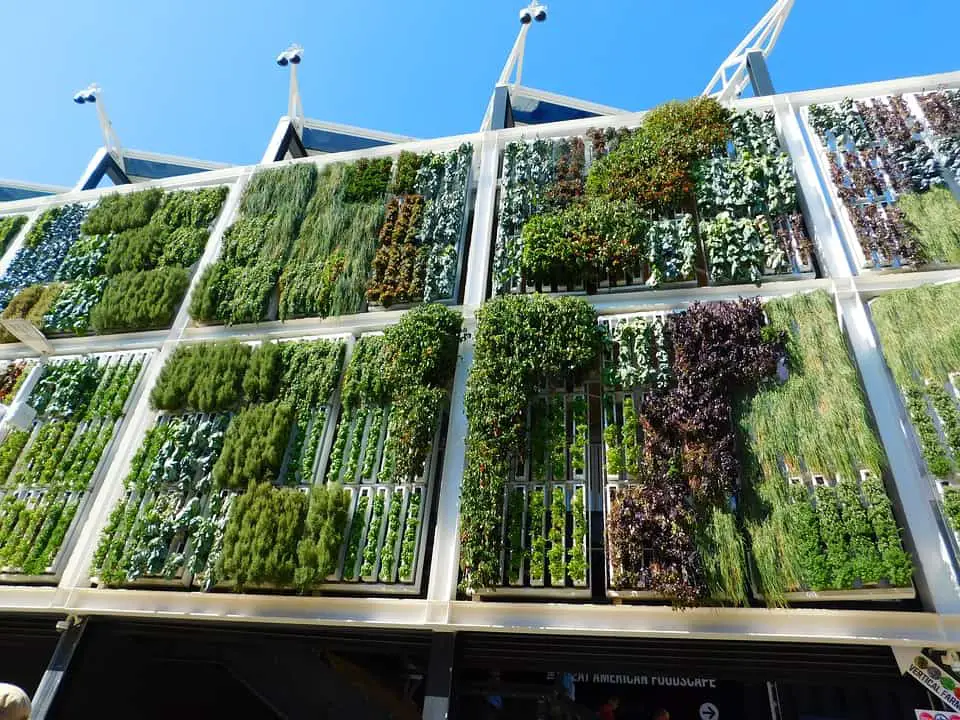
Vertical Garden
Vertical Garden
If you have a very tight tiny backyard, or even if your gardening is limited to a small porch area, you can certainly incorporate a vertical garden. Vertical gardening is perfect for those who don’t have enough space or budget but love to have beautiful gardens.
All you need to be is a bit creative. You can choose a specific wall in your backyard or space on your balcony. Get creative. If you plant hanging and flowing flowers, the understructure will be hidden in a short time, so you needn’t be overly worried about how that part looks.
You can buy little trellises; you can nail wire mesh to the wall, you can set a few posts to let vines climb, you can use ropes or strings connected to nails or screws, you can hang little pots from the wall or even screw planter boxes to a sheet of plywood leaning on the wall. Heck, spend an hour or two on youtube looking up vertical gardening ideas, and you are sure to come away with an idea or two that would fit your budget and your skillset.
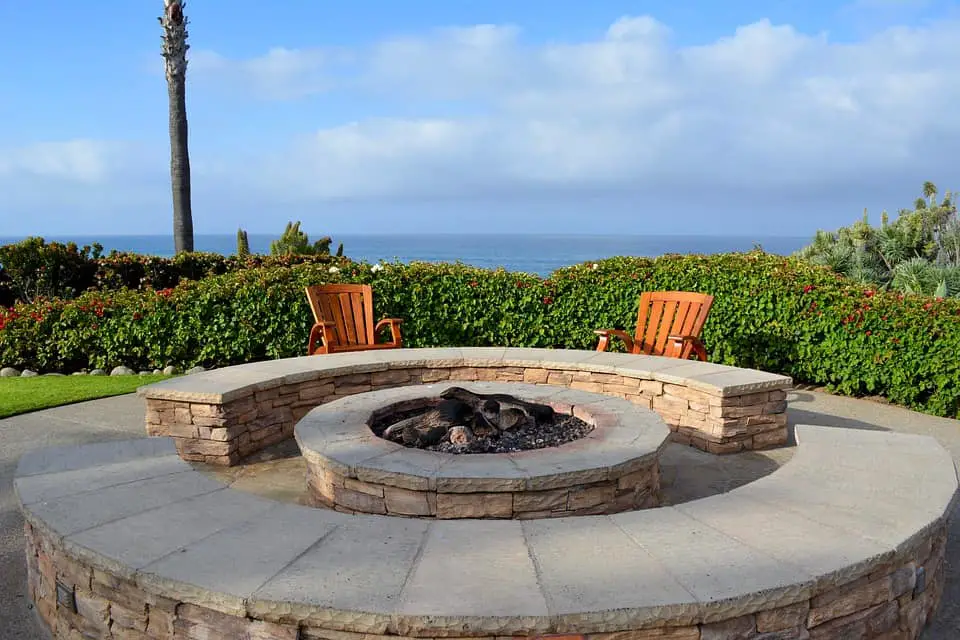
You will want to ensure that your pit is far enough away from trees, grasses, and your house that you aren’t concerned about starting anything on fire. The last thing that you want to do is start the neighborhood on fire. Clear off an area where you want the fire pit. Be sure to remove any burnables and then create a ring. The cheapest and most straightforward is often just a ring of boulders, large or small, to encircle your fire and keep the hot embers inside. If you’d like to get a bit fancier, use concrete retaining wall blocks and build a ring or buy one of the pre-made fire pit rings made of concrete or stone.
Add a Play Area for Children
Add a Play Area for Children
If you have children and want to provide them with a safe and healthy environment to enjoy, you can build a play area for them in your backyard landscape. You can place swings and different lawn playsets so your kids can play whenever they want. If your children usually go to the backyard in the evening or night, landscape lighting would be a fantastic idea to highlight their area.
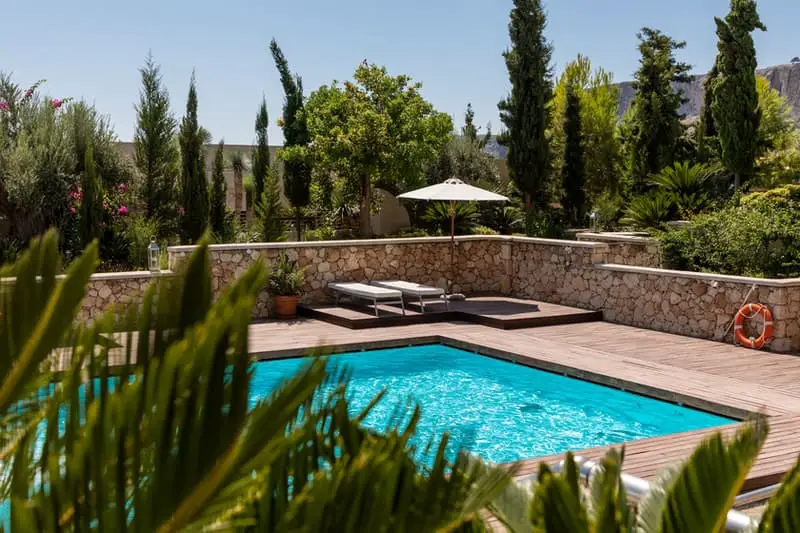
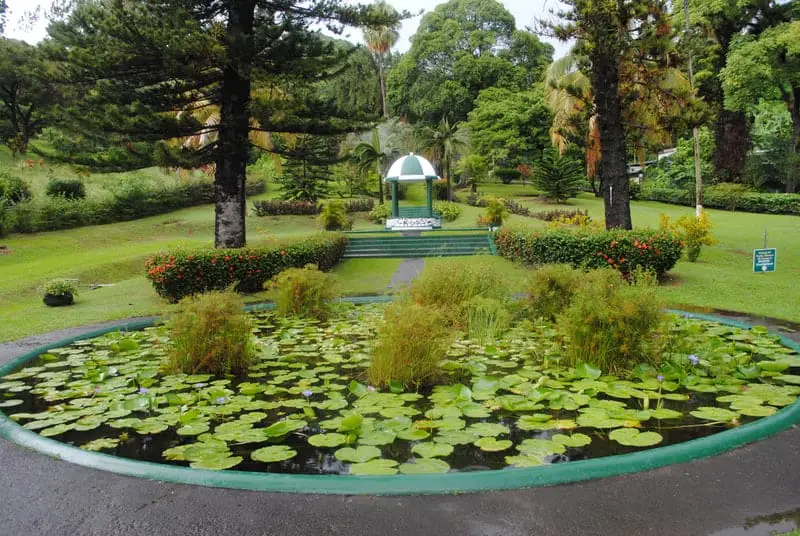
Add a Pool or Pond
Add a Pool
Water is always a great way to liven up the yard. Depending on what you are looking for, a nice inground swimming pool or swimming pond might n=be the answer. If those options seem a bit crazy and out of budget, then maybe a small koi pond or a fountain might be good.
Add a Patio or Deck
Add a Patio
If you don’t have a hard surface to relax on and to set some chairs, you might want to consider adding a patio or deck in the backyard. Once again, these are typically a bit costly, but if you don’t mind doing some of the work yourself, a dry-laid flagstone patio is the type of project most homeowners can tackle independently. Maybe combine a few ideas. Set a fire pit with some flagstone slabs around it as a patio, and then add a pretty pond next to it.
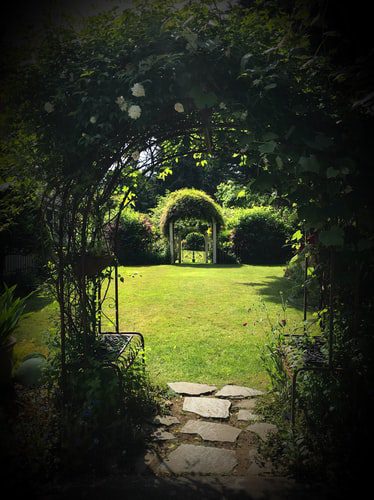
The Secret Garden
The Secret Garden
If your yard is okay and you just want to add a bit of intrigue and fun, consider hedging in a favorite sunny corner and create a secret garden with a winding stepping stone path. The key to a secret garden is that most people who visit your yard won’t even know it is there. Make sure it is hidden and sunny, and make sure to set a side s little sitting area for yourself so that you can hide in there on a warm sunny day and read a book while you enjoy your own little private garden.
Conclusion
Although the backyard isn’t going to affect your curb appeal, it will affect how you perceive your yard. The backyard should be a comfortable extension of your living space. With a bit of planning, you can end up with a beautiful creation that you did all on your own. Remember, a landscape is constantly changing. As long as you have an overall plan and vision, it can be worked on a little bit each year. Don’t blow your budget or enthusiasm all in one season; plan it out and keep it affordable and fun.
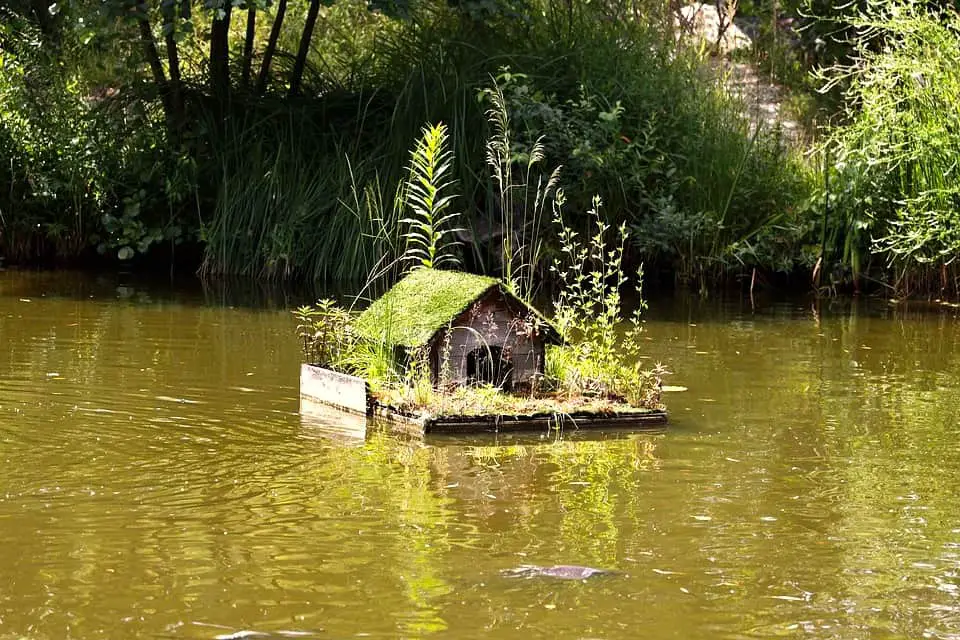
Nutrient pollution and sunlight cause the overgrowth of algae. High nutrient levels and other chemical pollutants can be a severe and critical burden for many of our natural waterways, especially in the more industrialized parts of the world. Floating plant islands are a natural, economical, and effective way to treat all types of water. Plants chosen for the plant islands should be based on the plants’ phytoremediation abilities and matched to the cleaning needs of the water.
According to the EPA, nutrient pollution is one of the most costly and pervasive environmental problems in the country. The use of artificial floating plant islands began as a natural way to treat wastewater about 40 years ago in North America and is currently a popular method used in Asia.
The floating plant island’s design is to provide a porous yet buoyant floating surface that will support the weight of the growing plants and allow the roots to pass through the island to hang down into the water. There are many different designs, but they all work about the same.
The islands can be placed linked together as a group or individually on the water’s surface. Either way, the islands do a great job of filtering water, and they look like a beautiful island of plants once they have grown in.
They are ideal for ponds with no planting shelves, ponds that are too deep to grow aquatic marginals, and any natural bottomed body of water where it is not practical or desired to plant into the shoreline.
How do Floating Plant Islands Help?
The islands remove nutrients from the water using the plants on top of them. The plants absorb the nutrients for growth, while the underwater root systems trap solids. Bacteria can form on the plants and floating structures that remove the nutrients using chemical processes.
Floating Treatment Wetlands
Some floating plant islands are also called floating treatment wetlands (FTWs), or human-made floating wetlands. These FTW’s are typically more than just a simple flat plant island but are instead crafted with more flotation to allow for a more varied island structure allowing for a more diverse assortment of plants and animals to thrive. As with any natural ecosystem, diversity is king.
Floating treatment wetlands, being larger, more diverse, and more buoyant, can be used to treat bigger problems in much more harsh environments than a standard plant island can. In addition to treating water, the FTW’s can also be used to control water flow and help protect shorelines from erosion.
The porous, fine material allows water in, prevents soil from entering the pond, and protects plants from fish. It is constructed to float at the pond’s surface and provides attractive options for showcasing your favorite aquatic plants.
Floating islands create a habitat on the water, which acts as a purifier. Plant growth is encouraged both below and above the waterline, allowing for wetland and terrestrial plants to grow. This enables a variety of plant species to purify the water in ponds, canals, and lakes.
Pick the size of the island you want
floating plant islands
Floating islands come in all shapes and sizes. The size you choose should depend on the types and number of plants you want on the island. The bigger the plant mass, the bigger the island you will need.
Installation of a Floating Island
strange floating plant island
You don’t need specialized equipment to install a plant island, but a small boat might be helpful, depending on the size of your pond. Plant the islands on the shore and push them into the water. What could be easier? Most floating plant islands, both large and small, are anchored to the bottom of the body of water, but sometimes they are tethered to the shore or each other to keep them in place.
A floating island is a simple way to add aquatic plants to your pond for beauty and the benefits they provide. The islands can be constructed in many different ways, but the one thing they all have in common is that they must float, and they must allow the plant roots to hang through into the water.
Choose a location in your pond.
Where to put it? That is your choice entirely. It is typically placed toward the middle of the pond, but as long as it is in the water, it is fine. More water flow is better; the plants will grow more quickly and remove more nutrients in moving water than still water. Enjoy its beauty! It is a living and cleaning piece of art — enjoy it.
Planting a Floating Island
Planting a floating island is easy. You can make it as simple or ornate as you desire. Just put the plants into the fibrous material of the island. Once in the water, the plant roots will quickly grow into the water. If planting terrestrial plants, you will likely need a bit of soil on top of the island. If planting only aquatic plants, no soil is required.
Here are a few guidelines to get started
Choose moisture-loving plants
The plants you choose must tolerate moist soil and shallow water conditions. You can certainly add terrestrial plants to the island, but they will need to be higher out of the water than the aquatic plants.
The only aquatic plants that will not work on an island are ones needing deep water, such as water lilies. Also, be aware that small plant islands with tall plants may tend to roll over, so plan accordingly.
For aesthetic appeal, place the focal-point, taller plants in the middle and surround them with ground cover plants along the edges. Plants that creep and spill over the sides work exceptionally well for floating islands because they hide the island’s foam edges.
Here are some suggestions of the ground covers that can be used.
Blue Creeping Mazus
Blue Moneywort
Creeping Jenny
Golden Creeping Jenny
Red Rotala
Variegated, Crystal Confetti Pennywort
Water Pennywort
White Creeping Mazus
Aquatic mint
Aquatic celery
Here are some suggestions for the taller plants you can use
Blue-Eyed Grass
Carolina Yellow Jacket Pitcher Plant
Chameleon Plant
Dana’s Delight Pitcher Plant
Horsetail
Mini Horsetail, Dwarf Scouring Rush
Red-Stemmed Parrot Feather
Society Garlic
Star Grass
Variegated Society Garlic
Yellow-Eyed Grass
Reeds
Rushes
Arrowhead
The Hard Working Plants
huge water lillies
The plants and their roots have a critical role to play. The long roots are doing two things. They slow down the water movement, help with settling, and the bacteria and microbes get stuck in the sticky biofilm on the roots to clean the water. There are also many benefits to the food chain. Many forms of pond life can make their home in the roots and on top of the island. With time, the plants will all grow together, and other plants are sure to seed themselves into your island, so make sure to use an island with plenty of floatation.
For the ultimate in nutrient and pollution removal from the body of water, the foliage of the plants on the island should be harvested at the end of every season to avoid having them die back and decompose back into the pond water. Roots do not need cutting, but allowing some of the plants’ foliage to die and disintegrate on the island will help begin the natural soil-building process to enrich the island for many years.
Six Midwest Flowers that are Perfect
Here are six Midwest flowers that are perfect for floating plant islands. Multiple species of native plants should be planted to attract diverse birds and insects. Scientific names have been included to help locate them at a nursery if needed.
Marsh Hibiscus – Hibiscus Laevis
This northern native plant is also known as Rose Mallow. It grows back every year in the same location. It can grow up to five feet and is a woody bush, which blooms from July to September. It has sturdy wood stems, makes an excellent center anchor for the island, and offers winter habitat if not trimmed.
Marsh Marigolds – Caltha Palustris
These are short mounding marigolds that thrive in moist areas. They bloom in early May and can, on occasion, have a few flowers blooming again late in the season. The leaves are dark green.
Obedient Plant – Physostegia Virginiana
These plants are common in wetlands and along shorelines and can spread quickly and take over less aggressive plants.
Rose Milkwood – Asclepias Incarnata
Butterflies love this tall, straight flower. It varies in height from three to five feet, blooming from mid-to-late summer. It is commonly found along undisturbed marshy areas.
Sweet Flag – Acorus Americanus
This yellow and green perennial plant looks like a bigger version of the iris but does not have a standard flower. It has a spathe, which encloses a flower cluster. The sweet flag was a favorite among Native American tribes for use as a medicinal resource. It was also used for ceremonies and trade. It gives off a lovely fragrance when the leaves are broken.
Wild Iris — Versicolor Iris
An iris is one of the first flowers to bloom in the spring of the year. The blue and purple flowers fade quickly, but the plant excels in providing a lovely backdrop for shorter summer flowers. Wild iris love to be wet, so they are perfect on a floating island with constant water access.
Do not introduce species onto the island that is non-native or invasive.
After several years, nature will become the gardener, so don’t sweat it when new plants show up.
The islands can stay in the water year-round. Repeated freezing and thawing cycles do not harm them.
Plant islands can be excellent nesting habitat for birds. If you don’t want aquatic birds nesting on your island, you may want to install light fencing around the perimeter.
Avoid flowering plants that are “tasty,” such as lilies or nasturtium, as they may attract muskrats.
The Effectiveness of Floating Plant Islands in Filtering Water
Floating plant islands are great at cleaning up wastewater because they filter out metals, pathogens, nutrients, and other water contaminants. Why invest billions of dollars in building new wastewater treatment facilities when there is a natural and environmentally-friendly way to solve the problem. Plus, it is a low-cost and highly effective way to deal with nutrient pollution in smaller ponds without harmful chemicals.
These plant islands are like “floating water treatment plants,” combining the greenery you would see in a traditional wetland with some human-made technology to keep it afloat.
There is a sticky biofilm that will form on the island and the roots below the island. It grabs microbes and bacteria which colonize to disintegrate the pollutants, and as they are at the beginning of the food chain, they will be fed on by fish and other organisms. The islands provide diverse habitats above, inside, and below the water.
The floating island provides a place for bacteria and microbes to colonize by adding a tremendous amount of surface area and an excellent place for them to flourish. While they grow, they are active and moving, which is when the pollutants in the water are breaking down. The dirtier the water is, the more active the microbes are, the more water is being cleaned.
Floating islands are an easy way for us to mimic the wetlands and bogs that have been cleaning the earth’s water since time began.
Why Are Wetlands and Bogs Important?
Marshes, swamps, and other water-soaked lands link organisms in water and land in a way that permits them to co-exist naturally. As water moves through the plants’ roots, it is naturally and efficiently cleaned by the plants and the multitude of organisms that thrive in their root masses. It is unfortunate, but wetlands are being replaced rapidly for agricultural or urban development, depriving the earth and its waters of many countless acres of filtration that have for so long protected our precious groundwater and aquifers.
Here are a few facts about the importance of wetlands.
Wetlands are similar to human kidneys. Our kidneys extract waste from the blood and balance bodily fluids. The wetlands can clean the water that flows through them, mitigate large flood events, and recharge the underground aquifers.
Wetlands also provide fisheries and timber resources, protect coastal communities from extreme weather events such as hurricanes and typhoons, and provide a habitat for biodiversity.
Wetlands can lessen climate change. Coastal wetlands such as mangrove forests store large quantities of blue carbon in the vegetation. “Blue carbon” is stored naturally by marine and coastal ecosystems. These ecosystems hold a lot of carbon. An area of a mangrove forest can store up to ten times as much carbon as a land-based forest of the same size. It is vital to conserve and protect the blue carbon because its release of carbon dioxide (CO2) into the atmosphere is a significant cause of climate change.
Wetlands are a habitat for biodiversity as the species found there are some of the most unique in the world. They have evolved specifically to survive in these hydrologically changing ecosystems. Muskrats, alligators, nutrias, crocodiles, fish species, and hundreds of birds such as geese, mallards, and herons are found in wetlands. There are more than 800 protected migratory birds in the United States, and more than half of them rely on the wetlands.
The vegetation located in wetlands has evolved to survive in seasonal flooded and saline conditions, making it unique as well. Examples of this are mangrove species in coastal wetlands and cattails in freshwater wetlands.
Threats to the wetlands continue as many of them are being drained, destroyed, and replaced with commercial, residential, urban, or agricultural development. The destruction of the wetlands negatively impacts millions of people dependent on the ecosystem’s services.
Wetlands are known to clean water. Thick vegetation traps excess nutrients and heavy pollutants and keeps waterways free and clear. Unfortunately, many rivers and lakes no longer have wetlands. They are the first to be eliminated when planners need more real estate areas to develop.
Wetlands improve water quality in stormwater runoff and manage watershed nutrients. They are beneficial to the treatment of wastewater and other industrial contaminants. Wetlands rely on a natural process to filter water biologically. It passes through permeable bottom soils and shallow areas of dense aquatic vegetation.
The nutrients are removed by the uptake of microbes and plants, assimilated, absorbed into inorganic and organic sediments, then converted into gas by dissolving. The aquatic plants above and below the water take up these elements and remove them from the sediment and water column into the biomass or plant material.
How These Floating Plant Islands Can Help Ponds
The two most significant benefits are improved water quality and the diverse habitat. The floating wetlands reduce algae by cycling nitrogen and phosphorus. They reduce suspended solids which are the cause of cloudy water.
The second main benefit of creating diverse habitat is “above the island,” “on the island,” and “below the island.” Frogs and turtles are attracted to the surface of the island. Plants appealing to pollinators, such as butterflies, bees, beetles, flies, bumblebees, and honeybees, should be planted. For example, if you live in an area where monarch butterflies are plentiful, plant swamp milkweed. Other plants that are important for the birds and bees will help them with a nutritional plant they may not encounter in an individual’s garden.
Pond plants provide oxygen enabling fish and other animals such as aquatic insects and other small creatures to live in the pond by providing food and shelter. In larger water bodies, aquatic plants help reduce wave action, preventing erosion.
There are numerous organisms living in the porous holes of the island. The organisms, or macroinvertebrates, are essential. The island will double in weight during the first year because so many of them and other animal species live on the island.
Shoreline Protection
Many people value islands for the protection of the shoreline. For example, in Gulf areas, floating islands offer shoreline protection to help restore the marshes by reducing the wave chop.
They can also be used for soft-scaping and beautification. In urban areas where there are metal walls along some waterways, the floating islands provide a natural habitat and make the waterway more attractive.
Aeration
Adding aeration below floating islands is an excellent way to improve your floating island’s efficiency. Lake bottom aeration below the island provides an oxygenated environment where aerobic bacteria thrive. The biofilm, which forms under the islands’ surface, colonizes the biofilter and becomes the habitat for billions of beneficial bacteria. The bacteria consume excess nutrients in the water, creating the water’s perfect treatment. More oxygen and more water movement will equal more efficiency and more water clean-up.
Natural Pond Balance Works
lotus flower
Most people do not have the patience to wait for nature to take its course. That is why so many companies promote the use of chemical applications for pond maintenance. The products they sell are poisoning our water. It becomes a vicious cycle of killing the algae with chemicals. The dead algae go to the bottom, creating more nutrients for the next algae bloom when the chemicals wear off. This is why most natural bottomed retention ponds are a nightmare for their owners – chemicals and thick sludge stay on the bottom of the pond.
But done the natural way, the pond eventually does very well on its own. And without our help!
Install a plant island in your pond today and take one massive step toward maintaining your backyard pond, retention pond, or golf course pond naturally.
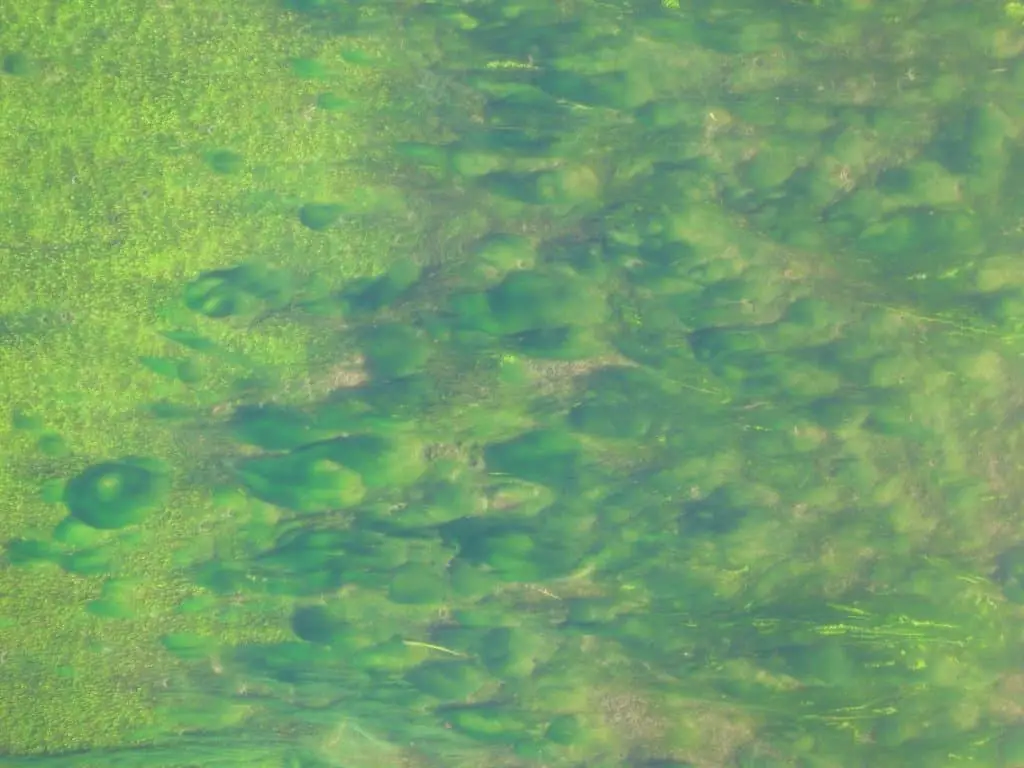
There are hundreds of types of pond algae. The two most common are string algae which look like long green hair, and planktonic algae, which looks like green pea soup. Many pond owners get very frustrated when trying to control algae. I often get asked, “How can I kill the algae in my pond?” This is the wrong question. They should be asking, “How can I control the algae in my small pond?” For this question, I have an answer.
A Common Misconception
A common misconception is that algae are bad for a pond. Only during a very out of control and heavy bloom is algae bad for a pond or fish. This is rare in a small backyard pond. Usually, the algae are irritating to the pond owner but not necessarily bad for the pond. All-natural ponds will have some algae. This is a sign of a healthy pond. We need to control the algae by creating balance in our ponds.
Types of Pond Algae
String algae or filamentous algae will form mats that float on the pond’s surface, resembling wet wool. It will also grow along the pond’s bottom or edges where there isn’t much water circulation. Many pond owners refer to this kind of algae as “pond scum.”
Planktonic algae are floating microscopic plants that are usually suspended in the first couple feet of water, making the water look green and “pea soupy.” This is the stuff that might prevent you from seeing your fish.
How to Control Algae
Before you can determine how to control algae, you need to understand what makes it grow.
Pond algae need two things to grow: nutrients and sunlight. By controlling these two things, we can maintain our pond’s balance, which will control the algae. Sounds simple enough, right?
Sunlight
You can block the sunlight from the pond by using an aquatic sun blocker or pond dye, but this is unnatural and looks ridiculous. It is much better and cheaper long term to plant a few water lilies in your pond to shade the water.
Prevent Nutrients from Entering
You can prevent nutrients from entering your small pond by keeping leaves, debris, and runoff out of your pond. Some people go overboard with this. While it’s great to keep excess debris out of your pond, I’m guessing that you don’t have a bunch of time for this activity. Some people are out skimming leaves from their pond daily. I never do this.
A well-balanced pond will be able to deal with a few leaves; what messes up pond balance is fertilizer runoff. The worst algae blooms that I have seen were the result of runoff carrying lawn fertilizer into the pond or lawn fertilizer getting into the pond during application.
Chemical lawn fertilizers are very concentrated, and they can easily throw a pond out of balance. Another very common way to accidentally fertilize your pond is by blowing grass clippings into it. If you pay someone to fertilize and mow your lawn, take some time to watch them as they work. Make sure that they aren’t adding to your pond nutrients.
Remove the Existing Nutrients
All ponds have some debris in them. Adding beneficial bacteria to our ponds will help break down any debris that is already in the pond. By maintaining high levels of bacteria, we can ensure that we don’t get any debris build-up in the pond.
Add Oxygen
Low oxygen levels in our water will slow down the decomposition of the debris. High oxygen levels speed up decomposition and allow more beneficial bacteria to survive and help us out. You can raise the oxygen levels in your water by installing a waterfall, a fountain, or a bottom aeration system.
Add Plants
Plants are our biggest pond helpers. The pretty plants in our ponds are competing with the algae for the nutrients in our pond, so the more plants we have in the pond, the fewer nutrients will be available for algae. Floating plants, submerged plants, and marginal aquatic plants can all do their part to help balance our ponds.
Most garden ponds do not have enough plants in them to handle all the nutrients in the water. Planting more plants will help reduce algae, But what if we could install something to supercharge the removal of nutrients?
Install a Wetland Filter
Upflow wetland filters mimic the natural wetlands that filter all of the earth’s water. By installing a wetland filter in your pond system, you provide your pond with the absolute best filtration available. A wetland filter can be planted with many aquatic plants, and these aquatic plants that are in the wetland filter with pond water getting pushed through their roots will grow more quickly and remove more nutrients than plants that are growing in the pond.
When barley straw decomposes in water, it releases a natural toxin that slows and discourages algae growth. Put a small bale of barley straw in your small pond, and you will help control the algae cheaply and naturally. The barley should be placed somewhere near the surface or below a waterfall in the pond. Once again, more oxygen will help the barley decompose more quickly. Moving water is our friend.
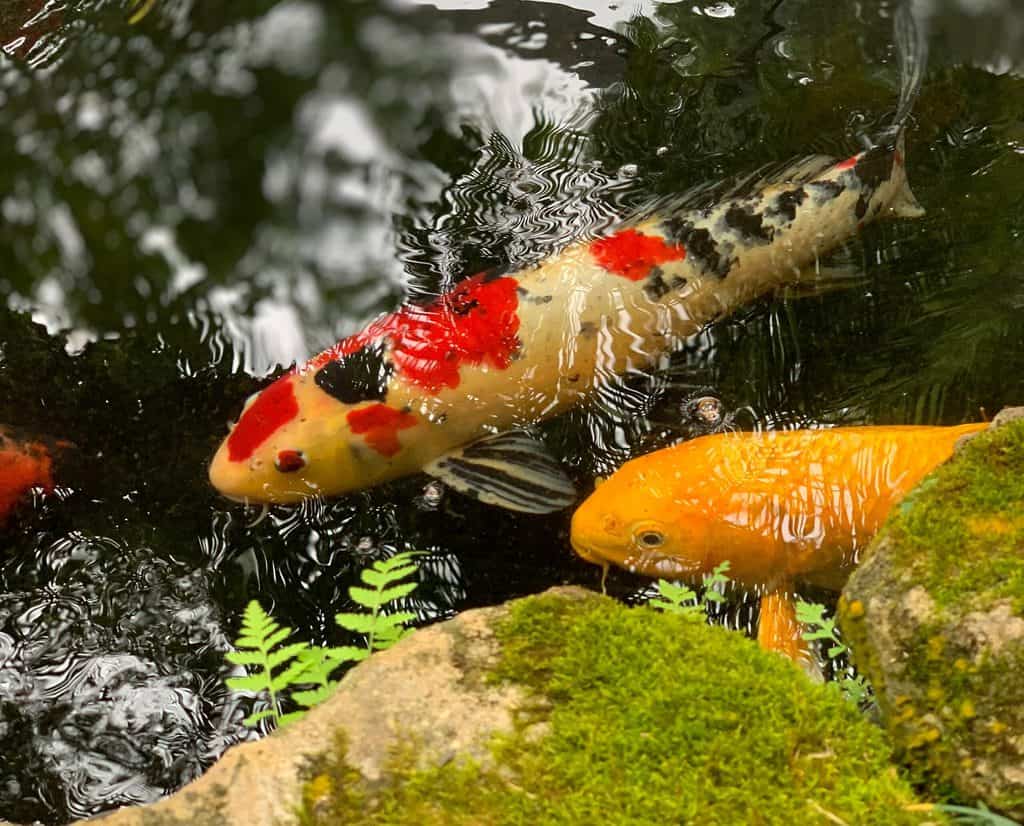
Add Fish
Many people think fish are an option when you own a pond. I consider fish to be a vital part of pond balance. Your fishy friends will spend their days rooting around through the gravel on the bottom of your pond, stirring things up and eating the algae. Be careful not to feed your fish too often; hungry fish make for a clean pond. Any fish food you toss in the pond that doesn’t get eaten becomes fertilizer for algae.
Never, Ever Add Chemicals
Chemical products designed to kill algae are never a good idea. Killing algae is not the answer; controlling it naturally is. Any chemical killers that get into your pond water kill off beneficial bacteria and beneficial microscopic pond dwellers that help keep our pond balanced.
Killing the algae results in dead algae, dead bacteria, and dead pond creatures piling up at the bottom of the pond, just waiting to be fertilizer for the next algae bloom as soon as the chemicals wear off. It is a never-ending vicious circle, don’t do it.
Wrapping it Up
If we understand that our small backyard ponds are natural ecosystems and that they will take care of themselves if they are correctly balanced, we can understand how to control our algae.
If we have heavy algae blooms, we have too many nutrients in our pond. Killing algae will only make it worse. We need to eliminate the excess nutrients, not the algae.
We can do this by keeping the nutrients out of the water or by removing nutrients from the water.
Keep debris and runoff out and add plants, bacteria, and fish to promote balance. Balance will take a bit of time and patience to achieve, but everything gets much easier once we achieve this balance.
Working with nature is always the easy way. Working against nature will only bring us trouble.
Keep it simple and be a part of the solution, not the problem!
Every backyard pond that you have ever seen is a functioning ecosystem. Just as all plants and animals out of the water are part of the natural ecosystem, all of the life below the water is also part of its own little ecosystem. An ecosystem is a dynamic, functional unit comprised of consumers, producers, and decomposers. One portion could not survive without the other, so the well-being of the whole will be reflected in the individual’s well-being.
Garden ponds were rare not so long ago. They are now considered to be an essential part of many backyard gardens. They genuinely transform a backyard, no matter the size of the pond. Dragonflies, fish, frogs, and lovely plants are all part of the beauty that comes with a backyard pond. It can be as grand or as simple as you would like.
The addition of a waterfall to the pond will create a beautiful visual and auditory display. It will also help improve the pond ecosystem by providing vital water movement and oxygen. You will also find that living creatures such as frogs, snakes, birds, turtles, rabbits, mice, chipmunks, and squirrels will all appreciate having a fresh water source nearby.
A backyard pond will include the following:
Rubber Pond Liner
Most small backyard ecosystem ponds are lined. Pond liner is used to retain water in a garden pond, stream, and waterfall. 45 mil, EPDM Rubber the most common pond liner used because of its flexibility to conform to any shape and durability to withstand many years of service. The rubber liner is laid into a previously excavated hole, and the edges of the rubber are tucked in or hidden above the pond’s high water line.
I would always recommend installing underlayment under the rubber to help protect it from sharp sticks and stones. Underlayment is cheap; rubber is not. EPDM pond liner will last indefinitely if protected from the elements. Sunlight is the most destructive force for rubber, so protecting the liner from the sun by covering it with rocks, gravel, and plants is your best bet.
Piping for Your Pond
I would always recommend using flexible PVC piping as it is easy to work with, it can be bent to create curves, and it is reasonably resilient to the freeze and thaw that occurs in many climates. The pipe must be back-pitched to allow for the water to drain out when the pump is off to avoid freezing when full of water.
Pump
You will need a pump to move the water in your pond; stagnant water does not make for a thriving ecosystem. Your pump should be chosen based on efficiency and desired water flow. This site has much good information on pond construction. They say you should select a pump capable of turning over the pond water volume once each hour.
Filtration
Having a wetland filtration system for your pond will allow the water to be filtered, the suspended solids to settle out, and help remove toxins and nutrients from the pond water, which will help create a healthy pond ecosystem. There are hundreds of man-made filter boxes and systems on the market, but they all pale in comparison to the wetland filter and, for the most part, are not worth the money.
So How Does a Backyard Pond Ecosystem Work?
As we mentioned, the pond ecosystem is made up of producers, consumers, and decomposers. Let’s talk a bit about each of these groups and what they do for our backyard pond ecosystem.
The Producers
the producers
The biggest producers in our backyard pond ecosystem are the plants. Just like plants play the most critical role in our above water ecosystem, they also play the most important role in your backyard pond ecosystem. They collect their energy from the sun and use photosynthesis to convert carbon dioxide and water to organic compounds and oxygen. These plants, in turn, require phosphorous and nutrients to survive.
While algae aren’t technically classified as a plant because it doesn’t have stems and leaves, it is a plant-like organism that carries on the process of photosynthesis. In fact, there have been some scientists who estimate that algae produce half of the earth’s oxygen. So, the next time that you see algae bloom in your pond, you can smile, knowing that your pond is helping to oxygenate our earth.
The main reason that you are getting these algae blooms in your pond is because of nutrient pollution. Nutrient pollution is typically caused by fertilization, runoff, and animal wastes. When we get an algae bloom, we should look in the mirror for the cause because it is us more often than not. People often think that algae blooms are bad. The reality is that they are likely just a symptom of something that humans have done to offset nature’s balance. With backyard ponds, lawn fertilizers are often the worst culprits.
The pretty aquatic plants and the algae in our ponds compete for the same nutrients. The most effective way to control algae growth in your backyard pond and maintain clear, healthy pond water is to incorporate many plants into the pond. More plants taking in nutrients means that there will be fewer nutrients available for algae.
Some plants are more effective than others at removing nutrients from a pond. An effective wetland filter filled with plants will help maintain good water quality by eliminating harmful ammonia from fish waste and decaying plants and allowing all of those plant roots to soak up the nutrients from your water.
These ultra-effective plants are known as “clear water plants” because they will beat the algae to the water’s nutrients. These are fast-growing plants with high metabolic rates and extensive root systems to absorb nutrients. This makes them really good at soaking up phosphorous and nitrogen.
Here are some of these “clear water” plants.
Oxygenating Pond Plants These plants, such as hornwort and water thyme, are incredibly effective clear water plants because they feed through their roots and foliage. One bunch should be used for every three-square foot surface area of the pond for the best result. They also provide spawning areas for fish and provide shelter for baby fish.
Floating Pond Plants Water lettuce and water hyacinth are beneficial as filter plants because they are fast growers and heavy feeders. They will multiply quickly and take in many nutrients right up until the first frost when they will wilt and die. They block the sun and shade the pond competing with algae for nutrients. Like submerged plants, their root structure provides spawning areas for fish and shelter for babies. Duckweed, ivy duckweed, fairy moss, and floating fern are also effective clean water plants.
Variegated Water Celery Variegated water celery is a good, low-growing filter plant. If planted in a shallow gravel bed or a mesh planting basket, these plants thrive, producing thick roots. The variegated foliage is attractive in the spring when it has pink fringes.
Water Iris Water iris have beautiful flowers and stunning sword-like foliage. They are also very efficient filter plants. Like other marginal plants, they are best planted in shallow gravel beds or mesh baskets to spread their fibrous roots.
Watercress Watercress is a very vigorous plant with delicate white flowers. When the warm weather arrives, this low-growing plant will grow extremely fast, producing long white roots that are very efficient at sucking up nutrients from the water. Watercress prefers to grow in flowing water, making it perfect for streams and waterfalls. It is also suitable for your salad!
Pickerel Plant Having beautiful pink or blue flowers, pickerel plants are functional, clear water plants while also being decorative.
Taro Taro are tropical plants that produce huge leaves, some having beautiful patterns and colors. The “Black Magic” variety is a popular variety that has very dark purple, almost black, stems, and leaves. When the water gets warm, these are amazingly fast-growing, but if you are in the colder climates, the plants will die at the first sign of frost.
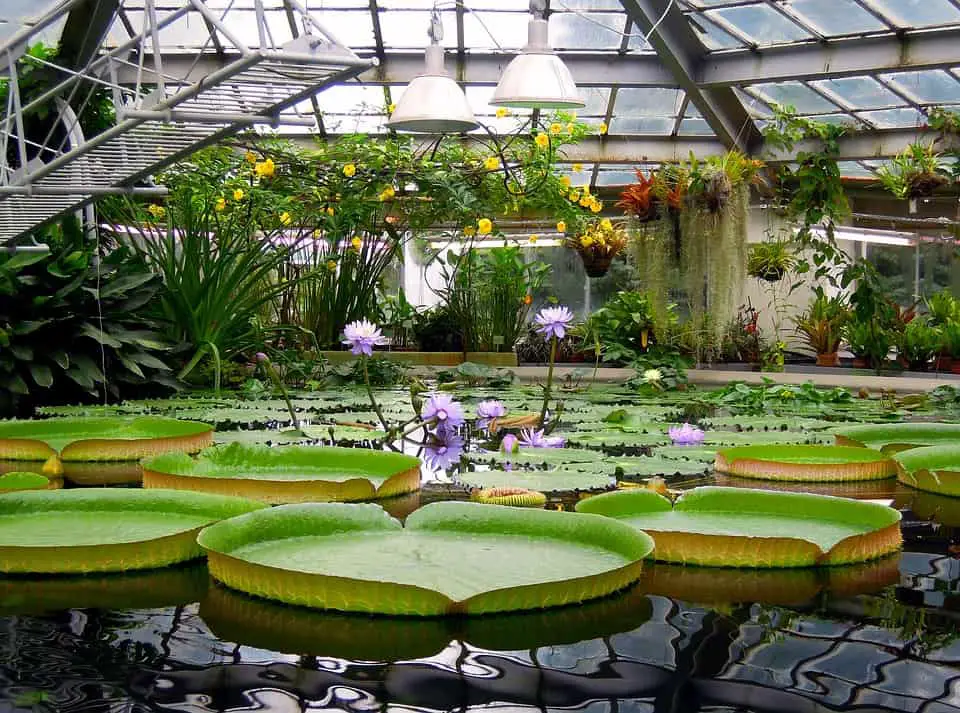
Water Lilies Water lilies are not considered filter plants, but they shade the water, which inhibits algae growth and keeps the pond water cooler. A well-thought-out garden pond should be 60-70% covered with plants. Water lilies are always a pond favorite as they can bloom all summer and come in a wide array of colors.
Caution
Be aware that many fast-growing aquatic plants are considered invasive, so check your state’s invasive plants list and be sure to keep these pond plants in the pond where they belong. Fast-growing plants in the pond are great for absorbing nutrients, but they can quickly take over garden beds out of the pond.
Consumers
the consumers
The consumers in your backyard pond ecosystem are all of the creepers, crawlers, and swimmers in your water. There are tiny little microscopic zooplankton; there are small little invertebrates (water beetles, snails, worms, pond skaters, etc.) and the larger vertebrates (fish, frogs, snakes, etc.). All of these consumers swim around-consuming each other as well as feeding on the plants and algae in our ponds.
Decomposers
decomposers
The bacteria and enzymes in your backyard pond ecosystem are the base for the animal food chain. Bacteria and enzymes decompose and consume any waste material from plants or animals that end up in your pond. Bacteria also become a food source for the consumers in your pond, which may, in turn, become food for the larger animals that come to your pond. All of these living organisms compete for the nutrients in your pond. The more nutrients that get taken up by these pond organisms, the less there is available for algae.
There are aerobic and anaerobic bacteria, each serving their own purpose in your pond, breaking down organic matter. Healthy quantities of bacteria and adequate oxygen levels will reduce the muck (organic sediment) on the pond bottom. This muck layer on the bottom of your pond can be thought of as fertilizer as it contains phosphorous and nitrogen, both of which contribute to algae growth.
Removing this muck using natural bacteria products will improve water clarity and reduce the amount of phosphorus and nitrogen available to grow algae. If you spend time in your pond, you will appreciate the lack of slimy muck on the pond’s bottom.
Enzymes are required for life on earth. Just like we can’t exist without oxygen or water, we can’t exist without enzymes. Enzymes are organic proteins that are made from amino acids. In nature, enzymes control the build-up and decomposition of necessary matter in animal organisms and vegetation.
All of this decomposition and breakdown being caused by the bacteria and enzymes won’t happen (or will at least be slowed dramatically) without oxygen. In eutrophic or aging ponds where aquatic plants and algae are a problem, there is usually too much organic waste and insufficient oxygen.
This is why water flow is so essential to a pond. The more water flow we give our ponds through waterfalls and bottom aeration, the more oxygen is present, and the more effective the bacteria and enzymes can be in breaking down the organic muck.
Here is The Ecosystem Circle
To summarize: Plants take in nutrients and give off oxygen, bacteria decomposes and consumes organic muck. Fish, water bugs, etc., eat whatever is smaller than them, including plants, and all waste and decomposing debris creates nutrients to feed the plants. There it is, one big circle!
Here is How We Humans Screw Up the Ecosystem
humans and the ecosystem
This circle of life can be easily disrupted. The typical, uneducated(on pond life) homeowner means well and wants a nice-looking pond, so they go to the local hardware store or search online for algae killer and find a hazardous chemical that will kill the algae. This product is touted as fish safe, so they think it is okay. Fish safe means that it shouldn’t kill your fish unless you apply too much. Sort of how radiation is “human safe.”
In reality, any of these man-made chemicals are hazardous and deadly to life in your pond. They may not kill the fish, but they do kill much of the other life and bacteria in your pond, along with the algae.
The homeowner dumps it in their pond, keeps their fingers crossed, and sure enough, the fish lived, and the algae died. They are happy, but they don’t realize that they just created a biological nightmare.
The chemicals killed much of the pond’s beneficial life, and the dead algae sank to the bottom. Now they have a layer of dead algae on top of a dead bunch of muck that has lower bacteria levels because of the chemicals. The algae layer now begins to rot slowly and robs the muck of whatever oxygen there was at the pond bottom. As it decomposes, the algae gives off nutrients which create a rich environment to feed the next algae bloom as soon as the chemicals wear off.
One week or so later, the homeowner is back buying more chemicals to start this process all over again.
We need to have patience, step back, and let our pond ecosystem take care of itself. Add beneficial bacteria, add more plants to the pond and wait for it to balance. Once in balance, your pond will take care of itself. That is what this ecosystem is all about.
Also, be aware that many companies out there are creating new gadgets every year that claim to help your pond. Chemicals, chemical injectors, ionizers, UV-sterilizers, sand filters, etc., are all products that are designed to empty your pocketbook but will not help your pond ecosystem. Only mother nature can do that!
Aquatic Wildlife
wildlife and water
Garden ponds add beauty and visual interest to a backyard landscape, but they can also benefit wildlife as a habitat. Ponds offer food sources, clean water for drinking or living, shelter, and nesting sites or materials for many types of wildlife, including butterflies and birds.
We, in turn, benefit from the ecosystem provided by the pond, with more mosquito-eating dragonflies and cleaner, oxygenated air.
Gradually sloping edges or ledges with short vertical drops on the edge of the pond will help many smaller birds, insects, and amphibians get in and out of the pond with ease or enable them to access the water for bathing or drinking.
Here are some things to consider that will benefit and attract wildlife to your backyard garden pond.
Moving water – the sound attracts wildlife and reduces breeding mosquitoes.
Perches and shelters provide areas for wildlife to rest, find food, offer nesting areas, or hide from the elements and predators. Pale-colored rocks can reflect the sun to warm dragonflies’ bodies and other insects.
Sun and shade – if possible, locate your pond so it receives both some sun and some shade part of the day. You will attract a wider variety of wildlife.
Significant water depth will prevent the pond from freezing all the way through during the winter. I would recommend a minimum of three feet deep. This is advantageous, so aquatic wildlife and plants can survive the winter. Aquatic wildlife can also hide from predators in deeper sections of the pond. It’s hard, but remember that predators need to live too. Losing some fish to predators only means that your pond is an active part of the larger ecosystem.
Avoid invasive animals or plants in your backyard pond. A seed, root, stem, or leaf, pest, or disease can spread at random, even into the containers of non-invasive aquatic plantings. Some invasive plants to avoid are:
Flowering rush
Brazilian elodea
Yellow flag iris
Eurasian watermilfoil
Plant a native garden close to your pond that will attract a diversity of wildlife to your yard, which will then find and use your new wildlife pond.
NEVER spray pesticides, herbicides, or insecticides near your pond or anywhere on your property. Our ecosystem depends on you to do your part to take care of it.
Conclusion
With a bit of patience and knowledge, we can easily have a beautiful, low-maintenance backyard pond with a fully functioning and balanced ecosystem. This pond will enliven your yard for the rest of your life and will benefit the lives of any animal that is lucky enough to live near it. Just have patience and let mother nature do the heavy lifting.
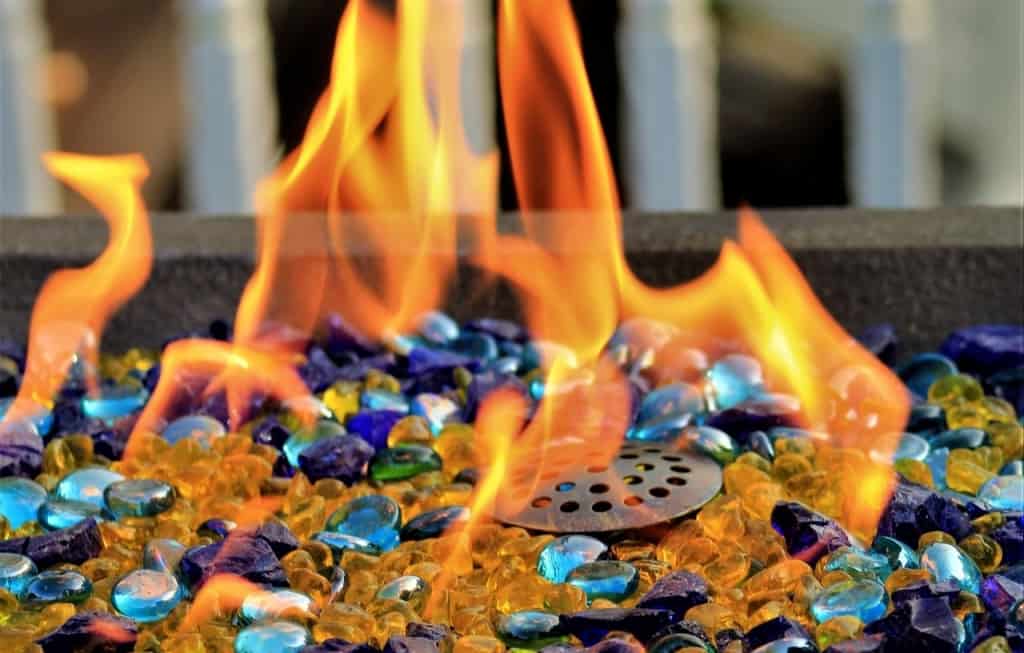
Nothing beats sitting around a cozy fire during chilly evenings, whether it’s with your family and friends or just alone having your ‘ME’ time. Wood burning fire pits will give you the most authentic bonfire experience, however, sometimes the smoke and maintenance are too much of a hassle, and some states even have restrictions on wood burning fire pits. The solution is propane or natural gas fire pits. They are easy to use, no smoke or smell, and eco friendly. Today we are looking at the best propane fire pits for your patio in 2021.
The ASLA survey showed that fire pits are among the most desired outdoor design elements in the USA. With thousands of various gas fire pit styles, designs, and types, it might be hard to select one that best fits your needs. That’s why we wrote this detailed propane gas fire pit buyers guide. Please continue reading to learn about various gas fire pits, their advantages and disadvantages, and our list of the best propane gas fire pits for your patio in 2021!
What to Consider Before Buying a Propane Gas Fire Pit?
Shape and Size
You can find hundreds if not thousands of different propane gas fire pits currently in the market. They can range from just a couple of inches from the ground fire bowls, bar top height columns to 6 feet wide tabletops for ten guests. Gas fire pits can be made from steel, concrete, bricks, or even natural stones. The exterior choices are even more diverse to complement your backyard and patio design. Generally, you’ll find gas fire pits in 3 shape designs:
These gas fire pits usually look like a regular coffee table that can hold drinks and plates but with a fire pit in the middle. Most of these fire pits come with covers so the table can be used for dining and a source of light and heat after. These fire pits are very versatile, can be used on many occasions but usually come at a higher price point.
Firepit bowls usually sit close to or on the ground and are very easy to move around. Few setup steps and storage make them perfect for camping or the occasional night in the backyard. Most fire bowl fire pits don’t have an extravagant exterior or design but do come at a much lower price. If you want the warmth and firelight and don’t care about the looks, fire bowl style gas fire pits are a perfect budget option.
Chimney gas fire pits, also known as column fire pits, look exactly like their name indicates column or chimney. These squared fire pits have burners at the top or in a fire bowl standing on top of the column. They usually have a beautiful design and exterior details and can be a great addition to your backyard or patio design.
Heat Output
Gas fire pit heat output is rated in BTUs (British Thermal Unit). The higher the BTU fire pit can output, the more heat it will produce. Most residential propane gas fire pits range from 30,000 to 60,000 BTUs. If you live in a location that gets pretty chilly and plan to station your fire pit in an open area, go for the highest BTU possible. If your fire pit will be placed on a patio that is at least a bit closed off, and the weather isn’t too cold, you can get away with a lower BTU fire pit.
Ignition System
Manual Ignition
This is simple and old-school. Turn on the gas and use a match, lighter, or torch to light up the fire pit. It’s not the easiest ignition method but the most reliable. No spark buttons or electrical systems mean fewer things that can break.
Spark Ignition
Like most BBQ grills, the spark ignition system has a spark button to create a tiny spark to light up the gas. This is the most common and convenient ignition system.
Electric Ignition
Electric ignition is probably the newest technology-wise. You just need to flip a switch or push a button, and the fire lights up. Some smart fire pits can be integrated with your home system or phone, allowing you to switch the fire on or off with the push of a button.
Advantages and Disadvantages of Propane Fire Pit
Advantages
Eco friendly – All propane fire pits are eco-friendly and produce no pollution. The burning of clean gas creates no emissions, reducing the carbon footprint.
Various Styles and Designs – There are numerous different styles and designs of propane gas fire pits. No matter what style, color, or material your patio or deck is made of, you’ll be able to find a fitting propane gas fire pit.
No Smoke or Smell – Propane gas fire pits don’t produce any smoke or smell. There will be no more coughing from a ball of smoke and smelling like a burned sausage the whole evening!
Easy to Use and Heat Control – Unlike wood burning fire pits, you don’t have the hassle of setting up the firewood, igniting and kindling it. Propane gas tanks ignite instantly and can be turned off just as easily. You can also instantly increase or decrease the fire to your liking.
Requires Very Little Maintenance – There is no ash and ember cleaning, no scrubbing, or continuous fire kindling. Propane gas fire pits require little to no maintenance. Just change the gas tank when it’s empty, and the party can continue.
Disadvantages
Not as Authentic – Of course, propane gas fire pits aren’t as authentic as wood burning fire pits. You don’t have the smell and smoke of the burning wood, which most folks associate with a real bonfire.
Less Heat than Wood Fire Pit – Hot embers and fire from a large wood fire can create a lot of heat, enough for large areas. Most propane gas tanks won’t provide as much heat. If you’re looking for a propane gas fire pit to warm you up during cold evenings, go for a fire pit with a higher BTU, but don’t expect to warm up your whole backyard.
Can’t Use for Grilling – Propane gas fire pits are more for warming you up and aesthetics. You can not use it for a BBQ party and grill food on it. The main reason is that food drippings will get stuck on rocks, filler, and even gas valves. This can reduce the heating quality and will be very hard to clean.
Best Propane Fire Pit Reviews
Bond Manufacturing 54,000 BTU Aurora Propane Fire Pit
Let’s start with a small propane fire pit from Bond Manufacturing. The small Aurora model produces a whopping 54,000 BTU heat that is more than enough to keep your guests warm on your patio or when camping.
The 18.5-inch size fire pit is perfect for camping, outdoor events, or tailgating but can be used on any deck or patio as well.
This small stainless steel round propane fire pit is very well built and even has a metal lid for easy storage and portability. Easy no-tools setup and auto-ignition allow enjoying a cozy fire in just a few minutes.
High-quality but straightforward build, high BTUs, ease of use, and low price make the Aurora the best budget propane fire pit on our list.
Outland Firebowl 870 Premium Outdoor Portable Propane Fire Pit
This is another small propane fire pit for the camping, tailgating, and van-life fans. At only 19 inches in diameter, it would also be great for a small patio or balcony. It weighs only 23.3 lbs, but produces 58,000 BTU heat! You also get a cover, carry kit, and 4.4 lbs of natural lava rocks to fill the pit.
The durable, high-quality steel construction is finished with a protective enamel coating. This gas fire pit isn’t afraid of rain, mud, or low temperatures as long as the burner is not clogged up. It’s quick to set up and has matchless ignition.
This Outland small and lightweight fire pit is also CSA approved and can be used during most campfire bans (always check current fire restrictions in your area). Size, quality, and weight make the Outland Fire bowl the best portable propane fire pit on our list that won’t make too much of a dent in your pocket.
Hiland GS-F-PC-SS 40,000 BT Propane Fire Pit
Don’t let your outdoor activities end when the evenings start to get colder. The Hiland 24-inch height and 38-inch squared fire pit is perfect for keeping 4-6 people warm around the table. The CSA-approved fire pit generates 40,000 BTU heat and can be positioned on any material decks, patios, and grass.
The Stainless steel table is sturdy and robust, so you’ll have no problem having dinner or drinks at the table. You won’t need a separate hideaway table for your propane tank; there’s enough space to store it inside the table.
Hiland GS-F-PC-SS also has a 1-year warranty but should last you way longer. Sturdy build, large diameter, and beautiful design come at a higher price, but it’s money well spent as it is our best medium-sized propane fire pit for patios.
Bond Manufacturing 28in Woodleaf Fire Pit
Another Bond Manufacturing propane fire pit, what can we say, the company can make good fire pits! The Woodleaf 28-inch squared propane fire pit table produces 50,000 BTU heat, has a lid to use the pit as a table, and you can store your propane tank inside.
The size is perfect for 2-4 people to sit around, and you can station it on any deck material. This nice looking Woodleaf fire pit isn’t exceptional or flashy but is of excellent quality and at a very good price point. It is recommended for smaller budgets that still want a fire pit and table combination.
Endless Summer Propane Fire Table
We love the looks of this propane fire pit table! The lava rocks and wave design panels make it feel like you would be sitting near a natural wood burning fire pit, just without the smoke and smell.
The Endless Summer propane fire table is made from steel and weighs close to 82 lbs. It’s not the most portable fire table but definitely a sturdy and long-lasting one. As with most fire pit tables, you can store your propane tank inside. You’ll find the concealed heat control panel and electronic ignition system behind the table door.
The only disadvantage of this fire table is the heat output. Endless Summer fire table has only 30,000 BTU. Unless you have frigid evenings, this is a perfect propane fire pit choice that will be a beautiful addition to your backyard design.
BALI OUTDOORS Propane Gas Fire Pit Table
Bali Outdoors is a well-known brand in the fire pit industry that continuously produces high-quality and good-looking fire pits. Their propane gas fire pit table is a very elegant mid-size fire table perfect for 2-4 people to enjoy a romantic atmosphere outdoors.
The 50,000 BTU gas burner is covered with beautiful glass stones to produce an incredibly cozy fire show. The pit top has four elegant tiles and a lid if you want to convert it to a dinner table or a bar.
All in all, large heat output, elegant design, and high-quality build come at a higher price point but make the Bali Outdoors fire table the best propane gas fire pit on our list.
Femor 42-in Round Propane Fire Pit Table
Want to impress your friends? Check out the Femor 42-inch round propane fire pit. This large round fire pit is perfect for larger outdoors social events as you can have 4-6 chairs or 10-16 people around it.
50,000 BTU heat output is plenty to heat medium to large patios and decks. The electronic ignition and heat control panel makes it super easy to use, and the hidden propane tank doesn’t get in the way when socializing.
The wood grain tabletop imitation and blue decorative glass filler look beautiful on any deck day or night.
The only disadvantage is the higher price; however, the elegant looks, high-quality design, and ease of use make it a worthwhile investment.
Kinger Home Propane Fire Pit Table
As long as we are going big, I thought I’d show you this beauty. This is another 42 inch fire pit table, but this one is square, so it gives you even more room. Even room to set your glass of wine.
With a 50,000 BTU output, it should give off plenty of heat to keep you and your friends warm. It does weigh a whopping 82 pounds, so you might want to invite those friends over the day it gets delivered.
This comes with glass beads and a removable glass wind guard for those breezy days on the patio. It has an aluminum frame with a great looking wicker outer shell.
It’s versatile also, and comes with a removable aluminum lid so that it can be used as a table when you’re not using it to heat the neighborhood.
The propane tank is hidden and this unit has a stainless steel fire bowl, so it will stand the test of time without rusting out. It also comes with a PVC cover to keep it protected when you aren’t using it.
If you want a sharp looking, quality-built, high output propane fire pit that can also be used as a table, this is the one for you!
Frequently Asked Questions
Can I Cook Food Over Propane Gas Fire Pit?
Generally, we would advise against cooking on gas fire pits. The main reason is that the drippings of meats, veggies, or marshmallows will stick to the decorative fillers and be very hard to clean. When grilling over wood-burning fire pits, the drippings burn together with wood and get cleaned with ashes, while gas fire pit fillers aren’t discarded and will have to be cleaned. If you’re buying a gas fire pit for pleasing aesthetics and low maintenance, then avoid cooking over it.
How Long Will 20-pound Propane Tank Last?
A regular 20-pound propane tank will burn for about 10-12 hours. Of course, the length of the burn varies on the burners BTU and flame setting. If you have a powerful 54000 BTU burner and keep the flame on the highest level, then your tank might last just 4-6 hours.
Can I Use Pea Gravel in Gas Fire Pit?
Pea Gravel, a porous rock, is not recommended in gas fire pits. Rocks with small pores can have air and water trapped in them when wet. If you heat such rocks, the steam inside can build quite a bit of pressure and even cause the rock to explode. It’s better to stay away from porous rocks and go with hard rocks like granite, marble, or decorative fillers.
Is it Safe to Use a Gas Fire Pit on a Wood Deck?
One of the most significant advantages of a gas fire pit is that you can use them on almost all kinds of decks and even grass. Non-combustible material decks like concrete, marble, or stone are the safest for any fire pit. In comparison, combustible decks from wood, vinyl, or other recycled materials can quickly catch fire. Most gas fire pits are ok to use on combustible material decks if the clearance is high enough and they remain upright. Always check manufacturers’ clearance and installation documentation for guidance. If in doubt, it is always a good idea to use a FIRE PIT MAT. Always be sure to keep your fire pit far enough away from your house. You don’t want the flames licking at your siding on a windy day.
Who doesn’t love just sitting back on your patio and enjoying a chilled drink after work? It’s a perfect way to end your day. If you want to make it even better, get yourself a wood-burning fire pit. The crackling sound of firewood and cozy warmth will create an incredibly cozy and inviting atmosphere without leaving a big dent in your pocket. Today we’re looking at the best free-standing fire pits for your patio in 2021.
What You Should Know Before Buying A Free-standing Fire Pit
Before jumping into the list, you need to consider a couple of things before buying a free-standing fire pit.
Location
First of all, where will you position your fire pit? Almost all fire pits are required to be placed on non-flammable surfaces like concrete, grass, or any other non-combustible surface. If you don’t have a fire-resistant surface, you should get yourself a fire pit mat to protect any surface underneath from high-temperature, fire, and sparks flying out of the pit.
Using Wood
Secondly, remember that wood-burning fire pits use, well… wood to burn. You’ll need to have space for firewood and also equipment to clean up all the coal and ember after using the fire pit. Make sure you find the best wood for your fire pit (we suggest going for Oak or fruit woods). If you don’t want to deal with all the cleaning process and storing wood, you might just go for a propane or natural gas fire pit.
Material
Finally, the material the fire pit is made of is very important as well. Copper looks nice but will tarnish and won’t be the cheapest. Cast Iron fire pits will be very solid and stable because of the weight. If you want something a bit more portable, go for a steel fire pit, but keep it from rain and moisture since it’s more likely to rust.
Top 7 Best Wood Burning Fire Pit Reviews
1. KINGSO Wood Burning BBQ Fire Pit
Let’s start the list with a small wood-burning fire pit from KINGSO. This 22-inch fire pit is quite versatile since it can be used as a beautiful fire pit and to cook marshmallows also. The set includes a fire pit, spark screen, coal grate, and ember poker with a wooden handle.
We love the versatility, looks, and portability of this small fire pit. If you’re not cooking a marshmallow, just pop the spark screen on and enjoy the beautiful and warm fire. If we’re being honest, the spark screen is not that good at preventing sparks from flying out, probably blocks like 30% of sparks or jumping embers; however, it does look very aesthetically pleasing.
All in all, the bonus of grilling and low price makes KINGSO wood-burning BBQ fire pit the best budget wood burning fire pit on our list.
2. OOX Fire Pit
Here we have another small 22-inch wood-burning fire pit. This thick steel fire pit is sturdy and has a high-temperature paint finish that adds additional rust protection.
We love the OOX Fire Pit since it comes with a variety of accessories. The set includes a fire pit bowl, wood grate, grill grate, spark cover, poker, and even a PVC cover to protect from rain and dust if you’re going to keep it outside.
The only disadvantage we encountered is that the high legs on this small fire pit aren’t as stable as we would like them to be. The added height does make it easier to grill with, but make sure you locate it on a leveled surface.
Overall, the low price and lots of accessories make the OOX Fire Pit the best small wood-burning fire pit on our list.
3. Pleasant Hearth Martin Extra Deep Wood Burning Fire Pit
The Martin Extra Deep wood burning fire pit from Pleasant Hearth Store is a beautiful square-shaped fire pit. The steel fire pit is quite heavy and has a low base, making it very sturdy and extremely stable. However, remember that the low fire pit base should be placed on a heat-resistant surface like concrete or a heat-resistant mat.
As mentioned in the name, the Martin fire pit is extra deep and 26-inch in size; this allows it to hold a lot of wood, making a massive fire.
This fire pit also has grilling grates in case you want to have a BBQ party with your friends and family. The easy-to-use wood poker can also be used to take the spark screen on or off and adjust the grill grates.
If you’re looking for a beautiful but sturdy fire pit that could also be used as a grill, the Martin Extra Deep wood burning fire pit is a great option.
4. Bali Outdoors Wood Burning Fire Pit
Look at this big boy! This multi-functional 32-inch beast not only holds a ton of wood but also has a raised 18-inch grill for all your BBQ needs. The grate also turns 360 degrees, and an additional round grill grates around the fire pit itself if you want to keep the food warm but away from direct fire.
We love the low four metal legs that make this big fire pit stable on any surface. A deep 24-inch height bowl will hold a lot of wood to create a large fire. Usually, most 2 in 1 grill and fire pits can burn your food in an instant, but Bali Outdoors elevated grill grate allows you to enjoy a large fire and still properly cook your food.
If you have enough space on your patio and love big fires, Bali Outdoors black fire pit will be a great addition to your household.
5. Landman Big Sky Stars and Moon Fire Pit
Looking for a fire pit that would create a warmer atmosphere during evening nights in your backyard or patio? Landman Big Sky Stars and Moon fire pit will not only warm you up but also creates beautiful shadows on your patio!
The 23-½ inch size fire pit is not the largest but still holds enough wood for a big fire. The low-medium height base is made from steel, making the pit very sturdy and steady. Steel construction and black paint finish make the pit rust-resistant even if you leave it uncovered.
Don’t need a BBQ grill but a beautiful fire pit? Landman Big Sky Stars and Moon fire pit is the most beautiful wood-burning fire pit on our list that will create a great fire and shadow show on your patio.
6. Innfinest 6-1 Large Bonfire Fire Pit
We’re getting into the big leagues now! Innfinest 6 in 1 Fire Pit is larger than most fire pits on our list. The 36-inch fire pit has water drainage holes, so you won’t have to do any DIY work in case of rain.
The set also includes a fire pit cover, spark mesh, ash plate, and assembly tools.
This large wood-burning fire pit weighs 28 lbs because of the thick steel construction, so it’s not very portable but sturdy and long-lasting.
If you have a big household or patio space, this large pit might just fit the bill. The Innerfest Fire Pit is one of the best large wood-burning fire pits on your list.
7. Ohio Flame Patriot Fire Pit
Ohio Flame 48 inch giant fire pit is individually made and numbered in the USA and comes with a lifetime warranty! This handmade beast is pure plate steel and will take years to wear, but it does weigh 260 pounds, so you won’t be moving it often.
The extremely solid, rugged construction and large diameter will burn a lot of wood and create a cozy and warm atmosphere for large parties.
The thick steel won’t rust even if it’s outside in the rain. It also has drain holes, so you won’t need to do a lot of cleaning.
If you have a large patio or backyard without a fire pit, consider the Ohio Flame Patriot fire pit. It is the best large wood-burning fire pit on our list that acts as a significant source of heat and as a beautiful patio piece and will definitely turn heads.
Frequently Asked Questions
Will wood burning fire pit give enough heat?
Yes. Wood-burning fire pits produce the most heat of all types of fire pits. Wood produces the biggest flames and is the best option if you need to heat your patio properly.
The heat level also depends on the wood used. If you want the most heat go for Oak; if that’s not possible other options are walnut or pine.
Can I use any wood in a fire pit?
You can use any wood as long as it is not wet, rotten, diseased, and moldy. That kind of wood might create toxic smoke and be bad for your health.
In general, the best wood to use is hardwoods. The best hardwood is Oak, Birch, Hickory, Ash, and Fruit Trees. These will produce the most heat and the least smoke.
Do I need to worry about starting a fire?
Absolutely. These natural wood fire pits burn natural wood, so there will always be hot embers and ashes rising into the air. You must be sure that there are no low-hanging trees to catch fire, and don’t place these too close to any wooden structures. If you are placing a fire pit on a deck, always use a protective fireproof pad underneath. If you want a fire pit that does not pose as much risk, try a propane fire pit.
So, you’ve been thinking that maybe you need a brick patio in your yard. You’ve seen all of the other options, such as concrete, gravel, and wood decking, and you like the look of brick. Well, before you take the plunge and either buy a bunch of products to do it yourself or hire a contractor to do it for you, there are a few things you ought to know about Brick Patio Choices and Construction techniques for a brick patio.
History
Back in the day, brick meant brick. They were all rectangular, and they were all made of clay. Today, when a person says brick, you really don’t know what they mean without asking a few questions. If you are talking about having a brick patio, you will need to be able to describe what you envision precisely.
Choices
Clay Pavers
The old-style clay brick has been around since we first started pounding earth into rectangles and throwing them into a kiln. You can find old clay brick walkways in many historic areas worldwide, and they are still popular today. Clay brick can be very attractive and a bit more delicate in both appearance and sturdiness than your other options. But now, Concrete pavers are much more popular.
Concrete Pavers
Nowadays, when I go to a meeting, and the client says that they want a brick patio, I am almost certain that what they really want is a concrete paver patio.
Years ago, when they were first introduced to the market, concrete paver looked similar to clay brick, just not as nice, and were much cheaper than clay brick. They were more affordable and made of concrete, which is much more durable than clay, making them a popular choice for many. These old brick pavers held up structurally, but the colors faded fast, so the concrete industry went back to the drawing board.
Now, many years later, the concrete paver industry has flown past the clay brick industry and is not looking back. Now the colors are clear, vibrant, and long-lasting. Concrete pavers come in every size and shape imaginable, and you can buy a concrete paver to look like almost any type of natural stone or clay product that you can think of.
Considerations
So, unless you are a real history buff and you are putting in a patio reminiscent of something that you may have seen in Colonial Williamsburg, I’m guessing that you want a concrete paver patio.
Take Your Time and Explore
My suggestion to you would be to take some time and explore the many top-tier paver manufacturers’ websites out there. Get an idea for the styles and colors you like, and then look at some samples in person at your local brickyard. You won’t find prices on any of the websites, but in general, the more that the paver looks like a natural stone or is a very distinct shape, the more it will cost. The cheap ones are the ones that look like an old, rectangular clay paving brick.
Take some time and look at and feel the pavers that you like. Many of them will have a textured surface or a contoured surface depending on the design, so I would recommend that when you visit the brickyard, you see the paver actually laid out on the ground so that you can understand how your patio will be.
Some yards will have sample patios already laid with the different styles, and others will not. If yours does not, don’t be afraid to pull a bunch of pavers off of a pallet and lay them side by side on the concrete to get a feel for them. Due to variations in texture, contour, and spacing gaps, they can appear quite differently when laid in a group than they do when you pick up one individual piece.
Patterns
If you choose a paver that looks like a natural stone, it will often come in a specific random pattern with multiple sizes so that when laid, it resembles one of the standard laying patterns for stone. Or, it will be all squares, which makes it very formal and easy to lay.
If you choose a rectangular paver, you will need to decide on a pattern. There are many patterns to choose from, but straight bond, running bond, basketweave, herringbone, and diagonal herringbone are common choices. Check out this pattern picture
Consider the Shape
At this point, before you get your heart set on a particular pattern, you need to consider your patio shape and size. If your patio is a big square, just about any pattern will do just fine. Running bond would be your most common choice, and diagonal herringbone would be the toughest to lay.
If your patio has lots of curves or will lead into a walkway of the same pavers, you will need to make some more decisions. The most challenging part of laying a brick patio for the professionals and the newbies is cutting. Laying out the main pattern is relatively quick and easy. The devil is in the details, and when you get out to the edges of your curvy patio with your diagonal herringbone pattern, you will understand why you don’t see too many houses with this combination.
At the Edge
You will need to install some edging to hold in the bricks at the edge of the patio. This edging will create your curves, and each brick will need to be cut to the curve—the tighter the curve, the tougher the cut.
Square or rectangular patios with a straight pattern have very few cuts. Curvy walkways with a running bond pattern have very few cuts. Curvy patios and walkways have considerably more cuts, and curvy patios with diagonal herringbone patterns have the most cuts of all.
Choose your pattern wisely.
Dry or Wet
This article will assume that this patio you envision is dry-laid simply because they are much more common and easy to install than a wet-laid patio over concrete. If you want this to be a wet-laid patio over concrete and you aren’t a very detail-oriented and patient person, I would suggest hiring a mason.
Dry laid means that the paving material (concrete pavers, brick pavers, stone) is laid down dry (without mortar) on a bed of compacted stone. Once laid, sand is swept into the joints to tighten it up.
Edging
Any dry-laid patio will need to be edged to retain the paving material. When it comes to edging, you have many choices. There are plastic edging systems, Steel edging systems, aluminum edging systems, and probably a few others. If you want to go old school, you can apply a thick bed of mortar along the outside of your final row of pavers. All of these edges need to be applied to a firmly compacted base, just like your pavers. When you are laying out your patio and preparing your base, be sure to leave at least an extra 4″-6″ around the perimeter to allow you a nice flat spot to apply your edging.
In-Fill
After you have finished laying your brick patio, you will need to fill in all of the cracks with an in-fill material. TIn-fill has traditionally been done with sand. Any fine, dry sand that will fall down into the cracks will do. Everyone used to use silica sand for this, but advances in sand technology (is there such a thing?) have led to polymeric sand.
Polymeric sand is a mix of (yep, you guessed it) sand and polymers.
This stuff is a little more challenging to work with, but it is really nice once it is done. To install any dry sand, you sweep it back and forth across the patio and make sure that it fills all of the cracks.
You do the same for polymeric sand, but then you sprinkle it with water, which causes the sand to harden into a semi-flexible sort of grout that helps keep the brick in place and keep out dirt and debris.
The only catch here is that the poly sand requires the patio to be completely dry. Even a little bit of moisture will make this stuff stick like glue to your brick. Also, before you sprinkle it with water, you must be sure that there is no sand on the patio’s surface or, again, it will stick like glue.
Supplies
Below is a list of tools and supplies that you will need to complete this project should you choose to do it yourself:
Pavers (this is your surface)
Base material (this is your base under the pavers)
Okay, now we have gotten through the easy part of picking out the products we like. From here on out, it is all about construction. Whether you are hiring someone to do this or doing it yourself, you must understand a few things.
Site
You want your brick patio to drain well. If your patio sits in a low spot in the yard, it will hold water, which means that the surrounding ground and likely the ground below will be soft, allowing the patio to move. Also, worse yet, if you live in a part of the world that gets freezing temperatures, the ice is likely to destroy your patio. No matter what type of product you choose, having it wet going into freezing weather will cause cracks and deterioration of the paving material.
Ice is very powerful!
Settling
If you moved into a new house or have just built your home, you would be better off allowing things to settle for a year before building a dry-laid patio up against your house.
During construction, the excavator dug a big hole for your foundation, and after the foundation was complete, it was backfilled. The area surrounding your house is likely well compacted due to all of the equipment used in your house construction, but the area right along your foundation is never as compacted.
I’m sure that you had a good builder, and they installed drain tiles and washed stone. I’m sure that they tried to compact around the house, but the fact is, no one can get it compacted properly, and the area within a foot or two of your foundation is going to settle over time. Most of the houses that I have seen over the years with wet basements and sagging patios are due to settling around the foundation.
My advice to you would be to prep for your patio but just live with the base for a year until things settle out. Once they do, you can build your patio, and you won’t need to pick it up in a year or two to fix sagging areas.
Base Prep
The secret to a good hard surface installation (no matter what the surface is) is base prep. Poured concrete is less affected by base prep, but I would argue that a good base is still essential to prevent cracking and shifting. Any time that you see a patio, walkway, driveway, or road with sags, potholes, etc., it is due to incorrect base prep and not due to the topcoat.
Mark it
Layout the area for your patio using stakes and mason line if possible.
Pay attention to pitch. You need any water that lands on your patio to run away from your house, so make sure it pitches away. They say that ¼” per foot is positive drainage, but that is too much for patios to be comfortable, in my opinion, so I usually go for 1/8″ per foot or less. As long as it pitches away, you are fine. Your entire patio needs to be in one plane, so plan accordingly.
Be sure to set your line at least 8″-10″ past the edge of your patio so that you have room to dig and lay enough base to also accommodate your edging.
Too much base is much easier to deal with than not enough. Most newbies excavate just enough to lay their patio and then end up with sagging edges and edging popping up due to frost heave.
Dig it
You will need to excavate down to hardpan. You need a very solid surface to build upon. This means removing all topsoil and dig down until you hit a hard layer of soil or base. You will know it when you get there. If you are in an area that is very soft and just can’t or don’t want to dig that deep, you can continue with the installation; just don’t be surprised if it moves over time. If you are in a very sandy area, then you will not get down to a hard surface, but sand compacts (and drains) very well as long as it is encapsulated, so you should be in good shape.
Your excavation should pitch away from your house also. Your dry-laid patio will be a semi-permeable surface, meaning water will pass through it. You don’t want this water running toward your home.
Fill it
Now that you have your excavating done, it is time to start filling. You want your base to consist of stone of some sort.
Over the years, many types of stone have been used. Lately, the common consensus has been that a fractured and washed stone base will provide the best compaction long term.
For those of you who have ever compacted anything, I’m sure that you are thinking, “wait a minute, how will this ever compact if it contains no fines?”
I’m with you on that. The first few times that I used washed stone, I thought it was crazy, but it works quite well.
Old School Fill
Old school installers have long used crushed limestone (or any crushed stone) as their base because crushed limestone with all of the little crushed pieces and fines in it compacts really hard. If you compact crushed limestone and sprinkle it with water in between layers, it will get rock hard. For years, this was the standard.
On top of the base, the old school people would put a layer of sand to make striking and setting the brick easier.
The problem with this old school approach would occur when you would have this perfectly compacted and laid patio on a base of crushed limestone, and then one year, the clients’ gutter would clog up, and water would pour out of the gutter on to the patio for a few months of heavy rain.
Dry laid patios hold up just fine to rain, but enough concentrated water flow in any area will cause things to move. Again, water is mighty powerful! So, all of this rushing water will eventually wash out some of the fines and the sand.
Once the fines get washed out, the remaining larger stone will settle. This will leave you with a low spot right where that gutter was dumping the water.
New School Fill
The solution is to remove all of the fines before you compact. This is where the crushed, washed stone comes in. It seems it would be hard to compact, and indeed, the top layer always seems a bit looser than you would have been used to old-school, but as long as the walls of your excavation hold in this base, it will compact just fine. Make sure to compact in small layers and keep it correctly pitched during compaction.
Don’t Rush the Process.
This is the hardest part of your patio project, and newbies always want to rush it. Rushing this part is setting yourself up for failure. This is where we separate the men from the boys (as the old-schoolers would say). The newbies figure it doesn’t matter, so they dump in thick layers of stone, run the compactor back and forth a bunch of times, stomp on it a bit and call it done.
It will look good for a few months, but it will settle eventually.
Honestly, lay down a few inches of base, rake it out to pitch properly, and then strike it in two directions before laying a few more inches of base and doing it all over again. Once you start getting within a few inches of your top-level, you will want to use a screed or strike board to make sure that your pitches are perfect. The last thing that you want to do is end up needing to remove the compacted base because you didn’t check it, and it ended up too high.
Laying it Down
Once you are up to your top-level and everything is struck perfectly and pitches perfectly, I would check it one more time, just to be sure. Once you lay down those pavers, you will not want to pick them up to fix something that you missed.
Now that you are really sure that it is done, you can start laying your pavers.
Always start at a long straight edge and work your way out using more stakes and more mason line to set some 90-degree lines so that you are checking your lines every few feet. Again, you don’t want to lay half the patio and then realize that your lines are starting to curve.
When laying pavers, avoid walking on your perfectly prepped base and walk very flat-footed if you need to cross it. The best case is to lay down a few courses and then work off of your finished surface to lay the remaining pavers. Be sure to use a rubber mallet to tap bricks into place, ensuring that they are set tight against each other, and check your top surface often with your screed to be sure that you have no dips or hills.
Once your patio is laid, cut any edges, install your edging, and sweep in your sand. You are done!
Time to enjoy.
Conclusion
Whether you tackle this project yourself or hire someone to do it, making sure that it is installed correctly will set you up for a lifetime of worry-free time on the patio. This one will last a lifetime. Or at least until your significant other decides it’s time to remodel.
For many hundreds of years, barley straw has been used to control algae growth in ponds. There is no official documentation about when the use of barley straw for ponds first began. The story goes that an English farmer was traveling by wagon along his property. A few barley straw bales fell into an algae-ridden pond. This accident proved to be fortuitous for this farmer and others who made their livings from agriculture and farming.
Controlling algae in ponds with barley straw is becoming more common. Studies conducted in England in the 1990s found it to be effective for this purpose. Since that time, its use has spread throughout America by scientists trying to assess its effectiveness and pond owners looking for effective and easy ways to combat algae. Rye or other types of straw are not effective in combating algae.
Barley straw is helpful in controlling algae only and not effective against plants such as duckweed, pondweed, or watermilfoil.
You are probably wondering, “how does barley help my pond”? Let’s discuss what algae are, the problem it causes, and other information that will answer this question for you.
What are Algae?
Algae are microscopic, free-floating plants that comprise a vital part of water’s food cycle. They are fed upon by tiny creatures called zooplankton, an important food source for fish. Algae color the water brown or green. If the growth is not controlled, it can lead to noxious odors, nuisance surface scum, poor water clarity, and an overall reduction in the body of water’s recreational value.
Algae come in a variety of colors and shapes.
Chlorophyta – green algae
Chrysophyta – golden-brown algae
Euglenophyta – euglenoids
Phaeophyta – brown algae
Pyrrophyta – fire algae
Rhodophyta – red algae
Xanthophyta – yellow-green algae
A common form is “planktic,” single cells that float in the water and, when abundant, give it a soupy-green appearance. The form “filamentous” grows in hair-like strands forming mats on the water’s surface. While some algae forms have relatively complex shapes that may appear to be higher plants, they do not have roots or leaf veins.
Algae produce oxygen during the day through photosynthesis but stops at night. Algae continue to use oxygen at night, and a large population of algae in a pond can deplete the oxygen supply overnight. This will cause a low-oxygen situation that can be harmful or fatal to aquatic life. Large algae die-offs can also deplete oxygen levels. This is another reason why chemical pond treatments are so dangerous for fish.
Excessive levels of algae occur when phosphorus or other nutrients are in abundance. Take steps to reduce the amount of phosphorus entering a pond to control algae growth directly. Usually, this is accomplished by treating the pond or lake with compounds such as Cutrine Plus or copper sulfate. While these treatments may be useful for short-term control of algae, they are also toxic to food source organisms that are essential for fish, such as insect larvae and zooplankton. We would never suggest using such toxic chemicals in your pond.
Chemical applications are very hazardous to our environment, and they start a vicious cycle of application and re-application as their effectiveness subsides in a short time. The build-up over the long-term of copper in water sediments is an environmental threat and a health concern. It is preferable to use an eco-friendly method to control algae growth. There must be a safe and environmentally friendly way to prevent algae growth. Barley straw is the solution; harmful chemicals are not.
The Algae Growth Problem
Excessive algae growth is a common problem in ponds, and traditional chemical control methods are not advisable due to their adverse health effects and high cost. When applied at the proper time and correct amount, barley straw has been successful in algae control.
The common issue of controlling algae in both larger lakes and smaller ponds becomes more problematic in the summer months. Algae and aquatic plants provide oxygen and food for marine life, including fish. But excess algae in a pond can interfere with swimming and fishing. It can also cause unpleasant odors and other aesthetic problems such as mats of algae on the water’s surface.
Types of Straw Available
Barley is a type of straw used to control algae. But others, such as wheat, linseed, and lavender stalks, can be used as alternatives if barley straw is not available. But they will not be as effective in eliminating algae, nor will they function the same. If you decide to use one of the alternatives to barley, you must increase the application frequency and quantity used. Never use hay to eliminate algae, as it will release nutrients that will encourage its growth.
Barley straw is an acceptable alternative to using copper compounds that have toxic effects on rooted aquatic plants, insect larvae, fish, and zooplankton. It is a cost-effective and environmentally friendly way to control algae in ponds.
How Does It Work?
It needs to be used in a specific way to work. When barley straw is placed in water, it breaks down, and a chemical is released that inhibits algae growth. The breaking down of the barley straw is a microbial process that depends heavily on the surrounding environment’s temperature. The chemical release occurs more rapidly in the summer and slower in the winter.
Initially, the algae may not appear to be affected by the barley straw’s presence, but after several weeks, it will diminish.
While it has been discovered that barley straw prevents algae’s growth, it does not kill algae already present in the pond. Thus, it is an algistat (an agent or substance that inhibits algae’s growth) rather than an algicide (a substance that destroys algae).
It has not been determined how barley straw prevents the growth of algae. It is thought to result from the straw decaying in the water that releases chemicals that inhibit algae growth. Another theory is that the decaying straw feeds certain microbes, which are algae, predators.
Conditions Required for Barley Straw to Work
Adding the barley straw to a pond does nothing until the decomposition occurs. This is called “conditioning,” which depends on several factors such as temperature, being the most important. Once properly conditioned, it will continue to work for many months. Barley straw extract may work faster as it is already conditioned.
The barley straw needs water and oxygen to decay. The straw can be floated on top of the water or just under the surface. The straw can also be placed in waterfall boxes, wetland filters, or under a waterfall. Pond aeration and moving water increase barley’s effectiveness.
How Effective is Barley Straw?
There is positive research-based evidence that barley straw effectively controls some kinds of algae. But which types are controlled? Evidence has shown that barley straw is effective in controlling planktic algae. It clarifies water that is green from algae. Research continues regarding its effectiveness in blue-green algae, filamentous algae, and mat-forming algae. Some testing results are positive for these types of algae.
Where Can You Purchase Barley Straw?
Barley straw is available in full-size square bales from feed stores or farm supply stores. This is an economical way to purchase it, especially when needing larger quantities to treat bigger ponds. Its availability in farm stores may be seasonal, depending on the location. Whole bales can be ordered from retailers online, but the cost is typically more than from a local farm store or feed store. Consult with government or private agencies that work with local farmers, such as Conservation District offices, extension offices, or farm supply companies, to determine if barley straw is available in your area.
You can also purchase various barley straw products for use in smaller ponds, including liquid extracts, miniature bales, and pellets. When purchased in smaller quantities, the barley straw’s cost is typically more per pound than if purchased in full bales. These smaller quantities are appropriate for smaller ponds such as water gardens and koi ponds. These products are available from pond supply stores, garden centers, and online retailers. These are the barley straw bales that we use.
Algae is the pond owner’s biggest problem. People try everything to get rid of it. Farm supply stores or feed supply companies sell barley straw bags in small amounts for the backyard pond.
Barley straw extract can also be used—pond barley’s benefits without the mess. It is sold as “straw in liquid form.”
Barley Straw – It is a Pesticide?
Barley straw is not considered a pesticide by the United States Environmental Protection Agency, so you don’t need a license or permit of any sort to apply it. It is regarded as a home remedy for the private landowner, but only on their private property. Any public property application should be approved by the governing body.
When Should Barley Straw Be Applied?
Because barley doesn’t kill algae, it is best to apply it in early spring, before the algae begin to grow. When applied to cold water, less than 50 degrees, it may take six to eight weeks for the straw to decompose and produce the chemicals that inhibit algae’s growth.
The decomposition process is temperature-dependent and is faster in warmer water. When the straw is applied to water above 70 degrees, it may become effective in as little as one or two weeks. Barley straw will remain effective for approximately three to six months after the application.
Where Should the Barley Straw Be Applied?
Spreading the barley straw in smaller quantities around the pond will improve the distribution of the growth-inhibiting chemical found in the barley straw bale. Place each net of straw equal distances from the shore and other nets. The placement of bags does not need to be exact. In larger bodies of water, practical considerations such as allowances for angling and boating may determine the bags’ placement. In small ponds, where only one net is needed, place it in the pond’s center or in an area where it gets water flow like a wetland, waterfall, or stream.
Barley Straw – How Much Should Be Applied?
The most common application is roughly two or three bales per acre of pond. The pond’s water depth is not a factor unless the pond is adequately aerated, which would circulate the pond water, increasing the barley application levels. In a pond that is muddy or has been known to have heavy algae growth, two or three times the recommended dose may be required for the first treatment. Ensure not to overdose the pond with barley straw as it deoxygenates the water as it decays and may kill the fish. This is especially true if overdosed during a warm spell, but you would need to add quite a bit of barley for this to occur.
Muddy pond water will require more barley straw than a clear pond. Some people have questioned whether the barley straw itself could become a problem with the microorganisms colonizing and absorbing the water’s oxygen. But the decomposition of the straw occurs slowly, and the use of oxygen by the microorganisms isn’t a problem unless large amounts of straw are used that are more than most pond owners will ever need. If you have a muddy pond, it is highly recommended that it be heavily aerated and treated with bacterial tabs to reduce the sediment levels.
The amount of straw required to control algae’s growth depends on the surface area of the pond. Ponds that historically have problems with algae need treatment at a ratio of 225 pounds of straw per surface acre. This rate is about 0.8 ounces of straw per ten square feet of pond surface area. You can try lower doses, but do not fall below 90 pounds of straw per acre or 0.3 ounces per ten square feet.
The straw is less effective if it is in muddy water, so a higher dose is recommended in bodies of water that are incredibly muddy or have very severe algae problems. In this case, apply 450 pounds per acre but do not exceed 900 pounds per acre. The straw requires oxygen to decompose, so using amounts greater than 900 pounds per acre could significantly reduce the oxygen content that could kill or stress fish.
As the algae begin to subside, the amount of barley straw can be reduced.
Calculating the Amount of Straw Required
The following example will determine the amount of straw required to treat a pond of five acres that does not have an excessive amount of algae or is not too muddy.
The pond’s surface area is five acres; therefore, the selected dose is 225 pounds of straw per acre.
So, multiply acres by pounds. For example – 5 acres x 225 lbs./acre = 1125 lbs.
To calculate the number of bales required, divide the total amount of straw needed to treat the entire pond by the single bale weight. The bales vary in weight, but 45 pounds is probably average. For example – let’s say that one bale weighs 45 pounds – 1125 lbs ÷ 45 lbs. = 25 bales.
How is the Straw Applied?
Large Pond Application:
It is essential that the bales are appropriately placed in the pond for maximum effect.
The strawbales must be broken apart first. If the bales are too tightly packed, it will not allow for adequate water movement through the straw since many large ponds lack proper water movement or aeration.
The loose straw should be placed in some type of netting. For larger ponds, wrap the straw in the cylindrical netting used for wrapping Christmas trees. This type of netting can be used for straw-filled tubes up to 65 feet long and can contain about 110 pounds of straw.
For smaller ponds requiring less straw, use loose woven sacks, such as onion sacks or nylon stockings.
Suspend the straw-filled netting with floats in the first three to four feet of the pond. If it sinks below this depth, the straw will not be as effective. The water movement near the surface will keep the straw properly oxygenated while distributing the growth-inhibiting chemical throughout the pond’s upper portion.
It is recommended that the floats be inserted inside the netting when the netting is filled with straw. The netting is then anchored in place using a rope attached to concrete blocks or bricks.
Small Pond Application
For small, lined backyard water garden ponds, it is generally recommended that approximately 16 oz of barley straw will effectively treat up to 5000 gallons for up to three months.
Barley for small ponds is often sold in mesh bags or fully biodegradable bags. The biodegradable bags are typically preferred as the entire bag and barley straw can be left to fully decay in the pond and will not require cleanup or removal.
The straw needs water flow to decompose properly, so place the barley bags in the pond’s waterfall box, wetland filter, or stream to ensure maximum water flow through the barley straw. In ponds lacking any of the above features, place the barley near the circulating pump or the aerator to provide the necessary water movement and oxygen for proper decay.
Other Ways to Control Algae in Ponds and Lakes
Excess algae growth is promoted by an increase of nutrients in the water, particularly phosphorus. All runoff water of any sort will carry nutrients, especially from pastures, farms, fertilized lawns, roads, malfunctioning septic systems, or wildlife excrement.
To reduce the algae growth in a pond, you need to increase oxygen and decrease nutrients.
Use surface aeration to disperse the algae and to minimize the effects of die-offs.
Remove filamentous algae with rakes or nets.
Use bottom aeration for increased water oxygenation and reduction in long-term sediment build-up, which will reduce nutrients.
Divert nutrient-filled runoff from entering the body of water.
Prevent large groupings of geese and other wildlife from frequenting the body of water. A few is fine; a bunch is a problem.
Treat runoff with buffer strips of grass or vegetation before it can enter the pond or lake.
Reduce phosphorus fertilizer use from nearby lawn areas.
Apply bacteria and enzyme tablets to help break down debris and reduce overall nutrient levels.
Every pond owner deals with algae at some point. While there are many products available, the best alternative to controlling algae naturally is organic barley straw. Help save the earth naturally by not using chemicals. Organic barley straw is by far the best option!
As an Amazon Associate I earn from qualifying purchases.