A Homeowner’s Guide to Saving the Earth

a sunflower with bees

How Plant Growers and Floriculturists are Contributing To Phytoremediation

Most homeowners, plant lovers, and floriculturists may not know that they are making a considerable contribution to the reduction of our Earth’s pollution. Phytoremediation is the most effective, cheap, easy to install, and easy to maintain method of reducing air, water, and soil pollution. The pollution may be due to Organic chemicals (TNT, BTEX, etc.), Nutrients (Ammonia, Phosphate, and Nitrate), metal pollutants (Lead, Mercury, Chromium, etc.), and most importantly, VOCs (Volatile Organic Compounds).

Soil and Water Phytoremediation is being practiced at the National and International levels in almost every country. What about Air Phytoremediation? The Clean Air Act, 1963 under the United States Federal Law, was passed to control the everyday increasing amounts of ozone, carbon monoxide, and other various hazardous gases in the air at the national level. However, progress has been limited, and the world continues to struggle with the ever-increasing burden of pollution.

We will not be able to resolve the issues until many more people are educated and made aware that we are all contributing to the problem! Everyone contributes to the pollution of this Earth in their own way, but landowners have the opportunity to make the most positive impact on the health of our Earth.

In fact, “Paying landowners to store carbon is a strategy that is rapidly gaining in popularity.” If we can plant trees, shrubs, flowering plants, and foliage plants in and around every single house and plot of land, we can begin to control air pollution.

Here’s How

Here is a guide for all of the Landowners, Gardeners, and Plant Lovers to follow to do their part to reduce the amount of pollution on this Earth. Any time we can have plants covering the Earth, rather than concrete, asphalt, and bare Earth, we are better off. Planting the following list of super-effective plants will not only beautify your surrounding environment but will also clean the air, soil, and water.

Best Phytoremediation Trees:

Genipa americana (Genip Tree):

This tree is widely adapted and grown in North and South America’s tropical climates. The tree performs both phytostabilization and Rhizofilteration of chromium ion properties.

  • Rhizofilteration of Cr3+ on roots
  • Phytostabilization of Cr6+Also absorbs small concentrations of cadmium and zinc also.

Salix (Willow):

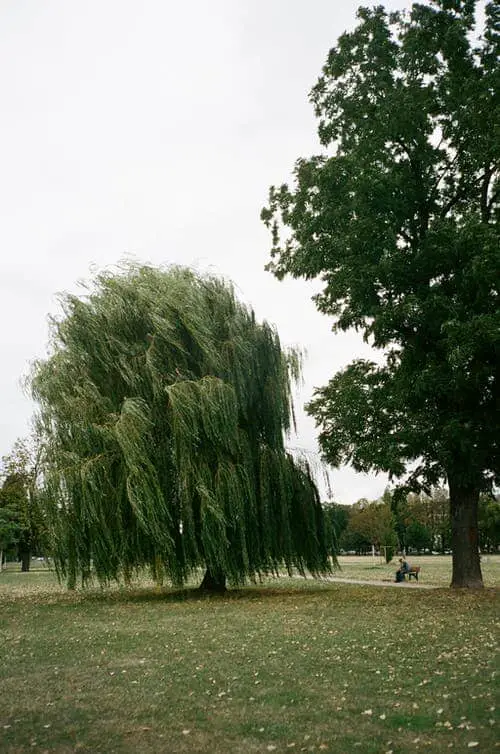
Broad-leaved Willows are diverse groups of evergreen or deciduous trees and shrubs from the genus Salix. Having the great potential of phytoextraction and accumulation of Cadmium ions, this is a beautiful plant that everyone should start planting in their lawns and gardens.

Willows are commercially grown near mining areas and wastewater cleaning plants to reduce soil, water, and air pollution due to heavy metals accumulation. But water, air, and soil pollution have been so prevalent over the years that limited planting of hyper-accumulators is not enough to overcome the problem. Everyone should try to plant at least one willow tree or shrub in their lawn to contribute to the environmental cleaning effort.
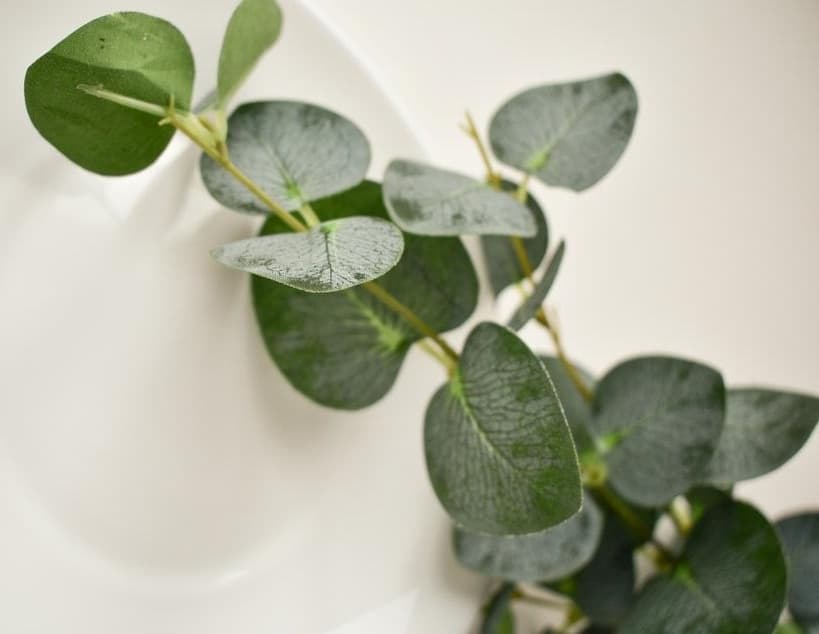
Eucalyptus globulus (Eucalyptus):

Eucalyptus is said to be the “Beauty of every lawn.” Not only do these plants beautify your yard, but they also have good Phytoremediation properties. They are fast-growing trees with a high tolerance to heavy metals especially lead, and chromium.

Populous deltoids (EasternCottonwood):

Commonly known as eastern cottonwood, it is a deciduous and highly environmentally friendly tree. Phytoextraction, Phytodegradation, Phytostabilization, and Phytovolatalization are processes that this tree completes superbly!

Best Phytoremediation Shrubs:

Salix viminalis (Basket Willow):

It is a shrub that grows best in alkaline soil. If you are going to use some shrubs in your garden, I suggest you plant Salix because it is a good air cleaner, soil amender, and does not require extensive irrigation. It is often planted around wastewater treatment plants because it takes from the soil and water and accumulates in its leaves Zn (5%) and Cd (20%).

Salvia elegans (Pineapple Sage):

It is a perennial shrub, native to Mexico, commonly known as “Pineapple Sage.” It is a preferred choice for lawns, gardens, and indoor box containers and will decorate your yard and clean the air simultaneously. Sage absorbs 378 µg m-3 m-2 of toluene in one hour. Toluene is released from indoor cleaning products and sanitizers, and it is very toxic if breathed at high rates.

Best Phytoremediation Flowering/Ornamental Plants:

Spathiphyllum wallisii (Peace Lily):

Peace lily is a white-colored flowering plant. It is a good choice for indoor air cleaning as it absorbs airborne toxins like trichloroethylene, benzene, formaldehyde, and xylene. It produces oxygen and helps to eradicate mold.
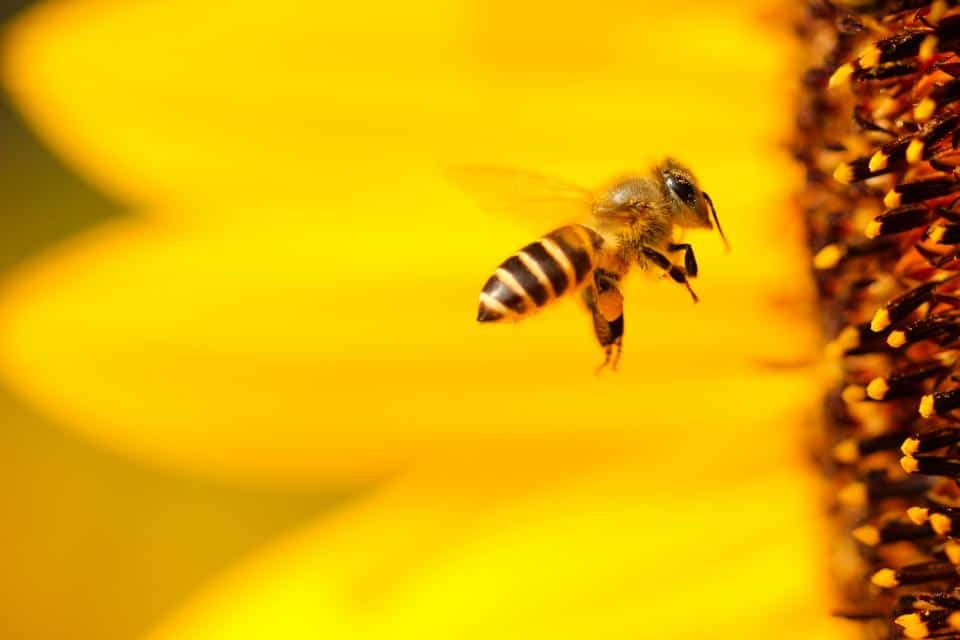
Helianthus annuus (Common Sunflower):

Common Sunflower is a high air, soil, and water-heavy metal pollutant removing plant. It is an annual plant, which absorbs lead and volatile organic compounds. It should be harvested and burned at the end of the growing season to be most effective.

Kalanchoe blossfeldiana (Madagascar Widow’s Thrill):

Widow’s thrill is an herbaceous indoor flowering plant. It is a good air purifier that can also be grown in lawns and gardens.

Best Phytoremediation Grasses:

Arbuscular Mycorrhizal Fungi increase sequestration efficiency of hyper-accumulators. This fungi populates grasses’ roots and secretes glycoprotein “Glomalin” to change the pollutant’s chemical composition to make it less toxic. For example, highly toxic Cu (III) is transformed into a much less harmful form, i.e., Cu (VI), with the help of enzymes found in the secretions of microbes.

Agropyron cristatum (Crested Wheatgrass):

Crested wheatgrass is one of the most widely grown grasses in the U.S. and Canada for its soil erosion control properties. It has gained popularity because of its remarkable features; it is extremely drought tolerant, shade tolerant, and can handle moderate alkaline conditions. It is easy to establish by seed, low maintenance, and very resilient in a wide range of atmospheric conditions.

Festuca Rubra (Creeping Red Fescue):

Creeping red fescue is a grass tolerant to varied climates and habitats. Red fescue has the potential to hold high concentrations of metal contaminants.

Agrostis tenuis (Colonial Bentgrass):

Colonial Bentgrass is highly tolerant of Lead, Copper, Arsenic, and Zinc. In a study performed by Porter and Peterson (1975), one bent grass plant can hyper accumulate 150-1100mg As/g of dry mass. It is mostly grown in less fertile soils, near sewage wastewater cleaning plants, and the revegetation of bare soils.

Elodea canadensis (Elodea bulrush):

It is described as an excellent Nitrate purification performer grass. An experiment was conducted at the Army ammunition plant in Milan to check out a canary plant’s potential to remove trinitrotoluene and RDX (hyxahydro-1, 3, 5-trinitro-1,3,5-triazine). Within one month of planting, approximately a 90% removal of nitrate had been noticed.

Best Phytoremediation Foliage:

Chlorophytum comosum (Spider Plant):

Spider plant is one of the easiest indoor plants to maintain. It produces oxygen and cleans the inside air by absorbing carbon monoxide, formaldehyde, and xylene.
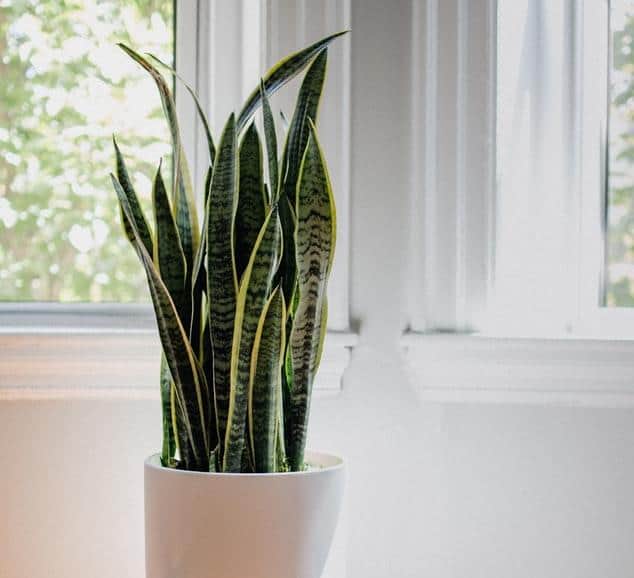
Dracaena trifasciata (Snake Plant):

You will find snake plants in many homes in the U.S. It is not only kept for interior decoration but also phytoextraction. It absorbs benzene, xylene, formaldehyde, and carbon monoxide. 5-6 snake plants in a room or office are enough for healthy air-breathing.

Philodendron giganteum (Giant Philodendron):

A beautifully structured large to small-sized leafy plant which likes indoor conditions like low temperature, medium-light, infrequent irrigation and is excellent at removing formaldehyde from our air.

Aglaonema (Chinese Evergreen):

Floriculturists have described it as “the most user-friendly indoor and outdoor plant.” It is very efficient in phytoextraction.

Chrysalidocarpus lutescens (Butterfly Palm):

The gorgeously structured palm is the beauty of every shopping mall, office, restaurant, and public park. It assists in cleaning and purifying indoor air. For home lawns, gardens, and interior plant-scaping, the Butterfly palm should be a preferred plant because it is an excellent air cleaner that absorbs formaldehyde, benzene, toluene, and xylene (all are toxic for humans and pets health).

Best Phytoremediation Cacti and Succulents

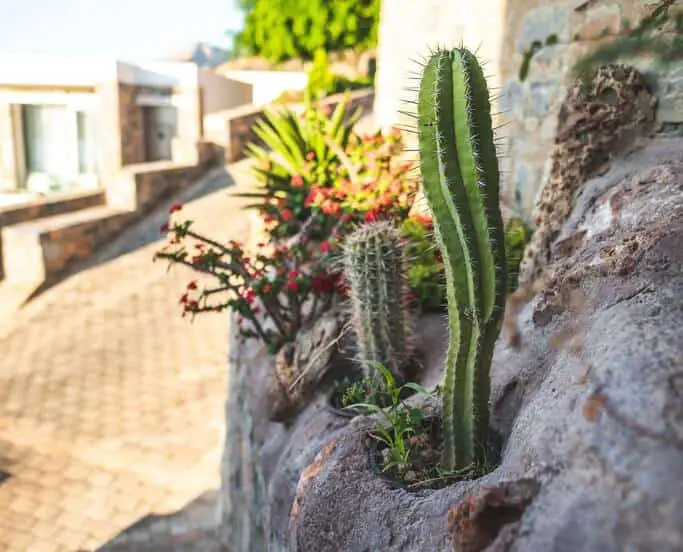
Cacti and succulents have many advantages over other plants; they do not need much maintenance, space, or irrigation, and they are great at phytoremediation.

Euphorbia milii (Christ Thorn):

It is impossible in some parts of the world to have a place called a Garden without a Christ Thorn! Floriculturists used to call it “Crown-of-thorns.” It is a Woody succulent with pink and red-colored flowers grown mostly for ornamental purposes and used in medicines and pesticide manufacturing.

Carpobrotus rosii (Pig Face):

The Pig face succulent is native to coastal areas of South Australia. It has been studied for its phytoextraction properties and found to uptake and store the highest concentrations of almost all heavy metals (Cd, Zn, Mn, Pb, Cr, etc.) without showing toxic effects on its growth (20.6-26.6 mg per plant day-1).
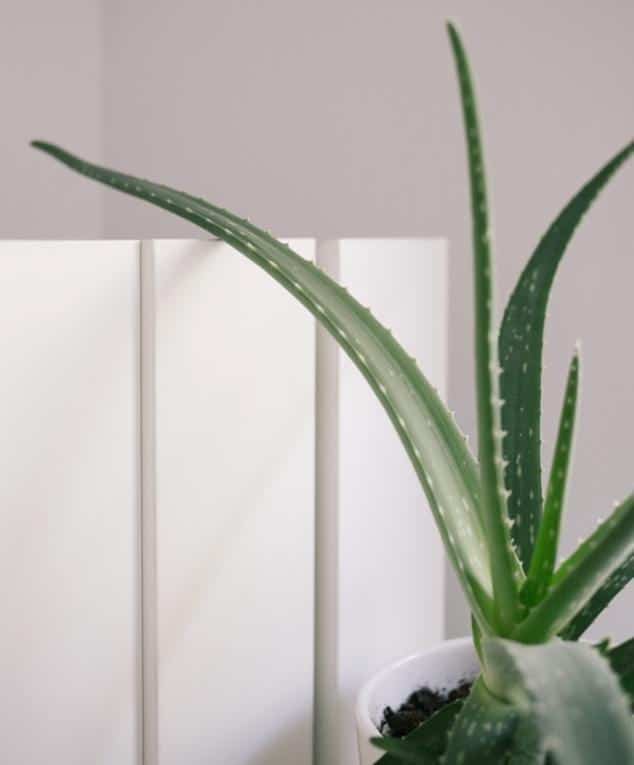
Aloe barbadensis (Aloe Vera):

There is likely no one in the world who is not aware of the Aloe Vera plant. It is the beauty of every room, shelf, corner, and lawn. Besides its ornamental characteristics, Aloe Vera’s leaf jell helps heal cuts and burns, and it also absorbs volatile organic pollutants and purifies the air.

Nopalea cochenilifera (Cochineal Plant):

N. cochenilifera is efficient in the Phytodegradation of highly toxic textile dyes and heavy metals in polluted water and soil.
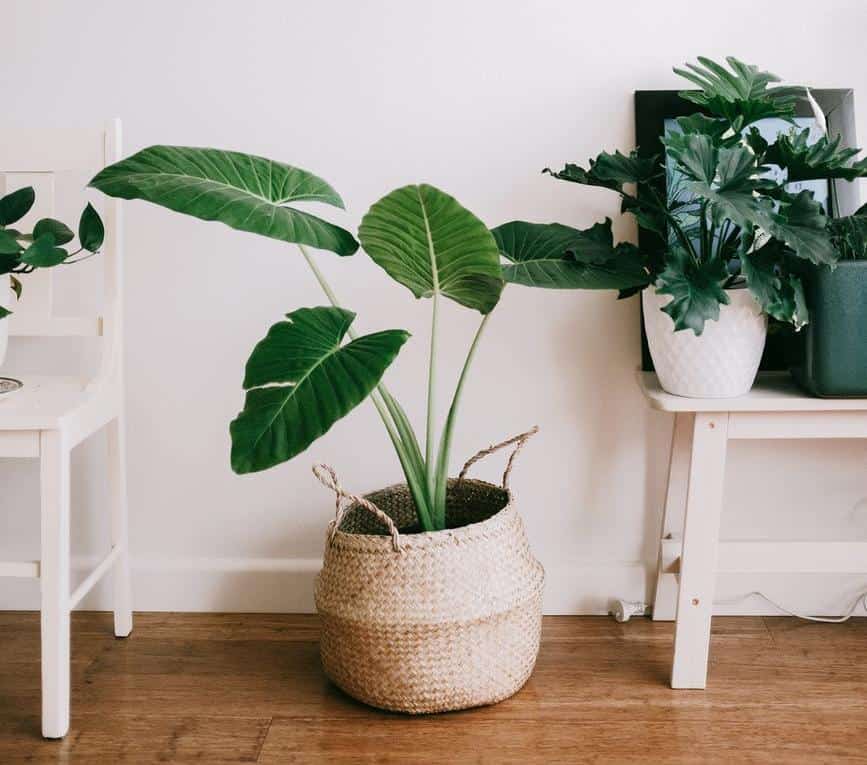
Conclusion:

“Our future is in Your Hands; You Just Have to Plant the Right Seeds.”

Being educated and responsible citizens of the world, everybody must contribute to the environmental balance restoration. How can you help to reduce air, soil, and water pollution? By growing trees and Phytoremediator plants, of course!

One ridiculous trend against our fight to save the Earth is the widespread use of artificial flowers, trees, and grasses in some areas of the world. Really? Why can’t we use real plants? Let’s get serious. When you see people using artificial plants, please mention to them that we would all appreciate their help with saving the Earth. Maybe you could start a conversation and let them know how vital phytoremediation is to all of us.

Global warming, ozone layer depletion, and the ever-increasing list of human diseases are the issues we are now facing due to the ignorance towards and unawareness of the importance of flora and decimating effects of deforestation.

Please plant some more plants on your land wherever possible, eliminate bare ground and minimize hard surfaces. Keeping this Earth covered in plant material is our best bet for long-term survival.

Please check out the Plant a Billion Trees Campaign.

References:

Bringslimark, T., Hartig, T., & Patil, G. G. (2009). The psychological benefits of indoor plants: A critical review of the experimental literature. Journal of Environmental Psychology, 29(4), 422-433.

Cetin, M., & Sevik, H. (2016). Measuring the Impact of Selected Plants on Indoor CO 2 Concentrations. Polish Journal of Environmental Studies, 25(3).

Qin, J., Sun, C., Zhou, X., Leng, H., & Lian, Z. (2014). The effect of indoor plants on human comfort. Indoor and Built Environment, 23(5), 709-723.

Kim, K. J., Khalekuzzaman, M., Suh, J. N., Kim, H. J., Shagol, C., Kim, H. H., & Kim, H. J. (2018). Phytoremediation of volatile organic compounds by indoor plants: a review. Horticulture, Environment, and Biotechnology, 59(2), 143-157.

Torpy, F. R., Zavattaro, M., & Irga, P. J. (2017). Green wall technology for the phytoremediation of indoor air: a system for the reduction of high CO 2 concentrations. Air Quality, Atmosphere & Health, 10(5), 575-585.

Irga, P. J., Pettit, T. J., & Torpy, F. R. (2018). The phytoremediation of indoor air pollution: a review on the technology development from the potted plant through to functional green wall biofilters. Reviews in Environmental Science and Bio/Technology, 17(2), 395-415.

Gawrońska, H., & Bakera, B. (2015). Phytoremediation of particulate matter from indoor air by Chlorophytum comosum L. plants. Air Quality, Atmosphere & Health, 8(3), 265-272.

Irga, P. J., Torpy, F. R., & Burchett, M. D. (2013). Can hydroculture be used to enhance the performance of indoor plants for the removal of air pollutants?. Atmospheric environment, 77, 267-271.

Torpy, F. R., Irga, P. J., Moldovan, D., Tarran, J., & Burchett, M. D. (2013). Characterization and biostimulation of benzene biodegradation in the potting-mix of indoor plants. Journal of Applied Horticulture, 15(1), 10-15.

Dullinger, I., Wessely, J., Bossdorf, O., Dawson, W., Essl, F., Gattringer, A., … & Dullinger, S. (2017). Climate change will increase the naturalization risk from garden plants in Europe. Global Ecology and Biogeography, 26(1), 43-53.

Methods of Organic Pest Control

garden pest

Whether you are a landscaper or a gardener, at some point, you are liable to come across a few pests in your yard. How you treat these pests is up to you, but I would strongly suggest that you resist the urge to douse your yard in hazardous chemicals when there are excellent organic methods.

Organic pest control methods can give you the benefit of reduced pests and the comfort of knowing that chemical treatments aren’t harming your family and pets. If you typically use chemicals to treat pests, please have an open mind and consider these organic pest solutions the next time you have a problem.

Hazardous, human-made chemicals are contaminating our Earth. Most of these are untested for human safety. Many in the landscape industry are dangerous to many other animal species and only minimally effective on the pests they target. Considering the links to cancers, cognitive and developmental function, and disease, we should all be very wary of any chemical that comes into our homes or yards. Chemical manufacturers are in business to make money; they are not in business to ensure our safety.

Dangers Outweigh Benefits

After many years of landscaping, I cannot recall an instance where an insect infestation has done any serious damage to a yard. Here and there, you will see chewed and eaten leaves or groups of plants that insects of one sort or another have recently damaged, but the truth is, while it may be irritating to see this damage, it rarely kills the plants, and it never really has any long term effects. Compare this to the chemicals that poison our water and land for decades to come, and I think you’ll realize that you have an obvious and easy choice.

The use of chemical pesticides will often kill the predatory insects that would otherwise prey on the insect you are targeting. If we step back and let mother nature work, we will see that she is quite efficient and balanced without our intervention. The dangers of chemical pesticides far outweigh the benefits.

Planting a diverse and healthy landscape of plants that are native to your area is your best defense against pests. Healthy and happy plants can usually take care of themselves. Many of our pest problems come from overcrowding of single species planting beds and plantings that are not suited for our hardiness zone.

In organic pest control, you use natural materials or living organisms that are not harmful to the environment. There are different control methods such as mechanical, physical, and biological pest control. If you want to be earth-friendly and save some money, go for home remedies or use beneficial animals and insects to eliminate pests.

What is Organic Pest Control?

There are many techniques and methods to control pests and give your plants a healthy environment. Here are the most common methods of organic pest control.

  • Mechanical and physical methods
  • Biological control
  • Home remedies
  • Predatory animals and insects

For a great education on organic pest control and more information than you will ever want to know about how chemicals are bad for us, check out this great publication by Stephen Tvedten; The Natural Pest Control Manual.

Or, visit his website, which has a boatload of great free content: http://www.stephentvedten.com/

Mechanical and Physical Methods

We use traps or barriers to restrict or remove pests in physical or mechanical pest control methods. Whether it is the manual removal of insects or the use of barriers, it is all removal.

The Manual Methods

  • Handpicking works best with easily seen pests like aphids, scales, mealy bugs, caterpillar, snail, Japanese beetle, and cutworms; handpick the adult insects to eliminate the chance for them to lay eggs and worsen the problem.
  • Crush any eggs that you can find.
  • You can often use a hose to spray down plants and leaves to discourage many leaf-dwelling insects. Spray enough to remove pests but not enough to damage leaves.
  • Shaking the plants will often cause the insects to fall off, making them easier to collect.
  • Depending on your location, you could introduce some chickens to your gardens, which would help you manage your bug population.
  • If plants or parts of plants are extremely infested, remove that part and drown in water or burn to eliminate the pest.

Sticky Traps

The use of sticky traps are also an effective method to control insects outdoors and indoors. Insects are attracted to colors, and we can use this attraction to trap them. We can use a rigid material of a particular color in these traps and coat them with a sticky substance such as corn syrup or petroleum jelly to catch the insects. You can either buy a prepared sticky trap or make your own. If you are buying them, please buy the non-toxic organic ones.

If you want to reuse your homemade sticky traps, cover the colored trap with clear plastic before making it sticky. This way, when the sticky gets all full of bugs, you can pull off the plastic and reuse the rigid material.

Hang them near your affected plants and watch them fill with bugs.

With any sticky trap, you may want to put it in some sort of wire mesh container so that you catch plenty of bugs, but not birds. Sticky traps in your garden will catch birds that were likely there to eat the bugs from your plants.

Colors

  • Yellow traps attract fruit flies, whiteflies, mealy bugs, thrips, leaf miners, leafhoppers, scales, and midges.
  • White traps are suitable for flea beetles, cucumber beetles, whiteflies, and plant bugs.
  • Light blue traps lure thrips.
  • Black traps attract horse flies and deer flies.

Floating Row Covers

Floating row covers are one of the best methods to control pests in your lawn or garden. These covers are translucent and porous polyester fabrics that prevent insects’ entry. If your garden is under the influence of mobile pests like cabbage moths, beetles, Mexican bean beetles, flea beetles, aphids, or bugs, floating row covers are best to keep the pests away from your plants.

You can have either lightweight or heavy floating row covers depending on your choice or need. In fact, both of these are easy to use. As these row covers are more like blankets and let in 8O% of the light, the lighter ones are good for summer as they do not cook the plants. When the season gets colder, use heavier covers that will retain warmth to give plants suitable growth conditions.

When using row covers, be careful not to restrict pollinating insects. Only use them temporarily during peak infestations.

Pheromones

Pheromones are specific chemicals that insects secrete to communicate with others. These are strong smells that insects use as a signal to attract mates and warn off predators. Scientists used these scents and duplicated them to make traps. When any moving pest passes nearby the trap, it is attracted towards it and is trapped. One of these traps’ limitations is that they are sex traps as they mostly attract male insects.

Pheromone lures moths, armyworms, cabbage loopers, corn earworms, cutworms, tomato pinworms, and European corn borers. It can also attract other stinging insects.

Tips for using pheromone traps

  • Each trap is designed for a specific insect. It will not be sufficient to use a single trap for all insects. When using pheromone traps, make sure you have selected the right pheromone for the insect you are trying to control.
  • The traps are not safe for pets and children, so keep them out of their reach.
  • Traps are not weather resistant and check after any storm or winds for repair or replacement.
  • Don’t forget to wash your hands after using pheromones, as pests may follow you for the smell you carry after working with the traps.
  • It is essential to read the label before use. Some of the traps are specifically designed for the outdoors and need to avoid using indoors.

Biological control

Biological control is a way of controlling insects and diseases with the help of other organisms. It is one of the safest organic pest methods and has many ecological benefits.

Bacillus Thuringiensis

Bacillus thuringiensis is soil-borne bacteria used to kill specific insects or a class of insects. This is usually available in liquid or powder that needs to be diluted before use. You can also get some products in the form of granules or dusts to directly apply to the infected plant.

The bacterium releases a protein in the insects that cause their death. If you use Bacillus as pest control, make sure you are using the right type as each type of BT is useful only for a particular insect or a class of insects.

BT var. kurstaki is one of the most common strains that kill a wide range of insects like corn worms, tomato hornworms, cabbage loopers, caterpillars, and European corn borers.

Trap Crops

Trap crops are used to lure insects away from the plants we are trying to protect. We choose a plant that we don’t care about but that the insect prefers to eat over the plant that we do care about. This way, our preferred plant can remain insect-free, and the insects can eat the trap crop. Once the trap crops attract a good amount of pests, they can be destroyed, pests and all.

For example, if Cucurbit (melons, squash, cucumbers, gourds) is your preferred plant (cash crop), you can plant a Blue Hubbard Squash perimeter as a trap around the Cucurbit.

Similarly, you can grow Sunflowers around your tomatoes as a trap crop for leaf-footed bugs.

Home Remedies

When you don’t want to use mechanical or biological means of pest control, home remedies are the ultimate and instant solution to tackle pests. Here are some common treatments that you can apply at your place and enjoy pest-free plants.

Use Coffee Grounds

Insects and pests do not like coffee grounds, and it repels them. Ants especially hate coffee grounds. If there is an ant’s infestation in your lawn, laying down, some coffee grounds can help.

Apple Cider Vinegar

Apple cider vinegar is best to be used against fruit flies. Fill about half of a bottle with the apple cider vinegar and place it near the plant. When using this home remedy, make sure the bottle allows the flies’ entry but is narrow from the top, and flies cannot get out once entered. A funnel-shaped bottle works well for this job. The fruit flies love to hover over fruits, and their smell attracts them. When you make a trap, flies will be drawn and trapped in the bottle.

Tinfoil and Bananas

You can use banana peels to deter aphids in your garden. Place some banana peels under the top layer of the soil near the plant’s base. You can also place a tin or aluminum foil over the ground and then place peels.

Fly Bait / Sugar Baits

You can mix 90% honey or molasses (the fermenting kind) and 10% food-grade Diatomaceous Earth as an excellent fly bait.

Many types of homemade sugar baits and traps can effectively kill pests, including mosquitoes. With the recent concerns of diseases spread by mosquitoes, much research has been done as of late. Creating a sugar-water mix with about 1% Boric acid has been proven effective against mosquitoes and many other insects.

DIY Mosquito Trap

Check out this simple video for how to create your very own do it yourself mosquito trap

Stephen Tvedten suggests that adding some yeast to the above-mentioned sugar baits makes them even more attractive to biting mosquitoes.

Boric acid comes from Borax, a naturally occurring compound, and has been used as an insecticide and cleaning agent. It has been found to kill many insects and is considered generally safe because it occurs naturally. Studies indicate that in very high doses, it could be dangerous, so please keep it away from pets and children.

Neem oil

Neem oil is a commonly used remedy to eliminate insects and pests. As it is the extract of the tree and inhibits insects’ growth cycle. You can spray the infected plant with neem oil, and it retards the growth of young insects and the insects that proliferate. It is effective against squash bugs, Mexican bean beetle, aphids, caterpillars, and Colorado potato beetles. Available here.

Tweetmint All-Purpose Enzyme Cleaner

This product contains no harmful chemicals and is an effective cleanser and an effective pest deterrent. This product is sold super concentrated and must be diluted. It contains a specially formulated enzyme that can kill many insects or arachnids by dissolving their exoskeleton. It should only be used sparingly when you have a bad infestation to avoid negative effects on some of the more beneficial insects in your garden. You can buy it Here.

Smite & Banish

Supreme growers have created an all natural pesticide product using plant oils. It works for spider mites, powdery mildew, fungal diseases, mosquito larvae, chiggers and thrips. Check it out here.

Spinosad

This is a natural substance made by a soil bacterium that can be toxic to insects. It is a mixture of two chemicals called spinosyn A and spinosyn D. It is used to control a wide variety of pests such as thrips, leafminers, spider mites, mosquitoes, ants, fruit flies, and others. You can see it here.

Beneficial animals and insects for pest control

When it comes to pest control, animals and beneficial insects come first to fight damaging pests without affecting nature. Some of the animals that are widely used are

Dogs

Dogs can help keep your yard relatively free from mice, rats, squirrels, gophers, and rabbits. They certainly won’t rid your yard of these pests, but they will definitely discourage large populations.

Frogs

Some people consider frogs a nuisance due to their sound, but some folks find it downright relaxing. Frogs are outstanding predators and consume hundreds of insects daily. If you do not have frogs in your garden, invite them by building a pond.

Toads

Toads have a diet very similar to frogs, so rest assured they are helping to control your insect population if you see these in your garden.

Parasitic nematodes

Nematodes are tiny microscopic roundworms that live in soil and kill other soil-dwelling pests such as armyworms, root maggots, cutworms, squash wine borers corn earworms.

They are called parasitic because they inhabit the target insects’ bodies and end up killing them, usually within a day or two. These all-natural soil friends are a really effective and affordable way to protect our gardens from certain pests.

Nematodes occur naturally in the soil, but you can purchase more to add to your soil to boost its resistance to pests.

When ordering, you will get dormant nematodes in a moist medium that you can store in the refrigerator for about 4 months. These are living little beings, so you will want to use them as soon as possible. They love moist and warm soil.

Conclusion

As you can see, we have many, many natural and safe solutions for a comparatively small problem. Let’s not destroy our lives and our earth with hazardous chemicals to kill a few bugs in our yard. Pests are not the end of the world, stay calm and try to let mother nature take her course. Oftentimes, with or without help from us, Mother Nature will take care of it. The end of the world is the end of the world. I’m sure that none of us want to see that any time soon!

Organic Flower Gardening

flower garden

A healthy organic flower garden, brimming with life, can be within your reach. Billions of microorganisms will be present within the soil, and pollinators of all varieties will call it home. If you want your very own organic paradise for butterflies, birds, and blooms alike, follow these simple pointers for assured success.

Prepare Your Site for Planting

Healthy soil is alive with an out-of-this-world population of microorganisms. The old way of prepping our ground would have had us tilling, plowing, and chopping our soil, damaging many of these beneficial organisms. Research has indicated that layering our gardens with organic matter for the winter and then planting right into the layers will result in a much healthier soil structure overall.

No more tilling and breaking up the soil, instead use what they call the lasagna method of gardening. Just like creating a yummy pan of lasagna, you are layering organic materials, which over time, creates a very soft and fertile ground in which to plant.

Where to Start

Existing Garden

The stage that your beds are currently at will determine how you approach this new method. If you have old, established flower beds with a manufactured weed barrier, you’ll want to remove the barrier, as this will only complicate your gardening over time. Instead, start to build up thin layers of multiple different materials to create your very own mini “lasagna” in-between your existing plants. Don’t pile deeply against the plants, which will only promote rot. Over time, as your surrounding soils improve, you will likely want to pull up the old plants, divide them and plant them back into the rich new blend that you have created.

New Garden

If you are starting a new bed where there was grass or other plants, you will want to build up many varying layers of organic material to smother the existing plants and plan to plant your flowers in about a year when things have decomposed a bit. You can always help the decomposition process by watering when the area gets dry and by applying some good quality, rich soil or aged compost over the top of your “lasagna.” Kind of like the cheese!.

Making Lasagna

You don’t want thick layers of any one type of material, and if you are covering vigorous plants and weeds, it will help to lay down a layer of cardboard to snuff out the existing unwanted plants. Then add a few inches of one nitrogen-rich material, a few inches of the next material, etc., until this “Lasagna” is as thick as you want it. The thicker, the better, but depending on your yard, you’ll probably want a minimum of maybe six to ten inches. Top it all off with some carbon-rich materials to discourage flies that may be drawn to the nitrogen materials. The layers and diversity of the materials are the keys to quick decomposition.

Remember, your “Lasagna” will shrink considerably over time, so don’t be afraid to pile it high at the end of the year. Next spring, it will be quite a bit lower.

  • Carbon-rich materials include wood-based materials like paper, cardboard, leaves, twigs, wood chips, sawdust, etc. Think brown and relatively dry.
  • Nitrogen-rich materials would include the more green and wet stuff like grass clippings, plant cuttings, fruit and vegetable scraps, aged manure, etc. It’s the stuff that will get stinky over time.

When spring does finally come to your area of the world, you will be ready to plant. It will be tough to resist the urge to till, but trust me that this garden soil will be the nicest that you have had the pleasure of planting into over time.

Plant Choices

Be sure to plant flowers well suited to your area’s light and moisture conditions. If you are planting perennials, be sure only to choose plants that are well suited to your planting zone. Resist the urge to push the limits; this will only result in frustration and more maintenance. If you are planting an annual garden, then all bets are off; you can go crazy and see what wild things you can get to grow, knowing that this one summer is all that you can hope to get. Then, at the end of the season, those annuals just become nitrogen-rich material for next year’s garden.

Sun or Shade Levels

Determine how many hours of sunshine your planting area receives every day so that when it is time to choose your plants, you choose the correct ones. Any plants that like full sun will need 6 to 8 hours of sunshine a day. Plants that prefer part sun can thrive in 4 to 6 hours of sunshine per day. A plant that likes partial shade will do well with only a few hours of direct sun per day, while the shade lovers want the shade with very little if any direct sun.

Plan Strategically

Decide if you want your flower garden to be formal with symmetrical groups of plants in neat and tidy groups, or if you prefer the more natural look where there is no clear pattern, and it looks like mother nature herself could have laid it out. Realize that the more formal look will require more care in planting and more care over time to maintain the specific look, while the informal, natural look will basically require you to plant it and leave it alone (other than weeding, of course).

Plan for Continuous Blooms

This is the holy grail of landscape planting. Whenever I walk a property with a client, they inevitably say,” I would like it if I would have blooms all season.” This is not a bad goal, and in some parts of the world, it is no problem at all. Here in Wisconsin and many of the world’s colder areas, it is a real challenge.

This leads many people to choose their plants based on which ones look the prettiest and claim they will bloom at the correct time rather than which ones will survive in their yard. Bloom times claimed on plant labels are approximate and will not always be accurate every year. Plant blooms will change depending on many environmental factors.

To get the most out of your garden, always choose plants that are well suited to your hardiness zone and do your best to select a variety of plants and evenly spread the varying bloom time throughout the garden so that it is balanced for the entire season. You will never get it perfect the first time, so I would suggest planting rather sparingly, which will leave room for additions and changes as you learn how the plants grow and bloom in your yard under your conditions.

A Sure Thing

One sure way to ensure year-round blooms is to plant annual flowers. You can, of course, plant your entire garden in annuals and change it every year as you see fit. Or, you can plant a base structure of some of your favorite perennial choices and then leave open ground areas where you can choose and plant bunches of annual flowers every year to both change the look and to even out the desired year-round blooms.

Big Beds

If you are planting a huge bed, make it easy on yourself and create more visual interest by placing a few stepping stones or a pathway of wood chips. This will allow you to easily tend your garden, even on the wettest of days, and creates some structure and interest.

Perspective

When laying out your garden, regardless of size, consider your viewing perspective. If your bed is viewed from all sides, you will want to plant taller plants near the center and shorter plants near the edges. This will give you the best view from all sides. Alternatively, you can mound the ground in the center to allow you to lant same sized plants and still have a great view of all of the plants from all sides.

If your bed is along a lot line and will only be viewed from one side, plant the tallest plants at the rear and shortest in front. Berming can also be used in this instance if same-sized plants are desired.

You’ve Got Options

If your soil is rich and you plant the right plants for your garden conditions, you shouldn’t have to worry about using fertilizers in your garden. If you notice yellowing leaves, you can always add a bit of compost to your bed. Don’t be afraid to continue stacking your “lasagna” during the growing season. It will only help your garden this season and the seasons to come.

I understand that not everyone has enough time to create a proper and ongoing “lasagna’, so if you are in that group, you can amend your soil-building efforts with a bit of help. There are many organic fertilizer manufacturers, but be sure to read the labels carefully. Don’t just look at the large title; actually, read the fine print to ensure you are not bringing any hazardous chemicals you’re your environment.

If you decide to hire a professional, be very careful. Many contractors out there want to get the job but want to do it their way. The old chemical way is easier. It’s easier and cheaper to buy chemical treatments, and that is what they have been doing for years, so they are reluctant to change. I have seen contractors walk through a yard and discuss a project with a client, agreeing to all of the client’s requests and then doing it their way, regardless of the client’s wants.

Contractors like this do not deserve your business. If you are going to hire someone, make sure that your trust them, but do follow up. I have seen online ads entitled organic lawn treatments only to click through to their website to see nothing but chemical options and no talk of even considering organic alternatives.

If we are committed to organics, we need to be strong and confident in our decisions.

Seed or Transplant?

It doesn’t matter if you’re planting seeds or transplanting plants; both can work just fine in your new organic garden. The only downside to store-bought plants is that they have likely been grown and raised using chemical fertilizers. There are certified organic growers, but they aren’t as numerous, and you can expect to pay significantly more per plant because certification is difficult and more expensive for the growers. The seeds will be cheaper, but they need a little bit of patience from you. If you choose to plant seeds, choose non-GMO seeds that are organically certified, and have patience.

You may be able to find a good local gardener who grows organic. This would enable you to buy locally grown plants that have been raised in your local zone, which will make for a very stress-free transplant for the plant.

Organic Control of Pests

A healthy organic garden has a large insect population, most of which are beneficial. It is estimated that less than 10% of the insects in most gardens are harmful to the plants. A vigorous, healthy plant can usually combat pests without many problems.

Such a small pest problem certainly doesn’t require much of a response from us, and it certainly doesn’t warrant the use of hazardous synthetic pesticides.

Also, use caution; even if using organic pesticides, you must use great caution. Just because a pesticide is considered organic doesn’t make it safe. Organics pesticides can still kill or damage good and helpful insects like bees. You are usually better off ignoring a few pests and letting mother nature take care of them. If you use an organic pesticide, be sure to read the label and thoroughly research the product before using it in your garden. Also, be sure that you figure out whether you really Have a problem. The damage you see might be a monarch caterpillar eating the leaf of a milkweed plant, the food that it needs to become an adult butterfly.

If you have a pest problem, try to control pests naturally and organically by attracting and encouraging beneficial insects that feed on them. ““Natural enemies” such as ladybugs, predatory wasps, earmuffs, and killer bugs are natural pest control. Give these garden helpers the plants that they love, like Yarrow, Golden Rod, Sunflower, and Golden Alexander.

Conclusion

With some commitment, patience, and hard work, we can have a fabulous and self-sustaining organic flower garden. We can have all of the beautiful flowers and none of the hazardous chemicals. If more people committed to this gardening approach, our world would be a better and safer place.

Organic Lawn Care: How to Treat Your Lawn Organically

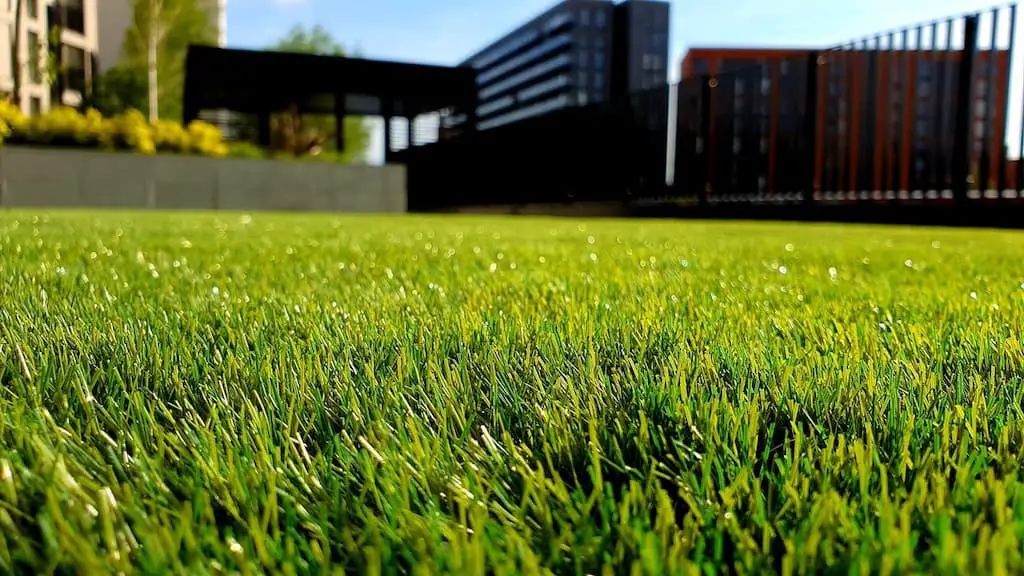
well-maintained lawn

Building organic lawns or shifting to organic lawn care is an emerging trend. The new generation is working hard to be more environmentally conscious and responsible. Making the shift to, or at least heading in the direction of organic lawn care is something that every homeowner can do without a great deal of trouble to make a positive impact on this earth’s health.

Homeowners dump somewhere in the ballpark of 80 million pounds of chemical pesticides on their lawns each year. When comparing pounds per acre, homeowners use more chemicals than farmers. The sad part is, they aren’t producing anything but green grass with all of those chemicals.

Somewhere along the way, the lawncare and chemical industries have convinced homeowners that it is okay (or even necessary) to poison our earth to have a beautiful green lawn. When did we go from taking pride in our property and caring for our families to poisoning the land and ignoring the consequences?

By definition, organic lawn care is managing a lawn without the use of any synthetic fertilizers or pesticides. Organic lawn care requires thoughtful actions and a commitment to follow through. It is not easy, and it tends to cost a bit more if you purchase all of your organics commercially.

Benefits of Organic Lawn Care

Organic lawn care is not only more environmentally friendly and safer for the earth, but over time, your lawn will evolve to be less maintenance and more hardy than ever before. Thank you for exploring the benefits of organic lawn care.

Reduction in Chemical Exposure

Organic lawn care is better than chemical lawn care because it doesn’t involve all of those chemical-based insecticides, fungicides, and weed killers, which are hazardous for the lawn and very harmful to the environment. Organic lawn care is every person’s opportunity to make a difference for the better.

To truly have an organic lawn, you must only use completely natural products to nurture your soil and grass. This will take some getting used to, especially if you are one of those people who lays down the weed and feed after every mowing.

If you have been paying one of the many chemical lawn care companies (almost all lawn companies use chemicals), you can expect them to send over their best salesperson to convince you that their products are completely safe and that you should continue using their services. You need to do your research and understand why these chemicals are so dangerous. Their livelihood depends on you and your lawn remaining chemically dependant.

Through organic lawn care, you can dramatically reduce your family’s exposure to chemicals. By treating your lawn organically, you will eliminate the need to worry about precautions or avoiding the yard after treatment. Organic fertilizers used in the treatment are much safer than chemical-based fertilizers because they are natural. Your family, friends, and pets will thank you.

Revitalization of the Ecosystem

The process of organic lawn care revitalizes the ecosystem of your lawn. Chemical fertilizers are made up of compounds that deprive the soil of the vital nutrients your lawn needs and kills off many of the beneficial microbes that are there to help your lawn. On the outside, the lawn may look fine and healthy, but under that thin green veil lies a deprived and vulnerable ecosystem, making the lawn susceptible to many harmful microbes and pests.

Organic treatments improve your soil’s overall condition and enable it to keep its natural nutrients and microbes intact, the way that Mother nature intended. Overall, organic lawn care may be the one step that you can take to have the most significant impact on your property and your family’s health.

Moreover, you will be doing your part to stop these hazardous chemicals from leaching into our groundwater, lakes, and rivers. Organic lawn care saves the ecosystem from this problem as organic fertilizers consist of natural materials that release slowly into the soil and take care of the ecosystem.

Improved Soil Function

It doesn’t happen overnight (you’ve been chemically treating for years), but your yard will adjust to the organic treatment and will become healthier and more robust than ever. Conditioning the soil organically enhances soil function. Rather than depleting, organic fertilizers will help build up your soil’s ability to retain water and nutrients. Organics enable the ground to hold all the vital microflora, rejuvenating the soil’s immune function. The natural microflora of the soil is essential to a healthy ecosystem.

Transitioning to Organic Lawn Care

Shifting from chemical lawn care to organic lawn care will take time, but it is worth it. Over time, your lawn will be healthy’ lush, safe, and low maintenance.

Hiring it Done

The easy way to do this would be to find a lawn care company specializing in organic lawn care. If you can find the right company and don’t mind paying for the service, this will be your easiest route.

Be aware that anyone can advertise for any keyword. There is no google police making sure that they are advertising truthfully. If I google search organic lawn care in my area, the first few ads that pop up are chemical lawn care companies whose websites make no mention of organic lawn treatments. You need to do a bit of searching and find someone who can come out to your property and discuss your options thoroughly. You want someone that specializes in this.

If you are going to hire the work done, be prepared to pay more. Organic products cost more than chemical alternatives.

In the long run, it will level off, but at first, there will be much work to be done to make up for years of chemical treatments.

Do it Yourself Guidelines – The Short List

If you choose to do it yourself, it will take less financial commitment but more mental and physical commitment. First, stop using harmful chemical-based products in your lawn and shift to organic fertilizers. Do your research and follow the directions. The applications will be a bit different but similar.

Perform a Soil Test

I’m not a big tester sort of guy, so I would likely skip this part, but if you are the type who likes a clear path and sound data, then you might want to get a soil test. Usually, you can find a place where you can send in a bit of soil and have it tested relatively cheaply. In our area, the local university does soil tests for around twenty bucks, and you get back your results and some useful info on what steps to take next. Alternatively, you can test your soil by buying a soil test kit. This might be the way to go if you feel that you should test fairly often.

As I said, I’m not a big tester, but I’ve been doing this for a long time. If you spend a bit of time out in your yard looking at the soil and the grass that you have growing now, you will likely be able to figure out what to do next simply through observation.

Irrigation

If you have a sprinkler system and it’s watering every other day or so, start to wean it off a bit. Your lawn will be healthier with less frequent but deeper watering, which encourages deep root growth. This makes your lawn healthier. Frequent watering and fertilizing schedules are a staple of the chemical and irrigation industries. This makes your lawn dependent on their services.

Aeration

If your soil seems hard and compacted, it will benefit from core aeration. Rent yourself a good core aerator and get it done.

Composting

Once aeration is done, amend your topsoil by spreading a compost layer over it. Not so deep as to bury the blades of grass. An inch or two will do for now. Find a good quality, aged compost.

Mowing

Set your mower high. Mow at the height of three inches. Tall grass has deeper roots and shades the soil, keeping down weeds and holding moisture.

Fertilizing

Keep an eye on it. If it starts to look yellow, it likely needs some fertilizer. You can do another round of compost or use an organic fertilizer such as Garden WOW because it is entirely organic, and it helps control weeds through the use of corn gluten.

A Deeper Dive on a Few Topics

Thatching

Thatchers remove the layer of dead grass that is lying on top of your soil. Thatch happens because of overwatering and chemical pesticides and fertilizers. Once your lawn is organic, this won’t be an issue.

I would not bother thatching since as soon as you start adding compost to your lawn, that thatch will break down and provide more nutrients.

Aeration

Aeration is recommended and needed on most residential lawns for several reasons. First of all, it is likely that your developer stripped off all of the natural topsoil and sold it when he started your subdivision. Then, he ran heavy equipment over the area for months or years to shape the land and build the houses. Then, he brought in as little topsoil as he could get away with and still grow grass. He took that topsoil, ran a bunch of equipment over it, and then seeded it.

You have likely been overwatering it and applying chemical fertilizers, and then it’s been cut with a big zero-turn mower once a week.

This is why core aeration machines were created. Core aerators are motorized machines that you run all over your lawn to pull out small plugs of the hard topsoil. The device leaves the plugs on top of the lawn and leaves the holes open. This allows moisture and nutrients to get down into the soil, which, over time, will help your lawn.

Core aeration is a great first step when you begin your journey toward an all-organic lawn. Core aerate, spread compost, and then water deeply.

If your lawn is very compacted, you may want to do this spring and fall for a few years, but once your lawn has adapted to its new organic lifestyle, it probably won’t be necessary.

Composting and Topdressing

Compost is broken down organic matter that will help protect and nourish your soil. Apply it right after you aerate, spread it evenly, and then water deeply.

If you are starting a new lawn, mix it into the top 4 inches of topsoil before you seed to give your lawn a good start.

For your established lawn, topdressing with compost a few times may be sufficient; other times, topdressing and overseeding may be warranted.

Compost enhances the growth of vital microbes, which fix nitrogen from the air and release the right spectrum of nutrients in the soil. Organic materials help the soil hold in moisture and plenty of oxygen needed by the roots and the microflora.

Just look at what you’ve got. If the existing lawn is in terrible shape and it has been cut very short, and the soil is very hard, then you’ll likely want to overseed. If the grass looks relatively healthy and tall, just rake a bit of compost in and let it grow. As with any plant, grass doesn’t want to be completely buried, so multiple thin layers of compost with a few weeks in between are better than one thick layer, which may cause the grass to struggle.

Dealing with Pests

Lawns can occasionally face the problem of grubs and other pests. The chemical guys will have you out there digging holes, counting grubs, and applying deadly chemicals. Grubs and other pests are part of nature. They come and go, just like everything else. Over the years, I have never seen a huge problem. The worst case is when animals come into your yard and dig them up to eat them. This can leave a bit of a mess, but that heals with time.

Pests in your grass are typically not a concern. Keep treating organically, mow tall, water deeply, and your lawn will be able to withstand almost anything. Weak, dependent lawns are easily turned, but an old, established organic lawn is very hard to kill. My advice is to patch any holes with some compost or soil and a bit of seed and just ride it out.

Avoid Raking

Avoid raking and bagging the fallen leaves. The landscape industry has created the cycle of removing leaves and then bringing in fertilizer as a great way to ensure extra work both spring and fall.

It makes much more sense to let the leaves decay and turn into fertilizer. Let work and less cost. Just mow the leaves with your mulching mower and leave them. Decaying leaves are compost.

Leaves cause problems only when they smother plants.

Deep layers of wet leaves on top of tiny plants can kill plants. If you have many trees, and the leaves get deep, you may need to remove some of them and use them in an area of your yard where you can use a bit of extra mulch, like under some shrubs or larger trees. Just don’t pile the leaves up at the plants’ base, as this will promote rot and animal chewing.

Ongoing Organic Lawn Maintenance

The first few years might be struggle, depending on how bad your lawn is now, but once your soil is back into healthy shape and your grass is adjusted to the average rainfall for your area, the maintenance will be very slight. Over time, you will need to fertilize less, if at all.

Continue to mow no lower than three inches and cut when it gets around four inches. Keep your blades sharp. Sharp blades let the grass recover more easily. Mow when the grass is dry so that you don’t mat it down. A lighter mower is better since it compacts less and disturbs less. If you have a large yard and need a rider, go for wide tires to disperse the weight, turn gently and alternate cutting patterns to avoid wheel ruts.

Your lawn probably won’t need watering once it has been weaned off of the sprinkler system unless you live in a very dry area where grasses wouldn’t grow naturally. If there are big grassy fields in your part of the world, you shouldn’t need to water yours. Healthy grass will go dormant if it gets too dry, and then it will pop right back once it rains again.

Weeds will become less and less of a problem over time. The best defense against the weeds is to have a thick green covering of healthy grass.

At first, you may want to go after weeds manually and use the suggested weed-suppressing organics, but in time they will be minimal and more diversity in your landscape will make it more hardy.

Lastly, enjoy your organic lawn and feel proud of yourself as you contribute to the cleanup of our environment.

Show your yard off to your neighbors and tell them about the lack of long-term maintenance and the money savings.

Who knows, you may start an organic revolution in your neighborhood!

The Truth About Sustainable Landscapes

sustainable landscaping

With all the attention that eco-friendly concepts are getting, you’ve likely heard the term ‘sustainable landscaping’ before, but do you know what it means? Have you ever actually seen sustainable landscaping for yourself? Well, it’s a hot topic for a reason, and we’re going to take a closer look at just what you should know. After all, you may want to look into setting up sustainable landscapes in your yard and even the yards of your family and friends.

What is Sustainable Landscaping?

Sustainable landscapes are designed to survive without a whole lot of outside interference. They can sustain themselves. Now, that doesn’t mean that you just sit back and let your yard do whatever it wants. Instead, it means that you set up your yard so that natural weather patterns will sustain it. That includes the temperatures that are normal for your area and the amount of rainfall.

If you have ever walked down the street and seen a perfectly manicured lawn with lots of pruned trees and extensive and exotic flower beds, you’ve probably really enjoyed it. But you’ve likely also seen the owners of those lawns covering their flowers and trees when the weather gets too cold or watering the lawn each day. Those are definitely not sustainable landscapes because the typical weather and conditions in the area don’t do enough to keep them looking that way.

Instead, a sustainable landscape uses things that nature itself can nurture. If you live in a colder climate, it means designing your yard with hardy plants that will survive the colder weather. If you live in a dry climate, it means creating a yard that uses drought-resistant plants or decorations. It’s easy to determine which plants to choose. Figure out which Hardiness Zone you live in and choose your plants accordingly. What’s great about all of this is that it’s going to help improve your yard’s eco-friendliness while also making it easier for you in the long run.

Why Sustainable Landscaping?

Let’s get a little bit further into just what sustainable landscaping can do for you and the planet. That way, you can see precisely why it’s gaining so much popularity. First of all, Sustainable landscaping is a whole lot more cost-effective. You don’t need to spend a lot of money on fertilizers, irrigation systems, frost protection, or pest control. Your plants will be in the zone that is suited for them, and they will thrive in a climate that they have evolved to be in.

Once you design and sustainably plant your yard, it’s going to be ready to go—no need to do anything further. Okay, I guess there will probably be some weeding here and there, but all of the struggles to maintain plant material that is not suited for your climate will be gone, including spending money on higher water bills or protective products.

You will certainly enjoy the fact that you will need to invest less time in landscape maintenance. Because your plants are hardy in the climate that happens naturally in your area, you don’t have to worry about them struggling to survive. It means no watering the plants (once they are established), no harmful chemical fertilizers, no plastic covers and tarps to prevent freezing, etc. You can simply put them in and let them go, which frees up your time for more of the other things you would rather be doing (like spending time with family and friends or just relaxing outdoors and enjoying your yard).

More Eco-Friendly

In general, native plants and landscaping will be more resistant to the pests that are native to your area. That means you shouldn’t need pesticides to protect your plants. This doesn’t mean that there won’t be any insects or animals chewing on your plant; that’s just part of nature. It does mean that your plants will be able to handle it because they are well suited for the environment. This will help you improve the health and wellbeing of your yard and the community as a whole because fewer chemicals are getting into the air, the water table, and the ground itself. Plus, you can keep those harmful pesticides and chemicals away from your family and your pets.

Another benefit is the eco-friendly aspect. When you use native plants, you’re cutting down on the potential for harmful invasive species both in plants and the pests that they attract. You will be improving the health of your entire environment. Also, you’re going to use less water, which means you’re wasting less water, which is excellent for the environment. Finally, fewer pesticides mean that fewer chemicals are getting into everything in the environment, which improves plants and animals’ health (as well as your neighbors). Setting up a sustainable landscape in your yard is going to help the planet in more ways than you might think.

Heck, who knows, maybe if you set a good example, that neighbor of yours who is always paying someone to spray their yard with chemical fertilizers, insecticides, and herbicides might just stop in and ask you why you never have those scary warning signs posted in your yard. And if you talk to them nicely and explain how economical and easy it is to be earth-friendly, you might just start a neighborhood transformation! And then, if the neighborhood down the block takes notice and the one after that and the one after that, we might just have a revolution to save the earth that supports us! Now wouldn’t that be inspiring?

Creating Your Own Sustainable Landscape

Sustainability isn’t rocket science; if you do a bit of searching, it is relatively easy to figure out which plants will work in your yard and which will not. Check out the plant hardiness zones map, figure out which zone you live in, and then buy plants accordingly. Please resist the urge to purchase plants simply because they look nice. Buy the ones that will thrive. Anywhere that you buy plants, whether it be at the local garden center or online, each plant will have a label telling you the zone that it will thrive in and telling you how much sunlight it prefers and how much water it prefers.

By the way, hardiness zones are numbered. If you are in zone 5, for example, you can be reasonably sure that zone 5 and lower plants will survive in your yard. If you are near the border of zone 5 and zone 4, you might want to stick with zone 4 plants just to be sure. Most times, plants will have a range, such as zones 6-9. This would be a warm-weather plant, meaning it wouldn’t survive the winter in your zone 5 climate. Even if you get the zone right, be sure to pay attention to the sunlight and water requirements. Planting a dry-loving full sun plant in a wet, shaded area will almost certainly result in death. If you know your yard and pay attention to your plants, you will be setting yourself up for a low maintenance, safe, and delightful yard.

Rock it Out

Rocks are always a great addition to any landscape. No matter where you live, you can use rocks to enhance your gardens’ look. Especially in areas where there’s a lot of dryness or drought, rocks can play a significant role. If you layout a rock and hardy shrubs design, you can create a beautiful landscape without worrying about getting enough rain.

Parts of the country that are dry, desert climates, like parts of Arizona, can be great for this type of landscaping, and you’ll see a lot of it. But you don’t have to sacrifice to have rock landscaping. You can create unique and stunning landscapes with different colors and styles of rocks. Rocks don’t care where they are, so feel free to import exotic rocks into your yard. They survive anywhere!

Make it Your Own

The truth is, there are many different ways that you can create a sustainable landscape. You will want to do your research and spend some time out in your yard getting a feel for things. Pay attention to the shady and sunny spots, the wet and dry spots, etc. Understand how the sunlight changes throughout the day and the year. If you pay attention to your environment and do your research, you can create a sustainable masterpiece all on your own.

Mother Nature Can Help

You can also improve your yard even more by paying attention to Mother Nature. Runoff and drainage patterns through your yard are important factors to consider. You never want to impede drainage, but sometimes proper plantings and allowing the runoff to drain through properly pitched beds can eliminate erosion and keep that valuable rainwater in your yard to invigorate your landscape.

Mother nature also provides plenty of fertilizer in the way of grass clippings, leaves, twigs, veggie trimmings from the kitchen, etc. Make sure that you take advantage and create a composting area in your yard and use all of the leaves in your beds to act as a mulch. It makes no sense to remove the leaves from your yard and then buy mulch.

Should You Go Sustainable?

In short, going sustainable is an excellent option for anyone, and it’s going to help you create a cost-effective and environmentally friendly yard that your friends and neighbors will envy. After all, while they’re working hard to keep their yards looking great, yours is going to look even better, and it’s going to be much less work. What could be better than getting great benefits from not having to put in a lot of work and saving the earth at the same time?

Phytoremediation

helianthus annus

Horticulturists and Environmentalists used to call “Phytoremediation” a Blessing of God! Phytoremediation is a combination of two words: “Phyto” means “Plants” and “re-medium” means “restoring balance.”

Phytoremediation is the process of using the natural potential of plants to remove contaminants from soil or water. These are special kinds of plants often called “Hyper accumulators” because they have the ability to store high concentrations of organic chemicals, nutrients (ammonia, phosphate, nitrate), as well as heavy metals (lead, cadmium, mercury, zinc, arsenic, etc.) without showing any toxic effect on their growth and development.

Nobody was aware of hyperaccumulator plants before the 20th century. At the beginning of the 21st century, people started using these plants as indicators for mining. With the increase in research and technology, the real value of phytoextractors has been recognized.

Applications of Phytoremediation

Many countries are struggling to discover how to maximize the number of ways that plants could be used to control the prevailing water and soil pollution.

Below are some of the more typical ways that these plants are being used:

  • Restoration of dumped/abandoned metals at mining plants to avoid their discharge in soil, water, or air.
  • Revegetation of bare soils (especially those that are severely affected due to excessive heavy metal concentrations).
  • Phytoremediation has been used as an economical way to prevent soil erosion which is a global issue.
  • Hyper accumulators are under study in almost each and every tissue culture and biotechnology lab in the world. The genes in them are either studied to improve them or to transfer them to certain other plants.

Metal hyperaccumulator plants were first used as indicators for mining. They are able to translocate and absorb the contaminants, which is why they are used as “sub-surface contaminants sensors.”

Types of Phytoremediation:

Phytoextraction

It involves the uptake of contaminants and accumulation in leaves, stems, or aboveground parts of the plant. Phytoextraction is of two types: continuous or induced. In Continuous phytoextraction, the plants will slowly accumulate contaminants, to then be harvested and burned, with the ashes sold as “high-grade nutrient fertilizers (zinc ore or sphalerite or zinc blend). On the other hand, in induced phytoremediation, certain chemicals are applied to increase the bioavailability of metals and contaminants to intensify their uptake.

Alpine pennycress: This plant has an outstanding ability to accumulate zinc, nickel, and cadmium but mostly zinc. Alpine pennycress is found to store almost 30,000ppm of zinc in its leaves and stem. It is then harvested, and the ashes are sold as zinc ore.

Berkheya coddii: is another hyperaccumulator, which stores up to 3.8% of nickel in its stem and leaves. It is widely grown and has applications in the remediation of nickel-affected soil and water.

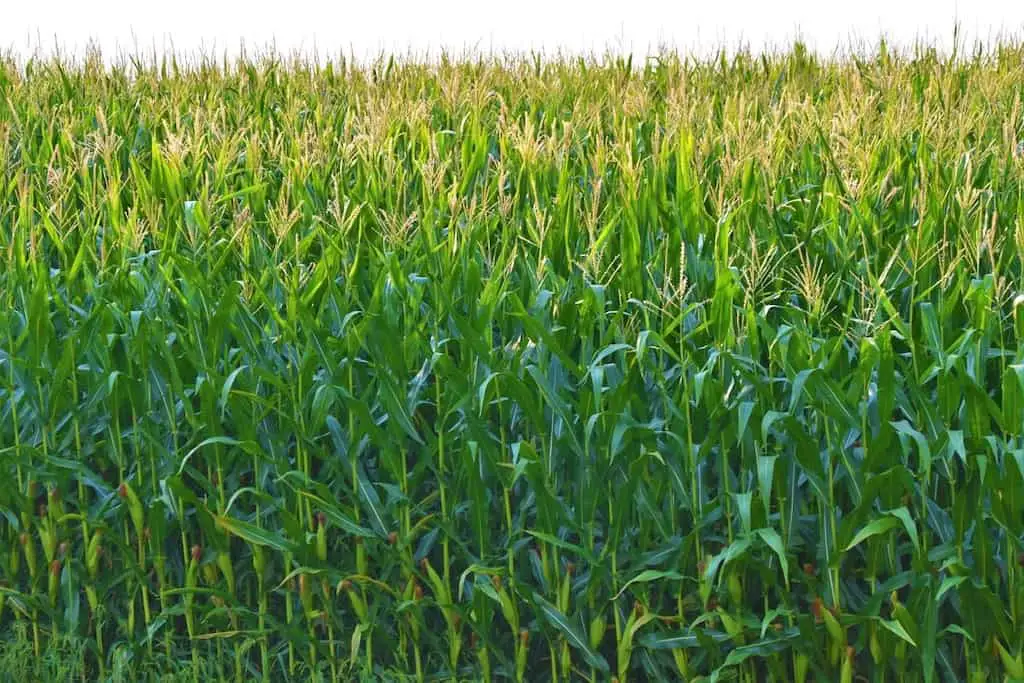
Zea mays(Corn):is found to be efficient in absorbing lead. Lead contaminated soils and water are first treated with 10 mmol kg-1 of EDTA (Ethylene diamine tetra-acetic acid) to increase this corn plant’s uptake efficiency up to 1.6% of shoot dry mass.

The only problem with hyperaccumulator plants is their slow growth rate. Although 4000 species of plants have been found to have the ability to accumulate metals and organic chemicals, for the most part, one plant can store only a single specific metal element. Nowadays, plant growth regulators are used to increase their growth.

Phytostabilization

Phyto-stabilization helps to prevent the movement of contaminants (either in soil or water) from one place to another in three ways:

  • Through plant’s root system and low growing vegetation that holds the contaminants in place, preventing mechanical transportation.
  • Trees transpire large quantities of water (more than 15 gals/day), the pumping action of plants stops the migration of contaminants in the water table.
  • Plants and microbes are combined to transform the contaminants into a non-available form, such as metal precipitation on roots.

Phytostabilizers have been widely used in the revegetation of mine tailings. Mine tailing is the waste from mining that is very toxic. Some of the most effective metal tolerant varieties of grasses are mentioned below:

Fescuta Rubra: commonly known as creeping red fescue, is a grass tolerant to varied climates and habitats as well as high concentrations of heavy metals. Sequestration efficiency of hyper-accumulators is increased by arbuscular mycorrhizal fungi (AMF). It colonizes in the grass roots and secretes glycoprotein “Glomalin” to alter the contaminant’s chemical state. For example, Cu (III) can be converted into a much less toxic form, i.e., Cu (VI), by enzymes found in the exudates of microbes.

Rhizofiltration

Classified under the umbrella of phytostabilization, Rhizofilteration uses the extensive root system of plants for contaminant filtration. For example, “Helianthus annuuswere used in a pond near a Cherbonyl; within one week, these sunflowers hyper accumulated several thousand times of cesium and strontium.

Agrostis tenuis (Colonial Bent grass): A.tenuis is tolerant of lead, copper, arsenic, and zinc. According to a study by Porter and Peterson (1975), a single bentgrass plant can hyper accumulate 150-1100mg As/g of dry mass. It is often planted near mining sites, sewage wastewater cleaning plants for the revegetation of bare soils.

Phytovolatilization

In phytovolatilization, plants absorb the contaminants, convert them into volatile form, and released it into the atmosphere. The use of plants in the removal of gaseous pollutants from soil and water is a common practice first started in China. Mercury is the primary metal that this process has been used for. On the other hand, selenium, arsenic, methyl tert-butyl ether, and trichloroethylene are also removed by plants.

Indian mustard: Commercially planted around oil wells, power plants, and mining operations, for selenium removal, the plant takes selenium and converts it into dimethyl selenide and releases it into the atmosphere.

Hybrid Poplar tree: This tree is extensively planted for trichloroethylene volatilization into chlorinated acetates and carbon dioxide. Most of the hyperaccumulators are slow-growing plants, but poplar trees are fast-growing and have extensive root systems. That is why they are often chosen for phytoremediation. They will uptake heavy metals, chlorinated compounds, and other toxic chemicals.

Tulip tree: The tulip tree can convert mercury into a volatile form that is methyl mercuryand release it into the atmosphere from affected soil or water resources. A bacteria called Escherichia coli’s genes were inserted into the plant to improve its phytovolatilization ability through genetic engineering techniques.

Photodegradation/Phytotransformation

Scientists use the term “Green Liver” for the process of phytotransformation because the plant act as human liver, i.e., it uptakes the contaminants, alters their polarity with the help of enzymes, and releases them back into the soil.

It is the breakdown or degradation of pollutants in two ways:

Absorption / Uptake:

  • If plants uptake the pollutants to degrade them, it will be accomplished through the use of enzymes. For example, oxygenase nitroreductase is an enzyme present in tissues and root exudates, which plants use to breakdown certain organics like trinitrotoluene, trichloroethylene, atrazine, etc.

No Absorption / No Uptake:

  • Plants release certain enzymes via roots. These enzymes stimulate the microbes in the soil to degrade the contaminants. For example, the yellow poplar trees stimulate microbes in the soil to degrade atrazine.

Transgenic tobacco plant: “Nicotiana tabacum” is a genetically engineered trinitrotoluene (TNT) tolerant plant. A soil bacterium is known as “entereo coloca” had been discovered to contain these genes. The genes expressing the enzymes “nitroreductase and pentaerythritol tetranitrate reductase” were inserted into the tobacco plant. These enzymes are able to utilize ester explosives to meet their nitrogen requirements. N.tabacum can uptake and degrade up to 0.25% of TNT per plant, a much higher potential of phytoremediation than a wild tobacco plant.

Canary grass (Elodeia bulrush): An experiment was conducted at the Army ammunition plant in Milan to check out the potential of a canary grass to remove trinitrotoluene and RDX (hyxahydro-1, 3, 5-trinitro-1,3,5-triazine). Within one month, a removal rate of more than 90% had been realized.

The old and traditional methods of controlling TNT pollution are so much more expensive that very few of them are implemented properly. On the other hand, these plants having the natural ability to store high concentrations of toxic contaminants without showing adverse effects on their growth, are now widely used by TNT handlers. Phytodegradation is not only effective in reducing contaminant levels in the soil but also improves the soil’s physical and chemical composition. Degradation activities and bio-stimulation of bacteria in the soil improves the nutrient levels of bare soils, reclaims acidic soils, and is cost-effective as compared to other reclamation methods.

A collective list of plants having phytoremediation properties:

Trees: mainly for organic as well as inorganic metal’s removal.

  • Willow,
  • Yellow poplar,
  • Poplar tree,
  • Gum tree etc.
  • Bamboo
  • Hemp tree (Cannabis sativa)
  • Hibiscus (Hibiscus cannabinus)

Brassicaceae family: mainly for inorganics removal.

  • Brassica juncea
  • Allysum (Allysum alyssoides)
  • Thlaspi (Thlaspi arvense)

Grasses: for organic contaminants removal.

  • Buffalo grass (Boutaloua dactyloides)
  • Red fescue (Fescuta rubra)

Aquatic plants:

  • Cattail
  • Reed (Calamagrostis)
  • Parrot feather
  • Spartina
  • Salicornia
  • Water Hyacinthus
  • Pennyworth
  • Duckweed

Summary

Atomic weapons manufacturing plants, research laboratories, experimental sites, chemical manufacturing industries, dyeing factories, and the untreated wastewater of industries dealing with heavy metals, Chernobyl, etc., are the places where contaminants are prepared and released to pollute the non-polluted soil and water. Heavy metal pollution is a burning issue for every country in the 21st century. The use of plants to remove or minimize heavy metals and organic and inorganic compounds is the most reliable and environmentally friendly method know to man. I find it ironic that plants, which man has been abusing, and decimating for centuries, might just turn out to be our saviors!

References

Greipsson, S. (2011). Phytoremediation. Nature Education Knowledge 3 (10): 7 http://www. nature. com/suitable/knowledge/library/phytoremediation-… 1 of 5 1/1/2015 11: 41 PM. Figure 2, 2.

Limmer, M., & Burken, J. (2016). Phytovolatilization of organic contaminants. Environmental science & technology, 50(13), 6632-6643.
Guarino, F., Miranda, A., Castiglione, S., & Cicatelli, A. (2020). Arsenic phytovolatilization and epigenetic modifications in Arundo donax L. assisted by a PGPR consortium. Chemosphere, 251, 126310.

Shackira, A. M., & Puthur, J. T. (2019). Phytostabilization of heavy metals: Understanding of principles and practices. In Plant-metal interactions (pp. 263-282). Springer, Cham.

Galal, T. M., Gharib, F. A., Ghazi, S. M., & Mansour, K. H. (2017). Phytostabilization of heavy metals by the emergent macrophyte Vossia cuspidata (Roxb.) Griff.: a phytoremediation approach. International journal of phytoremediation, 19(11), 992-999.

Yang, S., Liang, S., Yi, L., Xu, B., Cao, J., Guo, Y., & Zhou, Y. (2014). Heavy metal accumulation and phytostabilization potential of dominant plant species growing on manganese mine tailings. Frontiers of Environmental Science & Engineering, 8(3), 394-404.

Muthusaravanan, S., Sivarajasekar, N., Vivek, J. S., Paramasivan, T., Naushad, M., Prakashmaran, J., … & Al-Duaij, O. K. (2018). Phytoremediation of heavy metals: mechanisms, methods, and enhancements. Environmental chemistry letters, 16(4), 1339-1359.

Ahmadpour, P., Ahmadpour, F., Mahmud, T. M. M., Abdu, A., Soleimani, M., & Tayefeh, F. H. (2012). Phytoremediation of heavy metals: A green technology. African Journal of Biotechnology, 11(76), 14036-14043.

Park, S., Kim, K. S., Kim, J. T., Kang, D., & Sung, K. (2011). Effects of humic acid on phytodegradation of petroleum hydrocarbons in soil simultaneously contaminated with heavy metals. Journal of environmental sciences, 23(12), 2034-2041.

Permaculture

permaculture practice

Permaculture is the development and philosophy of adopting sustainable, self-sufficient agricultural ecosystems and consciously designed landscapes. Permaculture is the combination of two words: the Latin word “Perma” means “sustainable,” and the French word “culture” meaning “cultivation.”

History

The term “permanent Agriculture” was first introduced by Joseph Russel Smith in 1929. He wrote the book A tree crop: A Permanent Agriculture to motivate the people, from farmers to employers, educated to non-educated, at the National and International level, to grow the amount of food they consume on their own. This was a huge challenge towards sustainability. Later on, in the 1960s, Bill Mollison (a researcher, scientist, teacher of Environmental Psychology) was the first to the public the term permaculture in his book “Permaculture One.” He has been described as the “father of permaculture” and wrote that:

“The greatest change we need to make is from consumption to production, even if on a small scale in our own Gardens. If only 10% of us do this, there is enough for everyone”.

Bill Mollison

His students worked to broaden the term from agricultural ecosystem to sustainable human habitats. The spread of the permaculture movement in Asia and Central America resulted in the establishment of many institutions, including:

  • IMPA (Institute of Mesoamerican permaculture)
  • Permaculture Institute of EI Salvador
  • AISA (Asian Institute of Sustainable Architecture, Hong Kong.

Principles of Permaculture

Holmgren described the principles of permaculture to cover, arrange, and place the patterns, functions, and species of landscapes where they can yield their maximum potential. These ethics are listed below:

Observe and interact

Observing and responding in accordance with what is required the most in relation to the climate, soil, and topographic factors. For example, a salt-sensitive plant will not survive in the alkaline soil, and an aquatic plant will not grow in soil/dry conditions. Careful inspection (because it will be the base of all the efforts) is necessary for a sustainable landscape.

Catch and Store Energy

We have an infinite source of energy in the form of the sun. Now it’s up to us how to use that source most efficiently. Growing enough food for you and your family on your land is the best way to use this energy properly. If you don’t have a lawn/garden to grow vegetables and plants, you can contribute to permaculture through indoor plants.

Obtain a Yield

You must be getting something out of it. Permaculture provides sustainable yield both in the form of food, air, soil, water purification, reduction of global warming and mental health, peace (that we are contributing to the nature restoration), and the generation of meaningful rewards.

Apply Self Regulation and Accept Feedback

Disturbance in any ecosystem will occur when a majority of the people start thinking that they are not responsible for environmental sustainability, and this is the duty of either government or social workers! “In the Unity of our Nations rests the glorious future of our peoples.” Encourage others to speak against the wrong activity and accept where you have gone wrong.

Use and Value Renewable Resources

Reduce, Reuse, Recycle, and Regulate are the key necessities for a sustainable landscape. Instead of excessive use of non-renewable and pollution-causing resources, we should focus more on renewable energy resources like powering homes with solar panels, cleaning wastewater, growing your own food, and growing trees for a safe future.

Produce No Waste

Is it possible to produce no waste? Obviously not. But it is possible to waste nothing. Buying less, recycling to the maximum, and wasting nothing (both biotic and abiotic factors) will decide a sustainable and happy forthcoming.

Design from Patterns to Details

Observe the climatic, societal mindset, and trends for designing patterns, for example, which species, climatic conditions, and public liking and disliking will decide the basis of the first step towards permaculture.

Integrate Rather than Segregate

Environmentalists believe that “Plants are the only assurance for a safe future.” They provide food, shelter, wildlife habitat, removal of toxic gases, reduced soil erosion/other problems, and are the source of rains. We need to work together with the plants to save this earth. They can do it alone, especially if we keep fighting them.

Use Small and Slow Solutions

“Long-term consistency trumps short-term intensity.” It is better to start from a single, healthy plant and grow it to make it a tree rather than buying many but caring for none. In the same way, amend the soil using organic fertilizers instead of instant synthetic fertilizers. Start small, but think big.

Use and Value Diversity

“Diversity is an art of working independently together,” the beauty of an ecosystem and a landscape lies in diversity. Try to use non-traditional, difficult to plant, different colored, environment-friendly plants, flowers, and trees and finding new ways that they can interact with each other.

Use Edges and Value the Marginal

One tree produces hundreds of seeds every season. If we plant at least half of those seeds, it would be enough for a sustainable landscape. But unfortunately, we are not planting even two percent of those seeds. Use your lawn to raise vegetables or plant a single fruit tree in an empty corner of your backyard. Don’t be the standard, be the difference, blur the lines.

Creatively Use and Respond to Change

Permaculture prepares the whole community to respond to a sudden, unexpected change intelligently. For example, to fight against drought, disease attack, climate change, etc.

Permaculture Tools

Layers:

Layers offer various designing elements such as heights, shapes, combinations to develop a harmonious relationship between all these tools. The aim is to properly and wisely use the whole available space in the following different ways:

  • Canopy/highest layer: it entails large timber trees, nitrogen-fixing, and nuts trees (you can add any tall tree you like).
  • Sub-canopy/understory layer: it includes the fruit trees that are evergreen/deciduous and grows lower than ornamentals, for example, apple, fig, plum, apricot, persimmon, etc.
  • Shrub layer: woody shrubs of medium height (5-6 ft.) come under this layer—Blackberry, raspberry, chokeberry, buckthorn, gooseberry, etc.
  • Herbaceous layer: This covers a diverse group of herbaceous, shelter-giving herbs (to the beneficial insects) and medicinal plants. These plants would include; asparagus, sun-flower, brassica, artichoke, etc.
  • Soil surface/ground cover: lies in between herbaceous and ground cover layers. The plants in this layer function to cover bare patches, tolerant to moderate foot traffic, and grow closer to the ground as well. These plants would include; yarrow, Borage, Oregano, Mint, lemon, and strawberries.
  • Root layer: This layer contains root crops (garlic, onion, radish, sweet potato, etc.), beneficial insects, fungi, worms, and nematodes that function together to make the soil fertile, decompose the organic matter, and are important in the nitrogen recycling process.
  • Vertical layer: This layer covers woody and non-woody vines, creepers, and climbers—grapes, kiwi vine, cinnamon, lima beans, etc.

Zones:

The thoughtful planning and planting of elements of the landscape into zones so that the most accessed will be placed in the first zone and so on.

  • Zone 0: the simple, home zone. The aim is to reduce the energy and irrigation requirements and develop a sustainable, comfortable environment to live and work in.
  • Zone 1: the elements that demand frequent attention need to be visited and should be nearest to the house, for example, soft fruits (strawberries, raspberries, etc.), greenhouse crops, compost bin, etc.
  • Zone 2: perennial plants are sited here as they require less frequent visits.
  • Zone 3: The main domestic and trade crops are grown and require weekly visits.
  • Zone 4: for timber production, wild plant collection only.
  • Zone 5: a wild area to host insects, bacteria, microorganisms. Very often visited by humans.

Permaculture practices:

Forest gardening:

Forest Gardening is a combination of agronomy (production of commercial crops) and forestry (production and forest management). This has been a successful approach toward a sustainable ecosystem. It integrates the principles and relationships of permaculture to grow food crops and timber wood trees in the same place. A practical example of agroforestry/permaculture is “Kandayan Tree Garden in Southeast Asia.

Plants take ten to fifteen years to become trees. The benefit of agroforestry is that the area between rows and plants can be utilized for the production of crops giving seasonal income while trees are growing at the same time. You can plant seasonal vegetables and trees (Willow, Eucalyptus, Deodar, or fruit plants) in your garden simultaneously.

Urban permaculture:

Suburban aims to modify the cities to make them greener, healthier, and sustainable. They are transforming vacant places, edible landscaping, rainwater storage/catchment, a garage into a front-yard garden, school activities for promoting the green urban movement, large city buildings growing plants on their walls and roofs, etc.

Natural building:

Natural building applies permaculture principles to construction. Use of straw bale, Taipa (rammed earth for building walls), chalk, or lime), cob/Colm (made from sub-soil and sometimes lime), adobe, etc., instead of using cement, paints, and varnishes that emit carbon dioxide and other volatile organic compounds.

In your garden, use structure/boxes/planters made up of above mentioned environmentally friendly materials.

Storage of rainwater:

Wisely collecting and using rainwater for irrigation, livestock, and drinking are the most efficient permaculture practices. You can grow nothing without water, so why not store the water we are getting for free!

Stormwater harvesting is collecting rainwater by designing and utilizing unique methods to increase the water table, landscape irrigation, and greenery while reducing erosion.

Veganic permaculture:

It is the addition of a fourth basic value that is “animal care” in the existing three core ethics of permaculture:

  • Earth care
  • People care
  • Fare Share

Not consuming domesticated animals in order to increase soil fertility and recognizing the importance of free-living animals for ecosystem balance are two key factors for a sustainable landscape.

Restricted pruning in plants:

“A mature leaf can generate/release oxygen enough for ten people to inhale for one year.” Experiments in temperate fruit plants showed that the un-pruned trees showed more tolerance and survival against chilling conditions as compared to pruned trees. So if we are getting all these benefits, then why prune? It’s time to adopt “do nothing” farming.

Conclusion:

People frequently asked “where do I start?” the answer is always “at your doorstep.” When everyone contributes to the degradation of the landscape and ecosystem, why isn’t everyone taking part in the re-balance and restoration of that same ecosystem! Being a Floriculturist, I would suggest every home-owner keep at least three to five potted plants indoor/each room, establish grass at 136 sq. ft. area, and plant one evergreen tree in the corner of your front yard if you want a sustainable landscape. As it takes many years to destroy an ecosystem, it will take many years to make it better and rebuild the ecosystem.

References:

Holmgren, D. (2020). Essence of permaculture. Melliodora Publishing.

Hirschfeld, S., & Van Acker, R. (2020). Permaculture farmers consistently cultivate perennials, crop diversity, landscape heterogeneity, and nature conservation. Renewable Agriculture and Food Systems, 35(3), 342-351.

Oliveira, H., & Penha-Lopes, G. (2020). Permaculture in Portugal: Social-Ecological Inventory of a Re-Ruralizing Grassroots Movement. European Countryside, 12(1), 30-52.

Bulut, Z., & Yılmaz, S. (2008). Permaculture Playgrounds as a New Design Approach for Sustainable Society. International Journal of Natural & Engineering Sciences, 2(2).

Suh, J. (2014). Towards sustainable agricultural stewardship: evolution and future directions of the permaculture concept. Environmental Values, 23(1), 75-98.

Rhodes, C. J. (2012). Feeding and healing the world: through regenerative agriculture and permaculture. Science progress, 95(4), 345-446.

Krebs, J., & Bach, S. (2018). Permaculture—Scientific evidence of principles for the agroecological design of farming systems. Sustainability, 10(9), 3218.

Mannen, D., Hinton, S., Kuijper, T., & Porter, T. (2012). Sustainable organizing: A multiparadigm perspective of organizational development and permaculture gardening. Journal of Leadership & Organizational Studies, 19(3), 355-368.

Vitari, C., & David, C. (2017). Sustainable management models: innovating through permaculture. Journal of Management Development.

Creating a Rock Garden

Cactus Rock garden

Is your garden dry and dull? Then create a rock garden! I will show you how you can transform rocky garden areas, bare garden plots, rock walls or fence rows into a colorful flower paradise full of life. 

Rock gardens can be very diverse. They offer an attractive and simple way to transform a challenging garden situation into a blooming landscape.

Do you have an aging, old rock wall? Great! An aging rock wall can be the perfect place to start a vertical rock wall garden.  There are always good places for rock garden plants to grow in the cracks between the stones. 

Rough and rocky hillside plots that would be very difficult to turn into a perennial flower bed might be the perfect spot to create a rock garden.  Adding stones and plants to an already rocky hillside to create your rock garden will not only look attractive but will help to prevent erosion as well.

A rock garden is also an excellent alternative to border and delineate your property or lawn edge with a very natural look. There are often stone walls and rocky fence rows that border properties in the countryside, and many can be planted with various rock garden plants to create a beautiful, low-maintenance rock garden and privacy screen.

Styles of Rock Gardens

There are many ways to create a rock garden and many different styles to chose from.  The type of rock garden that you make will likely depend greatly on what part of the country you live in and what supplies you have at hand.

Most of the rock gardens that I have seen fall into two categories; the vertical rock garden and the horizontal rock garden. 

Vertical

As mentioned earlier, an existing rock wall can be a great place to create a rock garden.  When talking about rock walls, I feel that it is best to clarify a bit.  There are several rock wall styles, and they might not all be as well suited for rock gardens as you might think. 

The most common types that I have seen turned into rock gardens are the low, boulder style retaining walls that might hold back grades and terrace a sloped yard.  These walls are typically dry laid, meaning no mortar is applied between the rocks.  This type of wall is often perfect for rock gardens because it is usually built right against the dirt and often has lawn or a flower bed in front or behind it.

Vertical retaining wall with crevices

To create a rock garden in this type of wall is perhaps the easiest of them all.  The wall already exists, and there is already dirt in the holes between the rocks.  You simply need to find plants that will grow in the wall and then plant them in all of the nooks and crannies between the rocks.

The other type of rock wall that I have seen used for rock gardens is the free-standing, dry-laid rock wall.  This type of wall will typically not have dirt between the rocks but will instead be comprised of carefully stacked rocks that rely on gravity to keep them in place.  Walls such as this have been used to border yards and farm fields for many years and are more prevalent in Europe than in the United States.  This type of wall takes a great deal of patience and skill to build, so I am reluctant to encourage you to fill the blank holes with soil and plants.  Over time, if the wrong plants are chosen, the roots could move the rocks and cause the wall to fail.  Another concern with a wall like this is weather-dependent.  Dry laid rock walls are intended to remain dry.  If a wall such as this is backfilled with soil, it will hold moisture.  If this wall happens to be in a part of the world that experiences freezing temperatures, this moist soil will freeze and expand, which will likely cause the wall stone to move over time.

Another type of vertical wall is the free-standing masonry or wet set wall.  Walls like this are built similarly to the dry-laid vertical walls, but these walls are typically set on a footing or foundation, and the stones are held together using mortar.  Walls such as this are the most expensive walls to build and would once again be prone to damage from roots and freezing soil in the cracks.  My advice would be to avoid planting into a wet-laid masonry wall.

Horizontal

The other style of rock garden that I have seen, and probably the most common, is the type that is typically just laid on the ground.  Sometimes these start as rocky hillsides, and sometimes they start as old fence rows of rock.  Either way, there is no fear of ruining an existing structure since the rock is already on the ground or maybe stacked a couple of stones thick in the case of a fence row.  These types of areas are perfect.  If there are already many rocks but little soil, you will want to add some soil between the stones.  If there are few rocks and mostly soil, you will want to add rocks to create more interest.

Further Considerations

Depending on where you are located, you may want to consider a few things before deciding on the rock garden style that you will create.  If you are in a very arid and dry region, it may be difficult to get plants to grow in a free-standing wall because they will dry out quickly.  If you wanted to create a vertical, free-standing rock garden in a climate like this, I would suggest only the most drought tolerant plants that you can find.  You might want a horizontal rock garden right down on the ground in this sort of environment.  The rocks will help collect moisture and protect the soil from the hot sun, and the plants will have the opportunity to grow into the native soils, which will make them more drought tolerant.

On the other hand, if you live in a very moist and humid area, the horizontal garden might be too wet for most rock garden plants, in which case you would be better off creating a vertical rock garden where the plants can dry out a bit more.  You need to understand your environment.

Plant Choices

Once you’ve decided on the type of rock garden you will create, you can consider the plants you might want in your rock garden.  Some of the most popular rock garden type of plants that I have seen used are the low growing, creeping, crawling variety of plants such as:

  • Creeping Thyme
  • Wooly Thyme
  • Hens and Chicks
  • Snow in Summer
  • Alyssum
  • Sea Thrift
  • Ice Plant
  • Creeping Sedum
  • Soapwort
  • Creeping Juniper
  • Creeping Phlox
  • Creeping Cotoneaster
  • Rock Cress
  • Candytuft
  • Bellflower

Alternatives

Many people like to plant their rock gardens tight with perennial plants.  I find that sometimes it’s a nice idea to leave some blank spaces for annual flowers.  Planting low-growing annual flowers into your rock garden will give you the opportunity to very easily change the look and feel of your garden every spring.  And who doesn’t look forward to that first trip to the greenhouse to pick out some new annual flowers?

Location

When you are planning out your rock garden, consider its location.  Is it in the center of your yard where you can view it from all sides?  Is it at the side of your yard where you can only view it from one side?  If it is one-sided, then it is often nice to plant some attractive taller plants behind it as a backdrop.  This will allow you to have a tall perennial or shrub border in the back with a low rock garden in front.  If you will be viewing it from all sides, keep the taller plants near the center and the lower plants near the edges.  This will give you great views from all sides.

Rock type

You must also consider the type of rocks that you will be using.  You can go all out and purchase any rocks that you would like.  There are many types of beautiful rocks to choose from, but I most often see folks using the rocks that they or a neighbor might have on-site.  Either way, choose your plants in relation to the rocks that you will use.  The larger your rocks are, the larger your plants should be, and vice versa.  If you have small stones and plant larger plants, the plants will overwhelm the rocks, and it will look more like a mounded perennial garden than a rock garden.  If done correctly, the garden should showcase the plants and rocks equally.  Often it is necessary to trim back the plants during the growing season to be sure that you keep some rock exposed.

If you are planting into an exiting vertical wall, I’d suggest using only soft rooted, easily controlled creeping perennials.  These plants will beautify the wall, be easier to maintain, and will not be as likely to damage the wall should they need to be removed in the future.

Rocking On

In general, rock garden plants like it a bit dry and rugged.  Any plant that will grow in your climate and that likes to be dry and stays relatively short compared to your rocks will be a great addition to your rock garden.  Don’t forget that your rock garden project will likely be a work in progress. You may plant some plants that grow too quickly that you will need to remove; you may plant other plants that don’t survive for one reason or another.  As with any flower beds, it’s not about getting it perfect and proper the first time; it’s about what it grows into over time.  Too many landscapers and gardeners over plant when installing their landscapes which only results in the necessity to remove plants as the years go by or some of the plants will simply get snuffed out by their more aggressive neighbors.  It is better to start a bit sparse and let the plants grow in.  Different plants will grow differently in different locations.  You need to plant, care for and observe.  Your gardens will tell you what they need over time.

Irrigation and Landscaping

landscape irrigation

Irrigation and landscaping, landscaping and irrigation.  They seem to go hand in hand.  Landscaping is a very important (and expensive) aspect of your home and yard, and your irrigation system can be as well.  For what it’s worth, I’d put my money into the landscaping and not so much the irrigation.

The Typical System

Todays’ irrigation systems are a far cry from the old hose real and rainbow sprinkler that you may have used to water your lawn back in the day.  We now have complex, computerized, wall-hung control panels that allow us to break down our yard into as many zones as we can dream up.  On top of that, we have the option to create as many watering scenarios as we might like.  We have water sensors so that the computer can tell when it rains and prevent the system from running, we can set the system to run only during certain hours, and we can pick which zone to run for how long on which days and at which time of the day.  The systems typically consist of spray heads and drip irrigation.  The spray heads are usually used for lawn and shrub areas, and the drip irrigation is generally reserved for your more delicate plantings and flower beds.

OLYMPUS DIGITAL CAMERA

The Magic

These systems seem complicated on the face, and the professionals always set them up for you and inject plenty of fancy lingo when describing the system to ensure that there is a bit of magic and confusion around how they work.  This way, you will call them back for a service call any time you need to adjust something.  In reality, if you can operate your computer, log into the internet, browse web pages and collect your email, you are likely smart enough to read through a few pages of instructions and program your sprinkler controller.  The heads and valving are pretty easy to adjust as long as you have a few specialized tools for whatever system you have.  The system is water, piping, and electrically controlled valves that open and close.  Don’t be scared, just read the book and ask lots of questions.

A Bit of Observation

Over the years, I have seen many clients spend a great deal of money on the latest and greatest irrigation systems.  I’ve also seen penny pinchers create their own ad hoc irrigation system using hoses, pipes, and whatever sort of sprayers and nozzles they can find.  And then I’ve seen many homeowners with really nice landscapes that don’t have any irrigation system at all.  Nowadays, most owners of large homes and estates think that an irrigation system is necessary if you are going to have a nice yard and healthy plants.

Here’s The Story

It usually goes something like this.  “Mr. Homeowner, I’m sure that you don’t want to spend your time moving sprinklers around, and you certainly don’t want all of these expensive landscape plants to die, do you?”  Combining the threat of extra work and the idea that their plants might die usually gets them reaching into their wallets for thousands of dollars to spend on an irrigation system.  At this point, they haven’t realized that the system that they are about to pay thousands of dollars for will also need adjusting and maintaining, so it will keep costing them for as long as they own the home.

A Different Story

The truth of the matter is that most landscapes don’t need an irrigation system.  The need for an irrigation system in your landscape has mostly been a fabrication of the industry and an excellent way for contractors to squeeze a few more dollars out of a homeowner.  Now don’t get me wrong, irrigation systems have their place.  I can’t imagine a finely manicured golf course without an irrigation system.  I can’t imagine growing much in the desert and many of the drier areas of the US without some irrigation.  But each and every home in your average upscale subdivision?  Come on now; I think that we all know that this is not necessary.

Some Exceptions

If you are an avid gardener and your passion is growing unusual and exotic plants that aren’t well suited for your climate, then an irrigation system broken down into many spray and drip irrigation zones will undoubtedly benefit some of your plants.  If you are trying to create a lush green landscape where there would otherwise be dry dirt, sand, and cactus, then yes, you will need an irrigation system.

The Big But

But, if you own a home, large or small, with a landscape that is relatively well suited for your climate and you aren’t a plant expert that is going to be choosing rare and exotic plants, then you don’t need hundreds or thousands of feet of poly pipe and wire buried in your yard and a computer controller in your basement or garage.  The truth is that most landscapes that have an irrigation system installed don’t need it.

Starting Out

The most useful few weeks of an irrigation system are the first few weeks after your lawn and garden have been installed.  This is when you have hundreds if not thousands of plants that were just torn out of the ground and transplanted to your yard.  You’ve got an acre of new lawn area that has just been painstakingly graded, raked, and seeded, and you are just praying that it isn’t too dry or too wet for all of these new plants to take hold and survive.  This is when those of you who purchased the full irrigation system can sit back and relax, knowing that it is highly likely that most of your plants and lawn will survive because they are being watered automatically every single day.  If you decided not to buy the irrigation system, this is when the irrigation contractor drives by and laughs as you drag out hoses and set sprinklers in your yard, trying to keep your grass and plantings alive. 

The Tough Part

These first few weeks of no irrigation system is the tough part.  If you didn’t buy the system, then you are the system.  You are now in charge of monitoring the weather and ensuring that your yard gets the irrigation that it needs.  You may get lucky, and it may drizzle every other day, and you have nothing to worry about.  You may get unlucky, and it is scorching hot and very dry, which means you must irrigate everything, or some of your plants will die.  Probably the best thing that you can do at this point is to head to your local hardware or big box store and buy a nice assortment of hoses, y-splitters, and a few varieties of sprinklers.  This will cost you a few hundred bucks for sure, but it is stuff that you will use later in life also, and it will be a fraction of the cost of an irrigation system.

The Plan

Plan out your watering routine and get the hoses, splitters, and sprinklers set out in advance of needing them.  Set it up so that the biggest sprinklers cover the biggest areas possible, and then work your way down to the smaller areas.  You won’t be able to water everything at once, so use the splitters to set up as big of an area as your water pressure can handle.  You will need to switch the splitters to activate one zone and then another to cover the entire yard.  The most important areas will be the new grass seed, followed by the smallest of flowers and probably a few select large trees.

This is a Real Pain 

You are correct if you think that this sounds like a pain in the ass.  This will be irritating and not fun if mother nature doesn’t cooperate with you, but just think of the thousands of dollars and yearly costs down the road you are saving.  A few weeks of work and attention now will save you a bundle in the future.  The best-case scenario is that you have kids who can be put in charge of watering so that you just call them and tell them to water, and the job gets done.  Heck, you could even hire a neighbor kid for a few weeks to do it for you and still be many thousands of dollars ahead.

The Truth

The truth of the matter is that once the newly installed grass and plants have a chance to grab hold, you won’t need an irrigation system.  The grass is at its most delicate when it first germinates; those tiny little seeds start to sprout, and they are very easy to kill at this point.  Once established, grass is tough to kill.  Have you ever tried to eliminate it from a flower bed or your vegetable garden?  It is the same thing with flowers, trees, and shrubs.  When first installed, they are vulnerable.  Once established, they do very well.

But, what about my Friend?

I know you are thinking about that friend of yours whose sprinkler quit for a few weeks, and his lawn went brown on him.  That is quite true, it does happen, but there are a few things that you should know.  The first thing to realize is that all plants tend to adapt to their environment.  If your friend had an irrigation system that was watering every other day, keeping his lawn nice and irrigated at all times, his grass adapted to that and has grown very shallow roots.  So, suddenly, the water stops coming every other day like clockwork, and the grass goes into shock because it wasn’t prepared.  If that same lawn had been established without an irrigation system, the grass would have deeper roots and would have been ready for a bit of drought because it would have had to go through times like that before.  The same goes for all of your plants.  And by the way, even if his grass did brown out when his sprinkler system quit, I’ll bet that it came right back once the water came back.  Grass is very resilient and will go dormant when too dry.

Make it Through  

Once you make it through these first few weeks, it all gets easier.  After these new plants get established, you should still keep an eye out for the first few months for extremely dry periods that may cause a plant with minimal roots to run short of water, but a wisely placed sprinkler now and then will take care of any of these con=cerns.  Also, consider the biggest of the trees that you had planted.  That small root mass needs to support all of the trunk and foliage above ground, so it is a great idea to let the hose run and soak them down now and then over the first few months just for added insurance.

That’s About It

That’s it.  Now you are through the challenging part, and you can likely put all of your hoses away and only get them out when you plant some new flowers in spring or an occasional shrub or two.  You don’t need to worry about programming timers, you don’t need to adjust anything, you don’t need to pay for fall shutdowns and spring start-ups, you don’t need to pay to repair the poly tubing when you decide to rent a lawn edger five years down the road, and you rip through a few shallow lines.  And, you don’t need to worry about hitting a pipe or wire every time you decide you want to plant a shrub in your lawn.  Life is much more simple, and you can use the extra money saved for a well-earned vacation once a year.

Irrigation Pros and Cons:

Pros:

  • Irrigation keeps newly planted plants sufficiently watered.
  • Irrigation can be set to water very specific areas in very specific ways if needed.
  • Irrigation can be helpful if you plant things that aren’t well suited for your location.
  • Irrigation can help keep ponds, birdbaths, and fountains topped off by automatically filling them.
  • Irrigation can give you peace of mind knowing that your yard is getting watered regardless of what mother nature has in store.

Cons:

  • Irrigation systems are costly.
  • Irrigation systems need regular maintenance, which is also expensive.
  • Irrigation systems are prone to damage from people and equipment working in the yard.
  • Irrigation systems are largely unnecessary once your lawn and plants are established.
  • Irrigation systems will need to be modified if your landscape beds change or if you add features such as patios, walkways, etc.
  • Irrigation systems will freeze and be damaged if not properly shut down prior to freezing temperatures.
  • Irrigation systems set your plants up to fail by not allowing them to set deep roots as nature intended.
  • Irrigation systems promote the need for more fertilization since the fertilizers get washed out of the soils more rapidly.
  • Irrigation systems waste vast amounts of water (not everyone in this world has unlimited water).

K. I. S. S. Keep it Simple Stupid

We are planting plants in dirt.  Plants have been growing in soil on this earth long before humans arrived and will continue to grow here after we are gone.  This isn’t some sort of voodoo.  Plant plants that are well suited for your climate.  Don’t let your landscaper talk you into exotic plants that may or may not grow here.  Plant native plants, plant the stuff that wants to grow here.  This will leave you with an easy to maintain and beautiful yard that is free from a bunch of unneeded mechanicals.  It will also leave you with a bit more change in your pocket. 

Evergreen Landscaping: Making Your Garden Look Luscious in All Seasons

landscaping with evergreens

Making Your Garden Look Perennially Beautiful

Flowers, shrubs, and deciduous trees are lovely as they fill your yard with blooms and colorful leaves throughout the spring, summer, and fall of the year. But, come late fall, when all of the flowers are dying back, and the trees are losing their leaves, there is one star of the landscape that is too often overlooked.

The evergreen plant. If you are looking to add balance and year-round interest to your yard, you need to start adding evergreens to your landscape. Evergreen landscaping brings a whole new texture and interest to your landscape!

Location, Location, Location

In many parts of the United States, winters are long, cold, and dreary. One great way to liven up your landscape for the winter is to install some evergreen plants now. While evergreen plants typically lose some of their leaves or needles over time, they will never lose all of their leaves at once. They stay green all year round. Thus the name evergreen. Most evergreen plants have needles instead of leaves because, in general, needles do better in the cold weather than a broadleaf will. It is essential that you first check to make sure that the plant is well suited for your location whenever you begin to consider a plant for your yard.

You must not only think about the plants’ hardiness zone, but you must also consider the soil conditions, the moisture requirements, and the sun or shade requirements of the plant.

Changing Ways

Back in the old days, when everyone purchased plants from the local garden center or simply transplanted some plants from the neighbors’ property, climate zones weren’t an issue. But, today, you can order plants from sources all over the country with a click of your mouse (and a valid credit card, of course). So, when you are browsing the online marketplace for your next evergreen plant for your yard, please be sure to check out the hardiness zone.

Evergreen Favorites:

When old man winter has turned your yard into a dull grey and white, you will undoubtedly welcome the site of your evergreen friends that are still putting on a show for you even during these cold and dreary months.

While there are many evergreens to choose from, below are some evergreen landscaping favorites to consider.

  • Boxwood: These shrubs are perfect for evergreen landscaping in partly shady or sun-drenched gardens. They need minimal shaping and pruning if left on their own, but gardeners will often use them to form borders and hedges in their gardens. This is a versatile plant that can be kept small and tight through consistent and accurate pruning or allowed to grow large and lanky if left on its own. It is somewhat unique in the evergreen world because it has leaves rather than needles, and while they won’t survive all climates, boxwood do very well in many environments and stay green or mostly green year-round. Boxwood have long been a staple for the lovers of the formal English gardens with their intricate designs and perfectly sheared hedges.
  • Golden Euonymus: Is there such a thing as ever golden? This vibrantly colored shrub will bring color and texture to your yard all year round with its beautiful, variegated leaves. It can endure extreme weather conditions such as scorching Sun rays and poor soil.
  • Holly: This evergreen shrub is known for its stiff glossy leaves and is another example of an evergreen that has leaves and not needles. Most Holly prefer full sun, but some will tolerate a bit of shade and wet feet. Keep in mind that most Holly varieties will require both a male and female plant to bear fruit. Holly comes in many sizes and can also be used as a hedge.
  • Junipers: The Juniper has long been a favorite evergreen shrub known for its variety of available textures, colors, and shapes. This shrub can grow large and wide or stay relatively compact and small, depending on the type you choose. You can purchase upright juniper that grow tall and wide, and you can buy creeping Juniper that crawls along the ground like a groundcover. It is an evergreen shrub with prickly needles and can be a favorite shrub for rabbits to hide under for the winter months. Upright Juniper can be used for hedging and as a windbreak similar to the Arbor Vitae listed below. It has the advantage of not being eaten by the deer due to its prickly needles.
  • Arbor Vitae: This evergreen shrub comes in many shapes and sizes. Some tend to stay small and round, and others grow tall and wide. This plant does well if left alone but can also be sheared into manicured hedges if desired. This evergreen always prefers a sunny spot and has long been used to border gardens and yards. It can be a great wind block with its dense branches and flattened scale-like needles. Be warned; the Arbor Vitae is a favorite food for dear in the winter months when they can’t get to the grass under the snow. In the northern parts of the country, you will often see Arbor Vitae growing that are pruned up to just higher than a deer can reach due to their constant pruning all winter long.
  • Pine: Pine trees come in many varieties, shapes, and sizes, but for the most part, they are all large trees and should be planted at the borders of your yard, never too close to your house. There are varieties such as the Mugo pine that stay a bit smaller, but most pines do not take too well to pruning and are best planted and left on their own. They can be grown in groups to form a windbreak or as a solo specimen tree. Much of the wood used to build your house comes from the pine tree, as it has long been grown as a fast-growing tree for the lumber industry.
  • Spruce: These evergreen plants are often used as Christmas trees, and most will have that classic triangular Christmas tree shape. The needles are typically very hard and pointed, and the trees come in a variety of colors ranging from dark green to blue. These trees can also be a very effective windbreak and are often used on the border of a yard for privacy.
  • Yew: The Yew is another great evergreen shrub. This is yet another variety that can be sheared to keep its shape; it can be planted in hedges or left on its own. It comes in many shapes and sizes and is usually fairly hardy. The Yew is one of the few evergreen shrubs that do well in the shade. While it won’t do well in full shade, if you have a spot that could use an evergreen, but it’s too shady for some of the before-mentioned evergreens, the Yew might be a perfect choice.
  • Cypress: The Cypress is another evergreen that can be very large or very small, depending on the variety you choose. It looks very similar to Arborvitae at first glance, but it likes things a bit warmer and won’t grow well in the more Northern climates.
  • Rhododendrons: While Rhododendrons are a favorite shrub due to their beautiful summertime flowers, they are also evergreens. The leaves will stay green all year, but since they are generally more sparsely branched and leaved, they do not provide as much winter interest as you might hope. Also, I have found them to be a bit finicky and hard to grow in the more Northern states.
  • Hemlock: The Hemlock is yet another evergreen that will look very similar to a pine except for its drooping branches and softer, more flattened needles. The foliage on this plant is generally more delicate than some of the other evergreens on this list, so it isn’t well suited for screening or a windbreak; it is often used as an accent plant.
  • Fir: These evergreen plants also come in a variety of shapes and sizes. Some of the largest can grow to 200 feet tall, while the more common types are often used in the Christmas tree industry and will grow to be about 60 feet tall.

It’s All Relative

The evergreens listed above will remain evergreen in all but the absolute harshest climates. Remember, some places are so cold that they can’t grow anything but ice!

As you move to southern, warmer states, the overall year-round temperatures increase, and so do the number of plants that will remain evergreen. When you get down into the tropical climates, only the most delicate plants will die back and re-start. This is why you need to be so aggressive with your pruning shears if you live in the Southernmost states.

Advantages of Evergreen Landscaping

  • Keeping the Curious Neighbors Away: Are you bothered about the prying eyes of your neighbors? Evergreen trees with a sturdy structure work well as a boundary to your outdoor space.
  • Minimal Care: Evergreens typically require very little maintenance, and you don’t need to rake up the leaves.
  • Help with your Cooling Bill: Tall evergreens can provide some nice dense shade. If they are planted on the South side of your house, they can help keep your roof cool, which will reduce your cooling bills.
  • Help with your Heating Bill: Planting a hedgerow of dense evergreens on whichever side of your house the prevailing winds come from will help reduce your heating costs in the winter by blocking some of that harsh cold wind that you can feel sneaking in through your windows.
  • Help your Hearing: What’s that you say? Sure, evergreen trees planted as a screen will also cut down on the noise coming into your yard. Plant a lovely hedge of evergreens along that busy roadway and cut down on the amount of traffic that you hear.
  • Provide a Barrier: Not only will evergreens keep unwanted neighbors out, they can help to keep your children and pets in. Sure, they aren’t as much of a barrier as a security fence, but they do make a pretty good stopping point for kids on the run.
  • Breath Freely: Because they are green all winter long, evergreen photosynthesize even in the winter!
  • Welcome Some Delightful Guests: Evergreens provide much-needed habitat for many different critters over the winter. Birds and bunnies alike appreciate the evergreens’ ability to hide them from predators and protect them from the cold.

Overall, using evergreens in your landscape is a great way to balance your yard, give your yard some year-round interest, create a screen or windbreak, and add some different textures. The next time you consider adding a new plant to your landscape, why not make it an evergreen?