
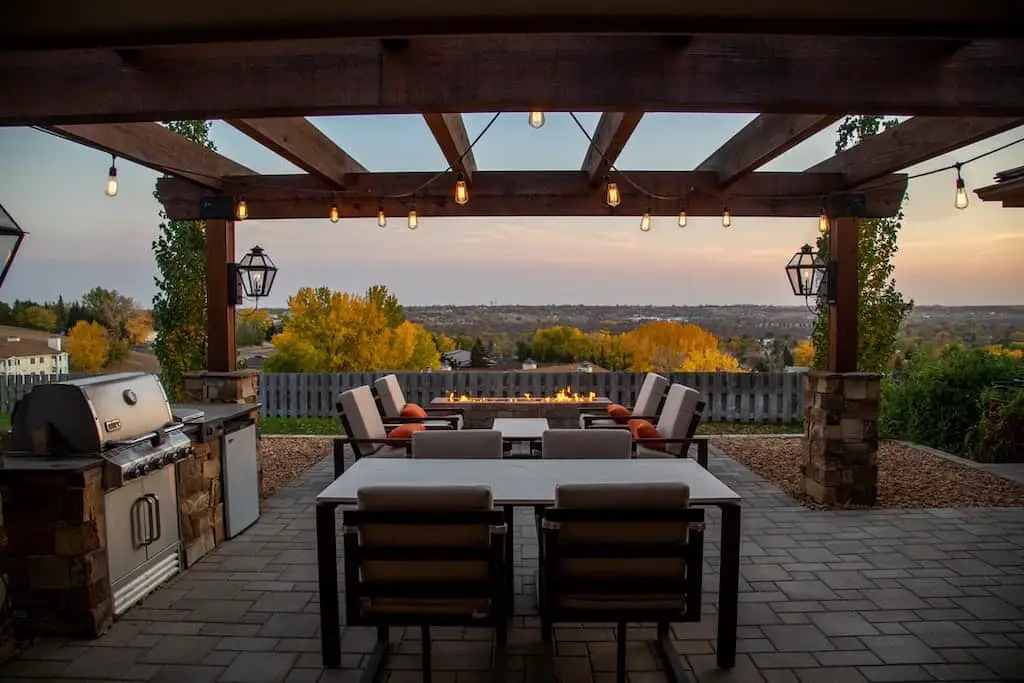
So, you’ve been thinking that maybe you need a brick patio in your yard. You’ve seen all of the other options, such as concrete, gravel, and wood decking, and you like the look of brick. Well, before you take the plunge and either buy a bunch of products to do it yourself or hire a contractor to do it for you, there are a few things you ought to know about Brick Patio Choices and Construction techniques for a brick patio.
History
Back in the day, brick meant brick. They were all rectangular, and they were all made of clay. Today, when a person says brick, you really don’t know what they mean without asking a few questions. If you are talking about having a brick patio, you will need to be able to describe what you envision precisely.
Choices
Clay Pavers
The old-style clay brick has been around since we first started pounding earth into rectangles and throwing them into a kiln. You can find old clay brick walkways in many historic areas worldwide, and they are still popular today. Clay brick can be very attractive and a bit more delicate in both appearance and sturdiness than your other options. But now, Concrete pavers are much more popular.
Concrete Pavers
Nowadays, when I go to a meeting, and the client says that they want a brick patio, I am almost certain that what they really want is a concrete paver patio.
Years ago, when they were first introduced to the market, concrete paver looked similar to clay brick, just not as nice, and were much cheaper than clay brick. They were more affordable and made of concrete, which is much more durable than clay, making them a popular choice for many. These old brick pavers held up structurally, but the colors faded fast, so the concrete industry went back to the drawing board.
Now, many years later, the concrete paver industry has flown past the clay brick industry and is not looking back. Now the colors are clear, vibrant, and long-lasting. Concrete pavers come in every size and shape imaginable, and you can buy a concrete paver to look like almost any type of natural stone or clay product that you can think of.
Considerations
So, unless you are a real history buff and you are putting in a patio reminiscent of something that you may have seen in Colonial Williamsburg, I’m guessing that you want a concrete paver patio.
Take Your Time and Explore
My suggestion to you would be to take some time and explore the many top-tier paver manufacturers’ websites out there. Get an idea for the styles and colors you like, and then look at some samples in person at your local brickyard. You won’t find prices on any of the websites, but in general, the more that the paver looks like a natural stone or is a very distinct shape, the more it will cost. The cheap ones are the ones that look like an old, rectangular clay paving brick.
Take some time and look at and feel the pavers that you like. Many of them will have a textured surface or a contoured surface depending on the design, so I would recommend that when you visit the brickyard, you see the paver actually laid out on the ground so that you can understand how your patio will be.
Some yards will have sample patios already laid with the different styles, and others will not. If yours does not, don’t be afraid to pull a bunch of pavers off of a pallet and lay them side by side on the concrete to get a feel for them. Due to variations in texture, contour, and spacing gaps, they can appear quite differently when laid in a group than they do when you pick up one individual piece.

Patterns
If you choose a paver that looks like a natural stone, it will often come in a specific random pattern with multiple sizes so that when laid, it resembles one of the standard laying patterns for stone. Or, it will be all squares, which makes it very formal and easy to lay.
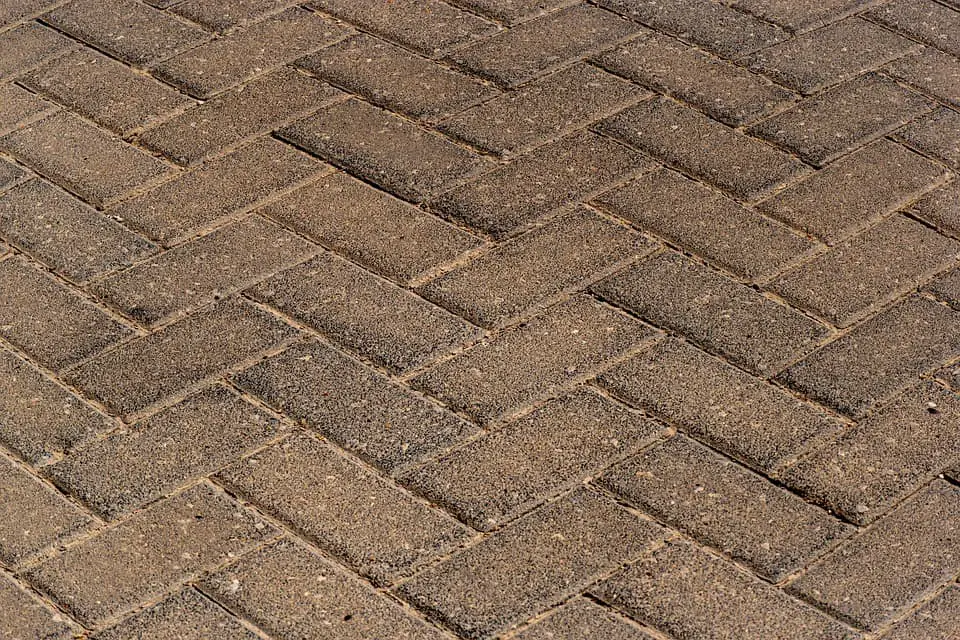
If you choose a rectangular paver, you will need to decide on a pattern. There are many patterns to choose from, but straight bond, running bond, basketweave, herringbone, and diagonal herringbone are common choices. Check out this pattern picture

Consider the Shape
At this point, before you get your heart set on a particular pattern, you need to consider your patio shape and size. If your patio is a big square, just about any pattern will do just fine. Running bond would be your most common choice, and diagonal herringbone would be the toughest to lay.
If your patio has lots of curves or will lead into a walkway of the same pavers, you will need to make some more decisions. The most challenging part of laying a brick patio for the professionals and the newbies is cutting. Laying out the main pattern is relatively quick and easy. The devil is in the details, and when you get out to the edges of your curvy patio with your diagonal herringbone pattern, you will understand why you don’t see too many houses with this combination.
At the Edge
You will need to install some edging to hold in the bricks at the edge of the patio. This edging will create your curves, and each brick will need to be cut to the curve—the tighter the curve, the tougher the cut.
Square or rectangular patios with a straight pattern have very few cuts. Curvy walkways with a running bond pattern have very few cuts. Curvy patios and walkways have considerably more cuts, and curvy patios with diagonal herringbone patterns have the most cuts of all.
Choose your pattern wisely.

Dry or Wet
This article will assume that this patio you envision is dry-laid simply because they are much more common and easy to install than a wet-laid patio over concrete. If you want this to be a wet-laid patio over concrete and you aren’t a very detail-oriented and patient person, I would suggest hiring a mason.
Dry laid means that the paving material (concrete pavers, brick pavers, stone) is laid down dry (without mortar) on a bed of compacted stone. Once laid, sand is swept into the joints to tighten it up.
Edging
Any dry-laid patio will need to be edged to retain the paving material. When it comes to edging, you have many choices. There are plastic edging systems, Steel edging systems, aluminum edging systems, and probably a few others. If you want to go old school, you can apply a thick bed of mortar along the outside of your final row of pavers. All of these edges need to be applied to a firmly compacted base, just like your pavers. When you are laying out your patio and preparing your base, be sure to leave at least an extra 4″-6″ around the perimeter to allow you a nice flat spot to apply your edging.
In-Fill
After you have finished laying your brick patio, you will need to fill in all of the cracks with an in-fill material. TIn-fill has traditionally been done with sand. Any fine, dry sand that will fall down into the cracks will do. Everyone used to use silica sand for this, but advances in sand technology (is there such a thing?) have led to polymeric sand.
Polymeric sand is a mix of (yep, you guessed it) sand and polymers.
This stuff is a little more challenging to work with, but it is really nice once it is done. To install any dry sand, you sweep it back and forth across the patio and make sure that it fills all of the cracks.
You do the same for polymeric sand, but then you sprinkle it with water, which causes the sand to harden into a semi-flexible sort of grout that helps keep the brick in place and keep out dirt and debris.
The only catch here is that the poly sand requires the patio to be completely dry. Even a little bit of moisture will make this stuff stick like glue to your brick. Also, before you sprinkle it with water, you must be sure that there is no sand on the patio’s surface or, again, it will stick like glue.

Supplies
Below is a list of tools and supplies that you will need to complete this project should you choose to do it yourself:
- Pavers (this is your surface)
- Base material (this is your base under the pavers)
- Polymeric sand (this will be swept into the paver cracks)
- Edging (to edge the patio)
- Spikes (to spike the edging)
- Mason line (used to delineate and set grades)
- Mason stakes (used to hold line)
- Line level (clip to the line to check pitch)
- 4′ level (use to set grades)
- Knee pads (to keep your knees from bleeding)
- Screed or straight board (to strike your base)
- Tamp (to compact the corners of your base)
- Plate compactor (to compact your base – can be rented)
- Shovel (to dig and scoop)
- Rake (to help smooth out your base)
- Broom (to push sand into joints)
- Wheelbarrow (to move materials)
- Tape measure (measuring things)
- Sharpie or pencil (marking things)
- Brick saw (cutting brick – can be rented)
- Carpenters square (to mark brick and determine angles)
- Hammer (to set spikes)
- Mallet (to set brick)
Construction
Okay, now we have gotten through the easy part of picking out the products we like. From here on out, it is all about construction. Whether you are hiring someone to do this or doing it yourself, you must understand a few things.
Site
You want your brick patio to drain well. If your patio sits in a low spot in the yard, it will hold water, which means that the surrounding ground and likely the ground below will be soft, allowing the patio to move. Also, worse yet, if you live in a part of the world that gets freezing temperatures, the ice is likely to destroy your patio. No matter what type of product you choose, having it wet going into freezing weather will cause cracks and deterioration of the paving material.
Ice is very powerful!
Settling
If you moved into a new house or have just built your home, you would be better off allowing things to settle for a year before building a dry-laid patio up against your house.
During construction, the excavator dug a big hole for your foundation, and after the foundation was complete, it was backfilled. The area surrounding your house is likely well compacted due to all of the equipment used in your house construction, but the area right along your foundation is never as compacted.
I’m sure that you had a good builder, and they installed drain tiles and washed stone. I’m sure that they tried to compact around the house, but the fact is, no one can get it compacted properly, and the area within a foot or two of your foundation is going to settle over time. Most of the houses that I have seen over the years with wet basements and sagging patios are due to settling around the foundation.
My advice to you would be to prep for your patio but just live with the base for a year until things settle out. Once they do, you can build your patio, and you won’t need to pick it up in a year or two to fix sagging areas.

Base Prep
The secret to a good hard surface installation (no matter what the surface is) is base prep. Poured concrete is less affected by base prep, but I would argue that a good base is still essential to prevent cracking and shifting. Any time that you see a patio, walkway, driveway, or road with sags, potholes, etc., it is due to incorrect base prep and not due to the topcoat.

Mark it
Layout the area for your patio using stakes and mason line if possible.
Pay attention to pitch. You need any water that lands on your patio to run away from your house, so make sure it pitches away. They say that ¼” per foot is positive drainage, but that is too much for patios to be comfortable, in my opinion, so I usually go for 1/8″ per foot or less. As long as it pitches away, you are fine. Your entire patio needs to be in one plane, so plan accordingly.
Be sure to set your line at least 8″-10″ past the edge of your patio so that you have room to dig and lay enough base to also accommodate your edging.
Too much base is much easier to deal with than not enough. Most newbies excavate just enough to lay their patio and then end up with sagging edges and edging popping up due to frost heave.
Dig it
You will need to excavate down to hardpan. You need a very solid surface to build upon. This means removing all topsoil and dig down until you hit a hard layer of soil or base. You will know it when you get there. If you are in an area that is very soft and just can’t or don’t want to dig that deep, you can continue with the installation; just don’t be surprised if it moves over time. If you are in a very sandy area, then you will not get down to a hard surface, but sand compacts (and drains) very well as long as it is encapsulated, so you should be in good shape.
Your excavation should pitch away from your house also. Your dry-laid patio will be a semi-permeable surface, meaning water will pass through it. You don’t want this water running toward your home.
Fill it
Now that you have your excavating done, it is time to start filling. You want your base to consist of stone of some sort.
Over the years, many types of stone have been used. Lately, the common consensus has been that a fractured and washed stone base will provide the best compaction long term.
For those of you who have ever compacted anything, I’m sure that you are thinking, “wait a minute, how will this ever compact if it contains no fines?”
I’m with you on that. The first few times that I used washed stone, I thought it was crazy, but it works quite well.
Old School Fill
Old school installers have long used crushed limestone (or any crushed stone) as their base because crushed limestone with all of the little crushed pieces and fines in it compacts really hard. If you compact crushed limestone and sprinkle it with water in between layers, it will get rock hard. For years, this was the standard.
On top of the base, the old school people would put a layer of sand to make striking and setting the brick easier.
The problem with this old school approach would occur when you would have this perfectly compacted and laid patio on a base of crushed limestone, and then one year, the clients’ gutter would clog up, and water would pour out of the gutter on to the patio for a few months of heavy rain.
Dry laid patios hold up just fine to rain, but enough concentrated water flow in any area will cause things to move. Again, water is mighty powerful! So, all of this rushing water will eventually wash out some of the fines and the sand.
Once the fines get washed out, the remaining larger stone will settle. This will leave you with a low spot right where that gutter was dumping the water.

New School Fill
The solution is to remove all of the fines before you compact. This is where the crushed, washed stone comes in. It seems it would be hard to compact, and indeed, the top layer always seems a bit looser than you would have been used to old-school, but as long as the walls of your excavation hold in this base, it will compact just fine. Make sure to compact in small layers and keep it correctly pitched during compaction.

Don’t Rush the Process.
This is the hardest part of your patio project, and newbies always want to rush it. Rushing this part is setting yourself up for failure. This is where we separate the men from the boys (as the old-schoolers would say). The newbies figure it doesn’t matter, so they dump in thick layers of stone, run the compactor back and forth a bunch of times, stomp on it a bit and call it done.
It will look good for a few months, but it will settle eventually.
Honestly, lay down a few inches of base, rake it out to pitch properly, and then strike it in two directions before laying a few more inches of base and doing it all over again. Once you start getting within a few inches of your top-level, you will want to use a screed or strike board to make sure that your pitches are perfect. The last thing that you want to do is end up needing to remove the compacted base because you didn’t check it, and it ended up too high.

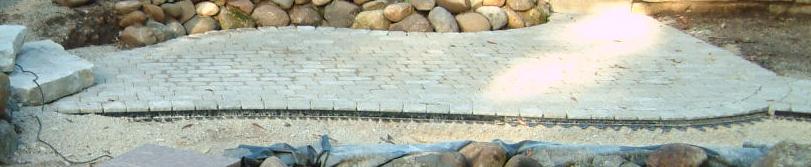
Laying it Down
Once you are up to your top-level and everything is struck perfectly and pitches perfectly, I would check it one more time, just to be sure. Once you lay down those pavers, you will not want to pick them up to fix something that you missed.
Now that you are really sure that it is done, you can start laying your pavers.
Always start at a long straight edge and work your way out using more stakes and more mason line to set some 90-degree lines so that you are checking your lines every few feet. Again, you don’t want to lay half the patio and then realize that your lines are starting to curve.
When laying pavers, avoid walking on your perfectly prepped base and walk very flat-footed if you need to cross it. The best case is to lay down a few courses and then work off of your finished surface to lay the remaining pavers. Be sure to use a rubber mallet to tap bricks into place, ensuring that they are set tight against each other, and check your top surface often with your screed to be sure that you have no dips or hills.
Once your patio is laid, cut any edges, install your edging, and sweep in your sand. You are done!
Time to enjoy.
Conclusion
Whether you tackle this project yourself or hire someone to do it, making sure that it is installed correctly will set you up for a lifetime of worry-free time on the patio. This one will last a lifetime. Or at least until your significant other decides it’s time to remodel.