Top 7 Best Fire Pit Mats in 2021

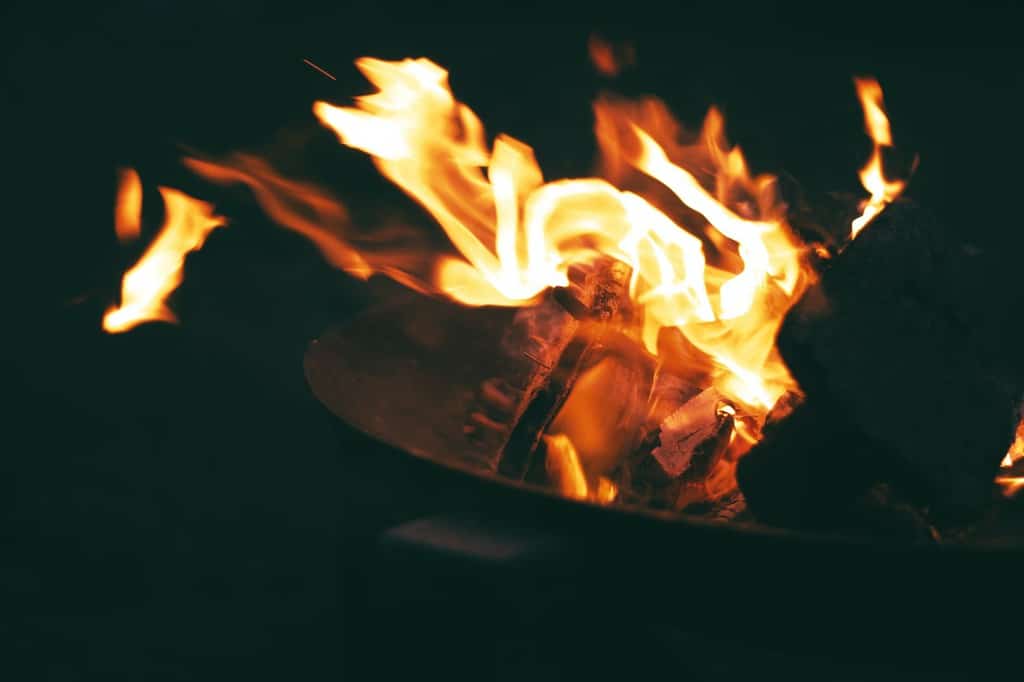
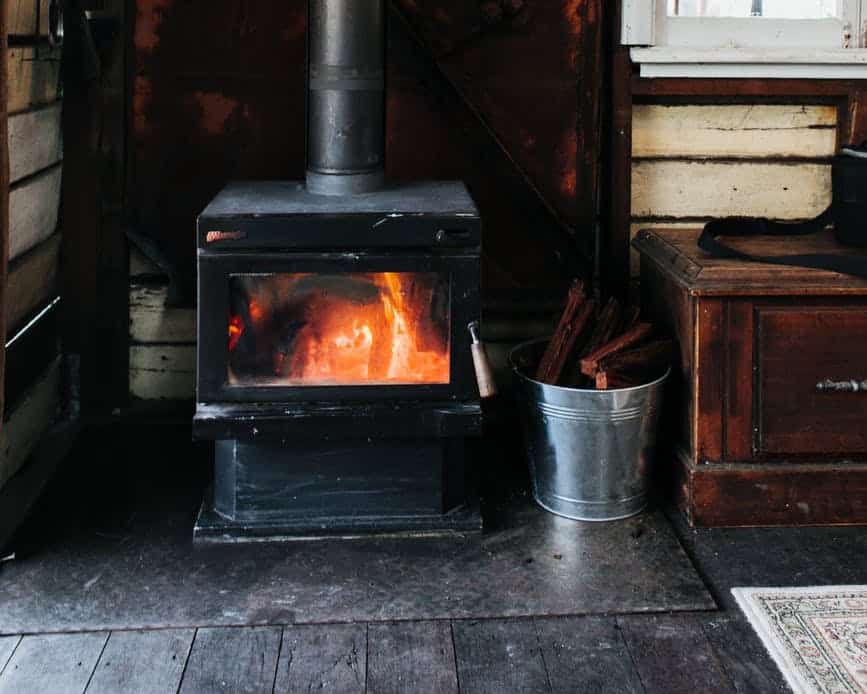
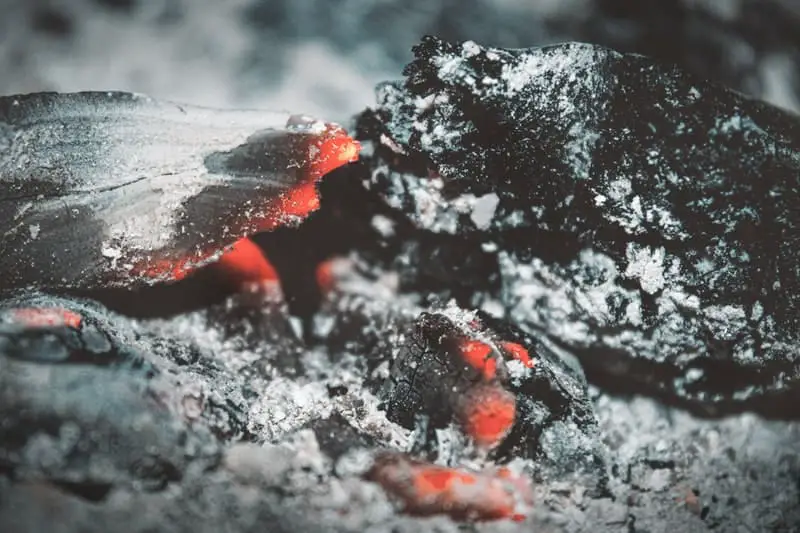
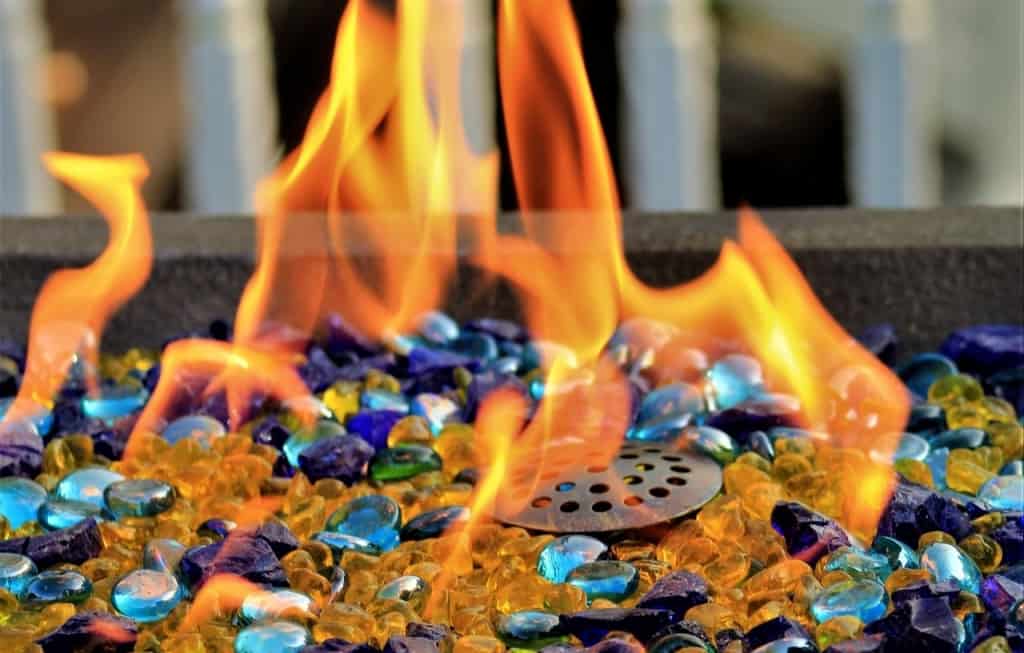
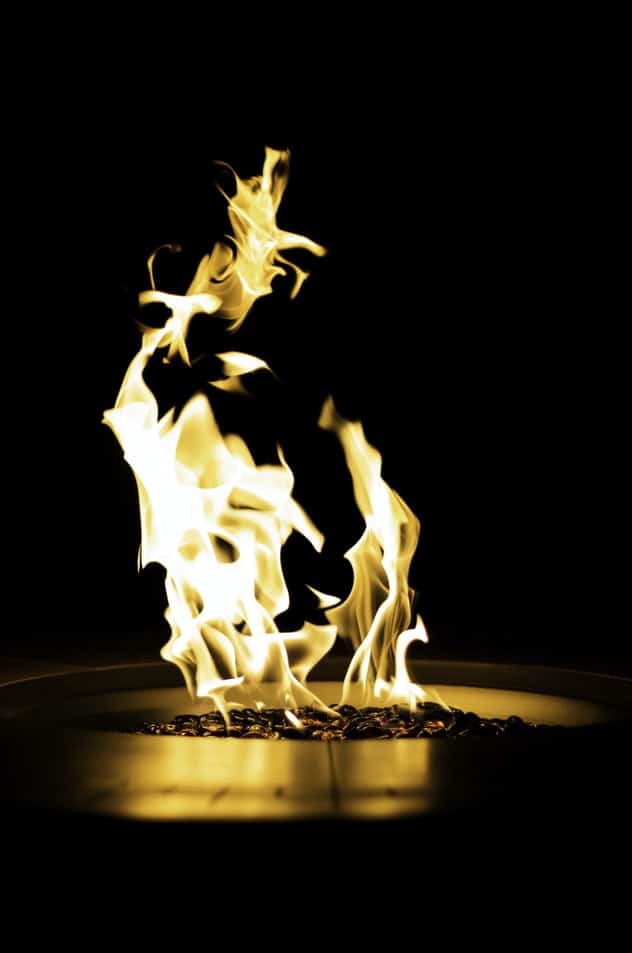
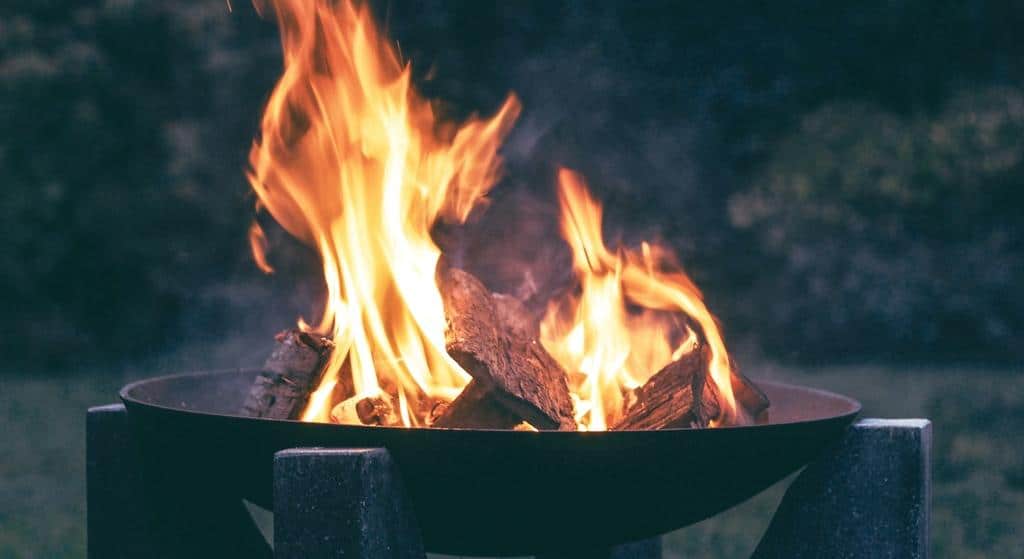
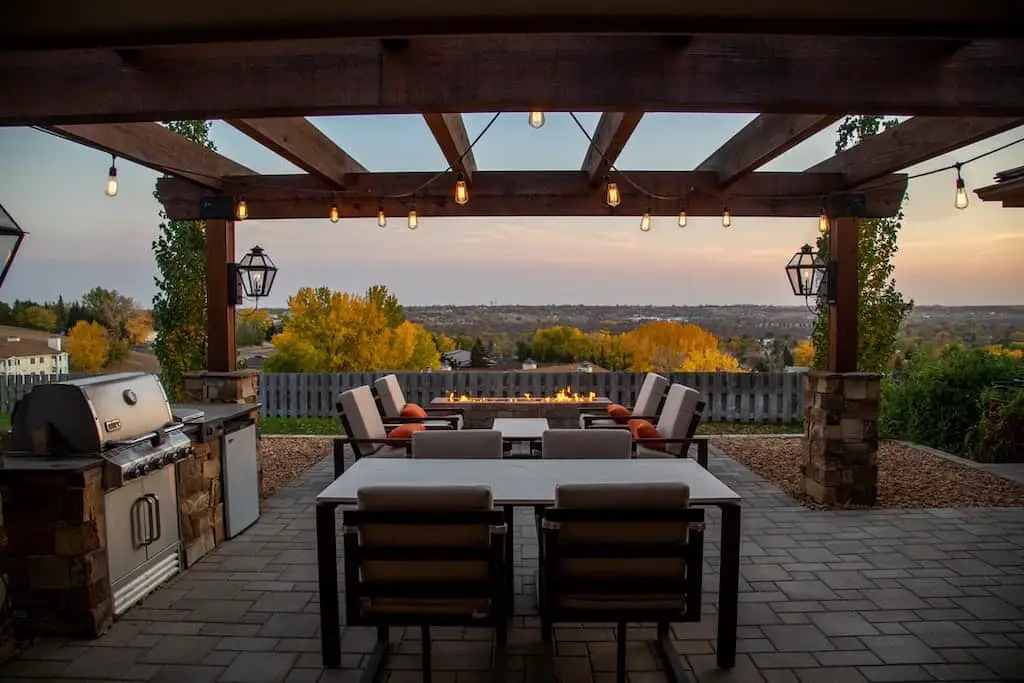
So you’ve bought your wood-burning fire pit and are enjoying cozy evenings by the fire, but are you protecting your deck? Flying sparks, embers, or the heat from a metal fire pit itself can damage, melt, or even set your deck on fire if it’s not heat resistant. Hot charcoal can be up to 1,200 degrees Fahrenheit, so if your fire pit bowl is stationed on the deck or close to it, you can expect severe damage in the long term. Fire pit mats or protective padding is a cheap way to protect your deck and an extra step to make your household safer. Today, we’re giving you our list of Top 7 Best Fire Pit Mats in 2021 to protect your deck and backyard from damage.

When Do I Need a Fire Pit Mat?

hot fire
coffee over a fire

If you’re placing your wood-burning fire pit on a combustible (vinyl, wood, PVC, etc.) deck, you’ll most likely need a fire pit mat underneath it. A short base fire pit or fire bowl that sits directly on the deck can get very hot and may melt, damage the finish, or burn your deck. If you’ve positioned your fire pit on the grass, a fire pit mat can be a great way to protect it from burns and having scorched grass patches in the backyard. 

If you have a propane gas fire pit that sits quite low on the deck, you might also need protective padding underneath it. Gas fire pits don’t create as much heat as wood fire pits, but if they sit low enough on the deck, they might damage it. If you want to keep your deck in pristine condition, think about getting a heat-proof fire mat for your gas fire pit too.

Fire Pit Mats and Pads Materials

fire pit mat and supplies

Most of the fire pit mats are made from fiberglass or fire-retardant film. They are good enough to protect the underneath surface from flying embers, ashes, and heat from the pit itself if it does not directly sit on the mat. The majority of these mats will warn that there should be at least 6 to 10 inches of space between the mat and the fire pit bowl.

If your fire bowl is not standing on any legs and directly sits on the ground, you should look into firmer pads made of volcanic rock fiber or a thicker metal heat-resistant shield.

Best Fire Pit Mat Reviews

Fireproof Pros 36″ Fire Pit Mat

US-based FireProof Pros released a series of next generation fire pit mats for under your firepit. Unlike other fire pit pads, this flame retardant heat shield is over 6mm thick with a vast mix of materials to give more heat protection for your grass, patio, concrete, wood deck, and other areas. 

This is a true 3-layered fire pit mat, which can block heat transfer from fallen embers for up to two minutes, where this is not possible with the thinner mats or lesser quality materials.

  • The top layer is a heat reflective and blocking aluminum and fiberglass/silica mix that has been made more peel resistant so your mat will last long.
  • The middle layer of this mat was designed for flame resistance and to slow heat transfer through that mat. 
  • The bottom layer is made of more non combustible and non-slip material so the mat does not slide when used.

The three layers are bound together with a fireproof Kevlar thread that is also treated with heat resistant coatings to help keep this mat together and lasting longer after many uses. This is not something you see with most other self proclaimed “protective mats.”

It comes with a convenient weatherproof storage/carrying case that allows you to store this mat away or take it with you.
This fire pit mat is designed for fire pits with legs with at least 4″ of height between the metal bottom and the mat. So you will not want to use fire pits made completely of metal with a solid metal base of fire bowls or grills where the heat source is directly above the mat within the recommended 4 inches. 
With all these features, this is the highest quality fire pit mat on our list giving longer protection from intense heat, longer lasting for many uses, and higher heat blocking materials. 

Key features: 

  • Incredible quality
  • 6mm thick
  • Fire resistant stitching
  • More peel resistant
  • Better ember protection
  • Weatherproof carrying case
  • US based customer service and support

Weaknesses:

  • The one downside would be the aluminized top which may not be as attractive as you’d like. 

Uterstyle Fire Pit Mat

Here we have a 36 x 36-inch fire pit mat from Uterstyle. This large fire pit mat is made from high-quality fiberglass that lasts a long time. The flexible and large mat can be used under any fire pit, bbq, or chiminea to protect from stains or heat as long the fire source is not sitting directly on the mat. 

This large fire pit mat can be used on any deck, patio, and grass. We would advise being cautious when using it on the grass. Thin fire pit mats may not be enough to protect the grass if your fire pit bowl is very close to the ground. You could fold the mat in half and double it as an extra precaution to keep the grass from getting burnt.

Considering the low price, the Uterstyle fire pit mat is the best budget fire pit mat on our list. It is very versatile, easy to fold and store, and doesn’t cost a fortune. The only disadvantage we can think of is the plain white/cream color, which might not fit with everyone’s backyard style or color scheme.

Key features:

  • Great price
  • Versatile
  • Easy to fold
  • Large coverage

Weaknesses: 

  • Plain color

Fireside Outdoor Ground Ember Fire Mat

Fireside Outdoor is a well-established brand specializing in portable fire pits, protective mats, and fire covers to keep campers and nature safe from fire hazards. The Ground Ember Fire Mat is probably their best product in terms of quality and heat protection. 

The large 67 x 60-inches mat will protect from even furthest flying embers or grease splashes. It comes with a 1-year warranty and meets all USFS & BLM fire blanket regulations.  The mat is coated in food-grade silicone, making it easy to handle, won’t cause itching, and won’t transfer fibers if food is dropped on it. 

Ground Ember Fire Mat is designed to stay in place even in windy conditions. There are eight stainless steel edge grommets to keep it in place during high winds. Additionally, the reflective edges make it easy to see at night time.

This fire pit mat comes at a higher price compared to other mats, but high quality, versatility, and large size make it the best fire pit mat on our list.

Key features:

  • Great quality 
  • Very large
  • Versatile
  • Coated with food-grade silicone
  • Grommets to secure to surface
  • Reflective edges for night use

Weaknesses: 

  • High price

Newtex Fire Pad Deck Protector 24-inch

This small fire pit mat is great if you want to be extra careful on your wood, PVC, or vinyl deck. The Newtex 24-inch fire pad will fit underneath most small to medium-sized fire pits. The Z-flex aluminized fabric technology can reflect up to 95% of radiant heat and stay cool to the touch. The multilayer of industrial-grade high-quality fibers used in this military-grade fire containment cover provides an impenetrable fire barrier to protect your deck or grass.

The company claims that this USA-made product is 3x better at keeping the temperature under 200 degrees Fahrenheit compared to the competition. 

Being made and tested in the USA, the mat comes at a higher price but is still affordable to anyone. If you want to take extra care of your deck, consider the Newtex fire pad as it is the best small fire mat on our list.

Key features:

  • Aluminized fabric to reflect heat
  • High quality
  • Made in the USA
  • Portable and easy to store

Weaknesses: 

  • High price

WELLUCK 40 Inch X 40 Inch Ember Mat

Here we have a square fire pit mat from WELLUCK that is 40 x 40-inches in size and is perfect even for large fire pits or BBQs. 

You’ll find that the middle of the mat has a reflective layer to reflect the majority of radiant heat. Additionally, this fire pit mat also uses dual-aluminized technology designed to protect from the heat of up to 1,800 degrees Fahrenheit.

The mat can be secured to the deck or ground using the stainless steel grommets in the corners. This will keep the mat in place during strong winds and protect people from tripping over the mat.

If the sand color doesn’t bother you, then the WELLUCK Ember Mat is a great cheap pick for a large fire pit mat. It will cover a large area from sparks and embers and can be easily secured. Finally, the thin mat is easy to fold and store away when not in use.

Key features:

  • Dual aluminized material to reflect most heat
  • Very large
  • Cheap
  • Easy to fold and store
  • Grommets to secure to the surface

Weaknesses: 

  • Dull colors

ROLOWAY Fire Pit Mat

Here we have a 36-inch round mat from ROLOWAY, a company specializing in fire-resistant and safety products. The 3-layer heat-resistant mat is designed to withstand up to 2000 degrees Fahrenheit heat. 

The design of this mat consists of three important layers. The 1st layer of aluminized fiberglass reflects radiant heat (up to 95%).  The 2nd layer of thermal insulation cotton slows down the heat transfer and isolates it.  Finally, the 3rd layer of silicone-coated fiberglass adds extra protection to the surface underneath it.

Light and easy to fold, this mat is perfect for camping and storing. The aluminized front and silicone back are very easy to clean from grease or other food drippings. The mat is also waterproof and is not afraid of moisture.

The aluminized front does make it stand out and probably won’t go with most deck or patio designs; however, the budget price cannot be overlooked if you want extra protection for your deck or grass.

Key features:

  • Cheap
  • High-quality three-layer design
  • Lightweight and portable
  • Easy to clean
  • Waterproof

Weaknesses: 

  • Aluminized front is too eye-catchy

Huttoly Fire Pit Mat 67 x 60 inches

Hate those little sparks and ember pieces that fly out of the fire pit and ruin your deck finish? Have really dry grass most of the year and want to be extra safe around the fire? Then check out Huttoly mat, one of the best large fire pit mats on our list.

The 67 x 60-inch deck protector is large enough to catch flying sparks even from larger fire pits or BBQ grills. 

The three layers consist of a fiberglass middle layer and thick silicone-coated outside layers. Compared to aluminized coatings that reflect the heat radiation, liquid silica gel doesn’t reflect the heat or let it through and can withstand heat up to 1,800 degrees Fahrenheit.  This is enough when using most fire pits or grills as long as they stay 10-inches above the mat.

The Huttoly fire pit mat is great for camping and even everyday use since it is very easy to fold and unfold. If you like to stay by the fire at night, there are reflective strips and holes to fasten the mat to the ground for extra safety.

Key features:

  • Extra large
  • Sturdy 3 layer mat
  • Portable and great for camping
  • Grommets to fasten the mat to the surface
  • Reflective strips for night use

Weaknesses: 

  • Aluminized front is very eye-catchy

Northland Online Deck Defender & Grass Guard

If you have a wood-burning fire bowl pit that sits very low to the ground and is not elevated enough, almost none of the fire mats will be helpful. The extreme temperature from hot charcoal will burn through the mat and damage your deck or grass. Therefore, you need a heat shield like the Northland deck defender and grass guard.

This shield made in the USA by Northland Metal Industries is 100% fire-proof aluminum metal construction and comes with a 2-year warranty. The two-piece construction is designed to create air space between the layers for a better insulation effect. 

The sturdy and stable construction allows placing it on any patio, deck, or even uneven surfaces like grass or gravel. This 26 x 26-inch sized platform will fit most regular fire pits and requires them to stand no lower than 2-inches.  This is significant since most fire pit mats require at least 6 to 10-inches of space between the mat and fire bowl.

If you don’t mind the heavier weight and are looking for a sturdy option, then the Northland Online Deck Defender & Grass Guard is a great fire pit shield for you. Long-lasting, sturdy construction, and a great warranty make up for the heavier price.

Key features:

  • 100% fire-proof aluminum construction
  • Heavy duty
  • Long-lasting
  • Made in the USA

Weaknesses: 

  • High price

Frequently Asked Questions

Do I Need a Fire Pit Mat on a Wood Deck?

Fire pit mats protect wood decks from radiant heat coming down the pit, shooting sparks, embers, grease, and food drippings. If you have a fire pit that can stand 20-inches or higher from the deck, you most likely don’t need heat protection.

However, the mat also protects from flying sparks and embers that could leave small burn marks in just a few seconds. Finally, most fire pit mats are easier to clean than wood decks if any oil or food drips out of the pit.

Do I Need a Fire Pit Mat on Grass?

Not necessarily, but a fire pit mat will protect your grass from being damaged. Fire pits can easily scorch the grass if they have short legs, and you’ll end up with a yellow patch of burnt grass in your backyard.

If your grass is constantly dry, then having a fire pit with no protection is a real fire hazard. A large fire mat covering as much area as possible would be best for dry grass to avoid sparks and flying embers igniting the grass.

What Size Fire Pit Mat Do I Need?

If you need a fire pit mat only for heat protection, then you can go for a smaller 24 – 26-inches mat to place directly under your fire pit. As long as they are the same size and not smaller than your actual fire pit, your deck underneath should be protected.

However, if you want extra safety from sparks, embers, or oil and food drippings, go for larger mats. The more area you cover, the safer your deck base or grass will be. Anything over 36-inches should do the trick.

Be aware that a fire pit mat is not a guarantee that you will not cause a fire.  Wind can carry hot embers a very long distance, so you must always keep your fire under control and pay attention to weather conditions that may prove hazardous.

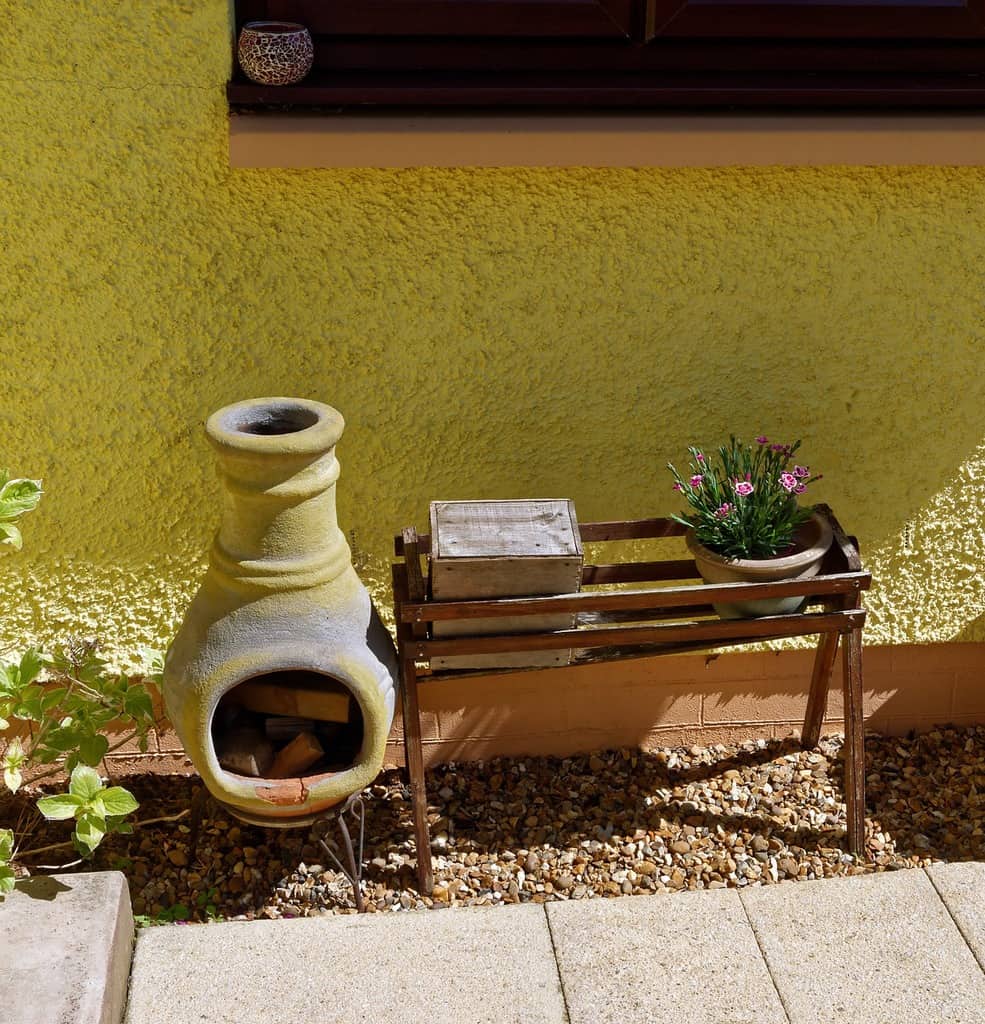
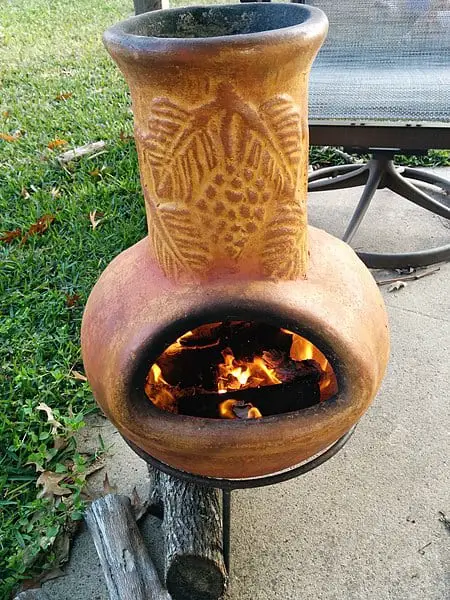
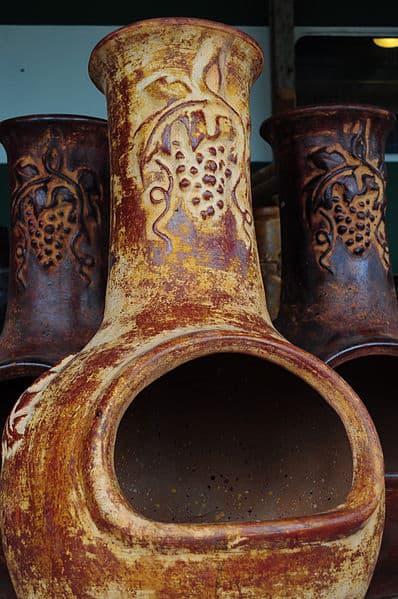
Do I Need a Fire Pit Mat for a Chiminea Fire Pit?

Yes, even though chiminea fire pits create less heat than wood-burning fire pits, they still should have a protective heat-resistant mat if they stand very close to the grass or combustible deck. Remember, chiminea fire pits are much heavier and should be set on a very stable base.

Top 7 Best Chimineas For Your Backyard in 2021

Add a bit more authenticity, sophistication, and rustic atmosphere to your garden with a chiminea fire pit. This pear-shaped outdoor fire pit has been used for warmth and cooking for over 400 years, with origins tracing back to Spain and Mexico. These days chimineas are gaining even more popularity because of their exquisite looks that add character and authenticity to your garden or a backyard. Take a look at our list of the top 7 best chimineas for your backyard in 2021 to find the perfect option for your garden.

What to Consider Before Buying a Chiminea?

Size and Shape

Chiminea on patio
Txspiderman81, CC BY-SA 3.0, via Wikimedia Commons

Depending on your needs, you might want a larger or smaller chiminea. If you’re looking for a cozy night outside on your patio with your significant other, then a small chiminea is perfect. If you’re looking to provide warmth for a group of friends, go for a chiminea with a larger base so it would fit more fuel. Larger chimineas are quite similar to big wood-burning fire pits with mesh on top, except the pits don’t have chimneys to collect some of the smoke. Just remember, the larger the chiminea, the more care and maintenance it might need.

Design

Joe Mabel, CC BY-SA 3.0, via Wikimedia Commons

Chimineas are all about the looks! Traditional-looking ones are pear-shaped with a bubbly bottom and chimney going upwards. They are excellent if you’re looking for something rustic and need to provide heat to a smaller area. If you want to do some grilling and provide heat for a larger area, you might want to go for a chiminea with a mesh. It will provide a 360 degrees view of the fire and usually has more space for grilling. However, you’ll have more smoke coming through the mesh instead of going out the chimney, and if the steel supports rust away, you will be left with an open fire pit.

Material

Traditional chimineas are made out of clay, usually by hand. These authentic chimineas are much heavier than most metal ones and require a lot of maintenance and care. For first-time buyers, we suggest staying away from clay chimineas. They look amazing but are extremely fragile, heavy, expensive, and require a ton of care.

The most common choice these days are metal chimineas. You’ll be able to find cast iron, cast aluminum, steel, or even copper chimineas. If you want something very sturdy, go for cast iron or cast aluminum. Steel and copper chimineas are very easy to move around if you decide to rearrange your backyard, but they are also prone to corrosion and rust.

Accessories

Chimineas usually don’t have a lot of accessories. A chiminea might have a wood grate at the bottom to provide more airflow for your fuel, but it is not a necessity since most chimineas usually have an air vent. If you want to cook, grill or smoke something, look at a chiminea that allows inserting a grilling grate. Some chimineas have mesh in the build to protect you from jumping embers.


Top 7 Best Chiminea Reviews

Esschert Design FF109 Small Terrace Heater

Esschert FF109 is a genuine cast iron chimenea for people looking to add extra coziness and a small fire source on their patios. Its dimensions are 15.75 x 14.96 x 27.95 inches and weighs 46 lbs. since it’s made from cast iron. Yes, it weighs quite a bit and is not very portable, but the whole cast iron construction is exceptionally sturdy and durable. It also comes with a lid for the top to protect against rain and unnecessary debris falling inside.

Don’t be mistaken and think that it won’t produce enough heat. This black beauty might be petite, but it packs a punch. When you have a proper fire going, cast iron gets really hot and will heat 6-8 feet around the chiminea. Depending on your patio or backyard layout, that might be enough to heat 4-8 people around the chiminea. If you want, you can also pop a grill grate on the tube top and cook some food.

The 14-inch mouth on this chimenea and a smaller chamber does limit the size of logs and kindling you can use. Anything over 8 inches in length will be hard to fit inside.

Other than that, the FF109 is one of the best small chimineas currently on the market that will add a rustic look and exclusive style to your outdoor living space.

Key features:

  • Cast iron construction
  • Sturdy and durable
  • Authentic design
  • High heat output
  • Cheap

Weaknesses:

  • The small body requires short logs.

B H & G C0. Antique Bronze Cast Iron Chiminea

If you’re looking for something more elegant and sophisticated than a simple firewood burning fire pit, B H & G chiminea might be a perfect option for you. The 46-inch height chiminea has a 360 degrees view of the fire through a thin mesh. A large 28-inches width chamber allows you to hold a lot of wood and provide heat for your whole patio.

This antique-style chiminea is made of cast iron and has a bronze finish. Compared to other cast iron chimineas B H & G Antique chiminea is much cheaper. We can see that the construction is a bit thinner than you would expect, so the longevity might be shorter than thick and heavy cast iron chimineas. However, it does come with a poker, lid on top, and even a nylon cover to protect against rain, snow, or other debris when not in use.

This large 360 degrees chiminea is the best budget chiminea on our list today and a perfect addition to any lounging area if you want something different but don’t want to spend a fortune.

Key features:

  • Cast iron construction
  • Large capacity
  • Nice bronze finish
  • 360 degrees view of the fire
  • Cheap
  • It comes with a lid and cover

Weaknesses:

  • Thin metal construction

BALI OUTDOORS Outdoor Fireplace Wooden Fire Pit, Chimenea

We have already reviewed a bunch of wood-burning fire pits from Bali Outdoors, so it’s no surprise to see their product on the best chimineas list too. Their cast iron chiminea has a black matte look to represent classic authentic chiminea and features a ton of accessories for easy use and care.

The 22 x 22 x 45 inches cast iron construction weighs almost 53 lbs. and stands on three sturdy legs to elevate the chiminea from the ground. A wide 22-inch cage has plenty of room for 16-inch firewood logs. The whole middle sectioned has fine mesh for a nice view of the fire all around the chiminea. A wide sliding door provides easy access to add more fuel or when using a grill grate for food. We love the small sliding ash drawer at the bottom for an easy clean-up after use.

As mentioned above, if you want, you can grill or cook food in this chiminea with the included grill grate and a convenient poker. The best part is that this lovely looking, high-quality, and nicely designed chiminea is not expensive at all! For this reason, it takes the overall best chiminea spot on our list today.

Key features:

  • Cast iron
  • Sturdy construction
  • Beautiful classic look
  • Large capacity
  • 360 degrees fire view
  • It can be used to grill, cook, or smoke.
  • Easy clean-up
  • Lid

Weaknesses:

  •  None

Kotulas Cabin-Style Outdoor Cooking Steel Chiminea

Love grilling but want something different than a regular fire pit? Kotulas Cabin-style chiminea is an amazing heat and fire source that looks like a small cabin. You’ll have plenty of space for grilling, while the small chimney will protect you from the pesky smoke.

The 0.8 mm – 1 mm thickness gauge steel construction is sturdy enough to stand firmly on any surface. The whole chiminea has a high-temperature finish and lovely deer engraved at the front to add some Northwoods vibes. You’ll also have poker and an ash shovel included in the purchase.

The chiminea’s unusual design makes it the center of entertainment during gatherings with friends and family. The opening and inside are big enough to add a grill grate for 4-6 people or use it for a cozy fire and marshmallow roasting.

The only disadvantage with this great-looking chiminea is the steel construction that is much more prone to rusting. Make sure to get a cover for it or add an additional heatproof paint coat.

Key features:

  • Exceptional design
  • Gauge steel construction
  • Large enough to grill food
  • Poker and shovel included.

Weaknesses:

  • Prone to rust

Deckmate Sonora Outdoor Chimenea Fireplace Model 30199

Standing at over 4 feet tall, Sonora is the best chiminea from Deckmate to date. Not only that the tall tube will protect everyone around from the smoke, but the build itself is remarkably sturdy with an alluring rubbed bronze finish.

The 21 x 21 x 51.6 inches chiminea weighs 75 lbs. making it very stable on any surface. It features a fine wire mesh body to provide an all-around view of the fire. The big chamber can easily fit 16-inch logs and even some 18-inch ones. A sliding door will give easy access to add firewood, while the ash drawer makes it easy to clean up after every use with the provided poker.

We love the construction of the chiminea and the whole build in general; however, the grate to hold burning wood seems to lack quality. Other than that, Sonora is the best large chiminea on our list in 2021.

Key features:

  • Large capacity
  • Cast iron construction
  • Rubber bronze finish
  • Tall tube for smoke
  • Can fit large logs
  • Ash drawer
  • Poker with hanger

Weaknesses:

  • Grate quality seems sub-par.
  • Quite expensive

Venetian Grill Wood Burning Chiminea Charcoal Color

Blue Rooster is one of the top chiminea manufacturers you can find. They strive to engineer their chimineas to last a lifetime and put their money where their mouth is with a lifetime warranty! If you are willing to splurge and want a product to last you a lifetime, then Blue Rooster Venetian chiminea is the best luxury chiminea for you.

The large opening allows you to easily add firewood logs of up to 16 – 18 inches. The company says the chamber easily fits up to 20-inch logs, but we think they’re pushing it a little bit, but you probably could fit one or two such length logs.

Ok, so the chiminea is for a lifetime and is big enough for big parties, but for us, the best part is the stunning Venetian-style exterior. The black matte finish with engravings mimicking old Italian Gothic-style columns will be an eye-catcher, and you’ll definitely get a ton of compliments. Even if you don’t use the chiminea often, it will be a fantastic addition to your outdoor living space style and decor.

Key features:

  • Cast aluminum construction (will not rust)
  • Large capacity
  • Amazing Venetian style
  • Very durable and rust-resistant
  • Lifetime warranty

Weaknesses:

  • Expensive

Sunnydaze Modern Chiminea

Tight on space but want a bigger fire source to heat up the patio? Sunnydaze heavy-duty cold-rolled steel chiminea is large enough to heat big spaces but doesn’t take half of your patio. The 18-inch wide chiminea body (22-inch width legs) and large opening easily fit standard-sized logs. The sturdy steel provides a lot of heat around the chiminea, making it a perfect lounging spot during cold nights.

You can use the chiminea for grilling if needed. Just remove the wood grate and add your own grilling grate (not included).

This chiminea is made from a bit thinner steel compared to other chimineas; that’s why it weighs just 30 lbs. On the one hand, yes, it’s a bit more portable, but on the other hand, it’s not as sturdy and might rust faster. Sunnydaze does give a 1-year warranty in case of any early malfunctions or breaks. There is also no lid or cover with chiminea, so if you want it to last more than a year, make sure to get a cover that protects chiminea from rain and moisture in general.

Key features:

  • Cold-rolled steel construction
  • Space-saving design
  • 1-year warranty
  • Lightweight
  • Easy to assemble
  • The rustic, old-school log cabin design

Weaknesses:

  • A bit flimsy
  • No chimney lid
  • No spark guard

Frequently Asked Questions

Which is better: clay or metal chiminea?

Clay chimineas usually are a bit more expensive (thick cast iron chimineas come close), but they do provide an exceptionally authentic, rustic, and warm atmosphere to your backyard. Clay can deteriorate over time, and you really shouldn’t try to move a clay chiminea once it’s been used for a while. The combination of extreme heat, outdoor moisture, and freezing may cause the clay to crack and fail. If it fails while you have a fire burning, it could be a real hazard.  Metal chimineas come in many varieties.  Sheet steel is light, cheap, portable, and prone to rust through.  Cast iron are very heavy and durable.  Cast aluminum are probably the best chimineas out there as they will not rust like steel, they will not break apart like clay, and they aren’t as heavy as cast iron. 

If you want a short-term chiminea that is portable, go sheet steel.

If you want a chiminea to last a lifetime, go with cast aluminum.

Is a chiminea better than a fire pit?

Not necessarily; it depends on how you want to use it.  Wood-burning fire pits are better for big open fires that everyone can gather around and see.  Chimineas are better for smaller fires for several people with less smoke and more heat holding capability due to the chimney and surround.  Chimineas are a bit safer because a strong wind won’t blow hot embers across your yard.

Will chiminea produce enough heat to keep people warm in the backyard?

The bigger space you are trying to heat, the bigger fire you will need.  To warm a large group, you will need a larger chiminea.  You will never warm the yard with any size fire (unless you have a small yard and a large bonfire).  If you are trying to warm a circle of friends gathered around the chiminea on a chilly evening, then yes, any of these will work.

If you want to heat a larger area of your patio or backyard, take a look at the Best Patio Heaters in 2022.[1] 

Can I put my chiminea on a wood deck?

Yes, you can put your chiminea on a wood deck; just keep in mind that there might be sparks and embers shooting out. To protect your deck, you can put chiminea legs on bricks or other non-combustible surfaces and have mesh grates so falling sparks won’t cause damage. If your budget isn’t too tight, we advise getting a heatproof fire pit mat[2] ; it’s an easy option to keep your deck safe.

Do I need a cover for my chiminea?

Some chimineas have lids for the chimney, but only a few include a cover. In general, all chimineas, no matter if they are made of clay, cast iron, steel, or copper, should be covered from rain or snow. A clay chiminea must be kept dry in freezing temperatures, or it will crack. The more you protect your chiminea, the longer it will last.  Sheet metal chimineas are prone to rust, so covering them will extend their lifespan.  Covers also help you avoid having a fire pit full of rainwater the next time you want to start a fire.


place to interlink future article on best patio heaters.

interlink fire pit mat article

Top 7 Ash Buckets for 2021

If you have a fire pit in the backyard or a fireplace of any kind that burns wood, you know the hassle of dealing with hot ash and embers. You probably even ruined one or two plastic containers thinking the ash was already cool, just to find the side of the bucket with a hole the next morning. Maybe it’s finally time to get a proper ash bucket that won’t warp, melt, or damage your floor? Today, we’re looking at the top 7 ash buckets for 2021. 

What is a Good Ash Bucket?

ash bucket next to a wood stove
used ash bucket

It’s a bucket; it shouldn’t be complicated, right? 100%! Ash buckets should be able to hold hot ash without breaking or damaging the surface it’s set on. A good ash bucket’s main features should be proper material like galvanized iron so it won’t warp, a handle to carry the bucket, and a double-layered bottom to prevent burn through. 

Best Ash Bucket Reviews

Amagabeli Bucket for Fireplace

The Amagabeli ash bucket has a durable construction of a 0.4 mm thick iron plate layer and a beautiful black finish. This allows holding cooled ash and embers from your fireplace, carrying kindling, or even hot charcoal. Just don’t keep hot embers or charcoal for a long time, this will damage the paint, and your bucket might start to rust.

The bucket comes with a 0.7 inch raised bottom to protect your surface from heat damage. However, you should always place it safely outside or on a fireplace hearth to be extra safe.

Finally, the bucket has a very large spout, flexible handle, and a pocket on the side to conveniently and neatly pour out the ashes.

A beautiful bucket that is not only easy to use but looks great on your fireplace hearth. If you’re not too price-sensitive, Amagabeli is one of the best ash buckets on our list.

Key Features:

  • Beautiful looks
  • Raised bottom
  • Thick iron plate layer
  • Large spout for easy pouring

Weaknesses:

  • A bit expensive
  • No lid

Panacea 15343 Ash Bucket with Shovel

This Panacea bucket comes with a small shovel for easy ash collection and keeping your fireplace clean and tidy. You’ll also have a bucket lid to protect the ash from being blown out if you place your bucket outside and a comfortable wood handle for transportation.

This heavy-duty steel bucket is 12.5-inch diameter and 13-inch in height with a powder coat to prevent rust and paint flaking. Panacea 15343 doesn’t have a double or lifted bottom, so make to keep it on your fireplace hearth or other non-combustible surfaces.

All in all, it’s a lovely set that can be used inside or outside for easy cooled ash collection and disposal.

Key Features:

  • Powder-coated
  • A lid to keep the ash from spilling
  • Shovel included
  • Wood handle

Weaknesses:

  • No double or lifted bottom

Smedley and York Coal and Ash Bucket 

Keep your fireplace tidy with Smedley and York ash bucket. This classic-looking black bucket comes with a metal shovel and a broom. It has a 2-gallon capacity to store logs, coal, ash, or pellets.

The bucket is made from galvanized iron, so it’s safe to shovel warm ash, but not advised to store hot coal since it doesn’t have a double bottom.

This set is perfect to have near your fireplace as you don’t need to use your house shovel or broom to collect the ash, and the bucket itself can hold ash from 2-3 fireplace burns. Additionally, the beautiful design and classic black color will fit nicely with most fireplaces and hearths.

Key Features:

  • Classic look
  • It comes with a shovel and broom.
  • Made from galvanized iron
  • Has a lid

Weaknesses:

  • A bit expensive

Vestil PAIL-STL-RI Steel Open Head Pail

Vestil steel open bucket is the best budget ash bucket on our list. If you don’t need anything fancy and just want a simple steel bucket to transfer cool ash from your fireplace, Vestil might be your best option.

This 5-gallon bucket measures 13-3/8 x 11-7/8 inches and is coated with rust inhibitors to prevent corrosion. This pail is made from thin steel, making it super lightweight. However, this also means it should not hold any hot ash or embers for any period of time; otherwise, it may warp, melt, or damage the surface beneath it.

It’s a nice, cheap option if you want a simple bucket for your ash, coal, pellets, or don’t have a firewood rack.

Key Features:

  • Inexpensive
  • Large capacity
  • Lightweight

Weaknesses:

  • Not suitable for hot ash
  • No lid

Minuteman International Scoop Coal Hod Pellet Bucket

This large pail from the Minuteman company is great for holding pellets, kindling, coal, and of course, ash. The 14-inch diameter and 14-inch height is large enough to scoop out ash from 3-4 fireplace burns or 30-40 lbs. of pellets.

This bucket, being constructed of galvanized steel with a double bottom for insulation, can hold hot ash without warping or damaging your floor (we still advise keeping it on your hearth).

A large spout is helpful to easily pour out any contents without making a mess. There is also a black metal scoop, but it felt a bit flimsy and lacked sturdiness.

If you don’t mind the shovel, the bucket is of excellent quality, easy to use, can hold hot ash, and looks good, making it the best large ash bucket on our list.

Key Features:

  • Stylish design
  • Made from galvanized steel
  • Double bottom
  • Large capacity
  • Large spout
  • Metal scoop

Weaknesses:

  • Scoop is a bit flimsy.

Plow & Hearth Double Bottom Metal Fireplace Ash Bucket

Plow & Hearth ash bucket is overall the best ash bucket for your fireplace on our list. It has a double bottom to hold hot ash, 3-gallon capacity, 28 gauge galvanized steel, and a beautiful charcoal black finish to match your fireplace.

The bucket has a 10-inch diameter and 13-inch height with a lightweight powder-coated steel lid and a handle with a wooden grip for comfortable handling inside or outside.

Beautiful finish, high-quality construction, and easy handling are worth every dollar.

Key Features:

  • Sturdy build
  • Beautiful modern design
  • Made from galvanized iron
  • Powder-coated
  • It comes with a lid
  • Wooden handle
  • Perfect for inside or outside use

Weaknesses:

  • None

Hisencn Wider Fireplace Ash Bucket

To end our list, we have another large ash bucket that can also be used for pellets, coal, or storing kindling. Hisencn fireplace ash bucket’s opening mouth is 16.1 x 13.9-inches with 11.8-inches in height. The large spout and a side pocket allow you to easily pour out the contents without making a mess. Additionally, you can store quite a bit of tinder or kindling in this bucket.

The strong galvanized iron is heat resistant, so you can scoop out warm ash without damaging the bucket, while the lifted support base will protect your wooden flooring if you forget to place your bucket on the fireplace hearth.

Overall, a high-quality large multipurpose ash bucket for any fireplace, grill, wood oven, or other miscellaneous landscaping tasks.

Key Features:

  • Large capacity
  • Large spout
  • Side pocket for easy pouring
  • Made from galvanized iron
  • Lifted bottom

Weaknesses:

  • No lid

Frequently Asked Questions

hot coals

Where Should I Store My Ash Bucket?

Even when handling barely warm or cool ashes and embers, take extra safety and store your ash bucket at least 3 feet away from any combustible material or surface. If your bucket doesn’t have a double or raised bottom, keep it on a non-combustible surface like cement or bricks; if you’re storing your ash bucket indoors, keep it on your fireplace hearth.

Why Do I Need an Ash Bucket? Why Remove Ash at All?

Everyone knows that burning solid fuels like wood, pellets, or coal will leave a bunch of ash behind. The ash leftovers can dramatically reduce the performance of your fire pit, fireplace, or stove by reducing air intake.

Ash build-up will also collect moisture, which will cause a metal fire pit to rust over time.

More importantly, ashes act as an insulator and stop hot coals from burning out. Hot embers insulated with ash can stay dormant for up to 4 days! This might be a fire hazard and a danger to unsuspecting people later using the fireplace or children playing around it. 

That’s why it is always important to remove ash after every burn and make sure all the embers burn out. Let the fire burn out, and give the embers a few hours to cool before you go after them.  Large piles of scorching embers makes the job much more dangerous.  Let them cool a bit and then scoop the ashes into your ash bucket and keep it in a place away from combustible material.

How to Safely Dispose of Fire Pit Ashes?

If your fireplace has finished burning, use your poker and look for any hot embers; if you find any, push them to the side and let them cool. It’s best not to put hot embers in an ash bucket, at least not for a long time, especially if it is not made from galvanized iron.

When there are no more hot embers, you can collect the ash into your ash bucket and store it away from anything flammable for extra safety. If possible, store your ash bucket outside on a non-combustible base.

The danger when disposing of your ashes is hot embers.  Dumping them out in the tall grass or below trees is dangerous because organic material could easily catch fire.  The safest option for your ashes is to mix them into the bare soil of a garden and water them down.  This will ensure that all of the hot embers have been extinguished, and it will help to fertilize your garden.

If you don’t have a garden, you can dig a small depression in the ground near the corner of your yard, dump the ashes in and water them down.  At the end of the burning season, you can cover the ashes with soil.

Landscape Masonry A Closer Look at Your Yard’s Hardscape

Understanding the role that landscape masonry plays in creating a functional and appealing outdoor space is an essential aspect of your overall landscape plan.  Below is a guide that will take a closer look at your yard’s hardscape and all of the different landscape masonry types and how you can incorporate them into your yard’s design.

Many of us have found more time at home lately.  Some have learned new skills such as painting, baking, and sewing, while others started growing plants and tidying up their yard.

If you are one of the thousands of people who are currently invested in the beautification of your outdoor space, you must have also thought of building additional structures like a kitchen, grill station, pool, patio, and walkway. These hardscape elements are typically constructed using landscape masonry.

What is Landscape Masonry?

Landscape masonry is a term used to address many hardscape features like walkways, patios, dry streams, columns, etc. Traditionally, the term masonry has been used more to describe stone, brick, block, or concrete work held together with mortar or cement.  Lately, it has been used to include all types of hardscape installations, including dry-laid walls and flatwork.

Unlike other construction techniques used in our landscapes, like carpentry and earthwork, masonry is considered highly durable and permanent because of the materials used in the construction process. These structures, which are usually made from stones, bricks, or concrete, can withstand just about any weather event that may occur.

If you want to add some more hardscape features to your yard, you have the option of doing it yourself or hiring a professional.  The materials aren’t particularly hard to obtain, but the work is rather technical and laborious, so if you do not like details and back-wrenching work, masonry may not be for you.

Two Landscape Masonry Techniques

When it comes to masonry, especially in the landscape, there are two basic construction techniques.

Wet-laid

This technique is also referred to as mortared.  The masonry structure is built adhering the stone or brick to each other using mortar or cement.  While typically considered its own category and product, concrete could also be regarded as a wet-laid technique since it is gravel and sand held together by a lime cement slurry.

Wet-laid structured are typically seen as more durable than dry-laid because individual pieces are less prone to move with little force.  When we are using stone and brick for home construction, it is almost exclusively wet-laid.

Wet-laid walls and patios will typically require a footing that extends down below the frost zone to avoid frost heave and cracking or a flat foundation.  In cold climates, when the ground freezes, it heaves.  It may only move slightly, but if your wet-laid patio or wall does not have a sturdy foundation below it, the mortar and stone will easily crack and shift with the force of the frozen ground. 

This same freeze and thaw cycle forces boulders to the surface of the earth over time, so don’t disregard its power.

A wet-laid wall will typically have a footing that extends below the frost line.  Here in Wisconsin, that is four feet below the surface.  This foundation is what the wall is built upon, and it will ensure that the wall does not heave and crack because it is built low enough that the ground below it will never freeze.

On the other hand, a wet-laid patio is typically built upon concrete flatwork.  Just like when laying concrete sidewalks and patios, concrete flatwork always has crack joints cut in it so that the walkway or patio will crack where we want it to crack as it moves with the surface of the earth.  Using this method, we can adhere stone or brick to the top of this concrete flatwork so that it has mortar joints over the crack control lines so that the movement doesn’t damage the stone and mortar.

Wet-laid masonry is always more expensive due to the extra time and materials needed to build it properly.  Even in warm climates where freezing is not an issue, wet-laid masonry takes more time to install.

Dry Laid

This technique is the most widely used method of wall building and patio and walkway building in America.  The technique involves removing any soft topsoil, compacting a flat base of crushed stone, and then laying or stacking the stone or brick on top of that.

Dry laid boulder or stone walls and patios are quite different in construction, but both rely on the same principles.  We are using gravity to keep our project intact.

A dry-laid patio or walkway will have brick or stone laid flat on top of the crushed stone base.  The stone or brick are set tight together with minimal gaps, and they are all set in one plane to create a pleasing flat surface.  They are held there by gravity and backfilled with sand to fill the gaps.  These patios and walkways will move with the freeze and thaw of the ground below, but as they are not mortared together, cracking is not an issue.  The rustic old European cobblestone roads were built with this technique, so we know it stands the test of time.

On the other hand, a dry-laid wall uses gravity to keep it together by stacking the rock or brick to always bear on the course below in such a way that the gravity will keep it in place.  This is why many dry-laid stone walls are wider at the bottom and more narrow at the top because the stones are leaning in toward the center of the wall to keep it standing.  Once again, these walls will move with the freeze and thaw, but if built correctly, it will not damage the construction as there is no mortar to crack.

Side note:  A retaining wall is typically a wall built to retain the soil behind it.  Retaining walls are most commonly dry laid.  Whether dry or wet-laid, a retaining wall’s durability lies in its drainage.  When you see a retaining wall leaning out and looking like it might fall over, that is due to the ground behind the retaining wall pushing out on the wall.  This can be from frost or simply from water and soil flowing down the hill that is being retained.

Two Wall Styles

The following terminology for the two styles is used more in home construction than landscaping, but the concepts might still apply if you create a mortared stone wall.

  • Rubble Masonry: This uses undressed, natural stones set in mortar.  This would be a natural fieldstone mortared wall, for example.
  • Ashlar Masonry: This type of stone masonry is more expensive as it requires sizing, shaping, and smoothing the stones to create the desired appearance. This would be a mortared wall constructed using square-cut stone pieces.  This is much more formal and stable due to each stone’s squaring.

Masonry Options

Gone are the days when landscape masonry only focused on natural stonework. Now there is a dizzying array of materials and options that would beautify any backyard, so it can be tough to narrow down your choices.  The list below is intended to help you choose what might be right for your landscape.

Natural Stone Masonry

Even though natural stone masonry is tagged as the oldest masonry technique, it still works in imbuing different structures with lots of sophistication.  Natural stone is more earth-friendly as it is naturally occurring, but it is typically more costly.

There are many natural stone options that you can choose from if you prefer stone masonry. Some of the most popular choices are granite, limestone, bluestone, and sandstone.  Typically, depending on the look that you want, you will be better off using a stone that is local to your area. Rock is heavy, so trucking it across the country can get costly.

Using a stone native to your area will better ensure its longevity.  I have too often seen landscapes where people used sandstone in a northern climate only to realize that it quickly breaks down when exposed to freezing temperatures when wet.  This is why you don’t find a lot of sandstone in Wisconsin.  The seasons’ freeze and thaw turn it into sand in short order.

The most natural look for dry-laid freestanding or retaining walls is the fieldstone boulder retaining wall.  These are natural stones taken from the earth and stacked to build the wall.  The boulders are typically sized to match the wall’s scale, and they are generally dry-laid (stacked).

Many natural stone walls are built using outcropping stone.  Outcropping stone is typically blasted out of rock quarries and fractures into rectangular blocks, making it ideal for stacked stone walls.

Many patios and walkways are created using natural stone that has been cut or fractured to a specific size or shape.  Limestone is a very popular option for patios, walkways, and stepping stone paths because when it is blasted out of quarries, it will often fracture into thin layers that are ideal for these uses.  Flat, natural stone is often referred to as flagstone.  Flagstone is a style of stone, not a particular type.

Brick Masonry

Historically, bricks have been used to build walls and flat surfaces for many years because they can be made out of clay in areas that do not have access to flat stone material.  Bricks are traditional rectangular and are relatively easy to use, laid flat, or stacked.

Although bricks won’t typically last as long as natural stone, there are many products on the market today that will get close.

Brick has been traditionally made using clay, so the brick’s color and durability were primarily tied to the region and soil structure from which it came.

More recently, the concrete industry has been making remarkable brick products in many shapes and sizes.  These concrete products are very durable and can be made to resemble clay brick or even natural stone, so they are a very popular choice for many homeowners.

Brick can be dry laid or wet-laid when used in patios but would typically be wet-laid when used in walls as their small size does not give them great stacking ability when dry.

A Few things to consider when choosing brick:

  • Natural clay brick can absorb water, leading to cracking and deterioration in colder climates.
  • Because they are absorbent, natural clay bricks will often grow moss in shaded areas.
  • The newer concrete bricks are generally very good, but some tend to fade in color.
  • Some concrete bricks are colored throughout, while some are only colored on the outside, which means that any chip will reveal a different color.

Block Masonry

There are many different concrete block products used in construction.  The tried and true cinder blocks have long been a staple in the home construction industry and are often used as the foundation for wet-laid brick and stone walls.

Concrete retaining wall blocks are widely used to retain the earth in residential and commercial settings.  These blocks come in many shapes, sizes, textures, and colors and can be small to create a pretty little garden or seat walls, or they can be quite large to hold back mountains of earth.

The retaining wall blocks are engineered specifically to fit their application and typically constructed so that they will tie into each other or be adhered to each other using construction adhesive.

Concrete Masonry

Concrete may not be your best choice if you are looking for pretty, but you can’t argue with its adaptability, strength, and longevity.  Poured concrete is used in both vertical and flat applications and can be engineered and reinforced to withstand almost any force.

Poured concrete has long been an easy and economical choice for landscape walls, flatwork, footings, and foundations.  If you are looking for an economical patio or walkway at your home, you won’t find a better price than a poured concrete application.  It can be formed to fit any space and will last many lifetimes.

If you have a bit extra to spend, you can look into colored and stamped concrete, which is poured concrete that is colored and/or stamped to have a particular look.  Some stamped concrete patios could be mistaken for natural stone.

Poured concrete or modified concrete that can be blown in against the walls is a primary construction method for in-ground swimming pools.  The two types of concrete used for pool construction are usually called shotcrete or gunite.  Both types are blown onto a vertical surface and would definitely need a professional’s touch and equipment for application.

Stone or Brick Veneer Masonry

Veneer masonry uses a thin layer of stones or brick for decorative purposes and not for load-bearing. Usually, the thin layer is stacked against and tied to a poured or block concrete wall.  While you will find some walls and pillars like this in landscapes, this technique is typically used in home construction.

Veneers can vary in their thickness and uses.  A full-bed stone or brick veneer uses pieces that are four to eight inches thick. A thin or sawn veneer, on the other hand, uses natural stones or brick that were sawn down to create the ideal one-inch thickness. These days, they are becoming increasingly popular since they can be used in areas where full bed stone veneers won’t fit, and they are more economical.

Ways to Incorporate Masonry in Your Landscape Designs

There are several ways to include masonry in your landscape, and here are they:

Walkways

Walkways enable you and your visitors to move through your landscape without damaging all your softscape. You can use pavers, poured concrete, or stonework to create this, but pavers are much preferable since they come in different tones that can be integrated into your landscape.

Stepping Stone Paths

Flat pieces of stone, large or small, can be laid in any design needed to allow for a very informal walkway through your lawn or garden.

Patios

Patios are perhaps the most common application of masonry in a landscape. You can use whatever sort of masonry material and technique you choose and create a very long-lasting patio of any shape or size.

Entryways

Want to create a great first impression among your guests or create a security gate? Then you might want to build masonry pillars at the end of your driveway.  This will make a formal entrance, and the pillars can support a gate.

Driveways

Many driveways are constructed using concrete, but they can also be built with brick or stone.

Retaining Walls

Utilizing masonry to add retaining walls is quite practical as it provides structural support and aesthetically pleasing planting areas and terraces.  These walls can be created using many different materials and techniques.

Fireplaces

Wouldn’t it be fun if you have a fireplace that can provide your outdoor space with a warm ambiance? Natural stone or brick masonry can be used in conjunction with a masonry product called fire brick (used to line the inside of the fireplace) to build a fireplace out in your yard, just like one that you may see inside a home.

Outdoor Kitchens

Outdoor kitchens seem to be gaining popularity and can be built using dry-stacked walls or wet-laid walls to create counters, cabinets, and enclosures for sinks, grilling areas, refrigerators, and more.  Often concrete or granite can be used for countertops.  Couple this kitchen with a fireplace, a table and chairs, and some new patio furniture, and you’ve got a full-scale living area outdoors!

Dry Stream Bed

A dry stream bed or dry creek bed is one of the most straightforward masonry applications in your landscape. All you have to do is line stones in a gully or trench for better drainage, to prevent soil erosion, and to add an artistic flair.

Garden Walls

Garden walls can be created to frame in a special garden, or they can be used at the edge of a patio to separate it from the rest o the yard.

Benches and Seat Walls

Benches and seat walls can be constructed in many different ways to suit your needs. Creating a nice solid spot to sit and view your garden can be a nice touch in many gardens.

Pools

Whether you live in a tropical climate or not, constructing a pool to complete your landscape is a good idea. Pools can be created in any style you might like to suit your yard and lifestyle.  Bring the vacation to your yard by giving yourself a beautiful swimming pool where you can enjoy the hot sun or a cool dip.

Columns

As mentioned before, columns can be built at the entrance to your home, or they can be used at the ends of walls or to draw attention to certain areas of your garden.  Due to their height, columns will typically require a foundation. They can be used to create height in the garden and can have lights mounted on them if desired.

Archways

Another wall addition that will certainly add flair to your garden would be a masonry archway.  Archways have long been used in more formal walled gardens and require a skilled craftsperson to build, making them a bit on the pricey side of things.

Water Features

Many beautiful gardens have a masonry water feature.  These can range from concrete reflecting ponds to fountains to large cascading waterfalls.  No matter how you do it, a masonry water feature can be the life of your landscape.

Fire Pits

Masonry has long been used to create enclosures for our fire.  You can create a fire pit of many different materials and in many styles and sizes, although you should avoid using very absorptive stone as it may pop when heated if it has moisture in it.

Outcroppings

Stone can be used to create outcroppings in your yard that can retain soil or be used as a backdrop or accent to a garden bed.

Final Thoughts

Masonry is the foundation of hardscaping. You won’t find a garden or a yard without stones, bricks, or concrete because they are the primary materials used for most landscape features.  Whether you hire it done or do it yourself, landscape masonry will be the backbone of your landscape.  It will likely endure for the life of your home, and your gardens will grow and change around your masonry features as the years roll by.

Balancing Hard and Soft Landscape + Bonus Tips for Small Spaces

You may have heard the words hardscape and softscape a couple of times but didn’t give them much of a thought until you began planning your landscape. Landscaping professionals primarily use these terms, so you don’t have to beat yourself up if you aren’t aware of them.  We are going to show you how to balance your hard and soft landscape and we will also give you a few tips for your small yard.

On another note, if you are on this page because you have finally taken an interest in beautifying your yard and you don’t know where to begin, you came to the right place. I will not only walk you through the differences between hard and soft landscaping but will also share some tips on how to balance them, whether you are planning to fix a large or a small garden.

Differentiating Hardscape from Softscape

Hardscape and softscape are the two main elements that make up different types of outdoor living spaces. They are quite different from each other, but both are necessary to maintain a relaxing and beautiful garden. To identify them, always remember that the hardscape is inanimate while the softscape is alive.

Are you still confused? Read on for an in-depth explanation of their features.

Hardscape

hardscapes

The hard stuff you’ll find in your yard or garden is called hardscape. These are the gravel, stones, retaining walls, decks, driveways, gazebos, patios, outdoor kitchen, etc. They can either be naturally existing or human-made.

Even though they are called “hardscape,” some of these elements are movable. For instance, the stones, paving, and gravel can be placed anywhere you see them fit. This is also why they should not be considered an afterthought of an incredible landscape.

These hardscape materials are essential in separating the garden from the rest of your property. Depending on their placement, they can also improve your water flow and drainage, prevent soil erosion, embody your landscape’s overall theme, and many more.

As you plan your landscape, hardscapes should be your priority since they make up the bulk of your landscape materials, and they create the backbone for your softscapes.

Softscape

softscapes

If the hardscape is composed of the solid, non-living materials found or built-in your yard, softscape is the exact opposite. They feature the living part of your landscape like horticultural components such as shrubs, trees, flowers, grass, mulch, dirt, and others.

Since these are living elements, they evolve and frequently change as they adapt to the region’s climate. They are also literally soft to the touch, unlike hardscape materials.

Many times, landscape novices are confused about how to label ponds, fountains, and similar structures because they seem to contain both hardscape and softscape. That’s the beauty of landscaping. Although these structures are built using hardscape materials, they can also be considered part of the softscape because of the plants used to tie them in and beautify them.

The Purpose of Hardscape and Softscape

balancing hard and soft landscapes
purpose of hardscape and softscape

Hardscapes

  • Hard landscaping serves as the foundation of your whole yard. You can only start improving your garden once these hard features are established.
  • Hardscape ensures that you won’t have a problem even if it rained or snowed heavily. Through the correct use of draintiles and irrigation, which are primarily hardscape elements, excess water can be moved out of your yard or brought to your plants. Thus, you can utilize your outdoor space without worrying that there are puddles of water everywhere, and you can ensure that your plants will survive the dry times of the year.
  • Hardscape surfaces also provide the added benefit of preventing soil erosion.  Rock and stone are great for protecting our ground from erosion. 
  • Hard landscape provides hassle-free access to your home through the use of driveways, patios, decks, and walkways.
  • Hardscapes such as pergolas, gazebos, and trellises can help protect you from the sun and give you a nice protected spot to read a book.
  • Hardscapes can be used to create an outdoor kitchen, dining area, or even a fireplace.

Softscapes

  • Softscape is the soul of your yard. This offers you an avenue to be creative.
  • Like hardscape structures that improve water issues in your yard, softscapes can be used in much the same way.  Different plants are suited for different soil types and moisture levels, and plant roots and foliage can do a great job of protecting our soil from erosion.
  • Softscapes provide your yard with cool air. You’ll surely enjoy lounging outside under the shade of your trees.
  • If you choose edible plants like herbs, you’ll never run out of fresh produce.
  • The most critical role of softscapes in your landscape is to blend and soften the edges.  Plants can be used in so many different ways to soften your yard’s look.  What would a patio or retaining wall be without that cascade of beautiful flowers?
  • Softscapes are what helps us to keep this earth in balance.  The more live and lush plants we have growing in our yards, the more we help our planet! Check out this article.

Importance of a Balanced Landscape

balanced flower garden

There should always be a balance between the soft and hard elements in landscaping. We should refrain from going overboard with either feature because doing so will prevent us from achieving the effect we are aiming for. 

How many times have you seen a yard which looks like a commercial property? This is probably because of too much hardscape. Similarly, you must have seen a garden that resembles a jungle. The problem? Excessive soft landscaping!

By striking a balance between the two, you can create a welcoming and nurturing space for you and your family to enjoy for many years to come.

How to Balance Soft and Hard Elements in Landscape Design

balancing hard and soft landscapes
  • Tip #1: Identify the function of the area. If small children and pets are going to hang out in your yard, you should make it safer by focusing on the softscapes. Meanwhile, if the area is outside an office building, you might want a more formal and rigid look with hardscape elements such as benches and walkways.
  • Tip #2: Avoid extremes. Do not overly decorate your landscape with shrubs, plants, trees, etc.  Many people overplant when they first landscape, which leads to overgrown beds and plants growing into one another.  Learn about your plants and space them according to their growth potential. On the other hand, do not cover your yard with stonework; it will feel cold,  uninviting, and industrial.
  • Tip #3: Consider water flow. Always keep in mind that mother nature will do what she will do.  Make sure that all of your hard surfaces are pitched away from your house, and don’t plant or hardscape where you might block drainage out of your yard.  The last thing you want is an unwanted puddle or a wet basement.
  • Tip #4: Prioritize water conservation and ease of maintenance. Choose plants resistant to droughts like Geranium, Lavender, and Aloe. Choose plants that are well suited to your growing zone and well suited for the sunlight and moisture levels that occur naturally in your yard.  Well adapted and well-planted softscapes will also be low maintenance.
  • Tip #5: Pay attention to quality.  Hardscapes can be forever if they are correctly installed, but a poorly installed hardscape can fail in a short time.  Base preparation is the most crucial factor in any hardscape, so pay attention to the details.

Hard and Soft Landscape Considerations for Small Spaces

techniques for small spaces

People with limited yard space often find it challenging to balance their hardscape and softscape. As a result, instead of building an outdoor oasis, they create a chaotic outdoor space that isn’t exactly livable.

Is there hope for these small outdoor spaces?

Of course, there is! Here are some ways to maximize your small yard through the proper ratio of hardscape and softscape.

Hardscape Techniques for Small Spaces:

  • Utilize vertical spaces through building pedestals and raised planters. These are great ways to economize space.
  • Put pavers around corners to create the illusion that the yard is extended.
  • Use low retaining walls as a planter holder or an extra sitting area.
  • Create an area that will serve as the focal point of your whole landscape. For instance, put concrete accent stools where one can rest.

Softscape Techniques for Small Spaces:

softscapes for small spaces
  • Put plants in the vertical spaces you made to draw people’s attention upward.
  • In planting, position bold-colored plants upfront. This will surely get the attention of whoever will see your landscape, and the small space beyond will no longer be noticeable.
  • For some reason, growing big tropical plants can make your backyard look a little bit larger. You might want to consider them, especially those with unusually shaped leaves.
  • Be sure to have the large plants at the perimeter of your yard.  Large plants can quickly fill and overwhelm a small yard.

Final Thoughts

Hardscape and softscape are the two fundamental elements of landscaping. One cannot go without the other, so you must understand how to create a balance between them.  Avoid focusing on one element too much.  Chances are, you are better at visualizing or installing one or the other.  You need to learn to focus on both aspects to create that well-balanced oasis that you have been hoping for.

Top 8 Best Propane Fire Pits for Your Patio in 2021

propane fire pit small

Nothing beats sitting around a cozy fire during chilly evenings, whether it’s with your family and friends or just alone having your ‘ME’ time. Wood burning fire pits will give you the most authentic bonfire experience, however, sometimes the smoke and maintenance are too much of a hassle, and some states even have restrictions on wood burning fire pits. The solution is propane or natural gas fire pits. They are easy to use, no smoke or smell, and eco friendly. Today we are looking at the best propane fire pits for your patio in 2021.

The ASLA survey showed that fire pits are among the most desired outdoor design elements in the USA. With thousands of various gas fire pit styles, designs, and types, it might be hard to select one that best fits your needs. That’s why we wrote this detailed propane gas fire pit buyers guide. Please continue reading to learn about various gas fire pits, their advantages and disadvantages, and our list of the best propane gas fire pits for your patio in 2021!

What to Consider Before Buying a Propane Gas Fire Pit?

Shape and Size

You can find hundreds if not thousands of different propane gas fire pits currently in the market. They can range from just a couple of inches from the ground fire bowls, bar top height columns to 6 feet wide tabletops for ten guests. Gas fire pits can be made from steel, concrete, bricks, or even natural stones. The exterior choices are even more diverse to complement your backyard and patio design. Generally, you’ll find gas fire pits in 3 shape designs:

Fire Pit Tables

These gas fire pits usually look like a regular coffee table that can hold drinks and plates but with a fire pit in the middle. Most of these fire pits come with covers so the table can be used for dining and a source of light and heat after. These fire pits are very versatile, can be used on many occasions but usually come at a higher price point.

Fire Pit Bowls

Firepit bowls usually sit close to or on the ground and are very easy to move around. Few setup steps and storage make them perfect for camping or the occasional night in the backyard. Most fire bowl fire pits don’t have an extravagant exterior or design but do come at a much lower price. If you want the warmth and firelight and don’t care about the looks, fire bowl style gas fire pits are a perfect budget option.

Chimney Fire Pits

Chimney gas fire pits, also known as column fire pits, look exactly like their name indicates column or chimney. These squared fire pits have burners at the top or in a fire bowl standing on top of the column. They usually have a beautiful design and exterior details and can be a great addition to your backyard or patio design.

Heat Output

Gas fire pit heat output is rated in BTUs (British Thermal Unit). The higher the BTU fire pit can output, the more heat it will produce. Most residential propane gas fire pits range from 30,000 to 60,000 BTUs. If you live in a location that gets pretty chilly and plan to station your fire pit in an open area, go for the highest BTU possible. If your fire pit will be placed on a patio that is at least a bit closed off, and the weather isn’t too cold, you can get away with a lower BTU fire pit.

Ignition System

Manual Ignition

This is simple and old-school. Turn on the gas and use a match, lighter, or torch to light up the fire pit. It’s not the easiest ignition method but the most reliable. No spark buttons or electrical systems mean fewer things that can break.

Spark Ignition

Like most BBQ grills, the spark ignition system has a spark button to create a tiny spark to light up the gas. This is the most common and convenient ignition system.

Electric Ignition

Electric ignition is probably the newest technology-wise. You just need to flip a switch or push a button, and the fire lights up. Some smart fire pits can be integrated with your home system or phone, allowing you to switch the fire on or off with the push of a button.

Advantages and Disadvantages of Propane Fire Pit

Advantages

  • Eco friendly – All propane fire pits are eco-friendly and produce no pollution. The burning of clean gas creates no emissions, reducing the carbon footprint.
  • Various Styles and Designs – There are numerous different styles and designs of propane gas fire pits. No matter what style, color, or material your patio or deck is made of, you’ll be able to find a fitting propane gas fire pit.
  • No Smoke or Smell – Propane gas fire pits don’t produce any smoke or smell. There will be no more coughing from a ball of smoke and smelling like a burned sausage the whole evening!
  • Easy to Use and Heat Control – Unlike wood burning fire pits, you don’t have the hassle of setting up the firewood, igniting and kindling it. Propane gas tanks ignite instantly and can be turned off just as easily. You can also instantly increase or decrease the fire to your liking.
  • Requires Very Little Maintenance – There is no ash and ember cleaning, no scrubbing, or continuous fire kindling. Propane gas fire pits require little to no maintenance. Just change the gas tank when it’s empty, and the party can continue.

Disadvantages

  • Not as Authentic – Of course, propane gas fire pits aren’t as authentic as wood burning fire pits. You don’t have the smell and smoke of the burning wood, which most folks associate with a real bonfire.
  • Less Heat than Wood Fire Pit – Hot embers and fire from a large wood fire can create a lot of heat, enough for large areas. Most propane gas tanks won’t provide as much heat. If you’re looking for a propane gas fire pit to warm you up during cold evenings, go for a fire pit with a higher BTU, but don’t expect to warm up your whole backyard.
  • Can’t Use for Grilling – Propane gas fire pits are more for warming you up and aesthetics. You can not use it for a BBQ party and grill food on it. The main reason is that food drippings will get stuck on rocks, filler, and even gas valves. This can reduce the heating quality and will be very hard to clean.

Best Propane Fire Pit Reviews

Bond Manufacturing 54,000 BTU Aurora Propane Fire Pit

Let’s start with a small propane fire pit from Bond Manufacturing. The small Aurora model produces a whopping 54,000 BTU heat that is more than enough to keep your guests warm on your patio or when camping.

The 18.5-inch size fire pit is perfect for camping, outdoor events, or tailgating but can be used on any deck or patio as well.

This small stainless steel round propane fire pit is very well built and even has a metal lid for easy storage and portability. Easy no-tools setup and auto-ignition allow enjoying a cozy fire in just a few minutes.

High-quality but straightforward build, high BTUs, ease of use, and low price make the Aurora the best budget propane fire pit on our list.

Outland Firebowl 870 Premium Outdoor Portable Propane Fire Pit

This is another small propane fire pit for the camping, tailgating, and van-life fans. At only 19 inches in diameter, it would also be great for a small patio or balcony. It weighs only 23.3 lbs, but produces 58,000 BTU heat! You also get a cover, carry kit, and 4.4 lbs of natural lava rocks to fill the pit.

The durable, high-quality steel construction is finished with a protective enamel coating. This gas fire pit isn’t afraid of rain, mud, or low temperatures as long as the burner is not clogged up. It’s quick to set up and has matchless ignition.

This Outland small and lightweight fire pit is also CSA approved and can be used during most campfire bans (always check current fire restrictions in your area). Size, quality, and weight make the Outland Fire bowl the best portable propane fire pit on our list that won’t make too much of a dent in your pocket.

Hiland GS-F-PC-SS 40,000 BT Propane Fire Pit

Don’t let your outdoor activities end when the evenings start to get colder. The Hiland 24-inch height and 38-inch squared fire pit is perfect for keeping 4-6 people warm around the table. The CSA-approved fire pit generates 40,000 BTU heat and can be positioned on any material decks, patios, and grass.

The Stainless steel table is sturdy and robust, so you’ll have no problem having dinner or drinks at the table. You won’t need a separate hideaway table for your propane tank; there’s enough space to store it inside the table.

Hiland GS-F-PC-SS also has a 1-year warranty but should last you way longer. Sturdy build, large diameter, and beautiful design come at a higher price, but it’s money well spent as it is our best medium-sized propane fire pit for patios.

Bond Manufacturing 28in Woodleaf Fire Pit

Another Bond Manufacturing propane fire pit, what can we say, the company can make good fire pits! The Woodleaf 28-inch squared propane fire pit table produces 50,000 BTU heat, has a lid to use the pit as a table, and you can store your propane tank inside.

The size is perfect for 2-4 people to sit around, and you can station it on any deck material. This nice looking Woodleaf fire pit isn’t exceptional or flashy but is of excellent quality and at a very good price point. It is recommended for smaller budgets that still want a fire pit and table combination.

Endless Summer Propane Fire Table

We love the looks of this propane fire pit table! The lava rocks and wave design panels make it feel like you would be sitting near a natural wood burning fire pit, just without the smoke and smell.

The Endless Summer propane fire table is made from steel and weighs close to 82 lbs. It’s not the most portable fire table but definitely a sturdy and long-lasting one. As with most fire pit tables, you can store your propane tank inside. You’ll find the concealed heat control panel and electronic ignition system behind the table door.

The only disadvantage of this fire table is the heat output. Endless Summer fire table has only 30,000 BTU. Unless you have frigid evenings, this is a perfect propane fire pit choice that will be a beautiful addition to your backyard design.

BALI OUTDOORS Propane Gas Fire Pit Table

Bali Outdoors is a well-known brand in the fire pit industry that continuously produces high-quality and good-looking fire pits. Their propane gas fire pit table is a very elegant mid-size fire table perfect for 2-4 people to enjoy a romantic atmosphere outdoors.

The 50,000 BTU gas burner is covered with beautiful glass stones to produce an incredibly cozy fire show. The pit top has four elegant tiles and a lid if you want to convert it to a dinner table or a bar.

All in all, large heat output, elegant design, and high-quality build come at a higher price point but make the Bali Outdoors fire table the best propane gas fire pit on our list.

Femor 42-in Round Propane Fire Pit Table

Want to impress your friends? Check out the Femor 42-inch round propane fire pit. This large round fire pit is perfect for larger outdoors social events as you can have 4-6 chairs or 10-16 people around it.

50,000 BTU heat output is plenty to heat medium to large patios and decks. The electronic ignition and heat control panel makes it super easy to use, and the hidden propane tank doesn’t get in the way when socializing.

The wood grain tabletop imitation and blue decorative glass filler look beautiful on any deck day or night.

The only disadvantage is the higher price; however, the elegant looks, high-quality design, and ease of use make it a worthwhile investment.

Kinger Home Propane Fire Pit Table

As long as we are going big, I thought I’d show you this beauty. This is another 42 inch fire pit table, but this one is square, so it gives you even more room. Even room to set your glass of wine.

With a 50,000 BTU output, it should give off plenty of heat to keep you and your friends warm. It does weigh a whopping 82 pounds, so you might want to invite those friends over the day it gets delivered.

This comes with glass beads and a removable glass wind guard for those breezy days on the patio. It has an aluminum frame with a great looking wicker outer shell.

It’s versatile also, and comes with a removable aluminum lid so that it can be used as a table when you’re not using it to heat the neighborhood.

The propane tank is hidden and this unit has a stainless steel fire bowl, so it will stand the test of time without rusting out. It also comes with a PVC cover to keep it protected when you aren’t using it.

If you want a sharp looking, quality-built, high output propane fire pit that can also be used as a table, this is the one for you!

Frequently Asked Questions

Can I Cook Food Over Propane Gas Fire Pit?

Generally, we would advise against cooking on gas fire pits. The main reason is that the drippings of meats, veggies, or marshmallows will stick to the decorative fillers and be very hard to clean. When grilling over wood-burning fire pits, the drippings burn together with wood and get cleaned with ashes, while gas fire pit fillers aren’t discarded and will have to be cleaned. If you’re buying a gas fire pit for pleasing aesthetics and low maintenance, then avoid cooking over it.

How Long Will 20-pound Propane Tank Last?

A regular 20-pound propane tank will burn for about 10-12 hours. Of course, the length of the burn varies on the burners BTU and flame setting. If you have a powerful 54000 BTU burner and keep the flame on the highest level, then your tank might last just 4-6 hours.

Can I Use Pea Gravel in Gas Fire Pit?

Pea Gravel, a porous rock, is not recommended in gas fire pits. Rocks with small pores can have air and water trapped in them when wet. If you heat such rocks, the steam inside can build quite a bit of pressure and even cause the rock to explode. It’s better to stay away from porous rocks and go with hard rocks like granite, marble, or decorative fillers.

Is it Safe to Use a Gas Fire Pit on a Wood Deck?

One of the most significant advantages of a gas fire pit is that you can use them on almost all kinds of decks and even grass. Non-combustible material decks like concrete, marble, or stone are the safest for any fire pit. In comparison, combustible decks from wood, vinyl, or other recycled materials can quickly catch fire. Most gas fire pits are ok to use on combustible material decks if the clearance is high enough and they remain upright. Always check manufacturers’ clearance and installation documentation for guidance. If in doubt, it is always a good idea to use a FIRE PIT MAT. Always be sure to keep your fire pit far enough away from your house. You don’t want the flames licking at your siding on a windy day.

Top 7 Best Free-standing Wood Burning Fire Pits for Your Patio in 2021 – A Buyers Guide

small wood fire pit

Who doesn’t love just sitting back on your patio and enjoying a chilled drink after work? It’s a perfect way to end your day. If you want to make it even better, get yourself a wood-burning fire pit. The crackling sound of firewood and cozy warmth will create an incredibly cozy and inviting atmosphere without leaving a big dent in your pocket. Today we’re looking at the best free-standing fire pits for your patio in 2021.

What You Should Know Before Buying A Free-standing Fire Pit

Before jumping into the list, you need to consider a couple of things before buying a free-standing fire pit.

Location

First of all, where will you position your fire pit? Almost all fire pits are required to be placed on non-flammable surfaces like concrete, grass, or any other non-combustible surface. If you don’t have a fire-resistant surface, you should get yourself a fire pit mat to protect any surface underneath from high-temperature, fire, and sparks flying out of the pit.

Using Wood

Secondly, remember that wood-burning fire pits use, well… wood to burn. You’ll need to have space for firewood and also equipment to clean up all the coal and ember after using the fire pit. Make sure you find the best wood for your fire pit (we suggest going for Oak or fruit woods). If you don’t want to deal with all the cleaning process and storing wood, you might just go for a propane or natural gas fire pit.

Material

Finally, the material the fire pit is made of is very important as well. Copper looks nice but will tarnish and won’t be the cheapest. Cast Iron fire pits will be very solid and stable because of the weight. If you want something a bit more portable, go for a steel fire pit, but keep it from rain and moisture since it’s more likely to rust.

Top 7 Best Wood Burning Fire Pit Reviews

1. KINGSO Wood Burning BBQ Fire Pit

Let’s start the list with a small wood-burning fire pit from KINGSO. This 22-inch fire pit is quite versatile since it can be used as a beautiful fire pit and to cook marshmallows also. The set includes a fire pit, spark screen, coal grate, and ember poker with a wooden handle.

We love the versatility, looks, and portability of this small fire pit. If you’re not cooking a marshmallow, just pop the spark screen on and enjoy the beautiful and warm fire. If we’re being honest, the spark screen is not that good at preventing sparks from flying out, probably blocks like 30% of sparks or jumping embers; however, it does look very aesthetically pleasing.

All in all, the bonus of grilling and low price makes KINGSO wood-burning BBQ fire pit the best budget wood burning fire pit on our list.

2. OOX Fire Pit

Here we have another small 22-inch wood-burning fire pit. This thick steel fire pit is sturdy and has a high-temperature paint finish that adds additional rust protection.

We love the OOX Fire Pit since it comes with a variety of accessories. The set includes a fire pit bowl, wood grate, grill grate, spark cover, poker, and even a PVC cover to protect from rain and dust if you’re going to keep it outside.

The only disadvantage we encountered is that the high legs on this small fire pit aren’t as stable as we would like them to be. The added height does make it easier to grill with, but make sure you locate it on a leveled surface.

Overall, the low price and lots of accessories make the OOX Fire Pit the best small wood-burning fire pit on our list.

3. Pleasant Hearth Martin Extra Deep Wood Burning Fire Pit

The Martin Extra Deep wood burning fire pit from Pleasant Hearth Store is a beautiful square-shaped fire pit. The steel fire pit is quite heavy and has a low base, making it very sturdy and extremely stable. However, remember that the low fire pit base should be placed on a heat-resistant surface like concrete or a heat-resistant mat.

As mentioned in the name, the Martin fire pit is extra deep and 26-inch in size; this allows it to hold a lot of wood, making a massive fire.

This fire pit also has grilling grates in case you want to have a BBQ party with your friends and family. The easy-to-use wood poker can also be used to take the spark screen on or off and adjust the grill grates.

If you’re looking for a beautiful but sturdy fire pit that could also be used as a grill, the Martin Extra Deep wood burning fire pit is a great option.

4. Bali Outdoors Wood Burning Fire Pit

Look at this big boy! This multi-functional 32-inch beast not only holds a ton of wood but also has a raised 18-inch grill for all your BBQ needs. The grate also turns 360 degrees, and an additional round grill grates around the fire pit itself if you want to keep the food warm but away from direct fire.

We love the low four metal legs that make this big fire pit stable on any surface. A deep 24-inch height bowl will hold a lot of wood to create a large fire. Usually, most 2 in 1 grill and fire pits can burn your food in an instant, but Bali Outdoors elevated grill grate allows you to enjoy a large fire and still properly cook your food.

If you have enough space on your patio and love big fires, Bali Outdoors black fire pit will be a great addition to your household.

5. Landman Big Sky Stars and Moon Fire Pit

Looking for a fire pit that would create a warmer atmosphere during evening nights in your backyard or patio? Landman Big Sky Stars and Moon fire pit will not only warm you up but also creates beautiful shadows on your patio!

The 23-½ inch size fire pit is not the largest but still holds enough wood for a big fire. The low-medium height base is made from steel, making the pit very sturdy and steady. Steel construction and black paint finish make the pit rust-resistant even if you leave it uncovered.

Don’t need a BBQ grill but a beautiful fire pit? Landman Big Sky Stars and Moon fire pit is the most beautiful wood-burning fire pit on our list that will create a great fire and shadow show on your patio.

6. Innfinest 6-1 Large Bonfire Fire Pit

We’re getting into the big leagues now! Innfinest 6 in 1 Fire Pit is larger than most fire pits on our list. The 36-inch fire pit has water drainage holes, so you won’t have to do any DIY work in case of rain.

The set also includes a fire pit cover, spark mesh, ash plate, and assembly tools.

This large wood-burning fire pit weighs 28 lbs because of the thick steel construction, so it’s not very portable but sturdy and long-lasting.

If you have a big household or patio space, this large pit might just fit the bill. The Innerfest Fire Pit is one of the best large wood-burning fire pits on your list.

7. Ohio Flame Patriot Fire Pit

Ohio Flame 48 inch giant fire pit is individually made and numbered in the USA and comes with a lifetime warranty! This handmade beast is pure plate steel and will take years to wear, but it does weigh 260 pounds, so you won’t be moving it often.

The extremely solid, rugged construction and large diameter will burn a lot of wood and create a cozy and warm atmosphere for large parties.

The thick steel won’t rust even if it’s outside in the rain. It also has drain holes, so you won’t need to do a lot of cleaning.

If you have a large patio or backyard without a fire pit, consider the Ohio Flame Patriot fire pit. It is the best large wood-burning fire pit on our list that acts as a significant source of heat and as a beautiful patio piece and will definitely turn heads.

Frequently Asked Questions

Will wood burning fire pit give enough heat?

Yes. Wood-burning fire pits produce the most heat of all types of fire pits. Wood produces the biggest flames and is the best option if you need to heat your patio properly.

The heat level also depends on the wood used. If you want the most heat go for Oak; if that’s not possible other options are walnut or pine.

Can I use any wood in a fire pit?

You can use any wood as long as it is not wet, rotten, diseased, and moldy. That kind of wood might create toxic smoke and be bad for your health.

In general, the best wood to use is hardwoods. The best hardwood is Oak, Birch, Hickory, Ash, and Fruit Trees. These will produce the most heat and the least smoke.

Do I need to worry about starting a fire?

Absolutely. These natural wood fire pits burn natural wood, so there will always be hot embers and ashes rising into the air. You must be sure that there are no low-hanging trees to catch fire, and don’t place these too close to any wooden structures. If you are placing a fire pit on a deck, always use a protective fireproof pad underneath. If you want a fire pit that does not pose as much risk, try a propane fire pit.

Brick Patios Choices and Construction

brick patio living area

So, you’ve been thinking that maybe you need a brick patio in your yard. You’ve seen all of the other options, such as concrete, gravel, and wood decking, and you like the look of brick. Well, before you take the plunge and either buy a bunch of products to do it yourself or hire a contractor to do it for you, there are a few things you ought to know about Brick Patio Choices and Construction techniques for a brick patio.

History

Back in the day, brick meant brick. They were all rectangular, and they were all made of clay. Today, when a person says brick, you really don’t know what they mean without asking a few questions. If you are talking about having a brick patio, you will need to be able to describe what you envision precisely.

Choices

Clay Pavers

The old-style clay brick has been around since we first started pounding earth into rectangles and throwing them into a kiln. You can find old clay brick walkways in many historic areas worldwide, and they are still popular today. Clay brick can be very attractive and a bit more delicate in both appearance and sturdiness than your other options. But now, Concrete pavers are much more popular.

Concrete Pavers

Nowadays, when I go to a meeting, and the client says that they want a brick patio, I am almost certain that what they really want is a concrete paver patio.

Years ago, when they were first introduced to the market, concrete paver looked similar to clay brick, just not as nice, and were much cheaper than clay brick. They were more affordable and made of concrete, which is much more durable than clay, making them a popular choice for many. These old brick pavers held up structurally, but the colors faded fast, so the concrete industry went back to the drawing board.

Now, many years later, the concrete paver industry has flown past the clay brick industry and is not looking back. Now the colors are clear, vibrant, and long-lasting. Concrete pavers come in every size and shape imaginable, and you can buy a concrete paver to look like almost any type of natural stone or clay product that you can think of.

Considerations

So, unless you are a real history buff and you are putting in a patio reminiscent of something that you may have seen in Colonial Williamsburg, I’m guessing that you want a concrete paver patio.

Take Your Time and Explore

My suggestion to you would be to take some time and explore the many top-tier paver manufacturers’ websites out there. Get an idea for the styles and colors you like, and then look at some samples in person at your local brickyard. You won’t find prices on any of the websites, but in general, the more that the paver looks like a natural stone or is a very distinct shape, the more it will cost. The cheap ones are the ones that look like an old, rectangular clay paving brick.

Take some time and look at and feel the pavers that you like. Many of them will have a textured surface or a contoured surface depending on the design, so I would recommend that when you visit the brickyard, you see the paver actually laid out on the ground so that you can understand how your patio will be.

Some yards will have sample patios already laid with the different styles, and others will not. If yours does not, don’t be afraid to pull a bunch of pavers off of a pallet and lay them side by side on the concrete to get a feel for them. Due to variations in texture, contour, and spacing gaps, they can appear quite differently when laid in a group than they do when you pick up one individual piece.

Patterns

If you choose a paver that looks like a natural stone, it will often come in a specific random pattern with multiple sizes so that when laid, it resembles one of the standard laying patterns for stone. Or, it will be all squares, which makes it very formal and easy to lay.

If you choose a rectangular paver, you will need to decide on a pattern. There are many patterns to choose from, but straight bond, running bond, basketweave, herringbone, and diagonal herringbone are common choices. Check out this pattern picture

Consider the Shape

At this point, before you get your heart set on a particular pattern, you need to consider your patio shape and size. If your patio is a big square, just about any pattern will do just fine. Running bond would be your most common choice, and diagonal herringbone would be the toughest to lay.

If your patio has lots of curves or will lead into a walkway of the same pavers, you will need to make some more decisions. The most challenging part of laying a brick patio for the professionals and the newbies is cutting. Laying out the main pattern is relatively quick and easy. The devil is in the details, and when you get out to the edges of your curvy patio with your diagonal herringbone pattern, you will understand why you don’t see too many houses with this combination.

At the Edge

You will need to install some edging to hold in the bricks at the edge of the patio. This edging will create your curves, and each brick will need to be cut to the curve—the tighter the curve, the tougher the cut.

Square or rectangular patios with a straight pattern have very few cuts. Curvy walkways with a running bond pattern have very few cuts. Curvy patios and walkways have considerably more cuts, and curvy patios with diagonal herringbone patterns have the most cuts of all.

Choose your pattern wisely.

Dry or Wet

This article will assume that this patio you envision is dry-laid simply because they are much more common and easy to install than a wet-laid patio over concrete. If you want this to be a wet-laid patio over concrete and you aren’t a very detail-oriented and patient person, I would suggest hiring a mason.

Dry laid means that the paving material (concrete pavers, brick pavers, stone) is laid down dry (without mortar) on a bed of compacted stone. Once laid, sand is swept into the joints to tighten it up.

Edging

Any dry-laid patio will need to be edged to retain the paving material. When it comes to edging, you have many choices. There are plastic edging systems, Steel edging systems, aluminum edging systems, and probably a few others. If you want to go old school, you can apply a thick bed of mortar along the outside of your final row of pavers. All of these edges need to be applied to a firmly compacted base, just like your pavers. When you are laying out your patio and preparing your base, be sure to leave at least an extra 4″-6″ around the perimeter to allow you a nice flat spot to apply your edging.

In-Fill

After you have finished laying your brick patio, you will need to fill in all of the cracks with an in-fill material. TIn-fill has traditionally been done with sand. Any fine, dry sand that will fall down into the cracks will do. Everyone used to use silica sand for this, but advances in sand technology (is there such a thing?) have led to polymeric sand.

Polymeric sand is a mix of (yep, you guessed it) sand and polymers.

This stuff is a little more challenging to work with, but it is really nice once it is done. To install any dry sand, you sweep it back and forth across the patio and make sure that it fills all of the cracks.

You do the same for polymeric sand, but then you sprinkle it with water, which causes the sand to harden into a semi-flexible sort of grout that helps keep the brick in place and keep out dirt and debris.

The only catch here is that the poly sand requires the patio to be completely dry. Even a little bit of moisture will make this stuff stick like glue to your brick. Also, before you sprinkle it with water, you must be sure that there is no sand on the patio’s surface or, again, it will stick like glue.

Supplies

Below is a list of tools and supplies that you will need to complete this project should you choose to do it yourself:

Construction

Okay, now we have gotten through the easy part of picking out the products we like. From here on out, it is all about construction. Whether you are hiring someone to do this or doing it yourself, you must understand a few things.

Site

You want your brick patio to drain well. If your patio sits in a low spot in the yard, it will hold water, which means that the surrounding ground and likely the ground below will be soft, allowing the patio to move. Also, worse yet, if you live in a part of the world that gets freezing temperatures, the ice is likely to destroy your patio. No matter what type of product you choose, having it wet going into freezing weather will cause cracks and deterioration of the paving material.

Ice is very powerful!

Settling

If you moved into a new house or have just built your home, you would be better off allowing things to settle for a year before building a dry-laid patio up against your house.

During construction, the excavator dug a big hole for your foundation, and after the foundation was complete, it was backfilled. The area surrounding your house is likely well compacted due to all of the equipment used in your house construction, but the area right along your foundation is never as compacted.

I’m sure that you had a good builder, and they installed drain tiles and washed stone. I’m sure that they tried to compact around the house, but the fact is, no one can get it compacted properly, and the area within a foot or two of your foundation is going to settle over time. Most of the houses that I have seen over the years with wet basements and sagging patios are due to settling around the foundation.

My advice to you would be to prep for your patio but just live with the base for a year until things settle out. Once they do, you can build your patio, and you won’t need to pick it up in a year or two to fix sagging areas.

Base Prep

The secret to a good hard surface installation (no matter what the surface is) is base prep. Poured concrete is less affected by base prep, but I would argue that a good base is still essential to prevent cracking and shifting. Any time that you see a patio, walkway, driveway, or road with sags, potholes, etc., it is due to incorrect base prep and not due to the topcoat.

Mark it

Layout the area for your patio using stakes and mason line if possible.

Pay attention to pitch. You need any water that lands on your patio to run away from your house, so make sure it pitches away. They say that ¼” per foot is positive drainage, but that is too much for patios to be comfortable, in my opinion, so I usually go for 1/8″ per foot or less. As long as it pitches away, you are fine. Your entire patio needs to be in one plane, so plan accordingly.

Be sure to set your line at least 8″-10″ past the edge of your patio so that you have room to dig and lay enough base to also accommodate your edging.

Too much base is much easier to deal with than not enough. Most newbies excavate just enough to lay their patio and then end up with sagging edges and edging popping up due to frost heave.

Dig it

You will need to excavate down to hardpan. You need a very solid surface to build upon. This means removing all topsoil and dig down until you hit a hard layer of soil or base. You will know it when you get there. If you are in an area that is very soft and just can’t or don’t want to dig that deep, you can continue with the installation; just don’t be surprised if it moves over time. If you are in a very sandy area, then you will not get down to a hard surface, but sand compacts (and drains) very well as long as it is encapsulated, so you should be in good shape.

Your excavation should pitch away from your house also. Your dry-laid patio will be a semi-permeable surface, meaning water will pass through it. You don’t want this water running toward your home.

Fill it

Now that you have your excavating done, it is time to start filling. You want your base to consist of stone of some sort.

Over the years, many types of stone have been used. Lately, the common consensus has been that a fractured and washed stone base will provide the best compaction long term.

For those of you who have ever compacted anything, I’m sure that you are thinking, “wait a minute, how will this ever compact if it contains no fines?”

I’m with you on that. The first few times that I used washed stone, I thought it was crazy, but it works quite well.

Old School Fill

Old school installers have long used crushed limestone (or any crushed stone) as their base because crushed limestone with all of the little crushed pieces and fines in it compacts really hard. If you compact crushed limestone and sprinkle it with water in between layers, it will get rock hard. For years, this was the standard.

On top of the base, the old school people would put a layer of sand to make striking and setting the brick easier.

The problem with this old school approach would occur when you would have this perfectly compacted and laid patio on a base of crushed limestone, and then one year, the clients’ gutter would clog up, and water would pour out of the gutter on to the patio for a few months of heavy rain.

Dry laid patios hold up just fine to rain, but enough concentrated water flow in any area will cause things to move. Again, water is mighty powerful! So, all of this rushing water will eventually wash out some of the fines and the sand.

Once the fines get washed out, the remaining larger stone will settle. This will leave you with a low spot right where that gutter was dumping the water.

New School Fill

The solution is to remove all of the fines before you compact. This is where the crushed, washed stone comes in. It seems it would be hard to compact, and indeed, the top layer always seems a bit looser than you would have been used to old-school, but as long as the walls of your excavation hold in this base, it will compact just fine. Make sure to compact in small layers and keep it correctly pitched during compaction.

Don’t Rush the Process.

This is the hardest part of your patio project, and newbies always want to rush it. Rushing this part is setting yourself up for failure. This is where we separate the men from the boys (as the old-schoolers would say). The newbies figure it doesn’t matter, so they dump in thick layers of stone, run the compactor back and forth a bunch of times, stomp on it a bit and call it done.

It will look good for a few months, but it will settle eventually.

Honestly, lay down a few inches of base, rake it out to pitch properly, and then strike it in two directions before laying a few more inches of base and doing it all over again. Once you start getting within a few inches of your top-level, you will want to use a screed or strike board to make sure that your pitches are perfect. The last thing that you want to do is end up needing to remove the compacted base because you didn’t check it, and it ended up too high.

Laying it Down

Once you are up to your top-level and everything is struck perfectly and pitches perfectly, I would check it one more time, just to be sure. Once you lay down those pavers, you will not want to pick them up to fix something that you missed.

Now that you are really sure that it is done, you can start laying your pavers.

Always start at a long straight edge and work your way out using more stakes and more mason line to set some 90-degree lines so that you are checking your lines every few feet. Again, you don’t want to lay half the patio and then realize that your lines are starting to curve.

When laying pavers, avoid walking on your perfectly prepped base and walk very flat-footed if you need to cross it. The best case is to lay down a few courses and then work off of your finished surface to lay the remaining pavers. Be sure to use a rubber mallet to tap bricks into place, ensuring that they are set tight against each other, and check your top surface often with your screed to be sure that you have no dips or hills.

Once your patio is laid, cut any edges, install your edging, and sweep in your sand. You are done!

Time to enjoy.

Conclusion

Whether you tackle this project yourself or hire someone to do it, making sure that it is installed correctly will set you up for a lifetime of worry-free time on the patio. This one will last a lifetime. Or at least until your significant other decides it’s time to remodel.

Creating a Rock Garden

Cactus Rock garden

Is your garden dry and dull? Then create a rock garden! I will show you how you can transform rocky garden areas, bare garden plots, rock walls or fence rows into a colorful flower paradise full of life. 

Rock gardens can be very diverse. They offer an attractive and simple way to transform a challenging garden situation into a blooming landscape.

Do you have an aging, old rock wall? Great! An aging rock wall can be the perfect place to start a vertical rock wall garden.  There are always good places for rock garden plants to grow in the cracks between the stones. 

Rough and rocky hillside plots that would be very difficult to turn into a perennial flower bed might be the perfect spot to create a rock garden.  Adding stones and plants to an already rocky hillside to create your rock garden will not only look attractive but will help to prevent erosion as well.

A rock garden is also an excellent alternative to border and delineate your property or lawn edge with a very natural look. There are often stone walls and rocky fence rows that border properties in the countryside, and many can be planted with various rock garden plants to create a beautiful, low-maintenance rock garden and privacy screen.

Styles of Rock Gardens

There are many ways to create a rock garden and many different styles to chose from.  The type of rock garden that you make will likely depend greatly on what part of the country you live in and what supplies you have at hand.

Most of the rock gardens that I have seen fall into two categories; the vertical rock garden and the horizontal rock garden. 

Vertical

As mentioned earlier, an existing rock wall can be a great place to create a rock garden.  When talking about rock walls, I feel that it is best to clarify a bit.  There are several rock wall styles, and they might not all be as well suited for rock gardens as you might think. 

The most common types that I have seen turned into rock gardens are the low, boulder style retaining walls that might hold back grades and terrace a sloped yard.  These walls are typically dry laid, meaning no mortar is applied between the rocks.  This type of wall is often perfect for rock gardens because it is usually built right against the dirt and often has lawn or a flower bed in front or behind it.

Vertical retaining wall with crevices

To create a rock garden in this type of wall is perhaps the easiest of them all.  The wall already exists, and there is already dirt in the holes between the rocks.  You simply need to find plants that will grow in the wall and then plant them in all of the nooks and crannies between the rocks.

The other type of rock wall that I have seen used for rock gardens is the free-standing, dry-laid rock wall.  This type of wall will typically not have dirt between the rocks but will instead be comprised of carefully stacked rocks that rely on gravity to keep them in place.  Walls such as this have been used to border yards and farm fields for many years and are more prevalent in Europe than in the United States.  This type of wall takes a great deal of patience and skill to build, so I am reluctant to encourage you to fill the blank holes with soil and plants.  Over time, if the wrong plants are chosen, the roots could move the rocks and cause the wall to fail.  Another concern with a wall like this is weather-dependent.  Dry laid rock walls are intended to remain dry.  If a wall such as this is backfilled with soil, it will hold moisture.  If this wall happens to be in a part of the world that experiences freezing temperatures, this moist soil will freeze and expand, which will likely cause the wall stone to move over time.

Another type of vertical wall is the free-standing masonry or wet set wall.  Walls like this are built similarly to the dry-laid vertical walls, but these walls are typically set on a footing or foundation, and the stones are held together using mortar.  Walls such as this are the most expensive walls to build and would once again be prone to damage from roots and freezing soil in the cracks.  My advice would be to avoid planting into a wet-laid masonry wall.

Horizontal

The other style of rock garden that I have seen, and probably the most common, is the type that is typically just laid on the ground.  Sometimes these start as rocky hillsides, and sometimes they start as old fence rows of rock.  Either way, there is no fear of ruining an existing structure since the rock is already on the ground or maybe stacked a couple of stones thick in the case of a fence row.  These types of areas are perfect.  If there are already many rocks but little soil, you will want to add some soil between the stones.  If there are few rocks and mostly soil, you will want to add rocks to create more interest.

Further Considerations

Depending on where you are located, you may want to consider a few things before deciding on the rock garden style that you will create.  If you are in a very arid and dry region, it may be difficult to get plants to grow in a free-standing wall because they will dry out quickly.  If you wanted to create a vertical, free-standing rock garden in a climate like this, I would suggest only the most drought tolerant plants that you can find.  You might want a horizontal rock garden right down on the ground in this sort of environment.  The rocks will help collect moisture and protect the soil from the hot sun, and the plants will have the opportunity to grow into the native soils, which will make them more drought tolerant.

On the other hand, if you live in a very moist and humid area, the horizontal garden might be too wet for most rock garden plants, in which case you would be better off creating a vertical rock garden where the plants can dry out a bit more.  You need to understand your environment.

Plant Choices

Once you’ve decided on the type of rock garden you will create, you can consider the plants you might want in your rock garden.  Some of the most popular rock garden type of plants that I have seen used are the low growing, creeping, crawling variety of plants such as:

  • Creeping Thyme
  • Wooly Thyme
  • Hens and Chicks
  • Snow in Summer
  • Alyssum
  • Sea Thrift
  • Ice Plant
  • Creeping Sedum
  • Soapwort
  • Creeping Juniper
  • Creeping Phlox
  • Creeping Cotoneaster
  • Rock Cress
  • Candytuft
  • Bellflower

Alternatives

Many people like to plant their rock gardens tight with perennial plants.  I find that sometimes it’s a nice idea to leave some blank spaces for annual flowers.  Planting low-growing annual flowers into your rock garden will give you the opportunity to very easily change the look and feel of your garden every spring.  And who doesn’t look forward to that first trip to the greenhouse to pick out some new annual flowers?

Location

When you are planning out your rock garden, consider its location.  Is it in the center of your yard where you can view it from all sides?  Is it at the side of your yard where you can only view it from one side?  If it is one-sided, then it is often nice to plant some attractive taller plants behind it as a backdrop.  This will allow you to have a tall perennial or shrub border in the back with a low rock garden in front.  If you will be viewing it from all sides, keep the taller plants near the center and the lower plants near the edges.  This will give you great views from all sides.

Rock type

You must also consider the type of rocks that you will be using.  You can go all out and purchase any rocks that you would like.  There are many types of beautiful rocks to choose from, but I most often see folks using the rocks that they or a neighbor might have on-site.  Either way, choose your plants in relation to the rocks that you will use.  The larger your rocks are, the larger your plants should be, and vice versa.  If you have small stones and plant larger plants, the plants will overwhelm the rocks, and it will look more like a mounded perennial garden than a rock garden.  If done correctly, the garden should showcase the plants and rocks equally.  Often it is necessary to trim back the plants during the growing season to be sure that you keep some rock exposed.

If you are planting into an exiting vertical wall, I’d suggest using only soft rooted, easily controlled creeping perennials.  These plants will beautify the wall, be easier to maintain, and will not be as likely to damage the wall should they need to be removed in the future.

Rocking On

In general, rock garden plants like it a bit dry and rugged.  Any plant that will grow in your climate and that likes to be dry and stays relatively short compared to your rocks will be a great addition to your rock garden.  Don’t forget that your rock garden project will likely be a work in progress. You may plant some plants that grow too quickly that you will need to remove; you may plant other plants that don’t survive for one reason or another.  As with any flower beds, it’s not about getting it perfect and proper the first time; it’s about what it grows into over time.  Too many landscapers and gardeners over plant when installing their landscapes which only results in the necessity to remove plants as the years go by or some of the plants will simply get snuffed out by their more aggressive neighbors.  It is better to start a bit sparse and let the plants grow in.  Different plants will grow differently in different locations.  You need to plant, care for and observe.  Your gardens will tell you what they need over time.

Decorative Concrete Landscape Edging

decorative landscape edge

Decorative concrete landscape edging (curbing) is a durable, very long-lasting, and creative way to frame your landscape planting beds.  Attractive concrete landscape edging not only edges your beds securely and keeps your soil and mulches inside where they belong, but it also adds a fabulous new look to any yard.  Decorative concrete landscape edging highlights your flower bedding and can also provide you with beautiful pathways where you can stroll through your garden.

Concrete landscape edging can be used in many different ways in your landscape.  As mentioned above, the edging of planting beds and pathways has long been the standard.  In addition to these uses, you can also use this relatively new edging style to border your driveway, edge your pond, delineate your patio, or help keep the mulch around your trees. 

Edging Options

Whether you are contemplating updating your existing landscape or starting from scratch, concrete landscape edging is a very solid (haha) choice. There are many other options, such as natural bed edging, plastic bed edging, rock edging, brick edging, wood edging, and metal edging, but none are quite as long-lived and maintenance-free as concrete edging.  

Many types of brick and stone-like manufactured concrete products can be used to edge beds, but these brick-like concrete products are not what this article is about.  When we refer to concrete edging in this article, we mean poured or extruded concrete curbing.

Installation Options

Concrete edging (curbing) can be installed in two different ways.  There is the long-time, old-school method of setting forms and pouring the concrete, and then there is the new way of doing things.  The new way is what they call extruded concrete.  The concrete is mixed and applied using an extruding machine.

Old School – Form and Pour

To install the old school method, you will need to excavate a trench to start with a uniform depth and width for your pour.  Any time you are pouring concrete, it is essential that it is consistent in width and thickness so that it is balanced and doesn’t shift excessively over time. You also want to be sure that your curbing is rectangular or broader at the bottom than the top.  Any concrete pour that is heavier on top than on bottom will tend to tip over time. 

Once you have dug a consistent and level trench, you can set your forms.  Most people use thin and flexible plywood to form their curves.  You can find this at most big box stores.  Just look for full-sized sheets of flexible plywood and cut them to size for your project. If you’d like, you can buy forms which will make the job much easier.  


You will also need some type of stakes to secure your forms. For stakes, you can choose wood, steel or plastic.  Concrete is heavy, so make sure that you stake your forms every six to twelve inches, depending on the curve.  If you have long, straight areas, you will probably want a more rigid board so that you don’t need as many stakes.

Once you have your forms leveled and secure, you will need to either order concrete to be delivered or mix your own.  Either way, make sure to pour the concrete into the forms starting at the far end and work your way toward the concrete mixer or truck.  Once you start, you need to finish it in one pour for each section of curbing.  The concrete will need to be compacted, struck, and finished before it hardens.  Let it sit for a day, and then strip the forms and backfill with soil.

If you haven’t worked with concrete before, you will need a few tools for this job.  Goldblatt makes some pretty decent stuff.  This kit should have everything that you will need to set some curbing.


New School – Extruded Concrete

The new style extruded concrete curbing can be installed by do-it-yourselfers, but it is a bit more technical, and we haven’t been able to find any equipment rental shops that rent the extruding machines.  So, if you were thinking about laying your own extruded concrete curbing, you would probably need to buy an extruder.  Machines such as this generally start around $1000.00 for the most basic models.  This hurdle, the fact that you must use a particularly dry mix of concrete and that it helps to have some experience running such a machine, will lead most homeowners to hire a professional for this type of work.  The prep is about the same; you need a level, consistent trough in which to place the curbing.


In the Middle

Both types of concrete curbing can be strengthened, if desired, by adding things to the concrete.  Many concrete mixes contain fibers that help bind the concrete and prevent cracking.  Fibered concrete is also beneficial when creating concrete edging.  Another way to strengthen your concrete curbing is to place rebar or cable in the center of your pour.  The addition of a continuous length of steel in the center of your pour will always help the concrete resist cracking and hold together better in extreme conditions.

Top it Off 

All concrete, regardless of its form, will benefit from a long slow curing period with even and controlled temperatures and moisture.  Once cured, the concrete should be sealed with any one of many commercially available concrete sealers.  A long curing time and quality sealer will ensure a long-lived and crack-free concrete edge.  Check out Concrete Sealers Here

Pros and Cons of Concrete Landscape Edging:

Pros

  • Extruded concrete gives you the freedom to craft curves and edges, shapes, and contours to accent your landscape.
  • The concrete can be colored to match your garden design, patio, or house.
  • Concrete edging prevents unwanted grass, weeds, and roots from invading your flower beds, pathways, and lawn.
  • Concrete edging will help keep your gravel or stone patios and walkways neat and tidy.
  • While expansion joints are necessary and concrete edging will move with the frost in cold climates, its’ weight and rigidity will help keep it in place as the ground thaws.
  • Concrete edging can help prevent runoff during heavy rains.
  • Concrete edging is more resistant to deteriorating than most other edging products.
  • Concrete edging won’t be damaged by lawn equipment.
  • Concrete edging dramatically reduces the need for any edge trimming.

Cons

  • Concrete edging is quite permanent.  Once it is installed, it is probably the most challenging type of edging to remove if you decide you no longer want it.
  • Concrete edging is one of the more expensive lawn edging alternatives.
  • Concrete edging is very unforgiving.  If you have small children running about your yard, you may want a softer edging alternative.
  • If you edge your driveway with concrete in the northern climates, the edging may get broken and pushed aside by your snow plowing company.  Residential concrete edging is tough, but not as tough as the curb and gutter that you see on the edges of the road.
  • Concrete edging is more rigid and formal than some other options, so it may not mix well with a very laid-back and natural landscape plan.
  • Concrete edging requires specialized equipment to install, so it is not as much of a do-it-yourself project as many other edging alternatives.
  • Because it is made using concrete, this edging is not as eco-friendly as some other completely natural choices.

Conclusion

Decorative concrete landscape edging isn’t for everyone, nor is it for every yard. Still, it has become relatively popular in the last few years, and it can be seen adorning lawn and garden edges in neighborhoods both large and small.   It has been a favorite of large commercial settings for many years, but with recent advances in installation methods and smaller, more efficient installation machines, it is well within reach for most homeowners.