The Ultimate Guide to Outdoor Fireplaces

Outdoor Fireplace

If there is one landscape feature that many are raving and dreaming about, it is the outdoor fireplace. Who wouldn’t want to sit by the fire and get cozy with the people close to you, right? This landscape element has been a cornerstone of the outdoor living space movement for quite some time. Sure, fire pits and chimeneas are nice, but if your yard has the space and you have the money, a masonry fireplace at the edge of your patio living space simply can’t be beat.

Not only will it raise the value of your real estate and add some structure and beauty to your yard, but it will also allow you to extend your patio season considerably. If you plan to add a fire feature to your property, congratulations on finding this article about outdoor fireplaces! This is a crash course on everything fireplace-related.

What is an Outdoor Fireplace?

As its name suggests, an outdoor fireplace is quite simply a fireplace that is outside, typically along the edge of your patio living area. It is very similar to an indoor fireplace in terms of materials used, but its construction is more straightforward since the chimney can be much shorter and isn’t connected to the house.

Outdoor fireplaces are commonly composed of a firebox and a short chimney. While they are primarily designed for heating, some are also designed to become wood-fired ovens where homeowners and guests can make pizzas or even casseroles. 

Are Outdoor Fireplaces Different from Fire Pits?

Although both fireplaces and fire pits burn wood and add some warmth and character to your landscape, they aren’t the same. Here are their key differences:

Outdoor Fireplace

  • An outdoor fireplace is composed of a firebox and a chimney for proper smoke ventilation.
  • Firebox openings are usually arched, rectangular, or square.
  • Fire Brick should always be used to line the firebox.
  • Chimneys may either be tapered at the top or rectangular.
  • They may be attached to the house or situated at an adjoining patio, deck, or terrace.
  • They can be almost any size and as complex or simple as you would like.
  • People sit in front to enjoy the fire and feel the heat radiated out of the front when in use.
  • They may or may not have a fire screen to catch hot ashes.
  • They are traditionally constructed using all masonry materials.
  • They traditionally burn wood, but there are certainly gas and electric varieties.
  • They can add privacy and block wind due to their size and structure.
  • Construction will likely require a building permit.

Outdoor Fire Pit

  • Fire pits can either be in the ground or freestanding
  • Most fire pits are round in shape, but there are also oval, square, and rectangular ones.
  • They allow for seating all around the fire.
  • They may or may not have a fire screen to catch hot ashes.
  • They can be built anywhere since they don’t have a chimney.
  • It’s basically just a campfire, other than it may be sunk into the ground with some sort of masonry structure. Or it is a metal structure that can be moved around.
  • Much less expensive to build and maintain.
  • Usually, burn wood, but there are gas or electric varieties.
  • Wide-open to the wind, nothing to stop the fire and ashes from blowing around.
  • Typically no building permit will be required.
  • So the only thing these two have in common is that they burn wood? Pretty much, the fire pit is nice, but it is very different from an outdoor fireplace.
  • Both will keep you warm on a chilly night, and both will give you a spot to burn some marshmallows.

9 Reasons to Add an Outdoor Fireplace to Your Property

Outdoor fireplaces are pretty romantic, and they allow you to spend late nights outside while you’re snuggling with your partner or sharing some fun times with the kids while making s’mores. If you’re still trying to convince yourself or your housemates to add a fireplace just outside your house, here are some reasons that would have you looking for a professional builder:

  1. Outdoor fireplaces provide warmth – The primary function of an outdoor fireplace is to provide warmth during those cold nights. Instead of being cooped up inside, you’ll be able to enjoy your outdoor space without worrying that you’re going to freeze. 
  2. It extends your time spent outside – Since outdoor fireplaces provide heat, staying outside for more extended periods won’t be a problem. You can throw an intimate celebration until morning or sit and talk with your loved ones all night while warming up in front of your fireplace.
  3. It extends your living space – coupled with a few nice comfy lounge chairs or maybe a couch; it can give you that cozy living room feel outside on your patio. Who couldn’t use an extra living room,
  4. It is easy to maintain – just a bit of ash cleanout, nothing too complicated here.
  5. It can improve the overall look of your property – By adding this fire feature, your backyard will have an accent piece that will pull people’s attention, even when it is not lit.
  6. It changes the ambiance of your home – Not all of us are lucky enough to have a fireplace in the house, so this is a much more affordable way to bring the sights, sounds, and smells of a real wood fire into your life.
  7. You have extra space for entertainment – adding the outdoor fireplace might just give you an additional seating area attraction for your guests.
  8. It is an excellent investment – In the future, when you decide to move and sell your property, you’ll realize that you made a great choice by adding an outdoor fireplace to your yard. The aesthetic appeal it brings increases your home value. You’ll also find it easy to find potential buyers since outdoor fireplaces are currently a popular trend.
  9. It can keep bugs away – the smoke from the fire will help discourage them.

Things to Consider Before Installing an Outdoor Fireplace

Don’t let your excitement jeopardize your plans to build an outdoor fireplace. Make sure that you have researched and prepared well so you won’t encounter problems in the long run. 

Here are a few things that you should consider before building:

Identify your outdoor fireplace’s purpose –

Your purpose for adding an outdoor fireplace to your backyard is an important planning consideration since it will help you decide on the size. If you have identified that you just want a place where you and your family can hang out and share some stories, a small fireplace is suggested. However, if you would like to cater to more people— your friends, colleagues, or distant relatives perhaps, then you should opt for a two-sided outdoor fireplace.

Review local ordinances

This is crucial since some areas may not allow fireplaces. Always check local ordinances and talk to homeowners’ associations prior to beginning any construction. You don’t want to get part way into your construction project just to be shut down and fined by the local authorities.

Consider safety when choosing the location.

Choosing the location of your fireplace is also something you should carefully plan. We are dealing with fire here, so we need to make sure that prevailing winds aren’t going to be blowing hot ashes into our trees or house.

Prioritize proper ventilation

Due to the short chimney, it would be easy for the smoke from your outdoor fireplace to settle down into the seating area, especially if you have an enclosed or partially walled-in areas. You want this pretty much out in the open so that you are not trapping the smoke.

Familiarize yourself with the types of fireplaces

Part of building an outdoor fireplace is choosing between wood and gas. Be honest with yourself here. Are you the type that doesn’t mind the extra work of chopping or buying wood and cleaning ashes? If you are not the type to enjoy the processes involved with building a wood fire, you may want to consider installing a gas fireplace.

Make sure the fireplace complements your home.

With so many styles, colors, and patterns of block available, you can create any sort of fireplace that you can dream of, but let’s make sure that it fits well with your home as well as the surrounding landscape and hardscapes. You want things to look like they were planned out, and you don’t want too many different materials. Having the masonry of the fireplace match or compliment any seat walls and patio stone that you might already have is a good start.

Pay attention to scale

You also want the scale of the new fireplace to complement and reflect the scale of the house. Neither a large fireplace next to a tiny house nor a tiny fireplace next to a big house will look right. 

Learn about fire safety

No matter how much warmth and coziness the fire brings, it is still hazardous. If you haven’t had a fireplace before, you need to do a bit of fire safety research to make sure that you can keep yourself and your family safe. You must learn how to use a fire extinguisher and make sure that one is readily available near the fireplace.

Consider the Placement

I mentioned a while ago that your outdoor fireplace must compliment your home, but another concern is how it will fit into your existing patio. Do you have a good spot for it, or will you need to expand the patio to make this work? Will it be too close to the outdoor kitchen or that big tree in the yard? Will you have room to create a seating area in front of it, or is the entire patio already full of furniture? Most patios simply don’t have enough room for a completely new seating area. This is an important consideration. If your entire patio needs to be re-done to accommodate this new outdoor fireplace, the project’s scope and cost just increased significantly.

Consider Features

Should this fireplace be small and simple, or might you want it built big enough to incorporate a mantle and hearth? Will you want a built-in wood storage area or a built-in area for tools?

Consider Accessories

Will you need to purchase fire tools like pokers and tongs? Will you need a fire screen or wood hauler? Don’t forget about furniture; you will surely want some comfortable lounging furniture near your fireplace.

Pros and Cons – Wood vs. Gas

Wood-burning Pros

  • More rustic and authentic.
  • The fire is different every time and changes through the hours you spend around it.
  • The fire provides you with something to do while it is burning; many people enjoy poking in the fire, arranging the logs, adding logs, etc.
  • It will actually smell like the campfire. Nothing beats that smell of burning wood (for some people)
  • Cheaper to install, no need for gas lines and burners.
  • Chopping and splitting firewood is good exercise.
  • The smoke can keep the bugs away.
  • It might be an excellent way to get rid of those sticks that always seem to land in your yard.
  • No chance of a gas leak.
  • Neighbors might like the smoke?

Wood-burning Cons

  • The fire needs to be built; it doesn’t just happen at the flick of a switch.
  • It’s an actual wood fire, so that means popping and hot embers jumping out or blowing out of the firebox.
  • It will actually smell (a con for some people)
  • You will need to chop or buy firewood
  • The fire will need some attention as it burns.
  • The fire will be harder to extinguish than gas.
  • Neighbors might not like the smoke?
  • You might end up with ashes on cars, tables, chairs, etc., after a night of burning.

Gas Pros

  • Sarts at the flick of a switch
  • It doesn’t really smell.
  • Easy to extinguish.
  • No ashes or debris to clean up.
  • No sparks and embers flying out of the firebox.
  • Not smoky 
  • Can choose a gas burner with ceramic logs.

Gas Cons

  • No wood-burning smell.
  • Nothing to do while it burns.
  • It doesn’t give you that same cozy feeling like an actual wood fire does.
  • More expensive to install.
  • Potential for the gas burner to corrode over time and need replacing.
  • The chance of a dangerous gas leak.
  • The fire looks the same every time.

Outdoor Fireplace Styles

Outdoor fireplaces are constructed for both functionality and aesthetics. As mentioned earlier, you will want to match the style of your fireplace to the style of your home and patio.

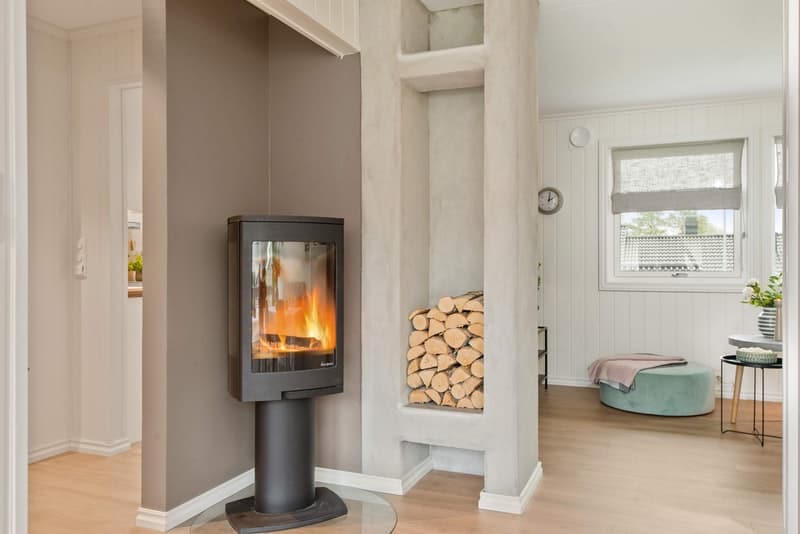
Traditional Outdoor Fireplace Style

This style would remind you of fireplaces found in log cabins which give off some rustic vibes. They are usually made out of stones and bricks for a cozier home atmosphere. To achieve a complete traditional look, the fuel recommended for this fireplace is wood. However, they can also be outfitted with a gas or electric insert if you desire.

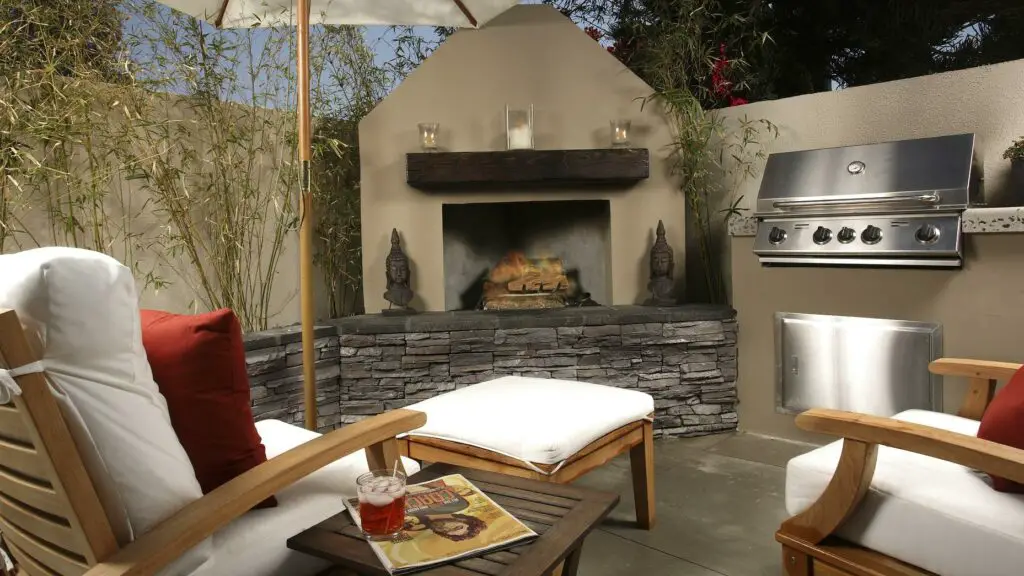
Contemporary Outdoor Fireplace Style

If your home has contemporary decors, I would recommend a contemporary fireplace designed to have sharp lines. Like the traditional fireplace, the materials used are stones, bricks, and concrete, but a more contemporary feel.

Modern Outdoor Fireplace Style

Some outdoor fireplaces double as a piece of art. If you have a modern styled home, instead of using the usual brick and stone, you can use materials such as glass and marble for a more futuristic and clean look. These might be looked at as more of an artistic focal point than a source of heat.

Outdoor Fireplace Materials

The outside covering of your fireplace is the first thing your guests will notice, and it is a distinctive design element that you should plan and style well if you want to add value to your property. Consider how your fireplace will blend in with your whole landscape. You should choose materials that will bring cohesiveness to the overall look of your property. If you can find the right material for your fireplace, it is possible for it to look as if it has been there from the begining.

Listed below are the common materials you can use for your outdoor fireplace project:

Brick

Bricks are made out of clay which naturally occurs in many states. These clays are shaped and heated in an oven to become durable. Where the clay originated will determine its color, ranging from cream to dark brown. If your home is built with brick, then it makes sense that you would want to extend the same aesthetic in your outdoor fireplace. Be sure to take the time to find a brick that compliments the color of the house.

Stone

Using stone to build your outdoor fireplace can give it a more natural look. You can use genuine stones or manufactured ones, depending on your budget. The pros of choosing this material are that it is long-lasting and extremely durable, you can choose from various earth stones, and has an upscale style. On the other hand, it also has its disadvantages. It is more expensive than other materials, and the installation is more complex.

Stucco

Stucco is made of Portland cement plaster which is factory-prepared, and this is a low-cost material typically applied to a concrete block understructure. Stucco can be reasonably reliable and durable but will tend to get dirty more quickly, and in places that freeze, a small crack in the stucco can let in water which can cause the stucco to fail in freezing temperatures. Homeowners who want to achieve a Spanish or Mediterranean look are better off choosing this material. It is readily available in multiple colors and it is not too heavy to ship, unlike stones and bricks.

Concrete

Concrete is very durable and is used in all types of construction. Many fireplaces are constructed of concrete, and it is a versatile product that can be formed into whatever shape you want. The downside of concrete, in my eyes, is the aesthetic appeal, and it is not the most attractive option to choose.

Outdoor Fireplace Safety Tips

When you add a heating feature to your outdoor living area, you also increase the risk of injuries and unexpected fire.

  • Clear your yard waste. Any debris and yard waste can become a hazard if they contact hot embers or fire.
  • Only use the intended fuel. Don’t burn any material in your outdoor fireplace other than what is meant to be burnt in it.
  • Prune trees and shrubs that are near your outdoor fireplace. Low-hanging branches, bushes, and shrubs that grow near your outdoor fireplace need to be regularly pruned so they won’t catch fire.
  • Use safety screens. Add a safety screen on your outdoor fireplace to serve as a barrier between the fire and your guests. This will prevent embers from blowing or popping out of the firebox.
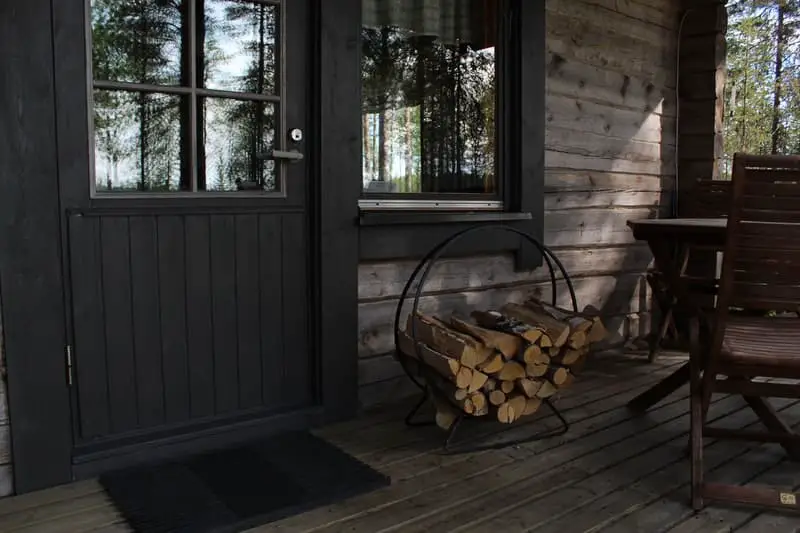
  • Store firewood far from your fireplace. Even though it is convenient to store wood near your fireplace, the Federal Emergency Management Agency (FEMA) does not recommend this since it can increase fire risk. It would be better to store your firewood 30 feet away from any structure.
  • Don’t let kids play with the fire. This one is pretty obvious. Kids are naturally curious and playful. If you put something as exciting as a fireplace in your yard, they are bound to play with it. The last thing you need is a kid running through the yard swinging a flaming stick. Teach them how to deal with fire and how to stay safe.
  • Don’t light your fireplace and leave. Leaving any fire unattended is a terrible idea. Many forest fires are started by embers left glowing in a fire.
  • Stock up on emergency supplies. It is required that you keep emergency supplies on hand just in case an unexpected fire occurs. Some of the essential items you should have are buckets of sand, a water hose, and a fire extinguisher.
  • Use the correct log size for wood fireplaces. Wood-burning outdoor fireplaces can be dangerous if you use wood that is too big for your setup. All your logs must fit on the firebox to ensure that it is safe for you and your guests. Over-stuffing a firebox will only result in a dangerous fire that blackens the front of your fireplace with soot.
  • Maintain a distance between your furniture and the fireplace. Most patio furniture is flammable, so keep it far enough away so that it won’t catch fire.
  • Completely extinguish the fire when you are done. Many people leave a fire and go into the house for the night when it is still lit or glowing, and this is always dangerous. Fully extinguish your fire when you are done.

Frequently Asked Questions

How Much Does it Cost to Build an Outdoor Fireplace?

According to Home Advisor, the cost of building an outdoor fireplace is between $1,500 to $20,000. Meanwhile, if you opt for pre-made kits, expect to pay $1,500 to $9,000. On the other hand, custom projects will run you from $8,000 to $50,000, depending on your fireplace design and your budget.

Do Outdoor Fireplaces Need a Chimney?

The need for a chimney depends on the type of fireplace. Gas fireplaces are designed to operate without needing a vent. On the other hand, wood-burning fireplaces always have a chimney to direct smoke upwards. 

What Direction Should an Outdoor Fireplace Face?

Many experts suggest that outdoor fireplaces should be built so that the back wall faces the wind. This is primarily to control the fire and reduce the smoke produced by burning wood, and this also works to protect you and your guests from sudden gusts of the wind.

How Far Does an Outdoor Fireplace Need to be From the House?

In general, your outdoor fireplace should be set up about 10 to 20 feet away from your house or any structure that might be flammable. Note that this is only the minimum distance. The farther it is from your indoor living space, the better.

Final Thoughts: Is Building an Outdoor Fireplace a Good Choice?

There is no definite answer as to whether building an outdoor fireplace is a good choice for you. It will all depend on your location and how often you will use it. If your area allows building one without any restrictions, then you are quite lucky! All you have to consider is whether you will utilize it.

I hope this guide taught you all you need to know about outdoor fireplaces and why they are popular right now. Make sure that you bookmark this page so you can review this once you are already in the process of building your fireplace.

Is an Outdoor Kitchen Worth Adding to Your Landscape?

outdoor kitchen

We have all been looking for new ways to enjoy our living spaces, and there is something just so inviting about dining al fresco. For starters, you get to be outside in the sun and fresh air, and you get to enjoy the scenery and share a meal with your loved ones. You also have more space to do some on-the-spot cooking like Korean Samgyeopsal or barbecues, and you don’t need to worry about greasing up your kitchen. 

To make this type of dining possible, you could have a simple grill and a picnic table, but if you enjoy the finer things in life, you absolutely must have an outdoor kitchen situated in your yard. Of course, it must be equipped with the right features and appliances so it can serve both you and your guests.

In this article, we will cover the benefits of building an outdoor cooking space and some valuable tips on building one. If you are undecided about whether you should start building, consider this as a sign. After all, I’m here to help you get started.

What is an Outdoor Kitchen?

An outdoor kitchen is an area outside your house where you can prepare a meal and dine with other people. It is mainly composed of a heating element like a grill, a stove, or an oven, and it offers more room for movement and activities since it is located in an open space.

Most people find it more enjoyable to dine outside, especially when the weather is hot. This is especially true for tropical areas which experience a humid climate all year round. The outdoor kitchen doesn’t always need to be especially grand, but it must be appointed well enough to serve its purpose of making preparing and serving the outdoor meal a pleasurable experience.

Another great reason to build an outdoor kitchen is to alleviate some of the closed-inclosed-in feeling of life during this awful pandemic. Sure, maybe you should stay home, but wouldn’t it be nice to get outside and enjoy a bit of fun with your dinner?

No matter what your reason for getting interested in outdoor kitchens is, the process of building one can be tricky. Prepare your notes or bookmark this page since this guide offers everything you need to know about this essential addition to your landscape.

13 Benefits‌ ‌of‌ ‌Outdoor‌ ‌Kitchens‌ 

If you aren’t convinced yet that adding an outdoor kitchen to your backyard is one of the best decisions you’ll ever make, take a look at its long list of benefits:

  1. It can be built to fit your specific needs and wants. A simple Google search will give you an idea of the number of designs available for your kitchen project. Pinterest and Instagram also offer a lot of unique “inspos” you can choose from.
  2. It‌ ‌can‌ ‌reduce‌ ‌your‌ ‌power‌ ‌consumption. You might be confused— is it possible that adding another feature to your home reduces energy consumption? Well, yes, it is! Outdoor kitchens help you save on utility bills, especially during the summer months. Instead of kicking your AC into overdrive, choosing to cook outside in the open air is more practical. Remember that when you bake or make anything that generates heat, your house temperature elevates, making your AC work twice as hard to cool the space down.
  3. It’s‌ ‌easy‌ ‌to‌ ‌manage‌ ‌and‌ ‌clean. Of course, I’m not saying that you won’t have to clean at all. But having an outdoor kitchen significantly reduces the time you spend cleaning. If, for instance, a bit of food falls on the ground, you don’t need to worry about it. Heck, it will just be a bit of fertilizer for the lawn.
  4. Outdoor kitchens can make use of the yard space to‌ accommodate ‌large‌ ‌crowds. It might be a bit uncomfortable moving around in a crowded indoor kitchen filled with guests. Now imagine them all out in your yard with plenty of elbow room. Go ahead, invite the neighborhood!
  5. You‌ ‌can‌ ‌work‌ ‌on‌ ‌it‌ ‌without‌ ‌rushing. Outdoor kitchens are simply an extension of your living space. That being said, if you want to start your project and build it slowly because you want to do it yourself or you’d rather do it a bit at a time to fit it into the budget, it won’t be a problem. You can work on it anytime you want and still use your indoor kitchen and be completely comfortable in the meantime.
  6. It keeps an unwanted smell outside. I alluded to this in the first paragraph. Sure, coming home to the smell of dinner being cooked is usually quite pleasing, but there are some dishes that tend to really stink up the kitchen. Wouldn’t it be nice to have the option of cooking them in the great out of doors so that your entire house doesn’t smell like greasy cooked pork bellies? Outside, the scents will simply drift away on the breeze. Although, you may find yourself with some extra guests when the neighbors catch a whiff of what you’re cooking.
  7. It reduces the trips in and out of the house. My least favorite part of having an outdoor meal is carrying everything out of the house, out to the patio, and then bringing it all back in again. It really gets a bit frustrating. If you build it correctly, you can have most of your supplies on hand in your outdoor kitchen. Cabinets, drawers, and a fridge are common additions to the outdoor kitchen. 
  8. The value of your home will likely increase with the installation of an outdoor kitchen. If you plan to sell your property in the future, adding an outdoor kitchen will surely increase its value. The investment you’ll make in building or remodeling this area of your landscape can benefit you greatly since homes with outdoor kitchens have reportedly sold for almost 30% more than houses without outdoor kitchens. I believe that it is the functionality of the outdoor kitchen and the aesthetic appeal of having the extra structure and intrigue in your yard versus the flat patio with surrounding gardens.
  9. It helps expand your living space. With the current tiny living trend, more and more houses are built with limited space. Of course, this can get tiring over time, especially since we are all required to stay at home due to the Covid situation. By extending your home through an outdoor kitchen, you have more space to move around and do some activities that cannot be done inside, like grilling or making smores.
  10. It may help you save money on dining out. I know it’s not the same, but having a great outdoor kitchen with everything you need close at hand may encourage you to use it rather than go out. Dining in restaurants can be extremely pricey, and cooking a meal right outside your house can save you a few bucks, not to mention that it’s an excellent spot for a special meal without needing to brave the crowds or wait for a table.
  11. Your quality of life will improve. We all need a bit of sunshine and fresh air, and too much time indoors robs us of both. Having a few meals a week outdoors could really increase your time out in nature. Cooking is a form of bonding for many families. Creating meals with our loved ones while enjoying some fresh air and a beautiful landscape puts us in a good mood, and our lives become a little bit less stressful.
  12. The food you cook becomes tastier and healthier. One of the mainstays of outdoor kitchens is, of course, the grill. If done properly, you may be able to grill more of your food which will lessen the need for oils and frying, not to mention that the fats from your steak will end up on the grill rather than n your belly.
  13. Cooking can be more diverse. Your indoor kitchen may not allow you to create certain meals that your outdoor kitchen can. Outdoor kitchens can have open flame areas, smokers, pizza ovens, and almost any type of specialty cooking item that you might be lacking in your existing kitchen.

Materials

Since these kitchens are constructed outdoors, building them using anything other than the most weather-resistant materials would be foolish. Here are the most common materials chosen.

  • Poured concrete is a very versatile material that can be used for patios, seat walls, cabinets, countertops, and even roofs. While most of us consider concrete to be relatively industrial and not particularly aesthetically appealing, in the hands of an experienced artisan, this extremely durable material can be rock solid as well as beautiful.
  • Concrete brick and block are used to build the majority of outdoor kitchens that I see. It is attractive, durable, and easy to use. There are many color and size choices, and contractors or skilled do-it-yourselfers can install them.
  • Natural stone is again very durable and probably the most visually appealing choice. Stone is most often used for countertops and walls.
  • Wood is a very versatile building material that can be used for all aspects of the outdoor kitchen, but it is flammable, can be chewed by animals, and does decay over time when left out in the elements. Wood is usually only used for structures such as pergolas or gazebos.
  • Steel can be used to build all aspects of the outdoor kitchen, with stainless steel being the most popular choice for its weather resistance. A custom-designed outdoor kitchen constructed entirely of stainless steel would be pretty pricey, so it is typically used for doors, appliances, and sometimes countertops. 

12 Considerations when Building an Outdoor Kitchen

Before you go ahead and contact a masonry expert or a landscape professional, you first have to look at some essential factors that can directly affect how your kitchen will look or what appliances it will contain.

  1. How you are going to use your outdoor kitchen
    • Take some time and reflect upon who you are and how you might use the outdoor kitchen. There is no sense in building a huge area if you aren’t the type that enjoys entertaining, and maybe it just needs to be big enough for the family.
    • On the other hand, if you love to have a home full of guests, you will want a much more expansive outdoor kitchen with plenty of room to work.
  2. It should fit
    • You want it to suit the size of your home and your needs. A vast, sprawling outdoor kitchen may look out of place next to a tiny house, but it might be just right for you if you spend all of your time outdoors.
    • A large house with a tiny outdoor kitchen may not look balanced and might not sell for as much on the real estate market as it would if it were in fitting with the house size. Scale is important.
  3. The area where you live
    • Let’s face it, some parts of the world just lend themselves to outdoor dining, while others, not so much. You will want to design and build your outdoor kitchen in a way that fits your climate.
    • If you are in an area that is warm and comfortable most days of the year, you are in a great position to build your kitchen with all of the amenities and in just about any style that you want. You will likely get plenty of use out of it and your money back, plus some when you go to sell your home.
  4. Should it be covered?
    • If you live in a very dry and hot location, you will almost certainly want to include some sun shade elements and maybe even fans to keep yourself and your guests comfortable. A big fabulous outdoor kitchen doesn’t do much good if you are in the house in the air conditioning.
    • If you are in a place where it is raining many days of the year, you might be better off building a roof over your outdoor kitchen and even a covered walkway leading to the kitchen rather than an extensive outdoor kitchen that doesn’t get used due to the weather.
    • In the northern regions where the cold wind drives you inside many days of the year, you will want to build your kitchen with some structure to block winds and give you some nice cozy areas where you can install some outdoor heaters to make your new kitchen more user friendly for a better part of the year.
  5. Appliance and fixture choices
    • The climate in your area will also influence some of your appliance choices. Things like refrigerators and wine coolers don’t do as well in freezing temperatures or may need to be moved indoors for the winter months. 
    • Water lines and sink traps will need to be drained for the winter months if freezing occurs in your area. Tropical climates or places on the sea will undoubtedly require appliances made from marine-grade stainless steel for longevity.
  6. The frequency of its usage
    • When you build an outdoor kitchen, it should not only serve as an aesthetic addition to your backyard but should also be very much functional. 
    • If you think you will be using the new kitchen for most meals, you will want to buy higher grade, more industrial appliances. If you like the idea of having the outdoor area but don’t like to cook and think it won’t be used often, put your money into the structure and get decent, but maybe not top-of-the-line appliances.
  7. Storage
    • As previously discussed, your outdoor kitchen will likely include some storage areas. How you use these storage areas will depend significantly on their construction. For a good reason, most outdoor kitchens are built using concrete or stone products and stainless steel. This kitchen will be out in the elements and must be rodent resistant.
    • Whether you see them or not, I can guarantee that you have some little sneaky chewing, nibbling, and pooping critters in your area. The last thing that you want is to give them great places to make their homes and then stock them with edibles. Remember, rodents classify edibles very differently than we do. You will be surprised at the wide range of things they’ll chew on.
    • While wooden facias and features might soften the look and feel of your outdoor kitchen, they certainly won’t help with rodent-proofing. All storage areas must be built so that mice can’t get in. Remember that these little critters can go anywhere they can fit their heads, so even tiny little holes will be enough to invite the mouse family in for the winter. Make sure that your kitchen is well built and has latching doors so that even the crafty and curious raccoon won’t be able to gain access.
  8. Access to your house 
    • No matter how well thought out and appointed your outdoor kitchen is, you will still want it reasonably close to the house because you will surely be running back and for some of the stuff. Make it convenient to encourage your family to use it more.
  9. Layout is important
    • Just because this kitchen is outdoors doesn’t mean that it can be built however you want. Be sure to follow good kitchen layout practices when laying out this outdoor area. Once again, if it is not convenient, you will use it less. If you put all of the money into building it, make sure that it is an excellent place to cook a meal. 
  10. Distance from the outdoor dining or entertainment area
    • In every gathering, whether it is for the family or friends and colleagues, It may go without saying, but we’d better say it anyway. The cooking and entertaining areas should be all located centrally, so that everyone, including the cook, can be part of the party and enjoy themselves. Remember, this is all about enjoyment. Make sure it is for everyone.
  11. Function and the Future
    • When laying out and building this outdoor kitchen, be sure that you have thoroughly thought out and planned for all possible conditions. This will likely be a sizable construction project that will require trenching to the house for electrical wires, gas lines, and water pipes. You don’t want to build all of this only to find out that you should have run one additional water pipe or electrical line. Even if you don’t think you will need them at this time, installing an extra electrical circuit and a water supply and drain to accommodate future needs will be a small expense compared to trying to do it later.
  12. Location and Position
    • Be sure to position the kitchen, seating areas, and dining areas to face a great view and also be sure to position them to take advantage of the sun and to help block the prevailing winds.

Outdoor Kitchen Zones

It’s about time we get to the technical side of things. An outdoor kitchen is not just composed of a grill and a countertop for food prep. It is composed of four zones, and each has a purpose. They are discussed in detail below:

Preparation Zone

Before the meat hits the pan, it is cleaned, cut, and seasoned by the designated cook or chef. There should be a wide counter space to do all of this prep work.

The prep zone, as most people call it, is usually composed of a countertop, a sink, and a fridge. Other items that should be found in this area to make the food preparation hassle-free are cutting boards, knives, food processors, and cooking utensils. Ingredients that are needed for additional flavors are also commonly found here.

Cooking Zone

The cooking zone is obviously where the magic happens. This is where you’ll usually find the grill, the pizza oven, the smoker, the side burners, etc. Apart from all these appliances, you can also find cooking accessories in this zone, such as tongs, spatulas, and ladles.

The most used feature of the cooking zone is the grill. Therefore, paying attention to its location and its ventilation should be one of your top priorities.

Serving Zone

Right after the food is cooked, it is brought to the serving zone or a kitchen island for plating and serving. If the guests are only a few, they may be able to dine here, so adding a few barstools might be a welcome addition.

If your budget doesn’t allow for a separate kitchen island, you can certainly use the dining area as the serving zone.

Entertainment Zone

The fourth outdoor kitchen zone is dedicated to entertainment. This is where the people can lounge and have some drinks without getting in the way of those who are preparing for food.

The primary appliance that should be found in this area is a refrigerator for refreshments, and this is different from the one situated in the prep zone. Some people also choose to add a keg fridge or a wine cooler. You will also want to have a selection of drinkware readily available for your guests.

Depending on your intentions, this area could include lounging areas and even a television or hot tub.

‌Outdoor‌ ‌Kitchen‌ Layout ‌

Your outdoor kitchen’s configuration or layout will greatly depend on the available space, design, and budget. Below are your common layout options once you start planning:

Linear

As the name suggests, this is the simplest and easiest to achieve since it does not take any shape. 

For many homeowners, their outdoor kitchen may be connected to the house with countertops flanking the grill. However, freestanding linear kitchens can also be an option if attaching them alongside the owner’s home is impossible.

Galley

Similar to indoor galley kitchens, outdoor galleys have a central walkway, and the cabinets and countertops on both sides are facing each other. This forms a narrow rectangular work area, which saves on space but makes it difficult for any more than one person at a time to work in the kitchen.

This layout is much more appealing for some people since it is very ergonomic. All the essential services are clustered in a small space, making everything easily accessible. 

L-Shaped

L-shaped counters are quite popular for both indoor and outdoor kitchens since they feature more moving space. It is also ergonomic like the galley, so the cooking workflow is efficient.

Since this is a classic configuration, it allows for a lot of flexibility. You can add an island to the open space, or you can place a central dining set, and you can even add both if there is enough room since the L-shaped counters do not take much space.

U-Shaped

As you could probably imagine, this kitchen layout is composed of cabinets, counters, and appliances arranged in a U-shape. It has an open space in its center which can offer a lot of movement.

This is ideal even for a small outdoor kitchen because it capitalizes on the counter space. Meanwhile, you can add a dining table or an island for large kitchens to maximize the layout further.

Outdoor‌ ‌Kitchen‌ ‌Cover‌ ‌

There is no doubt that outdoor kitchens can be functional and fun to use; mother nature can certainly have her way with our dinner plans if we don’t build our outdoor kitchens to defend against her sometimes sudden and unexpected onslaughts.

There are countless ways to design your kitchen to protect it from the weather to some extent. A few examples are listed below.

Gazebo

You’ll often hear the words gazebo, pavilion, or pergola used interchangeably, but the two are distinct from each other.  

Gazebos and pavilions will typically be round, square, or rectangular and have a weather-tight roof.

Gazebos are traditionally built using lumber, but there are certainly many that have masonry bases. Many pre-built metal or PVC gazebos can be purchased at big box stores and assembled at home.

Pergola

Pergolas consist of columns that serve as the support for beams and rafters. One distinguishing characteristic of this type of outdoor covering is its Italian feel which can be attributed to the fact that they were first designed during the Italian Renaissance. 

Pergolas do not have a weather-tight roof; instead, the beams or rafters offer dappled sun protection and a handy place to grow vines.

They can be almost any shape, although they are often rectangular or square.

These are traditionally wooden structures, but other pre-built options are available at retail locations like gazebos.

Canopy

Among the three types of outdoor kitchen covers, canopies are the least expensive and the easiest to install. There are different sizes and designs to choose from, which makes them very versatile, but most must be fastened to the house, limiting their use for some people. Some are permanent structures, while others can be rolled up when not used.

Must-Have Outdoor‌ ‌Kitchen Appliances and Accessories

This article would not be complete without the list of appliances and accessories you have to purchase to make your outdoor kitchen functional. These items aren’t exactly cheap so prioritize the ones you will be using more often.

  • Grill: Whether your outdoor kitchen is large or tiny, you will definitely need a grill. The choice of whether to install a gas, charcoal, or wood-fired grill could fill an entire article, so let it be said that this topic is very personal for some folks, and you need to decide which you enjoy the most. Or, if cost is no object, maybe install all three.
  • Side Burner: This, of course, makes your outdoor kitchen much more versatile and more similar to your indoor kitchen. A side burner or cook space has a multitude of uses.
  • Traditional Oven: This might not be a common choice, but it greatly expands the versatility of your outdoor kitchen and can significantly expand your ability to prepare full meals for large groups.   
  • Refrigerator / Freezer: Your refreshments need to be chilled, and your food needs to be cooled or frozen if you plan to store any in your outdoor kitchen. Many outdoor kitchens will do well, with one fridge in the prep area for the food and another fridge in the entertaining area for drinks.
  • Trash Bin: This might seem unnecessary, but if you are truly going to use your outdoor kitchen as a kitchen, you will undoubtedly need a trash bin of some sort to make clean up easy and convenient. Make sure that it is rodent and weatherproof.
  • Pizza Oven: Who doesn’t love pizzas, right? Here you can go all out and install a brick pizza oven to create fire-cooked pizza creations, or you can just install an electric drawer style oven to cook the frozen pizzas quickly and easily.
  • Flat Top Griddle: This one depends entirely on your needs and wants. Some people may never use a griddle in an outdoor kitchen, and others might use it more than the grill. You know which one you are.
  • Power Burner: Again, will you use this or not? It can be gas or electric and makes your outdoor kitchen much more like your indoor kitchen. Some people will love it while others will never use it.
  • Sink: I believe a sink is a must-have item for all but the smallest outdoor kitchens. You will have trouble cooking serious meals in your outdoor kitchen without a sink for food prep and cleaning.
  • Warming Drawer: This low-heat cooking device ensures that your food stays heated if you will not consume it immediately. Wonderful if preparing large meals for many guests, probably overkill for small gatherings.
  • Mixer/Food Processor: A good quality blender can often come in handy for food prep or frosty drinks.
  • Television: Many weatherproof choices can give you more reason to stay in the great outdoors.
  • Speakers/Music: You can either install an entire sound system or simply a Bluetooth exterior grade speaker so that you can enjoy some music in your entertaining area and kitchen.
  • WiFi:  Maybe your house WiFi will reach the outdoor kitchen, but if not, you might want to install an extender.
  • Lighting: There are many lighting options for your outdoor kitchen, including color-changing and lights that will change with the music if you are so inclined.
  • Outlets/Charging Stations: If you want the kids to use the space, you better have extra plugs around so they don’t need to run back in the house to plug in.
  • Pool/Hot Tub: Okay, this might be going a bit far, but if you want the ultimate outdoor entertaining space, a hot tub or pool might just be the icing on the cake.
  • Bar Stools: If your outdoor kitchen includes a built-in bar or island, then you will need some stools.
  • Patio Dining Set: Well, they are all going to need to be able to sit down and eat this fabulous meal that you created for them, aren’t they?
  • Seating / Lounging: Aside from the chairs included in the dining set, you should also consider adding some lounge chairs in your kitchen’s entertainment zone so your guests will be more comfortable.
  • Fireplace: The addition of a fireplace can really make this an all season entertainment zone and will add more beauty and structure to your site.
  • Wine Cooler: This keeps wine bottles chilled to a specific temperature. This also allows self-serving, so that’s less work for you.
  • Ice Maker/Ice Storage: If you don’t want to run out of ice during a party, then an ice maker is a worthy purchase.
  • Shelves/Cabinets: Tidying up your outdoor kitchen starts with a clean countertop. You might want some shelves or cabinets to help with storage.
  • Glassware Storage: A functional storage area or glass rack where your guests can serve themselves will be invaluable at large gatherings.
  • Fire Pit: Parties don’t have to end at sundown, so I strongly suggest that you add a fire pit to your entertaining area.
  • Patio Heater: A great alternative to fire pits and a must if you are in some of the colder areas of the world and you want to get the most out of your outdoor kitchen.

Final Thoughts: Should You Start Working on Your Outdoor Kitchen?

Adding an outdoor kitchen to your property is a wise investment. As established in this article, there are a lot of benefits that you can enjoy once you decide to build one. But, you need to make sure that it is functional and that it fits your house and your budget. 

Don’t rush into an outdoor kitchen project. If you don’t do your planning, whether you choose to do it yourself or to hire it done, you may end up with a less than ideal outdoor kitchen.

Hopefully, this article can help you decide if an outdoor kitchen would be an advantage for you and your family.

Walkway Design A Comprehensive Guide

Brick Walkway Under Construction

An often overlooked aspect of the landscape plan is the walkway design. Our attention is often focused on the main attraction – be it a pond, a swimming pool, a garden, a patio, or anything else of interest in the yard. We might take the walkway for granted because we think we just need a simple path or sometimes no path at all to get from point A to point B. The correct way to design a walkway would be to lay out all of the hard surfaces prior to designing the landscape so that the softscapes can accent the hardscapes, not the other way around. You need to get the main skeleton in place before you start dressing it up. 

By neglecting the walkway design, we may unknowingly risk the following:

  • The garden may become disjointed or may lack cohesion with the house. 
  • Access to the house or the yard may be inconvenient or even cumbersome.
  • A simple path may become unsafe. 
  • The trail may become muddy and uninviting.
  • You may end up needing to remove some landscape elements to install a new walk.

If the path is well thought out, there will be benefits to be enjoyed:

  • Well-defined walking areas.
  • A clear path of travel through the yard.
  • A cohesive and comfortable garden and landscape. 
  • An inviting and easily accessible path to key areas of the yard.
  • Advanced planning and doing things in the correct order will always save time and money in the long run.

To help you develop a good walkway plan, we’ve listed some essential guidelines. On this page, we will be covering the following topics that contribute to the creation of a good walkway design:

  • Materials
  • Width Guidelines
  • Budget and Cost
  • Helpful Tips
  • Design Ideas

Design Considerations

Here are some of the most important points to consider when planning your walkway.

Function – What is the purpose of the walkway?

When planning a walkway, the first question is; what is the purpose? A walkway to welcome guests from the road to your home will be much more grand in both design and size than a simple path back to the herb garden. 

The walkway going to the house’s front door will likely have much more foot traffic than the path into the backyard. Also, this front walk will be used by delivery people, movers, friends, and family, so it needs to be designed to suit all types of visitors. A primary walkway’s design needs to be sturdy, solid, wide, and smooth to accommodate a wheelchair, persons carrying or rolling heavy objects, and to prevent people from tripping.

It is often wider to allow at least two people to pass simultaneously or wide enough to be carrying grocery items or other stuff going to the house. The choice of material will be driven by its purpose as well as its aesthetic value. You will typically be choosing a very hard, solid surface such as concrete or stone. 

For the path that leads to the garden, the foot traffic and its usage will be considerably less. This is called a secondary walkway or an auxiliary walkway. This pathway may branch out from the primary walk, or it may be entirely separate. Its purpose is often a route for a casual stroll through the yard or garden, but it could also be used for utilitarian reasons such as yard work and maintenance. Its width and material requirements are usually much more flexible than the front walk. It can be a simple gravel path, a wooden walkway, or even a casual stepping stone trail through the garden. While this path is typically more narrow, keep in mind that it may need to be wide enough for garden carts or wheelbarrows.

Aesthetics – How do you want the walkway to look?

When planning a walkway, consider choosing a design and material that will complement and blend visually with the style and architecture of the house. This will help create cohesiveness in the overall theme of the property. For example, if you have a modern-looking home, you don’t want a traditional or historic-looking brick-layered pathway to go with it as it will look off-sync. But matching it with a geometrically shaped walkway design may be more appropriate as it complements the house design better.    

When planning a walkway, consider whether you would like to create a formal or informal feeling. A straight line type of walkway evokes a formal mood or works well if you want to get to a particular destination quickly or conveniently. This works well with the primary walkway, where you prefer a quick walk from the driveway to the house’s front door. An informal or casual walkway uses curves and makes for a more relaxing walk. Bends in a curved path allow for opportunities to place interesting plants or statues along the way. An informal walkway works best in a secondary path where the goal is not only to get to your destination (perhaps a pond, a fountain, a patio, or even a garden plot) but to enjoy the journey getting there. The opportunity to stop now and then to enjoy an interesting plant or feature along the way is often a good excuse for a widening of the path to accommodate a small bench or chair.

Safety – Make this a priority.

Consider also the safety aspect of the walkway. Make sure a smooth walkway has proper drainage and does not collect water. For example, in a primary walkway, because of the amount of traffic and frequency of use, a smooth and non-slip surface would be recommended. It is less of a concern for a secondary pathway, but you should still make sure there are no protruding roots or uneven tripping obstacles. Also, consider the placement of lawn sprinklers so that they don’t overspray the walks and create slippery or stained spots.

Another thing to consider would be the placement of walkway lights in the design. Make sure the path is well lit and does not have dark spots on the path. This will make for a very pleasant stroll through the garden regardless of the time of day.

Budget – How much do you intend to spend?

Knowing the budget for your walkway project means you will be able to accomplish what you envisioned without going overboard. Having a clear and concise budget will help you decide on materials as well as the overall scale of the project. It will also help you determine whether you will be able to hire a contractor or if this will need to be a do-it-yourself project.

 Materials

Having considered the critical points in a walkway design, we can now consider material choices. By knowing the pros and cons of each type of material, we will better understand which option to choose.

Turfgrass

While turf is never a good choice for the main front walkway, it is often a reasonable choice for some backyard paths. Walking on a turfgrass surface is like strolling on a golf course; it’s comfortable, looks neat, and blends well with flowering plants. It seamlessly unites your garden areas into one single garden rather than separate areas of the yard. It’s also easy to install using seed or sod and can be formed to almost any size and shape. Just make sure the path is wide enough to be able to use the mower.

A turfgrass path is relatively high maintenance when compared to many other surfaces, but the installation costs are very low. Turfgrass needs sufficient sun and nutrients to grow, so it will be a challenge in some of the yard’s more shaded and poor soil areas. Lastly, it’s not suitable for high-traffic areas as the soil tends to compact, and the turf will tend to thin with extensive wear.

Mulch

Mulch is one of the simplest and easiest ways to create a path. It makes use of natural waste products such as wood chips, cocoa beans, and bark which can often be obtained at very low or no cost. Contact your local tree trimming service, a lumberyard, or a woodwork shop to find out if they have excess wood products to dispose of.

Mulch is light and very easy to spread. A layer of 3 or 4 inches may be enough to create your path and to block most weeds and turf, but be aware that this mulch will decay rather quickly, resulting in the need to replenish it every couple of years.

The upside of this, when used for a garden path, is that it replenishes nutrients in the soil as it decomposes. 

Mulch is easily moved by high winds and water flow, as well as just being kicked around by foot traffic.

Mulch paths should never be used for front door walkways or too close to formal yard areas and are better suited for woodland paths where they blend in seamlessly.

Lumber

Nothing compares to the feeling of walking on wood nor to its flexibility of design options that blend well with the outdoor landscape. A wooden walkway never fails to evoke a certain charm. Wooden walkways or boardwalks consistently rank high on the wish lists of homeowners. Depending on the design, they are attractive, fairly durable, and can be formal or casual. Another positive aspect of a wooden walkway would be that many people may feel more comfortable working with wood rather than stone or concrete products. They can be designed to work in almost any situation, bridge wet areas, include steps and handrails for sloped areas, and have a host of other design options. 

Keep in mind that we are once again talking about wood, so it will be nowhere near as durable or long-lasting as stone or concrete walkways. We would typically not use a wooden walkway for a front entrance, but it is often used in backyard settings and goes well with wooden decks. A wooden walkway is susceptible to moisture, sunlight, and termites, so it needs to be treated well and often. Lastly, it can be slippery after rain, and cleaning the mud from its grooves can be challenging.

Gravel and Crushed Stone

Gravel or crushed stone is a popular choice of material because of its functionality, practicality, durability, and cost. Stone products for walkways are often ordered in bulk by the ton and can typically be delivered right to your home and dumped in the driveway for you to apply at your leisure. The good thing about stone is that it is very durable, easy to install, and will practically last forever. The downside is that it is stone, so it is heavy to move and place. Gravel and stone paths offer good drainage, have low-maintenance requirements, and can withstand heavy traffic. While the path material will last a very long time, it will still need some maintenance. 

On the downside, because the gravel pieces are loose, they can spill out into garden areas and get tracked into the house, so don’t use them near entryways. Also, it can pose a problem when placed in areas where you need to shovel snow. You should plan to order a bit of extra stone every few years to replenish low spots and to rake it smooth.  

I would always recommend installing landscape fabric below any loose stone path to prevent the gravel and dirt from mixing and prevent weeds from popping through the walk. You should also plan to skim off a bit of topsoil if your walk is to be installed through soft fertile ground.

Flagstone or Stepping-stones 

Flagstones or stepping stones are typically made of stone that naturally breaks out of the quarry in layers, such as limestone, bluestone, and some sandstones. It is typically 1-2 inches thick and durable, yet relatively easy to cut or fracture to shape.

It can be purchased in specific patterns or shapes to be laid in a more formal pattern, or it can be purchased in randomly broken pieces that can be used individually as a stepping stone path or can be pieced together like a puzzle in a detailed walkway.

There is little need for any prep or excavation when used as a random stepping stone path through a garden. Simply flatten out the area beneath each stone and lay them down. Any number of different materials or plants can fill in the gaps in a walkway like this. Common materials are turfgrass, mulch, gravel, sedum, mosses, etc.

When installed in pattern, it is advisable to first excavate to hardpan, prep a crushed stone base and lay the stone on that. The stones are durable enough to handle heavy foot traffic, but depending on the installation, they may move and create tripping hazards, especially in areas prone to freezing ground.

Flagstone has long been used for both formal, grand front walkways as well as meandering random garden paths. The difference is typically installation method more than stone variations.

Poured Concrete

If you are looking for a walkway material that’s relatively affordable and very durable, concrete might be the answer. Concrete is a very durable and low-maintenance pathway solution but possibly not the most aesthetically pleasing choice. It is no longer limited to a solid gray, monotonous color but can be shaped, stained, colored, etched, or engraved with a bit of imagination. This makes it versatile and popular for DIY projects.

Like any walkway material, concrete does have some issues. Some cheaper colored concrete products may chip or fade over time, making for a more dull or less desirable surface. Sealants can help prolong the color, but this can be an added maintenance procedure. 

Concrete requires curing time upon completion, so it cannot be used immediately, and once it is cured, it may require a jackhammer to remove it, so you had better be sure that you have all of your design decisions figured out prior to pour day. It is one of the most durable products you can choose, and when poured thick enough, it can be almost timeless. It will crack over time in frost-prone areas and when not installed correctly. It is hard to repair if it does crack or chip, and the repaired area will never look the same as the original. When pouring and finishing concrete for outdoor paths, be sure to leave a brushed surface for traction rather than a smooth polished surface like what might be used indoor.

Clay Brick 

Brick is a relatively durable material with great design flexibility and options. It is well suited to grand front walkways as well as quaint garden paths. It is made from clay, so it looks very natural and can be laid in countless patterns. It will hold up well to heavy traffic and ages nicely when installed correctly.

Like most hard surface materials, base preparation is the key factor in the long-term quality of the walkway. Brick is typically laid in one of two ways.

Dry laid – this requires excavating to hardpan and preparing a compacted base of crushed stone on which to set the brick. The walkway would be typically edged with mortar, plastic or metal, to keep the brick in place. This can last many lifetimes if done properly, but it will move a bit with the freeze and thaw in areas prone to this.

Wet Laid over slab – in this method, the brick is mortared down to a poured concrete base, making it very durable and long-lasting but prone to cracking like a poured concrete slab would be.

Brick can be more expensive and tedious to install than concrete pavers or other materials due to its small size and the need for proper prep and alignment. Some brick can be prone to cracking in wet areas that are prone to freezing, as moisture can seep into the clay brick and force a crack when it freezes.

Pavers 

The term pavers typically refers to any shape of man-made concrete products manufactured to look like clay brick or stone. They can be almost any size or shape and come in a vast range of colors and patterns. It has become a favorite walkway choice because of its diversity, durability, and economical cost.

Because they are made out of concrete, they are very durable and long-lasting. They can be purchased in interlocking shapes that are great for heavy-use areas. 

Once again, these pavers can be installed in the same fashion as listed above with clay bricks. The casual onlooker may not know the difference between some brick pavers versus clay bricks or natural stone. 

Mixed Materials

You can combine different materials and techniques to create pathways to meet almost any aesthetic desire or taste. Many have combined stone, gravel, brick, and concrete to create one-of-a-kind walkways that are both unique to their property and very durable and timeless.

Mosaic Walkway

Walkway Width Guidelines

How wide should a walkway be? The width of a walkway will usually depend on its purpose, where it is located, and what it leads to and from. A primary front walkway needs to accommodate passing foot traffic as well as package carts, furniture dollies and all sorts of different transportation devices. The rule of thumb for a primary walkway is to be four feet wide, which will allow two people to walk comfortably side-by-side, but you will often see three-foot-wide primary paths that do the trick.

A secondary pathway is narrower and usually wide enough for a single person. These secondary walks can be almost any width but are generally more narrow than the primary walkway and sometimes as sparse as a slight path of stepping stones. A comfortable walking path through the backyard is often two feet wide.

Walkway Budget and Cost

When installing a new walkway, the cost depends on several factors, such as the size of the path, the material you will use, and the complexity of the design. The price will also vary depending on your state and the contractor you will use if you choose to do so. 

Budget numbers are always tricky, and they often come down to the contractor. If you are lucky enough to find a seasoned crew that takes its time with installation and prides itself on quality, you may pay more than any of the costs listed below.

If you find yourself someone new to the business, you may find it cheaper than what is listed below, but you probably don’t want that contractor installing your walk. Corners will need to be cut, and those corners are usually cut in the base prep, which will result in a good-looking walk for the first few months that will deteriorate soon after.

To know the approximate cost of your walkway, you can use the following figures for your budget computation.

  Material Price Per Square Foot:

  • Wood: $3 – 22
  • Gravel: $1 – 5
  • Flagstone: $15 – 30
  • Poured Concrete: $5 – 16
  • Stamped Concrete: $8 – 20
  • Clay Brick: $10 – 30
  • Pavers: $8 – 30

With a budget on hand, you can ask at least three contractors for an estimate. Compare the three professional estimates to get a fair price for your walkway project. Please keep in mind that the most challenging part of the installation is the base, so the cheaper bids will undoubtedly have less base work figured into the price. Less base will result in less long-term quality. With the professional estimates on hand, you will see if the cost is within your budget, or you may need to revise your plan to fit your budget. 

You can save on the cost if you make it into a DIY project, but this will depend on your skillset and willingness to work and learn. DIY doesn’t need to mean low quality. The right DIY project can be much cheaper and often better quality than the cheap contractor options simply due to the homeowner’s commitment and willingness to do the work when it gets hard.

Helpful Tips

Now that you have an idea of what is needed to design a proper walkway, there are some things to keep in mind.

Don’t hesitate to seek advice from pros early in the planning stage. Contractors and landscape architects will gladly answer questions specific to your site as they stand to gain, should they be awarded the project. You need to have clear specifications and designs if you expect to get comparable bids.

When interviewing and choosing contractors, it is often better to go with the person who seems more trustworthy and knowledgeable.

When making your walkway design, sketch out a layout plan on a piece of paper and mark it on the ground using twine, hoses, flags, or paint. This way, you will be able to visualize the walk and figure square footage accurately.

A curving path is more interesting than a straight path but always more challenging to install and thus more expensive. 

Most paths would require a crushed stone base to stay level for years to come. This base is anywhere from 4 inches to a foot or more, depending on the ground below. Laying any sort of base on top of soft friable topsoil will result in a walkway that moves over time.

For walkways to have proper drainage, they must be pitched. The pitch should not exceed more than 2% for primary walkways, or it will become a safety hazard when covered with water or ice. Secondary walkways can pitch with the ground or be stopped, but both types should be designed and installed to shed rather than collect rainwater and runoff.

When adding steps to offset the slope difference or to bridge height differences in the garden, keep all the steps’ height consistent; the suggested height is 6 to 7 inches. Anything less than 4 inches or above 7 inches can be a trip hazard, especially for older adults. If you break up the steps with landings, the landings should be around 4 to 5 feet to allow for a rhythm of movement.      

 Sprinklers near a sidewalk or walkway should be installed in an alternating pattern. This will provide complete coverage without overspray that may cause slippery walkways or unnecessarily wetting cars or pedestrians. 

 Before embarking on a project that will affect the frontage of your property, check with your local planning department or homeowners association for zoning laws. 

Take your time with all aspects of your walkway project. From the initial concept and design to the setting of the final stone, there is no need to rush. A walkway will be part of your property for generations to come, making it worth the effort.

Top 8 Best Patio Heaters in 2022

Love spending time outdoors in your backyard and can’t wait for it to be warm enough to sit outside at night? A good patio heater will allow you to enjoy fresh air in your backyard and keep you warm and toasty all year round. You may have seen these appliances in restaurants and enjoyed the cozy warmth wrapping around your whole body, making your evening much more enjoyable. Today we’re giving you a list of our top 8 best patio heaters in 2022 to make every night outside in your backyard special and extra cozy.

What to Consider When Buying a Patio Heater?

There are numerous different sizes, power supplies, and designs for patio heaters, so you need to consider several things if you want to buy the best patio heater for your needs. 

Power Source

electric heater

Nowadays, there are three primary power sources for patio heaters:

  • Electric – Electric patio heaters are very popular since they are straightforward to use, don’t require much maintenance, can be mounted to a wall or patio, and can also be used indoors if they are portable. However, they are not as energy efficient as gas heaters, so you might end up spending quite a lot on electricity.
  • Propane Gas – This is the most popular patio heater option because of its energy efficiency and low carbon emission. Propane patio heaters also heat up quickly to provide hot air around the area in just a few seconds.
  • Natural Gas – Natural gas is a bit greener option than propane. If you are very eco-friendly, this is your best option. However, remember you’ll need a natural gas conversion kit to connect to your house’s natural gas supply.

Heat Output

All gas heating appliances’ heat output is measured in BTUs (British Thermal Unit). The higher BTU, the more heat you will get. You’ll find patio heaters BTUs ranging from 10,000 to 48,000 BTUs. If the weather is not very cold and you need to heat a small area, 10,000 – 12,000 BTU heater might be enough, but for larger areas and patios, go for over 30,000 BTUs.

Electric patio heaters emit infrared light energy and warm up your clothes and skin instead of the air around you. Their heat output is measured in Watts. If you want to heat a larger area with an electric heater, go for 1500W or more, while a small room or table area can be a heater with 500W – 1000W of power.

Style

best patio heaters
upright heater

You’ll find various styles of patio heaters currently in the market. Some people love the mushroom-type gas heaters, while others find them ugly and love the pyramid-shaped ones. Electric patio heaters can be wall or ceiling-mounted. If efficiency or heat output is not an issue, you’ll be able to find a heater that perfectly fits your backyard or patio exterior and theme.

Best Patio Heater Reviews in 2022


Oscillating Ceramic Outdoor Heater with Adjustable Thermostat


Let’s start with the best small patio heater on our list for people who only need an occasional source of heat while sitting on the porch. This oscillating ceramic heater is perfect for indoor and outdoor use because of its portability and space-saving design. 

The rotating design allows it to cover a 120-degree area around the heater. This electric heater has a low (750W) and a high (1500W) heat setting and an additional fan-only mode to use as a fan. For safety, there is tip-over and overheat protection.

We love that you can easily bring it outside or inside depending on your needs, but keep in mind that the electrical cord is relatively short, just 70 inches, so you’ll need to position your lounging near an outlet.

This is definitely not a heater for large areas but is a perfect budget option to keep a small room warm or to keep a couple of people toasty while lounging on the porch.

Key Features:

  • Rotating heater covers 120 degrees area
  • It can be used indoor and outdoor
  • Portable
  • Space-saving
  • Safety features
  • Over-heat and tip-over protection
  • Budget-friendly

Weaknesses:

  • Short cord
  • Not suited for larger areas

Kracie electric outdoor patio heater


The Kracie electric heater is a great option to keep your patio warm. The adjustable height and 1500W power are enough to heat a small patio or a room. Compared to other electric heaters Kracie heater heats up very quickly. You can also change the inclination angle by 45 degrees to divert the heat more efficiently.

The stainless steel base makes the heater very stable. Along with overheat protection, tip-over protection shuts off the power if somebody accidentally tips the heater.

We love that there is a long power cord to better position your heater in larger areas like the patio, backyard, or garage. The only disadvantage of this heater is that the heating element is not very wide, so you need to strategically place and direct it to precisely the spot you’ll be staying in.

Key Features:

  • Powerful
  • Adjustable height
  • 45 degrees inclination angle
  • 3-meter cord
  • Stable base
  • Over-heat and tip-over protection
  • Cheap

Weaknesses:

  • Heater elements could be wider to cover more space

IQ Heat Portable Outside Heater with Stand – 1500W


IQ Heat 1500W heater is the best electric patio heater on our list. If you don’t mind spending a bit more on a quality product that will last you many cold seasons, this is your best bet. 

IQ Heat heater is very versatile, it comes with a tripod to position it anywhere on the ground, or you can mount it on a wall or patio frame to provide heating from above. If you’re using it on a tripod, it does take a bit more space because of the three legs but is very stable and hard to tip over. Even if somebody manages to tip it over, there’s an automatic shut-off along with overheat protection. The longevity and reliability are reinforced by a 2-year limited warranty against manufacturing defects. 

The remote-controlled heater has three heat settings to find that perfect temperature no matter what the weather is. If needed, you can use the heater indoors too, but we feel it’s a bit large to use unless it’s a big indoor area. IQ heater is very quiet and won’t disturb anyone even during nighttime. 

Key Features:

  • Very quiet
  • Over-heat and tip-over protection
  • Stable tripod
  • It can be wall-mounted
  • Three heat settings
  • Remote controlled
  • 2-year warranty against manufacturing defects

Weaknesses:

  • A bit expensive

Hampton Bay 38,200 BTU Bronze Propane Gas Patio Heater


Propane gas heaters are very powerful and energy-efficient; that’s why you usually see them in restaurants’ outside areas all the time. The Hampton Bay 38,200 BTU patio heater is a bit expensive but very well built with unique features that other heaters lack.

This bronze propane gas heater is easy to set up and stands stable on the surface because of its weighted base. If needed, there are wheels on the bottom for easy relocation. Also, you’ll have a head vinyl cover included to protect the heater against dust and moisture, prolonging its lifespan. 

Despite having a bit lower BTU output than other similar mushroom-type propane heaters, the Hampton Bay heater features an adjustable reflector cap that allows diverting heat exactly where needed. 

Even though the heater has a very sturdy build and weighted base to protect against tipping, there is additional tip-over and flame failure protection to shut off the gas in case somebody manages to tip it over, or there’s a flame interruption.

Key Features:

  • Sturdy build
  • 38,200 BTU
  • Adjustable reflectors
  • Wheels to move around
  • Weighted base and anti-tilt design
  • Flame failure cut-off
  • Includes head vinyl cover

Weaknesses:

  • Expensive
  • Not as powerful as other similar heaters

Hampton Bay 48000 Btu Stainless Steel Patio Heater


If you’re looking for sheer power, then the Hampton Bay 48000 BTU heater is the best patio heater on this list for you. This stainless steel heater is an excellent option if you need to provide a lot of heat in a patio or backyard during cold evenings.

The easy to assemble stainless steel construction stands solid on any surface, but make sure to plan where you’ll keep the heater since it doesn’t have moving wheels. Additionally, the heater is in plain stainless steel color that might look off-putting for some.

All in all, this is a simple but very powerful patio heater to heat large areas if you don’t mind the plain looks.

Key Features:

  • Great quality
  • Very powerful 48,000 BTUs
  • Easy to assemble and use

Weaknesses:

  • Plain silver look
  • No wheels to move it

Avenlur Pyramid Patio Propane Heater


This pyramid heater is an option that provides heat, is stylish, and stands as a beautiful fixture in your outside area. The 48,000 BTU heat output is enough to heat medium to large outdoor spaces while also providing a mesmerizing flame show.

The 90-inch tall pyramid heater is perfect for heating a lounging area or an outdoor dance floor on the patio. Because of its design, this heater provides heat in a 360 degrees circle and has a sturdy base to protect against tipping in case someone bumps into it. The wheels at the base will allow you to easily relocate the heater if needed.

The high-quality solid construction with quartz glass flame tube makes this heater not only exceptionally looking but also long-lasting. However, good quality and beautiful design come at a much higher price compared to other propane heaters.

Key Features:

  • Pyramid style
  • Great exterior addition
  • Safety shut-off valve
  • 48,000 BTU heat output
  • 1-year warranty against manufacturing defects

Weaknesses:

  • Expensive

Amazon Basics Outdoor Patio Heater with Wheels, Propane 46,000 BTU


This Amazon private label patio heater is a powerful propane gas heater that looks pretty good, has everything you would want from a standard heater, and won’t leave your pockets empty.

The 46,000 BTU heat output is enough to keep a party of 4-6 people warm on your patio or backyard. If you want to provide heat for more people, you’ll most likely need more than one heater.

The heater is made from rugged steel, aluminum, and sturdy plastic. You can even choose from seven different colors. While the looks are a plus, the build itself is a bit flimsy and not very solid. However, it is straightforward to install and comes with a 1-year limited warranty.

Amazon Basics patio heater is for sure the best propane gas patio heater if you are on a budget. The flimsiness of the build is a bit annoying, but the high BTU heat output, design, and low price redeem it to be a worthy purchase.

Key Features:

  • 46,000 BUT
  • Great price
  • Multiple colors
  • Easy to set up and use
  • Base with wheels
  • Amazon basics 1-year limited warranty

Weaknesses:

  • Build not very solid

JIYU 1500W Patio Hanging Electric Heater


If you are tight on space and looking for something unobtrusive? JIYU 1500W heater is one of the best electric patio heaters that you can hang over your table or lounging area. This suspended electric heater is perfect for porches that need a little warmth during chilly evenings.

JIYU heater has three heat levels (600W, 1000W, 1500W) and heats up in just three seconds. You can easily switch between the levels or turn on/off the heater with remote control. It also comes with a 24h auto shut-off if you forget that it is on.

This heater can be used as a light source so that you won’t need extra light fixtures. It’s straightforward to set up; just unpack, and you can attach the harness to a hook on the ceiling. We would advise hanging it as low as possible. If you have a very tall porch ceiling, you might not get enough warmth from the heater. Finally, one minor inconvenience is the 70-inch cord, so when installing, keep in mind to have an outlet nearby.

Key Features:

  • Great for porches
  • Heats up in 3 seconds
  • 3 heat settings: 600W, 1000W, 1500W
  • Easy remote control
  • 24h auto shut-off
  • LED lights to provide warm light
  • Can be a source of light
  • Easy to set up

Weaknesses:

  • The power cord is quite short
  • Not enough heat on tall porches/ceiling

Frequently Asked Questions

Is it safe to put a patio heater on my deck?

Yes, all free-standing patio heaters will have a heat source at the top or middle of the construction, so the bottom and base of the heater won’t get hot. This allows the heater to be placed on flammable decks like wood. 

Is it safe to place a patio heater under a porch?

Yes, putting a patio heater under a porch is safe as long as you have enough ceiling clearance and air ventilation. All mushroom-type heaters have shields to reflect heat downwards, thus reducing the heat going upwards, but just to be safe, always have at least 20-inch clearance to the ceiling. If your patio is enclosed with no ventilation, it’s advised not to use gas heaters to avoid poisoning in case of a gas leak.

Electric heaters should have some clearance as well, but in general, they provide way less heat and no direct flame. They can also be used in enclosed porches or indoors since they don’t have a poisoning risk or open flame.

Which patio heater is better, electric or propane gas?

It depends on your needs. If you want to provide more heat to a larger area, go for a powerful propane gas heater that can output 35,000+ BTUs. Propane gas heaters usually provide more heat to a larger area and are cheaper long-term because of cheap fuel. 

Electric heaters require way less maintenance and are easier to set up and a bit safer since you don’t need to deal with open flame. They can also be used indoors. However, they can run up your electricity bill quite quickly if used often and for long periods.

Top 9 Best Charcoal Starters in 2021

Many of us delight in the opportunity to fire up the old charcoal grill and display our long practiced meat grilling skills. We take enormous pride and comfort in the process and the tasty outcome. Before we can start sizzling steaks on the grill, we need to get those coals to just the right temperature and shade of grey. We have many options for how to get the coals glowing, but some are clearly safer and more efficient than others. Starting your charcoal effectively and evenly allows you to control and time your heat and, in turn, properly plan your cooking, grilling, or smoking. These days there’s no need to douse charcoal with liquid fuel and risk seasoning your food with petroleum aroma; let’s just stick to salt and pepper on our food. Learn how to effortlessly and effectively get your charcoal going with these top 9 best charcoal starters in 2021.

What is a charcoal starter, and why do I need one?

charcoal fire

A charcoal starter is a device or a consumable that allows you to effectively heat the charcoal until it is ash grey white and ready for your charcoal grill or chiminea. You might ask why would I need one if I can take a ball of rolled-up paper, cover it with charcoal, and light it up? But be honest with yourself, how many times has your paper or tiny kindling fizzled out under the charcoal, forcing you to begin again and pushing back your dinner schedule by another 1/2 hour? Or the charcoal lit up unevenly, and your grill temperature kept on changing every 5 minutes, making it hard to time your cooking? Save time and hassle by picking one of our best charcoal starters and move onto what you do best – grill!

Different types of charcoal starters

Charcoal starter on a grill
old charcoal starter

There are several types of charcoal starters you can get your hands on; they are very different in how they operate, but in the end, how much they cost or how fast they can light up the charcoal are the main differences. 

Chimney charcoal starters

charcoal chimney

Chimney charcoal starters are probably the most popular way to effectively and evenly light up your charcoal. A basic chimney starter construction consists of an upper compartment for your coal, a bottom compartment for a fire source, and a handle to transport or pour out hot coal. These starters are popular because they are easy to use, budget-friendly, and heat the coal evenly. It will take around 20 minutes in a chimney starter to have your coals ready for cooking.

Electric charcoal starters

A new trend among beginning and seasoned grillers are electric charcoal starters. They usually have a heating element or a very hot air fan to heat the coals. The most significant advantage of electric coal starters is that some of them can heat your coals in just a few minutes; however, they require an electric outlet and are a bit pricier.

Propane gas charcoal starters

You may have used a standard torch to light up a fire or grill yourself at one time or another. These are very portable and relatively cheap, but they are not as efficient in heating coals and require you to manually hold and point the torch towards the coals until they get hot.

Consumable charcoal starters

These starters are usually made from wood chips, paraffin wax, paper, or a mix of all of them. There are a lot of eco-friendly options that are made with nontoxic products and are very portable. However, they are not as reliable in quickly and evenly heating the charcoal.

Best Charcoal Starter Reviews


Weber 7447 Compact Rapidfire Chimney Starter


Weber Grilling equipment is one of the most popular BBQ equipment brands worldwide, so you know you’re on the right track with the Weber 7447 chimney charcoal starter. It’s made from stainless steel and features a heat protection plate to protect the handle from getting too hot, which also increases the sturdiness of the whole chimney.

The Compact Rapidfire chimney can fit around 40 briquettes, making it a perfect size for small to medium grills. The Weber 7447 Compact Rapidfire innovative grate inside the chimney lets you heat your coals in about 15 minutes. A cool-to-touch handle protects from burning your hand; however, always wear a heat-resistant glove or oven mitt to be safe.

This Weber grill is the best chimney starter on our list for a small grill or if you’re on a budget.

Key Features:

  • Well recognized brand
  • Fits around 40 briquettes
  • Compact
  • It gets coals hot in 15 minutes
  • Cool to touch handle
  • Sturdy construction
  • Budget price

Weaknesses:

  • It might be small for larger grills

Oklahoma Joe’s 9848125R04 Half-Time Charcoal Starter XL


If you have a huge grill that needs a lot of charcoal, you might be interested in Oklahoma Joe’s Charcoal Starter XL. This large chimney starter can fit up to 100 briquettes at a time, and as the company boasts, the charcoal lights up twice as fast compared to competition chimneys. We’re not entirely sold on this statement, but the coal heats up at least a bit more quickly due to many air intake holes in the chimney.

We love the two handles on this chimney. The main heat-resistant handle (improved design, nonplastic) with a heat protection plate allows lifting the chimney safely. Since the XL chimney is large and becomes heavy when full of charcoal, an extra handle will enable you to use two hands and control the pouring of hot charcoal.

While the main handle is solid and sturdy, we did feel the second one was a bit flimsy, so you might want to tighten the bolts yourself.

Despite having a bit higher price point, Oklahoma Joe’s XL is the best large chimney starter on our list if you have a large grill and want to avoid lighting 2 or 3 batches of coal.

Key Features:

  • Extra-large capacity of 100 charcoal briquettes
  • Stainless steel construction
  • Improved heat resistant handle and shield
  • Extra handle for controlled dumping of the coal

Weaknesses:

  • Construction is a bit flimsy
  • A bit expensive

BBQ Dragon Chimney of Insanity Charcoal Starter


BBQ Dragon Chimney is an innovative chimney charcoal starter with a 90-degree elbow inside to fit their grill fan and supercharge the heating process. This allows the charcoal to heat up in just 3 minutes. All you need to do is grab a couple of crumpled balls of paper, stuff them into the elbow, and light them up. Now turn on the fan, stick it into the elbow, fasten the fan onto the grill and leave it running for 3-4 minutes. (fan not included)

The thick galvanized steel construction feels really solid and easy to handle. As with all chimney starters, you have a heat protection shield and a heat-resistant nylon handle.

Be informed that the chimney itself is sold separately and is quite expensive compared to other chimney starters. Without the fan, you won’t be able to utilize the unique design elbow tube. The chimney and fan combination is quite expensive but allows you to heat the charcoal in just 3 minutes and makes it the best luxury charcoal starter on our list.

Key Features:

  • Innovative design
  • Lights up charcoal in 3 minutes
  • Thick gauge galvanized steel
  • Thick heat shield and heat resistant nylon handle

Weaknesses:

  • Quite small
  • Expensive
  • Have to buy the chimney starter and the fan

MIGI WOLF Electric Charcoal Fire Starter


Hot airstream charcoal lighters are probably the most popular charcoal starter currently on the market. They blow hot air of up to 1100°F to light up the charcoal in around 60 seconds. By heating 2-3 spots of the charcoal pile, you’ll have your coal ready for grilling in just 3-5 minutes. This is the fastest charcoal starter on our list.

This electric charcoal starter doesn’t use any flame or gas, so it’s much safer for you or your party-goers. The long heating fan stick allows you to safely hold it without burning your hand.

The only disadvantage of the looftlighter is that it’s pretty expensive, and like with most electric lighters, you’ll need an electric socket nearby to use it.

Key Features:

  • Heats up to 1100°F
  • Very powerful 
  • An extended heat stick protects the hand from getting hot
  • No gas or flame used
  • Can heat targeted charcoal in 60 seconds

Weaknesses:

  • It needs to plug into an electric socket
  • Expensive

BISON AIRLIGHTER 520 Cordless Fire Starter


Love camping and need a portable option or just don’t have an electric socket? The Bison Airlighter 520 is a cordless charcoal starter perfect for on-the-go grilling where there’s no easy access to electricity or space is tight.

The refillable butane tank powers a small flame to light up the coal first, and then you can switch to the fan to quickly heat the coals.

The fan is a bit weak but enough to get your coals going in 3-5 minutes. The small size and no need for electricity make it one of the best portable charcoal starters in 2021.

Key Features:

  • Cordless
  • Portable
  • Convenient and versatile
  • 15 minutes of burn time
  • Refillable butane tank

Weaknesses:

  • The fan is a bit weak

GGC Electric Charcoal Fire Starter


This GGC electric charcoal starter is an excellent option if you’re on a budget but still want to light up your coals in less than 5 minutes. With this fire starter, you can safely light up your charcoal using nothing but hot air. Just plug it into the socket, aim it at the charcoal until it gets red and move onto the other side of the charcoal pile. In about 5 minutes, the charcoal should be ready for grilling.

The build and fan might not be as strong as other top brands, but GGC electric charcoal starter is pretty cheap, making it a great budget option.

Key Features:

  • No gas or flame used
  • Budget price
  • Heats coals in several minutes

Weaknesses:

  • It needs to be plugged into an electric socket
  • Not very powerful 

Stanbroil 600W Electric Charcoal Starter


Here we have a Stanbroil 600W electric charcoal starter that uses a heating element instead of a fan. It’s a great passive way to heat your charcoal without the need to stand next to your grill. Just stick the heating element into a pile of charcoal and plug it in. In about 8-10 minutes, your charcoal will be started.

The 600W powerful heating element can cover a large amount of charcoal at the same time, so you don’t need to relocate it during the process. It may not be the most conventional charcoal starter, but it requires little to no attention. This is the type of charcoal starter that I use and I find it very effective and has lasted me for at least five years without any sign of failure.

Key Features:

  • 600W heating element
  • Large heating element
  • Easy to use
  • Cheap

Weaknesses:

  • It needs to plug into an electric socket

Naked Flame Fire Starters Natural Fast Lighting Charcoal Starters 

These wood wool fire starters are dipped in food-grade wax, making them 100% natural with no unpleasant odor. Just grab a couple of rolls, stick them in different sides of your charcoal pile and light them up. The perfect option for camping and traveling when space is really tight.

Key Features:

  • 100% natural
  • Easy to light up
  • 8-10 minutes burn time

Weaknesses:

  • A bit expensive

Weber Lighter Cubes


This is another consumable charcoal starter, this time from our famous grill master Weber. These lighter cubes are very easy to light up even if they are wet or during conditions. You don’t need any paper or kindling, just a touch of fire. 

All it takes is 1-2 Weber lighter cubes in a pile of charcoal and 15-20 minutes of burn time to get the coals hot.

Key Features:

  • Lights up fast
  • Lights up even wet
  • Burns for 15-20 minutes

Weaknesses:

  • Messy packaging
  • It has some lighter fluid smell

Frequently Asked Questions

How to use the chimney charcoal starter?

Using a chimney starter is quite simple. The first step is to fill the top container with charcoal of your choice. Make sure to fill it up with as much coal as you’re going to use, so all coals light up at the same time. Now roll up some paper, paraffin wax, lighter cubes, or small kindling on your grill grates and light it up. Put the chimney starter with coals on top and let it burn. 

The air intake holes at the bottom part of the chimney starter will get the fire going upwards straight to the coals. You can leave the chimney burning for around 20minutes; by that time, your coals should be ash grey white and ready for grilling. Grab a heat-resistant glove or oven mitten and pour out the hot charcoal into your grill.

How to use an electric charcoal starter?

An electric charcoal starter is even easier to use. You’ll usually find two types of electric charcoals – heat guns that blow hot air onto the coals or starters that use a heating element that you need to bury into charcoal.

Using a heat gun is pretty easy; just plug in your starter, push the button, and aim into the coal. When a few pieces of coal start sparking and are red hot, continue with the next charcoal and repeat until all the coals in your grill are turning ash grey white and are red hot.

If you have a heating element coal starter bury the element into the coals, plug it in and leave for a good 8-12 minutes. You can check-in between if some coals are not getting any heat and rearrange them with a poker. Be sure to follow the directions, these starters can melt in the charcoal if left for too long.

Top 7 Best Propane Gas Grills in 2021

Are you tired of taming flame on your wood-burning fire pit or waiting for your coals to get hot in a charcoal grill? Consider getting a propane gas grill that will let you start grilling in 5-10 minutes. If you are a beginner or just lazy like we are, you’ll love the convenient and quick heat control whether you’re searing a steak or BBQing tasty ribs. To save you the hassle of researching which propane gas grills are the best, we have compiled a list of the Top 7 Best Propane Gas Grills in 2021 with detailed and compact information about top-performing grills in various categories.

What to Consider When Buying a Gas Grill?

Before jumping in and buying the first recommended gas grill, take some time and think about what kind of gas grill best fits your needs. Here are a couple of points you should take into consideration.

Price

weber grill

As always, your budget is one of the most significant factors when looking for a gas grill. If you’re looking for a budget option, be ready to sacrifice quality, durability, and special features. However, you don’t need to spend $10,000 (yes, there are grills for $10,000 or more) on a grill to get high-quality. Our list contains propane gas grills with the best price-to-quality ratio, so you don’t spend a single dollar for something you don’t need.

Size

Reflect on your previous grilling experience. How many people do you usually need to feed? Is it just your family of 4 or large parties? Large gas grills are pretty chunky and take a lot of storage space, so if you’re going to fire up the grill only occasionally for a few burgers, go for a compact two-burner gas grill or even a tiny portable tabletop grill.

For bigger households or events, get a four-burner grill or at minimum three burner one to avoid cooking your food in multiple batches and making a part of your guests wait while others already munch on your delicious burgers.

Features

best propane grill
grilling meat

Warmer rack, rotisserie forks, a side burner for side dishes or sauces, safety gadgets, LED lights for night cooking, fuel conversion, and many other various features can be found on a propane gas grill. Just remember, the more special features a gas grill has, the higher your total price will be. 

In our opinion, a good gas grill should have a good igniter, high-quality grill grates, a warmer rack, and maybe a side table. Anything extra is optional and should be picked depending on your needs.

Best Propane Gas Grill Reviews in 2021


Coleman Portable Propane Grill for Camping & Tailgating


The Coleman portable propane grill is excellent for camping trips or tailgating events for 2-4 people. The 28.81 x 18.31 x 10.63 inches size will fit in any car trunk and will be easy to store during the cold season.

The high-quality cast iron grill construction and stationary legs provide stability and extra sturdiness to the whole build. The grill grates are enameled cast iron which is dishwasher safe but can be easily cleaned with some hot soapy water. However, avoid using metal utensils, or you’ll scratch and damage the non-stick surface.

We love that this Coleman grill is very easy to maintain. The grates can be washed with soap without any strenuous scrubbing, and the bottom of the grill has a water pan to catch all of the nasty grease drippings.

This small 225 sq. in. grill has two burners; however, they are divided into an inner and outer ring instead of separate heat zones.

All in all, the Coleman Portable propane gas grill is not the most powerful gas grill you can get but is the best portable gas grill for camping, tailgating, or tabletop cooking for a small family.

Key Features:

  • 225 sq. in. cooking surface
  • Two burners
  • 11,000 BTU power
  • Water pan to catch grease
  • Solid build
  • Very portable can be used tabletop
  • Easy to clean

Weaknesses:

  • It cannot be adapted to natural gas line
  • Just one heat zone
  • Expensive for a small grill

Cuisinart CGG-750 Portable, Venture Gas Grill


Look at this beauty! If you’re a sucker for beautiful builds and aesthetics, the Cuisinart CGG-750 portable grill is one of the most beautiful portable propane gas grills on our list. It’s perfect for trips to the beach, park, or short BBQ sessions in your backyard.

The Cuisinart CGG-750 has an innovative stacking design with a bottom with space for a 1-pound propane gas cylinder, the middle part containing the grill itself, and the top cover with an integrated cutting board. Everything stacks up nicely, and you can carry it like a small picnic basket.

The small 154 sq. in. cooking surface is best suited for two people. 9,000 BTU power is also a bit weak and won’t give you scorching heat to properly sear a steak. 

The most significant advantages of this small grill are its beautiful aesthetic build, looks, and portability to take it almost anywhere. This is a perfect option for an occasional tableside grilling in your beautiful backyard, park, or beach.

Key Features:

  • 154 sq. in. cooking surface
  • 9,000 BTU burner
  • Integrated cutting board
  • Portable and lightweight
  • Efficient stackable design
  • Beautiful looks

Weaknesses:

  • Small cooking surface
  • The grilling grate is more like a grill pan
  • Shallow drip pan
  • Weak BTU power

Char-Broil 463673519 Performance Series Propane Gas Grill


Let’s leave portable grills and move on to grills for your backyard. The Char-Broil 463673519 is a two burner and 24,000 BTU powered propane gas grill which is excellent for 2-4 person households. 

This model ignites very easily with a battery-powered ignition by a button push. Two burners allow you to have different heat zones on the 300 sq. in. primary cooking surface. There is also an additional warming rack (100 sq. in.) to place already cooked protein or veggies. If you don’t have a table nearby, you’ll love the two folding side tables to place any dishes or barbecue equipment while grilling.

The Char-Broil 463673519 propane gas grill is very easy to maintain. Porcelain-coated cast-iron grates are non-stick and easy to clean after use. A removable grease pan is convenient to take out and clean up. When grilling and cleaning are done, you can unfold the side tables and conveniently store the grill even in small storage spaces. 4 caster wheels allow you to easily transport the grill no matter if it’s on your brick patio or thoroughly groomed lawn.

This is one of the best compact gas grills on our list for small households that don’t have a lot of space in their backyard or patio.

Key Features:

  • 300 sq. in. primary cooking surface
  • 24,000 BTU power
  • Two burners
  • The thermometer on the lid
  • Compact design
  • Porcelain-coated cast-iron grates
  • Electronic ignition
  • Two side tables
  • Easy to move wheels with lock ability

Weaknesses:

  • Less at the front of the grill than in the back
  • Requires quite a bit of assembly

Huntington 30040HNT Liquid Propane Gas Grill


The Huntington 30040HNT propane gas grill is one of the best mid-sized gas grills if you’re on a budget but still want to enjoy all the perks of proper grilling. Huntington products are made in North America and actively compete with overseas brands by offering customers lower price points while maintaining high quality.

The Huntington 30040HNT propane gas grill has a cast aluminum box that helps retain more heat and is less prone to rusting, increasing the grill’s longevity. The whole body is made from North American steel, which should be very sturdy; however, the steel is relatively thin, so the build does feel a bit flimsy when assembled.

As mentioned above, it’s a mid-sized gas grill with 430 sq. in. of primary cooking surface and 130 sq. in. space on the warming rack. You’ll have no trouble feeding 3-5 people, but a bigger party will have to wait in line.

The Huntington 30040HNT is a fantastic option on a budget for occasional grillers. It may not be the most powerful grill and a bit flimsy, but the quality of materials is quite good. It delivers everything you would want from a propane gas grill without costing a fortune.

Key Features:

  • 430 sq. in. primary cooking surface
  • 30,000 BTU power
  • Two burners
  • Porcelain-coated grates
  • Two side tables
  • Affordable

Weaknesses:

  • Flimsy build quality

Weber 61016001 Genesis II E-335 3-Burner Liquid Propane Grill


If you’re a regular reader, you know that the Weber company name pops up in almost every article about grilling. They’ve been producing consumer-boasted grilling equipment since the invention of the kettle grill in 1952. The Weber Genesis II E-335 is no exception. The superb build quality, power, and numerous accessories take us to the professional grillers league.

The GS4 high-performance system is backed up by a 39,000 BTU power main burner and 12,000 BTU side burner for sauces or side dishes. Additionally, there’s a 9,000 BTU sear station explicitly made to add fantastic sear and grill marks on your meats.

A large 513 sq. in. cooking surface grates are made from 7mm solid stainless steel rods and will fit up to 20 burgers. The grill has three burners, so you can multitask on three separate heat zones and rest your food on a warming rack.

Genesis II E-335 is a very versatile and convenient grill. You’ll have quite an ample storage space under the grill for your disposables or cleaning equipment. Tables on the sides give you enough space for prepping or keeping dishes and drinks.

The whole build of the grill and accessories are protected by a 10-year warranty making it the best large propane gas grill in 2021 on our list. You’ll have to spend a bit more, but it is a long-term investment that should serve you a decade.

Key Features:

  • 513 sq. in. primary cooking surface
  • 39,000 BTU power main burner, 12,000 BTU side burner, and 9,000 BTU sear station
  • Solid stainless steel grates
  • Interactive 3D assembly instructions
  • Storage space under the grill
  • Sear station
  • Side burner
  • 10-year warranty on all parts

Weaknesses:

  • Expensive

Char-Broil 463377319 Performance 4-Burner Liquid Propane Gas Grill


The Char-Broil Performance 4-Burner gas grill is an excellent option for large households or party caterers who are on a budget but still want to entertain a large group of people. 

The 425 sq. in. primary cooking surface is large enough to cater 10 to 15 people at a time while also cooking up a sauce or side dish on the side burner. The cooking grates are made from porcelain-coated cast-iron, which helps retain heat and is easy to clean. Having four burners allows you to divide the grill into multiple heat zones to cook multiple dishes simultaneously. 

The grill construction is made from gauge steel with stainless steel finish on other parts. We felt that the steel is a bit thin, making the grill flimsy if moved around, but you probably shouldn’t expect superb quality for a budget price. The Char-Broil 463377319 is our pick for the best large propane gas grill on a budget.

Key Features:

  • 425 sq. in. primary cooking surface
  • The temperature gauge on the lid
  • Side burner
  • Side table
  • Warming rack
  • Four burners
  • Porcelain-coated cast-iron grates
  • Budget price

Weaknesses:

  • Thin gauge steel construction is a bit flimsy

Blackstone 36 Inch Cooking 4 Burner Flat Top Gas Grill


If you can’t live without pancakes, eggs, and bacon, consider getting a flat-top gas grill in your backyard. Imagine waking up early in the morning and firing up a tasty diner-style breakfast on your own flat top!

The Blackstone 36-inch flat top grill has four burners and a 720 sq. in. cooking surface to create various heat zones for multiple dishes at a time, even for a large party. Want to have a large barbecue party? No problem, this grill can handle up to 30 burgers at a time, and the flat top will allow you to get that crunchy sear by using burger grease, which would usually be lost on a regular grill. Additionally, you have less hassle when cooking bacon or small veggies, and cleaning is much easier since you have only one surface to clean.

This flat-top grill has 4x 15,000 BTU burners and a thick rolled steel surface for fantastic heat retention to sear your steaks and burgers properly.

Because of the thick steel surface and wide-spread legs, the whole grill feels very solid on the ground and stays in place with the help of lockable caster wheels. This flat top is not the best to take camping since it is pretty bulky and weighs 120 pounds.

All in all, Blackstone 36-Inch flat top grill is one of the best flat-top grills currently on the market and a fantastic budget option for large catering events and parties.

Key Features:

  • 720 sq. in. cooking surface
  • 15,000 BTU power
  • Four burners
  • Budget price
  • Thick rolled steel surface
  • Easy to clean

Weaknesses:

  • Heavy
  • Not as powerful as other large grills

Gas Grill Maintenance Checklist

Preheat before grilling

You should always cook on a hot grill. When a grill is preheated, you’ll have indirect heat cooking your food (when the lid is closed, of course). If the grill is just turned on and you slap a burger on cold grates, it most likely will get stuck, and only the bottom will be cooking by direct heat for the next 5 minutes.

Clean your cooking grates

Before and after every use, you should clean your grilling grates or flat top to avoid burnt charcoal on your next meal or even food poisoning. Use necessary grilling tools like grill brushes or just soapy water, depending on your cooking surface material.

Empty the grease drip pan

Avoid nasty smells by occasionally removing and cleaning your grease drip pan. We like to clean it every other grilling, but the more often you clean it, the better.

Use a grill cover

If you want your grill to last long, you need to get a grill cover. Rain, wind, sun, leaves, and other debris will have a toll on your grill very quickly despite it being rust-resistant. A cheap water-resistant cover will keep your grill clean and moisture-free.

Top 7 Best Charcoal Grills in 2021

So you want to be a bit more serious about grilling, and a regular wood-burning fire pit with a grill is not enough anymore? It’s time to move on to charcoal grills. They can provide very high heat for that perfect sear, smoky flavor, and charcoal grills don’t cost a fortune compared to gas grills. Even if you’re on a budget, you can enjoy grilling burgers, steaks, and even slow cook ribs and smoke various meats with some practice. Check out our top 7 best charcoal grills in 2021 to find the best option for you.

What to Consider Before Buying a Charcoal Grill?

Size 

a full grill

As always, size is determined depending on your needs. If you’re a frequent host of BBQ parties, then you’ll need a big charcoal grill with a large grilling area. For 8-10 or more people, go for 400 square inches or more of cooking area. If it’s just your small household, then even 250 square inches of cooking area should be enough.

Additionally, remember that large grills take up more space and are harder to transport. If you plan to take the grill camping or to a park, get a more portable, smaller one that can fit in your car.

Material

You’ll find that grills can be made from gauge steel, ceramics, aluminum steel, and other material; honestly, there are no bad options. Different materials will differ in price or how hot they can get. For beginners, we suggest going for gauge steel or aluminum as they are budget-friendly and high-quality too. 

Accessories and Features

Best charcoal grills
charcoal grill

These days there are various accessories and features on charcoal grills like smokers, double or even triple grilling grates, thermostats, work stations, charcoal igniters, etc. However, the must-have features on the charcoal grill are vents and adjustable grill grate height.

Vents allow you to control the airflow to the grill, thus controlling the heat. Having vents will allow you to properly sear a steak on high heat, roast a juicy chicken, or slow cook mouthwatering ribs.

Finally, the adjustable-height grill grate is very handy for beginner grillers to control their cooking heat. If you’re not experienced with charcoal, it’s unavoidable you’ll either have a too high temperature or a too low one. Charcoal heat takes time to adjust; it’s not gas where you can just turn a knob; that’s why an adjustable grate is excellent to quickly lift the grate off of high heat or lower it if the charcoal is dying down.

Best Charcoal Grill Reviews in 2021


Weber 14402001 Original Kettle Premium Charcoal Grill


Weber grills are one of the most popular grills not only in the US but all around the world. This Weber Original Kettle charcoal grill is perfect not only for beginners but for seasoned grillers who are looking for a portable but high-quality charcoal grill.

The large 363 square inch grilling area will allow cooking 12-13 burgers if you use the whole surface. That should be more than enough space for 4-6 people if you are grilling protein and side dishes.

The Weber Original Kettle grill is famous for its build design. The plated steel grate has a hinged area that you can open while grilling and add more charcoal without lifting the whole grate. The damper at the top of the lid and thermostat allows controlling heat without opening the grill. Finally, the ash bucket at the bottom makes cleaning effortless and very quick. 

You also have a lid hanger on the side, but it’s not very convenient and sometimes doesn’t hold the lid properly; this is probably the only minor weakness of the grill. 

Other than that, the Weber Original Kettle Charcoal grill is the best charcoal grill for beginners because of its versatility and ease of use.

Key features:

  • 363 square inch cooking surface
  • Plated steel hinged grate
  • Versatile and easy to operate
  • Rust-resistant bowl
  • Comfortable ash catcher
  • Easy assembly

Weaknesses:

  • The lid hook is not very convenient

Weber 15501001 Performer Deluxe Charcoal Grill


Did we mention that Weber makes excellent grills? We did, and that’s why we have another Weber grill on our list. This time it’s a deluxe version of the above-mentioned Weber Kettle Premium grill. 

So what is the difference between the two? The deluxe version of the grill has the same 363 square inch cooking surface, same easy-to-clean ash catcher and is made from the same high-quality, long-lasting materials. 

The deluxe part kicks in when we start talking about accessories. This charcoal grill is like a spaceship for grillers. First of all, they added a charcoal ignition system so that you wouldn’t need any additional charcoal starters. With one push of a button, you’ll start igniting your charcoal, no more black fingers or paper ash flying around. There’s also a container to keep your charcoal in one place. Secondly, they upgraded the poor lid hook that didn’t work correctly and added a work table to place food, dishes, or your favorite grilling drink. Finally, there’s an LCD timer for those who aren’t good with keeping track of time or who constantly find themselves chatting away from the grill.

In the end, the grill became a grill cart and took more space while the price increased drastically too. However, all of the extra accessories and features make grill prep, cleaning, and actual grilling so much easier it’s a no-brainer best small charcoal grill for your money.

Key features:

  • 363 square inch cooking surface
  • Easy to use ash catcher
  • Rust-resistant bowl
  • LCD cook timer and thermostat
  • Charcoal ignition system
  • Charcoal storage container
  • Worktable
  • Proper hooks for tools

Weaknesses:

  • Expensive

Sun Chief Heavy Duty 613 Square Inches Charcoal Grill


If you’re not looking to spend a lot on a grill but still want one with a large grilling area, Sun Chief Heavy Duty charcoal grill cart is one of the best large budget charcoal grills on our list. You’ll have a cooking surface of 415 square inches perfect for 6-10 people with an additional 198 square inch warming rack. The grill frame also has four vents and a temperature gauge for excellent airflow control without opening the lid. 

When you’re done grilling, an ash dump pan allows for a quick and easy clean, and the folding wooden shelves make it a touch easier to store. The name of the grill states it’s heavy-duty, but we didn’t see any reinforced parts or thicker framing compared to other grills. However, the build is solid and definitely worth the price (an excellent price!).

Key features:

  • 415 square inches grilling surface
  • Solid build
  • 198 square inches warming rack
  • Four vents
  • Foldable wooden shelves
  • Easy to clean ash dump pan
  • Temperature gauge
  • Inexpensive for the size

Weaknesses:

  • Grate opening to add extra charcoal in a weird position

Royal Gourmet CC1830F Charcoal Grill with Offset Smoker


If you’re looking for an introduction to smoking without spending an extra buck, Royal Gourmet CC1830F is an excellent cheap charcoal grill and smoker combination. The main grill grate has 438 square inches, a warming rack of 179 square inches, and a smoker of 183 square inches for a total of 800 square inches of combined cooking surface. 

The grill exterior features a simple metal shelf for extra prep or seasoning space, while the additional warming rack will allow keeping already cooked food resting without getting cold. We love that the main grilling grate height can be adjusted. Combined with a thermostat and air vents, it makes heat control easy even for beginners. 

This grill-smoker is excellent for grilling enthusiasts who want to get started with smoking. The build is not very airtight, so controlling heat is more challenging, but it’s a great learning option without spending too much. We noticed that quite a few people had the smoker paint flake; this happens if you don’t cure the grill properly, make sure to follow the instructions, and you won’t have any flaking.

Key features:

  • 800 square inches of combined cooking surface
  • Offset smoker
  • Front shelf for extra workspace
  • Grill grate porcelain coated
  • Warming rack
  • Adjustable grate height
  • Air vent and thermostat
  • Inexpensive

Weaknesses:

  • Paint flakes if not cured
  • Build a bit flimsy

Char-Griller E1224 Smokin Pro


Char-Griller is another well-known charcoal grill brand in the USA. They are famous for their versatile grill and smoker combinations while being decently priced. 

This great-looking charcoal grill and bbq smoker is perfect for seasoned grillers that also want to smoke from time to time without spending $1500+ on a premium smoker.

E1224 grill and smoker has a 580 square inch main grilling grate and 250 square inches side firebox for a total of 830 square inches of cooking surface. This will allow you to grill for a party of 8+ people or smoke a couple of decent briskets.

The vents at the top and the firebox, along with adjustable grate height and thermostat, allow for easy heat control even for beginners. One weakness we saw is that the vents are not very airtight, making it a bit harder to control heat, especially when smoking and trying to keep a low temperature.

Key features:

  • 830 square inch total cooking area
  • Sturdy heavy gauge build
  • Side smoker
  • Front and side shelves
  • Air vents and thermostat
  • Decent sized smoker
  • Adjustable grill grate
  • Easy dump ash pan

Weaknesses:

  • The firebox is not very airtight

Char-Griller E16620 Akorn Kamado Charcoal Grill


A list of the best charcoal grills wouldn’t be complete without a Kamado-style egg-shaped grill. The Char-Griller Akorn grill is the best option for a couple or single griller. It has only a 153 square inch grilling surface meaning you’ll be able to cook a couple of burgers and some veggies at a time.

The Akorn Kamado egg-shaped grill is built from an extremely sturdy 22 gauge steel. It has triple wall insulation to hold heat exceptionally well, making it a perfect option not only for grilling but smoking too. Top and bottom dampers with a temperature gauge on top allow for easy heat observation and adjustment.

The grill is just 25 inches tall and 21 inches wide, so you can take it to a park or camping without taking too much space in your trunk.

Overall, a great charcoal grill and smoker for a single person or a couple for an occasional grilling or smoking.

Key features:

  • 153 square inch grilling surface
  • Holds heat very well
  • Extremely sturdy 22 gauge steel body
  • Dual damper and temperature gauge for precise heat control
  • Portable
  • Easy to clean ash damper
  • Cheap for a Kamado style grill

Weaknesses:

  • Small cooking surface

PK Grills PK360 Outdoor Charcoal Grill and Smoker Combination


Finishing off the best charcoal grill list with a bang is a premium charcoal grill and smoker PK360 from PK Grills. This triple-walled cast aluminum grill is exceptionally sturdy and is rustproof; no more crying over flaking paint!

The cast aluminum construction and the patented four vent system allow for precise heat control, making it a great smoker for beginners and experienced smokers.

You’ll find a glass-fiber reinforced polyester shelf on each side of the grill to rest your tools, season, or place already cooked food. The shelves are highly heat resistant and super sturdy.

Yes, it’s not a big grill, but the build quality, sturdiness, heat retention, and control make it an exceptional product that will last you years. The only downfall for us is the thin legs that aren’t very stable on soft landscaping material and a steep price point. 

If money is not a problem, then the PK360 is definitely the best luxury charcoal grill on our list that money can buy.

Key features:

  • 360 square inch cooking area
  • Cast aluminum construction
  • Great heat control
  • High-quality thermometer
  • Rustproof
  • Two heat resistant side shelves
  • Four vents
  • Ash vent for an easy cleanup

Weaknesses:

  • Expensive
  • Legs are not very stable on a soft surface

Tips for Beginner Grillers

Set aside some time to light the charcoal

Unlike gas, charcoal takes quite a bit of time to heat up. If you don’t want to keep your guests hungry, make sure to add 15-20 minutes just for heating the charcoal. You want to have all the charcoal in a gray ash color. If your charcoal is not heated evenly, you’ll have a hard time controlling the heat since different pieces of charcoal will start reaching their optimal grilling temperature at different times.

Separate your grill into several heat zones

We know some of you want to split the hot charcoal evenly throughout the grill. That’s a rookie mistake. You want to have 2-3 different heat zones on the grill if it’s big enough. This will allow you to set aside cooked food to a lower temperature area if it’s burning and, in general, cook different types of dishes if they require different cooking temperatures. 

Put your food on a hot grill.

Like using a pan, make sure your grill is hot before putting your food on the grates. When you have ash white charcoal, close the lid and let the grill heat for 5 minutes. You want your food to sizzle when you throw it onto the grate to get that beautiful sear and keep all the juice inside, whether it’s protein or veggies.

Use vents

Learn to use your vents! You can’t imagine how big of a difference good airflow control makes. If your grill is not hot enough, open up the vents to get more air to burn the charcoal. If you want to lower the temperature, close all the vents and see how the temperature starts to drop slowly. In time you’ll use the vents not only to increase or decrease the temperature, but you’ll also use them to master different cooking techniques like searing, roasting, and smoking.

Frequently Asked Questions

How to properly start a charcoal grill?

You’ll need a charcoal starter to heat your charcoal. Whether using an electric charcoal starter or a chimney starter, the most important thing is to heat the charcoal properly. You want your charcoal to be fully ash gray in color. This will allow for an even burn and even heat.

We don’t advise using a lighter fluid unless it’s made from biofuels or alcohol. Otherwise, you’ll end up with an unwanted taste and smell in your food.

How to heat control in a charcoal grill?

You need to learn how to use vents on your charcoal grill. For more heat, open up the vents; for less, close them. We advise getting a grill with adjustable grate height for a quick-cooking temperature change if you’re a beginner.

How do I safely put out a charcoal grill?

The easiest and safest way to put out a charcoal grill is to suffocate the fire. Close down the grill lid and shut all the vents. This does smother the fire, but it will take a good 12 hours or more for the ash to cool down. Another way is to spray some water on the coal for a quick smothering. If you’re going to use water to put out a charcoal grill, make sure to use small amounts of water to cool the ember slowly, a large dose of water might create a huge ash ball coming to you or even make the ember jump out of the grill.

What is Hard and Soft Landscaping?

Landscaping is the act of transforming our outdoor spaces to suit our individual needs. The entire landscaping process uses many different materials, but they all can be classified as either hard or soft. Many people ask What is Hard and Soft Landscaping and this article will try to explain this concept a bit further and provide you with some examples.

Hard vs. Soft Landscaping

I’m not sure when this hard and soft landscaping concept came about, but it’s simply people trying to categorize things as we are apt to do. It’s a fine idea, but not always very useful or clear. Everyone probably has their favorite, but it’s a lot like apples and oranges when comparing the two. Hardscapes are generally easier to maintain, while softscapes are prettier, more environmentally friendly, and harder to maintain. But, it probably doesn’t matter, since you need both to have a great landscape.

Any landscaping that you do will include both aspects. You will need to blend the two components to give your yard a balanced and integrated look and feel. Having too much of either will significantly affect the appearance of your property.

Hardscapes

hard and soft landscaping
hardscapes

In general, hardscapes are all of the unchanging, nonliving things in your landscape: hard, inanimate objects made of rocks, bricks, concrete, plastic, or metal. Hardscapes can be natural or man-made materials.

Do not go overboard with hardscaping, or your yard will start to look like rigid, lifeless architecture. In

Examples of hardscape materials:

  • Brick (actually made of clay or concrete)
  • Block (concrete)
  • Rock
  • Asphalt (tar and rock)
  • Concrete (actually just a mix of rock and minerals)
  • Gravel (really just broken up rock)
  • Edging (plastic or metal, stakes, spikes)
  • Wood? (more later)
  • Pumps
  • Piping
  • Wire
  • Clamps
  • Hardware
  • Draintile (clay, concrete, plastic)
  • Landscape fabric (plastic)
  • Furniture (fabric, metal, plastic, concrete)

Hardscaping Features

masonry buildings

In landscape architecture, hardscaping refers to hard components—tough, long-lasting, large, and stable materials that give structure, add height, or define a path. Hard landscaping is important because it retains the parts of your property. Hardscaping is like the bones of your landscape. It’s the starting point; it is the foundation upon which everything else is based.

Examples of hardscape features:

  • Outdoor Kitchens
  • Pools
  • Patios
  • Walkways
  • Stairs
  • Decks
  • Stepping Stone Paths
  • Gazebos
  • Driveways
  • Fountains
  • Decorative walls
  • Statues
  • Retaining Walls
  • Irrigation Systems (piping, clamps, plastic heads, timers, etc.)
  • Landscape Lighting Systems (transformers, wire, fixtures, etc.)
  • Fencing
  • Decking
  • Pergolas
  • Arbors
  • Gazebos
  • Grottos
  • Ponds and Waterfalls? (more later)
  • Fireplaces
  • Benches

Sometimes, hardscaping can be multipurpose. You can build a small retaining wall to act as additional seating space, or you can install flat stone pieces to act as stepping stones through a garden and to keep down weeds in blank spaces. Hardscape features can also affect the environment in both good and bad ways. Paved surfaces prevent the soil from absorbing runoff, but paving and stone can also protect the soil and prevent erosion.

Maintaining Hardscapes

patio at night

For the most part, hardscapes take care of themselves; that’s the beauty of them. They are not living and typically don’t change a heck of a lot. Your hard surfaces may need some cleaning over time, and patios and walkways tend to need some re-grouting or sanding, but if installed correctly, they should last a lifetime.

I believe that rocks and boulders are the stars of the landscape world. They come in a wide range of sizes, shapes, and colors, they last forever, they can be used to decorate or to retain, you can walk on them, sit on them, drive on them, run water over them, etc. The possibilities are endless; rocks are fantastic!

If you’re a fan of low-maintenance landscaping, weed barrier covered with gravel or washed stone is some of the most maintenance-free bed treatment you can get.

Softscapes

front yard hard and soft landscapes
plants are softscapes

Softscapes are all of the living and changing things such as trees, grass, water, flowers, mulch, etc. If you go too crazy with softscapes, your yard will look like an overgrown mess.

Examples of softscape materials:

  • Flowers
  • Trees
  • Shrubs
  • Grasses
  • Vines
  • Herbs
  • Aquatic plants
  • Soil?
  • Mulch?
  • Water? (we will address these three later)

Soft Landscaping Features

mostly softscapes

In landscape architecture, softscaping refers to all of the pretty plants that fill out our gardens, cover our bare ground and help to soften our hardscapes. If hardscapes are the bones, then softscapes are the skin. Softscaping elements are all of the living plants in your landscape. Softscapes bring life and natural beauty to your landscape and are an essential component.

With softscaping, the possibilities are almost endless. The vast quantity of plants available to us, each with its own individual appearance and characteristics, can make your head spin.

Add to that the potential combinations of plants, and deciding on a few plants for your front yard, can turn into a two-day event. Add to that the fact that softscapes change with time, and it becomes a real live puzzle.

Sofstscapes are continually changing, from month to month and year to year; they just don’t stop. Until they do, and then it is time to find yourself some new softscapes.

The advantages of softscapes are their beauty, adaptability, and environmental value Plants are the only thing saving our earth from destruction. Plants are cleaning our air, our water, and our soil. Plants can shade us, block the wind, hide a fence, block sound and provide us with a dazzling display of beauty.

The downside to plants is that they will likely need to be maintained and that one day, they will die. Softscapes, unlike hardscapes, typically only do well in certain zones and conditions, whereas hardscapes don’t care where you put them; they will likely remain unchanged.

Maintaining Softscapes

front yard softscapes

Unlike their hardscape counterparts, softscapes need our attention. At least most of them do. Most softscapes are plants, and plants need water, nutrients, and air to live. Most plants also need pruning over time. They just keep growing and changing, so you need to keep an eye on them.

Most softscapes are alive, which is their benefit and their downfall. They help us maintain our environment, and in return, we must help them. They also, in a roundabout way, lead to pollution.

We humans tend to dump tons of harmful chemicals on our lawns and garden beds every year in an attempt to care for our precious plants. We wrongly assume that these plants need to be doused in chemicals to survive.

More to Discuss?

I know that this article is all about soft and hard landscapes, and I think that we have pretty well covered that, but there are a few more topics that I think we need to address. I’m sure that these are not right there at the top of your list, but having been in the industry for so long, I have given them a bit of thought.

Blankscaping / Airscapes?

some blank spaces

I feel that this is the part of landscaping that many homeowners and landscapers alike have trouble with. It is a fairly basic concept, but it seems to get lost over time (literally). What I am referring to is the hallowed blank space or separation.

Most landscapes start with plenty of separation and blank spaces, but people forget about its importance over time.

Don’t get me wrong; I love having my flowers hang down onto my patio, I love how a creeping juniper will trail down into a waterfall, I love the way that a clematis will cover and hang from an arbor.

All of these things are great, and there is a time and place for everything, but when that everything starts growing into everything else and overtaking all of the blank spaces, we need to acknowledge it and fight back. Once everything is allowed to grow together, we lose the distinction and importance of the individual features. Rocks and fountains get buried, edging gets hidden, the lawn is growing into the beds, and the beds grow into the lawn.

It is not all about the materials, hard or soft; it is also about how they work together and apart to create a pretty and functional landscape. I have seen way too many over-planted and overgrown yards over the years. They might have looked nice for the first year or two, but now they are a mess.

Please find some time to pull out the pruning shears and the edging shovels and reclaim some of that precious blank space that has been lost over the years. One good long day of separating things that used to be separate and uncovering features that have been hidden will bring your landscape back to life. Believe me; it will be time well spent.

The Gray Area

Okay, now we step into the gray area. I want to discuss the materials that may or may not fit into either category of hardscapes or softscapes. You may have noticed above that some of the listed materials had question marks behind them. These and others are the ones in question.

Hardscapes and softscapes are fine, but are they classified by how they look, how they feel, or what they are made out of?

Here are the Gray items:

  • Wood Mulch, bark chips, etc. – most people consider mulch to be a softscape, and I’d somewhat agree because it comes from plants and is light and biodegradable, but what about wood for other uses?
  • Wooden Fencing – I guess it is a hardscape made out of a softscape material?
  • Timber Retaining Wall – another hardscape made from a softscape?
  • Water – seems like a softscape, but a pool seems like a hardscape?
  • Pond – seems like a softscape if it is unlined and natural, but lined with rubber and rock, it seems hardscape-ish.
  • Waterfall – again, if all that I see is water flowing through plants, I think softscape. If it’s water rolling over rocks, I think hardscape?
  • Rubber pond liner – it’s soft like a softscape, but EPDM is entirely synthetic, so I guess it would be a hardscape?
  • Soil – Many classify this as a softscape, but then is a berm considered a softscape?
  • Clay Bricks – Bricks are hardscapes, but clay is a type of soil, so is it a hardscape made from a softscape?
  • Sand – sand is technically very tiny stones, so it must be a hardscape, but when I see it in a landscape, it sure looks like a softscape.
  • Rubber Mulch – okay, we are calling wood mulch a softscape, but wood timber a hardscape, and we are calling rubber a hardscape, so I guess rubber mulch can be a softscape?

Alright, maybe I’m splitting hairs here. We can leave these gray areas alone and call them whatever we want.

Conclusion

a mix of hard and soft landscapeing
hard and soft landscape from above

I guess when it comes down to it, the hard and soft designations come more from how the product or material makes the landscape appear to you. What sort of feel do you get from it? If I see a line of rock in a wall or a pond, I want to add some plants to soften the feel of it. If I see a large bed of plants, I’d love to add a boulder or three to give it a bit of structure. I often look at the softscaping as the glue or the paint that blends the hardscapes into one another and softens the entire look and feel of an otherwise rigid structure.

Top 8 Best Firewood Racks for 2021

Whether it’s indoors or outdoors, enjoying warm fire is one of the best ways to relax and unwind from daily stress. To have as few interruptions as possible to your zen time, make sure you have a proper firewood stack ready. This way, you’ll keep the fire going way longer before having to go to your firewood storage. Firewood racks are a great accessory to keep your firewood nicely stacked, reduce mess, and can even add to your household design. These days you can find racks of various sizes and designs, and the best part is they don’t cost a fortune. Today, we’re giving you our Top 8 Best Firewood Racks for 2021.

What to Consider When Buying a Firewood Rack

Size and Capacity

Best firewood racks
Large hoop rack

Before buying a firewood rack, think about what size would best fit your fireplace surroundings, how often you use the fireplace, and how long your sessions are.

If you like to keep your fire going for a long time, or even the whole day, pick a bigger rack so you won’t need to run to the firewood storage every couple of hours. 

However, make sure to keep in mind your fireplace area size. Some fireplaces are quite small, so a big firewood rack might look very bulky or even get in the way for people to move around.

A 16 to 26-inch firewood rack should be more than enough for small to medium fireplaces.

Material

built in rack

Most firewood racks are made from wrought iron, stainless steel, or other hard metals. Anything weaker than that, and you might end up with a flimsy rack that is prone to bending or even collapsing. We would suggest staying away from anything plastic; it’s just not durable or sturdy enough for firewood. 

It’s also important to mention that racks made from heavy metals can have a hollow inside; this makes the rack lighter, cheaper, but not as sturdy. We personally like the non-hollow ones if the price is not too steep.

Indoor or Outdoor 

best firewood racks
indoor and outdoor rack

You’ll have no trouble keeping any of the racks indoor or outdoor as long as they can resist outside weather. If you’re planning to keep your rack outside, make sure it’s powder-coated to reduce paint flaking, rusting, and corrosion. Additionally, think about getting a rack cover to keep your wood dry and prolong your rack’s lifespan.

Most of the smaller racks are designed to be indoors; they’ll have a smaller capacity to fit near a fireplace, have a hanger for fireplace tools, kindling, and fire starters.

Design

designer firewood rack

No matter if you’re looking for a modern minimalistic rack or an old rustic one for country houses, there’s a variety of different designs to fit any fireplace and house vibe. If you don’t have any fireplace tools, you can also find racks with tools included. Some racks even have separate shelves for fire starters or small kindling, but these extra accessories usually come with a higher price.

Best Firewood Rack Reviews

PHI VILLA 17 Inch Small Firewood Log Rack

Phi Villa is a small firewood rack measuring 17 x 13 x 16 inches for someone with a small fireplace for an occasional relaxing evening by the fire. 

The rack is straightforward to assemble and comes with a detailed manual; all you need is a wrench and a screwdriver.

The Phi Villa rack is sturdy since it’s made from thick steel tubing to hold a maximum of 150 lbs. of firewood. Honestly, you probably couldn’t even fit that much firewood on this rack. You can also leave this rack outside because of the double powder-coated finish that heavily increases durability and longevity. 

This is just a great simple small firewood rack with a classic but sturdy design.

Key Features:

  • Thick steel tubes make it sturdy and durable.
  • Double powder-coated finish
  • Easy to assemble
  • Portable
  • Fit for outdoor use

Weaknesses:

  • It might be a bit small for medium-large fireplaces.

Everflying Fireplace Log Rack with 4 Tools

The Everflying log rack is a perfect option for an indoor fireplace if you are tight on space. The rack is much taller instead of being wider, measuring 28.7 x 15.7 x 11.8 inches. This allows you to store more wood vertically and fit the rack into smaller spaces near your fireplace.

The steel black powder-coated rack is easy to assemble and features two shelves, with the bottom one having a steel plate to reduce rubbish on the ground. You can use the bottom shelving for magazines, fire starters, or as extra space for firewood.

The rack comes with four tools (poker, shovel, broom, and tongs) that can be hung on the side of the frame. If you don’t mind the higher price point, the Everflying Fireplace Rack Set is the best small firewood rack on our list to keep your fireplace tidy, neat, and good-looking.

Key Features:

  • Four tools to keep fireplace organized and tidy
  • Space-saving horizontal design
  • Easy to assemble
  • Sturdy steel tubing

Weaknesses:

  • A bit expensive

DOEWORKS 23 Inches Solid Steel Log Hoop

DOEWWORKS firewood hoop rack is a stunningly beautiful, probably the best-looking firewood rack on our list, yet a very minimalistic product. Made from solid steel and finished with a black powder-coat, it is extremely sturdy, despite the steel hoops looking thin.

This firewood hoop rack can be used indoors and outdoors since it’s sprayed with anti-rust oil to prevent rust, corrosion and extend lifespan.

The 23-inch width rack is perfect for small-medium fireplaces and can keep 15-20 medium-sized logs. Additionally, It comes as a single piece, with no assembly required. Just unpack, fill it with firewood and enjoy the view.

Key Features:

  • Minimalistic design
  • Suitable for indoors and outdoors use
  • No assembly required
  • Very sturdy build
  • Portable

Weaknesses:

  • None

Weven Industrial Heavy Duty Firewood Log Rack

If you’re looking for something heavy-duty, high quality, and also good looking, check out the Weven firewood rack. This industrial-style log rack is truly a stunning piece that will not only keep your firewood in place but will also add a sophisticated touch to your fireplace.

You’ll have no trouble assembling this rack with just a wrench and a screwdriver. The sturdy firewood rack measures 19.7 x 13.8 x 37.4 inches and can hold up to 300 lbs. of firewood. Compared to other log racks, the Weven rack has more depth, so even when it’s packed up to the brim, it stays very stable.

Known for excellent rust and corrosion resistance, the Weven Industrial firewood rack can be used indoors and outdoors. However, we always advise covering your metal firewood racks if you want to increase their life span.

All in all, this is probably the best firewood rack if you want something sturdy to hold more firewood.

Key Features: 

  • Very sturdy
  • Heavy duty
  • Industrial-style look
  • Suitable for indoor and outdoor
  • Rust and corrosion-resistant
  • Vertical build holds more and takes less space.
  • Adjustable floor mats

Weaknesses:

  • The rough industrial look might not fit every fireplace.
  • Not very portable

Patio Watcher 3-Foot Firewood Rack Wood Storage Log Holder

Patio Watcher firewood rack is the best firewood rack for indoors on our list. It’s an excellent product that comes with additional accessories to facilitate maintenance of the fireplace and space around it. The 33 x 13 x 30 inches 25 lbs. frame is made from heavy-duty, durable steel and a double-coated finish to protect from rust or corrosion (can be used outdoors).

As mentioned above, this firewood rack is very versatile as it comes with four tools (poker, broom, shovel, and tongs) to help maintain fire and space around it. Additionally, on the other side of the rack, you have a fire starter or small kindling holder to have everything organized and still on one rack. The rack is also raised 4 inches from the ground to allow better airflow to keep the wood dry or protect from insects if kept outside.

If you have enough space near your fireplace, the Patio Watcher is a versatile firewood rack with a beautiful classic look and a versatile design.

Key features:

  • Sturdy build
  • Versatile design to hold small and large kindling
  • Beautiful classic look
  • Four tools included
  • Large capacity
  • It can be used indoor and outdoor.

Weaknesses:

  • Required a bit of assembling

Firewood Rack Log Rack 24 Inch

The Ucared 24-inch firewood is perfect for small fireplaces and tight spaces. The minimalistic durable steel construction firewood rack is very sturdy yet weighs only 11 lbs. Its weight and size make it portable and easy to relocate to your patio or back inside. If you decide to keep it outside, a black powder-coat will protect the rack from rust and corrosion during rainy or snowy weather.

This small firewood rack is easily assembled with a provided tool and measures 24 x 11.8 x 24 inches when built. It can hold enough firewood for small to medium fireplaces or shorter bonfire sessions.

The Ucared small firewood rack is well built, portable, and has a very unintrusive, minimalistic design. The only downfall we see is the higher price compared to similar size log racks.

Key features:

  • Easy to assemble
  • Heavy-duty sturdy construction
  • Perfect to use inside or outside
  • Minimalistic design

Weaknesses:

  • Quite small
  • A bit expensive for a 24-inch rack

Ucared Firewood Racks Heavy Duty Log Rack 47 Inch

Here we have another Ucared product.  This time, it’s a large firewood rack, primarily for outdoor use. The 47 x 11.8 x 24 inches heavy-duty log rack is excellent for large fireplaces or long evenings by your fire pit. By no means are we claiming that it’s for outdoor use only; if you have enough space indoors, you can use it there as well!

The construction is made from the same powder-coated durable steel as the 24-inch version. The rack is easily assembled in around 10 minutes, and we love that the rack feet have adjustable mats so you can adjust individual feet for uneven surfaces.

The minimalistic industrial look can be tailored to most classic and modern exteriors without standing out too much.

If you don’t want anything fancy or sophisticated, the Ucared 47-inch rack is the best large firewood rack on our list that doesn’t cost a fortune while still being sturdy and long-lasting.

Key features:

  • Easy to assemble
  • Perfect for large fireplaces or fire pits
  • A clean, minimalistic industrial look
  • Adjustable floor mats
  • Heavy-duty construction
  • Great price

Weaknesses:

  • None

SnugNiture Firewood Log Storage Rack Bracket Kit

Looking for a cheaper option and don’t mind some DIY work? The SnugNiture firewood rack bracket kit allows you to customize your log rack to precisely the size you want. The kit includes 2x brackets and 25x screws. To build the rack, you need to purchase your own 2 x 4s. 

The assembly does require some work but is pretty straightforward. Measure and cut your 2 x 4s in whatever length and height you want your rack to be, insert into the brackets and attach with the provided screws. 

We love that you can customize the size of the rack to your needs. You can build a small 24-inch rack for indoors or a large up to 10 feet length outdoors firewood storage rack.

SnugNiture also paid a lot of attention to details. The brackets are not only powder-coated to last longer but also have holes to drain water and seal strips to hold the 2 x 4s tightly.

This bracket kit should last you a very long time. Even if your 2 x 4s break, rot, or wear out, you can change them with new ones, and the rack will be brand new!

Key features:

  • Sturdy and long-lasting brackets
  • Customizable rack size
  • It can be used indoors and outdoors.

Weaknesses: 

  • Requires some DIY work
  • It could be a touch higher off the ground.

Frequently Asked Questions

How deep should the firewood rack be?

Usually, the depth of the firewood rack depends on the length of firewood you use. The standard average firewood length is 16 inches. If you use a small firewood rack with a depth of 10 inches and stack it with 16-inch logs, you run the risk of the rack tipping over. We advise using 12-inch and deeper racks for standard logs for safety reasons, especially if you stack them relatively high.

Do I need to cover my firewood rack?

Yes and No. In general, firewood needs to dry out when it’s fresh and stay that way to avoid rotting. If your firewood rack is indoors, you don’t need a cover; however, it’s unavoidable you’ll have rain or snow when the rack is outside. Some rain or snow is ok since wood dries pretty quickly, but if precipitation is frequent, a cover is advised to keep your firewood dry and prolong your rack’s lifespan.

Top 7 Best Firewood Carriers in 2021

If you ever owned or wood-burning fire pit, a chimenea or a fireplace, you know the hassle of carrying kindling from your storage back to the fireplace. Leaving your cozy and warm seat is bad enough, but on top of it, you get all your clothes dirty while leaving a trail of dirt, leaves, or crumbs from the wood when carrying it by hand. Keep your house and clothes clean and enjoy longer fires with a firewood carrier! Check out our Top 7 Best Firewood Carriers in 2021 to make wood carrying less of a chore and keep the fire blazing longer.

What to Consider Before Buying a Firewood Carrier?

Length of the Carrier

man using a firewood bag
firewood basket

You’ll find that there are different length carriers ranging from 20 to 30 inches in length. Think about what kind of logs you usually use. If you’re stocked on 8 – 10 inches kindling for a very small fireplace or a mini chiminea[1] , then probably a shorter carrier makes more sense. Standard or bigger logs will need a longer carrier; of course, anything around 25 – 30 inches in length should be plenty. If you’re not sure what size logs you’ll be using, just go for a bigger firewood bag; the price difference is usually very minimal.

Size and Capacity

small mesh carrier

But we already talked about length? Yes, but the carrier’s size and how much firewood it can carry depends on the height and width. Large firewood carriers are great because you need fewer trips to the storage during those long evenings by the fire. You can also just use a large log carrier instead of a firewood rack and just keep the firewood inside. Large carriers are great for long sessions, but small ones are usually more convenient to carry and don’t take up a lot of space.

Material

firewood in white bag

You can find firewood carriers made from leather, canvas, cotton, or a mixture of all of them. Which one to choose? Well, it’s honestly up to your liking. Leather is usually more expensive, has great durability, and looks fantastic. Cotton is probably the cheapest but not as durable or nice. The heavy-duty waxed canvas is an excellent option since it’s not that expensive and made to last while very easy to clean.

Accessories

mesh firewood bag

To make firewood log carrying easier, look for a bag that has handles along with shoulder straps to distribute weight to the upper body. Secondly, a firewood fastener is an excellent accessory, so your logs don’t slide around or fall out. Some carriers also feature a pocket to store your gloves so you won’t misplace them.

Best Firewood Carrier Reviews

Amagabeli Firewood Carrier Bag

This beautiful brown firewood carrier is 18 inches in length and 38 inches wide when unfolded. You’ll have no trouble fitting standard 16-inch logs. A very wide bag allows packing as much firewood as you can carry, while the waxed canvas is adequately secured with straps going around the carrier to avoid ripping or tearing.

The waxed canvas is water-resistant and dirt-proof, so it won’t need frequent cleaning since any liquid will just run down most of the time. However, if you want to extend the bag’s longevity, avoid leaving it outside in moisture or rain.

This firewood carrier’s only downfall is the double D ring strap to secure firewood. It’s a hassle to secure it properly, especially with gloves. Other than that, Amagabeli is a stylish one of the best firewood log carriers for its price.

Key features:

  • Good size and capacity
  • Nice brown waxed canvas
  • Water-resistant and dirt-proof
  • Cheap

Weaknesses:

  • D ring strap not practical

BONTHEE Extra Large Waterproof Firewood Log Carrier

If you hate making multiple trips to get firewood during long sessions by the fire, we suggest getting Bonthee extra-large firewood log carrier. This carrier is 23.6 x 11.8 x 19.7 inches in size and can fit even 20+ inches length logs if you have a big fireplace. If needed, you can fit up to 15kg of firewood.

Besides the huge capacity, we love the design of the bag. You have a regular handle and an over-the-shoulder strap for a more ergonomic carrying of heavier loads. The straps also go all the way around the bag, making it more robust.

Bonthee’s extra-large firewood carrier is waterproof so that you can use it during any weather or with any type of wood. If the bag gets stained or soiled, the heavy-duty canvas can be easily cleaned with a brush and some soap. This is definitely one of the best firewood carriers for large loads.

Key features:

  • Extra large
  • Over-shoulder straps
  • Waterproof
  • Rivet reinforced
  • Wall pocket
  • Easy to fold

Weaknesses:

  • Canvas not waxed

Stanbroil Firewood Carrier & Log Tote, Log Holder

You’re at the bottom of your budget but hate carrying wood by hand? Stanbroil log holder is the best budget firewood carrier on our list. For an extremely low price, you get a 35-inch length and 17.5-inch height firewood tote that is made from a durable waterproof canvas. This large bag can fit different firewood log sizes and is fully enclosed to protect any scraps, dirt, or water from spilling on the floor.

The canvas does look a bit thinner and maybe not as nice as most other bags, but you can’t ask more from a firewood carrier for such a price. Stanbroil even gives a 1-year warranty if the log tote is not up to standards.

Key features:

  • Budget price
  • Strong canvas
  • Easily folded
  • 1-year warranty

Weaknesses:

  • It might not last as long as other bags.
  • Not very pretty

Cougar Outdoor – The Ultimate Log Carrier

Cougar Outdoor company should already give it away that this log carrier will be heavy-duty and able to hold heavy loads. The 24 x 17 x 12 inches 1200 denier canvas is very sturdy and built to last. There are also double-stitched external trims around every seam to provide more robustness.

You can use this not only for firewood carrying but any other gardening or household chores. If it gets dirty, just spray it with a hose or scrub with a soapy brush and leave it to dry.

This firewood carrier isn’t made for people who want a beautiful bag to sit as a decor piece by the fireplace. The looks are pretty plain and indistinguishable. Another weakness of the bag is that it doesn’t stand well when empty, even though it’s advertised that it does.

Despite these minor disadvantages, it’s definitely one of the best large firewood carriers if you don’t care about the looks and want something heavy-duty. The budget price is also a bonus!

Key features:

  • Heavy duty
  • Great price
  • Extra large
  • Water-resistant
  • Two handles

Weaknesses:

  • Plain looks
  • Doesn’t stand up when empty

LogOX WoodOX Sling – The World’s Most Ergonomic Firewood Log Carrier

Have a weak back or just want to avoid bending and kneeling as much as possible while on firewood duty? LogOX has manufactured an unconventional firewood carrier which they call the world’s most ergonomic carrier. We haven’t tried many other ergonomic carriers, but the WoodOX sling is extremely easy to load and unload.  You put one strap over your shoulder and slide one hand into the loop. This way, all the weight is distributed to the upper body while eliminating the need to bend and load the carrier.

The patented firewood carrier is made from natural cotton canvas and strong nylon straps to last numerous seasons. If you need to carry firewood at night, there’s even an LED light to illuminate the surroundings.

The WoodOX Sling does come at a high price but is a fantastic carrier for more ergonomic and faster firewood trips.

Key features:

  • Very ergonomic design
  • Natural cotton canvas
  • Very easy to load and unload
  • LED light for night trips
  • Made in the USA

Weaknesses:

  • Expensive

INNO STAGE Waxed Canvas Firewood Log Carrier

The Inno Stage firewood carrier could probably be mistaken for a stylish duffel bag, at least from afar. The beautiful design with scratch-resistant waxed canvas and leather-like handles will tempt other household residents to take over the firewood carrying chore.

The Inno Stage log carrier is 23.4 x 10 x 11.4 inches in size and can easily fit any standard size logs. The 16oz waxed canvas and reinforced handles make the bag sturdy even when holding heavy loads. One of the main disadvantages is that the bag doesn’t stand when empty and makes it a touch harder to load.

If you want to look stylish on firewood duty, the Inno Stage log bag is made for you. It is undoubtedly the most beautiful firewood carrier on our list and probably on the market in general.

Key features:

  • Stylish design
  • Large capacity
  • Comfortable handles
  • Water-resistant
  • Waxed canvas
  • Very durable

Weaknesses:

  • It doesn’t stand well when empty.

Snitsla Carrywood – A Firewood Log Carrier

The Snitsla firewood log carrier is a versatile bag that can be used not only for kindling carrying but also for various other gardening or landscaping chores. Three side pockets allow you to hold gloves or various tools.

Use a comfortable shoulder strap for a more ergonomic carry or short handle if the load is lighter. If needed, you can fit even 18-inch logs into this attractive bag. The 16 oz waxed cotton canvas is durable, water and dirt resistant, but most importantly, comfortable.

Our only frustration is with the double D rings for the fastener strap; it takes too long to secure the load and sometimes just doesn’t work at all. Other than that, it’s an excellent firewood carrier that can be used for various other chores around the house or backyard.

Key features:

  • Beautiful design
  • Shoulder strap
  • Water-resistant
  • Side pockets
  • Multi-purpose
  • Strap to secure firewood
  • 1-year warranty

Weaknesses:

  • A bit expensive
  • Double D rings are a hassle.

Frequently Asked Questions

Can I leave my firewood carrier outside?

Yes, you can; most of the firewood bags are made from robust canvas, which is water and dirt-resistant. However, leaving your carrier wet for a long time is not advised. The moisture on the canvas combined with various pieces of wood chips, leaves, and dirt will start growing mold and will ruin your carrier. As a general rule, keep your firewood carrier dry, whether it’s inside or outside.

Can I store wood in my firewood bag?

Of course! The carrier is not only to transport the kindlings but also to keep them by the fireplace. If you don’t have a convenient firewood rack[2]  nearby to nicely stack your logs, just leave it in the carrier to avoid making a mess on the floor or hearth.

How to clean my firewood carrier?

If your carrier got some mold on it from wet firewood sitting in there for a long time or it just got really dirty, you can easily clean it. If your firewood carrier is made from leather, just grab a wet cloth, add a couple of drops of dish soap and scrub the stains; just make sure to rinse with hot water and dry thoroughly so no soap residue is left.

If it’s a cloth canvas, then just grab a scrub brush, wet the canvas with some warm water, add a few drops of dish soap and scrub until the stains are gone. The harsh scrub brush usually does the trick and doesn’t damage the carrier since most of them are made from a heavy-duty waxed canvas. As always, make sure to dry the carrier before storing it away.