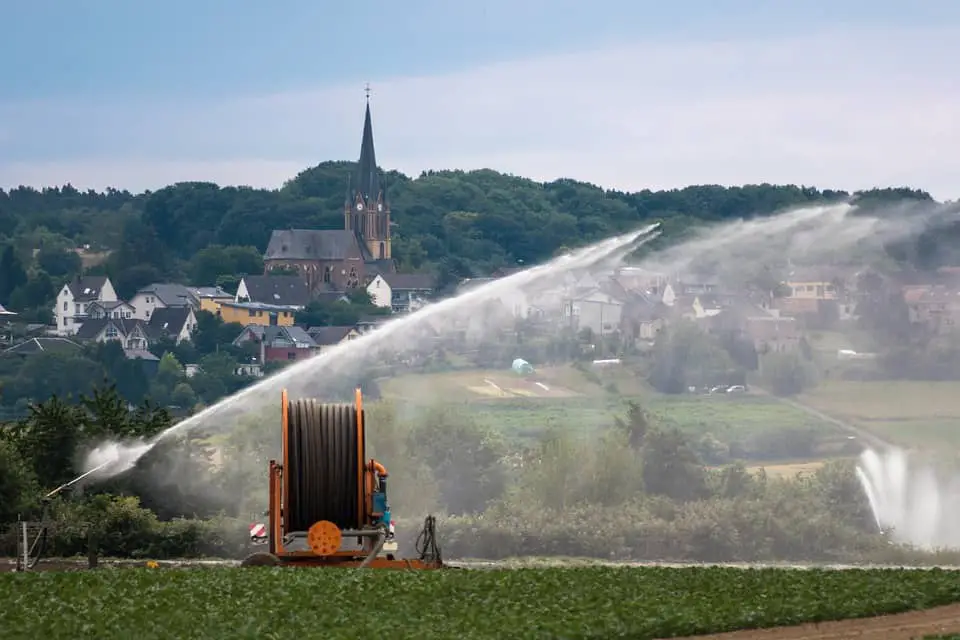
Every household with even the tiniest backyard needs to have a hose to water plants, grass, greenhouse, or to perform washing duties. But, using the hose doesn’t need to be a dreaded chore; stop hurting your back with all the bending required to pick up, coil, unwind, or store your hose. Hose reels allow handling the hose much quicker and easier while also keeping it clean. There are various types of hose reels depending on the length of your hose, your house and landscape design, and of course, your budget. Today we’ll talk about different types of hose reels and how to pick the best for your needs. We’ll also give our picks for the top 7 best hose reels for your backyard in 2021.
Types of Hose Reels
If you’re actively looking to buy a hose reel, you know that there are quite a few different hose reel types or even mixtures of various types, but the majority of hose reels fit into these categories:
Wall-mounted hose reels
wall mounted hose reel
It’s pretty straightforward; it’s a hose reel that you can be mounted to a wall, a post, or any other solid surface. Wall-mounted hose reels are a great option if you have a long hose and need to water continuously in the same area. They are an excellent pick for smaller backyards to water grass, plants, glasshouses, or clean garages.
Cart hose reels
Cart hose reels are very portable and great for people who live on large properties or for professional landscapers. As it’s evident from the name, these reels work like carts and can easily move around.
Hose boxes
Hose boxes are a great addition to your backyard. You can find different styles, colors, and designs to fit your garden or backyard exterior. These reels are also great at protecting your hose from rain, various debris, and even rodents. Just remember, they are stationary with no wheels. If you decide to use your hose outside the reachable radius, you’ll have to move the hose box too.
Hose stands
These are probably the most simple and budget-friendly. Stationary hose stands have sharp legs that you can stick into the grass for stability and some kind of a rack at the top where you can hang your hose.
What to Consider When Buying a Hose Reel?
Hose Length and Width
Before buying a hose reel, always check what length and width hose you have. If you have a hose reel that fits 80 ft. but your actual hose is 140 ft., you’ll have trouble coiling all of it into the reel, leaving you with 60 ft. of hose hanging on the ground.
Hose Reel Construction
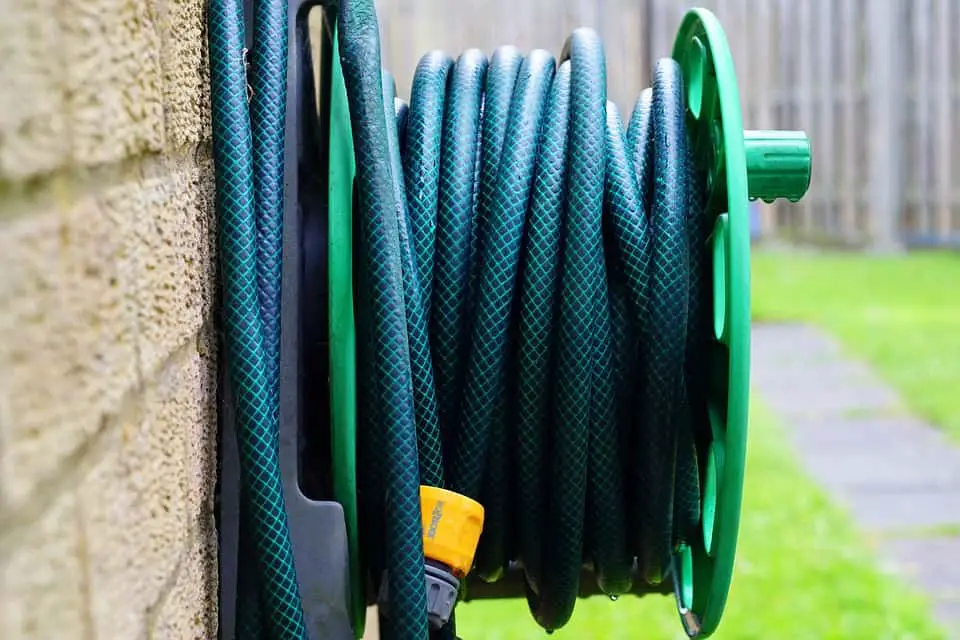
wound up hose
You’ll find reels made of plastic, polyresin, and metals like aluminum, stainless steel, or even cast iron. Metal hose reels are way more durable and long-lasting but will cost a bit more and aren’t as portable (unless on wheels). Polyresin reels are strong and lightweight but must be protected from the sun as it weakens the construction. Finally, plastic is as cheap as it gets and is very lightweight but also very fragile.
Stationary or Portable?
If you have a small garden, a greenhouse, or a garage, you need constant watering, or washing a stationary hose reel will make your life way easier. Stationary hose reels require no lifting but can reach only a set amount of area depending on the hose length. If you have a large landscape, you’re probably better off with a hose reel on wheels so you could reach multiple spigots or transport your hose from one property to another.
Hose Leader
These days almost all hose reels have a hose leader varying in length from 2-10 ft. A longer hose leader will give you extra length to cover a larger area. Long hose leaders are great if your spigot is in a full garage, basement, or some other tight spot where the hose reel itself couldn’t fit. It is also essential to always check the diameter of your hose and the hose leader. If they don’t fit, you won’t be able to thread them.
Top 7 Best Hose Reel Reviews in 2021
Giraffe Retractable Garden Hose Reel 1/2″ x 130 ft
We’re starting our list strong with Giraffe Retractable 130ft garden hose reel that already has a hybrid hose included and preinstalled. This heavy-duty black and dark gray hose reel has a 180 degrees swivel and a very convenient slow return system, so you don’t even have to do any winding yourself.
Conveniently, the hose is already preinstalled and hidden in a tight casing that protects from rain, wind, sun, and unwanted debris. All you have to do is tighten the bracket to a wall or a post and hook up the hose reel. In case you want to store your hose inside, the whole reel casing easily detaches and attaches with just a single handle.
Sturdy construction, a return system, and a preinstalled high-quality build is a fantastic package that isn’t cheap but is the best hose reel on our list for your money.
Liberty Garden is a beautiful-looking hose reel that will not only fit your garden or house exterior but will improve it! The 18 gauge steel construction has an anti-rust powder coating that makes the reel good-looking, sturdy, and durable during harsh weather.
You’ll be able to fit up to 125 feet of ⅝ inch thickness regular garden hose and effortlessly unwind it with a soft handle. What makes it one of the best hose reels on our list is the 360 degrees rotating reel, allowing you to move in a wide range of directions. The pull-up knob on top allows you to either lock it or let it move freely.
The hose comes fully assembled, but you’ll need to have your own mounting hardware and maybe drop a touch of grease on the swivel for smoother spinning. Other than that, this reel is no the cheapest one but very durable and definitely the most beautiful hose reel on our list.
Key features:
Hose capacity: 125ft x ⅝ inch
Hose leader: 5 ft x ⅝ inch
18 gauge steel construction
Weather-resistant coating
Aesthetic design
Really sturdy build
Weaknesses:
Swivel might need a touch of grease
Mounting hardware not included
Giraffe Metal Hose Reel Box 130ft
Giraffe Metal Hose Reel Box is a reel built for the outdoors. The sturdy metal construction weighs 30 lbs which keeps the box in place when unwinding the hose. Forget plastic hose reels that are light as a cardboard box and can’t handle any harsher weather. Giraffe rust-resistant paint on the box improves durability and allows you to keep your hose box outside even during hot summer days or the rainy autumn season.
The Giraffe hose reel box can fit 130 ft of ⅝ inch or 200 ft of ½ inch garden hose. It also comes with a 5 ft x ⅝ inch hose leader hermetically sealed into the box. You can put this box by the wall, on your patio, or even on the grass. The decorative design blends with any surface and can even be used as a landscape piece.
If you’re not on a tight budget Giraffe hose reel box is a great-looking hose hideaway that can blend into various areas.
Key features:
Hose capacity: 130 ft x ⅝ inch or 200 ft x ½ inch
Hose leader: 5 ft x ⅝ inch
Heavy duty
Rust-resistant paint
Decorative design blends into any area
24 months warranty
Heavy enough to not move when handling hose
Weaknesses:
Expensive
Handle a bit flimsy
BluBird RMX BluSeal Retractable Water Hose Reel 50 ft
If you need a hose reel with a short hose for a greenhouse, garage, or a small garden BluBird is the best short hose reel on our list. This sturdy hose reel by BluBird comes with a 50 ft BluSeal lightweight, strong, and flexible 100% rubber hose. It also comes with a 6 ft x ⅝ inch hose leader.
The powder-coated 20 gauge steel reel can be mounted on a wall, deck, or a 6×6 pole without the fear of rain or sun damaging it.
The convenient auto-retract mechanism and a nine-pattern spray nozzle on top of a high-quality, sturdy build make it a package well worth the higher price.
Key features:
Hose capacity: 50 ft x ⅝ inch
Hose leader: 6 ft x ⅝ inch
Nine pattern spray nozzle
Heavy-duty brass fitting
Auto-retract
It comes with a hose
Weaknesses:
Expensive for a small hose reel
Liberty Garden 870-M1-2 Industrial 4-Wheel Garden Hose Reel Cart
Have a very long hose for your large backyard, work as a landscaper, and tired of hauling 200-300 ft length hoses every day? Liberty Garden is an industrial hose reel cart designed for extra long hoses.
The double-coated finish on 13 gauge steel construction is mounted on four 10-inch pneumatic wheels that allow the cart to go through mud, rocks, sand, or any other surface.
This hose reel isn’t made to look good but instead to move and store heavy hoses. The robust build allows for daily heavy-duty use by both amateur and professional landscapers.
Key features:
Hose capacity: 300 ft x ⅝ inch
Hose leader: 5 ft x ⅝ inch
For extra long hoses
13 gauge steel construction
Double powder coat finish
4 x 10-inch pneumatic tires
Very heavy duty
Weaknesses:
Not very attractive looking
Rusts
AMES 2388340 ReelEasy Side Mount Reel, 100-Foot Hose Capacity
Ames ReelEasy hose reel is the best budget hose reel on our list. It is very lightweight and can be mounted on any wall. The reel can hold up to 100 ft x ⅝ inch of regular garden hose.
You’ll find that it has a comfortable, easy spin grip to coil your hose and a clip to secure the nozzle.
Ames ReelEasy is a great budget option for casual gardeners who want to store their hoses neatly.
Key features:
Hose capacity: 100 ft x ⅝ inch
Hose leader: 6 ft x ⅝ inch
Lightweight
Integrated hose guide
Hose clip
Easy spin grip
Very cheap
Weaknesses:
Fragile and a bit flimsy build
TomCare Garden Hose Holder
This is not exactly a hose reel since it doesn’t have an actual reel, but it holds hoses very well, so we decided to include it in our best hose reel list. TomCare garden hose holder is made from solid 0.2-inch thickness metal and can hold even large hoses. This freestanding holder is easy to assemble and has three long sharp stakes that stick deep into the ground and keep the holder stable. Moving is also straightforward if you need to hose a different part of your garden or store the holder away for the off-season.
We love the unique and attractive holder design, which is a beautiful addition to any home or backyard while keeping the hose neatly packed and out of the way.
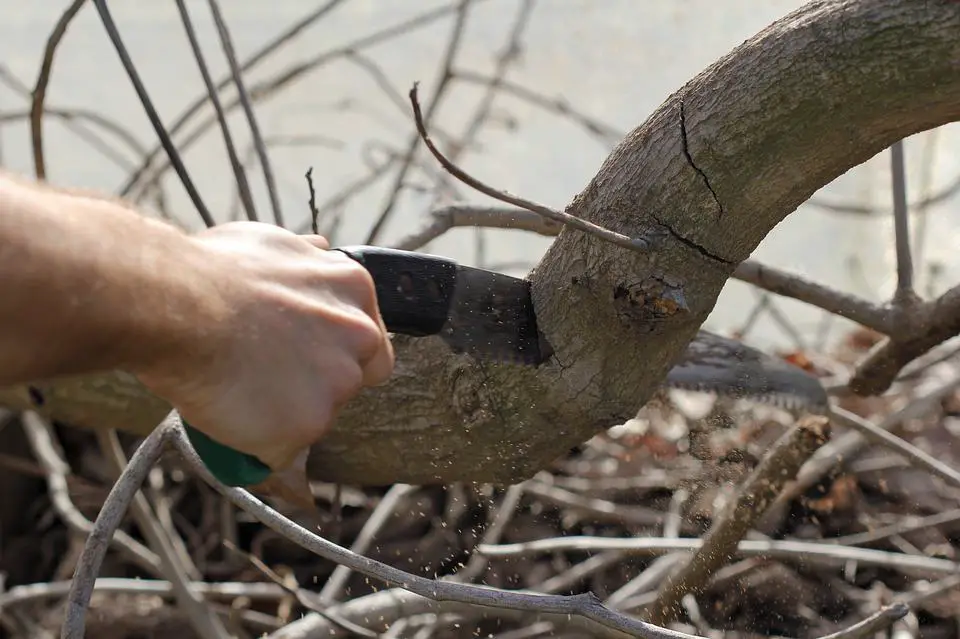
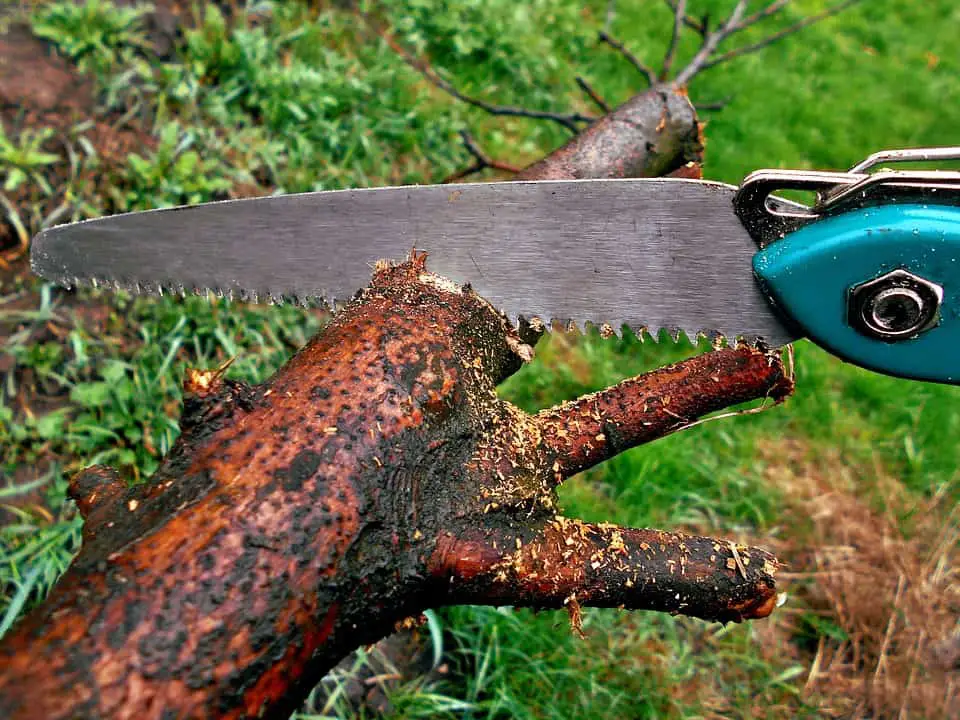
Have your magnolias, crabapples, or boxwood shrubs started getting out of control that even the best pruning shears have a hard time cutting through? It’s time to get a pruning saw to help you deal with branches, stems, or roots thicker than 1,5 inches. A good pruning saw is very easy to use, doesn’t take a lot of space, and can be easily carried around. You’ll see that there are hundreds of pruning saws with different shapes, sizes, and price points. Continue reading our round-up of the top 7 best hand pruning saws in 2021 for landscaping to find the best option for your needs.
Different Hand Pruning Saw Types
Non-folding hand pruning saw
Probably the oldest and most common type of pruning saw. The straightforward construction of a handle at one end and saw blade at the other end. Non-folding pruning saws are usually more durable and sturdier because they don’t have a folding mechanism. They do require some sort of a case or sleeve if you want to carry it around. Saw blades are extremely sharp, so you can’t just put an uncovered blade in your pocket.
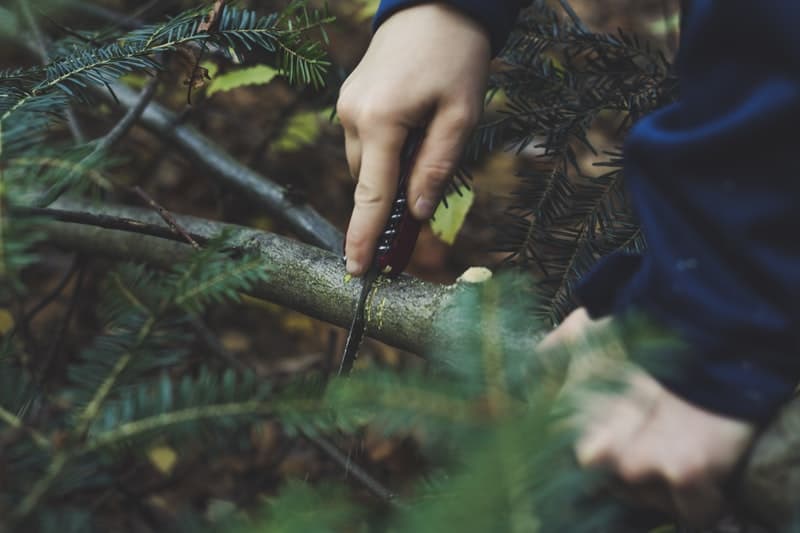
Folding hand pruning saw
folding hand saw
These have the same construction as non-folding hand pruning saws except that they fold in the middle, which allows for safer storage and takes up less space. Folding hand pruning saws are very popular with regular homeowners and professional landscapers as well. You can quickly take the saw out of your pocket to deal with small branches, roots, or shrubs and go back to other tasks in seconds.
As we already mentioned above, folding hand pruning saws can be a bit flimsier because of the folding mechanism, so it’s essential to pay attention to build quality, especially when picking budget options.
Straight blade
A straight saw is designed to work at the waistline. If your backyard is full of small trees or bushes (or you use a ladder for larger trees) and most of your sawing is done between the waist and shoulder level, then a straight saw blade is more efficient. It doesn’t mean you can’t use a straight blade to cut up high or down low; it’s just that it will provide the most efficient cut at that level.
Curved blade
A curved saw blade is designed to use above the head or below the waist. The angled position, whether it’s up or down, gives comfortable arm movement, and the curved blade will naturally dig into the wood with all of the saw blades.
You can use it at waist level, but it won’t be as efficient or comfortable. When doing the push and pull action, you’ll see that the blade lifts up a little and misses the wood with the middle of the blade. This, in turn, makes us do a weird curved motion to try and use all teeth of the blade. This hand movement is inefficient and non-ergonomic.
What to Consider Before Buying a Hand Pruning Saw
Blade length
tiny saw
If you’re going to be pruning thin 1 – 4-inch branches, then even a small folding pruning saw is sufficient and easy to handle. But thicker trees or branches are better tackled with longer 10+ inches saw blades. A longer blade means more teeth and quicker sawing.
Teeth Per Inch
Most hand pruning saws have coarse to medium toothed blades with 5-10 TPI (teeth per inch). In general, smaller TPI is better for softwoods and dry wood since it allows the teeth to snatch and break off larger pieces of wood. Anything from 5-7 TPI will do great.
For hardwoods or wet wood, go for a larger 8-10 TPI to allow for a slower, more precise cut with less friction.
Material
Almost all hand pruning saw blades are made from high-quality carbon steel, making the blade very hard and durable. There are two different hardening techniques used for hand pruning saws: Quench hardening and Impulse hardening.
Quench hardening is the process of heating the blade to a very high temperature and dipping it into oil, water, brine, or air. Impulse hardening is a new technique that uses impact energy to heat and cool the blade at very precise time intervals. Impulse hardened saw blades are up to 3x harder and more durable than quench hardened blades but come at a higher price.
Finally, pay attention to the saw handle. Weak and low-quality plastic handles might come at a very low price but won’t be comfortable and can even crack when sawing with a lot of force.
If you have read our Best Manual Pole Saws and Pruners article, you should remember that Corona makes incredible quality landscaping tools at very competitive prices. RS 7265D folding pruning saw has a massive 10-inch blade full of 3 sided impulse hardened teeth. This allows for a quick and effortless pruning of branches up to 6-inch thickness.
The impulse hardening technique allows the blade teeth to be sharp for a very long time, and the chrome-plated blade is rust-resistant. Still, we advise keeping any stainless steel tools away from any moisture to improve longevity and occasionally lubricate the blade.
We love the comfortable non-slip handle that allows for a tight grip with any type of gloves or when wet. This Corona folding saw is excellent for camping as it’s lightweight (360 grams) but still can cut through thicker branches and wood. The only weakness of the build is that when folded, some of the blade teeth as exposed.
Despite the small design flaw Corona RS 7265D gives is very sharp, sturdy, and easy to handle, making it the best folding pruning saw on our list.
Key features:
Blade length: 10-inches
Weight: 360g
3 sided razor impulse hardener teeth
Up to 6 teeth per inch
Chrome plated
Great price
Perfect for cutting up to a 6-inch thickness
Weaknesses:
Teeth are a little exposed when folded
FLORA GUARD 7.7 Inch Folding Hand Saw
Constantly on your knees in your backyard or need to get into tight spaces between tree branches, bushes, or hardscapes? Flora Guard 7.7-inch folding pruning saw is an excellent tool that will fit in any pocket to deal with that annoying branch or stem in your way.
This small folding hand saw is excellent for the occasional pruning job in your backyard. It is very compact and easy to transport when landscaping and dealing with branches up to 4-inch thickness.
Triple-cut razor teeth are very sharp, but the blade itself is a bit thinner than other blades in the market. The whole build seems lower quality, too; however, for the price it’s selling, you can’t ask for more.
If you have a few smaller trees in your backyard that need pruning once a year, then Flora Guard is the best small folding saw on a budget.
Key features:
Blade length: 7.7-inches
Lightweight
Very compact
Triple cut razor teeth
Perfect for occasional small pruning jobs
Great budget price
Weaknesses:
Lower quality
Thin blade
Silky GomBoy Curve Professional Folding Saw 240mm Large Teeth
Silky GomBoy folding saw is a fantastic Japanese-made curved saw. It is designed to be used by pulling, not pushing, thus saving energy and giving better results. The excellent quality of the build is no surprise as they are manufactured in Hyogo, Japan. Impulse hardened teeth are precision ground and mounted on an ergonomic handle.
The whole pruning saw weighs around 270 grams making it a perfect addition to any homeowner, backpacker, or camper looking to cut wood for a campfire or clean up fallen branches. They also include a carry case for the saw to protect it from unwanted debris or moisture.
If a gas chainsaw is a bit of an overkill for your backyard firewood needs, the Silky GomBoy folding saw is an excellent high-quality alternative and one of the best folding saws on our list.
Bahco 396-LAP is probably the best pocket pruning saw for homeowners who often go camping and hiking but also need to do seasonal pruning in the backyard. The Laplander saw is a very solid but lightweight (just 200g!) folding saw.
The 7.5-inch sharp blade can cut through both dry and wet wood. Seven teeth per inch are perfect for smaller up to 4-inch thickness tree branches or wood.
Even though Bahco is not the most popular tools manufacturing brand, their saws are very high-quality, sturdy, and long-lasting. The 396-LAP saw blade has a special coating for rust protection and better friction. The handle is made from two-component plastic for a soft but sturdy grip with a safety lock to protect the saw from accidentally opening up.
Key features:
Blade length: 7.5-inches
Weight: 200g
Solid build
Specially coated blade for rust protection and lower friction
Comfortable plastic handle with leather strap
Safety lock
Weaknesses:
Anything over 4-inch thickness will take more effort and time
Fiskars 15 Inch Pruning Saw with Handle
Fiskars, well known for their excellent quality landscaping tools, is introducing an entry-level non-folding curved blade pruning saw.
Why entry level? First of all, the amazing budget price makes it affordable to everyone. An ergonomic soft-grip handle allows for safe and easy sawing. The D-shaped handle also allows you to flip the saw for easy undercuts.
The 15-inches blade will allow you to cut anything from small branches, stubs, or bushes to medium-sized trees and wood. The long blade full of triple-sided sharp teeth produces long and effortless strokes; however, since the blade is manufactured for pull and push sawing, this blade doesn’t bite into the wood as well as competition. But in the end, the versatility, high quality (lifetime warranty), and budget price make it the best hand pruning saw for beginners on our list.
Key features:
Blade length: 15-inches
Weight: 340g
Triple side teeth
Ergonomic soft-grip handle
Full lifetime warranty
Easy to control for beginners
Budget price
Weaknesses:
It doesn’t bite into the wood as well as the competition.
Könnig Professional Heavy Duty Pruning Saw
Love spending your weekend afternoons in the backyard cherishing your landscape by doing all the manual work yourself? The Könnig saw is a fantastic heavy-duty pruning saw that is designed for rough handling and thick cuts.
This non-foldable pruning saw has a 14-inch curved saw blade best suited for overhead tree pruning, large bush trimming, or cleaning up after fallen branches. The Japanese tooth design allows for a smooth cut even through thicker branches and flexible control when using overhead.
The pruning saw comes with a set of gardening gloves and also a saw case for safe storage.
All in all, it’s a straightforward tool with no special features, but the sharp blade and durability of the build make it one of the best heavy-duty hand pruning saws for larger landscaping projects.
Key features:
Blade length: 14-inches
Weight: 230g
Strong heavy-duty design
Japanese tooth design
It comes with a protective case and gardening gloves
Weaknesses:
Not the most comfortable handle
Silky ZUBAT Arborist Professional Hand Saw 330mm XL Teeth
To finish off the list, we have another Silky pruning saw. This time it’s a premium curved hand pruning saw Zubat. A 13-inch blade is full of Japanese steel razor-sharp teeth, perfect for cutting dry and wet trees. The build of the saw is very sturdy because it’s a full tang saw with the metal going all the way through the handle. Along with a high-quality plastic handle and metal screws going through the tang, this eliminates the risk of breakage and provides more stability.
It is also nice to have a professional scabbard come with the saw. Store your saw safely in your tool shed or attach it to your belt or leg straps.
The only negative thing about this saw is the very steep price. If your budget allows, Silky Zubat is one of the best hand pruning saws currently in the market.
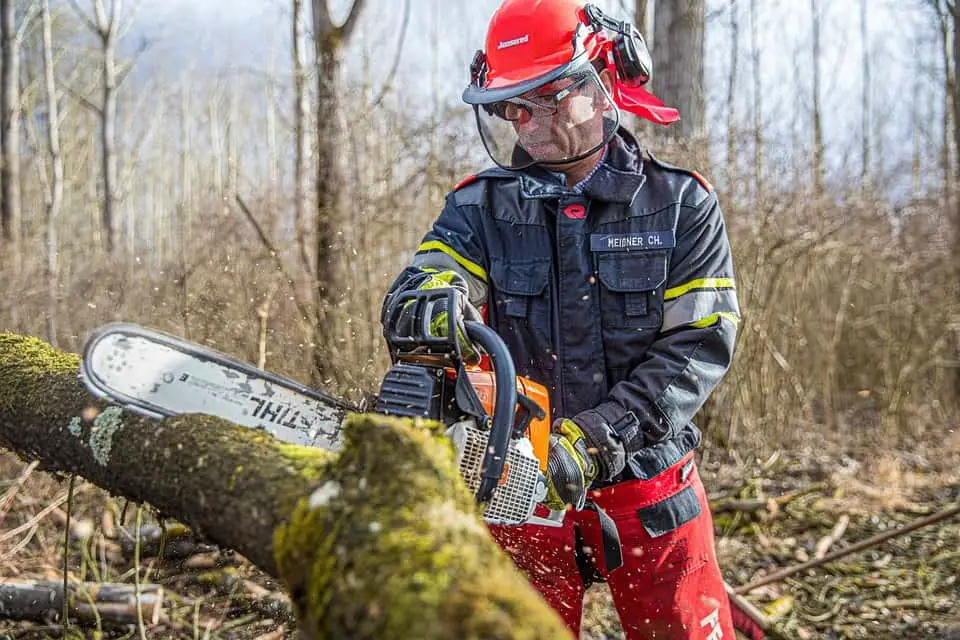
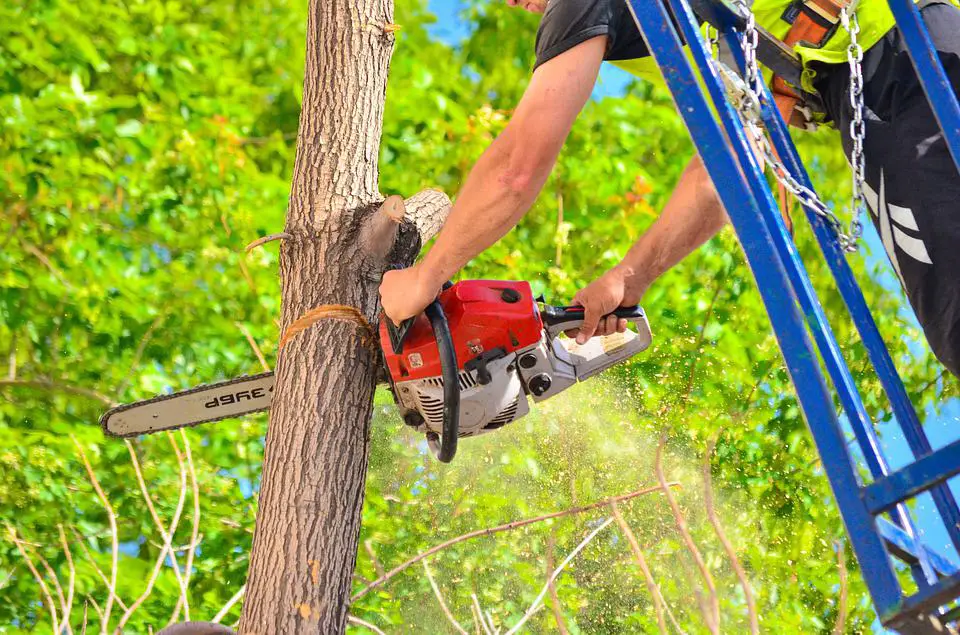
If you have a large backyard or a garden full of trees, then a gas chainsaw is an essential tool for taking care of tree removal or limb removal. Gas chainsaws are very powerful and do most of the heavy lifting if there are trees in the way. You can use a smaller chainsaw for pruning, trimming, or cutting small-medium trees, while a larger chainsaw can handle cutting, bucking, and felling even old large trees. To pick the best gas chainsaw for your needs, read our list of the top 7 best gas chainsaws in 2021 for landscaping and backyard maintenance.
What to Consider Before Buying a Gas Chainsaw?
What trees are you going to cut?
gas chainsaw and big tree
Before you jump in and buy a gas chainsaw, consider if you really need one. What kind of trees are growing in your garden, or what type of landscaping project are you taking on? If you’re looking to trim and prune thin branches, maybe a small manual pruning saw or a pole saw will be more efficient.
If the trees need to be cut down or there are multiple thick branches, then a gas chainsaw is always a better option.
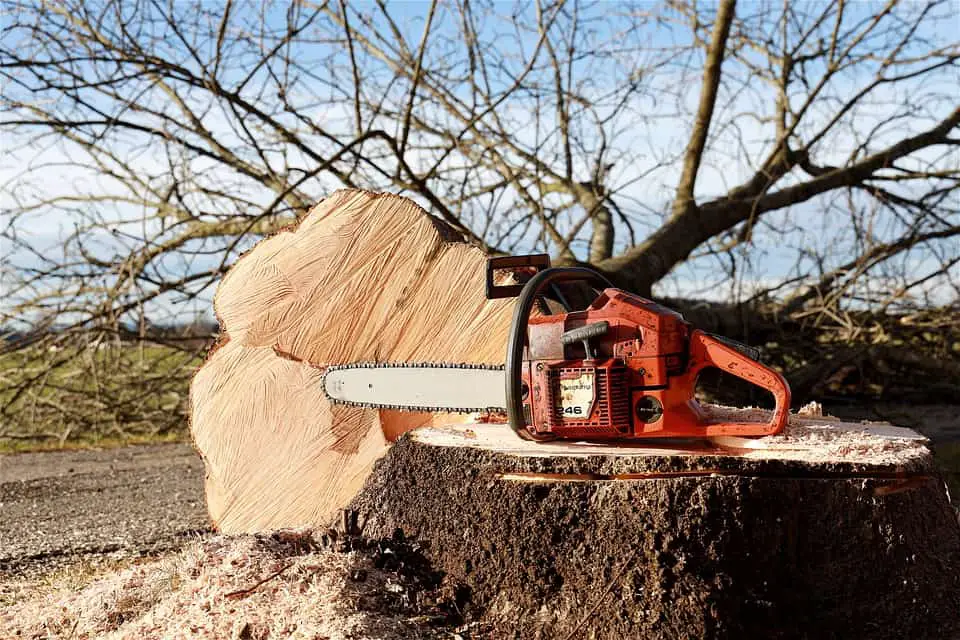
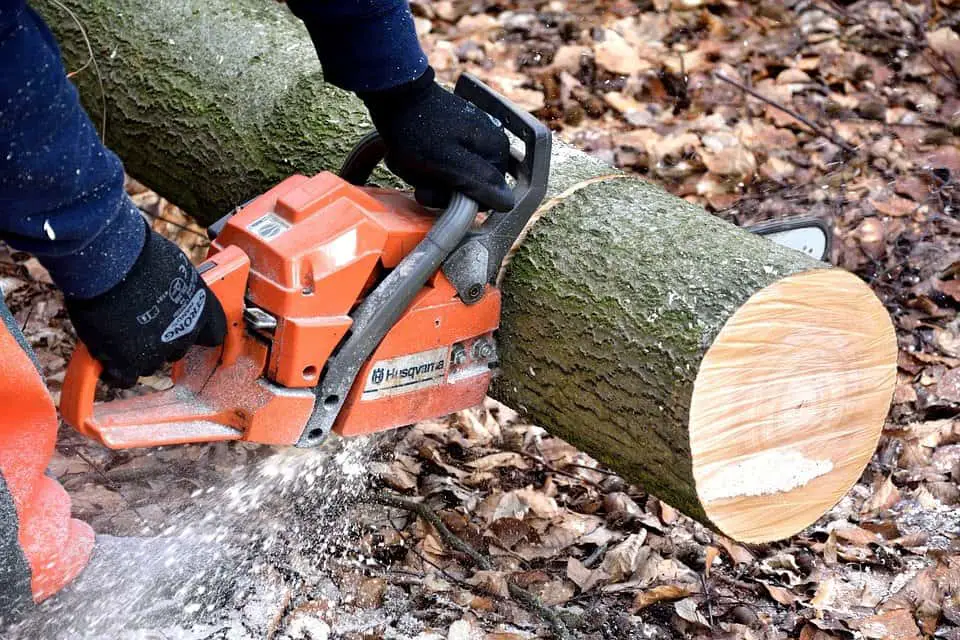
Blade size
cutting a small tree
You will usually see 12 to 24-inches blade size. The length of the blade determines how thick a tree the chainsaw can cut. 12 – 16-inches length blades are more than enough for beginner landscapers and homeowners. This size can easily handle small-medium trees, and the chainsaw is much lighter and easier to maneuver.
Larger 18 – 24-inches blade lengths are for heavy-duty projects and professional landscapers. These chainsaws are usually bulkier, heavier, and more powerful.
Power and engine size
gas saw cutting log
Engine size is measured in cc (cubic centimeters) capacity. The larger the capacity, the more fuel engine can use and, in turn, provide more power.
You’ll find that gas chainsaw engines will usually range from 24 to 60 CC. Smaller and lightweight chainsaws will be on the smaller 24-42 CC range and are perfect for light-duty work like tree trimming or bush pruning. To cut larger trees, go for a more robust 50 – 60 CC engine.
Remember that larger engines are more powerful but will be bulkier and, most of the time, cost more.
Safety features
Gas chainsaws are very powerful and one of the most dangerous landscaping tools if you’re not careful. It is always important to wear personal protective equipment like safety goggles, gloves, a hard hat, and ear protection.
To protect yourself from any injuries and accidents caused by the chainsaw, look for safety features like:
Chain brake – an emergency brake usually located at the top of the front handle to stop the chain from spinning. It is activated by manually pushing forwards with your hand or automatically from a kickback.
Trigger lock – a safety feature that prevents accidentally turning on the chainsaw.
Chain catcher – a feature that catches the chain if it breaks or derails.
Top 7 Best Gas Chainsaw Reviews
Husqvarna 24 Inch 460R Gas Chainsaw
Husqvarna is one of the top brands for gas-powered chainsaws and manufactures extremely durable and heavy-duty tools. The 460 Rancher gas chainsaw is the best large gas chainsaw for landscaping on our list.
The 24-inches length blade size and 60.3 CC engine can cut anything from small to large trees. It has minimum kickback and very little vibration, even with tough hardwoods. The reliable starting mechanism allows starting the chainsaw every time with minimum effort.
Additionally, there are a number of features and accessories that allow for safer and easier operation. An automatic chain oiler will lubricate the chain as needed, while the side-mounted chain tensioning system allows adjusting the chain’s tension with no additional tools. Finally, along with the trigger and throttle lock, there is inertia activated chain brake that will protect you from unexpected kickbacks.
If you have a large backyard full of trees that needs constant landscaping, Husqvarna 460 Rancher is not a cheap gas chainsaw but an excellent investment that will last a long time.
Key Features:
24-inches blade length
60.3 CC engine
Heavy-duty
Great for large trees
Reliable start
Automatic chain oiler
Inertia activated chain brake
Side-mounted chain tensioning system
Easy to clean and replace the air filter
Weaknesses:
Expensive
Quite heavy
HUYOSEN 60CC 2-Stroke Gas Powered 20-inch Chainsaw
Huyosen 60 CC 2-stroke gas chainsaw is a powerful tool to cut down one or two large trees in your backyard. It is also a great starter chainsaw for beginner landscapers. Huyosen 60 CC is the best powerful chainsaw if you are on a budget and need to cut down bigger trees.
The chainsaw is a 20-inch blade that is powered by a 2-stroke 60 CC 3.9hp gas-powered engine. It can cut through wood, trees, or even ice with minimal kickback. We were surprised by the comfortable non-slip and shock-absorbing handle, which is very ergonomic, allows for a firm grip, and reduces vibration. Honestly, even $800+ chainsaw handles can’t compare to this one.
To increase air filter longevity and reduce fuel consumption Huyosen has an automatic air filtration system. There is also an automatic oil filling to provide constant lubrication and reduce chain and guide bar wear. Despite having proper lubrication, we feel that the chain wears out quite fast on this Huyosen chainsaw. Most likely, the chain is a bit cheaper, but you can’t expect everything high-quality while paying a budget price.
Key Features:
20-inches blade length
60 CC engine
Budget price
Air filtration system
Automatic oil filling
Excellent non-slip and shock-absorbing handle
Throttle and trigger lock
1-year warranty
Weaknesses:
Requires a bit of assembly
Chain quality low
ECHO CS-271T 12 In. Chainsaw
Echo CS-271T might look like a baby saw, but this little bad boy can bite! The 26.9 CC engine might seem small, but it gives plenty of power to spin the chain on a 12-inch blade.
Casual landscapers and professionals praise it. If you have a backyard that needs pruning, trimming, brush clearing, or occasional tree cutting, CS-271T is a versatile, maneuverable, lightweight (just 11 pounds!) yet powerful chainsaw. Professional landscapers love it because they can easily use it one-handed while high on a tree or in tight spots (although one-handed operation is never advised). The 12-inch blade length is enough to straight cut a 10-inch tree or, if you have 360 degrees access, up to 15-inches branch/tree.
The build of this small gas chainsaw is high-quality and sturdy. No leaking, unnecessary clacking, or vibration. Very reliable as it starts every time without much effort.
High-quality, superb performance, longevity, and maneuverability do come at a much higher price. If you are looking for a small, lightweight chainsaw to last you a decade, Echo CS-271T is the best small chainsaw on our list that money can buy.
Key Features:
12-inches blade length
26.9 CC engine
Lightweight
Maneuverable
Powerful
High-quality build
Easy to start and handle
For beginners and professionals
Weaknesses:
Expensive
Too small for 15-inch+ tree thickness
Husqvarna 16 Inch 130 Gas Chainsaw
Here we have another Husqvarna chainsaw on our list, this time a smaller and much more affordable Husqvarna 130 gas chainsaw. This model is one of the entry-level chainsaws in the Husqvarna lineup targeted at casual landscapers and DIYers.
It is equipped with a 38 CC engine, which gives more than enough power for the 16-inch blade to cut down small to medium trees or large branches. The LowVib vibration reduction system does wonders, probably the lowest vibration if compared to similar price chainsaws. Additionally, the 10.4-pound weight is excellent for casual, young, or old users.
As all Husqvarna chainsaws, 130 has inertia activated chain brake for safety, an automatic chain oiler, and no tools chain tightening system.
We did find a couple of weaknesses compared to other products of Husqvarna. The plastic covers and the handguard of the chainsaw feel very flimsy. Additionally, we ran into trouble starting the chainsaw on a few occasions.
All in all, it’s a powerful and lightweight entry-level chainsaw from a reputable brand and shouldn’t disappoint you despite the flimsy plastic and motor start shortcomings.
Key Features:
16-inches blade length
38 CC engine
Lightweight
Inertia activated brake chain
LowVib vibration reduction system
Automatic chain oiler
No tools chain tightening system
Weaknesses:
Sometimes hard to start
Flimsy plastic on the chainsaw
Remington Gas Powered Chainsaw Automatic Chain Oiler-Anti Vibration System
As the company states itself, Remington RM4216 is for the “suburban homeowner.” A lightweight but powerful chainsaw that won’t leave your pockets empty. This chainsaw is equipped with a 16-inch chain blade and powered by a 42 CC engine to provide plenty of power to cut down small to medium-sized trees.
The RM4216 is a pretty average chainsaw. It has an automatic oiler, an anti-vibration system, and quickstart technology. We were pleased with the quickstart feature as it allows you to start your chainsaw very easily, whether it’s cold or warmed up. However, the engine seems to be leaking oil a little, so it needs constant cleaning; otherwise, you’ll have gunk accumulating at the bottom of the chain.
On a brighter note, we love the heavy-duty carry case! It allows to safely store or transport the chainsaw without damaging it or making a mess.
Yes, the chainsaw doesn’t stand out for its quality or features, but it is very cheap. If you need a chainsaw just a couple of times a year, RM4216 is the best budget chainsaw for casual landscaping on our list.
Key Features:
16-inch blade length
42 CC engine
5 point anti-vibration system
Quickstart technology
Automatic oiler
Heavy-duty carry case included
Great price
Weaknesses:
Leaks a bit of oil
Needs constant cleaning
Craftsman 42cc-16 (2020 Model) S165 42cc Gas Chainsaw
Craftsman is another reputable brand in the gas chainsaw industry. They offer fantastic value for your money for both beginners and professionals. The Craftsman 42cc 16-inch gas chainsaw is just a sturdy, powerful, and easy-to-operate landscaping tool.
The S165 has an anti-vibration system, inertia-activated chain brake, easy start technology, automatic chain oil, etc. These features are standard, but the build quality is just way sturdier; it’s a Craftsman product for a reason.
The only downfall we observed was that it’s much harder to start when the engine is cold. Sometimes required 3-4 pulls to get it going.
Overall, powerful and fantastic quality gas chainsaw for beginner landscapers and homeowners.
Key Features:
16-inch blade length
42 CC engine
Easy start technology
Budget price
Lightweight
Anti-vibration system
Inertia-activated chain brake
Comfortable to operate
Weaknesses:
Hard to start when cold
Poulan Pro PR4218, 18 in. 42cc 2-Cycle Gas Chainsaw
Poulan Pro PR4218 is the best large gas chainsaw on our list if you’re on a budget. Had a big storm, and there’s a ton of fallen trees? Poulan 18-inch chain blade is perfect for medium and even larger trees. The 42 CC engine might not be the most powerful for large trees and might take a little longer, but in the end, it does the job.
The most significant advantage of PR4218 is that it weighs just 13 pounds allowing it to operate without much strain on your back and arms. It is also very easy to start the engine, probably the easiest starting chainsaw on our list. However, we’ve heard a few customers complaining that the pull starter broke sooner than expected.
We like that you also get a carry case and an additional chain in case the original breaks. All in all, this is a reasonably priced and quality chainsaw for larger personal landscaping projects or tree clearing needs.
Key Features:
18-inch blade length
42 CC engine
Lightweight (13 pounds)
Carry case, and extra chain included
Effortless pull starting
Anti-vibration system
2-year warranty
Great price
Weaknesses:
Low-quality pull starter
Steps to Follow Before Starting a Gas Chainsaw
Check gas level – make sure that you have enough gas to run the chainsaw. Gas chainsaws use a gas and oil mix to run the engine. Check manufacturer’s manual for appropriate gas and oil mix ratios.
Check chain tension – before starting the engine, check the chain tension. If it’s too loose, it might be a safety hazard. All gas chainsaws will either have tensioning tools included or a knob that doesn’t require a tool. Always read the manufacturer’s manual to learn how to tension the chain properly.
Wear PPE – always wear personal protective equipment like goggles, helmet, gloves, and chainsaw pants; even when operating the best chainsaws with all the safety features, you need to wear PPE.
Starting the chainsaw – Never start a chainsaw by drop pulling. Always set the chainsaw on the ground with no obstructions in the way. Get the chain brake on so it doesn’t spin. Now you can turn on the choke, or if it’s a primer, push it 4-5 times to get the gas into the carburetor.
Set the toggle switch on or if it’s a master controller into the cold start position. Now you can start the engine with a swift pull of the starter handle. If it didn’t start the first time, move the master controller to a warm start position; otherwise, you might flood the engine. Now swiftly pull the starter handle again. You might need 2-3 pulls, depending on the chainsaw.
For extra stability when pull starting a chainsaw on the ground, we advise slipping your foot into the opening of the rear handle while holding the top handle with one hand.
Operation – Always hold a chainsaw tightly with both hands while operating. Always be sure to wrap your thumbs around the bar when holding on to it and be ready for kickback. Even experienced operators will experience kickback on occasion. Always be aware of where your feet, legs and body is in relation to your cut and never put yourself in the path of the blade should it pass quickly through the piece you are cutting
Check out our manual pruning saw and pole saw articles.
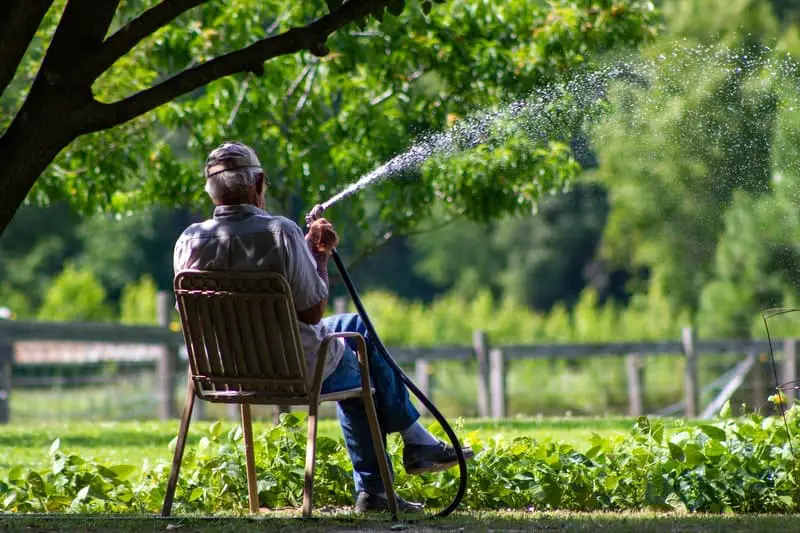
You don’t need to be a professional landscaper or a die-hard gardener to understand that a good garden hose is a must-have tool for anyone with a piece of grass, greenhouse, or garage to keep the property clean fresh, and green. At first sight, all garden hoses look similar but can vary in quality tremendously. If you’re on a tight budget, you can buy an extremely cheap hose; however, adding even as little as $10-$20 can make a huge difference and turn watering and washing chores into a relaxing and pleasant time outdoors. In our buyer’s guide, we’ll explain how to pick the proper hose for your landscape needs, and we’ll also provide our picks for the top 7 best garden hoses in 2021.
What to Consider When Buying a Garden Hose?
man using a hose
Length
It’s really important to consider where you’re going to use your garden hose and what area you want to reach. For a small garden, backyard, or garage, a 50 ft. hose is more than enough, but if you have a larger property go for a 100 ft. length hose. You don’t want to end up with a hose that can’t reach behind your house or all the way to the property edges. Before buying your garden hose, it’s a good idea to measure the maximum distance you might need to reach and add 5-10 ft. for maneuverability. If you need to buy a 100 foot hose, you may want to avoid the heavy hose material like rubber which will be quite heavy to pull around. Also, for longer hoses, you should probably consider buying a hose reel for easier transportation and storage.
Material
Garden hoses are usually made from vinyl, rubber, rubber hybrids, latex, metal, or polyurethane. Vinyl hoses are cheap but prone to kinking, heavy, and don’t last as long, so you might end up saving initially but might have to buy a new one much quicker. Rubber is usually very rigid, long-lasting, the most enjoyable to use, but much heavier, while polyurethane is very light but not heavy-duty. There are also garden hoses made from latex layers that allow the hose to expand when filled with water and shrink when emptied. Such hoses do not have coil memory, are lightweight, and easy to store, but tend to restrict water flow considerably.
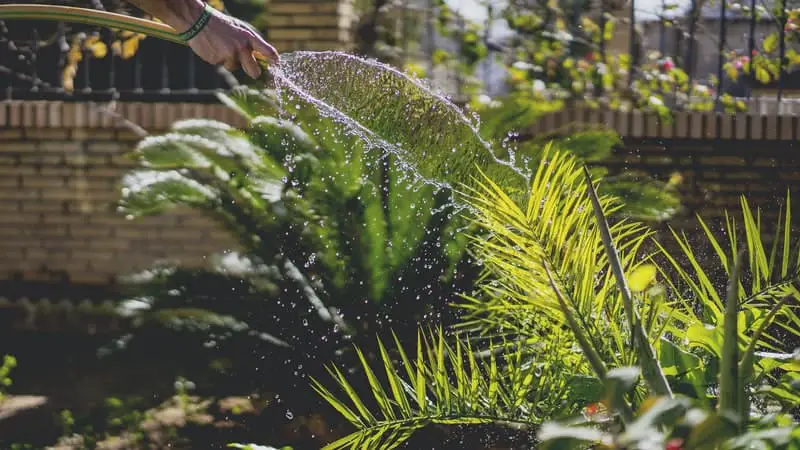
Diameter
spraying with a hose
The diameter of the hose will determine the amount of water that can flow through the hose. A smaller diameter hose will handle less water and be more restrictive, while a larger diameter hose will provide a larger stream and be less restrictive. If you live in a city with a small backyard or garden and use a basic spray nozzle or a sprinkler, a ½ inch diameter hose should be plenty. For larger properties and tasks that require more flow, like filling large containers or watering crops, you can go with a ¾ inch or 1 inch diameter hose to speed up the process. Just remember, the larger the diameter, the heavier, bulkier and more expensive the hose will be.
Coupling
You’ll find that garden hoses can have couplings made from plastic, brass, nickel, stainless, and other metals. They can come in round or octagonal shapes. Cheaper hoses can have aluminum or plastic couplings which are cheap but fragile, while nickel, brass, or stainless steel are not afraid of being thrown on the ground or even ran over by truck tires. We would also advise buying an octagonal shape coupling instead of a round one for an easier grasp with pliers.
Weight
A 200 ft. rubber hose might be very rigid and reach far away, but it will be a pain to drag it around as it can weigh up to 40 lbs. If you don’t need to use a pressure washer, go for a lighter expanding hose that is easier to maneuver and move around. For longer lifespan, durability, and pressure washing, you’ll have to reconcile with a heavier hose.
Layers
You’ll find garden hoses ranging from 2-6 layers. The more layers a hose has, the stronger it is and more resistant to kink and twisting. A suitable hose should be flexible for ease of use but kink as little as possible. Cheaper hoses with 2-3 layers will often kink, which quickly reduces their life span and aren’t suitable to use with pressure washers since they can’t hold high pressure. Premium hoses with 4-6 layers don’t kink as much and can even be crush resistant to withstand cars or machinery driving over them with no damage.
Is It Food Safe?
dog playing with hose
If your household has children or animals that might drink water straight from the hose (if your tap water is drinkable), it’s advisable to pick NSF and FDA-certified hose. If the hose is not food safe, it might leak harmful chemicals into the water. Also, remember never to drink water that has been standing in the hose, especially in warm weather. Standing warm water is a perfect environment for bacteria to grow.
Top 7 Best Garden Hose Reviews in 2021
Eleegan 100′ Garden Hose
The expandable Eleegan garden hose is a multipurpose hose that is lightweight, long, durable, and compact. It is mainly designed for watering tasks like grass watering, greenhouse watering, or car washing. The lightweight four-layer latex core is easy to drag through the grass even when full of water. You could pull it over the pavement as well, but it will wear much more quickly.
The expandable material increases the hose size from 33 ft. to 100 ft. when filled with water. The compact size makes it perfect for RVs, camping, or even apartments with larger balconies.
Even though the hose itself is designed for light use, it has a rigid brass coupling and a ten-function nozzle for different watering needs.
If you have a larger backyard or greenhouse and are tired of dragging heavy hoses day after day, the Eleegan 100 ft. hose is the best lightweight garden hose on our list to help you out.
Key features:
Length: 100 ft.
Diameter: ¾ inch
Material: 4 layer latex core
Brass coupling
Lightweight
Burst strength: 145psi
Expandable
Ten function nozzle
Weaknesses:
Not heavy duty
Flexzilla Garden Hose, 5/8 in. x 100 ft.
Flexzilla is one of the most known garden hoses currently in the market. The hybrid polymer 100 ft. is very flexible and easy to drag around corners and trees. They advertise it as a kink-free hose because of the hybrid polymer material and their Swivel grip technology. The grip handle allows the hose to spin around inside the grip, which is very useful when uncoiling.
This bright, durable hose can withstand harsh weather conditions and stays flexible even at -40 to 150°F degrees days.
Flexzilla hose is also great for families with children or pets as the hose is made from lead-free materials.
We love that it is more rigid than expandable garden hoses while still very flexible and lightweight. It is also safe for kids and animals to drink. The only big disadvantage is the higher price tag.
Key features:
Length: 100 ft.
Diameter: ⅝ inch
Material: Hybrid polymer
Weight: ~7 lbs.
Aluminum alloy coupling
Flexible and durable
Weather-resistant
Drinking water safe
Swivel grip
Weaknesses:
Expensive
Macuvan Garden Hose 100 ft Heavy Duty
Macuvan is made from a heavy-duty four-layer polymer blend to withstand harsh weather conditions of -40F – 160F degrees. The ⅝ inch diameter hose provides water flow enough for watering your backyard grass and plants in an area up to 100 ft. Its 4th layer of hybrid polymer is abrasion resistant, so you can drag it over the pavement for washing tasks without fear of damaging the hose.
It’s nice to have a nickel-plated brass connector as it doesn’t leak, but on the other end of the hose, the 9-way spray nozzle does feel a bit cheap and might not hold up as long as the hose itself. Despite the questionable nozzle quality, the Macuvan is one of the best heavy-duty garden hoses for regular homeowners.
Key features:
Length: 100 ft.
Diameter: ⅝ inch
Material: 4 layer polymer blend
Nickel-plated brass connector
Heavy-duty
Burst strength: 500 psi
9-way spray nozzle
Weather-resistant of -40F – 160F
Weaknesses:
Nozzle feels very cheap
A bit expensive
GrowGreen Heavy Duty Expandable Garden Hose
The next product on our list is the GrowGreen heavy-duty expandable hose. It’s a very comfortable to use and maneuverable hose. The expandable design allows the hose to be virtually kink-free. It expands up to 3 times when filled with water making this hose just 17 ft. in length when empty. This allows it to be squeezed into a small bag to carry around or store virtually anywhere.
It’s a great small and compact garden hose for small watering tasks like plants or flower watering, garage, or runway spray down. We feel that the water flow rate is too weak for more frequent or larger tasks and just takes too long. This is definitely a light duty tiny space, homeowner hose and not meant for any heavy duty application.
Key features:
Length: 50 feet
Diameter:
Material:
Very lightweight
Expandable kink-free design
Weaknesses:
Weak flow rate
Restrictive
Very light duty
The FitLife Flexible and Expandable Garden Hose
The FitLife flexible and expandable hose is our pick for the best short garden hose as it’s super lightweight, making it perfect for small backyards, RVs, or patios. The hose has a triple-layer latex core that is very flexible, won’t crack when stepped on or driven over, but sadly can be damaged by lawnmowers.
Empty hose weighs just 1.8 lbs. and is very compact, perfect for RVs, small houses, or even apartments. When filled, the hose expands to 25 ft. in length and can withstand a maximum pressure of 300-350 psi. The spray nozzle has eight different streams, which can be easily switched with your thumb. The nozzle itself does feel a little cheap, but you can’t expect premium quality for a budget price.
Overall, this short-budget garden hose is for light use and simple watering tasks. It’s not very durable for heavy-duty use, especially in winter, as it doesn’t withstand temperatures lower than 23F.
Key features:
Length: 25 ft.
Diameter: ¾ inch
Material: triple layer latex
Weight: 1.8 lbs.
Burst strength: 300-350 PSI
Heat resistant
Solid brass fittings
Very lightweight
Cheap
Eight pattern spray nozzle
Weaknesses:
Can’t leave outside in winter
Bionic Steel 100 Foot Garden Hose
Are you tired of buying new garden hoses every year? You need to try out the Bionic Steel heavy-duty 100 ft. garden hose. This hose is made from 304 stainless steel, can be dropped, stepped on, ridden over with a car, or even a lawnmower.
From first sight, the hose looks to be heavy but weighs just 3 lbs. Making it the lightest heavy-duty garden hose on our list. The hose is kink-resistant since you can’t bend stainless steel without using a lot of force. Bionic Steel hose can withstand up to 500 PSI, so it can be used for pressure washing and regular watering tasks.
This stainless steel garden hose is perfect for hot or freezing temperatures can be left outside in any weather conditions as it is corrosion and rust-free.
Key features:
Length: 100 ft.
Diameter: ⅝ inch
Material: 304 stainless steel
Weight: 3 lbs.
Burst strength: 500 PSI
Weatherproof
Extremely durable
Corrosion and rust-free
Weaknesses:
No nozzle sprayer
On the expensive side
Flexi Hose with 8 Function Nozzle
To end our list of the best garden hoses in 2021, we have the Flexi 100 ft. expandable hose that is a bit more expensive than other expandable hoses but feels slightly more durable as it has four latex layers.
It can expand up to 100 ft. without any kinks or knots. We love that the brass coupling is easy to attach and has an easy to open or close water lever.
You’ll find an eight-pattern spray nozzle included in the kit, which is handy but is plastic and can break or crack if dropped on concrete.
All in all, it’s a very lightweight and long hose perfect to water large backyards or greenhouses. The only weakness of the hose is that it doesn’t withstand temperatures below 41F or above 113F. It is one of the best expandable garden hoses in terms of quality but might not suit people living in colder regions.
Key features:
Length: 100 ft.
Diameter: ¾ inch
Material: 4 layer latex
Very lightweight
Brass coupling
Eight pattern spray nozzle
Weaknesses:
Isn’t weatherproof
Expensive compared to other expandable hoses
Frequently Asked Questions
Can I connect different metal fittings?
No, it’s best for the hose coupling metal to match your faucet metal. Never buy aluminum couplings if you have a brass or steel faucet. Different metals can have corrosive effects on each other, so it is best to match materials. A harder metal fitting might crack the weaker metal if you use too much force when tightening, or it will be tough to unscrew.
Can I leave my hose outside in winter?
In general, you shouldn’t leave your hose outside in winter because when the water freezes, it expands and might crack or split your hose. If you do leave your garden hose outside or in a shed where it’s really cold, make sure to drain all the water out first and never leave a hose attached to your spigot in freezing temperatures.
Some heavy-duty hoses made from stainless steel or rugged rubber aren’t afraid of cold temperatures as they can withstand expansion from freezing water, but cheaper and softer materials don’t hold that well. Before leaving your hose in freezing weather, make sure to check the instructions to see if it can withstand cold temperatures.
In general, freezing water is very powerful and causes much damage every winter. Leaving water inside of any container, including a garden hose over winter is simply asking for trouble.
Over the past decade, there has been an increase in the growth of invasive plant species in the U.S. due to international trade and travel. This is already becoming a major ecological problem because these plants can quickly take over large areas and crowd out native plants.
Many experts believe that these invasives were primarily planted in landscapes and gardens but can escape. This being said, homeowners must be educated about all these plant species, which can cause potential harm on a larger scale.
In this article, I have listed 28 invasive plants that you should skip buying if you are starting your garden. This is essential if you want to beautify your yard without posing a threat to our environment. I have also included some valuable tips on getting rid of them if they get out of hand.
What are Invasive Plants?
As opposed to native plants, invasive plant species are considered aliens or not indigenous in a particular area where they are seen to be growing. They are labeled as such because they tend to spread like wildfire, and they can cause harm to both our environment and economy.
Since these plants are usually pretty at first glance, most people purchase them to include in their landscapes. While this is not strictly prohibited, one should always consult a landscape professional before growing these alongside native plants because they may cause monoculture in the long run.
If you are interested to know why these invasive plants are indeed so invasive, the answers are both easy and complicated. There are no diseases or insects that plague these plants in their new homes as compared to where they originated, so they have free rein.
Another factor that helps these invasives grow faster than other plant species are underground root networks like rhizomes. By definition, rhizomes are stems that grow underground in a horizontal manner. They produce new roots from their nodes, so they aid these unwanted species’ production.
Impacts of Invasive Plants
To fully understand why you should avoid planting invasives at all costs, let me share their impact from a small scale to a larger scale. Here’s how they affect your landscape, the economy, and the environment:
Landscaping Impacts
Invasives cause extra work for gardeners.
They tend to displace plants that are more difficult to grow.
They lessen one’s enjoyment of seeing a landscape.
They may cause trouble with the neighbor, especially if they also invade their area.
Environmental Impacts
Invasives do not provide strong root structures to bind the soil, so erosion is possible during constant flooding.
Invasive plants are one of the leading causes of biodiversity loss since they displace native plants.
They outcompete plants that serve as food and cover for some wildlife animals.
They reduce the growth of trees because they can prevent the sunlight from reaching the seedlings.
They weigh down trees, so they become easier to blow down.
They create fuel for unexpected wildfire.
Economic Impacts
Invasives decrease land’s value.
It hinders agricultural and fishing productivity.
The cost for controlling their growth is not exactly cheap.
Livestock can be forced into sub-optimal and marginal lands.
Social Impacts
The options for livelihood can be narrowed since lands that should be used for productivity are dominated by invasives.
The use of land for recreational purposes is limited.
Some invasives pose a risk to human health.
29 Worst Invasive Plant Species in the United States
When we visit plant nurseries, we are often drawn to the aesthetically appealing ones. We excitedly bring them home and include them in our gardens, not knowing that they can cause problems in our whole landscape.
Some invasive plant species in this list are exactly like that. They look really desirable and pretty on the outside, but their true nature becomes apparent after a while.
Several plants in this list are considered native in one region and extremely invasive in another. Do not be confused, and do further scientific research on each plant if you want to know more about them.
1. Purple Loosestrife
Scientific name: Lythrum salicaria
Purple Loosestrife is an invasive plant species that originated in Europe and temperate Asia. They were first introduced in the U.S. in the early 1800s to serve as medicinal and ornamental plants.
Since it arrived in North America, Purple Loosestrife has seriously invaded roadsides, wetlands, and disturbed areas. To give you a picture of how uncontrollable they are, each plant can grow up to 30 flowering stems that can release 2.7 million seeds into the earth each year.
In an effort to eradicate them, both the American and Canadian governments released two European beetle species, which are natural enemies of Purple Loosestrife, in the year 1992.
2. Japanese Honeysuckle
Scientific name: Lonicera japonica
Japanese Honeysuckle traces its origin to Eastern Asia, specifically Japan, China, and Korea. They were brought to North America in the late 1800s to help with soil erosion and wildlife cover.
Unfortunately, this species is now considered invasive because it can adapt to different environmental conditions, and they compete with whatever plant there is in the area by producing toxic chemicals. They are very aggressive that they are commonly found in roadsides, forest edges, fields, and floodplains.
Since birds usually eat their fruit, they spread fast and form dense patches.
3. Japanese Barberry
Scientific name: Berberis thunbergii
This invasive shrub from Japan was introduced in the U.S. as an ornamental plant in the 1800s, is now very detrimental to many forest lands found in the Northeast.
It dramatically impacts agriculture due to being hosts of black stem rush, a disease that can cause significant damage to grains. It can also shade out all the native species in a forest, even the undisturbed ones.
This plant is densely thorned and is commonly spread by birds. If not prevented from growing, they have the ability to invade native lands, lessen wildlife habitat, and restrict different forms of recreational activities.
4. Norway Maple
Scientific name: Acer platanoides
Similar to the invasives formerly discussed, Norway Maple is able to spread quickly. This is a native plant in Europe that was introduced in the United States in the year 1756.
Since this tree is very much adaptable, it is planted everywhere to provide shade. However, as time progresses, this has proven to be a dominant species since it tends to displace native trees, especially in the Northeast and Northwest.
This tree’s common victims are the native maples and some wildflower species.
5. English Ivy
Scientific name: Hedera helix
English Ivy is an evergreen groundcover brought to the U.S. in the early 1700s by European colonists. It can crowd out weeds in a landscape, and it also looks extremely pretty, so most homeowners fall for their charm.
Many aren’t aware that English Ivy can also be quite destructive since they can completely cover and topple trees, and they can supplant native plant species in a forest. They are so vigorous that they are already considered seriously problematic in the Pacific Northwest.
6. Kudzu
Scientific name: Pueraria Montana
The Kudzu vine belongs to the pea family, but if you expect them to be a normal type of crop, you’ll be disappointed.
This invasive species was introduced by Japan to the U.S. in 1876 at the Philadelphia Centennial Exposition. Initially, it is known to be an ornamental plant and a forage crop.
The Soil Conservation Service even planted a million acres of Kudzu from the 1930s to 1940s to eradicate soil erosion. Eventually, they realized that this plant grows one foot a day. This means that they can easily kill trees by toppling and girdling them.
7. Chinese Wisteria
Scientific name: Wisteria Sinensis
Wisteria Sinensis, or Chinese Wisteria, is another flowering plant from the pea family. It has been growing in the U.S. since 1916 and is widely known to be an ornamental plant.
There are currently 19 states in the United States that find this plant invasive. Its woody vines can quickly be established, whether in full or partial shade.
There is evidence that it can climb shrubs, trees, and even manmade structures. Their vines twine around their hosts, which causes destruction in just a matter of time.
8. Butterfly Bush
Scientific name: Buddleia davidii
Butterfly Brush is an attention-grabbing plant commonly found in home landscapes. However, no matter how helpful this shrub may look for butterflies and other types of pollinators, we cannot run from the fact that it is very invasive.
This species usually escapes cultivation and wreaks havoc among natural areas. It is time-consuming to remove them, and in some cases, it is impossible to pull them out.
Several states have already banned this plant’s propagation, and they really should since this can rapidly invade riverbanks, open fields, and reforested areas.
9. Black Locust
Scientific name: Robinia pseudoacacia
This tree which is a native of Pennsylvania is causing problems in Massachusetts, Connecticut, and Maine. They were once purposefully planted in the Midwest, Texas, and West Coast in the hopes that they can control erosion and fix the soil’s nitrogen level.
Right now, this invasive species spread rapidly through stump sprouting and root suckering. It forms dense colonies which shade most forest openings and prairies, which lead to the death of native vegetation.
This tree’s bark, seeds, stem, and leaves are very much poisonous to horses.
10. American Bittersweet
Scientific name: Celastrus scandens
This type of climbing vine tightly twines itself on its support, whether it is a shrub, a tree, or a masonry structure. Do not mistake this as the Ornamental Bittersweet because they are far from being the same.
The American Bittersweet produces an autumn fruit that many people find attractive because of its yellow-orange color. However, this crimson-berry like fruit should not be consumed by humans because it’s highly toxic.
Aside from bearing a toxic fruit, American Bittersweet can grow out of control on abandoned buildings and roadsides. They are capable of taking over an entire landscape in just a matter of months.
11. Japanese Knotweed
Scientific name: Polygonum cuspidatum
This invasive plant species, a member of the buckwheat family, was first popularized in the U.S. in the late 1800s. It was then used as an ornamental and erosion control plant.
The funny thing is, during the 1930s, this plant is even sold in various catalogs, even though many people know that it is problematic to include it in a landscape.
It can grow up to 15 feet tall, and its stems resemble that of bamboo. You’ll often see this invasive in old farmsteads and homes, low-lying areas, and near streams and rivers.
12. Common Buckthorn
Scientific name: Rhamnus cathartica
This can be called a small tree or a large shrub since it only grows up to six meters. Its leaves are egg-shaped, and they’re dull green in color, so it’s pretty easy to identify.
It was said that this invasive species was introduced to North America from Europe in the 1800s as a windbreak and ornamental plant. But in the 1900s, it was discovered that it forms thick hedges, preventing native plant and herbaceous species regeneration.
Viable seeds can remain in the soil and sprout for up to six years, so they are tough to eradicate. There are concerns that the Buckthorn is changing the fuel characteristics of forests, increasing the likelihood of forest fires.
13. Dame’s Rocket
Scientific name: Hesperis matronalis
Dame’s rocket used to be a garden favorite, but it is now considered a lethal plant that can rapidly invade private and surrounding landscapes.
How does this plant disperse uncontrollably? They have seed-bearing pods that can pepper seeds to many wildlife, which they then carry across different places.
Because this plant grows extensively, it can infiltrate waterways, tree lines, farm fence rows, and wetland margins. This invasive plant also colonizes most natural areas like savanna, prairie, and streams.
14. Burning Bush
Scientific name: Euonymus alatus
This shrub native in Asia has long been popular in the United States as an ornamental plant. The flame-red foliage and the red berries it produces during the fall are stunning; that’s why many homeowners include this in their landscape.
Despite its beautiful appearance, Burning Bush can effortlessly displace native species in any area because they grow rapidly and can reach a height of 20 feet.
Another issue about this plant is that the berries they produce often drop and reseeds. Eradicating them is hard since birds also carry these seeds to other areas.
15. Giant Hogweed
Scientific name: Heracleum mantegazzianum
Giant Hogweed is a perennial which belongs to the carrot family. This is originally an ornamental plant from Southwest Asia, but it is now naturalizing in some parts of North America.
According to most reports, this invasive species commonly grows along ditches, streams, and roadsides. It also invades other areas like old fields and woodlands.
What’s more alarming about this plant is that they often cause soil, rocks, and other stream banks’ materials to fall in the water. This threatens species living in the streams, so many states have already banned them from being planted.
16. Bamboo
Scientific name: Bambusa vulgaris
If you want some sort of privacy plant that can shield your property from your nosy neighbors, you may have thought of raising bamboos.
Unfortunately, this is not recommended since this giant grass is one of the most invasive plants in the U.S. Yes, its slender form and the shade it provides seem suitable for urban areas. But trust me, when they start growing roots in your property, they are incredibly uncontrollable.
They can grow up to 20 feet and form clumps in just a matter of months. If you have them spreading on your property, you may want to call a professional to get them under control as the roots are very aggressive and far-spreading.
17. Winter Creeper
Scientific name: Euonymus fortunei
Winter Creeper is an evergreen perennial from Japan, China, and Korea. It was initially introduced in the U.S. as an ornamental plant, but it is now causing significant land damages in various states.
This vine is reported to invade forest margins and openings. It can grow across the ground, killing herbaceous plants and climbing trees by clinging to their bark.
Like all other Euonymus plants, Winter Creeper is also poisonous when eaten in large amounts. However, since they are not that toxic to birds, they eat this plant’s berries and scatter their seeds to various places.
18. Sacred Bamboo
Scientific name: Nandina domestica
This plant species, also called heavenly bamboo, is not really that “heavenly.” It used to be an ornamental plant in most landscapes, but after a few years of being brought to the U.S., this small shrub has managed to escape and invade forest interiors as well as their edges.
Historically speaking, this plant came from Asia and reached North America during the early 1800s. It is seen invading forests located in the Southeast U.S. due to its ability to be shade tolerant.
19. Chinese Privet
Scientific name: Ligustrum sinense
Chinese Privet is a type of semi-evergreen shrub which was introduced to the U.S. in 1852. It is a native of Europe and Asia, and it grows up to 20 feet tall.
Because there are many privet species that currently exist, distinguishing them from the others can be difficult. It can create dense thickets which can invade riparian sites, fields, fencerows, forest understories, and roadsides.
Aside from this, they can shade native plants and reduce tree growth.
20. Autumn Olive
Scientific name: Elaeagnus umbellata
Autumn Olive is a woody plant brought to the United States in the 1800s. This used to be viewed solely as an ornamental species, but it was later used to provide cover and food for wildlife and prevent soil erosion.
Currently, this plant brings major hassle instead of strengthening erosion control. It grows uncontrollably in grasslands, meadows, roadsides, and forest edges, where it quickly displaces the native plants.
The Autumn Olive’s roots allow this plant even in unfavorable soils. When this plant grows, it can produce 200,000 seeds from a single plant yearly. Unfortunately, cutting or burning Autumn Olive’s only propagates them more.
21. Bradford Pear
Scientific name: Pyrus calleryana
An article published by the Washington Post headlined, “Scientists thought they had created the perfect tree. But it became a nightmare” the existence of Bradford Pear as an invasive plant was discussed in detail.
Initially, the U.S. Agriculture Department scientists label this plant as a rootstock for the common pear. However, in the late 1990s, its invasive tendencies progressed’ Right now, it is already tagged as a weed in 19 states.
Birds disperse the seeds of this tree. They can easily invade open spaces like woodlands, pasture, and grasslands by forming dense thickets. Its flowers also produce a foul smell which can be compared to that of a rotting fish.
22. Common Periwinkle
Scientific name: Vinca minor
Common Periwinkle, a vine-like plant that can also trail groundcover, traces its origin from Europe. It is introduced in North America as an ornamental species during the 1700s, but it managed to escape cultivation and invade most natural areas in some parts of the Eastern U.S.
Since this plant likes shady areas, forests and old homesites are often their target. Periwinkles form extensive and dense mats, which quickly displace woody plants and native herbaceous species on the forest floor.
The only good thing about this invasive is that it can be pulled by hand, raked up, or dug up. However, it is not suggested to mow areas with Periwinkles because it doesn’t help eradicate them.
23. Princess Tree
Scientific name: Paulownia tomentosa
This invasive plant species also goes by the names Foxglove Tree, Royal Paulownia, and Empress Tree. It was originally from Central and Western China, but the Dutch East India Company then brought it to Europe and America in the 1830s.
As per historical records, the Princess Tree was initially used for timber, ornamental, and medicinal uses. It is also highly-priced back then because it can be used for carving.
Currently, this tree is invading stream banks, forests, and rocky habitats in the Eastern part of the United States. It can sprout prolifically, and it can survive cutting, fire, and even bulldozing. What’s more, it can adapt to a wide variety of environmental conditions like drought and the existence of acid or infertile soil.
24. Sweet Autumn Clematis
Scientific name: Clematis terniflora
Do not be deceived by the good looks of this plant because this can quickly overwhelm your landscape.
Sweet Autumn Clematis or Sweet Autumn Virginsbower came from the Buttercup family. It is a native plant of Japan and China, but it reached U.S. lands as an ornamental vine being sold in nursery trade. The flowers it produces are white, and its leaves are usually compound three leaflets.
Today, Sweet Autumn Clematis is invading the Eastern United States, particularly forest edges, streams, and roads. It grows a dense form blanket that blocks the sunlight for other vegetation.
Curious as to what exact states consider this plant invasive? They are Virginia, Tennessee, Alabama, Delaware, Illinois, Georgia, Florida, New Jersey, Maryland, North Carolina, and South Carolina.
25. Weeping Lovegrass
Scientific name: Eragrostis curvula
Weeping Lovegrass is a type of perennial bunchgrass that rapidly grows, especially during the warm season. Its leaves are droopy, and the tips are almost reaching the ground, so they are called “weeping.”
Historically speaking, Weeping Lovegrass is a native plant of Southern Africa, but it was brought to the U.S. soil and has since established its roots in many areas.
Often, you’ll see this invasive grow in forest communities, chaparral, woodland, and roadsides. It is especially keen on growing on burned sites as well.
26. Japanese Spirea/Japanese Meadowsweet
Scientific name: Spiraea japonica
Japanese Spirea targets various habitats in the Eastern United States, including forests, fields, stream banks, and other disturbed areas. This is an invasive shrub that can grow up to six feet or 1.8 meters tall.
During the late spring, Japanese Spirea produces attractive clustered pink flowers at its branches’ tips. Although this is something that might convince you to purchase this plant from nurseries, I suggest that you skip doing so because it can displace other plants in your landscape.
You should also know that it spreads rapidly in natural areas because it quickly escapes our landscapes. Surely, you don’t want to cause damage in your community.
27. Ajuga
Scientific name: Ajuga reptans
The Ajuga plant, which is also called Bugleweed or Carpet Bugle, is a wide spreader. It is quite long-lasting as it can tolerate a wide variety of soil conditions.
If you are planning to add this to your landscape, think again. It can be hard to control this plant species because it spreads through stolons and rhizomes. This is highly problematic, primarily for small perennials and annuals.
Another thing to note about this plant is that it can spread by long runners. It can easily escape boundaries and invade your neighbor’s lawns and flowerbeds.
28. Lantana
Scientific name: Lantana camara
This plant which is still being sold in most nurseries in the United States, poses a major ecological threat by forming dense thickets. It is not recorded when this perennial shrub reached the U.S., but one thing is for sure, this is causing headaches to countless homeowners.
According to Texas Invasive Species, this plant has oval leaves which can be yellow-green to green in the shade. It produces tubular flowers, which can vary in coloration.
Like other invasives, this plant species can dominate plantations, orchards, and forest communities. It is also considered a significant pest in Florida since it reduces crop vigor and productivity.
Aside from all these, Lantana’s leaves and unripe fruit are poisonous to children and livestock.
29. Garlic Mustard
Scientific name: Alliaria Petiolata
This invader looks innocent enough with its pretty little white flowers on tall green stems, but don’t let it fool you. Once it invades your yard, it is very difficult to eradicate.
Garlic mustard is considered a class A noxious weed. It typically stands about 2-3 feet tall with scalloped, kidney-shaped leaves.
It spreads by seeds and is a self-pollinator. This means that one plant can end up overtaking an entire area, and a stand of these plants can produce 62,000 seeds per square meter. It also produces chemicals that inhibit the growth of other plants.
It can rapidly displace native species in forests and along riverbanks and has filled many unsuspecting back yards before the homeowners even realized it was happening.
It originally came over from Europe as a food plant.
3 Tips on How to Get Rid of Invasive Plants
Removing invasive plants in your landscape is not something you should put off since this would have significant impacts on the environment and economy once they are able to escape your yard. This being said, here are some tips to successfully rid your yard of these unwelcome plant species:
Tip #1: Research
Before you do anything on the shrubs, vines, or trees that are growing uncontrollably in your garden, make sure that it is indeed an invasive species. You might be removing an endangered plant, for all you know.
Tip #2: Remove invasives using the appropriate method
Here are some of the methods you can utilize in removing invasive plant species in your landscape:
Pulling and Digging: If the invasive plant is still present in a limited number, you can pull and dig them out in the traditional manner. However, you have to ensure that you remove the plant’s root system because this is the leading cause of its propagation. It can be a daunting task, but sometimes brute for is the only way to go.
Biological Method: This uses insect predators or plant diseases to target certain plant species.
Cutting or Mowing: By cutting or mowing, you interrupt the plant’s photosynthesis process since the leafy materials are removed. If you have invasives in an area that can be moved, this is often the easiest method.
Suffocation Method: You can put a UV-stabilized plastic sheet over the area affected by the invasives and leave it for two years. Yes, you read it right, two years! When you remove the plastic, the plant underneath will surely be dead after that span of time.
Chemical Method: Using herbicides is one of the most effective methods in removing invasive plants in your garden. However, you first have to consult your state’s rules regarding herbicide use.
Organic Method: This method is all about experimenting with natural ways to kill invasives. Some standard techniques use vinegar as a herbicide alternative and watering plants with boiling water.
Tip #3: Replace
Getting rid of the invasive plant in your landscape doesn’t end in removing it through the various methods I discussed in my previous tip.
You should also replace the holes the plant left so it can no longer establish its roots in your soil. To find suitable replacements, you can check out various articles on the web, or you can seek the help of expert gardeners.
It would be better to find a native plant to replace the invasive you removed because this is relatively easy to grow. However, if you want something similar in appearance to the invasive, there are tons of options to choose from. You have to invest time researching and visiting plant nurseries.
Final Thoughts
If you’re feeling unsure about beautifying your garden because of all these invasive plants you have to be cautious of, hear me out. The very reason why I wrote this article is to guide you in identifying them.
Now that you know all the 29 invasive plant species in the United States, you wouldn’t unknowingly buy them from plant nurseries. You’ll be more careful in choosing the plants or trees to include in your garden, which significantly contributes to our ecological balance.
It is possible to upgrade your landscape without causing harm to our environment. That is if you will tick off the invasives in your list. There are so many alternatives available, and you can easily access a list of them through a bit of web research.
Are you looking for the perfect plant to fill in the borders of your garden and brighten it up with colorful, showy blossoms that are dummy-proof to maintain and super resilient? Look no further; the Yarrow plant is virtually care-free and produces hundreds of radiant flowers throughout the spring and summer months. They look great in the garden and make an excellent addition to any bouquet. Maybe you should consider Using Yarrow in Your Garden.
This beautiful flower will look like a large circular bloom showing off to the summer sky from a distance. However, at a closer look, you will note that the Yarrow flower is a cluster of tiny flower heads all packed together, standing tall on a long sturdy stalk with soft feathery leaves.
Variety
Yarrow comes in almost every color in the rainbow, with the most common colors being white, yellow, pink, purple, red, or rose.
As an added bonus, the yarrow plant is a deterrent for insects and mosquitos as well as rabbits and deer, so they can be used throughout your landscape to help deter these pests.
These blooms are perfect pollinators, so be ready for the influx of bees and the added magical touch to your garden with all the butterflies they attract.
For hundreds of years, the yarrow flower has also been used for its medicinal properties, cosmetics, and sometimes even magic.
Beware that the yarrow grows so well it can be invasive and take over, so be conscious of what you are planting it next to and be ready with your shovel if it starts to overstep its boundaries.
Although there are over 100 species of the genus Achillea, the most common yarrows grown are:
A. clypeolata (moonshine yarrow).
A. filipendulina (fern leaf yarrow).
A. millefolium (common yarrow).
A. ptarmica (pearl yarrow).
A. taygetea (Egyptian yarrow).
Wild yarrow
You can find this popping up in meadows, along country paths, and even the backyard. Yarrow growing in the wild can have large flower heads with clusters of either white or yellow tiny flowers. This is technically the same plant as common yarrow; it is just listed as wild due to where it is located.
Common Yarrow
Derived from the group Achillea millefolium are many different types of what are known as the common yarrow. The rainbow of colors that you can find in this group is endless. From the bright, vibrant reds, like paprika and rust, to the soft pastel shades of apricot and salmon, there is something for everyone in this group of multiple cultivars. Perfect for cut flower enthusiasts because it compliments any flower arrangement.
Dwarf Yarrow
Unlike its peers, the dwarf yarrow (dwarf woolly yarrow, Achillea x lewisii), as its name suggests, lies closer to the ground and is perfect for rock gardens or to add some color to the edge of a path or driveway. This version of the yarrow has light yellow, low-lying flowers.
Hybrid Yarrows
Named after Queen Elizabeth’s coronation, the award-winning Achillea ‘Coronation Gold’ is a spectacular yarrow that is extremely easy to grow and produces excellent results even if you neglect it. From late spring to late summer, the pleasantly aromatic three feet in height, Coronation Gold is a gardener’s favorite, boasting bright yellow flowers.
Fernleaf Yarrow
Another significant aspect of the yarrow is its feathery light green-grey foliage, which the Achillea filipendulina yarrows are noted for. These yarrow flowers can be as tall as five feet. Some popular varieties include; Cloth of Gold, Parkers Variety, and Gold Plate.
How to Grow Yarrow Plants
The Yarrow plant needs little preparation, and once you have germinated the seeds, it’s a matter of raking some soil and popping them in the ground to watch them grow.
Yarrow plants bloom from June to September, so the ideal planting period is early spring, just after the last frost.
Growing from Seed
The yarrow plant is very easy to grow; you are in for a treat from planting to maintenance.
If you choose to grow from seed, the best way would be to start the seeds indoors, 6-8 weeks before you plant them outside.
Plant them in a seed tray, right on the top of the soil.
The optimal soil temperature is 15 to 18°C (60 to 65°F).
Be sure that the soil is not too damp to avoid any roots rotting.
Observe the germination process, which should take about 1-2 weeks. You can cover the seeded area with plastic wrap after the first week to speed it up.
Transplant
You can either transplant these seedlings into pots until they are larger using high nitrogen fertilizer, or you can plant the seedlings straight into the ground about ½ an inch deep. Be sure that the last frost has well and truly passed.
They love dry sandy soil with clay for ideal results. This hardy plant will even cope with being beside the sea; the salty ocean air can’t faze the yarrow. Yarrow plants can handle drought, but they will not tolerate wet soil.
They are not thirsty little flowers and only require about ½ an inch of water a week. Depending on the area, you could potentially go an entire summer without having to get the hose out, but a little water will keep them vibrant and looking fabulous.
Diseases
Yarrow plants are not likely to catch diseases; this is a sturdy plant and unlikely to become affected by disease or pests.
If you cut the ‘deadheads’ off the flowers in mid-summer, it will likely produce a whole other set of blooms before the season is out.
You can head to the garden center at the end of summer and pick up some post-bloom yarrow plants on sale. Bring them home and chuck them in the garden, and low and behold, with zero maintenance, you will have flowering blossoms come next summer.
Final Words
The Yarrow plant represents everlasting love, and who doesn’t want a bit of that in their world? Plant any of the vast number of yarrow species in your garden, and you will surely be happy with the vibrant, cheerful results year in and year out.
Large trees are a significant feature in any landscape. Each tree is unique, and they add a great deal of natural aesthetic appeal to our landscapes. But, they do so much more than that.
Trees shade our earth, help prevent erosion and clean our air, soil, and water. Trees and landscaping go hand in hand. Plant a tree today in your landscape.
Shrubs, flowers, and groundcovers are nice, but somehow, a landscape doesn’t look complete without trees.
What Are Common Problems for Trees and Landscaping?
Although large trees provide cool, shady areas and beautify the scenery, they can cause a few minor problems for the area below.
Since these big, mature trees shade the ground, absorb water and take in nutrients, it can be challenging for some plants to grow below them. Often, it’s the dense shade that these large trees provide that causes the most problems for plants below.
I have worked in yards where the homeowner adds topsoil and re-plants grass under a large tree for many years in a row in an attempt to keep his lawn alive below the tree. It’s not the tree’s fault that your grass won’t grow there. It’s just doing what trees do. You need to stop fighting mother nature and treat this area differently.
No matter which mix of grass seed you buy, grass just doesn’t grow well in the shade.
You can paint a beautiful scene with your trees and plants with a little know-how. Your tree doesn’t have to be alone in your landscape!
Some Big Tree Solutions
Some clever tips for landscaping around trees are: adding mulch (there’s a proper way to do this!), incorporating bold color using flowers, mixing up the plants underneath, and putting in pretty garden accents. By doing simple things such as these, you can do so much to “dress up” trees for your landscape. We’ll elaborate on each tip in the following section.
But there are some things to keep in mind and avoid when landscaping around trees. Aside from advice, we’ve included some common mistakes people make when landscaping with trees and how to steer clear of them.
Grow Plants Under the Trees
When planting under trees, you need to choose plants suitable for the light conditions. Knowing the different types of trees and the varying amount of shade they provide is important for choosing plants to add to the surrounding area.
Trees such as maple, dogwood, magnolia, and flowering cherry allow for dappled sunlight to reach the plants underneath, making them ideal for plant growth. You can easily grow a shade garden when you have these beautiful trees! Plants like Pachysandra, Periwinkle, Ivy (watch out that this one doesn’t climb too far up the tree and cause trouble), and Coral Bells should all do fine under these trees.
Most evergreens have a high density of leaves and branches, which means sunlight won’t reach the area below them as much. Almost no sunlight reaches the tree trunks. Ferns, Dead Nettle, and hostas are all shade-loving plants that will grow well under evergreens. You can typically plant right up to the trunk, but be aware that they probably won’t get much rainfall down there, so you may need to water them now and then to get them started.
Don’t be afraid to experiment with some sun-loving plants around evergreens; just make sure to plant them near the drip line on the Southside.
Be Careful
When working beneath large trees, be aware of the roots.
Removing some turf and loosening up the ground a bit with a digging fork is okay as long as you are careful, but using a mechanical tiller, edger, or sod cutter is certainly not advised. You can do a lot of root damage if you are not careful.
The last thing you want is a big dead tree in your yard!
To amend the soil under your large landscape tree, you can certainly add a bit of light topsoil or compost, just don’t pile it thick. Tree roots need oxygen, and piling the ground too high below them can cause problems. Not to mention that soil piled around the trunk will promote rot. The damage won’t be immediately apparent, but over the course of a year or so, you will notice the decline in the health of your tree. Instead, keep the soil level near the base of the tree.
Plant Annual Flowers Around Your Trees
Creating annual flower beds around your trees is an effective way to add color to your landscaping. It can add quite a flair if you use colors and patterns to highlight your new beds.
Before planting flowers around your trees, you should manually remove the grass and prep the soil, just like suggested above.
Some folks like to set an edge or boundary around their bed. You can cut a natural edge (carefully, by hand, of course), use rocks, or even brick.
Depending on the setting, it is likely pretty shady, so pay attention to the annuals you choose. You want annuals that thrive in partial shade or even in full shade. Some examples are Impatiens, Hellebores, Bletilla (ground orchid), and Torenia. These flowers are stunning and don’t require much upkeep!
With an annual flower bed beneath your large trees, you will be able to change the look of your yard every year to suit your fancy.
Add Mulch Around the Trees
Many people like to mow the lawn right up to their trees’ trunks. They plant grass right up to them and then spin that zero-turn mower around the trunk once a week for the rest of the short and damaged life of that tree. The root zone gets compacted, and the trunk gets scarred.
You may not realize it, but any scar you create in the trunk of a tree makes it harder for that tree to thrive. Also, the root zone on a large tree is very wide.
A Good Rule of Thumb
A good rule of thumb is to assume that a tree’s roots extend out at least as far as its furthest branches reach. Where the branches end is called the drip line.
The area where the water will drip when it rains.
Whether or not you create a planting bed beneath your trees, you will want to consider mulching them. Considering your trees’ huge water requirement, it will benefit the tree and other plants below it to have a two to three-inch layer of mulch. This will help retain moisture in the soil, resulting in less watering. It will also keep that mower off the roots and away from the trunk.
Never Pile Mulch at the Trunk
When mulching below a tree, never pile the mulch around the trunk.
Mulch piled at the trunk promotes rot and provides a lovely home for rodents to spend the winter and chew on your tree trunk. Instead, lay the mulch nice and thick from the drip line to within about six inches of the trunk and then taper it down to nothing as you approach the trunk.
I have seen many people use heavy plastic sheeting under the mulch around their trees. This is never a good idea as it will prevent water from getting to the tree roots and make life miserable for your trees. I wouldn’t even suggest weed barrier. While it will allow the water to pass, the barrier may eventually end up wrapped up in tree roots, making it hard on the tree and almost impossible to remove.
Add Garden Accents and Decor
What else can you put around the base of a tree aside from plants?
You have plenty of choices for garden accents and decor, such as beautiful boulders, small statues, garden benches, fountains, flowerpots, a small chair to rest on in the shade, a fairy garden, or toad house, or maybe even a rope swing!
Rocks
Plants are pretty high maintenance with their need for watering, trimming, and fertilizing. If you want alternatives to plants, you can always use strategically arranged, decorative rocks. Aside from being low-maintenance, rocks are an excellent choice for trees with roots that come above the surface. A well-placed rock or three can help protect the roots that come up out of the ground beneath the tree. Set your decorative boulders to protect the roots first and then garden or mulch around them.
Trees and a Hanging Chair
The shade from a tree can provide quite a relaxing, quiet spot. You can use the space under the tree by placing a wooden bench, stone bench, or hammock.
A hanging swing can accentuate your tree’s big, strong branches while providing a place to sit at the same time. It’s not only a nice place to read a book or relax on a windy day, but it can also serve as decor in your yard! Especially when you add plants, grass, or flowers around that special place.
Be aware that hanging too much weight on a small or dead branch can certainly cause it to break and fall from the tree. Not only would this give you a sore bottom when you swing hits the ground, but it may also give you a sore head when the branch lands on your head.
Make it Safe
Make sure to choose a big, heavy branch that doesn’t flex much under your body weight. Also, look for a branch that will get you away from the trunk so that you aren’t swinging into it.
If you will hang a swing, make sure to use a sturdy rope or chain, and please protect the tree branch. Rope, wire, chain, or cable will all cut into the bark of a tree. If you don’t protect the bark, you will eventually have a dead branch. The goal is to protect the bark without holding moisture against it. The larger the protector is, the less force per square inch you will be applying to the bark. Most people choose to use rubber hosing of some sort. Even with protection, the rope may still do damage, so be sure to check them often and maybe move them a bit so that the bark does not get damaged.
The ideal trees for hanging chairs and swings are hardwood trees. Oak, hickory, and cherry are some of the best sturdy trees that can support your swings and chairs.
Build Your Deck or Patio Around a Big Tree
Building anything around or under a tree is not ideal for the structure or the tree. I have seen many people try to save trees when building their house. They ask contractors to watch out for the trees, but equipment drives over roots and compacts the soil, materials get stacked beneath the tree, etc. Any time that you stack on build in or disturb the ground above tree roots, you risk irreparably damaging the tree. Most of these trees will eventually die unless an area at least as wide as the drip line is cordoned off and nothing is put there, no soil is added, and the surrounding grades aren’t changed significantly, leading to extremes in moisture.
Having said all of that, If you only have limited space and you need a patio or deck, and you would like to save the tree that currently resides in that space, maybe you can build around it. If you have another choice, take it. But, if the choice is to cut down the tree or build around it, it might be worth giving it a shot.
Given a choice, I’m sure the tree would vote that we try to build around it. I’m sure that a tree would also prefer that a deck be built around it rather than a patio. Either way, always plan for the tree’s future growth and give it room. I would also recommend that you plan out your deck or patio so that if the tree does not survive, you can easily cover the space so that you aren’t stuck with a blank hole in the middle of your deck or patio.
A deck would be preferable. A Careful crew can place footings and complete deck construction while minimizing any impact on the tree. On the other hand, a solid-surface patio might be much more disturbing to the tree as it would involve prepping a base over the roots and then placing the patio material that will inevitably damage and restrict water flow to the roots.
Add Landscape Lighting
Don’t forget about those trees at night! You didn’t spend all that time beautifying your trees and landscape just for them to disappear once the sunsets.
A few well-placed up lights below a tree can really highlight its features and the yard at night.
Or, a few well-placed downlights up in the crown of a mature tree can give the illusion of a soft moonlight glow coming through the branches. Landscape lights are worthy of a whole new discussion, but they help with safety in the evening and accentuate your trees and landscape.
A Note on Planting Trees
So far, we have assumed that you have trees in your yard. But what if you don’t have any, or don’t have enough. What can you do about that? Well, quite a bit.
If you are thinking about planting some trees in your yard, you’ll first need to do some research and find trees that are well suited for your plant zone and well suited for the area in which you want to put them. Pay attention to sunlight and water requirements and the final size of the tree when fully grown. You will want to make sure that you plant it in an area where it will be happy and have plenty of room to grow.
You have many choices for where to get the tree or trees. I’m going to start with the most economical choice and move up to the most expensive.
DIY Tree Transplant
Okay, I know, any tree that you plant will be transplanted, unless, of course, you plant a seed. This is an option, but you need to be a really patient sort of person to grow trees from seed. So, we will go right to transplant. It is certainly possible for you to transplant your own tree. Trees would rather be transplanted while they are dormant, so late fall is probably the best, and mid-spring, when they are pushing new growth, is the worst time of year.
Maybe you have a neighbor or a parent who has a few saplings growing where they don’t want them, and perhaps they’d let you dig them up and move them to your property. Transplanting is relatively straightforward and easy; it will just take a bit of work.
Digging it Out
You will want to prepare the hole for the tree ahead of time so that the tree doesn’t sit out of the ground for any longer than necessary. Dig out a wide, round dish-shaped hole in the approximate size you think you will need.
As you dig, pile the ground around the perimeter of the hole. This will make it easy to backfill the tree when planting, and the excess soil will act as a soil ring to retain water for the first year or so.
Next, go dig out the tree. Trees with shallow fibrous root systems like the Arbor Vitae are much easier to transplant than trees with deep root systems like an Oak, so choose wisely. When digging out your tree, your objective is to damage as few roots as possible and to get it back into the ground quickly.
Pick Your Day
It would be best if it were not a blazing hot and sunny day. Overcast, moist, foggy days are great for tree transplanting. While it is important to damage as few roots as possible, you will be damaging roots; there is no way around it. Ideally, the tree is small enough that you can get the majority of the root system and the soil surrounding them dug out in one neat and tidy ball.
Well, I hate to burst your bubble, but that is not likely to happen. I’ve been in the industry since 1987, and I’ll tell you that more often than not, you retain some of the soil, you cut more roots than you plan to, but the tree still lives. It is rare to get just the right type of soil and just the right tree to get it just right.
Add to that the fact that if you are still reading this, it is likely your first time, and your goal should not be perfection but simply to keep the tree alive.
Get it Planted
On that note, pick a tree that is small enough to handle. You will need to be able to lift it and transport it. Once you begin, don’t stop until it I back in the ground, fully planted and watered. I guarantee that you won’t get it perfect, so just make it quick. The more time the tree spends out of the ground, the more likely it is to die.
Dig quickly, wrap it in wet towels or blankets, transport it and get it into the ground, standing upright, backfilled, and water the heck out of it. You want to make sure that it is planted to approximately the same depth as it was where you dug it out. Don’t bury it really deep. Then check on it every day and water accordingly. You just cut a bunch of roots, so water it deeply for several weeks.
Alternatives to DIY Transplant
The above description is the cheapest route.
The following are all options that get more costly as we go. The steps are slightly different, but many of the concepts are the same. Don’t mess around and disturb roots, do it on a cool day, plant it at the same height, and water it well applies to all of the alternatives below.
Buy a Tree and Plant It Yourself
Go to your local garden center and buy a tree.
This is relatively cheap and is more likely to be successful than digging one out yourself, since presumably, either the plant was grown in the pot you purchased it in, or it was balled-and-burlapped by professionals who know what they are doing. Many garden centers even warranty their trees to live for one year.
When buying a tree, keep in mind your site restrictions and physical restrictions. Once again, you will be taking this home and planting it. Choose one that you or you and your helper can lift.
Hire a Landscaper to Plant a Tree for You.
You can certainly hire a landscaper to plant a tree for you. The landscaper should be willing and able to come to your house, give you some suggestions and bring in a lovely, properly planted tree with a warranty. This will cost you a bit more, but it should be nice and easy.
Using a professional landscape company will likely open up many options for you regarding the tree’s size and species. The bigger you go, the more costly it gets, but having a huge, expensive tree in your yard can be instant gratification and can make a surprising difference to the look and feel of your yard. It all depends on how thick your pocketbook is.
How to Maintain Your Trees
Trees take a long time to grow and will live for generations! Please make sure that you take care of these precious trees. Although they are hardy, magnificent living creatures, that doesn’t mean that you shouldn’t keep an eye on their health.
Here are some of the things that you can do to help your trees:
Water
When newly planted, water frequently, but once they are established, they really shouldn’t need your help. Unless, of course, the tree isn’t suited for your planting zone, in which case it will require a bunch of help.
Walk around your yard every once in a while and look at the trees. Are the colors looking gray and drab? Are the leaves wilting or curling? If so, the tree needs water. Please give it a good soak. Tree roots are deep, so a long slow soak is always better than a quick blast of water.
Fertilize
Once again, if the tree is native to your area and your soils are decent, it shouldn’t need much. Your best bet will be to spread a really thin layer of aged and organic compost over the roots in the spring if the tree is relatively newly transplanted. Mulch them nicely, let their leaves fall below them and leave them there, and the tree should do just fine.
Pruning
In most cases, less is better than more. Once again, most trees don’t need our help. If you notice branches rubbing on each other or dead branches, then you can cut them off using a clean and sharp pruning saw or shears.
Otherwise, just leave them alone.
If you have ornamentals that you need to keep in a particular shape, then prune them when they are dormant and do it yearly so that they don’t get a chance to get out of shape.
Conclusion
Trees can be the gems in your landscape. They can set the stage for all other landscaping, and they can be where the important life events happen. They provide a more welcoming, natural atmosphere, cool down the place, and provide shade. It’s always worth our while to care for and plant more trees.
We hope our guide gave you helpful tips on working with trees in your landscape.
A lush, well-maintained lawn is the ideal green fill for our colorful herbaceous borders, a fantastic setting for summer picnics as well as a foraging area for native birds and animals. Keeping your lawn looking beautiful may be a problem sometimes, especially when you are new to gardening, but if you follow our Top 10 Lawn Care Tips you will have it under control in no time.
Once you’ve built your dream garden space and installed the area’s best soil and grass, how are you going to keep it looking its best? We’re going to teach you how to keep your yard looking good throughout the year. The ultimate goal is to create an environment that allows your lawn to take care of itself (other than mowing, of course). To avoid getting a dull, weed plagued lawn, follow these easy measures.
Top 10 List
Mow Your Lawn Regularly
mow the lawn
It is best to cut just one-third of the length of the grass when mowing your lawn. The time of year and current weather conditions will decide how often you need to trim, but you will likely need to cut the grass in summer at least once a week and once every two weeks in spring and fall. Regular trimming facilitates the spreading of the roots, which will help to fill spaces and obstruct weeds.
Never cut your lawn shorter than three inches. Grass height of three inches keeps the ground shaded, the grass healthy, and the weeds down. Cutting it shorter makes it harder on the grass and easier on the weeds. Make sure that the mower is well balanced and the blades are clean and sharp.
Don’t mow when it is wet, as this will cause more damage to the blades of grass. Use the lightest mower that you can deal with. The trend has been toward large, high-powered, zero-turn riding lawnmowers that compact the ground and tear out the grass at each turn. If you Cn get away with a small mulching walk behind mower, do it.
Always alternate your directions of cut so that you don’t wear the same pattern into the lawn week after week. Always use a mulching mower and mulch leave right into the lawn. Leaving the clippings in the lawn will make for a stronger lawn with better soil.
Edge Your Lawn
Edging a lawn is a fresh, trimmed lawn’s final touch. To delineate your lawn after each mowing, use a string trimmer turned on its side like the professionals, or you can do it by hand with any sort of shears. Once a year, grab an edging shovel and re-cut the natural edge wherever the lawn is creeping into the beds.
Remove the Weeds
weed free lawn
Weeds can appear anywhere in your lawn and come from many different sources. The exact type of weed is not as important as your response to it. Your best weed defense is a healthy, tall lawn with deep roots. Your second line of defense is using an organic fertilizer that contains corn gluten which helps discourage weed growth. Your third line of defense is to pick the big weeds when you see them. If you pick a handful every time you mow, you will stay on top of the problem.
Don’t use chemical weed killers as they destroy beneficial soil microbes and contaminate your groundwater.
Relieve Compacted Soil
pretty front lawn
Compacted soil is the result of heavy equipment use, overwatering, and chemical fertilizer use. Hard, compacted lawn soil will make it more difficult for your lawn to thrive and take care of itself. To alleviate compacted soil, you have a couple of choices.
If your soil is compacted, I’m guessing that you have been neglecting it and treating it poorly for a bit, so I’m going to suggest core aeration. A core aerator is a motorized piece of equipment that rolls across the lawn and digs out cylindrical soil plugs. You can rent these machines at most local rental places.
If you don’t want to spend the money on the rental, but you have a digging fork, you can use that to loosen up the top couple of inches of soil. The trick is to push the fork in, wiggle it a bit and pull it out. You are not trying to pry out chunks of lawn and till the site. This would be disturbing too many grass roots. You are just loosening soil and leaving the root intact.
Once you have aerated, you will want to spread a thin layer of well-aged organic compost onto the lawn and water it deeply. The aeration will allow the water to carry the soil amending compost down into the ground. In time, with proper care, your lawn soil will loosen up and be rich and dark with nutrients.
Water Your Lawn
watering the lawn
The amount and frequency of irrigation in your area will depend on the type of soil and weather conditions. The goal is to have a healthy lawn that never needs watering, but if you are in a very arid region and want a lawn, you may need to water it. It is best to water grass in the early morning before it gets hot to get the best results.
Always water new, young lawns, but once they get established, only water a few times a year during the driest time and always water slowly and deeply when you do. Slow and deep watering encourages roots to grow deeply, which will produce a healthier lawn. Sprinkler systems are unnecessary, expensive and create a lawn that is shallow-rooted and dependent on the sprinkler to survive. If you are in an area where there are no wild grass areas, and lawns shouldn’t grow because it is basically a desert, then you will need an irrigation system, but really, you might want to consider xeriscaping instead.
Feed Your Lawn
feed the lawn
If you have been applying weed and feed several times per year and irrigating every other day with an irrigation system, then you will need to ween your lawn off slowly. But, if you have been organic for years, you should be able to take care of any fertilization by simply applying organic compost once or twice a year. Remember, if we do this correctly, our lawn can practically take care of itself. I haven’t watered or fertilized my lawn for many years, and it is green and lush each season because it is deep-rooted, organic, and diverse.
Fill Bare Lawn Patches
Over time, if you follow all of the recommendations above, you won’t have any bare patches to fill, but right now, if you are just starting out and you’ve just aerated and top-dressed with compost, this would be a great time to get a hardy mix of grass seed and fill in any thin or bare spots. More grass equals fewer weeds, so keep that grass strong, tall, and thick.
Over-Seed Your Lawn
If your lawn has been abused for years and is really short and thin and seems almost hopeless, a good plan might be to over-seed the entire lawn. In this case, you could over-aerate it to loosen it up, then spread compost over the lawn, but not so deep that you cover all of the grass. Then sprinkle a hardy mix of grass seed over the entire lawn and rake it all smooth to ensure contact with the ground. Water this lawn as if it were new, and you will have a nice thick lawn in no time.
When purchasing grass seed, don’t get the most expensive golf course mixes. Golf courses love to have very select, fine grasses and then irrigate and fertilize continually. You want to get the hardy grass mix #2 or whatever might be the favorite of the guys that seed the big expanses along the roads and large yards. This seed can be purchased from the local feed mill, and it will be hardy and will grow well in your area.
Ignore the Pests
My advice is not to look for pests and ignore them if you do see them. Lawn pests will not wipe out a robust, healthy lawn. These creatures love the weak and pampered chemical lawns. Your healthy organic lawn will take care of itself as long as you stick to the organic treatment.
Get Your Soil Tested?
I would always vote no. Once again, if you follow the steps above, you should have no need to test your soil. If you have other plants growing throughout your yard, the soil is fine. Wean your lawn off of the chemicals and start dressing it with organic compost, and it will be fine.
Conclusion
Follow these suggestions to manage your lawn organically, and in a few years, you won’t believe how easy it is. Below are a few more suggestions related to specific issues:
Frequently Asked Questions
I have a shady spot in my yard that just won’t grow grass. What should I do?
If your grass just isn’t growing in a few spots because it is too shaded, either give up and plant a flower bed or cut down some trees to let in more sun. That’s it. Don’t bother with shade seed, etc. Grass just doesn’t grow well in the shade. This is a fact.
We are having a drought in my area; what should I do to save my lawn?
In a drought, even the strongest lawn will brownout. Don’t sweat it; this is fine. This is how grass reacts to severe drought. It will jump right back when it starts raining again. Unless, of course, you’re in a dust bowl type of drought that lasts for years. In this case, forget grass altogether; it is the least of your worries.
I have an area in my lawn that is always wet, and it just won’t grow grass. What should I do?
if you have wet areas in your lawn that just won’t grow grass, you have three choices. You can re-grade the area to allow the water to drain out; you can install a French drain system to drain the water or give up and plant some plants there that like wet soil. That is it, no other options.
What should I do if my soil is really sticky and clay-like and my grass doesn’t grow well?
If your soil is very stiff and sticky like clay, you can aerate more and top dress with a sand and compost mix. Eventually, it will come around, but it may take several years.
What should I do if my lawn has a lot of thatch?
Thatch only occurs on pampered and chemically treated lawns. A healthy organic lawn has enough bacteria and microbes in the soil to break down thatch, so it just isn’t a thing. Treat your lawn organically as suggested above, and that will be a thing of the past.
Anyone planning to design a new landscape for their yard understands how challenging it can be to get started and how challenging it can be to create a consistent look. With so many options available to you, it just might make your job a whole lot easier if you decide to stick to one of our top 5 landscaping themes for your yard.
Landscape Themes Vary
We know that themes vary widely, and only our imagination can limit our vision. However, you shouldn’t worry so much about the challenges of picking a theme because once you’ve finally decided on it, all the great ideas will flow naturally.
You should also be aware that while choosing a theme may help you decide on certain elements that you want to incorporate into your landscape, it isn’t necessary to select a specific theme and adhere strictly to it. You can always create your landscape the way you envision it.
Choosing a theme simply helps you make decisions and helps keep the look of your property more consistent. We’ve all seen the properties that are just a jumble of plants and beds with no real order or theme. This can detract from your yard’s value and be very visually distracting.
Add Your Own Personality
A beautiful landscape is an excellent addition to your already beautiful home infrastructure. With a theme, a personality will be added to the garden as it sets the property’s tone.
Here we have a carefully crafted list of the top 5 most popular themes that will help you envision the future landscape of your dreams.
1. Mediterranean style
If you love the styles of Greece, Italy, and Spain and if you have wanted to move to these places but can’t, why not decide to bring these countries right to your backyard? You can create a landscaped garden that resembles a lot of the places mentioned, and the theme that is perfect for that is the Mediterranean style.
Mediterranean-style gardens scream elegance. Landscapes in this theme are inspired by combining laid-back softscapes with formal accents. Some of the Mediterranean garden’s popular features are the tiered fountains, bocce ball courts, Roman columns, herb gardens, and terra cotta pots and colors.
The most common softscapes used in this theme are plants that provide vibrance, texture, and structure. You can pick out citrus trees alongside cypress trees and ornamental grasses for your Mediterranean property.
The people in the Mediterranean love to socialize, dine outdoors, and do gardening. With that, bocce ball courts are prevalent in this style. This is an Italian game that can be traced back to the Roman Empire.
Rome is well known for its majestic Trevi fountain, which has inspired many landscapes in European courtyards to have tiered fountains of their own. These tiered fountains are usually situated mid-yard and become the center of attention with their carvings and statues.
With Italian and French people preparing such scrumptious meals, it is not surprising that they grow herb gardens in their backyards. In the past, the people near the Mediterranean use to grow herbs for culinary purposes and medicinal reasons.
With the greenery from the softscapes and the terra cotta colors’ warmth, this theme will surely make you feel like you live in the Mediterranean regions.
2. Tropical style
Many of us dream of tropical beaches when we think of vacations. If your climate will allow it, why not bring the vacation to your yard? Tropical-themed backyards will make you feel like it’s summer all year long.
A tropical-themed landscape’s fundamental elements are foliage, vibrant colors, and any form of water feature. A beautiful pond surrounded by colorful blooms and lush greenery sounds about right.
Be aware that you need to keep your climate at the top of your mind when considering this garden theme. It does you no good to dream tropical if you live in Zone 5.
Lush foliage is the most popular feature of a tropical garden. Large leaves of many beautiful and healthy-looking shades of green, along with contrasting textures of both large-leafed and long-stemmed plants.
It is crucial to break up the lush green foliage with bright shots of color by using large bloomed flowering plants. Fill the area with plants of varying heights to create that lush, full tropical feel.
You can pick out palm trees to provide shade in your garden. There are many tropical garden plants to choose from to achieve the rainforest or jungle-themed look that you desire.
You can start with planting caladiums as they are vibrantly colorful and will add a pop of color to your lush and lavish greenery. Hostas are also a great option as they are colorful and are, most importantly, considered to be hardy plants thus making it a perfect and safe choice for a tropical garden in colder areas. Cold hardy plants with broad and lush leaves can give you a tropical garden look even if you are on the fringes of an area considered semi-tropical.
Should you wish to have plants native to tropical regions and your climate won’t support them, you can pick out garden plants that can be wintered indoors. Plumeria, cannas, colocasia, and lilies are some examples. You can simply return them to your garden in spring.
It is also essential to remember that colors should be kept vibrant. Bright yellows, oranges, and reds should be used as accents to your garden as they resemble the tropical birds in rain forests. You should pick out Japanese and Siberian iris plants, which have slender leaves with flowers that highly resemble butterflies.
It is also vital to add water elements in a tropical-themed garden. Depending on your property’s size and layout, you may want to consider a pool, pond, waterfall, or even a fountain. The sound of flowing water will spread relaxation throughout your garden.
3. Japanese Zen Style
The Japanese love to meditate so much that they bring meditation to their backyard. Nothing else says calm better than a Japanese zen-inspired garden. Since it focuses on minimalist designs, it is arguably the most straightforward garden style to maintain
.Japanese zen gardens are designed for peaceful thinking. They are traditional gardens from Buddhist, Taoist, and Shinto philosophies and beliefs that can provide a spiritual haven for those who wish to visit.
You can add a Karetaki, or dry waterfalls, to your garden to create a Japanese zen look. A Karetaki can be created by designing and arranging stones, gravel, and sand to symbolize a waterfall but without the water.
To build on the waterfall idea, you can incorporate a dry stream bed at the end of the dry waterfalls. A layer of white sand or gravel can create the dry stream. This is called Karenagare, which means raked sand.
Kogetsudai can be placed in your Japanese zen garden. This is gravel shaped into cones that represent the mountains of Japan.
Rock sculptures, or Karensusai, are also important in a Japanese zen garden. Rocks can symbolize the five elements: metal, water, wood, fire, and earth.
Reisho rocks can be used to symbolize the firmness of metal.
Taido are tall rocks that stand for wood and are often designed and arranged with reishoi.
Earth can be symbolized by kikyakui rocks, which are turned onto their sides on the ground.
Flat shintai rocks will represent flowing water.
Shigyo rocks symbolize fire.
To create a contrasting effect to the gray tones of the earlier mentioned features, moss and evergreens can be added to create a pop of green color. Japanese maple trees and azaleas are great accents also.
It is important to pick perspective and focal points in Japanese zen gardens. Be aware of where you will view your garden from and what elements your vision will be drawn to. Plan ahead and create sitting areas in just the right spots to place your guests at the absolute perfect location to view and enjoy your Zen creation.
4. Italian style
Italian-themed landscapes are loosely based on the Renaissance to blend drama and elegance. Italian landscaping features classic and theatrical elements. Symmetry and order are essential characters in an Italian-themed garden. They are termed “formal” gardens and have heavily influenced the French-themed landscaping style.
You can use heavy iron gates to create a dramatic entrance. This will provide a formal, structured look and give you much-needed privacy and security.
Upon entering your garden, noticing a citrus scent will engrain the memory of your Italian garden on your guests’ olfactory memory, ensuring that they will envision your masterpiece every time that they catch that scent. The smell of sweet oranges, lemons, and grapefruit can add a wonderful fragrance to the air.
Italian-themed gardens heavily follow geometric and linear styles. Everything must be planned out, from the rows and columns of bushes down to the placement of statues and other hardscapes. Ars topiaria (topiary) is an essential element of Italian gardens. This is the art of cutting plants such as shrubs and hedges to create precise shapes. They can turn it into classic shapes or even animals to use as decoration in the garden.
It is best to use yews, cypress, and boxwood plants for pruning because they are well suited to shearing and will last for a very long time if cared for properly. Through ars topiaria, the garden can be divided into symmetrical areas, private rooms, and even mazes that lead to secret gardens.
Another vital element is the pergola. This is a space designed for relaxation while being at least partially shaded from the harmful rays of the sun. Climbing and blooming plants can make for a stunning sun shade that will also provide a soothing fragrance. You can choose to plant roses or evergreen ivy with lavender also.
While the typical Italian gardens are traditionally not surrounded by four walls because they are in open countrysides, you can undoubtedly make a very similar design work within the confines of your own yard.
Remember to use strategically placed romantic and classic statues in your garden to provide focal points and intriguing corners. You may also add water elements such as stone pools, fountains, and elegant canals. This water element will create a calm vibe to soften the heavy symmetry.
5. Xeriscape Style
Xeriscape landscaping has been gaining popularity nowadays. This type of landscaping is used in places where water conservation must be followed, such as drought-susceptible states and countries. Because of climate change, a lot of households have switched to xeriscaping.
An essential element in this landscape theme is using less lawn grass. Lawn grasses don’t do well in arid climates without supplemental irrigation, making them ill-suited for xeriscaping.
Instead of having a lawn, you can create walkways made of stone and rocks. Native plants must also be used since they are already used to the local climate and have already adapted to the environment, thus needing less water than foreign plants.
Rock walls and terraces make great ways to break up a landscape comprised of mostly dry-loving plants. Rocks are very eco-friendly as they look beautiful all year round, regardless of the precipitation. The rock walls are great spaces for growing plants as the rocks will trap moisture in their crevices.
Over time, these plants will grow and spill over the rock surfaces. This will form an artistic look and create a beautiful, flowing rock garden. Thyme, campanula, and lamium are some of the many plants that can thrive in rock gardens.
Succulents are also a great addition to your plant collection in your xeriscape-style garden. They require very little water and do not mind being under the hot sun.
It is best to place them in terra cotta pots for better moisture retention. However, clay and ceramic pots work well too. Putting them in containers will allow you to redecorate easily.
Mediterranean plants can also be included in your list of plants to collect as they enjoy plenty of sun and love being in sandy soils. Not only do they look pretty, but Mediterranean plants also provide other practical purposes, such as for your culinary needs. Thyme, rosemary, and oregano can be added to your herb garden.
Aside from picking out the right plants that will thrive in water conservation areas, it is imperative to plan out an effective water irrigation system if one is required. A well-built drip system buried in the ground will stay cool and conserve water. A drip system can use up to 70% less water than a broadcast system.
The drip irrigation system is highly efficient as it drips water where it is needed at the plant’s roots rather than spraying the water through the air.
This is Only a Taste
This is just a small taste of themes that you can choose from and remember that you don’t necessarily need to follow a theme; you can create the landscape in your own style, but be sure that as you plan your gardens, you keep consistency in mind. Using similar and consistent looks throughout your garden will give it a calming and complete look rather than a confusing, cluttered look.
If you have just started landscaping your property and want to become a bit more efficient and professional or you have decided to start landscaping as a profession, you must have professional landscaping tools and equipment. Trying your hand at landscaping is a great idea, but doing it without the proper tools will only make you suffer needlessly.
If you want to become a great landscaper, you must invest in professional landscaping tools and equipment to get decent results. Without these professional landscaping tools, it would be challenging for anyone to master their landscaping.
How Do You Landscape Like a Professional
Well, let’s set aside the obvious traits, like old worn-out jeans, the unkempt, dirty appearance, and the zeal for a few well place profanities when the going gets tough. What does it really take to landscape like a professional?
Landscaping gets expensive! Unless money isn’t a problem and you just hate hard work, you might want to consider doing your landscape work yourself. Most of it is not too technical. You will need a bit of common sense, a good strong back, and a few essential tools to get started.
Before we get into the tools, here is a list of things that may not seem obvious but that I have learned over a lifetime of professional landscaping.
You must invest in those plants that bloom throughout the year. Any landscaper will tell you that every client wants flower beds that bloom all year round. Your first order of business is to figure out how that is possible and which plants you need to do this. Good luck with this one.
Corners in your lawn and grass right up to the house are a pain in the rear. Cut bed edges to allow for long sweeping curves and beds along all walls of the house. Landscapers want it to look smooth and nice but also don’t want to get off that riding mower to trim any darn corners. Make sure that there aren’t any!
Don’t haul out any debris. Mulch your lawn clippings right into the lawn, mulch leaves into the lawn until they are just too thick, then blow them into the beds. Put all twigs and leaf debris into planting beds to act as a mulch. The only reason that landscapers are charging you to haul all of your leaves, twigs, and lawn clippings away is because you asked them to and because if they didn’t, they couldn’t sell you all of that mulch in the spring. Save all organics, use them as mulch, keep it simple and easy.
Forget about installing an irrigation system. Once your plants and lawn are established, you won’t ever need it again, and they are a pain in the rear and expensive.
Keep landscape lighting to a minimum and always use LED lights. Any other bulbs burn out way too often, and a complex lighting system is a waste of money and hard to maintain. A few well-placed spotlights will do.
Don’t ever install metal or plastic lawn edging. It will pop up out of the ground over time, get hit by the mower, and look like crap. Just cut a natural bed edge and save yourself a ton of headaches.
Don’t waste your money on landscape fabric or weed barrier. It only works for a couple of years before the weeds grow on top of it, and it is useless. It is a colossal pain to rip it out at that point, and it keeps you from being able to easily make changes in your plantings. It also stifles the spread of perennials.
Unless you are an avid gardener who loves weeding, keep your garden beds to a minimum. Large beds require more plants and more weeding. Mowing is much easier than weeding, so plant lawn and keep beds only big enough for the plants that you really want.
Plant groundcovers. Groundcovers spread readily and keep the weeds out. Beautiful!
Plant only hardy plants that are a zone lower than what you think you are. This will almost ensure that they will survive without a lot of pampering from you. Live plants that are easy to care for are good. Dead plants are a waste of money.
Never plant a tree or any plant deeper than it was in the pot or nursery, and be aware that many balled and burlapped trees you get from the nursery have extra soil mounded on top of the ball. Plant these a bit high. Most of the time, when I find a dead tree, it is because a homeowner or rookie landscaper planted it too deep and suffocated it. Plant roots need oxygen, plant them too deeply, and they will die.
Don’t stake newly planted trees. If you bought a decent plant and it has a decent root ball, don’t bother staking it. People forget about the stakes, and the ropes girdle the trees; the tree roots don’t develop as well because the tree does not sway in the breeze, and it is just a waste of time.
When planting a balled and burlapped tree, always create a soil ring around it to hold water for the first couple of years and always cut the twine away from the trunk, or you will never remember to come back and do it later, and it will girdle the tree.
When you are digging a hole for anything, think about where the soil will need to be when you are done. Don’t just throw it around anywhere; put it where it should be so that you only need to move it once.
When you order materials and have them dumped on-site, think about where to put them. Again, a truckload of anything is heavy. You don’t want to move it any further than you need to. Maybe the truck driver can dump half on each side of the house if that would be easier.
On a similar note, avoid dumping crap into the grass. Mulch, soil, gravel, and rock will mess up the lawn and be a pain to dig out every time. If you can keep these materials on a hard surface, please do.
Mulch around all trees. Don’t mow lawn right up to the trunk. You are compacting the soil over the roots, and I don’t care how careful you think you are for the first few years; you will hit that tree with the mower or string trimmer eventually.
When mulching around your trees and shrubs, keep the mulch thin near the trunks or stems. Thick mulch at the stem will only promote rot and encourage mice to live in there and chew on the tree.
Look at the shrubs and trees near your house at least once every year in late winter. Prune them if they are getting too big. Don’t wait five years and then hack the hell out of them. A bit of pruning every year as needed is much easier to do and will result in healthier, more attractive plants.
Alright, now that I got that off of my chest, let’s get on to the tools. This article is about the tools, right?
Professional Landscaping Tools and Equipment
Whether you’ve decided to start your own landscape business or just want to landscape your yard, you will always want to look for professional quality landscaping tools and equipment. The cheap crap never lasts, and it will break at the absolute worst times. Spend a few extra bucks and get the good stuff. Take it from a guy that knows.
Check out our list of professional landscaping tools. These are the basics that are in the truck every day. With this assortment, you will be able to do just about any landscape task.
Spade Shovel
The digging spade is the base tool for all landscaping. If there is one tool that gets used the most, this is it. From digging a pond to planting a perennial, this is your tool. It is pointed to dig quickly and comes in many styles.
Pay attention to handle quality; this is the most important part. Nice thick wood or fiberglass? It is a personal choice. I prefer the wood handle’s feel and contour, but the fiberglass ones are darn sturdy. I stay away from the steel handles simply because this is the all-day shovel. You don’t want the extra weight for your all-day shovel, nor do you want to catch a jolt if you happen to cut that old lamppost wire that someone forgot to tell you about.
Most of the time, I will choose a long-handled shovel over a short D-handled shovel, just because it’s easier on the back. Remember, this is not a pry bar. Using your shovel as a pry bar is the quickest way to separate the handle from the spade.
Here is one that I would buy.
Flat Shovel
The flat shovel is great for scooping on flat surfaces. You will use it for cleaning up debris from driveways or scooping soil off the bed of your truck. Not as often used as the spade, but nice to have for clean-up for sure. Check this one out.
Edging Shovel
You will need this shovel any time you are cutting a bed edge. It also works excellent as a root chopper when you are digging out a tree for transplant. Contract diggers will use these shovels when balling and burlapping trees. These are also great for picking up sod. I like the steel handles for these because they take a lot of pounding, and you are less likely to be digging deep with these, so you probably won’t hit electricity. I have one short and one long handle edger. The short ones are better cutting sod; the long-handled ones are better for all-day edging if you want to make it easier on your back. Here is one.
Steel Rake
A good steel rake is a must for any raking of soil, heavier debris, mulch, or when you need to dig some gravel out of the grass. Again, wood or fiberglass is a personal preference. Check this one
Plastic Rake
Some call it a leaf rake. Great for just that, raking leaves and debris from your lawn. These are usually relatively lightweight and probably the most disposable hand tool that we have. It’s not unusual to burn through several of these each year. They must be flexible to work well, making them prone to wear and fairly easy to break.
Pitch Fork
There are different tine patterns and widths. If you do a lot of mulch, you may want the big wide hayfork; otherwise, it’s nice to have the regular six-tined pitchfork for moving mulch, straw, piles of grasses, twigs, etc. Try picking up a pile of twigs and grasses from a spring clean-up with your shovel, and I assure you, you will be reaching for your pitchfork in short order.
Digging Fork
These are great for working up garden beds. No other tool can bust-up and turn over a bed quicker than this one. I usually go for the D-handle on this one because it is aggressive work, and the D makes it quicker.
Pry Bar
Every landscaper needs to have a pry bar in the truck. This tool will be with you for the rest of your life and will save you a bunch of money in shovel handles. Sometimes, there is just no other way to pop out that rock, root, or stump, and if you set any sort of boulders or flatstone, they are great to help with leveling.
Sledge Hammer
I would buy a small one to start. If you aren’t pounding in fence posts, you aren’t likely to need a big one, but having a sledge is great for pounding in any stake.
Axe
An axe comes in handy any time that you have roots to cut. I wouldn’t even try to cut out a stump without a good axe.
Push Broom
Growing up, we called this a barn broom because every farmer had one to sweep out the barn. Get a stiff-bristled one, and it will be great for sweeping sidewalks, patios, driveways, and your garage. The soft-bristled ones seem pretty useless.
Whisk Broom
This one won’t be used much and could possibly be left off of this list, but if you have stepping stones or a narrow walkway, this is the only way to do it.
Wheel Barrow
This is the workhorse of landscaping. We only buy the absolute toughest ones made because they will last for years, and you can haul anything from wet concrete to mulch. You can certainly buy the lighter-weight homeowner models, but you want a heavy-duty wheelbarrow if you are going really heavy. The lightweight plastic ones are fine for mulch, but they will flex under heavy loads. Many homeowners buy the dual-wheeled ones, but if you are doing anything other than straight line wheeling across your lawn, these are a pain in the rear. This one is my favorite, but get it with the pneumatic wheel.
Pruning Shears
These will be used for 90% of your pruning, so buy the best one that you can find. Even the good ones will dull with time, so use it carefully and buy a spare set of blades or a sharpener. Don’t use your pruning shears for cutting dirty roots or branches that are too big and never twist while cutting. This is the quickest way to ruin a pruner. I have purchased all of the cheap ones out there, and you get what you pay for; none have lasted a season.
Lopping Shears
Get the biggest and strongest one that you can. These are what you reach for when you need to cut the branches too big for your pruning shear. These are bigger, but once again, the quickest way to ruin them is to twist while cutting.
Hand Saw
This is what you reach for when the limb is too big for your lopping shears. Get a good one because cutting through thick branches can take a long time with a cheap, dull saw.
Pails
It sounds silly, and you probably have something around the house, but if you don’t, two five-gallon pails to carry with you when pruning or weeding are a big help so that you don’t need to backtrack and pick up after yourself. It’s back to efficiency; only touch it once if you can.
Wrapping it Up
That’s about it. There are thousands of tools to consider, but the landscape tools listed above are the backbone of everything you will do in your landscape. Buy good quality tools, and you will not be disappointed when it comes time to do your work. Buy cheap crap, and they will break at precisely the wrong time.
As an Amazon Associate I earn from qualifying purchases.