13 Most Popular Types of Driveways

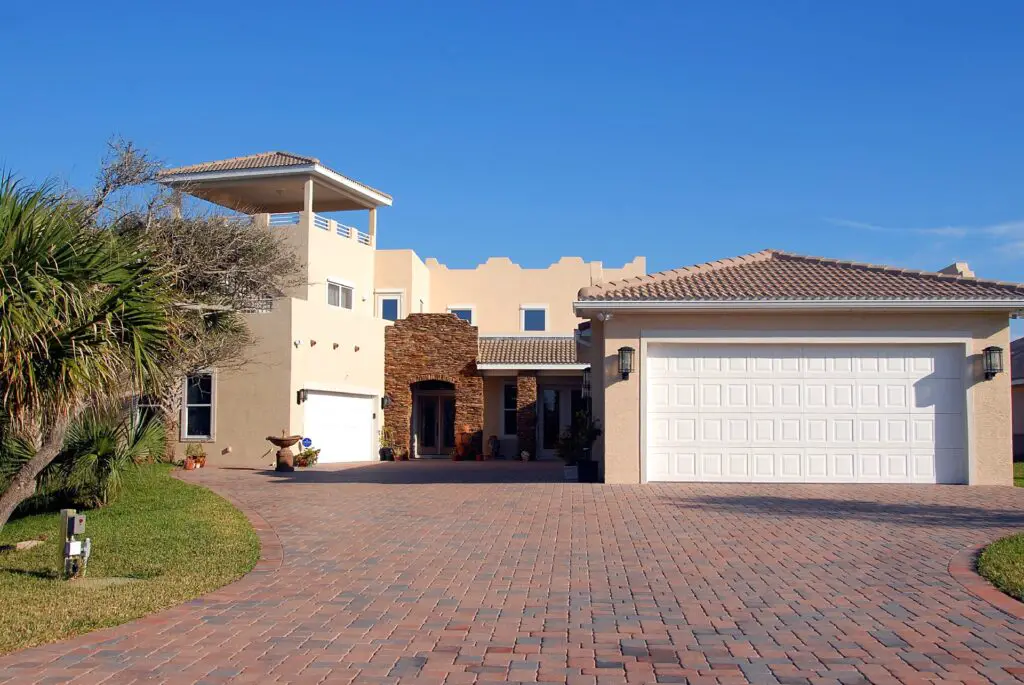
Beautiful paver driveway

Having the perfect driveway is crucial if you want to leave an impactful first impression of your dream home on anyone visiting or passing by. However, many homeowners often overlook their driveway when doing remodeling projects. As a result, they settle for something dull and monotonous as long as it serves its purpose. We’re here to tell you it doesn’t have to be like that.

There is an excellent variety of driveway materials from asphalt to concrete, grass bed to mosaic glass to cater to your preference and design tastes without breaking the bank. This article will discuss the most popular driveway types and some necessary information every homeowner needs to know!

The Importance of Curb Appeal

First impressions are important, and the same applies to your dream home. A beautiful and well-maintained driveway can easily add style and improve your house’s curb appeal.

Different types of driveway surfaces can change the whole look of your home. In contrast, choosing the wrong style could make your house look unappealing, drab, and outdated.

Colors and exterior details need to match the period of your house, and it should be the same with your chosen driveway or walkway, given that it is what leads people to your home. Typically, you would want it to be attractive, homey, and welcoming.

If you have plans to sell your house sometime in the future, chances are any potential buyer will be discouraged to even step a foot inside if your home doesn’t look visually appealing from the outside. Keep in mind that your driveway plays a crucial role in their first impression of the property.

A driveway in poor condition will devalue your home, as potential buyers might see the extra cost involved in fixing the driveway and its needed extra maintenance right away. It is your responsibility to keep your driveway looking at its prime.

Types of Driveways

To give you a brief background, the trend of driveways began in the second half of the 19th century. Before, gravel was the most popular surfacing material, while brick, stone, and flagstone were popular alternatives.

When motorized vehicles became the norm in the 20th century, driveways and back alley access became needed in many homes. Asphalt and concrete grew to be widely popular choices shortly thereafter. Today, homeowners can choose from many types and materials for their driveway needs.

1. Concrete Driveway

Concrete, which is considered one of the most popular types of driveway, is costly, but you can count on its durability for a very long time. This means extra savings on your part as you won’t have to get repairs or have a new one installed for many years to come.

Appearance-wise, it also offers a variety of appearances as it can be stamped or dyed a particular color of your own choice. Concrete can be ground down and top coated to change color or texture in the future.

However, like most solid surfaces, concrete can be affected by the quality of installation. While a properly installed concrete slab will last a lifetime, a thin, uneven pour over a substandard base will be prone to crack and move over time. The base prep is critical in all solid surface applications.

Concrete is prone to staining. If you change the oil in your vehicle while it’s parked in the driveway, you need to be extra careful not to spill a drop. If you spill oil on a concrete driveway, it will leave a stain that is very difficult to remove.

2. Asphalt Driveway

Asphalt is another popular material for driveways as it can be installed relatively quickly by a professional crew, and it is cheaper than concrete. More so than with concrete, asphalt relies heavily on the base prep, so don’t cut corners when hiring a contractor; make sure that the base will be solid or your asphalt driveway will fail in short order.

Their vibrant black appearance also makes your driveway look neat and presentable. But do take note that asphalt only comes in one color, limiting your customization choices. The material needs to be resealed often, at least once every four years.

Fortunately, it isn’t too difficult to do minor repairs and seal an asphalt driveway yourself. If you are handy and don’t mind some outdoor work, you can surely handle asphalt maintenance yourself.

3. Clay Brick Driveway

Brick has been used as a paving material since ancient times and will undoubtedly give your driveway a classic, timeless look. It is available in a wide variety of colors, so you are free to customize it just the way you like!

Homeowners can also count on its durability for a long time, and it’ll look perfect in historical homes and high-end houses. However, keep in mind that bricks may cost you more than other materials.

The downside of brick is that each individual brick can move on its own, so base preparation is critical. Also, brick is not as well suited to freezing climates as freezing temperatures can damage the bricks, and the bricks can catch the edge of snowplows.

4. Gravel Driveway

A popular, inexpensive option, gravel driveways are readily available everywhere. Generally, they can be installed easily and quickly, so you can use them immediately. This rocky surface can also be the base, so installation can often be a one-step process.

Given that this material is available in a wide range of colors, you will have a sense of freedom in customizing your dream driveway. Gravel is dug out of pits and will vary depending on the source and location. It is typically a mix of sizes installed and compacted in the same form as excavated out of the ground.

Drainage is essential for gravel driveways, as is base prep. Any loose soils should be removed before gravel installation, or the soft ground will push up through the gravel over time.

Gravel driveways that are well-drained and compacted over hardpan are durable and long-lasting and will likely only need a bit of topdressing and re-grading over the years. On the other hand, gravel driveways built in wet areas or over a soft base will require regular dressing and grading to eliminate potholes.

Gravel can be problematic in snowy regions as snowplows and snowblowers tend to move the gravel.

5. Dirt Driveway

This is what you get in the absence of a driveway. Many a dirt driveway was started when the first automobile crossed a grassy field to get from the road to the house. It is the simplest and cheapest option as it takes no prep at all.

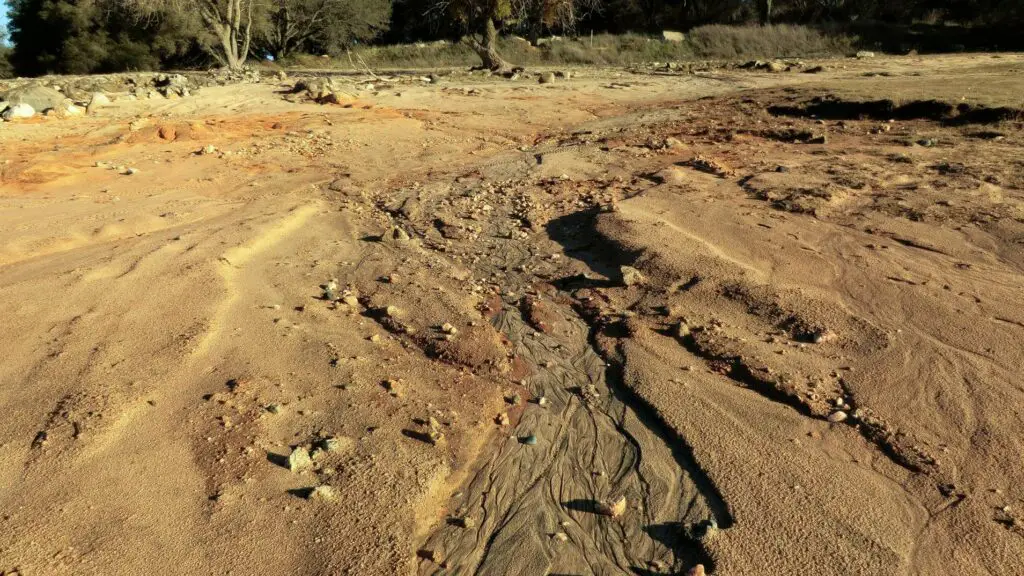
The only time a dirt driveway will serve you well is if you are out in the country where your neighbors won’t mind the look and if your ground is very firm and well-drained. Dirt driveways are very prone to rutting and erosion, so a light rain can turn your dirt driveway into a slip and slide.

6. Crushed Stone Driveway

While a crushed stone driveway is very similar to gravel in most ways, the stone used is a bit different. A crushed stone driveway is constructed using crushed stone. Rather than using gravel of various sizes and comprised of rounder stones, crushed stone drives are installed using a stone that is mechanically crushed to a particular size, which creates jagged shapes and dust.

Crushed stone driveways can be constructed using any stone that can be crushed, so limestone, granite, basalt of any other stone will work well.

As with gravel driveways, the crushed stone driveway is not particularly well suited for use in snowy areas where snow plows and snow blowers will tend to move the stone around.

7. Cobblestone Driveway

The sight of a driveway made of cobblestone is a tale as old as time. This classic material offers a variety of designs to choose from, which improves your home’s visual perspective appeal.

Homeowners can also count on cobblestone’s durability, given that it is made using natural stone blocks and will last indefinitely. As with other individual stone or brick driveways, the flatness and durability of the driveway will depend mainly on the base preparation.

No matter how good the base, like brick, individual cobbles can move independently of each other, so heaving in the wintertime and general movements can be expected. Also, like brick, cobbles will catch shovels and plows and may make snow clearing more difficult.

8. Green Lawn Driveway

Green lawn driveways are a popular alternative to traditional asphalt or concrete pavers. Typically, when you see a driveway that appears to be grass, it is actually grass growing through concrete or plastic blocks or gridwork that holds the soil in place and allows the grass to grow.

By providing a rigid structure to hold soil and take the weight of vehicles, these blocks will allow the grass to survive when an average lawn would simply turn to dirt.

Grass driveways are only recommended for light use areas, as daily heavy use will result in dead grass.

9. Interlocking Concrete Pavers Driveway

Interlocking pavers are composed of cement or concrete, shaped to fit together with other pavers of the same sort. As a result, they are as strong as concrete yet as easy to install as brick. The interlocking pavers come in a wide variety of colors and shapes and can resemble real stone or natural brick. Some are truly interlocking, which provides more stability, while others are simply brick or block-shaped.

As with brick or cobblestone, the finished driveway is only as solid as the base beneath. And like brick and cobbles, snow removal can be problematic.

10. Tar and Chip Driveway

While this material is not the most common pick, driveways made of tar and chip material are becoming more popular by the day. Also known as chip sealed driveway, this driveway type serves as a cost-effective alternative to asphalt paving, and it also gives homeowners an excellent surface for traction.

This type of paving appears similar to asphalt but with a different installation process. In particular, layers of gravel are arranged in a sequence, with hot liquid bitumen asphalt and more loose stone laid over the surface before being compressed. It also has other names, such as seal chip, macadam, chip-and-seal, or liquid asphalt and stone.

While you’re not required to spend a fortune on this driveway type, it needs more upkeep than other options. Consider covering your tar-and-chip driveway with a thin under-layer of concrete to boost longevity and possibly save money in the long run.

11. Recycled Glass Driveway

While a recycled glass driveway is an odd material choice, this makes for an attractive and handy solution. Don’t worry; it isn’t made of ordinary glass, so it won’t cut up your tires!

The recycled glass material will be professionally altered and resin-sealed, making it as strong as possible. When sealed with resin, your glass driveway can be used for a long time without recurring issues, and this makes it a cost-effective pick for many homeowners.

Given that it is made of recycled materials, your driveway will also be environmentally-friendly. Repurposing discarded glass from a local landfill is a great way to contribute to a greener planet.

Furthermore, this driveway type also requires little maintenance when installed properly. There are also several available color options, giving you the freedom to tailor a recycled glass driveway to your liking.

12. Exposed Aggregate Driveway

One of the biggest trends in modern driveways is exposed aggregate. This material is available in a variety of sizes and hues. With the wide range of choices, you will have a great selection of unique and attractive driveways to complement your property.

It also creates a non-slip sealed surface that requires little to no upkeep and can last for over a decade. Comprised of unique aggregates that are exposed on the surface with particular concrete mixes, the concrete surface has smooth-textured stones and pebbles. This is basically a poured concrete driveway with the aggregate exposed on the top layer to make it more interesting.

In comparison, a smooth concrete finish has a visible surface mostly made up of concrete fines or tiny concrete particles. Also, the typical dark grey of the exposed surface has the characteristic dull grey color of concrete.

13. Flagstone Driveway

Renowned for its distinctive appearance & unique look, this driveway type makes for a great choice if you want to improve the aesthetic appeal of your property. This material, however, requires more time and care to install than concrete or asphalt. Individual stones are placed together in a pattern, or a random puzzle piece look.

When building a driveway out of flagstone, the individual stone pieces need to be large and thick to avoid them moving around and cracking when cars drive over them. These would often be laid on crushed stone bases or can be mortared onto a concrete base.

Shapes of Driveways

Aside from choosing your driveway material, there are various things to consider, including your budget, intended purpose or usage, and the design or shape of your driveway.

Keep in mind that a well-designed and properly installed driveway will significantly improve not only your home’s curb appeal but also your property value.

Your preferred driveway design poses some practical implications. Hence, it’s best to decide after considering all the pros and cons.

Here are some helpful guidelines to help you choose the best driveway shape to fit your needs:

  • Straight Driveway – Straight driveways are the most common choice, and they give a direct route to the property. This type of driveway is straightforward to make, and you can even opt to lay and install it yourself as it doesn’t require much planning. It’s suitable for small properties without much room to spare. And when it comes to appearance, this design is geometric, clean, and modern. It’s the perfect choice for modern houses!
  • Circular Driveway – If you have extra space on your property, circular driveways may be the best choice! This design will take up a large area, so it’s best to ensure that you have the proper calculations and dimensions. A circular-shaped driveway means a steady flow of vehicles, and there’s no double parking or backing up near the door. The central area within a circular driveway can also be utilized in several other ways or landscaped– the possibilities are endless!
  • Semi-circular Driveway – Compared to circular driveways, semi-circular driveways take up less space while providing a stunning look at the same time. Semi-circular driveways are ideally suited for large properties situated on very busy roads. This design also provides a stronger safety guarantee, given that drivers won’t be required to back out right into a busy road. Instead, they can keep a clear view at all times.
  • L-shaped Driveway – The bottom segment of an L-shaped driveway can take the vehicle through the bottom and then straight up to the parking or garage area. This design is especially helpful if you have a long, narrow entrance to your property, with a garage on the left or right. Cars won’t be parked right in front of homeowners’ viewpoints, and they won’t take up valuable space that could be used for soft landscaping or a recreation area instead.
  • Curved Driveway – Curved driveways are probably the most aesthetically appealing type of driveway and are often necessary for properties with many trees or other obstacles to avoid. A well-planned curved driveway can add character and intrigue to a property. Whether your property is far away from the main road, or you simply want to use a curve for the added curb appeal, this design allows you to be as creative as possible!
  • U-Shape Driveway – U-shaped driveways are quite practical for daily use if you have extra space on your property. This design also has the potential to improve and transform the visual appeal of your front yard landscape. Given the driveway’s unusual shape, you will have a lot of room to work on getting creative and building eye-catching elements. Undoubtedly, this driveway shape will make your property stand out in the neighborhood.
  • S-shaped driveways – S-shaped driveways are convenient and serve as a safe solution for building a driveway on a gradual incline or downslope. Not only does it slow down the vehicle approach and ensure the safety of any oncoming pedestrian, but it will also create a beautiful approach to the property from a design standpoint. If your house has a sloping entrance, you should seriously consider a “stepped” or winding approach for vehicles and pedestrians. S-shaped driveways are suited to properties with large lots.
  • Y-Shape Driveway – As the name suggests, a Y-shaped driveway will take on the shape of its namesake letter. It will have a one-street entrance, with the driveway going two places. This is a less common driveway shape, but it has great use for homeowners. The Y-shaped driveway splits into two ways, one heading to the garage and the other to a walkway going to the front entrance. If you have more than one garage on your property or an extra space to park a boat or an RV, it’s best to consider installing this driveway shape. It could also be helpful if there is a natural or man-made feature in your way or when you need to break the driveway up.

Other Considerations

Aside from the layout and material choices, here are some other considerations every homeowner needs to keep in mind when installing a driveway:

Gradient and Width

The natural geography of your land will heavily influence your driveway’s gradient. If you’re planning to install a driveway, it’s best to strive for a slope that’s neither too steep nor too flat to ensure proper drainage.

A fully flat driveway may have poor drainage, resulting in water accumulating on the surface. On the other hand, a steep driveway may become overly slippery in inclement weather, especially if the surface isn’t properly designed. Curves can help minimize the slope, and filling in the middle of a level driveway allows water to run down on both sides.

Another important consideration is the width of your planned driveway. There are likely minimum and maximum requirements for each, so consult with your neighborhood first but then consider the vehicles that will be coming and going.

Installing a narrow driveway will save space and money, but a narrow curving drive will encourage careless drivers to drive off of the side of your driveway and create ruts.

Keep in mind that the safety of your property’s entrance is determined by the gradient and width of your driveway.

Ease of Access

Ease of access should be among the top considerations when planning a driveway for your home. Typically, you would want to install a driveway that creates a safe, convenient, and easy entry and exit.

Do note that this factor is especially important if your property is located on a busy or narrow street with limited visibility.

The size of your property will also have a significant impact on what you can do to improve access, but your chosen design can also help improve your home’s visual perspective.

Some methods to make your driveway safer are straying away from planting tall bushes and trees, lowering the height of your fence, and installing adequate lighting.

Trees, Shrubbery, and Utilities

Any driveway excavation may potentially damage existing roots, as well as any underground utility connections to your property. Always have the property marked for utilities before any excavation. It is also a good idea to plan your driveway around any important shrubs or trees that may be damaged during installation.

Adding biodiversity to your property will undoubtedly add more value and improve curb appeal. Fortunately, local experts can advise you regarding the correct planting for trees and shrubs that won’t send the roots into your new driveway.

Choosing a Local Contractor

In any driveway repair, repaving, or construction project, it is strongly advised to hire a professional contractor. A reputable company with strict design specifications, procedures, and trusted installation techniques can ensure high-quality results.

Other things you need to consider are obtaining several quotes for your driveway project, calling previous client references for validation, and visiting the previous installation and work sites by your chosen company if you have the time.

It’s also crucial to verify that the company offers proper liability insurance coverage in case of an accident or injury during the duration of the driveway project.

Subgrade Surface Preparation

The subgrade is an important part of any driveway project, as it acts as a foundation for whatever will go above it. The base must be dug down to hardpan To avoid movement in the solid surface in the future. This means that you must remove all soft friable soils until you reach a fairly solid surface.

This will vary greatly depending on your site. If your ground is very sandy and rocky, removing a bit of topsoil and compacting the base may be all that is needed. On the other hand, if you need your driveway to cross a wet, boggy area, it may require you to pump out all water and excavate deeply to remove the soft ground. Even then, there are some areas where your best bet is to lay down thick layers of geosynthetics under your base to keep the loose, wet mud from mixing with the base stone.

Adequate Driveway Drainage

Poor drainage will reduce the lifespan of your new driveway. As a result, you will be required to do frequent maintenance and repairs. Any permeation will eventually lead to cracks and holes, requiring you to spend money on driveway repairs too soon.

On flat ground, your driveway must have at least a 2% slope and a quarter-inch crown every foot for proper drainage. Drainage considerations also include assessing potential runoff from nearby structures, drains, sidewalks, and patios. Another special consideration is to install pipe cross drains beneath to channel the water under the drive rather than over.

Maintenance

Consider the expense and maintenance required in the upkeep of your driveway when choosing one. Gravel, for example, is less expensive than stone paving, but it will need more maintenance regularly. You might realize that the investment for a pricey yet less maintenance material is worthwhile in the long run.

Below are some general tips to help care for your driveway, regardless of its material or shape design:

  • Minimize water on the driveway surface – Clear the sides of the driveway from ground and debris to allow surface water to run off rather than soak in or freeze on your driveway. Also, be sure that runoff from your downspouts is not directed at the driveway.
  • Fill any cracks – If you see any cracks or holes in your solid surface driveway, opt to have them fixed right away. Remove loose pieces with a masonry chisel and brush off the debris before applying a crack filler and patching solution. Don’t forget to seal the entire driveway after the compound has dried as well. A well-maintained, smooth, and level driveway can help prevent untimely slipping or tripping accidents when visitors are around.
  • Make your driveway crack-proof – As the adage goes, prevention is better than cure. If you don’t want to go through the hassle of regularly filling the cracks on your driveway, you will need to ensure your driveway is built properly. To prevent water from entering, freezing, and cracking in driveways, seal concrete every year and seal asphalt every few years. Tree and plant roots can cause cracks, especially when pushing up from beneath the soil. With that in mind, any trees near driveways should be removed, or their roots clipped away as a remedy.
  • Be careful when plowing – Always be aware of your driveway surface to minimize snow removal damage. Areas of heavy snow and snowplows should expect to see plow marks over time, but smaller driveways that are hand cleared should not show wear from the shovel.
  • Clean your driveway regularly – Removing stains from solid surface driveways caused by engine oil, radiator fluid, and other similar chemicals can affect more than just your driveway’s appearance. For instance, motor fluids can penetrate concrete up to a quarter-inch and may soften asphalt. Scrub any old stain repeatedly using grease-cutting, biodegradable cleaners and a standard scrub brush.
  • Avoid using de-icing chemicals – Be aware that chemical deicers can cause damage to solid surface driveways. Various chemical products with ammonium nitrates and ammonium sulfates are particularly harmful since they chemically attack the concrete. Rock salt (sodium chloride) or calcium chloride might do less damage on your driveway surface, but they may harm live vegetation or corrode nearby metals. Stay away from using any deicers during the first winter after your driveway placement. Do note that new concrete is very susceptible to the harmful effects of salt. If you’re looking for an alternative, you can utilize sand for traction.

Make the most of your property by keeping your driveway clean and well-kept. Not only does it improve curb appeal, but it also makes your drive sturdier than those that are neglected. Remember that little regular upkeep can bring you significant returns later.

Frequently Asked Questions

What is the cheapest driveway material type?

Assuming that dirt just won’t do it, then gravel and crushed stone are by far the cheapest driveways that you can install for your driveway. They are also some of the quickest to install, and they can be used immediately after installation. Maintenance such as gravel replacement is just one of the few additional costs for using this material.

Despite being budget-friendly, there are still a few downsides to a gravel-made driveway. Gravel driveways produce noise that you or your neighbors may not like, and some of the stones may end up on the road or in your grass, causing more work for you.

I would say that gravel is the most popular, but concrete is probably the most coveted due to its permanence and relative maintenance-free nature. Asphalt is arguably one of the best contenders for the title because it offers a smooth, hard surface for a lower price than concrete, but it lacks the timeless durability and ease of maintenance.

Will a driveway increase my property value?

Yes, a driveway can increase your property’s value making it worth the investment. If you’re looking for a rough estimate, paving a driveway may increase your home’s value from 5 to 10 percent.

Should base be installed before paving a driveway?

This all depends on the type of driveway you are installing. Obviously, a dirt driveway doesn’t have a base, and the gravel or crushed stone driveway is its own base. If you pour concrete thick enough, it can span almost any poor base material, just like a bridge spans a river, but the cost of concrete often makes this type of installation way too costly for the average homeowner. A solid base is required for a stable and long-term driveway installation for all other driveway materials. Having said that, if your native ground is gravel and sand, then you have a natural base.  

How wide are residential driveways?

The width of a residential driveway will vary depending on if it is a single car or double car driveway. The standard width for a single-car driveway is 9 to 12 feet wide, while a double-car driveway is 20 to 24 feet wide.

Final Thoughts

The perfect driveway design starts with selecting the best material, shape, and other considerations that fit your needs. The drive is also likely to be used daily, so it needs to perform well and ensure optimal safety for everyone.

However, do keep in mind that whatever driveway layout you choose may significantly impact the property’s first impression and appearance.

Also, consider the lifespan you expect out of the driveway and how much maintenance and excess fees you are willing to commit. At the end of the day, it’s your responsibility to strike a balance between appearance, functionality, and safety in installing a new driveway.

Fish Health Management Fundamentals and Treatments for Common Fish Diseases

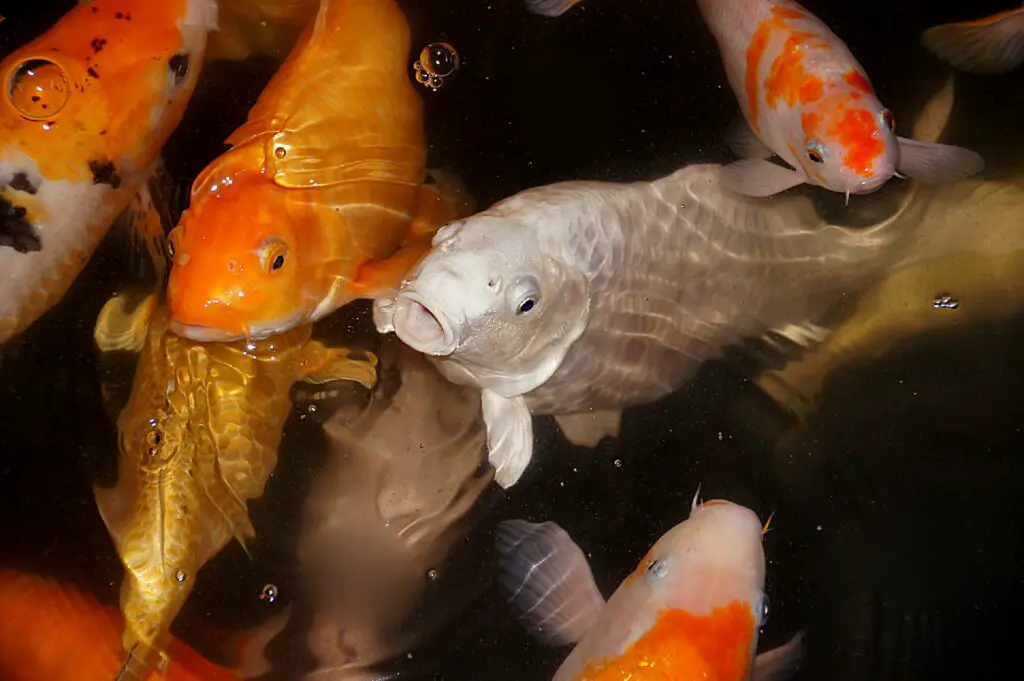
Healthy Koi Fish

If you are going to own fish, whether, in your garden pond or an aquarium, you should really know a few things about fish health. You can surely hire someone to clean your garden pond or maintain your aquarium, but it will pay to learn about the fundamentals of fish health management. The fact that you are still reading this article would indicate to me that you might just have a few fishy friends.

Now, if you’re wondering, “Does this guide apply to recirculating aquaculture systems, as well?” Yes, it does! The majority of the information I’ll share here can also be used in maintaining edible fish species, but to be clear, I will be focusing on koi and goldfish instead of most commercially farmed fish species like catfish or tilapia.

What is Fish Health Management?

Fish health management encompasses different practices meant to prevent various fish diseases. This is essential to large commercial fish farming industries and maintaining fish health in garden ponds and aquariums.

Three of the most critical areas of fish health management are water quality, fish nutrition, and sanitation. These are the common sources of fish stress that should be controlled to maintain a thriving pond or tank setup. The following section takes a closer look at these three areas.

Fundamentals of Fish Health Management

The fundamentals of fish health management mainly focus on prevention. This idea is that it is better to avoid certain conditions that could lead to fish diseases than deal with the repercussions later on.

1. Water Quality Management

Providing a healthy environment for your koi and goldfish begins by giving them quality water to live in. In an indoor aquarium, you will likely want to monitor temperature, dissolved oxygen levels, pH, general hardiness, alkalinity, ammonia, nitrate, nitrite, chlorine, and chloramine levels, while a well-balanced ecosystem pond should take care of all of these levels for you.

It is important to remember that the further we stray from nature, the harder we make things for ourselves and our fish. The fish are very far removed from their natural environment in an aquarium, so we need to monitor things closely. In a naturally balanced pond, mother nature does all of the heavy lifting, and we just need to be careful not to upset the balance too much.

Below is a detailed discussion on monitoring each aspect according to the needs of your koi and goldfish:

Temperature

Your pond or aquarium’s water temperature is crucial to the health of your fish. The hotter the water, the more the toxicity may increase and the less oxygen it will hold. Because they are cold-blooded, fish’s metabolism is directly tied to water temperature.

The ideal water temperature of a goldfish or koi pond is between 59° and 77° Fahrenheit, but the temperatures can stray far outside these guidelines with adequate aeration. Goldfish and koi can withstand very hot and cold water, but they cannot withstand quick temperature changes. This is why when moving any fish from one body of water to the next, we need to ensure that the temperatures closely match. Whenever I move fish from one pond to another or from our fish holding tanks to a pond, I check the temperature of the water with my hand. If I can’t tell the difference between the water temperatures with my hand, the goldfish and koi will be fine with the temperature.

Meanwhile, most experts suggest keeping your koi at 65° and 75° Fahrenheit for aquarium environments.

Dissolved Oxygen

Oxygen levels in a pond or aquarium significantly impact fish health. As stated before, hotter water holds less oxygen, while cooler water holds more.

Depleted dissolved oxygen (DO) is one of the major causes of fish kills in aquariums and ponds. Some of the primary sources of low DO are atmospheric conditions, high water temperatures, harmful algal blooms, chemical treatments, stratification, and pond turnover.

Bottom aeration systems can be installed to supplement the amount of DO in your pond or aquarium. These systems have an air pump that pumps air through tubing to the bottom of the body of water, where the air is pushed through an air stone or diaphragm diffuser causing many tiny bubbles which rise to the surface of the water. This process adds oxygen to the water and circulates the water.

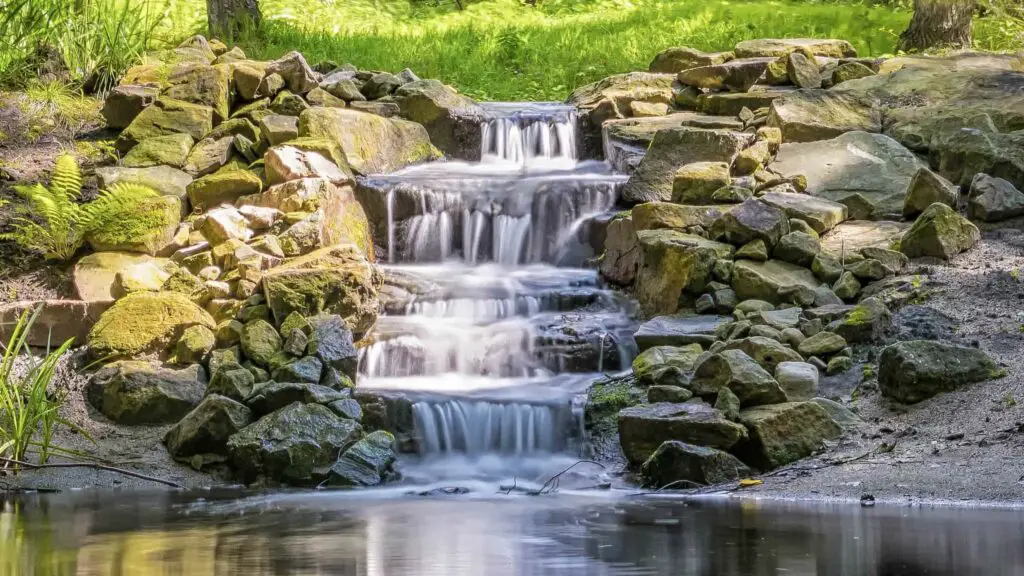
Another way to increase oxygen levels in your pond is to install a waterfall or a fountain pump. Any time that water is falling and splashing, it introduces more oxygen into the water.

For koi and goldfish, the minimum oxygen level required is 6.0 mg/L. However, a higher concentration facilitates healthy growth, reproduction, and tissue repair.

pH

One thing you should monitor in your aquarium is the pH or the level of acidity of water. If you’re not familiar with pH, it has a 0-14 scale, with one as the most acidic and 14 as the most alkaline.

To keep your koi and goldfish in good shape, ensure that your water has a stable pH between 7.0 and 8.6. Anything under or over the range may be detrimental to your pet fish.

Specifically, pond or aquarium water with a pH higher than 8.6 may lead to Alkalosis, a condition that occurs when water is too basic for the fish to tolerate. Likewise, any pH lower than 7.0, which leans toward acidity, may result in Acidosis. In worst-case scenarios, both Alkalosis and Acidosis may lead to fish kill.

I have been keeping koi and goldfish ponds for many years, and I have not found a need to monitor the pH levels of pond water. I maintain many ponds, and the fish do just fine. This is another case of nature taking care of the balance.

General Hardness

Different minerals are found in water, such as calcium, magnesium, borate, iron, and silica. General hardness or water hardness is used to describe the concentration of this mineral content in water.

The rule among fish enthusiasts is that the harder the water, the better fish health. Usually, this hardness comes from calcium and magnesium.

Unlike the pH level, water hardness is not that critical. However, it is best to keep it to a 60 to 160 ppm range.

I do not monitor hardness in any of our Wisconsin ponds and have never had an issue.

Alkalinity

Another thing you should monitor, especially concerning pH, is alkalinity or also referred to as carbonate hardness (KH). It determines the amount of carbonates (CO3) and bicarbonates (HCO3) in your aquarium water.

Why is KH important? Simple, KH protects the water’s pH level from fluctuations. Having a high KH level is beneficial because it neutralizes acid, affecting pH levels.

Keeping your KH at around 105 ppm is best to avoid pH fluctuations and stabilize its pH level.

We do not monitor KH in any of our ponds.

Ammonia

Ammonia is one pollutant to look out for as it is toxic for your koi and goldfish. There are different sources of ammonia in ponds, the primary source being your fish, as they naturally excrete ammonia when they breathe, urinate, and defecate. Debris, such as uneaten fish food, also creates ammonia. A pond with poor circulation and filtration that is heavily loaded with fish can certainly develop high ammonia levels. But, with average fish loads, good circulation, and plenty of plants, this is never a problem in our naturally balanced ponds.

This substance is potent as even a little bit may cause so much damage to any fish. When left unaddressed, ammonia can burn your fish’s gills, preventing it from getting dissolved oxygen from the water.

Ideally, it is best to have no ammonia, so maintenance of water quality is critical. If your ammonia level already reaches 0.25 ppm, know that it’s a cause for alarm, and you should take the necessary steps to address the problem.

Nitrite and Nitrate

Nitrites and nitrates are closely associated with ammonia and are equally significant in your pond’s ecosystem. Good bacteria turn ammonia into nitrites which are then converted into nitrates. One benefit of having plants in your pond environment is that they eliminate nitrates.

An abundance of nitrites can result in fish kidney and nervous system problems. Similarly, too many nitrates can lead to immune system problems.

A reading of 20 to 60 ppm is okay for nitrates, while nitrites should be less than 0.25 and, if possible, go down to zero.

In a naturally balanced ecosystem pond, you won’t have this problem either, since nature’s balance takes care of any levels that get out of balance.

Chlorine and Chloramine

Chlorine and chloramine are very harmful substances that can lead to fish kill, and they do so by damaging gills and scales, which later leads to breathing difficulties. This is why it’s essential to always use chlorine and chloramine remover whenever you add city water to your pond.

Both of these chemicals are used in treating our drinking water as these two eliminate bacteria, parasites, and bad odor, making water potable. While water with a certain amount of chlorine is safe for humans, it is most definitely not for fish. Aside from damaging the insides of your fish, chlorine gets rid of bacteria, including the good ones that reduce ammonia and nitrites. If you are lucky enough to get your water from a natural well that is not chemically treated, then you don’t need to worry about these chemicals.

One fact about chlorine is that it can evaporate. On the other hand, chloramine is harder to deal with as it is a mix of chlorine and ammonia. As I mentioned earlier, ammonia is definitely something you wish to avoid in fish ponds. The ideal level of chlorine and chloramine in pond water is none or 0.00 ppm as these do no good at all.

Algae

Algae is a natural part of all ecosystem ponds, but we can get extreme algae blooms when things get way out of balance. These will typically occur when we get a rich nutrient source entering our ponds, such as chemical fertilizers or animal manures. In these cases, ponds can be overloaded, and low oxygen levels can result.

While it is possible to have low oxygen levels with extreme algae coverage, fish kills are most common when people try to kill the algae with chemical treatments. Killing large quantities of plants of any sort in a pond will cause oxygen levels to crash and can easily result in fish kills.

2. Fish Nutrition

The nutrition you provide to your koi and goldfish is almost as important as water quality. Both species are omnivorous, so they eat whatever is given to them.

There are three types of food when it comes to fish feeding:

  • Natural food includes creatures naturally found in ponds such as bacteria, plankton, insects, fish, and aquatic plants.
  • Supplementary feeds are relatively cheap items such as kitchen waste, terrestrial plants, and agricultural byproducts.
  • Complete feeds are usually packed with nutrients and are easy for fish to eat and digest.

In a natural pond setting, koi and goldfish eat algae and can survive without supplemental feeding. On the other hand, if they are placed in a more controlled environment, you may have to give them the nutrition they need because of the lack of natural food. I always tell people that if they have their pond and fish to have a really clean pond, then don’t feed the fish. On the other hand, if the reason for the pond is to raise big, colorful fish, then feed them because they will grow more quickly and be more colorful.

As they feed on animal and plant products, you can also explore giving them food other than processed feeds. Insects, small fish, and other aquatic animals can be added to their diet, giving them the illusion of a natural setting. Among these are worms like silkworms, earthworms, mealworms, shrimp, tadpoles, and larvae of wax moths and mosquitoes.

Fruits and vegetables are also good sources of vitamins and fiber. Lettuce, watermelon, oranges, broccoli, carrots, pineapple, and apples are just a few of the many natural foods they will eat.

3. Sanitation

Just like humans, fish need a clean environment to be able to thrive. From my experience, an aquarium needs regular cleaning and water changes simply because it’s a clear plastic or glass box inside the home. On the other hand, Ponds can be almost maintenance-free if built correctly with wet well intakes and wetland filters.

Giving your pond the proper circulation, filtration, bacteria, and plants will be all that is needed for a very easy care pond.

Even with a well-balanced, natural pond, we should monitor the pond bottom to ensure that large accumulations of debris are eliminated as needed. With good balance, these debris piles will be minimal, but in yards with heavy tree cover, the pond water will collect more leaves than it can naturally digest, so some manual leaf removal will be necessary.

Fish Diseases

1. Causes of Koi and Goldfish Diseases

Koi and goldfish are not insusceptible to diseases. In fact, there are diseases these species commonly face, which every pond owner should know.

Awareness and knowledge of these health risks will help owners address them early on. The saying prevention is better than cure rings true, and preventing these issues is easier than remedying them later.

Pond owners should watch for several common causes of koi and goldfish diseases.

Improper Feeding

Diet is of utmost importance when caring for your koi and goldfish. Improper feeding, which covers not giving the proper diet and overfeeding, is one common cause of health problems.

Nutritional diseases arise when your fish does not receive the dietary requirements for optimum health. In selecting food that you give your pet fish, you should consider the nutrients it offers to ensure that nutritional needs are met.

Aside from the quality of food, one thing to consider is feeding frequency. While watching your koi and goldfish eat is enjoyable, you should be careful not to overfeed. It is more common for owners to overfeed their fish than underfeed.

How often should you feed your koi and goldfish? The rule of thumb among koi and goldfish enthusiasts is to feed only once a day.

Your next question would probably be: how much should I feed my koi and goldfish? This can be tricky as there is no one-size-fits-all solution in fish feeding. In general, the fish should quickly eat any food that hits the water. If you toss food onto the water and some remains, your fish are definitely overfed.

Never feed your fish when the water temperature drops below 50 degrees Fahrenheit. At this temperature, their metabolism slows, and this can cause food to go undigested and rot in their bellies.

Stress

When subjected to stress, fish can experience a decline in health. If you notice listlessness in your koi and goldfish, you may have overlooked some conditions that have caused this stress.

Different situations can trigger stress, such as rough handling, predators, and overcrowding in the pond are some of the most common causes in a naturally balanced pond.

Attack by Disease Organisms

External factors such as disease organisms also cause illnesses among fish. These organisms attack fish externally or internally, and external problems affect skin, gills, or fins, while internal problems affect the blood, nervous system, digestive tract, and the like.

Living organisms that pose health risks may be classified into three: viruses, bacteria, and parasites. Both viruses and bacteria are not visible to the naked eye and can be detected through tests and laboratory techniques.

Parasites, to some extent, can be seen and may be present inside or outside of the body. Organisms that dwell in the body of your fish include sucking worms and tapeworms, to name a few. Meanwhile, leeches, flukes, fish lice, water fungi, protozoa, and copepods live outside the body or just within the pond environment.

Luckily, with proper treatment and early detection, you can remedy the diseases caused by these organisms.

2. Areas to Analyze for Fish Diseases

Think something is wrong with your koi and goldfish? This checklist will guide you in determining if your fish is experiencing a health issue. By knowing which areas to check, you can narrow down possible problems your fish may face.

Waste/Feces

Fish waste is among the things you should check to know what is wrong with your koi and goldfish. The normal waste of koi and goldfish is brown and would sink to the bottom and dissolve. If it is gelatinous in consistency and floats, there may be an issue in your fish’s digestive system.

One problem that manifests in feces or waste is your fish’s diet. Double-check the quality and kind of food you give your koi and goldfish. Further, you can check for debris that may have fallen into the pond that caused this.

Physical Body

You can often see physical signs of disease on your fish.

Some alarming issues are the presence of opaque mucus on the body, wormhole-like things on the scales, and tiny parasites. Having a microscope at home will come in handy because you get to see minuscule features and organisms.

Take a look at your fish’s scales to see if there are noticeable differences from the usual. Red spots or congestion on the gills, skin, and mouth are also signs of health issues such as bleeding.

After a visual check, use your sense of touch for further findings. Feel your pet fish’s body and note if it is slippery as it naturally should be. Dryness can be a symptom of diseases such as gyrodactylus and chilodonella.

Take note of any unusual findings in the eyes, abdomen, gills, and other parts.

The eyes are the windows to the soul, but they also tell you if there is a problem. Check if the eyes are popping out or sunken in, look clouded, or seem like they are rotting.

For the abdomen, see if parts look swollen or bloated. Also, look for redness around the mouth or gills, as this may be a tell-tale sign of breathing difficulties. Aside from redness, check mucus or secretions around the gills that are white, grey, or yellowish. Note that when breathing, the gills of a healthy fish will have an open-and-close pattern and be deep pink in color and not pale or white.

Death Patterns

For the most part, in a well-balanced outdoor pond, we don’t see much of any of the above-listed illnesses. I can tell you that when we sold fish and held them in properly circulated indoor tanks, the number of sick fish made it very difficult.

In our natural outdoor ponds, the fish are at risk from predators such as the Great Blue Heron and Mink, but not so much from disease.

We will lose some fish over winter. Here in Wisconsin, we keep bottom aerators running over the winter months, and our ponds are frozen over with ice from December through March. We do typically see a few dead fish in spring, but it is not clear why they died.

I can say that here in Wisconsin; I have seen situations where fish begin to die several weeks after the ice melts. I think this is because the pond owner has not yet started the pond filtration and circulation system, and maybe the water is too still? We always recommend getting the pond running as soon as possible, and if not possible, we would recommend a partial water change to get the fish some new freshwater. If you are doing a partial water change, make sure to add a dechlorinator if you are on city water.  

It is unfortunate when one of your pet fish dies and all the more when you lose more than one. If death should occur, you should take note of the details and circumstances which may help you prevent further damage to your pond.

A common cause of fish disease in our natural ponds is the addition of new fish from a fish retailer. Any time you introduce new fish into your pond, you risk introducing disease. Always remember to do proper quarantine. Keep your koi or goldfish in an isolated or separate tank or pond for two to six weeks. This will give you time to spot bacterial or parasite infections that are both common causes of illness and, eventually, fish kill. By doing so, you are protecting your existing pond.

Another cause of fish kill is the ingestion of poisonous substances. Suspicious debris floating or at the bottom of the pond, strong-smelling chemicals, and other unnatural substances are signs to look out for as these may have led to the poisoning of your fish. If you hire a pest control company to spray for pests in your yard, these same chemicals can easily kill your fish if they get in the water.

Should you not be able to determine changes or actions done that may have caused the unfortunate death of your koi and goldfish, check and evaluate the bodies of the ones that passed away to find out what went wrong.

3. Common Fish Diseases and Treatment

Knowledge is definitely power. Knowing the diseases that commonly plague koi and goldfish will help you detect problems and find remedies early. In general, your best defense is a well-balanced, healthy pond. While sick fish can be treated with medications, it is very difficult or even impossible to do in a pond. If you see a sick fish in your pond, I suggest removing it immediately and putting it in a separate container. This way, you can easily medicate it if you choose to do so, and it is not getting your other fish sick if the disease is easily passed from fish to fish.

Dropsy

  • Causes: Dropsy is a problem that koi and goldfish commonly encounter. There are several known causes for Dropsy. It may be caused by a bacterial infection hitting the kidney or liver with the bloodstream as the route of infection. It may also be brought by the Mitraspora cyprini, a rare fish parasite that hits the kidney.
  • Symptoms: Physical signs to look out for that point to Dropsy are raised scales that resemble a pine cone, bulging eyes, fluid retention or body swelling, and loss of balance. Internal symptoms include congenital heart or kidney failure, kidney enlargement, and the loss of function for the organ.
  • Treatment: Dropsy isn’t contagious, and treatment is dependent on the nature of the problem. Since there is a wide range of possible causes with similar symptoms, the best action plan is to give varied treatments. There are medications for Dropsy that are antibacterial, antibiotic, and antiparasitic.

Flukes

  • Causes: Flukes are parasites among the most common to hit koi and goldfish. These parasites attach themselves to either the body or gills of fish and may hit the entire pond when left unaddressed.
  • Symptoms: Tell-tale signs of fluke infestation are flashing where fish scratch themselves against other objects or the bottom of the pond, frayed fins, difficulty breathing or frequent gasping, excessive mucus secretion, and weight loss.
  • Treatment: To treat flukes, koi are given Supaverm of Potassium Permanganate, while goldfish are given Praziquantel or Potassium Permanganate. Immediate treatment of the affected fish is vital not to affect others in the same pond.

Fin Rot

  • Causes: Much like Dropsy, fin rot is a condition that comes with another underlying problem. When under stress, koi and goldfish become more vulnerable to bacteria, leading to fin rot. Fins start to rot when the immune system is weakened due to poor water quality, disease, fin nipping, temperature change, and overcrowding, among others.
  • Symptoms: Aside from apparent rotting of the edges of the fins, fin rot can also have symptoms like fin discoloration, missing fins, inflammation near the fins, and behavior change like hiding and rubbing. If the condition worsens, fins will completely deteriorate up to the body tissue.
  • Treatment: Since poor living conditions contribute to fin rot, be sure to test and address problems to bring back water quality. Once the pond water is safe again for your koi and goldfish to live in, you can already start treatment using antibacterial medication.

Gill Rot

  • Causes: Gill rot, also known as Columnaris disease, is caused by the Flexibacter columnaris bacteria. Columnaris is a serious and alarming skin and gill disease mainly affecting freshwater fish.
  • Symptoms: You will know it is gill rot or Columnaris when there is the presence of white and yellow mucoid patches all over the body. These are usually composed of swarms of the bacterium with a reddish hemorrhagic zone and necrosis surrounding it. The overall appearance makes the fish look like it is covered in white rags.
  • Treatment: Antibiotics and certain chemicals are used to treat external infections caused by Columnaris. Copper sulfate, Acriflavine, Furan, and Terramycin are added to water to help cure this condition.

Anchor Worm

  • Causes: Contrary to its name, anchor worm is not a specific type of worm but rather the Lernaea copepod crustacean. This typically occurs when new goldfish and koi are added to the pond that have not been quarantined.
  • Symptoms: Anchor worms, usually appearing as a short piece of thread hiding beneath a scale, may dwell unnoticed in the newly added fish and affect others. They are typically found in the affected fish’s oral cavity, making its mouth resemble baleen. Those that fall off leave behind patches of hemorrhage or fibrosis.
  • Treatment: Because the naked eye can see these string-like organisms, you may want to pull them out. The best action to take is to leave it as it is highly recommended to have it removed by a veterinarian while the fish is sedated. Bacterial infections may develop in the areas where these anchor worms attach, so monitoring is important. This can also be treated with organophosphates or diflubenzuron (dimilin) but with caution.

Fungus

  • Causes: Fungus may grow and hit those with a weakened immune system when pond water quality is poor. Fish with existing infections and wounds are more likely to get fungal infections secondary to their condition.
  • Symptoms: If you find growths along your pet fish’s body and fins that look like cotton wool, it most likely has a fungal infection. When not treated immediately, fungal infections can lead to fatal results.
  • Treatment: Though it is not contagious, it is recommended for pond owners to isolate infected fish while it is being treated. Slowly take out the fungus with a cotton swab and use prescribed fungicide on the affected area. Infected fish should be monitored to avoid further infections. For the pond, improve water quality and at the same time use Methylene Blue to help get rid of the fungus.

Fish Lice

  • Causes: Fish lice or Argulus is quite common in koi and goldfish ponds. It may appear as green algae that has stuck itself onto the fish, but a closer look will show that it’s actually a tiny crustacean with a greenish-brown disk-shaped body. You can spot them in the stomach, throat, and bases of fins.
  • Symptoms: Fish lice attach to your fish, create tiny holes in the body, and leave red spots. With the fish lice attached, affected fish will try to scrape the organism off. If you notice abnormal activity like this, you may want to check for fish lice. Lethargy or less energy is also a sign, especially if the fish lice has attached itself long enough to make the fish anemic.
  • Treatment: Chemical treatment, such as Dimilin, is needed to eliminate fish lice and eggs in your pond. Be sure to read instructions carefully before doing these treatments to avoid harmful effects on your pond ecosystem. There are also recommendations from pond owners to use tweezers in removing fish lice with precaution.

Trichodina

  • Causes: Another parasite to look out for in koi and goldfish ponds is trichodina. It is pretty easy to identify this parasite with its wagon wheel-like appearance.
  • Symptoms: To know if a trichodina has latched itself to your fish, check if there is a gray film or mucus all over your fish’s body. Breathing problems may arise, especially when its effect has become severe. Other signs to watch out for are lethargy and flashing.
  • Treatment: The earlier the treatment of trichodina infection, the faster it will be, especially when it’s still in the early stages. Medication can be Potassium Permanganate or salt dip.

Ulcers

  • Causes: As with other bacterial infections, fish with a weak immune system are prone to getting ulcers. Ulcers are also caused by parasites such as flukes and anchor worms, so keeping your pond parasite-free helps prevent ulcers.
  • Symptoms: Initially starting as tiny red or white pimple-like spots, ulcers eventually become large holes that, when left untreated, will affect the muscle of your fish.
  • Treatment: Fish suffering from ulcers need medicated food to help them recover. Bath treatments of Tricide-Neo, antibiotic injections, and antibiotic ponds are courses of treatment you can take for your fish.

Chilodonella

  • Causes: Chilodonella are microscopic parasites that use their fish host as an anchor point in feeding off bacteria and microbes. These parasites stick to gills, especially in their juvenile stages. As these grow, they move to different parts of the skin.
  • Symptoms: Cloudy white spots on fish skin, flashing behavior, gasping for air, increased mucus production, clamped fins, and low energy are some signs that tell if your fish has a Chilodonella infection.
  • Treatment: One thing to remember in treating parasite and bacterial infections is that improving water quality does wonders in preventing further damage and recurrence. For fish with Chilodonella, isolate it into another tank and give necessary treatment such as a salt bath, salt dip, or Potassium Permanganate.

Costia

  • Causes: Very similar to the Chilodonella, Costia is a parasite that needs a microscope to be seen. This parasite attacks fish skin and gills and affects those with existing problems. It dwells more in colder water and is not that harmful unless it grows in large quantities.
  • Symptoms: Fish with less appetite and energy, fleshing, and extra slime production may be affected by Costia. Also, expect breathing problems, especially when gills are affected.
  • Treatment: Like other infections, keeping your affected fish in quarantine is the first step you should take. This prevents further damage to your pond and controls the situation. Costia may be difficult to treat once it has become widespread. Treatment includes medicated baths for the affected fish.

White Spot Disease

  • Causes: White spot disease is a common health problem that fish of different species experience. The sole cause of this problem is the protozoan Ich that sticks itself to fish’s gills. After clinging onto its host for about three weeks, the Ich will release its hold and settle at the bottom of the pond for reproduction.
  • Symptoms: You can identify it as white spot disease when there are small white spots on your fish that are the size of coarse sand or salt. However, other symptoms may manifest even before the appearance of white spots. These include lethargy, loss of appetite, and consistent rubbing of oneself against other objects.
  • Treatment: It is interesting to note that salt is a known medication for Ich. The salt concentration of the pond or quarantine tank is increased to about 0.5% for 10-21 days. For better and faster results, it is recommended to increase water temperature gradually. Another course of treatment is using malachite green and formalin, which requires caution and works best for short quarantine treatments.

Swim Bladder Disease

  • Causes: Swim bladder disease is when the fish cannot regulate its buoyancy. There are two types. First, the Positive Buoyancy Disorder is caused by either a change in diet, parasites, or a shift in the swim bladder. Second, the Negative Buoyancy Disorder is caused by many internal factors such as a rupture or infection.
  • Symptoms: You can identify the first type, Positive Buoyancy Disorder, when your fish floats at the top of the pond or on its side. On the other hand, with the Negative Buoyancy Disorder, your fish struggles to get to the top and stays at the bottom instead. This may go unnoticed because fish staying too low is not as noticeable as those that float too high.
  • Treatment: Different types and causes require different treatments. For Positive Buoyancy Disorder, if the cause is the diet, one possible remedy is to halt feeding for a couple of days to release excess gas. Surgeries to remove tumors and the like may also happen when advised by the veterinarian. Different plans may arise for the Negative Buoyancy Disorder depending on the diagnosis. While waiting for your veterinarian’s advice, you can help your affected fish by making it comfortable with the pond layout and giving it attention during feeding.

Gold Dust Disease

  • Causes: Also referred to as Velvet and Rust, Gold Dust disease is a common condition among freshwater fish caused by Oödinium or Piscinoodinium. There have been debates about whether it is a protozoan or algae because of its chlorophyll component.
  • Symptoms: As this is a parasite, infected fish will try to scratch the organism off its body. Other than flashing, symptoms for Gold Dust disease include lethargy, weight loss, labored breathing, clamped fins, and a velvety film of the skin that is either fine yellow or rusty. During its advanced stages, fish skin may start to peel off.
  • Treatment: This disease is contagious, so it is essential to remedy it at the soonest possible time. Treatment for Gold Dust disease includes raising the water temperature, dimming lights for several days, adding aquarium salt, and treating the pond with copper sulfate for ten days.

Final Thoughts

Starting a pond or aquarium is no easy task. There are a lot of things to consider. When your tank is unnatural and indoors, you have a much more challenging task as the tank will require you to care for it in the absence of nature. If you create a naturally balanced outdoor pond, most of the hard work is taken care of by nature, including fish health management. As the owner, you must be equipped with the proper knowledge of the fundamentals of caring for your pet fish and know-how on dealing with problems such as diseases that you may encounter later on.

I hope this guide provided you with all you need to know before you start your journey in building your pond or aquarium. Be sure to keep this in your bookmarks tab for when you need a quick reference as you explore the wonderful world of aquatics.

Tree Planting Techniques

Tree Planting

Planting Native Trees is a huge contribution to the restoration and maintenance of native wildlife as well as biodiversity. Planting any trees helps to offset the deforestation and clearing of our land. The more trees we have growing on this earth, the better off we will be. In this article, you will be provided with a complete guide on choosing, planting, caring for, and maintaining the US native fruit, phytoremediator, and ornamental trees.

Site Selection

Site selection is very important for the long-term health and prosperity of the tree. Some trees can adapt and grow almost anywhere, but choosing a good spot to plant for optimal, long-term growth is very important. Most trees prefer sunlight and deep, fertile soils, but trees can thrive in most areas as long as they are native to the climate. Choosing a tree that is native to your environment is likely the most important step.

One problem we often see with tree site selection is placing the tree where it looks nice now but not planning for its future growth. Far too often, we see very large trees planted too closely together so that they never reach their full potential due to crowding, or we see them planted too close to power lines or structures which means that someone will end up cutting them down long before they die of old age.

Having trees compete for resources is typically not a problem if you intend to replant a forest; that is the natural state, but some trees survive and thrive in the forest while others don’t. If you are paying for and planting trees in your yard, you probably want them all to survive, so you should take care to plant them in a suitable spot.

Consider their mature height and width. Some trees can be planted very close to one another, while others need room to spread out. For example, in the case of a fruit plant (apple, pear, peach, or pomegranate), you need to select a wide-open space to allow its canopy to spread. On the other hand, an ornamental tree such as a Palm tree or Sourwood grows erect, and the canopy is limited.

Steps to Planting a Tree:

1. Dig the Hole

  • The size of the hole that you dig will depend on several factors.
    • The size of the root mass of the tree you intend to plant. Always dig your hole at least one foot wider on all sides than the tree’s existing root mass(ball). This means that if you measure across the ball of the tree and it measures 2 feet, you should dig a hole with a 4-foot diameter. This will give the tree roots space to grow and make planting and leveling it easier for you. Of course, if you are planting a very small tree, you won’t need this much space. Do not dig the hole deeper than the ball of the tree; you need a firm, stable base that the tree will sit on.
    • The type of soil that you are planting in. If the ground you are planting into is very sandy, gravely, and dry, you will want to make sure to plant the tree as deep as it grew in the nursery to maximize its ability to get moisture. If you are planting into heavy clay soils that will hold any water that flows into them, you will want to dig a more shallow hole so that part of the ball of the tree can be above the surrounding ground to allow it to get the oxygen that it needs.
    • The moisture content of the ground you are planting in. How wet is the area? Regardless of the soil type, if the area is consistently wet, you may need to plant the tree a bit higher in the hole so that it can get the oxygen that it needs. Most dead, recently transplanted trees that I see have died because the tree was planted too deeply in the hole.
    • The condition of the tree ball. Every tree has a depth in the ground at which it naturally grows. Tree roots don’t only take nutrition and moisture from the ground to feed the tree; they also need oxygen to grow. If the tree roots are planted too deeply in the ground, they will not have access to enough oxygen, and the tree will die as a result.
      • It is always important to inspect the top surface of the root ball of a tree prior to its final planting. Where the roots grow from the tree’s trunk is called the root flare. The roots flare out from the base of the trunk. You must dig down gently to locate the root flare and the top of the roots to understand the depth at which your tree should be planted. Be careful not to scar the roots when you expose them.
      • Most container-grown trees will not have this problem, but many balled and burlapped trees will have a thick layer of soil built up over the top of the tree roots. These trees are grown in a nursery where the rows are cultivated multiple times per year, which tends to push soil up onto the top of the roots. Then, when it comes time to dig the trees, more soil is piled on top of the roots, and the entire ball is covered with burlap. If you simply plant these trees at the height of the top of the burlap wrapping, many will be too deep and will die. It is not uncommon for a balled and burlapped tree to have 4-6″ of extra soil on top of the roots. The proper height of the tree is the most challenging and most crucial part of the planting. You cannot untie the twine or burlap from around the tree’s trunk until it is standing in the hole and you are done pushing on the tree trunk. Otherwise, you will push the tree right out of the root ball. So, for now, you need to give it your best guess.

2. Create a Dike

  • As you dig the hole for your new tree, pile all of your excavations around the perimeter of the hole equally, and don’t step on them to compact them.

3. Put the Tree in the Hole

  • Once the hole is complete, place your tree into the hole and stand it upright. If your tree is too heavy to lift, leaning the tree to one side and supporting the trunk as you roll the ball into the hole is a good way to get it where it needs to be. Use caution when placing and handling the tree, as it is easy to break branches and stems if mishandled.  

4. Level the Tree

  • Stand back and look at the tree from several different angles to ensure that it is planted straight up and down. Adjust the tree as necessary to make it appear straight from all angles.

5. Remove the Twine

  • Once the tree is straight, and you are done pushing on the trunk, remove the twine and burlap from around the trunk and above the roots to ensure that the roots will be at the proper height. If the tree appears too low or high, you may need to re-wrap some of the twine or burlap to allow you to raise or lower the tree.

6. Backfill the Hole

  • Once you are sure it is at the proper height, backfill the hole with a mix of organic material and friable soils from the excavation.

7. Finish the Dike

  • Once the tree is backfilled, finish contouring the remaining excavated soils into a small dike around the hole that is slightly higher than the root ball and will help to hold in the water when you water the tree.

8. Water the Tree

  • Next, slowly fill the hole with water, watching for areas where the water washes the soil down and causes a sinkhole. If this happens, add some more friable soil as you are watering to fill all sinkholes. Fill the soil ring up to the top of the dike and let the water soak in.

9. Mulch the Roots

Once the water has soaked in and there are no sinkholes, lightly mulch the top of the tree roots with wood mulch to help keep the soil and roots moist.

10. Monitor the Tree

  • Monitor the tree for the next year by sticking your finger into the soil where the roots are. If the ground feels moist, the tree does not need any water. If the soil feels dry, the tree needs water, and you should once again fill the hole up to the top of the dike and let it soak in slowly. After the tree has grown for a year, it is not likely to need watering unless there are periods of drought.

Natural Soil Amendments:

Soil amendment is very important to improve drainage, water holding capacity, and soil nutrient availability. Amendments can be added to the hole as you backfill, along with some of the excavated soils. Amendments can also be added to the soils around the tree, outside of the hole, to encourage root growth. Always use organic soil amendments, as the chemical fertilizers are rapid action and less beneficial to long-term soil quality.

  • Compost: well-rotten/partially decomposed organic matter of “Greens” and “Browns.” Greens include the grass, leaves, and food scraps to provide the “nitrogen,” while Browns include the woody remnants to make the compost “carbon-rich.” Compost nourishes the soil and provides spaces for the beneficial bacterial colonies to grow, die, and add humus to the soil.
  • Sawdust: is a good soil nourishing material for acidic-soil-loving trees like Conifers, Rhododendrons, Blueberries, etc. It decomposes very slowly, so adding it to clay and moist soils will assist in speeding up the decomposition.
  • Peat moss: is an expensive but very effective and compact natural amendment that lasts longer in the soil. It helps to improve the nutrient and water holding capacity of sandy soils while improving drainage in the clayey soil.
  • Leaves: these are suitable for the entire yard. You can always add a layer of leaves over any garden to allow them to break down naturally and decompose, but if you want to use them for planting trees, it is recommended that you pile them with other organics and allow them to break down and begin to decompose.

Amendment of Problematic Soils:

  • Poor/less fertile soils: urban soils are usually not very fertile, so they require some nutrient-rich organic treatment to improve the soil’s health and help increase the water-holding cation exchange capacity of the soil. Any of the above-listed organic amendments will help this type of soil.  
  • Silty soils: Unlike clayey soils, silty soils have severe water erosion problems in high rainfall areas. Removal of the nutritious layer of soil, larger deeper gullies, and exposed roots are the problems associated with silty soil.
    • Solution: yearly addition of organic compost, leaf manure, or farmyard manure on the surface is good to avoid water erosion. Organic Mulching is the solution to silty soils.
  • Alkaline/Acidic Soils: high and low hydrogen ion concentrations are problematic for plants. In highly alkaline soils, plants cannot absorb the nutrients, especially micronutrients, while in Acidic Soils, the trees would suffer from severe calcium, phosphorus, and sulfur deficiencies.
    • Solution: Alkaline soil is treated with Gypsum/Lime solution to remove the exchangeable sodium ions with calcium. In Acidic soils, it will increase the soil pH and improve its cation exchange capacity.
  • Heavy/Clay Soils: have compaction problems due to tiny soil particle sizes, resulting in poor drainage, oxygen depletion, dying of roots, and in the end, the death of the plant.
    • Solution: It is recommended to add compost to the clay soils and to till it into the top 6 inches. Doing this every few months for a year before planting your tree would be a great way to loosen up the heavy clay soil. If you don’t have time for that, tilling organics into the clay around a newly planted tree will encourage root growth and help to break up the clay and improve the oxygenation of the soil. Depending on the density of the clay, cutting a smooth-sided hole, planting a tree, and backfilling with the organic matter may cause the tree roots to stay in the excavated hole as if it were a pot. The roots will simply circle due to the organic nature of the backfill and the density of the surrounding earth. This would not make for a stable root structure over time and is more likely to result in a root-bound, girdled tree. Breaking up the surrounding clay soils and adding organic matter, even if only in a few select areas, will get the roots started growing in the right direction and encourage the roots to penetrate the clay soil.

General Tree Planting Guidelines:

These are the general rules applicable to all types of tree planting:

  • Tree selection: Type of tree (fruit or ornamental), its canopy size when fully mature, and sunlight requirement should be considered as tree planting is a long-term investment. 
  • Annual Nourishment: Add compost or kitchen waste (prepared by decomposing the daily kitchen waste) every year during Feb- Mar. No need to provide any synthetic fertilizer.
  • Shaping/staking: every tree has its natural shape it attains when it matures. However, you can also choose to attempt to control the shape and size of a young tree through shaping and staking. Many professional tree planters will simply stake all newly planted trees, so they don’t need to come back to straighten a tree. For the tree’s health, it is better not to stake it as the movement of the trunk will help it grow deep and strong roots. The exception would be a tree that is very loose in the dirt ball, in which case it should be staked to prevent root breakage. 
  • Annual Pruning: When considering whether or not to prune your tree, it is important to ask yourself how much maintenance you want to sign up for. Most trees do just fine without pruning and can be left on their own to assume their natural shape. You can certainly choose to prune a tree to any shape that you would like, but it will add new growth every year, so keeping a particular shape or size will prove to be much work. In general, choosing a tree that is well suited for its location and allowing it to grow to its natural size and shape is the best scenario, both for the tree and you.
  • Annual Mulching: Many landscape services try to sell their clients on the idea of freshening up their mulch beds every year by adding more mulch. Adding more mulch over a weedy patch of garden bed is a fine idea, but adding mulch on top of tree roots every year is not such a good idea. Always be sure to inspect the tree’s root flare before adding more mulch. You only want a very thin layer of mulch over the area of roots near the trunk. Thick mulch in this area may result in trunk rot and may encourage animals to live in the mulch and nibble on the bark. A couple of inches of mulch over the remaining tree roots away from the trunk is fine, but you surely don’t want it to be 6″.

Tree Planting Techniques and Types:

Container-Grown Plant:

Container-grown plants have been grown from either a tiny shoot or seed and are grown directly in the container they are sold in. This gives them the advantage of not having their roots cut when transplanted. You simply remove the tree from the pot, maybe loosen the root mass a bit if it appears to be root bound, and then plant it into the ground. These trees can be planted at any time of the year since they do not undergo root pruning at the time of planting.

Limitation: container-grown plants that have been in the container too long will have roots that are very tight in the pot and that can curve back around themselves and end up girdling other roots or the trunk. If you come across a densely packed root mass, loosen up the roots with fingers or a pruning tool before planting.

When removing a tree from a container, it is best not to pull and twist on the tree’s trunk to get it out of the container. It is better to lay the tree on its side and slide or cut the container off the roots.

Balled and Burlapped (B&B) Plants:

“Balled” for the “ball of soil and roots collectively” and “Burlapped” refers to the “material used for safely wrapping the plant balled area with.” The American Nursery Standards are the best standards for B&B. Balled and burlapped trees have long been the industry standard for larger tree transplants. Balling trees can be done by hand or with a machine. There are specialized machines that will dig out a tree and drop it into the burlap and wire sack to support it through transport and sale. Also, field workers will trench around the root mass of trees, tightly wrap them in burlap and then break them off of their pedestal, complete the burlapping and tie the ball in a criss-cross fashion with jute twine.

A properly balled and burlapped, hand-dug tree is a thing of beauty, and the quality can be felt by the tree’s stability in the ball and the tightness and precision of the burlapping. Machine B&B trees are fine but usually have a wire basket and are generally not as tight and well supported as a hand-dug tree.

In any event, the burlap will stay on the tree when planted as the burlap is biodegradable, and the roots will undoubtedly work their way through the material. Even wire basket trees will typically be planted with the basket intact, as this will tend to rust over time, but this wire basket may also prove to be somewhat detrimental to root growth. It is important to note that it is crucial to cut away any non-biodegradable twine that might have been used. Too often, with machine dug trees, you will find plastic twine used around the tree’s trunk. This will kill the tree over time if left intact, as it will not degrade.   

Limitation: B&B plants can be moved only in the fall, winter, or spring when the transpiration rate is minimum, and the root growth is maximum. It takes about three years for the roots to establish correctly and start to regenerate to balance the root to shoot ratio.

Bare-Root Plants:

Easiest to plant, transplant, and least expensive are bare-root plants. Planted in the dormant season and staked as the landscape-sized bare-root plants are thin and elastic stemmed. This is a great way to get bulk tree saplings shipped to you very economically. Because they have no dirt, these tiny trees should be planted as soon as possible. Create a hole and hold the sapling at the correct level in the hole while it gets backfilled with a slurry of soft, friable topsoil and water, being sure to eliminate all air pockets as you work.

Environmental Benefits/Objectives of Tree Planting:

A mature leafy tree can produce enough oxygen for18 people to inhale throughout the year. The urban trees in the US produce approximately 61 million metric tons of oxygen annually, enough for two-thirds of the population of the US to inhale for the entire year. (Nowak, Hoehn, & Crane, 2007)

Plants absorb pollutants from the air, water, and soil as well. Either directly or indirectly, trees are helping in the removal of hazardous contaminants.

Plants absorb carbon dioxide, ozone, and other volatile organic compounds responsible for ozone layer depletion and global warming.

Trees’ extensive fibrous root system helps keep soil in place by minimizing soil displacement and preventing soil erosion.

Trees can be food sources for humans, animals, and wildlife and provide shelter to the animals; thus, they help conserve and increase biodiversity.

Trees are likely the easiest and cheapest way for us humans to reverse the climate change issues that our overpopulation and land abuse have caused.

Social Benefits:

At the start of spring, tree planting campaigns, projects, and activities become the source of building a community’s unity and spirit.

The experts arrange seminars school activities to highlight and remind the benefits of Tree Planting.

Plants improve mental health. Improves Mental health, stress and depression reduction, and psychological effects of plants are scientifically proved. (Kim, Lim, Chung, & Woo, 2009)

References:

Kim, W., Lim, S.-K., Chung, E.-J., & Woo, J.-M. (2009). The effect of cognitive behavior therapy-based psychotherapy applied in a forest environment on physiological changes and remission of major depressive disorder. Psychiatry Investigation, 6(4), 245.

Nowak, D. J., Hoehn, R., & Crane, D. E. (2007). Oxygen production by urban trees in the United States. Arboriculture & Urban Forestry. 33 (3): 220-226., 33(3).

The Uses Types and Costs of Landscape Fences

Landscape Fencing

As the adage goes, good fences make good neighbors. While this generally refers to perimeter fences surrounding a home, fences also play an influential role when it comes to landscaping.

Keep in mind that getting the perfect fence isn’t as easy as copying the design, size, or materials used for someone else’s enclosure. Each home and yard is unique, and the same goes for your family’s needs and preferences.

To ensure that your fencing will serve you well and last for many years, you should plan wisely and consider it an investment in your future. Spend plenty of time researching your options before you make a decision on which type of fence is ideal for your yard.

In this article, I’ll help you deal with your new fence installation, giving you a general idea of landscape fencing and its many uses.

What is Fencing in Landscaping?

As the name suggests, landscape fencing refers to design ideas for enclosing your landscape or property. These fences also benefit you beyond beautification reasons, as they also help define space, control views, and improve homesite safety.

Any kind of fencing is considered an integral feature of a landscape, which indicates a private possession as opposed to a public space. These landscape fences are also commonly called “partitions” since they work like indoor walls enclosing an area such as a backyard garden.

In addition to creating borders and separations, many fences are designed to be more of an aesthetic landscape feature. Detailed fences such as picket or split rail fences will add a certain feel and identity to our property.

Factors to Consider in Choosing the Perfect Fence for Your Yard

Nowadays, there are various types of fences in many different materials, colors, and styles. Many of which do not require painting, saving you the labor and additional costs incurred. The wide range of choices may prove to be a challenge to many, particularly new homeowners.

If you’re thinking about getting landscape fencing, here are some factors to consider in your decision-making process.

Rules and Regulations

It’s crucial to consult with the local governing bodies before you dig too deeply into this fence idea. Most areas will require a building permit, and most will have specific guidelines regarding property line offsets and height, design, and material restrictions depending on the location in the yard.

It doesn’t pay for you to start envisioning your newly fenced-in yard until you figure out what the powers that be will allow you to do.

Fence Types

Privacy

Many people are interested in fencing for privacy and safety reasons, and some fences are both. I told you this fencing stuff was a bit tricky.

It seems that most folks interested in fencing are interested for privacy reasons. Maybe they want to keep their yard private from the neighbors’ yard or just want to keep their pets and children privately enclosed in the yard so that there will be no worries. Wait, is that privacy or safety? A bit of both, I guess.

With the population rising and land prices increasing, privacy fencing is growing in popularity as an affordable way to get the privacy that a larger piece of land in a less populated area might get you. Privacy fences are often too tall to see over and often use side-by-side or overlapping boards to keep prying eyes out.

Usually, privacy fences along a property border must be installed so that the attractive side faces the neighbors’ yards. This is one reason why the shadow-board fences have become so popular since they look the same on both sides.

Of course, privacy fencing can be made from a multitude of materials and in as many styles as we can dream up. The most crucial factor here is just a bit of privacy.

Access

If you want a bit of privacy but still want to cross through with ease, you may want to consider an access fence. The access fence is just offset fencing sections that effectively block the view while allowing easy access to both sides of the fence. Access is a big deal when you are considering fencing your yard. Will you need multiple gates, or maybe an entire fence built for easy access?

Security

Security or safety fencing is a very popular category. A good strong fence can keep out wandering neighborhood kids and pets as well as would-be criminals eying up your belongings.

If you aren’t concerned about privacy and only safety, you might be interested in the industry-standard chain-link fence. These have been used for a long time to keep things, people, and pets where they belong and not where they don’t. If you are concerned about safety and privacy, a tall chain-link fence with slats might be just the thing for you.

Many industrial buildings are surrounded by chain-link fencing, gates, and barbed wire as an actual crime deterrent. Barbed wire may be a bit too industrial for most residential neighborhoods, but a good chain link fence and gate have saved a lot of headaches by keeping pets and kids in and keeping strangers out. Or at least significantly slowing them down.

If the old chain link look doesn’t do it for you, there are many security fences made with more attractive materials such as wood, steel, iron, aluminum, iron, or even PVC.

Aesthetics

Sometimes, it’s not so much about what you are keeping in or out, nor is it about blocking the view. Sometimes the fencing is meant to simply be attractive. Many a split rail, white picket, or ornamental iron fence section have been installed for no reason other than to beautify the property.

Curb appeal definitely matters when it comes to fencing. A tall ugly fence blocking out the sun will not be too attractive from the road, nor will a chain-link fence that makes your yard look more like an impound yard. Property value is a big deal. In the long run, you will likely be selling your house, so build a fence that suits your needs, but keep in mind that the curb appeal might be what sells the place.

Animals

Fences are an excellent way to keep pets, and other animals contained. Having a nice safe, fenced-in yard can be a great comfort to the homeowner letting their pet out back for a bit of exercise. When considering a pet fence, you need to consider the countless hours this new fence will save you. This will be all of the time spent watching, following, and picking up after your pet on all of those walks around the block and backyard visits. That fence is sounding more attractive already.

Be aware that certain fences may be hazardous to your pets, especially if they wear collars. Pet collars can sometimes get stuck on fences, resulting in the pets suffocating themselves with their own collars. Pets have also been known to get into trouble with fences that have gaps large enough to allow them to stick their head through the opening. Be sure that your fence design won’t let either of these tragic events happen to your pets. This is not a one size fits all category. Fencing a yard for a cat or small dog is entirely different than fencing your yard for a large dog.

Many fences are built to keep animals out as well. A well-constructed fence might just keep the bunnies and deer away from the veggie and flower gardens. Keep in mind that deer are fantastic jumpers and can clear tall fences. Depending on your location and how hungry they are, your deer fence may need to be 8-10′ tall if you want to be sure to keep them out.

On the flip side of that, the fence must be tight to the ground when trying to keep out rabbits. Those little bunnies can get into very small holes. Sometimes, burying a section of chicken wire or hardware cloth around the bottom of the fence and digging it into the ground might be the only way to keep them out.

Some animals, we really can’t fence. Squirrels, chipmunks, gophers, and mice are a few. These pesky critters can get through almost any sort of fencing that we can muster.

Climate

Before having a fence erected, you will need to consider the weather conditions of your area. Doing so will help you install the right fence to fit your needs.

For instance, if you live in a coastal area and choose to have a metal or wooden fence, be prepared to contend with rot or rust often. Sea breezes can be very destructive, and salt is not friendly to many materials.

Choose a fencing system that can survive the various weather conditions of your environment– rain or shine. Aluminum and PVC fences prove to be excellent choices in this respect. In particular, PVC materials can withstand both harsh ultraviolet rays and moisture.

Materials

Many different materials are available for your fencing needs, from wood to aluminum PVC to steel. To determine the best material type for your home, you must carefully weigh your options and ensure the pros outweigh the cons.

Some fence materials are cheap, easy to install, and resilient to different weather conditions. Meanwhile, others come at a hefty cost, require a lot of maintenance, and are prone to rust or decay.

I will discuss the pros and cons in detail in a later segment. Nonetheless, it’s best to take your time in deciding the appropriate fencing arrangement for your property.

Maintenance

In erecting a fence, you will need to consider the maintenance you need to do after its initial installation. Determine the amount of time you can commit to tending to your fence and maintaining its proper condition.

Typically, you get what you pay for, so cheaper upfront costs may result in more expensive and time-consuming repairs down the road.

Not all materials that would appear to be the same are, in fact, the same. Be very careful of your choices. A wooden fence built from pine is quite different than a wooden fence made from pressure-treated pine, cedar, or redwood.

Stainless steel is very different from standard steel. When dealing with metal fencing of any kind, the thickness of the material will make a huge difference in its durability, weight, and cost.

When considering some of the plastic (PVC) fences on the market, considering the grade of the fence will significantly affect its durability. You can find PVC fences that are very lightweight and flimsy and others that are very well built and durable. Once again, the UV resistance and thickness of the PVC material will make a big difference, as well as whether it is reinforced or not.

Having painted post and rail horse fencing as a kid, I will tell you that I would certainly choose a fence material that does not require painting as that can be a very time-consuming yearly task.

What is the Best Fence For You?

How do you decide which fence material is the best fit for your needs? For starters, you need to understand the pros and cons of various fencing materials.

Here’s a brief rundown to help you select the best fence material for your property:

Wooden Fence

  • Average Cost of Materials: $10 to $20 per linear foot
  • Uses: Wooden fences can serve different uses, such as privacy or security fences and landscape beautification. Ornamental picket fences are popular front yard choices. Meanwhile, board-on-board, dog-ear, horizontal slats, and stockade are famous styles for backyard fences.
  • Advantages: Wood is considered the most popular fencing material, given that it’s affordable compared to other options. It’s also one of the easiest fences to build on your own, allowing you to save money on professional installation. Given proper care, a wood fence can last for many years. As stated above, the wooden fence category is a complicated one. Do your research and find the type of wood that will best serve your needs.
  • Disadvantages: Wooden fences generally require more maintenance, given that it is susceptible to pests, rot, and water damage. You may need to repaint and give your wood fence a power wash every few years if you choose some of the lower-cost alternatives, while a redwood fence can go many years with no trouble at all.

Aluminum Fence

  • Average Cost of Materials: $7 to $32 per linear foot
  • Uses: Like wrought iron fences, aluminum fences are available in varying colors and styles. These fences are ideal for backyards and front yards, and they are also excellent choices for poolside fences.
  • Advantages: If you’re into personalized designs, aluminum fencing is the best choice as it is highly customizable at an affordable price. The material also doesn’t rust, so it doesn’t demand that much maintenance on your part.
  • Disadvantages: Aluminum is a weak material, making it prone to damage in harsh weather and harsh use. If your fence may encounter rough-housing teenagers, falling tree limbs, or large breed dogs, aluminum will not hold up well.

Wrought Iron Fence

  • Average Cost of Materials: $24 to $35 per linear foot
  • Uses: This material is used mainly for decorative and beautification purposes. Hence, they are available in a wide range of designs. You can choose to include spiked railheads for added security. Wrought iron fences are very popular as decorative front yards and entrances due to their ornate features.
  • Advantages: Both beautiful and durable, this material is perfect for those seeking to erect decorative or creative fences in their yards. This material is also strong and resilient, so you can count on it to last for years.
  • Disadvantages: Since most wrought iron fences are custom-made, prepare to shell out a hefty sum since these may get quite expensive. The material is also prone to rust and will typically need a fresh primer coating at least once every five years.

Vinyl Fence (PVC)

  • Average Cost of Materials: $18 to $40 per linear foot
  • Uses: This material makes for perfect, low-cost privacy fences, post and rail fences, and picket fences. It can also provide excellent security, beautiful landscape decoration, and pool or pet fencing. A vinyl fence can be used for both front or rear yard fencing as it can be constructed to look just like painted wood, and PVC and vinyl are essentially the same material.
  • Advantages: Generally affordable and weather resistant. This material is available in different UV resistance levels, different thicknesses, and price ranges. Be sure to get the variety that will serve your needs. Warping, rotting, and painting are not an issue with PVC as long as you don’t paint it. Most vinyl fencing can be easily snapped together, making the installation process a breeze even for first-timers. Commercial grade PVC will tend to be quite nice and durable.
  • Disadvantages: Buying cheap PVC fencing will give you a cheap-looking, not-so-sturdy fence. Cheap fencing in this category will be prone to breaking in frigid cold weather and may sag and discolor over time. PVC fencing will not do well with rough treatment, such as kids climbing, dogs jumping against the fence, or limbs falling on the fence.
  • Average Cost of Materials: $5 to $40 per linear foot. Note that higher prices may be applicable for thick-gauge, high-security chain-link fences.
  • Uses: If your main priority is to add an extra level of security to your front yard or backyard, a chain-link fence is a perfect choice. It keeps intruders (such as wild animals) off your private property. Its open design doesn’t give a lot of privacy, but you can buy attachable plastic privacy slats if you have the extra budget. Some homeowners also opt to include a barbed wire top for the additional sense of security.
  • Advantages: This fencing material is generally cheap, durable, and maintenance-free. DIY homeowners can install it, but unless the homeowner is in the construction trades, I would suggest leaving it to a professional who installs these fences every day.
  • Disadvantages: It contributes minimal visual appeal to a landscape. When buying a fence material without a protective coating, the metal can corrode over time.

Bamboo Fence

  • Average Cost of Materials: $3 to $6 per linear foot
  • Uses: Generally, bamboo fencing adds privacy to a backyard. You can erect a bamboo fence in two ways: growing live bamboo in clumps or buying rolled bamboo fence panels.
  • Advantages: This fence material is an eco-friendly option, which will be a delight to environmentally-conscious homeowners. Bamboo is also cheap and easy to install, making it a great pick for those who want a fence without breaking the bank.
  • Disadvantages: Given that Bamboo is a type of wood, it’s naturally prone to rot and pests such as roaches. It is also considered an invasive plant; hence live bamboo can take over your yard or quickly spread beyond your property lot. If you purchase rolled bamboo panels, it’s crucial to apply the protective coating and install them a couple of inches above the ground to prevent early decay.

Composite Fence

  • Average Cost of Materials: $15 to $45 per linear foot
  • Uses: These solid panels offer security and privacy and provide a safe containment if you have pets and toddlers at home. Composite fencing usually blocks views given its tall height, so it’s ideal to use for backyards rather than front yards.
  • Advantages: Composite fence material comprises plastic, resin, and wood pieces– making it a durable mix. It is also available in various colors and designs that imitate the look of natural wood, minus its vulnerability to rot and pests. Some manufacturers also offer composite fencing that takes on a natural stone look. This fence is generally low-maintenance and requires occasional water spraying to look appealing.
  • Disadvantages: Given their durability and premium quality, composite fences are more expensive than other options. It will also be challenging to install on your own and may sag or fade over time. Composite is a very loose term, and lesser costs mean lesser quality, so buyers beware.

Masonry fence

  • Average Cost of Materials: $10 to $80 per square foot. Its price may vary based on the stone quality and fence thickness.
  • Uses: Typically, brick, concrete, stucco, or stone fences increase curb appeal and add heightened security to your home. If you install them high enough, they make for private outdoor spaces. Meanwhile, low masonry fences are perfect for boosting the appeal of your front yard landscaping. Taller versions are an ideal fit for the backyard.
  • Advantages: A masonry fence, when properly installed, can stand the test of time and harsh weather conditions with little to no maintenance.
  • Disadvantages: A high-quality stone fence is a very expensive option. This type of material is already pricey, and it also requires professional installation.

Invisible Dog Fence

  • Average Cost of Materials: $200 to $2,500. The price depends on your yard size and the number of your dogs or other pets.
  • Uses: Also known as an electric fence, this material consists of an underground barrier activated by a receiver in your pet’s collar. It’s a great pick if you want to keep your furry companions in the yard without obstructing your view. Invisible fences can be erected in the front yard, backyard, or both and can cover areas in any form or size.
  • Advantages: Invisible fencing is less expensive and easier to install than other types of fences, and it also won’t get in the way or block your views.
  • Disadvantages: Pets will be contained in your yard with the help of electric fencing, but they cannot keep other animals out. For instance, wild animals like Raccoons or Coyotes may still enter your property unannounced, and this leaves your pet with no method of escaping them. Also, invisible fences stop working if the power goes out as they are powered by electricity. The static shock that keeps your dog from crossing the boundary may also pose unintended consequences.

Wire Fence

  • Average Cost of Materials: $3 to $5 per linear foot
  • Uses: Hog wire works as an excellent fence for gardens, as it keeps intruders away from your flowers, vegetables, and other plants. In general, wire fencing plays a huge role in rural and urban settings. It serves agricultural, industrial, and aesthetic purposes.
  • Advantages: This fencing material is relatively cheap and easy to install, so you can skip paying labor fees from a local contractor. Aside from making occasional repairs, your new wire fence is expectedly maintenance-free.
  • Disadvantages: Wire fencing can be visually unflattering to many and can sag and decay over time. Hence, consider this for practical fencing purposes rather than for landscape beautification.

Steel Fence

  • Average Cost of Materials: $17 to $90 per linear foot
  • Uses: Steel fencing primarily serves as a protective barrier on your property.
  • Advantages: Undoubtedly, you can count on the strength of your steel fence, given its power and durability. High-quality steel fencing also has a long life expectancy.
  • Disadvantages: This material can be quite expensive, lacks versatility, and is difficult to install due to its heavy weight.

LLDPE Fencing (SimTek)

  • Average Cost of Materials: $70 to $90 per linear foot
  • Uses: Linear Low-Density Polyethelyne is a durable fencing material that will be low maintenance yet perform better than PVC.
  • Advantages: A combination of galvanized steel and recycled polyethylene plastic, this material type is resilient and can withstand strong impact, and it is also UV light-resistant. SimTek fencing is available in various styles and sizes, giving you plenty of options for your home.
  • Disadvantages: This material isn’t widely accessible, as opposed to other fencing types. Simtek Fences are more expensive than wood or vinyl, so it takes a particular buyer to afford this fence.

Glass Fence

  • Average Cost of Materials: $70 to $100 per linear foot
  • Uses: This material is mainly used for pool areas or scenic views. Not only does it offer attractive benefits, but it is also a unique safety barrier. It is perfect for homeowners with stunning waterfront or bush locations, considered a stylish alternative to traditional wood or aluminum fence.
  • Advantages: This high-end fencing option offers a sleek, elegant aesthetic. It will also provide you with an uninhibited view of your surroundings. Glass fencing can be considered an investment that adds value to your property. Any deck, patio, or terrace transforms into an attractive focal point that can belong in a lifestyle magazine.
  • Disadvantages: Like most premium fences, this material can be expensive. It also requires high maintenance and may feel a bit risky around playful little kids or pets.

Now that you’ve acquainted yourself with the basics of different fence materials for your property, you can now make an informed decision on which one is the right fit for your needs!

Low-Budget DIY Fencing Options

If you want to erect a boundary around your property on the cheap, you certainly have multiple options to choose from. Check out these DIY cheap fence ideas for your next project:

Simple Pallet Fence

As the saying goes, simplicity is beauty. Even for beginners, a simple pallet fence is a quick and easy DIY project, and it only takes a few hours to install and is a considerably low-cost option.

The construction is relatively straightforward: pallets are stacked one on top of the other, with T-posts placed between the pallet boards and hammered into the ground to maintain the fence upright. Screws are also used to secure the pallets as they are added. Apply a coat of paint to make it look visually appealing. For a beautiful vertical garden project, consider planting herbs or flowers.

Split Rail Fence

This historical fencing option requires no special tools, as long as you have wood logs split into quarters or eighths. Rails are placed in an interlocking zigzag manner to ensure sturdiness. Generally, split rail fences are constructed so that they are simple to build and dismantle when needed.

Fence posts can be installed at the joints to improve stability, and quality woods can be used that resist rot. A truckload of this fencing material can be delivered, and the fence installed the same day. It is very easy to move around.

Wattle Fence

Another ancient yet simple building method, wattle fencing, requires no hardware or tools upon installation. It is completely made out of wood and relies wholly on tension to keep it upright.

For the posts, you’ll need pieces of thicker wood. Each one to two feet apart is hammered into the soil to a depth of one foot. Keep them close together if you want a sturdy finished product.

This fence has a lovely rustic appearance. You may create a live wall by planting clematis or other climbing plants along with it.

Corrugated Fencing

To build cheap fencing that is visually appealing, you can consider recycling old materials or buying new ones. Who knows, you might already have all the materials you need in your storage, especially if you happen to have torn down an old metal shed. Just sink some posts and fasten the corrugated panels.

Brush Fence

This type of fence is constructed by piling cleared brushwood (small trees or twiggy vegetation) until a broad structure several feet tall is formed. It is nearly impenetrable due to the dense thicket of twigs and branches. Steel posts can be used at intervals to make this fence more sturdy.

Hedging

If you’re looking for a living fence that offers seclusion, acts as a windbreak, and provides a habitat for birds and beneficial insects, you might want to consider installing a hedge. They are aesthetically pleasing and environmentally friendly. Just choose some thick, hearty shrubs that grow the height you are looking for and plant them in a tightly spaced line. Hawthorn, hemlock, prickly ash, barberry, boxwood, arborvitae, and privet are popular hedge plants. If you want the fence to be effective in winter, choose an evergreen plant.

Dry Stacked Stone Wall

This wall is made from stones of various sizes, without any mortar to hold them together. Building this wall is simple to pick up, but mastering it will take some time. Consider it a labor of love that necessitates a great deal of improvisation. You may be able to find the stone for free or cheap if you can find a farmer with fencerows full of stone. If you have a strong back and a bunch of patience, you can certainly build this wall cheaply. The taller it is, the wider the base needs to be as it is entirely held together by gravity.

Horizontal Plank Fence with Metal Posts

Any wooden design undoubtedly adds a rustic appeal, but adding the metal posts provides more sturdiness. The design is ideal to ensure security purposes and give better anchoring. Frequently, homeowners in windy or storm-prone areas have their fences torn up since they aren’t appropriately anchored. Layered slats of wood give the design a visual texture, and the placing also improves the home’s privacy.

Recycled Fence

Your next DIY fencing project doesn’t have to be expensive. Expect to spend nothing but some nails and fresh paint to build a recycled fence. This is an excellent fit for many environmentally conscious homeowners since they can use recycled materials free of cost. If you can find someone who is getting a new fence or wants to get rid of their fence, they may give you the materials in exchange for taking down and hauling away the fence. Then, simply take it to your house and rebuild it. Consider your skill level and available tools before choosing a DIY fencing project. Keep in mind that even a basic wooden plank fence can be functional.

Frequently Asked Questions

What is the best backyard fence?

If you browse the internet, there is no definite answer regarding the best fence for your backyard– but the wooden fence usually tops most of the lists out there. Wooden fences are very popular because of the wide range of choices available and the fact that most homeowners understand a bit of wood construction and can likely install them with much trouble.

What is the cheapest fence to build?

The cheapest fence to build is most likely the PVC fence. You can get cheap PVC fences, but I wouldn’t install them as they aren’t likely to last long. I would probably look for used high-quality fence material before choosing cheap new material.

Is it cheaper to build a fence horizontal or vertical?

This all depends on what you mean by this. A horizontal two rail post and rail fence goes in rather quickly. If you are asking about post and rail vs. pre-built panels, that is another question entirely. For the most part, the conditions of your ground and the tools available to you will generally have the most significant effect on your fence building timeline. Digging and setting the posts is always the most challenging part. Of course, the horizontal split rail fence is the quickest to install since it requires no tools and no digging.

What height is a fence allowed to be

There is no set standard height for a residential fence; the locale will have its own set of rules that all residents must adhere to. The most common height being regulated for front yard fences are around 3 feet, while for backyard fences is between 6 and 8 feet.

How do you build a fence without digging holes?

Building a fence without digging holes may be done in various ways. One of the most common methods is attaching a concrete block to a bracket that is heavy enough to carry the materials you will use to build a fence. Instead of digging holes, mount the posts in the bracket, and you can finish building your fence from there. Another alternative for a no-dig fence is purchasing a fence with driven steel posts. Of course, you can always build a split rail fence as mentioned above, but that is a very particular type of fence and may not suit your site.

What can I plant on a fence line?

If you want your newly installed fence to have some greenery growing on it, here are some recommended fast-growing and ornamental plants that you can install.

Annual Flowering Vines

  • Passion Flower
  • Hyacinth Bean
  • Morning Glory

Perennial Flowering Vines

  • Wisteria
  • Honeysuckle
  • Clematis

Evergreen Plants

  • Creeping Fig
  • English Ivy
  • Boston Ivy

Foliage Pants

  • Variegated Porcelain Vine
  • Silver Fleece Vine
  • Virginia Creeper

What can I use instead of a fence?

You are not limited to using a traditional fence, given that there are many alternatives out there you can consider. For instance, you can choose a hedge, stonewall, brushwood, bamboo, corrugated metals, and a vertical garden for when you need to create a perimeter around your yard. Often, your options for fencing materials will be limited by the local authorities, so always check before you put in a bunch of work.

Final Thoughts

In summary, landscape fencing is crucial as it adds value to a property and provides other benefits to the owner and the neighborhood. Be meticulous in choosing the best fencing configuration for your home and check your local regulations before beginning.

If you have little to no prior experience in fence construction, consult with a professional fence builder to get a bid on your project. An experienced builder from your area will also be knowledgeable regarding rules, regulations, and material choices, so don’t be afraid to ask many questions.

I hope this guide helped you understand all you need to know about landscape fencing. If you need other informative guides like this, please browse our other articles!

Erosion Control Plants for Your Landscape and Slopes

Soil Erosion

Soil erosion can act slowly but steadily, washing away topsoil over time or abruptly during extreme rain events. In whichever case, significant natural resources can be transported across great distances.

Maintaining a permanent surface cover on the soil surface and a dense web of healthy roots in the soil, such as in a meadow or pasture, is the most efficient approach to control erosion. Thus, soil conservation options, such as erosion control plants, should be considered in regions particularly vulnerable to water or wind erosion.

Shrubs or ground covers that are strong, beautiful, and have a root structure capable of stabilizing soil on a hill are the ideal plants for erosion control. To decrease the speed of heavy rain, they must have widespread foliage. They should also be deer-resistant plants if you live in deer territory.

First, Why Does Soil Erosion Occur?

Soil erosion can occur whenever we get heavy rainfall or strong winds. These forces move soil particles as they travel across the earth’s surface. In the grand scheme of things, if humans weren’t present on this earth, erosion would simply be moving particles from one place on earth to another, and the plants and animals would adjust to these changes and live on. Since we humans are here, we exacerbate these problems with our use of the land, destruction of vegetation, installation of impervious surfaces, and use of motorized vehicles, to name a few. As humans, we don’t like to see change, and we like to think that we can control nature, so we look for ways to prevent erosion.

Wind erosion is more of a problem in areas that are dry and have soft, sandy soils. Think of deserts where the wind moves large mountains of sand over time. Think also of man-made occurrences like the dust bowl when humans had cleared millions of acres of semi-arid land for crops, and then a drought came, and large swirling clouds of soil were swept across the Southern Plains of the United States by the winds that followed the drought. Wind can have great force when it is left to flow unimpeded.

Water erosion occurs when water flows over the ground and moves soil particles as it travels. The combination of steep slopes and exposed soil make for some of the worst erosion. Water erodes by the force of each droplet of water and its ability to move particles of matter. The faster the water moves, or the further the water falls, the more force it has and the more matter it can move. One fine example of the power of water erosion would be the Grand Canyon in the United States, where the Colorado River has carved out over 200 miles of the earth, creating canyons up to 18 miles wide and a mile deep in some spots. When large amounts of water get moving, they can move great mass.

You may have seen erosion occurring along stream and riverbanks where the ground is different from season to season in your own life and landscape interactions. You can often see erosion on bare slopes of construction sites after a rain event. You can see erosion in your flower beds or around your trees; whenever you get heavy rain or wind and soil particles get moved, that is erosion. Anyone who has ever seeded a brand new lawn may know firsthand how heavy rainfall can move bare dirt areas.

Why is Erosion Control Important?

As I mentioned before, erosion is a part of nature and has been happening long before humans were around to try to stop it. Erosion on its own is simply distributing the particles of the earth, and if it weren’t for humans, it wouldn’t be a problem. Let’s take the example of the Grand Canyon. This huge erosion event occurred millions of years ago, and the earth simply adapted to it. If we humans were here when it started, we would have surely researched and found ways to prevent it because we like to think that we can control nature, and we like for things to stay the same and not change. Had we been around to see this erosion starting, we would have surely been upset. Surely someone would have owned the property that was being eroded, and surely someone would have owned the property downstream of the area. Everyone who was anywhere near this incredible erosion event would have been up in arms about the potential destruction of their property and way of life.

It is hard to wrap your head around what we humans think is important or why, but in today’s world of property ownership and densely populated areas, soil fertility and where that soil is or is not located is of great importance to us.

If the unprotected soils move from one spot to the other, they may be taking pollutants and nutrients with them and depositing these on someone else’s property or into someone else’s waterway, which could have significant impacts on their way of life. This is the reason that we care about erosion. It is often sold to us as a way to conserve nature and its resources, but in truth, it is about preserving our resources and not adding to or taking away from our neighbors’ resources.

How Do We Control Erosion?

Wind and water erosion can be somewhat controlled by reducing the speed of both of these forces as well as increasing the resistance of the soil to these forces. For the scope of this article, we will mostly be discussing things that property owners can do to solve some of the erosion problems that we may come across.

Physical Barriers

If you have an area in your yard with consistent erosion problems, you can construct or install physical barriers to prevent this. If wind erosion is your problem, installing fencing or shrubs can be an effective wind barrier.

There are undoubtedly mechanical ways to slow or prevent erosion, but nothing as simple or effective as plants. We have developed ways to use solid materials such as concrete and rock to slow down wind and water movement. Think about sea walls and drainage swales. We can use our technology to use solid matter to help restrict and guide water flow, which will affect erosion. One way to really control water erosion is to slow down the movement of the water so that it can sink into the earth rather than run across it. We do this through the use of retention and detention ponds.

If you have water erosion in a particular flow area, you can install landscape fabric covered by rocks to prevent the erosion from occurring. This is a very effective way to protect the soil. The other thing that you can do would be to re-grade the area to slow down and spread out the water flow. A slower, more widespread flow will tend to move less soil. Often, temporary erosion control products such as straw bales or sediment control fabrics can be installed as a temporary barrier while we work to establish plant material to solve the problem long term. Sometimes, installing berms can help hold some of the water, allowing it to soak in rather than run off.

Other than introducing some sort of material or strategy to slow down the wind or water, the only great way to control erosion is by using plants. Once again, plants come to our rescue.

Vegetative Barriers

To reduce both types of erosion, plants are truly the answer. Isn’t it funny how so many of our problems, from global warming to world hunger, to water pollution, to soil particles moving when we don’t want them to, can be solved by plants? Nature would take care of itself if we were to only get out of the way.

Plants can block some of the force of wind and water by slowing down the movement of both. The foliage of the plants can slow wind and can slow water. The foliage of the plants can also reduce the impact of these forces by blocking them from coming into contact with the soil. If a raindrop falls and lands on a leaf, it is not moving any dirt. This answer may seem simplistic, but it is the basis of all erosion control.

The roots of plants also help to control erosion. Plant roots growing in soils tend to bind the soil together and restrict movement. Anyone who has attempted to dig out a shrub or a tree can attest to the fact that plant roots make moving the soi more difficult. Having lush, thick plants growing in the soil will slow down and may prevent most soil erosion.

Here is a list of Common Erosion Control Plants to Stabilize Your Landscape Slopes

Creeping Junipers (Juniperus horizontalis)

Creeping junipers are a very low-growing shrub that thrives in direct sunlight. They remain short and close to the ground, and they are pretty tough, drought-tolerant, and cold-hardy. They grow well in zones 3 to 9. Because Juniperus plants are evergreen, they provide year-round color to your landscape. These are often planted in dense groupings on hillsides as an easy way to help prevent erosion. Juniper are prickly, so they are not favorites of deer, but rabbits and mice will chew the bark.

Rockspray Cotoneaster (Cotoneaster horizontalis)

The Creeping Cotoneaster is another excellent low-growing shrub that will help to control soil erosion. Like the juniper, this plant is relatively hardy, grows low to the ground, and has a good root system for holding soil. Unlike juniper, it is a deciduous plant, so it loses its leaves in the winter. Cotoneaster is a slow-growing plant that will do well in zones 5 to 7. The branches of this plant will root into the ground where they touch, which tends to produce a very fibrous and dense mat of spreading roots and branches over time.

English Ivy (Hedera helix)

Ground cover plants, such as English Ivy, help to keep the surface from eroding similarly to the above-listed shrubs, but instead of one larger plant with thick roots, groundcovers are comprised of many smaller plants growing en masse. Groundcovers are typically faster to grow and develop than shrubs, so they effectively hold soil more quickly than shrubs. English Ivy is a vine, so it will spread and grow up vertical surfaces as well. Be aware that it may climb your structures and trees. Ivy grows well in the shade or full sun, so it is a versatile plant for erosion. The plants don’t do very well in drought conditions, and the leaves can be toxic if ingested.

Dwarf Coyote Bush (Baccharis pilularis)

Coyote brush (or bush) is a straightforward plant to cultivate in the landscape. It might take up to a week of summer water, but it also naturalizes quickly. It’s claimed to be fire-resistant. Baccharis’ Pigeon Point’, one cultivar of Baccharis pilularis, is a dense, deep-green groundcover that develops to be a foot tall and twelve feet wide. This is the favored type of Dwarf Coyote Brush for slope stability and beautification in virtually all places. These plants will only survive in zones 8-10, so they are unsuitable for colder regions.

Buckwheat (Eriogonum spp.)

These hardy perennials are drought tolerant and bloom for a long time from summer to fall, making them a valuable addition to your landscape. Aside from being effective for erosion control due to its dense, fibrous root system, buckwheat is an excellent choice for suppressing weeds because of its quick germination. Best of all, they’re easy to grow. Though many will accept some shade, they like well-drained, gravelly soil and full sun in hot environments. Buckwheat flowers are small but striking since they grow in clusters on long stalks and come in various colors, including white, pink, yellow, and red. Buckwheat has many varieties and can be perennial or annual.

Apache Plume (Fallugia paradoxa)

Apache plume is a showy plant that you can use for erosion control. It has a distinct look, as you’ll notice in its rose-like, white flowers with fluffy, thready, pink seed heads. This plant naturally grows in dry settings such as desert woods and scrub in the southwestern United States and northern Mexico. Apache plume is a simple to grow plant that blooms the year it is planted. Because of its drought tolerance and rapid seeding, it is effective for erosion control. However, it might become too aggressive if its ideal conditions are met. To renew, cut the oldest woody stems.

Periwinkle (Vinca minor)

Common Periwinkle is grown in many areas across the United States as a very effective groundcover. Periwinkle or creeping myrtle (Vinca minor) is a shade-tolerant, drought-resistant, short, evergreen ground cover. It grows three to six inches tall and can form dense protective mats in zones 4-8. Vinca minor spreads quickly throughout the forest floor through rhizomes, displacing native herbaceous and woody species of plants in the process.

Creeping Boobialla (Myoporum parvifolium)

Creeping boobialla (as it’s called in Australia) or Dwarf Native Myrtle is an Australian-native plant, where you will find it growing on clay soils and sandstone. It is an excellent, rapidly growing evergreen ground cover commonly developed for that function. It’s a fantastic groundcover for blending with other taller shrubs on slopes or as a sturdy groundcover that may suffocate weeds, and it’s especially beneficial on slopes. It grows up to 18 inches in height, and it can spread 8 to 15 feet. On stolon-like, prostrate branches, it forms adventitious roots. It favors a sunny, well-drained location but is adaptable to most conditions.

Interrupted Fern (Osmunda claytoniana)

Try a wild plant on your shaded slopes for a refreshing change. Osmunda claytoniana, a Missouri native fern, has good soil retention and prevents erosion thanks to its rhizomes. It tolerates wet soils and is an excellent choice for moist hillsides. Interrupted Fern grows in a spreading vase form two to three feet tall, in zones 3 to 8. You can find it naturally growing in counties north of the Missouri River, on damp sandstone ledges, wet, forested ravine slopes, and wet woods. The common name comes from its broad fronds being “interrupted” in the middle by spore-bearing leaflets (pinnae).

Autumn Sage (Salvia greggii)

Salvia greggii is a soft, dense shrub with bright clusters of mainly two-lipped red flowers, although the blooms can also be pink, purple, orange, white, or yellow. This plant is a hummingbird and butterfly magnet. Autumn sage can grow up to 2-4 feet, and its width can reach 3-4 ft. It’s a relatively small plant that will set up tough root systems and grow quickly. Autumn sage requires a well-drained setting and cannot tolerate clay soils that shrink and swell. Work in organic matter and amendments to promote drainage in clay soils and plant on a slope if possible.

Common Yarrow (Achillea millefolium)

Common yarrow is a remarkable plant, whether you’re growing it for its erosion control capabilities, medicinal use, garden advantages, lovely blooms, or a mix of all of these. Milfoil, as it’s sometimes called, grows in USDA zones 4b to 8b. It blooms in late summer and fall with fragrant white or pink flowers and grows under 3 feet tall. It may grow in partial shade or full sun and thrives in dry and wet environments. It is particularly beneficial for preventing erosion, and the roots of this plant are deep, drawing nutrients from well underground.

Forsythia

Like Cotoneaster horizontalis, another shrub option is Forsythia, a deciduous shrub that produces bright yellow flowers in springtime. Forsythia is a plant that grows four to six feet tall, and it’s suitable for zones 5 to 8. The weeping variety (Forsythia suspensa) is very useful for retaining soil on a slope because the tips of its branches that touch the soil take root, effectively functioning as ground cover.

Ostrich Fern (Matteuccia struthiopteris)

Matteuccia struthiopteris, often known as ostrich fern, is a clumping, rhizomatous, deciduous fern that grows two to three feet tall in cultivation but up to six feet tall in damp, cold regions. The prominent features of this fern are the finely divided, green vegetative leaves, which have a feathery look that resembles long ostrich plumes, as its name indicates. In damp, shaded forest regions, natural gardens, or wet zones near streams or ponds, you’ll find many ostrich ferns. When it lives in an area with the best conditions for growing, it spreads via subsurface rhizomes to produce dense colonies. Ostrich fern is easily cultivated in partial shade to absolute shade on average, medium to wet soils. Rich soils with a regular supply of moisture are ideal for this plant.

Creeping Phlox (Phlox subulata)

Aside from erosion control, Phlox subulata, when in bloom, will beautify your landscape with its field of vibrant blooms and its cushions of hairy, needle-shaped leaves. It is one of the most stunning plant species for erosion control when in bloom. This short plant (six inches) will certainly brighten up your day. It requires full sun and well-drained soil and is quite hardy, surviving temperatures as low as -4 °F. It is appropriate for USDA hardiness zones 3 to 9.

Beach Strawberry (Fragaria chiloensis)

This evergreen ground cover, usually known as Beach strawberry, or Chilean strawberry, is native to California, and It thrives in locations with part-sun to shade and well-drained soil. You will see beautiful, five-petaled white flowers on this plant in the spring and summer, while in the fall, you’ll love picking its edible strawberries! It is fairly easy to grow and nicely expands to form a thick ground cover that’s excellent at stabilizing slopes and dunes—perfect for erosion control. It has a spread of 12 to 18 feet and remains under 1 foot tall.

Japanese Spurge (Pachysandra terminalis)

Pachysandra terminalis, or Japanese spurge, is a short, broadleaf, evergreen ground cover that helps stop erosion. Japanese spurge creates a glossy, broadleaf, evergreen mat that minimizes soil erosion in deeply to partially shaded regions. It grows to be under 10 inches tall, grows well underneath trees but does not climb, and blooms in early summer with a light show of creamy white flowers. USDA zones 3 through 9 are acceptable for this plant.

Shrubby St. John’s Wort (Hypericum prolificum)

Shrubby St. John’s Wort is native to eastern North America, where it usually grows in sandy or rocky open forest areas, meadows, bogs, seepages, and riverside prairies. It is tolerant to a broad range of soil conditions but performs exceptionally well on wet slopes or where flooding happens regularly. It develops into a low 3-foot mound with dense, glossy, blue-green leaves and stunning yellow flowers when planted in part sun to shade.

Black Mondo Grass (Ophiopogon planiscapus Nigrescens)

Ophiopogon planiscapus Nigrescens is a plant tolerant of sun or partial shade. It grows up to six inches tall, and you’ll instantly recognize it for its black, grass-like blades. This zone 6-to-9 plant is a uniquely colored plant that will surely stand out in your landscape while helping with erosion control. Plant this in partial sun to partial shade on rich, moist, slightly acidic, well-drained soils. It prefers a constantly wet environment. Use as edging, border, groundcover, or along the edges of streams and ponds.

Creeping Plum Yew (Cephalotaxus harringtonia ‘Prostrata’)

One of a few shade-tolerant conifers is the Japanese Plum Yew or Creeping Plum Yew. This low-growing, spreading evergreen shrub grows to be one to two feet in height and three to four feet in width in just a season or two. It has thick growth that creates a dense bulk of glossy, dark green, fern-like leaves that wonderfully fill landscape beds. This plant grows in USDA zones 6 through 9. For effective erosion control, plant four feet apart. They can grow in a variety of soils and require very little upkeep. Plant in full or part shade; however, well-established plants may thrive in full sun.

Spotted Dead Nettle (Lamium maculatum)

The combination of attractive leaves and attractive blooms distinguishes Lamium maculatum from most plants that only have one or the other. Spotted deadnettle has beautiful, trailing, heart-shaped, white-variegated, or silvery leaves. Lamium maculatum is hardy in zones 4 to 8 and tolerates full shade, which means it can cover spacious areas pretty quickly and densely. This plant’s ideal growing conditions are in moderate moisture, well-drained, humus-rich soils in part shade to full shade. It is deer and rabbit resistant, making it perfect if these visitors frequent your area.

Indian Mint or Yerba Buena (Satureja douglasii)

Satureja douglasii is a member of the Lamiaceae (mint) family of plants. Indeed, you’ll notice a spicy, citrusy scent, especially when you crush this plant. It grows well in the shade and moisture of its natural environment, the coast of California’s forest understory. Thus, it will certainly thrive in shaded regions. Yerba buena is a lovely, non-invasive ground cover, for it does not grow more than six inches tall with a three ft. spread. This delicate, fragrant plant is deer-resistant and blooms white in the spring. It can tolerate sand and clay.

Muhly Grass (Muhlenbergia capillaris)

Muhly Grasses are among the most stunning grasses in the United States. They provide a fantastic combo of drought resistance and excellent, attention-grabbing aesthetics for modern settings. They thrive in harsh environments and adapt well to zones 6-10. Muhly grass is a common native North American perennial plant with exciting, cotton candy-like pinkish flower spikes that emerge above the leaves in the fall.

Border Grass (Liriope spicata)

Although Liriope spicata appears to be ornamental grass, it is not. This perennial, growing in zones 4 to 10, is a member of the asparagus family. Liriope spicata is suitable as an erosion control plant, especially on banks, and it makes a dense, even ground cover and spreads quickly by rhizomes. Another plus of this plant is its high salt tolerance and mild resistance to deer.

Crown Vetch (Coronilla varia)

Crownvetch is a very hardy and fast growing member of the pea family that has been widely used to control slope erosion along the highways and byways of The United States since the 1950’s. It grows well in many different soil and light conditions and thrives in zones 3-10. It has few insect predators and can spread quickly forming dense, thick mats of plant material. While it is great to control erosion, it can be it’s own control problem as it tends to be quite invasive and can overtake many native plants.

REFERENCES

Waterfall and Stream Construction

Stream and Waterfall

Waterfalls and streams are very different water features, but they have more in common than differences. These are the magic parts of a water feature, and these are where the water comes to life to delight us and any other animals that live nearby.

The construction of both is similar but not quite the same, and their reasons for being are similar but not quite the same. These are often the most difficult, time-consuming, and creative parts of building a water feature. This article will give you some tips so that if you decide that you need a waterfall or stream, you will know the difference and know which you want.

This article assumes that you already have a pond of some sort.

Why Should I Build a Stream or Waterfall?

Ponds are wonderful ecosystems filled with life. One of the key ingredients to having a naturally balanced ecosystem is water circulation. In nature, larger bodies of water are circulated by animal movements, wave action, springs, and runoff water entering.

Backyard ponds are often too small to get much wave action and often don’t have springs or any watering entering them. This all too often leaves them somewhat stagnant. The addition of a stream or waterfall can give them the water circulation that they need to balance themselves out and improve water quality.

Waterfalls and streams also give us the added benefits of the sights and sounds of splashing and running water. Nothing attracts animals (humans included) quite like running water.  

The Similarities and Differences Between Streams and Waterfalls

Similarities

  • Both need flowing water
  • Both need some grade change so that the water will run downhill.
  • Both will be lined with some type of liner. Typically rubber, but it could be any number of waterproof, flexible liners.
  • Both will be lined with rocks and river gravel to make them look natural and to protect the liner.
  • Both will have water pumped into the end furthest from the pond so that it will flow back into the pond.

Differences

  • A waterfall will typically have cascades or drops in level so that the water drops down levels.
  • A stream will be relatively flat and will usually twist and turn to give the moving water some interest.

Basic Materials Required for both Waterfall and Stream Construction:

  • Water pump
  • Pond Liner
  • PVC Glue
  • Decorative Rocks
  • Piping
  • Connectors
  • Pond Gravel
  • Underlayment Fabric
  • Pond Foam
  • Dual-Walled Plastic Culvert

Waterfall or Stream Construction

Building a waterfall or stream onto your backyard pond is not a very technical or difficult task, but it does take some practice and creativity to become really good at it. Many people will build several of them before they feel confident in their abilities. I’ll take you through the steps you can take to build your own.

First, there are some rules that you must keep in mind:

  • Water always flows downhill – This one seems easy, but you need to keep it in mind through the entire process.
  • Water must be kept inside the liner – Again, this sounds basic, but I see this part messed up all of the time.
  • Never twist heavy rocks on top of the liner – This will create holes that will allow the water outside the liner.
  • Avoid having folds of liner or rocks that will divert the water over the edge – This again seems like it might be too basic to mention, but it happens all of the time.
  • Electricity and water do not mix – Don’t get into ponds with pumps running in them. Failure of the pump or the electrical outlet while you are in the pond, could result in electrocution.

Before you Begin:

Location Planning

This is probably the most important step. Waterfall and stream construction is expensive and hard work, so it would be great to get it right the first time.

Consider the layout of your pond and its relation to the viewing area. The ideal situation would be that you have a hill on the side of your pond that is furthest from the viewing area. The viewing area is most likely the house, but if not, then wherever you will most likely be viewing the pond.

A hill on the backside of the pond allows us to build a waterfall or stream without needing to move a bunch of dirt, so it makes our lives easier. Unfortunately, this is not usually the case. Most ponds that I see are situated in a flat area. It is okay if this is the case; it just means more work for us.

We need the water to run downhill, and we want it to run toward our viewing area so that we can see it. Installing a waterfall or stream where you can’t see it is still very beneficial for the pond, just not as beneficial for you.

The ideal setup is a pond with a small hill behind it and an electrical outlet on the opposite side of the pond from the hill. This will allow us to build our stream or waterfall on the backside of the pond and plug our pump into the front side of the pond, giving us the best circulation.

Construction Steps

Base Preparation

We will need to prepare two areas of the pond. These areas need to be contoured to allow us to do our installation, and they need to be relatively free of rock, sticks, roots, or anything else that might poke holes in our liner.

On the backside of the pond, we need an area shaped somewhat like a trough that we can place our liner into so that the water will be kept in the liner.

If we are creating a stream, then a slowly meandering trough that starts wherever we would like it to start and ends in the pond would be great. This trough must pitch toward the pond and must not be lower than the top of the pond water at any point.

If we are creating a waterfall, then the hill must be higher, and the trough will look more like steps to allow the water to cascade down the steps. Once again, the waterfall should start at the high spot and end in the pond, but at no time can it be lower than the top of the pond water.

In both of these, the edges of the trough need to be high enough to support the liner so that the water remains in the liner.

The questions of how high the edges need to be and how deep and wide the trough needs to be are always dependent on how much water will be flowing through the stream or waterfall, and this is always dependent on the size of the pump.

Creating an attractive waterfall or stream requires at least 100 gallons per hour of water flow per inch of stream or waterfall width. So, if you want a waterfall that is two feet wide, you need to pump at least 2,400 gallons of water per hour. This is a minimum, and I would suggest more water flow.

Now that the backside of the pond where the stream goes is prepped, we need to prepare the front side of the pond to accept the pump. It is possible to buy a pump that is enclosed in a basket or filter and just toss it into the pond, but this will result in much clogging and much pump maintenance for you, and I assume that you would prefer less maintenance.

Whether your existing pond is lined or unlined will make a big difference in this step. If it is lined, we need to clear the stone, rock, and debris from the liner in the area where the pump will be. If it is unlined, I would recommend installing a piece of liner in the area where you intend to put the pump.

Prepare your pond accordingly. We want to install a culvert section into the pond to house the pump. We will then be covering the culvert with rocks to keep the muck and debris out of our pump.

For right now, clear out muck and debris and make an area that slopes down into the pond from the front edge (near the outlet).

Liner Installation

Once you have your base prepared, you should install the underlayment first. The underlayment is typically a geosynthetic material, but it could be almost anything that will protect the liner from being punctured. The underlayment should be everywhere that liner will come into contact with dirt.

After the underlayment is installed, the liner should be installed over the underlayment and pushed own into the trough. Be sure to always leave plenty of extra liner sticking up over the edges of the trough. Having too much liner is never a problem; we can cut it away at the end. Having too little liner can be the cause of long-term struggles and leaks.

If I am installing streams and waterfalls, I usually buy a roll of rubber that is ten feet wide. This gives me great flexibility in the design and size of the project. Remember that the liner will need to twist and fold to create turns and drops in the stream and waterfall. Also, the larger that your rock is, the wider your stream will need to be, and the wider your rubber will need to be. I’m not suggesting that you need a ten-foot-wide piece of rubber for every size waterfall or stream; I’m just suggesting that you plan to have significantly more than the width of your stream. Figure out what you think you might need, and then add a couple of feet.

Always have several feet of extra liner at the top of the waterfall and at the bottom to ensure that you do not run short.

I understand that rubber liner is expensive, but cutting corners on the amount of liner is the cause of so many problems later in the installation that I just need to stress the importance.

Push underlayment and rubber down into the pump area of the pond also, then place a section of a culvert on top of the rubber and pile rock on top of it until you can no longer see the culvert. Leave the top edge of the culvert exposed just below the top of the water to make it easy to drop the pump down the culvert. Make sure that the bottom of the culvert is protected with stone so that debris cannot get to the pump. Various sizes of stone are best to protect the pump.

Install Rock

Now we can install rock onto the liner of the stream and waterfall. The larger stones should be along the edges for the stream to make it look like a real stream and keep the liner in place. For the waterfall, the larger rocks must also be along the edges but must also be on the steps of the waterfall to create realistic-looking cascades.

At all times, while installing the rock, be sure that the edges of the liner stay standing up and don’t let any folds end up falling down behind the rocks. One fold that settles down behind a rock will be a tricky leak to find. Make it a habit to pull up on the liner after setting each edge rock.

Pay attention to the direction of water flow and the angles of the rocks you set. Don’t set any rocks that will form a ramp that will direct water out of the stream. If you have a rock with a sharp sloping angle on it, just face the angle downstream instead of upstream; this way, the water won’t flow up the ramp and out of your stream or waterfall.

Once all of the edge rocks are set, we can install some rocks in the waterfall area to agitate and direct the water. Once the larger rocks are installed, you can install the river gravel to fill in all gaps.

When installing the rock, you need to think about how the water will flow over and around the rocks, focusing on being sure that the water will not overflow the edge of the rubber and focusing on making the stream or waterfall look as natural as possible.

Install the Pipe

I always use flexible PVC pipe because it is much easier to install than rigid PVC, and it will flex a bit to avoid cracking. The pipe should be installed from the top of the stream or waterfall, around the pond’s edge, and into the culvert area to connect to the pump. I always leave the pipe very shallow, only deep enough to cover the pipe with dirt, mulch, or gravel. The pipe must be pitched toward the pond from the start of the stream or waterfall to the pump. The pipe will be connected to the pump using a PVC fitting. Many pumps come with a fitting.

The size of the pipe used is always dependent on the size of the pump, and more water flow requires a larger pipe. I typically use one-inch pipe for pumps up to 900 gallons per hour(gph), 1.5″ pipe for pumps up to 2000 gph, 2″ pipe for pumps between 2,000 and 7,000 gph, 3″ pipe for pumps that are larger than 7,000 gph, and 4″ for pumps larger than 12,000 gph.

At the top of the waterfall and the start of the stream, create a small bowl in the ground to push the liner down into. Push the pond pipe down to the bottom of this bowl and pile rocks and gravel on top to hold it down. This will allow the water to flow up through the rocks and create a natural-looking beginning to the falls or stream.

Run The Pump

Now is the point when you get your first glance at how the waterfall or stream might look and how the pump filter is working. Plug in the pump and watch the waterfall of stream closely. Since this is your first waterfall or stream, I would anticipate having some areas where the water flows over the edge of the liner. When you see these areas, turn off the pump, push dirt underneath the liner, and then run the pump again. Do this until you have fixed all the places where the water was running out.

At this point, if you think there are no leaks, I would let it run for a few hours and then recheck it looking for any wet areas and keeping an eye on the pond water level. A leak in the stream or waterfall will cause the pond water level to drop quickly.

Add Foam (optional)

Once you are confident that it is not leaking, you can turn it off and use the expanding pond foam to direct the water a bit. Never use the foam to try to keep the water in the liner; only use it to direct the water to go up and over some of the rocks so that you can see the water, rather than having it all run underneath the rocks. Remember, it is only a filler; it is not a water-tight seal, no matter what it says on the can.

I mostly use it under my cascade rocks to seal the bottom of the rock to the liner, and I will also use it to fill the gaps around the edge rocks next to the cascade rock. We are trying to block areas where the water can go under the rocks so that it is forced to go over the rocks.

Adding pond foam is certainly optional. Your pond, waterfall, and stream will function perfectly without any foam. The foam is only there for us to push the water up and over the rocks where we can see it better.

When working with the pond foam, wear rubber gloves, and please use it sparingly. It expands quite a bit and is sticky and very hard to remove from your hands.

After you have applied the pond foam and it is starting to dry, it may be a good idea to toss some gravel on the top of some of the larger foam areas so that it will stick and disguise the foam. This needs to be done before it finishes drying but after it sets for a little bit. Also, before it becomes completely dry and hard, you can push the expanding areas back into place to avoid having as much to clean away later. Always use caution when pushing on the foam; you want it to form a good seal between the rubber and the rock

Let the pond foam dry for a few hours and then push down or pull away any excess foam and disguise it with gravel.

Now, try to run the pump again. You will likely have raised the water level in the waterfall or stream, so you will probably have new leaks that you didn’t have before. Turn the pump off, push more dirt under the liner to stop the leaks, and then let it run once you think it is no longer leaking.

I would now let it run for a day and once again look for leaks.

Trim and Cover

Once you have the waterfall or stream running, you like how it looks and doesn’t leak; you can cut away the excess rubber. I typically leave at least 4″ of excess rubber along all edges and then let it run again. If it doesn’t leak, fold this excess rubber under or cover it with gravel, and you are done. Take a bit of extra time and be sure that all voids between rocks are filled with gravel. This will keep the mice out of your waterfall. Mice like to make nests in a hole over the winter, and they will chew holes in your rubber in the process.

Now you have a beautiful waterfall or stream in your yard, and I’ll be that you have some great ideas on how you would do it differently if you ever do it again. Who knows, you may just decide to do it again someday.

General Waterfall and Stream Tips

  • The balance of your pond relies on water movement, aeration, bacteria, and plants. The water movement and aeration provide oxygen for the plants, fish, and bacteria. The bacteria help break down debris that gets into the pond, and the plants take nutrients out of the water. The more attractive aquatic plants we have in our ponds, the fewer nutrients available for algae to grow. Now that you have a stream or waterfall, you have a great spot to install some aquatic plants. Put them on top of the rubber and under the river gravel without any pot. The roots will spread, and the plant will help to keep your pond clean.
  • Cleaning and maintenance of your waterfall or stream should be minimal. Most of the debris that gets into the stream or waterfall will end up in the pond. If you have a lined pond, you may want to pump it down and pressure wash everything every few years, but it is not entirely necessary. Cleaning helps to prevent large deposits of muck on the pond bottom. The stream and waterfall will almost certainly grow algae. Don’t panic; this is natural. Rather than spending time trying to scrub algae off of the rocks, which doesn’t work anyway, you should plant more plants and figure out how to keep excess nutrients out of your water.
  • Don’t ever fertilize the lawn around your pond; this will undoubtedly cause some fertilizer to run into your pond the next time it rains, which will be sure to grow a bunch of algae.
  • If you see a leak in your pond, it is almost always a stream or waterfall edge that has settled or fallen down. One way to tell if it is your stream or waterfall that is leaking or if it is your pond is to turn off the pump. If the water level keeps going down with the pump off, then your pond is leaking. If the pond is no longer losing water with the pump off, the leak is in the stream or waterfall.
  • If you do get rodent holes or tears in your liner, don’t worry, they can be patched. Just about every sort of pond liner has patch kits available. If you use rubber liner, it is just like patching a bike inner tube.
  • Add some low volt lighting to liven up your new waterfall or stream. Lights will give you a good show when the sun goes down. You can use waterproof lights under the water, which will make the water glow and shimmer, or you can use lights out of the water, which will give you a brighter, more sparkly shine. You can decide which one you like better.
  • Don’t resort to chemically treating your pond. By using chemicals, you are throwing the pond out of balance because you are killing off vital parts of the ecosystem. Only use completely natural bacteria to add to the pond. Using chemicals, even if the container says it is fish and plant safe, is killing microorganisms and algae. These dead materials sink to the bottom of your pond and add to the nutrients making your problems worse.

Outdoor Living Room Benefits and Design Considerations

Outdoor Living Room

Outdoor living rooms have become increasingly popular over the past few years. The combination of people stuck at home and wanting to get out of the house and a bunch of cool, outdoor-ready furniture has made the outdoor living room a must-have landscape feature for many homeowners. The designs and themes are practically endless so that each space can be customized according to its owner’s style and taste.

Not only will an outdoor living room increase your enjoyment of your backyard, but it will also increase the value of your home. The benefits will be more relaxation, more beauty, and more money. This sounds like a good combination. If you think it might be time to begin to consider an outdoor living room for your home, then you’ve come to the right place. This guide is chocked full of good advice and information. We will discuss design considerations, tips, and a few frequently asked questions.

What are Outdoor Living Rooms?

An outdoor living room is a more casual version of your indoor living room, and they serve as a destination point in your property where you can entertain guests or hang out with family. Often, this is set up on patios, pergolas, and gazebos with an extended dining area and an outdoor kitchen.

If you search Youtube for videos on how you can transform your patio into a cozy living space, you won’t be disappointed with the number of results you’ll get. These videos can help you get started in the right direction if you are handy and on a tight budget. However, if your finances permit and you aren’t quite as handy as you would like to be, it may be wise to interview a few contractors or designers before you begin.

As for the designs, you can always search Pinterest, Instagram, and other websites for inspiration. There is also the option of planning your outdoor living room by getting ideas from your housemates or family members. There is no right or wrong here as long as you follow proper building techniques, adhere to local ordinances, and end up with something you enjoy.

What is the Scope of Your Project?

When considering this project, the main questions are: What are you trying to accomplish, and what do you already have? Creating an outdoor living room can be as simple or as elaborate as you and your family would like it to be.

This doesn’t need to be a break-the-bank sort of project. If you already have a patio or deck and a bit of furniture, maybe you just need to add a few pieces of furniture, some speakers, and a bit of a roof? Heck, perhaps one large lounging couch and an outdoor television would suit your style.

On the other hand, if you’ve got bread to burn and want to go all out, you may want to start from scratch and get all the cool options.

Outdoor Living Room Options

Okay, let’s dig into some of the cool options that you have to choose from for your new outdoor living room.

Furniture

 It’s about time you let go of those outdated lawn chairs that leave marks on your legs whenever you sit on them. Outdoor furniture has come a long way over the last few years, so take your time, do a bit of research and get what you need. Keep in mind that longevity and resistance to the weather are two of the most important qualities of outdoor furniture.

When choosing your pieces, consider the construction of the cushions. They should be light, airy, and made of materials that will dry quickly and will not decay with moisture. They make some outdoor couches that are pretty close to what you have inside, but you need to ensure that they shed the water or dry very quickly.

Another consideration is the framework. Most outdoor pieces are made from painted, thin tubular steel, which is light and cheap to produce. The downside is that the lighter the steel, the more prone to breaking. You can undoubtedly find aluminum pieces to avoid the possibility of rust, but again, thin aluminum will be prone to breakage. You can also find wooden pieces, but the type of wood will be very important to longevity.

While most of our shopping might be down online, your outdoor furniture might be something you want to see in person before you lay down your hard-earned cash. Get a feel for how heavy it is, whether it shifts around every time you sit on it, etc.

Below are a few pieces of outdoor furniture that can make your space look relaxing and elegant at the same time:

  • Lounge Chair: Lounge chairs are permanently reclined seating options primarily made for relaxing, and it would be hard to use them for productivity since their structure is for leisure and lounging. If you visit furniture stores of big-box retailers, you’ll find various types of lounge chairs, such as the classic chaise lounges, armchairs or recliners, and club chairs.
  • Sofa or Couch: Similar to lounge chairs, outdoor couches are meant to bring comfort and relaxation to you and your guests. If you want to lay down and take a nap in your backyard, this might be just the piece you are need.
  • End or Accent Table: End or accent tables are meant to be placed at the end of your couch to primarily hold some décor or perhaps an icy drink and some snacks.
  • Coffee Table: As its name suggests, this outdoor table acts as a surface to hold snacks and drinks or maybe a laptop or tablet. It is usually situated at the center of your outdoor living room and is often the same height as your sofa cushions.
  • Stacking Chairs: Stacking chairs are a must-have if you build an outdoor living room for big gatherings but don’t want to add any fixed features. These chairs can be stacked when not in use so that they won’t take up much space, and you can even store them inside.
  • Hammock: Hammocks not only serve as extra seating, but they also give your outdoor living room that very relaxed, “kick your shoes off and stay awhile” vibe. Unless you have big trees right there in your outdoor living room, you will need a hammock that comes with its own frame. Be aware that while hammocks can be the ultimate nap spot, they can be a bit treacherous for the elderly or the young who don’t have much hammock experience. We wouldn’t want to see grandma flipping out of the hammock when trying to sit down.
  • Cooler Table: A cooler table is a handy piece of furniture to add to your outdoor living space if you want to skip trips inside your home when you run out of drinks. It serves as a drink cooler and a table at the same time. How can you go wrong with that?

Patio and Deck Coverings

Covering your outdoor living space makes it possible to use it more since it allows you to control the environment a bit more. Keep in mind that anytime you are installing roofs, umbrellas, or awnings, you are basically setting a big sail in your yard to catch the wind. Consider your location and wind when deciding whether or not one of these solutions will work.

  • Umbrellas: The most common and straightforward solution to providing a bit of shade and maybe a windbreak would be an umbrella. There are many options and sizes to choose from, and they are very easy to install. They can often be freestanding, or they can fit into the hole in the center of the patio table. Either way, be sure to pick one with a heavyweight to hold it down.
  • Awnings: Awnings are retractable patio coverings that come in various sizes, materials, and shapes. They are often attached to an exterior wall and offer convenient protection from sun and rain, but you do need a solid structure to fasten them to.
  • Pergolas: Pergolas come in many shapes and forms and can be custom-made to suit your needs. It is a framework that can have vines growing over it or a roof installed. They can be very delicate and cheaply built and last a season or two or long-term built-in structures. Sinking heavy beams into the ground and installing a metal roof would be one way to give your outdoor space a proper living room feel. These structures can also be fitted with curtains and mosquito netting to keep out the sun and bugs. Again, consider the weight and quality of the structure. You don’t want to find this in your neighbor’s yard after a strong wind.

Entertainment System

Having a quiet, peaceful living room outside is one thing, but having an entertainment area will make it feel more like your living room than sitting out in the yard. Your outdoor entertainment will depend on your likes and how you intend to use your outdoor space. The more high-tech stuff you install, the more breakable this outdoor space will be. Will this area be for large gatherings and parties or just for you and the kids to hang out? Are you trying to get away and be in nature, or are you trying to bring all of the comforts of your living room outside? Be aware that televisions and speakers may require internet connectivity, so plan accordingly.

  • Television: Installing a television is a great way to create the proper living room feel. Outdoor televisions come in all different sizes and can be anything from weather-resistant to weatherproof. Be sure to choose the right technology for your sun exposure. There are different types of screens designed for different sunlight levels. You don’t want to spend the money on a television that no one wants to watch because it doesn’t look as good as the one inside. Also, consider the location. Will this television be freestanding on a table or hanging on the wall?
  • Projector and Screen: You might want a projector and a screen to achieve an outdoor theatre setup. These will never have the picture quality of a high-def tv, but it is a very cool way for a big group to watch a movie.
  • Speakers: Of course, your whole audio-visual setup won’t be complete with outdoor speakers. This can be as simple as a single Bluetooth speaker on a table to a complete surround sound system mounted into the rafters of your pergola. The sound is not likely to be as nice as indoors because there aren’t walls for the sound to bounce off of, but it can be pretty cool to watch your favorite movie in surround sound outside.

Fire / Heat

Adding fire or heat to your outdoor living room will give you the ability to make it more of a group gathering place, as well as take the chill out of those cool spring or fall evenings. Keep in mind that your choice of fire needs to fit with the type of living room you are creating. The more it resembles your indoor living room, the less likely it is to do well with an open fire pit.

  • Fireplace: An outdoor fireplace traditionally consists of a firebox and a chimney. However, there are now different heating sources aside from wood that you can use. These are natural gas, ethanol, and electric-powered fireplaces. The three latter options are best if you don’t want to deal with the mess.
  • Fire Pit: An outdoor fire pit is an excellent focal point for your outdoor living room since it is often situated in the middle of the seating area. It is very inviting, allowing for a more intimate bonding experience. Keep in mind that large open flames, nicely appointed furniture, and flat-screen televisions may not do well together.
  • Space Heaters: There are many shapes, sizes, and types of heaters that you can choose from. Some are much more portable than others, so choose wisely. Keep in mind that heating an outdoor space will work better if protected from the wind.

Lighting

What would your living room be like without lights? Well, if you are planning to use your new outdoor space as a living room, you will need some lights.

  • Freestanding: There are plenty of choices for freestanding outdoor-rated lights to choose from. These can be sitting on the end table or be all on their own in the corner.
  • Built-In: If you are creating a solid structure pergolas to house your outdoor living room, your lights can be built right into the structure to really make it feel like home. Everything from chandeliers to downlights and rope lighting can give this space accent and function.
  • String Lights: If you aren’t planning a structure, you may have nearby trees or shrubs that can be used to hang some rope or string lights. Maybe you can run strings of lights along cables that cross the patio from one tree to the next? There are many types of easy-to-install and economical LED color-changing light sets that can be controlled from your smartphone, so if you want to liven up the look, you might want to consider color.

Decorations

Your outdoor living room would not be complete without some decorations that can give it more character and make it look more “liveable.” Consider some of the following choices.

  • Outdoor Rug: Rugs enhance your outdoor living experience by adding color, patterns, texture, and comfort to your space. Unlike indoor rugs, which use light materials, outdoor rugs are often made of durable fibers that can withstand the elements. Some of the best choices for outdoor rug materials are plant fibers like jute, hemp, seagrass, and sisal. Aside from these natural fibers, man-made materials such as polyester and polypropylene can also endure the worst of weather.
  • Patio Plants: What’s an outdoor living room without plants, right? To create a lush outdoor space, you must choose the best patio plants. Fan flowers, chrysanthemums, begonias, Mandevilla, marigolds, and herbs top the list of homeowner favorites. Like the potted plant in the corner of your indoor living room, a potted plant can help create a living room feel outside.
  • Outdoor Curtains: Outdoor curtains are not only perfect decorations, but they can also serve a lot of functions. For one, if the sun is too hot, they can provide shade to you and your guests. They can also give you more privacy if your neighbors seem too close. Note that outdoor curtains are different from indoor ones. Their materials are mildew-resistant so that they can be used despite the changing weather conditions.
  • Throw Blankets: Aside from warming up your guests, throw blankets also add a layer of elegance to your outdoor space. If you plan to have throw blankets, you may also need to plan an area to store them while not in use. Maybe that coffee table can have storage beneath?
  • Outdoor Cushions and Pillows: The best outdoor cushions and pillows are made to lock out moisture. Even though they are more expensive than the usual cheap cushions, they are highly durable, so you’ll likely get your money’s worth. Keep in mind that more layers, pillows, and blankets will encourage more animals to create homes in your furniture when you are not using it.
  • Wall Accents: What living room would be complete without some art hanging on the walls. You can undoubtedly incorporate some pictures, paintings, or wall art if you have any structure.

Other Accessories:

I know that we are not talking about outdoor kitchens in this article, but everyone knows that a living room needs access to snacks and refreshments.

  • Bar Cart: If you’ve invited many people, a tiny cooler table won’t suffice to hold your drinks, and you would need a rolling bar cart to satisfy everyone. Of course, you need to stock it up with rums, flavored vodkas, wine, glasses, reusable straws, etc.
  • Refrigerator: Long warm days out in the new living room with easy access to cold beverages sounds like a great setup to me.
  • Trash Can: Having an animal-proof trash can will come in handy when having snacks and refreshments in your new living room.
  • Furniture Covers: This is one of those accessories that you will live to hate. Good furniture covers will protect your furniture from the elements, but they will also discourage you from using the space because you will need to uncover the furniture first. These covers also provide cover for animals, so don’t be too surprised when you pull off a chair cover to find an animal sleeping in your chair. Also, if you choose to have furniture covers, where will you put them when they are not on the furniture.
  • Cabinet/Storage: A weather and rodent-proof storage cabinet will come in handy for often-used items like cups, broom, blankets, furniture covers, etc.
  • Outlets: If you are bringing a bunch of technology and electrical devices out to your living space, don’t forget to install some extra outlets for devices and other un-thought of accessories.

12 Benefits of Adding an Outdoor Living Room to Your Property

Is it worth investing time and money into building an outdoor living room? This question is one that you will want to be answered before you begin. Here are a few of the obvious and not-so-obvious benefits of the outdoor living room.

  1. Gives You More Space: The primary benefit you’ll get by setting up an outdoor living room is additional functional space. This means that you and your family will have an extra area where you can relax, share a meal, or make conversations. Since you can customize it according to your taste and needs, you can also make it child-friendly or senior-friendly. This way, your kids and grandparents can enjoy sitting outside to enjoy some fresh air and the comforting view of nature.
  2. You can Express Your Creativity: What is often overlooked is that the process of building an outdoor living room lets you express your creativity. From planning the layout to choosing the furniture and adding some wall accents, your right brain is getting the stimulation it needs.
  3. It can be a Stress Reliever: Having your own quiet, secluded outdoor space may be just what the doctor ordered to relieve the stresses of everyday life. Not to mention that if you build your outdoor living room yourself, you can get some great exercise in the process.
  4. It can be Affordable: Many homeowners think that building an outdoor living room is expensive, but it is one of the cheapest landscape changes you can make. Buying furniture and an umbrella can be pretty cheap if you already have the yard, patio, deck, and trees. Consider checking online postings and local rummage sales in some nicer neighborhoods for lightly used furniture of good quality.
  5. Increases Your Property Value: If you are planning to sell your property in the future, adding an outdoor living space can raise its value since it is highly functional and adds an aesthetic appeal to your home. Potential buyers always prioritize space whenever looking for properties to buy, so an outdoor living room might be just the thing that attracts them to buy.
  6. Flexibility for Entertainment: Tired of entertaining your guests indoors where all you can do is watch Netflix or play some old board game? Well, outdoor living rooms provide more ways to have fun while remaining at home. Also, if you have a large gathering, a bit of extra gathering space is always welcome. From tossing around the football to curling up on the couch and watching a movie, the outdoor living room can be a versatile entertaining area where the kids don’t need to take off their shoes before entering. This can also be a place to invite some of your cigar-smoking friends to enjoy a smoke without worrying about indoor air quality.
  7. Improve your Physical and Emotional Wellness: It probably won’t surprise you to hear that sunshine and fresh air can improve your health. Installing an outdoor living room gives you an excellent likelihood of spending more time outside.
  8. A Safe Space: If your house isn’t huge, you and your kids may get tired of sharing the living room. If life in the house feels a bit cramped, the outdoor living room can be a safe space for you or your kids to get some alone time and still be comfortable. This could be an excellent place for you and your spouse to get away from the kids for a bit of quiet time while still being home to keep tabs on them. It could also be an excellent spot for kids to hang out with friends and talk about kid stuff away from the prying adult ears.
  9. An Easier Entertaining Space: You might not always have the energy to throw a party, especially if it is inside your home. There is a bunch of prep and cleanup needed to throw a party. Well, if you have a well set-up outdoor living room, having a few of the neighbors over for an impromptu little get-together isn’t much of a bother at all.
  10. The Perfect Nap Spot: There is nothing better than a quiet nap outside. Especially if no one is making noise and the hot sun is not beating down on you. Think of how nice it will be waking up from a warm afternoon nap in the summer.
  11. Perfect Pet Spot: The outdoor living room can be great for your pets that may not be allowed to get close to you in your more formal indoor living area. They say that time spent petting your pets can lower blood pressure.
  12. Increased Productivity: The outdoor living room might be just the answer for when you are trying to find a quiet spot in the house to do a bit of office work on your laptop. What could be more peaceful than the quiet outdoors?

7 Considerations Before Creating an Outdoor Living Room

Before you contact a contractor or follow the steps on a Youtube video you watched, you should carefully consider the purpose of your outdoor living room, its size, layout, and some other factors that can affect how it should be built.

  1. Purpose: The primary thing that you should keep in mind during the planning phase of your outdoor living room is the purpose it will serve. Will this be for family use, or are you planning to invite many guests? Do you want it to be a quiet and relaxing spot, or do you want it to be the center of activity on your property? Do you have to childproof your outdoor living room or add a corner where kids can do some fun activities while you’re chilling on the couch? These are critical questions to ask yourself since they can significantly impact everything about your outdoor space — from materials used to layout and furniture choice.
  2. Size and Shape: The size and shape of your outdoor living room will depend on the activities you plan to host there as well as the number of people you are planning to invite over. It may also be limited by your budget or by your existing landscape features and the size of your yard. You should also consider how this new living space will affect the view from your house. As for the shape, the general rule is to avoid odd layouts where your furniture won’t fit properly, and your guests would have problems navigating around.
  3. Layout: Most landscape architects suggest that in designing an outdoor living room, you should exert the same effort as planning your home interior. Think about traffic flow and the usefulness and flexibility of areas. Consider how you and your guests will interact with the site and each other. Too much massive furniture on a small patio will not feel comfortable. Nor will a tiny furniture layout on a large patio.
  4. Budget: One of the most common mistakes of many homeowners is not setting up a realistic budget before beginning any construction. Whether you are doing this project yourself or hiring it done, you want to know that costs before you start; it will do you no good to get started just to find out halfway through that you will not have enough money left to finish it properly. This is not to say that you can’t plan around budget shortfalls, but you need to know ahead of time. An outdoor living room can certainly be done in phases; heck, you aren’t tearing apart your house. You could expand the patio one season, add a fireplace and some furniture the next season, and add a television and sound system the third season. As long as you plan ahead, this won’t be a problem.
  5. Placing the Room: The best thing about outdoor living spaces is that it allows an unobstructed view of nature or whatever a property has to offer. Thus, in designing your own, make sure that your sitting area can provide a perfect view of the sunrise or sunset, your landscape’s focal feature, or anything interesting that can relax the mind. Also, keep in mind the sun and wind exposure and place the room accordingly.
  6. Protection from the Outdoors: Since an outdoor living room is an external area of your home, you must consider its orientation to prevent the harsh sun rays from damaging your furniture or from making it so hot that you can’t use it. You need to consider how to block the wind if that is an issue. You need to consider drainage; the last thing that you want is to put a bunch of new furniture into a spot in the yard that floods when it rains. You might also want to consider the bugs in your area and whether bug protection is necessary. If you have an unlimited budget, glass screens and stacking or bi-folding louvers can make this more like an indoor space if you want.
  7. Privacy: Depending on your outdoor living room’s proximity to your neighbor’s home, you may want to build a privacy wall or plant some additional shrubbery. If you are not comfortable in your outdoor living room, you won’t use it, so ensure some privacy if that’s what you desire. Masonry seat walls or decorative walls are a great way to add a bit of solid structure and privacy to your outdoor space.

Common Design Mistakes That You Should Avoid in Creating Your Outdoor Living Space

Choosing between designs and creating an outdoor living room can be overwhelming, especially if there are too many ideas you want to incorporate into your space. To avoid some of the most common pitfalls, please read on. If you’re going to prevent your patio from becoming a mess instead of a liveable outdoor living room, you must be aware of the following mistakes that many homeowners make:

  • Making it look like indoors: Replicating your indoor living room in your outdoor space is going a bit far. You won’t feel that you are outdoors if you furnish it with furniture meant for indoor use and then wall it in with glass. A room like this would be better built onto the back of your home and called a sunroom.
  • Trying to DIY everything: If you are not the handiest person you know, you will probably want to hire a contractor if you plan a complicated structure or extensive masonry work. If you keep it simple and work with what you have, a handy person shouldn’t have a problem.
  • Too much or too little furniture: Adding too much furniture would make your outdoor living space like a yard sale. Meanwhile, being too minimalist in furniture selection can lead to a boring living room instead of a relaxing area.
  • Going overboard on decorations: Your space will look cluttered and busy when you hang or install too many decorations. For some reason, people tend to over decorate outdoor areas. If that is your style and that pleases you, then, by all means, live it up.
  • Not adding plants: Plants soften the look of your outdoor space. Not adding them can make your outdoor living room look a bit rigid.
  • Wrong color choice or combination: Just like inside your home, you will want the colors and textures in your outdoor living room to complement each other, not clash.
  • Overbuilding your Existing Structures: Sometimes, we will see the situation where a person decided to build an outdoor living area and made it very detailed and grand, but did it over a very old, cracking, and run-down patio or deck. Don’t sink a bunch of time and money into a failing structure. You want to have the solid structure proper before adding to it.

Frequently Asked Questions

How Much Does it Cost to Build an Outdoor Living Room?

The cost of building an outdoor living room would primarily depend on the hardscapes built, the furniture that will be bought, and some other decorations to make it feel homey and relaxing. There is no definite answer as to how much it costs to build an outdoor living space. However, Home Advisor claims that the average cost of creating an outdoor living space is around $7,670. This would be if you already have the structural elements in place and wanted to dress it up and get some furniture and accessories. For covered, natural stone patios and all of the goodies, you can easily spend $50,000+ depending on size.

How Can You Make Your Outdoor Living Room Look Bigger?

In making your outdoor living room look bigger, you must first and foremost remove all the unnecessary clutter. You can’t do anything with a space that has too much stuff. Once you’ve done this, proceed by moving larger furniture pieces to the outside of the living area to make the center seem more significant.

Can You Make an Outdoor Living Room on a Budget?

Of course, you can. This is assuming that you already have a pre-existing patio or deck that will work. The solid structures are the most costly. Simple furniture choices and umbrellas won’t break the bank, but $10,000 bright sunlight outdoor televisions will.

Is it better to have a deck or a patio for an outdoor kitchen?

This will depend on your budget and your desires. A concrete, stone, or brick patio will be longer-lasting, more formal, and more solid than a wooden deck. A wooden deck will typically be a softer and less harsh feel, since brick and stone are rough and hard. A deck will allow you to refinish it over time to change the look if you desire. A deck will let the wind come up from underneath the furniture, so the patio might be a more comfortable place on a windy, cool day. Most outdoor living rooms are built on a patio simply because the patio allows for installing a larger and more solid room structure.

Final Thoughts

An outdoor living room is a worthy addition to your landscape, especially since it has many proven benefits to your property’s resale value and your lifestyle and health. This space can be a favorite family gathering spot for many years with proper planning and creativity. Spend your efforts on the supporting structures like the patio, pergola, and walls at first. The rugs, furniture, and pillows are all wear items that will need to be replaced over time, so don’t prioritize them as they will be changing with time, while the solid structures will not.

Are Retaining Walls and Decorative Walls the Same?

Boulder Retaining Wall

There are so many landscaping elements that are thought to be similar but actually have very different functions. This is especially true for masonry features such as retaining and decorative walls. While this may not be the most exciting topic to explore, there are significant differences that are important to understand when planning out your landscape walls.

I prepared this detailed guide to help you identify a retaining from a decorative wall structure. We will cover their purpose, look, and some of the materials needed to build them. We will discuss the various types and some FAQs that can be useful to you if you are in the process or planning to build one.

Functions

First off, let’s talk about the role of retaining and decorative walls in landscaping. While their functions sometimes overlap, they are built for different reasons. Let’s take a closer look:

Retaining Walls

A Retaining wall is meant to keep the earth in place. As compared to other wall types, it is built to be stronger and sturdier so it can hold dirt and preserve the shape of your landscape. They can help stop erosion and can be used to convert slopes into useable spaces.

Below are some common uses for retaining walls:

  • Water Runoff Control: A retaining wall can be a very effective way to change the grades of your yard to channel the water where you want it to go rather than allowing it to take its natural course. Your retaining wall can divert water away from foundations and keep the rain from washing away garden dirt.
  • Slope Solutions: People who have steep slopes in their yard often struggle with getting plants to thrive on the hillside, which all too often results in erosion problems. Many times, a steeply sloped, unusable sloped area of the yard can be converted into a beautiful and functional terraced garden or even a sitting area.
  • Seating: If you are hosting a large gathering, you inevitably run out of seats. Retaining walls can serve as overflow seats depending on their location and height.
  • Visual Interest: Retaining walls can be used to create raised beds anywhere in your yard, so even if your yard is flat as a pancake, you can use a retaining wall to create a beautiful raised planting bed.
  • Lighting Solution: Retaining walls are an excellent way to set up lighting for your yard. It may not be economically feasible to install a retaining wall just to have some lights. But, if you need a wall anyway or already have a retaining wall, it’s fairly easy to add low volt or line voltage lighting to a retaining wall.
  • Maximizing Space: Installing berms and contours in your yard is an excellent way to enhance your landscape, but sometimes you just don’t have enough room to blend in a large berm. Never fear; a well-placed retaining wall can allow you to create a berm of any size and limit its spread on any side you’d like through the use of a retaining wall. Also, if your house is backed up against a slope with a sliver of a backyard, you can dramatically increase your living space by moving that hill back using a retaining wall.

Decorative Walls

Any other wall that is not retaining the earth is considered a decorative wall. This includes garden walls, seating walls, privacy walls, etc. Although each of these has its own purpose, if we think about it, they are primarily built to add character and visual appeal to your landscape.

Below are some common uses for decorative walls:

  • Privacy: When you throw a party or a family gathering, you surely do not want the prying eyes of your neighbors to make your guests uncomfortable. If your yard is wide open to the neighbors, a well-placed privacy wall can make all of the difference. Privacy walls are also a great way to block the prevailing winds and give yourself some nice calm, warm areas in your yard.
  • Mood and Aesthetic: A well-planned decorative wall serves as an aesthetic element to your lawn and can also be the focal point of your landscape. Depending on the theme you are going for, it can change the mood of your area.
  • Seating: Similar to retaining walls, decorative walls can also provide overflow seating once you invite friends over. Some great examples of these are low walls that accentuate your firepit or patio.
  • Division: Decorative walls can be a great way to segment your yard into separate and intriguing areas. Being able to view your entire yard is great for tossing around a football, but if you want an interesting yard, you need some division and intrigue. Use a gently curving wall to lead a path from one planting area to the next, use it to outline a special perennial bed, or use it to back a quiet seating area at the edge of the yard.
  • Vertical Gardening: Decorative walls can be more than just privacy or seating structure. They can also be used to garden vertically. Some homeowners opt to plant at its base for a more natural look, while others go for affixing planter boxes and baskets to the wall.

Retaining Wall Basics

Compared to decorative walls, retaining walls can be quite a bit more complicated to install. Here are some of the important basic rules that should be applied to any retaining wall construction.

  • Drainage: The most destructive force on a retaining wall is water. There are two ways that water can destroy a retaining wall.
    • Water Flow: Enough water flow can wash out the soil behind the wall and cause its failure. The ground behind the retaining wall must be graded to slope away from the wall. If you cannot pitch the soil away from your wall, then your wall is simply not high enough.
    • Freezing: Water held in the soil behind a retaining wall will freeze when the temperature drops low enough. When wet soil freezes, it expands. This expansion is a powerful force that will push any wall forward. This is not usually a one-season occurrence, but the wall will be pushed out a bit each time it freezes. Eventually, given enough time, the wall will fail. This is the most common failure that I see in retaining walls. To avoid this failure, you must pitch the ground away from the top of the wall, so water doesn’t flow behind the wall. In addition to this, every retaining wall must be installed with drainage behind it. Different walls require different drainage, but drain tile at the bottom behind the wall, backfill with washed stone, and geosynthetic fabric is pretty standard. Depending on the layout of the wall, it may also require seep holes out the front to alleviate the water. Adequate drainage behind a wall will remove the water to alleviate any freezing concerns.
  • Back Pitch: Most retaining walls other than some of the largest concrete and steel commercially installed walls need to be installed with a back pitch so that the weight of the wall material holds it in place.
  • Footings: Depending on the installation and your area, the wall may require some type of footing or bottom trench to help tie the wall into the existing soil. Like any patio or walkway, a retaining wall must be built on a solid foundation. All soft, friable material must be cleared away before construction, or the wall will move over time. If you are in an area of the world where the ground freezes, you will want to be sure that any mortar and concrete set walls that you build have a sufficient footing under them to avoid them being cracked by frost heave. It is usually recommended that this footing extend down below the frost line, and in my area of Wisconsin, this is four feet. Dry-stacked walls are often popular in colder regions because they will move with the frost, and no damage will occur.
  • Engineering: Most commercially available retaining wall blocks will require engineering plans if they reach over four feet high. Always follow manufacturers’ specifications for the wall that you are installing.
  • Limits: Under most conditions, a wall shorter than four feet won’t need special engineering specifications as long as it is built according to the water flow and drainage principles. There is really no limit to how high a retaining wall can be built, but an inexperienced wall builder should not cross the four-foot limit.
  • Height Matters: When planning and building a wall, material choice, proper drainage, and height are the most critical aspects. A typically constructed block wall above four feet will require a step-back greater than the height of the wall below and typically geosynthetics sandwiched between layers of the wall to tie it to the slope. Another way to offset wall height is to increase the size of the material. Enough mass and back pitch can also overcome height challenges

Decorative Walls

The appearance of a decorative wall will depend on its type. But as its name suggests, they are primarily installed for their aesthetic impact on the landscape. They are usually low walls measuring about 18 to 30 inches. They can be built using almost any material that will support its own weight. Since they aren’t holding back any soils, they only need to support themselves. Once again, the taller the wall, the more solid footing they will need.

Examples of Retaining Walls

There are as many types of retaining walls as there are possible materials.

Gravity Retaining Wall

This is considered the most basic type of retaining wall since it only uses weight and mass to keep the soil in place. These walls are based on logic. Enough mass in front of the soil will hold back the ground. It’s simple physics. Walls like this have been built for many generations. The most popular materials for these walls are whatever large stone materials are available locally. Historically, more than today, the weight of rock has limited the ability to move it, so large boulder and stacked rock walls were typically built using local rock. When installed properly, these walls are some of the most long-lived walls because they do not rely on man-made materials; they depend on rock and gravity. While most of these walls have been built of rock, gravity walls can and have been constructed using many different materials such as; large sandbags, stacked tires filled with soil, plastic drums filled with sand, and many more. These container-style materials are typically referred to as gabions. They don’t need to be fancy, just heavy.

Manufactured Block Retaining Walls

These have become very popular due to their simple building block style. Many are installed every year by homeowners and professionals alike. They are relatively straightforward to install, but the basic rules of wall building must be followed, and as stated earlier, manufacturers’ recommendations and specifications must always be followed. If these walls fail, it is almost always due to faulty installation methods, not due to product failure. Many are built using geosynthetics to tie them to the wall, and many are fastened together layer by layer using construction adhesive. While most of these are strong due to the engineering and correct installation, some commercial manufactured block walls are so heavy and large that they are basically gravity walls.

Cantilevered Retaining Wall

Cantilevered retaining walls are really only installed when a large amount of fill is being moved. They are made of steel-reinforced, poured concrete, and are L-shaped  The bottom of the L is under the weight of the soil that the back of the L is supporting. The ground above holds the slab so that the wall won’t tip forward. The success of this wall depends on gravity, but mainly on the structure of the L. These walls can be poured on-site or manufactured off-site and transported to the site.

Sheet Piling Retaining Wall

Sheet piling retaining walls are historically constructed of contoured steel pilings. The steel pilings are driven into the ground with specialized heavy equipment, and they are interlocked with each other as they are installed. They can be installed to support almost any wall height as long as the pilings are built thick enough, and they can be driven into the ground far enough to offset the weight behind them. Because they are made from steel and are interlocking, the chance of them pushing forward is very limited. The weakness of these walls is that they are built from steel, which will eventually corrode and fail.  It is possible to construct a driven piling wall using timbers and also vinyl, but timbers aren’t interlocking and are very difficult to drive accurately, while vinyl pilings are typically only used as break walls in areas where excavation can be used to install them, and they prevent erosion more than retain soil.

Timber Retaining Walls

These retaining walls were popular prior to the advent of the manufactured block walls. They can be built using any sort of wooden timbers, but the most prevalent wall materials were pressure treated timbers and re-purposed railroad ties. They were usually alternately staked and tied together using spikes and rebar for stability. Since they are not heavy, they rely on angles and buried wall sections to hold them in place. If a relatively straight timber retaining wall was created, “deadmen” were installed to tie the wall into the earth behind it. Deadmen are typically timber installed perpendicular to the wall, between layers, and spiked into the wall above and below it. The back of the deadman is dug into the ground behind the wall and would usually have a cross piece spiked to the end to ensure that it won’t pull out of the ground.

Poured Concrete Retaining Walls

Countless poured walls have been installed over the years, as concrete has been a go-to construction material for many years due to its design flexibility and extreme strength. Concrete walls can be engineered to retain any sort of wall. When in doubt, just add more concrete. Talk about the ultimate retaining wall; most dams are built using concrete.

Examples of Decorative Walls

Since decorative walls don’t retain the earth, there aren’t nearly as many rules or requirements. You can make a decorative wall out of almost any material you find attractive. Taller decorative walls, such as privacy walls, will be much more economical to build out of wood, steel, or vinyl, while the decorative short garden walls are typically made from stone, and patio walls are often built of the manufactured block. Decorative walls are usually constructed so that both sides are equally attractive since they can be viewed from both sides.

Garden Walls

This is the general, all-encompassing term for any free-standing, decorative wall built in the yard or garden. They can be used to divide certain landscape features or delineate beds and walkways and create structure in your yard. They are only meant to emphasize some landscape elements and not to withstand soil pressure. Decorative walls are also often used to delineate property lines and used in conjunction with pillars to create grand property entrances. While many garden walls are dry laid, simple, and rustic, formal garden walls can have footings and be constructed of concrete and brick or stone for a very formal, elegant look.

Seat Walls

Unlike garden walls, these often use double or single stacked manufactured blocks, and they usually have a cap to create a flat seating surface. While not as popular, seat walls can undoubtedly be built using natural stone, concrete, or brick. Seat walls are often accented with decorative planters and columns topped with lighting for the patio. While these seat walls can support people’s weight and often hold some garden soil, they are not designed to hold back the earth. They are stacked in a similar fashion to the manufactured block retaining walls and are often held together with construction adhesive.

Privacy Wall

Privacy walls are a worthy addition to your landscape since they can bring security and comfort to you and your guests. They are usually four to six feet tall and often built in a similar fashion to a short section of fence.

Materials Used for Walls

In building retaining and decorative walls, it is easy to get overwhelmed by the various materials you can choose from. Your budget, the wall purpose, and the look you desire should always be considered.

  • Manufactured Retaining Wall Blocks: These are probably the most popular type of retaining wall material right now. They are popping up in all sorts of neighborhoods and being used for soil support in road and sidewalk projects. There are varieties, colors, shapes, and sizes to fit any project and taste.  
  • Concrete Block: This is often used for free-standing, decorative walls as the structural center, which is then covered with brick or stone. It has been used as a stacked structural building block used with mortar to build walls for houses and other structures for generations. It can be left bare but is not particularly attractive
  • Stone Veneer: This material allows a lot of flexibility since you can choose from various natural stones. Stone veneer is installed over a poured concrete, concrete block, or wooden framed base. It is typically applied using mortar and wall ties, just like brick veneers.
  • Poured Concrete: Poured concrete offers the ultimate flexibility of design and shape. You can pour any shape that you can form, and it is very durable. It is often installed as the footings and foundation of a veneer wall, but it can be used on its own, especially if stamped and colored.
  • Brick: If you have a traditional house design, using bricks can complement it. Walls can be built using layers of stacked brick as was done historically on brick wall houses, but are more commonly constructed nowadays using a brick veneer over a wooden, concrete, or concrete block foundation. Brick is typically more prone to absorb water than stone, so it may require a capstone to protect it, and it may be more inclined to crack in freezing areas.
  • Wood: Installing wood retaining walls is relatively straightforward, but it has sort of fallen out of style over the last ten years or so. I believe that it has lost its popularity for three reasons. The wood used must be pressure treated or creosote treated, so not great for the environment. Manufactured concrete block retaining walls of greater durability, easier installation, and many color and texture choices. The wood timbers can decay over time, regardless of the chemical treatment.
  • Dry, Stacked Stone: Dry stacked stone walls are probably the oldest type of walls. They can be built using flat stacked stone or round or jagged boulders. Since these walls are not mortared and rely only on gravity to hold together, they must be installed correctly. When using natural, local stone, these walls can look very natural and typically go well with any landscape design.
  • Gabion: Gabions are basically any sort of container filled with stone, concrete, or sand that is stacked to form a retaining wall. They can be very effective and quick to install. The downside is that if filled with anything other than concrete, you depend on the container’s material for the durability of your wall. These are often used along shorelines as they can be installed from the topside with little shore disruption.

Retaining Wall Frequently Asked Questions

Does a retaining wall add value to your home?

One of the advantages of adding a retaining wall to your landscape is that it increases your property’s market value. Any property with attractive and functional masonry features is more appealing to buyers and can be sold at a premium.

How do I know if I need a retaining wall?

If your home’s foundation or any part of your yard is threatened by soil erosion, then you can likely alleviate this threat through the use of a retaining wall. If you would like to alter slopes or add contours, retaining walls can be used to do this also.

What can I use instead of a retaining wall?

Just about any heavy and stackable material can be used to help retain soil, so be creative and use what you have.

How close to a boundary can you build a retaining wall?

There are specific regulations on how close you can build a retaining wall to your property’s boundaries. As such, you would need to consult your local city council or your area’s building and engineering department before you start constructing a retaining wall.

What is the cheapest type of retaining wall?

The cheapest type of retaining wall is dry stacked and uses readily available cheap materials. If you are a handy person, doing the job yourself will significantly reduce your costs. If you live anywhere near farmers, they often have large piles of stones that they remove from their fields. They may be interested in getting rid of these piles at a real bargain, especially if you will do all of the loading and hauling.

What is the easiest retaining wall to build?

Many do-it-yourselfers seem to prefer the manufactured block walls, and I believe that this is due to the building block style and perceived ease of installation. Personally, I believe that a natural boulder wall is much more attractive, easier to build, and will last forever if constructed properly.

What is the strongest type of retaining wall?

I would say that poured concrete has the absolute highest strength potential since it can be designed and reinforced to withstand any force. Look at the Hoover dam. It is built of poured concrete over 700 feet tall. Now that is an enormous retaining wall!

Do I need foundations for a garden wall?

This depends on the style of garden wall that you are building. Any dry-stacked wall will move with the frost /thaw cycle and should be a problem. Any time you put mortar or concrete into your wall, you will likely want a footing or foundation.

How tall should seating walls be?

For you to sit comfortably in a seating wall, its height should be 18 to 24 inches, and this height should include the capstone.

How do you make an old garden wall look good?

Often, old garden walls become overgrown with plant material, and rocks often shift. To freshen up a natural stone garden wall, remove any overbearing plants and restack any fall stone areas.

Final Thoughts

Both retaining walls and decorative walls are a worthy addition to your landscape. Although their functions sometimes overlap, knowing their differences is essential if you don’t want to waste your time and money using the wrong materials. Most of this retaining wall knowledge is common sense, and the best way to build a wall is using common sense and patience. A retaining wall is a long-term investment in your property, and it is a lot of heavy material. Take your time building it and always follow manufacturers’ recommendations. If you are new to wall building, a stacked block or boulder wall less than four feet tall should be doable. Anything over that, and you will want to hire a professional or really do your research.

Raising Fish in a Backyard Pond

Raising fish in a pond

Raising fish in your garden pond is a good idea for many reasons. Maybe you just want to add a bit of color and life to your pond, perhaps you want help controlling the algae in your pond, or maybe you are interested in raising a source of food. Raising fish in your backyard pond is truly an easy and fulfilling endeavor, no matter your reason.

Pond Guidelines and Some Common Sense

Backyard pond is a very broad term. Your ability to raise fish in your backyard pond will depend on the type of pond you have in your backyard and the climate you live in.

From my experience, when people are referring to a backyard pond, it can be anything ranging from a small plastic insert filled with water to a large natural pond that spans acres.

So how do you know what types of fish you can raise in your pond? Well, this is where common sense comes in. You must realize that any fish that you put into your pond are likely to grow, and they are likely to reproduce, so you should plan accordingly or plan to remove some over time. Your fish have one significant limitation, and that is your pond. Their entire existence depends on the water in your pond. It’s not like they can just pick up and move if it gets too crowded or too dirty; their only options are to live or to die; the rest is up to you.

This article is going to be referring to naturally balanced backyard ponds. I will not get into the elaborate swimming pool-style filters and available systems, nor will I be considering chemical water treatments. When I think of a backyard pond, I think simple, not complex, and not chemically treated. It’s been my experience that mechanical and chemical treatments are never the answer and are typically just a waste of money and effort.

Some Characteristics of Good Fish Ponds

  • The pond must have an adequate amount of water. You would be surprised by the size of fish that I have seen living in tiny ponds. I have seen a dozen Koi, the length of your arm, living in a 10’x10′ pond that is 2′ deep. Vast amounts of water are not necessary to raise fish, depending on the type, but you should be aware that less water means more chance for fish to die off.
  • The pond should be of adequate depth. Whether you live in an area that gets very hot or very cold, you will want to have at least three feet of pond depth if you want to make your life easier raising fish. A bit of depth helps the fish have some water where the temperature doesn’t fluctuate as much.
  • The pond must have good quality water. For fish, water is life. You can compare their water to our air. Imagine how life would be if you were in a small box of air? Any minor changes to the air quality could significantly impact your quality of life. The same is true for fish and their water. Large fish in a small pond might be fine as long as the water quality is good, but if the water quality suffers, so will the fish.
  • The pond must have plants. They are the workhorses of this world. Plants clean our air, and plants clean your water. There is no maybe about this; it is a fact. Anyone trying to keep a pond that doesn’t have many plants growing in it is fighting a losing battle. Plants clean water, remove nutrients and provide cover and food for our fish. They are essential.
  • The pond must have some circulation. Larger bodies of water are circulated by wind and wave action and water flowing into them from rivers, streams, and springs. Our smaller backyard ponds typically lack any of these natural forms of circulation, so we should provide some circulation for good water quality and happy fish. All types of circulation also provide some aeration. The natural balance of the pond depends on aeration. All life in the pond must have a bit of oxygen to live, so no circulation means no aeration, which means no life. The more oxygen in the water, the more life it will sustain and the healthier it will be.
  • The pond should only take in clean water. All ponds will take in water from their surroundings, whether it is from a spring (if you are one of the lucky ones) or from rainstorms that wash runoff into our ponds. The cleaner this runoff water is, the better. If your backyard pond takes in runoff water from your lawn or farmed fields, it might be taking in chemicals and fertilizers. Trying to raise fish in a chemically-laden body of water will be difficult. Small amounts of pollutants will be easily taken care of by your plants, but large doses of lawn fertilizer or manure are sure to throw the pond out of balance.
  • The pond should be balanced. Speaking of balance, this can be the most challenging subject to understand and sometimes the hardest to attain. I’m sure that there may be a scientific formula for this, but I’m not a scientist, so I don’t have it if there is. I can tell you that from my years of experience, all bodies of water are either in or out of balance. A pond that is well balanced as nature intended will have clean water and healthy plants and animal life. A pond that is out of balance will show symptoms such as excess algae growth, cloudy water, green water, bad smells, and sick animals.

What Do I Mean by Pond Balance?

Pond balance encompasses all of the above essential elements needed for a pond. You likely see bodies of water all around your area that are either balanced or unbalanced. Most are probably not specifically managed by humans, but they are all affected by humans, to be sure.

Nature is constantly fighting for balance no matter where you look. Plants and animals across the globe are in constant competition for nutrition, air, and sunlight. Wherever we humans disrupt the balance, you can see nature fighting to get it back.

Our ponds will strive to balance themselves all on their own if we let them, but tiny little bodies of water that are not spring-fed will generally fill in over time if left to nature’s ways. Keeping small bodies of water chocked full of fish is not a natural occurrence, so to make it happen, we need to manage it a bit to help it survive well in nature.

Choose Wisely

First and foremost, choose wisely when adding fish to your pond. Adding a bunch of fish that are not suited to your pond size or temperatures is undoubtedly setting yourself up for failure. Research your fish choices and match them to your pond. Of course, it’s your land, so if you want to choose your fish and then build a pond to suit your fish, you can do that too.

Size Matters

Size matters when it comes to backyard ponds. In general, larger bodies of water are easier to balance than smaller bodies of water. Always err on the side of giving your fish more room than they need, at least in the beginning. You can increase fish load over time as you begin to understand how the fish and your pond work together.    

Add Plants

Add many plants to your pond of all varieties. Choose native aquatic plants that will thrive in your environment but avoid introducing overly aggressive plants that will tend to take over your pond. Aquatic plants tend to be a bit invasive to begin with, which is good because fast-growing plants remove many nutrients from the water, but it is terrible if you are in constant battle with your pond plants to keep them in control.

Provide Surface Area

Provide surface area. A big part of the pond’s balance is the microscopic bacteria that live in the pond. These bacteria are at work 24 hours a day, breaking down debris and taking in nutrients. They need surface area to survive, so having rocks, gravel, and plants in your pond will help with this. Ponds with bare rubber liners are at a disadvantage due to their lack of surface area. More surface area will mean that more bacteria can survive in your pond.

Provide Circulation

Provide circulation. Water circulation is of vital importance to the health of your backyard pond. Unfortunately, circulation typically involves some sort of a pump. Some systems use wind and solar power to run these pumps. We can circulate water from the bottom of the pond to a stream or waterfall where it flows back into the pond; we can circulate pond water through a wetland filter which is a great way to clean water and aerate it at the same time. We can also circulate water through the use of bottom or surface aeration.

Bottom Aeration

Bottom aerators work by setting a small air pump at the edge of the pond that pumps air through hoses to diffusers at the bottom of the pond. This is the same principle used in fish tanks when you see all of the tiny bubbles rising up to the surface. By pumping air to the bottom of the pond, we are adding oxygen to the deeper pond water, which makes the bacteria more effective at breaking down debris and it also circulates the pond water. The bubbles that rise through the column of water cause the water to move with the air, and that will cause the entire column of pond water to circulate from bottom to top.

Surface Aeration

Surface aeration is usually accomplished through the use of a floating fountain aerator. This is simply a pump mounted to a float that shoots water into the air, and this aerates and circulates the water.

Add Life!

Your pond needs LIFE! When I talk about life in a pond, most people think about frogs and fish. While these are undoubtedly excellent animals to have in your pond, they are just the tip of the iceberg when it comes to life in your pond. The amount of living things in pond water is truly amazing, and all of these living organisms play a role in the balance of your pond. Things such as protozoa, arthropods, diatoms, amoeba, paramecium, rotifers, and amphipods are just a few. For a great glimpse into the life in pond water, check out this fantastic site full of information: https://rsscience.com/microscopic-organisms-pond-water/

Don’t Be Your Pond’s Worst Enemy

Humans are often a pond’s worst enemy when it comes to water quality. We really only acknowledge what we see, and if we see something that we think is a problem, we want a quick fix. Unfortunately, nature doesn’t work with quick fixes; nature always works on long timelines. We see a bit too much algae in our ponds, and we think that we need to kill it before it gets out of control. This is the absolute wrong way to think about algae. Excessive algae in a pond is not the cause of your pond problems; it is a symptom of too many nutrients in the pond water. We want algae in our ponds because it is part of the pond’s balance. We don’t want excessive algae, so we need to have a good quantity of aquatic plants and animals to help control the algae, and we want to limit the amount of nutrients entering our ponds.

There are No Good Quick Fixes

Far too often, humans look for a quick fix and find some chemical that claims to be safe for fish. They dump it in the water, and the algae dies. They think they have won the war when, unfortunately, they have just taken an enormous step backward. Sure, the alga died, but it also sank to the bottom of the pond and began to decay. This means it will be fertilizer for the next round of algae that will return as soon as the nasty chemicals wear off.

Again, I am only talking about the things that we can see. The chemical industry has built it’s industry around hoping that we buy their claims of safety. I’m sure that you are not foolish enough to think that this chemical you dumped into the pond water only affects algae and nothing else, are you? That would be like saying that spraying toxic chemicals on our food crops won’t have any detrimental health effects or like saying that spraying toxic chemicals into the air to kill insects won’t also kill the birds and the bees and probably us over time. It’s true; any toxic chemical added to your pond water will be killing many other organisms that we can’t see without a microscope. All of these organisms take part in the balance of your pond. Don’t ever put any chemicals into your pond!

On to the Fish

Being a person who has installed and managed many decorative backyard water features in my life, I can say that I definitely have more experience with ornamental fish than any other type, so let’s start there.

Decorative Pond Fish

Goldfish: Goldfish are the most common decorative pond fish that I see for several reasons. They are very cheap and easy to get, they multiply like crazy, and they are pretty tough to kill. If you wonder if your pond will support fish, throw in a few tiny goldfish and see how it goes. Chances are, in a few years, you will have many more, and they will be thriving.

Koi: Koi are probably the second most common decorative fish I see. People seem to love their Koi. Maybe it’s their calm and mellow demeanor, perhaps it’s their bright colors, or maybe it’s because they can grow to the size of a young child. Koi are a very close relative to the common carp, so they are relatively hardy creatures, but I can tell you from experience they can’t hold a candle to goldfish.

Golden Orfe: These are schooling fish, so you will want to have at least five fish.  They seem to survive well and honestly look a lot like long goldfish.

Best Fish Commonly Raised for Food:

Tilapia: 

Tilapia are hardy fish with a diverse diet. They have adapted to grow outside of their native range, are excellent eating fish, and are fast-growing, reaching up to 1 pound in five to seven months. 

The Government of Sri Lanka introduced a program supporting small-scale fish farming, i.e., in backyard ponds. The average Tilapia production was 9,192 kg/ha, and the profit margins were very attractive due to the organic conditions under which the fish were raised. (Pushpalatha, Chandrasoma, Liyanage, Fernando, & Jayabahu, 2016). The widely grown hybrids of Tilapia are:

  • Blue Nile Tilapia (Nilotica, mango-fish, Boulti), 
  • Red hybrid Nile Tilapia
  • Stripped Tilapia

Catfish: 

Catfish are one of the easiest fish to raise in the beginning of pond fish farming due to several reasons: 

  • Very fast-growing, can be harvested after three months when appropriately fed.
  • Highly tolerant to low DO (dissolved oxygen) levels in water
  • Resistant to high ammonia levels in the water, they do well even when stocked at higher densities.
  • They are bottom feeders and prefer a pond with large flat bottoms to make feeding easier. These are valuable scavengers that are easy to raise and breed.
  • They are non-territorial and can live happily with Tilapia, Perch, Bluegill, etc.
  • Prefer water in the range of 75-85˚F, but survive in much lower and higher temps.
  • Channel catfish range from Northern Mexico to Southern Canada, mainly in the Eastern US.

Largemouth Bass:

  • Largemouth Bass is a top feeder, eats almost everything, including worms, pellets, and insects.
  • Tolerates a wide range of temperature fluctuations (65-85 ˚F), prefers alkaline but clean water and is resistant to high nitrate levels.
  • A good choice for growers who cannot change fish species between the warm and cold seasons.
  • Carnivorous species that will eat the sluggish Tilapia and Catfish in the winter, keeping the pond water clean and the pond population in control.

Salmon:

  • A Great-tasting fish and a rich source of Phosphorus, Carbohydrates, Omega-3 fatty acids, and Sulphur.
  • Not easy to grow, they take more than two years to reach harvestable size.
  • Need water depth of at least 10′ to survive.
  • Need water temperatures between 40 and 50 °F.
  • You will need to feed them as they won’t likely find enough food in your pond. 

Bluegill:

  • Also named as “Bluegill sunfish, copper bellies, copper heads,” etc., is q popular freshwater game as well as food fish in the Central and Southern United States.
  • The maximum length it attains is 15-23 cm and less than 0.25 kg.
  • Prefer water temps 65-80°F

Carp:

  • Carp is also a widely farmed pond fish in the United States, both for food and ornamental purposes.
  •  It contains little intramuscular bones within the fillet, which makes some folks hesitant to eat it, but it is a tasty eating fish if prepared properly.
  • Easy to raise and lives in almost every area of the world. 

Best Fish Pond Plants:

Pond plants should be the best oxygenators, create smooth underwater habitat for the aquatic animals, release oxygen directly into the water while absorbing carbon dioxide from water, grows on the fish waste, etc. (Rahmawati, Dailami, & Eka Supriatin, 2021)

Submerged pond plants:

  • Fanwort (Cabomba): its smooth, delicate leaves cushion the docile fish during movement.
  • Hornwort (Anthocerotopsida)
  • Anacharis or Elodea 
  • Eelgrass (Vallisneria): completely (partially) submerged pond plant, hardy plant that regrows from its parts damaged by pond fish, said to be the best oxygenator, fish waste absorbent plant.

Partially Submerged or Floating Plants:

Emergent plants grow efficiently in small ponds as they require shallow waters for root anchorage while the foliage and flowers show at the surface. (Huang, Zhang, Bai, & Qin, 2017). Some of the fish pond friendly emergent plants are mentioned below:

  • American lotus
  • American water plantain
  • Arrowhead
  • Beak sedge
  • Cogon-grass 

Water Quality Standards to support Fish Growth and Development:

Temperature:

Because fish are cold-blooded animals, water temperature is one of the most critical factors in the growth, breeding, feeding, behavior, and survival of any fish species. The fish will grow and reproduce happily within the optimum range and tolerance limits. Below are some fish types and their temperature requirements.

Key: in degrees Fahrenheit

LWT (lethal water temperature)

OWT (optimum water temperature)

STP (spawning temperature range)

 Fish type

  • Nile Tilapia: LWT 54-100, OWT 81-86, STP 72-73 
  • Common Carp: LWT 36-97, OWT 73-79, STP >64
  • African Catfish: LWT 54-100, OWT 77-81, STP 68-86
  • Largemouth Bass: LWT 36-95, OWT 73-86, STP 63-68

Dissolved Oxygen:

The dissolved oxygen levels in your pond will determine whether the fish will survive or not. Below are some examples of the needed DO levels for these fish. 

 Fish species Preferred/recommended DO level

  • Tilapia: 4 mg/l
  • Common Carp: 3 mg/l
  • African Catfish: 5 mg/l
  • Rainbow trout: 8 mg/l

Turbidity:

Cloudy or muddy water is turbid, and it can be a problem in newly established ponds and typically decreases when the pond plants have grown properly. Below are a few tips to control turbidity.

  • Do not stock the pond with species that stir up the bottom, e.g., the common carp, etc.
  • Plant vegetation in the pond. Once again, plants come to the rescue.
  • Rock the bottom of the pond

Benefits of Freshwater Fish Ponds to the Environment:

  • They enrich, support, and maintain a healthy ecosystem. 
  • They help conserve water.
  • They can be a productive and profitable hobby for the homeowner.
  • They can provide a healthy and organic, protein-rich food source for your family at a reasonably low cost.

References:

Huang, P., Zhang, D., Bai, S., & Qin, S. (2017). Application of combined emergent plants in floating bed for phytoremediation of landscape pond in South China. International Journal of Environmental Technology and Management, 20(1-2), 22-36.

Pushpalatha, K., Chandrasoma, J., Liyanage, H., Fernando, W., & Jayabahu, J. (2016). Farming of Nile tilapia (Oreochromis niloticus) in backyard ponds in Sri Lanka: Culture practices, fish production, and profitability. Sri Lanka Journal of Aquatic Sciences, 21(1).

Rahman, M. M. (2015). Role of common carp (Cyprinus carpio) in aquaculture production systems. Frontiers in Life Science, 8(4), 399-410.

Rahmawati, A., Dailami, M., & Eka Supriatin, F. (2021). The Performance of Water Quality in Tilapia Pond Using Dutch Bucket and Deep Flow Technique. Egyptian Journal of Aquatic Biology and Fisheries, 25(1), 885-897.

Towers, L. (2015). How to achieve good water quality management in aquaculture. The Fish Site.

https://rsscience.com/microscopic-organisms-pond-water/

The Ultimate Guide to Outdoor Fireplaces

Outdoor Fireplace

If there is one landscape feature that many are raving and dreaming about, it is the outdoor fireplace. Who wouldn’t want to sit by the fire and get cozy with the people close to you, right? This landscape element has been a cornerstone of the outdoor living space movement for quite some time. Sure, fire pits and chimeneas are nice, but if your yard has the space and you have the money, a masonry fireplace at the edge of your patio living space simply can’t be beat.

Not only will it raise the value of your real estate and add some structure and beauty to your yard, but it will also allow you to extend your patio season considerably. If you plan to add a fire feature to your property, congratulations on finding this article about outdoor fireplaces! This is a crash course on everything fireplace-related.

What is an Outdoor Fireplace?

As its name suggests, an outdoor fireplace is quite simply a fireplace that is outside, typically along the edge of your patio living area. It is very similar to an indoor fireplace in terms of materials used, but its construction is more straightforward since the chimney can be much shorter and isn’t connected to the house.

Outdoor fireplaces are commonly composed of a firebox and a short chimney. While they are primarily designed for heating, some are also designed to become wood-fired ovens where homeowners and guests can make pizzas or even casseroles. 

Are Outdoor Fireplaces Different from Fire Pits?

Although both fireplaces and fire pits burn wood and add some warmth and character to your landscape, they aren’t the same. Here are their key differences:

Outdoor Fireplace

  • An outdoor fireplace is composed of a firebox and a chimney for proper smoke ventilation.
  • Firebox openings are usually arched, rectangular, or square.
  • Fire Brick should always be used to line the firebox.
  • Chimneys may either be tapered at the top or rectangular.
  • They may be attached to the house or situated at an adjoining patio, deck, or terrace.
  • They can be almost any size and as complex or simple as you would like.
  • People sit in front to enjoy the fire and feel the heat radiated out of the front when in use.
  • They may or may not have a fire screen to catch hot ashes.
  • They are traditionally constructed using all masonry materials.
  • They traditionally burn wood, but there are certainly gas and electric varieties.
  • They can add privacy and block wind due to their size and structure.
  • Construction will likely require a building permit.

Outdoor Fire Pit

  • Fire pits can either be in the ground or freestanding
  • Most fire pits are round in shape, but there are also oval, square, and rectangular ones.
  • They allow for seating all around the fire.
  • They may or may not have a fire screen to catch hot ashes.
  • They can be built anywhere since they don’t have a chimney.
  • It’s basically just a campfire, other than it may be sunk into the ground with some sort of masonry structure. Or it is a metal structure that can be moved around.
  • Much less expensive to build and maintain.
  • Usually, burn wood, but there are gas or electric varieties.
  • Wide-open to the wind, nothing to stop the fire and ashes from blowing around.
  • Typically no building permit will be required.
  • So the only thing these two have in common is that they burn wood? Pretty much, the fire pit is nice, but it is very different from an outdoor fireplace.
  • Both will keep you warm on a chilly night, and both will give you a spot to burn some marshmallows.

9 Reasons to Add an Outdoor Fireplace to Your Property

Outdoor fireplaces are pretty romantic, and they allow you to spend late nights outside while you’re snuggling with your partner or sharing some fun times with the kids while making s’mores. If you’re still trying to convince yourself or your housemates to add a fireplace just outside your house, here are some reasons that would have you looking for a professional builder:

  1. Outdoor fireplaces provide warmth – The primary function of an outdoor fireplace is to provide warmth during those cold nights. Instead of being cooped up inside, you’ll be able to enjoy your outdoor space without worrying that you’re going to freeze. 
  2. It extends your time spent outside – Since outdoor fireplaces provide heat, staying outside for more extended periods won’t be a problem. You can throw an intimate celebration until morning or sit and talk with your loved ones all night while warming up in front of your fireplace.
  3. It extends your living space – coupled with a few nice comfy lounge chairs or maybe a couch; it can give you that cozy living room feel outside on your patio. Who couldn’t use an extra living room,
  4. It is easy to maintain – just a bit of ash cleanout, nothing too complicated here.
  5. It can improve the overall look of your property – By adding this fire feature, your backyard will have an accent piece that will pull people’s attention, even when it is not lit.
  6. It changes the ambiance of your home – Not all of us are lucky enough to have a fireplace in the house, so this is a much more affordable way to bring the sights, sounds, and smells of a real wood fire into your life.
  7. You have extra space for entertainment – adding the outdoor fireplace might just give you an additional seating area attraction for your guests.
  8. It is an excellent investment – In the future, when you decide to move and sell your property, you’ll realize that you made a great choice by adding an outdoor fireplace to your yard. The aesthetic appeal it brings increases your home value. You’ll also find it easy to find potential buyers since outdoor fireplaces are currently a popular trend.
  9. It can keep bugs away – the smoke from the fire will help discourage them.

Things to Consider Before Installing an Outdoor Fireplace

Don’t let your excitement jeopardize your plans to build an outdoor fireplace. Make sure that you have researched and prepared well so you won’t encounter problems in the long run. 

Here are a few things that you should consider before building:

Identify your outdoor fireplace’s purpose –

Your purpose for adding an outdoor fireplace to your backyard is an important planning consideration since it will help you decide on the size. If you have identified that you just want a place where you and your family can hang out and share some stories, a small fireplace is suggested. However, if you would like to cater to more people— your friends, colleagues, or distant relatives perhaps, then you should opt for a two-sided outdoor fireplace.

Review local ordinances

This is crucial since some areas may not allow fireplaces. Always check local ordinances and talk to homeowners’ associations prior to beginning any construction. You don’t want to get part way into your construction project just to be shut down and fined by the local authorities.

Consider safety when choosing the location.

Choosing the location of your fireplace is also something you should carefully plan. We are dealing with fire here, so we need to make sure that prevailing winds aren’t going to be blowing hot ashes into our trees or house.

Prioritize proper ventilation

Due to the short chimney, it would be easy for the smoke from your outdoor fireplace to settle down into the seating area, especially if you have an enclosed or partially walled-in areas. You want this pretty much out in the open so that you are not trapping the smoke.

Familiarize yourself with the types of fireplaces

Part of building an outdoor fireplace is choosing between wood and gas. Be honest with yourself here. Are you the type that doesn’t mind the extra work of chopping or buying wood and cleaning ashes? If you are not the type to enjoy the processes involved with building a wood fire, you may want to consider installing a gas fireplace.

Make sure the fireplace complements your home.

With so many styles, colors, and patterns of block available, you can create any sort of fireplace that you can dream of, but let’s make sure that it fits well with your home as well as the surrounding landscape and hardscapes. You want things to look like they were planned out, and you don’t want too many different materials. Having the masonry of the fireplace match or compliment any seat walls and patio stone that you might already have is a good start.

Pay attention to scale

You also want the scale of the new fireplace to complement and reflect the scale of the house. Neither a large fireplace next to a tiny house nor a tiny fireplace next to a big house will look right. 

Learn about fire safety

No matter how much warmth and coziness the fire brings, it is still hazardous. If you haven’t had a fireplace before, you need to do a bit of fire safety research to make sure that you can keep yourself and your family safe. You must learn how to use a fire extinguisher and make sure that one is readily available near the fireplace.

Consider the Placement

I mentioned a while ago that your outdoor fireplace must compliment your home, but another concern is how it will fit into your existing patio. Do you have a good spot for it, or will you need to expand the patio to make this work? Will it be too close to the outdoor kitchen or that big tree in the yard? Will you have room to create a seating area in front of it, or is the entire patio already full of furniture? Most patios simply don’t have enough room for a completely new seating area. This is an important consideration. If your entire patio needs to be re-done to accommodate this new outdoor fireplace, the project’s scope and cost just increased significantly.

Consider Features

Should this fireplace be small and simple, or might you want it built big enough to incorporate a mantle and hearth? Will you want a built-in wood storage area or a built-in area for tools?

Consider Accessories

Will you need to purchase fire tools like pokers and tongs? Will you need a fire screen or wood hauler? Don’t forget about furniture; you will surely want some comfortable lounging furniture near your fireplace.

Pros and Cons – Wood vs. Gas

Wood-burning Pros

  • More rustic and authentic.
  • The fire is different every time and changes through the hours you spend around it.
  • The fire provides you with something to do while it is burning; many people enjoy poking in the fire, arranging the logs, adding logs, etc.
  • It will actually smell like the campfire. Nothing beats that smell of burning wood (for some people)
  • Cheaper to install, no need for gas lines and burners.
  • Chopping and splitting firewood is good exercise.
  • The smoke can keep the bugs away.
  • It might be an excellent way to get rid of those sticks that always seem to land in your yard.
  • No chance of a gas leak.
  • Neighbors might like the smoke?

Wood-burning Cons

  • The fire needs to be built; it doesn’t just happen at the flick of a switch.
  • It’s an actual wood fire, so that means popping and hot embers jumping out or blowing out of the firebox.
  • It will actually smell (a con for some people)
  • You will need to chop or buy firewood
  • The fire will need some attention as it burns.
  • The fire will be harder to extinguish than gas.
  • Neighbors might not like the smoke?
  • You might end up with ashes on cars, tables, chairs, etc., after a night of burning.

Gas Pros

  • Sarts at the flick of a switch
  • It doesn’t really smell.
  • Easy to extinguish.
  • No ashes or debris to clean up.
  • No sparks and embers flying out of the firebox.
  • Not smoky 
  • Can choose a gas burner with ceramic logs.

Gas Cons

  • No wood-burning smell.
  • Nothing to do while it burns.
  • It doesn’t give you that same cozy feeling like an actual wood fire does.
  • More expensive to install.
  • Potential for the gas burner to corrode over time and need replacing.
  • The chance of a dangerous gas leak.
  • The fire looks the same every time.

Outdoor Fireplace Styles

Outdoor fireplaces are constructed for both functionality and aesthetics. As mentioned earlier, you will want to match the style of your fireplace to the style of your home and patio.

Traditional Outdoor Fireplace Style

This style would remind you of fireplaces found in log cabins which give off some rustic vibes. They are usually made out of stones and bricks for a cozier home atmosphere. To achieve a complete traditional look, the fuel recommended for this fireplace is wood. However, they can also be outfitted with a gas or electric insert if you desire.

Contemporary Outdoor Fireplace Style

If your home has contemporary decors, I would recommend a contemporary fireplace designed to have sharp lines. Like the traditional fireplace, the materials used are stones, bricks, and concrete, but a more contemporary feel.

Modern Outdoor Fireplace Style

Some outdoor fireplaces double as a piece of art. If you have a modern styled home, instead of using the usual brick and stone, you can use materials such as glass and marble for a more futuristic and clean look. These might be looked at as more of an artistic focal point than a source of heat.

Outdoor Fireplace Materials

The outside covering of your fireplace is the first thing your guests will notice, and it is a distinctive design element that you should plan and style well if you want to add value to your property. Consider how your fireplace will blend in with your whole landscape. You should choose materials that will bring cohesiveness to the overall look of your property. If you can find the right material for your fireplace, it is possible for it to look as if it has been there from the begining.

Listed below are the common materials you can use for your outdoor fireplace project:

Brick

Bricks are made out of clay which naturally occurs in many states. These clays are shaped and heated in an oven to become durable. Where the clay originated will determine its color, ranging from cream to dark brown. If your home is built with brick, then it makes sense that you would want to extend the same aesthetic in your outdoor fireplace. Be sure to take the time to find a brick that compliments the color of the house.

Stone

Using stone to build your outdoor fireplace can give it a more natural look. You can use genuine stones or manufactured ones, depending on your budget. The pros of choosing this material are that it is long-lasting and extremely durable, you can choose from various earth stones, and has an upscale style. On the other hand, it also has its disadvantages. It is more expensive than other materials, and the installation is more complex.

Stucco

Stucco is made of Portland cement plaster which is factory-prepared, and this is a low-cost material typically applied to a concrete block understructure. Stucco can be reasonably reliable and durable but will tend to get dirty more quickly, and in places that freeze, a small crack in the stucco can let in water which can cause the stucco to fail in freezing temperatures. Homeowners who want to achieve a Spanish or Mediterranean look are better off choosing this material. It is readily available in multiple colors and it is not too heavy to ship, unlike stones and bricks.

Concrete

Concrete is very durable and is used in all types of construction. Many fireplaces are constructed of concrete, and it is a versatile product that can be formed into whatever shape you want. The downside of concrete, in my eyes, is the aesthetic appeal, and it is not the most attractive option to choose.

Outdoor Fireplace Safety Tips

When you add a heating feature to your outdoor living area, you also increase the risk of injuries and unexpected fire.

  • Clear your yard waste. Any debris and yard waste can become a hazard if they contact hot embers or fire.
  • Only use the intended fuel. Don’t burn any material in your outdoor fireplace other than what is meant to be burnt in it.
  • Prune trees and shrubs that are near your outdoor fireplace. Low-hanging branches, bushes, and shrubs that grow near your outdoor fireplace need to be regularly pruned so they won’t catch fire.
  • Use safety screens. Add a safety screen on your outdoor fireplace to serve as a barrier between the fire and your guests. This will prevent embers from blowing or popping out of the firebox.
  • Store firewood far from your fireplace. Even though it is convenient to store wood near your fireplace, the Federal Emergency Management Agency (FEMA) does not recommend this since it can increase fire risk. It would be better to store your firewood 30 feet away from any structure.
  • Don’t let kids play with the fire. This one is pretty obvious. Kids are naturally curious and playful. If you put something as exciting as a fireplace in your yard, they are bound to play with it. The last thing you need is a kid running through the yard swinging a flaming stick. Teach them how to deal with fire and how to stay safe.
  • Don’t light your fireplace and leave. Leaving any fire unattended is a terrible idea. Many forest fires are started by embers left glowing in a fire.
  • Stock up on emergency supplies. It is required that you keep emergency supplies on hand just in case an unexpected fire occurs. Some of the essential items you should have are buckets of sand, a water hose, and a fire extinguisher.
  • Use the correct log size for wood fireplaces. Wood-burning outdoor fireplaces can be dangerous if you use wood that is too big for your setup. All your logs must fit on the firebox to ensure that it is safe for you and your guests. Over-stuffing a firebox will only result in a dangerous fire that blackens the front of your fireplace with soot.
  • Maintain a distance between your furniture and the fireplace. Most patio furniture is flammable, so keep it far enough away so that it won’t catch fire.
  • Completely extinguish the fire when you are done. Many people leave a fire and go into the house for the night when it is still lit or glowing, and this is always dangerous. Fully extinguish your fire when you are done.

Frequently Asked Questions

How Much Does it Cost to Build an Outdoor Fireplace?

According to Home Advisor, the cost of building an outdoor fireplace is between $1,500 to $20,000. Meanwhile, if you opt for pre-made kits, expect to pay $1,500 to $9,000. On the other hand, custom projects will run you from $8,000 to $50,000, depending on your fireplace design and your budget.

Do Outdoor Fireplaces Need a Chimney?

The need for a chimney depends on the type of fireplace. Gas fireplaces are designed to operate without needing a vent. On the other hand, wood-burning fireplaces always have a chimney to direct smoke upwards. 

What Direction Should an Outdoor Fireplace Face?

Many experts suggest that outdoor fireplaces should be built so that the back wall faces the wind. This is primarily to control the fire and reduce the smoke produced by burning wood, and this also works to protect you and your guests from sudden gusts of the wind.

How Far Does an Outdoor Fireplace Need to be From the House?

In general, your outdoor fireplace should be set up about 10 to 20 feet away from your house or any structure that might be flammable. Note that this is only the minimum distance. The farther it is from your indoor living space, the better.

Final Thoughts: Is Building an Outdoor Fireplace a Good Choice?

There is no definite answer as to whether building an outdoor fireplace is a good choice for you. It will all depend on your location and how often you will use it. If your area allows building one without any restrictions, then you are quite lucky! All you have to consider is whether you will utilize it.

I hope this guide taught you all you need to know about outdoor fireplaces and why they are popular right now. Make sure that you bookmark this page so you can review this once you are already in the process of building your fireplace.