Large Natural Ponds

Large natural pond with ducks

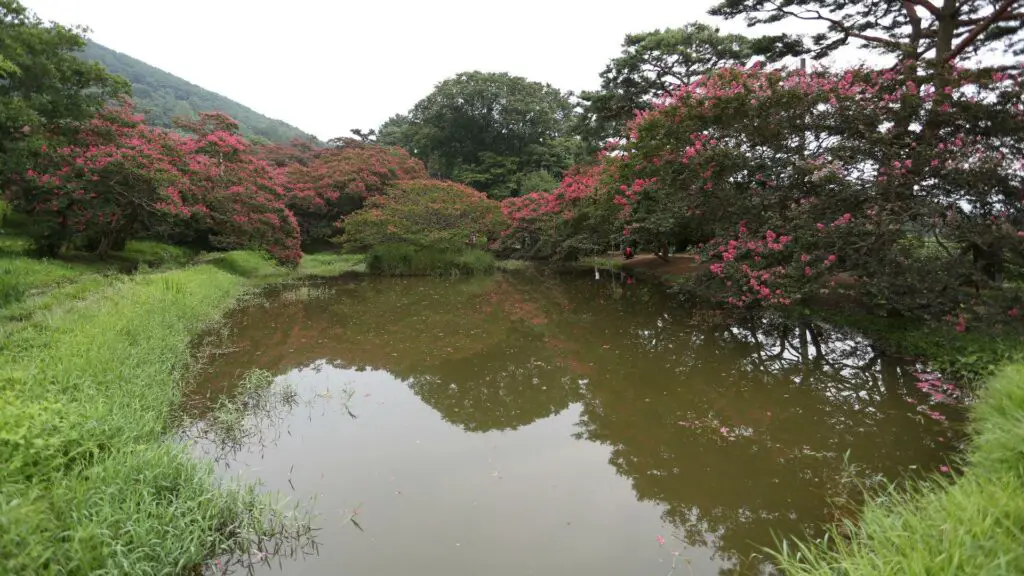
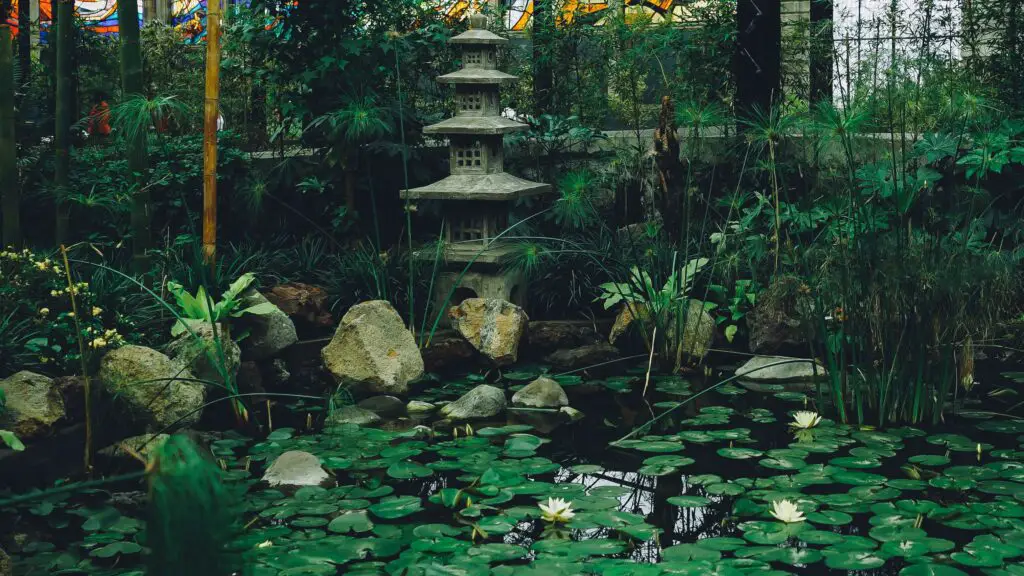
The term “Natural Pond” indicates a harmonious and balanced setting where plants, animals, microbes, and water support each other to develop, decompose, and regenerate. Many natural ponds are man-made and completely natural, created by mother nature herself. For the most part, when referring to natural ponds, we are talking about ponds with an earth bottom with no synthetic liner that is naturally maintained with no use of chemicals, filters, or pumps. 

This article will explore some of the similarities, differences, and environmental impacts of these various types of Natural ponds.

Biological Ponds

All natural ponds, big or small, can be classified as biological ponds. You really can’t maintain a body of water without any biological processes taking place, even if you spoil the water with high doses of chemicals; eventually, the chemicals will wear off, and the natural biological processes will take over again.

All biological (natural) ponds are cleaned and maintained by microorganisms, plants, and decomposing bacteria. The microorganisms utilize the contaminants present in the forms of heavy metals, organic, and inorganic substances, helping to reduce the pond water pollution and clean the water.

Aquatic Plants

All-natural (biological) ponds rely on plants to keep them clean. The plants in the pond play a critical role in balancing a biological pond, taking in the nutrients, and cleaning the pond water of pollutants. These plants are classified according to the functions that they perform for the pond. 

  • Oxygenating pond plants such as Hornwort and Water Thyme help our pond balance by taking in nutrients, adding oxygen to the water, and providing shelter for spawning and small water creatures of all types.
  • Floating plants are typically heavy feeders and fast growers that provide fish and shade for the pond water. Plants such as Water Lettuce, Floating Fern, Fairy Moss, etc., will suppress the algae growth by absorbing the nutrients and being in direct competition with algae. 
  • Bottom growing plants with long tubular stems such as lotus and water lilies help take nutrients out of the water and help to shade the surface of the water, which reduces algae and keeps the water cooler.
  • Marginal Aquatic plants would include the reeds, rushes, and grasses that grow in zero to ten inches of pond water. These plants also remove nutrients from the water, shade the water, provide cover for animals and help to reduce sediment runoff into ponds.

Plant Basics

  • Pond Plant Coverage: Every small or large pond should have 60-70% of aquatic plant coverage.
  • Extensive root system: The integrated root system will absorb the nitrogen, phosphorus, and other elemental pollutants from the pond water and act as a storage house for suspended solids.
  • Attractive plants: It’s a fact that the more beautiful pond plants we have in the pond water, the fewer algae will be present. Flowering and beautifully colored pond plants such as water lilies, Iris and Taro, beautify our ponds, clarify our water and provide habitat for wildlife of all types.

Bacteria

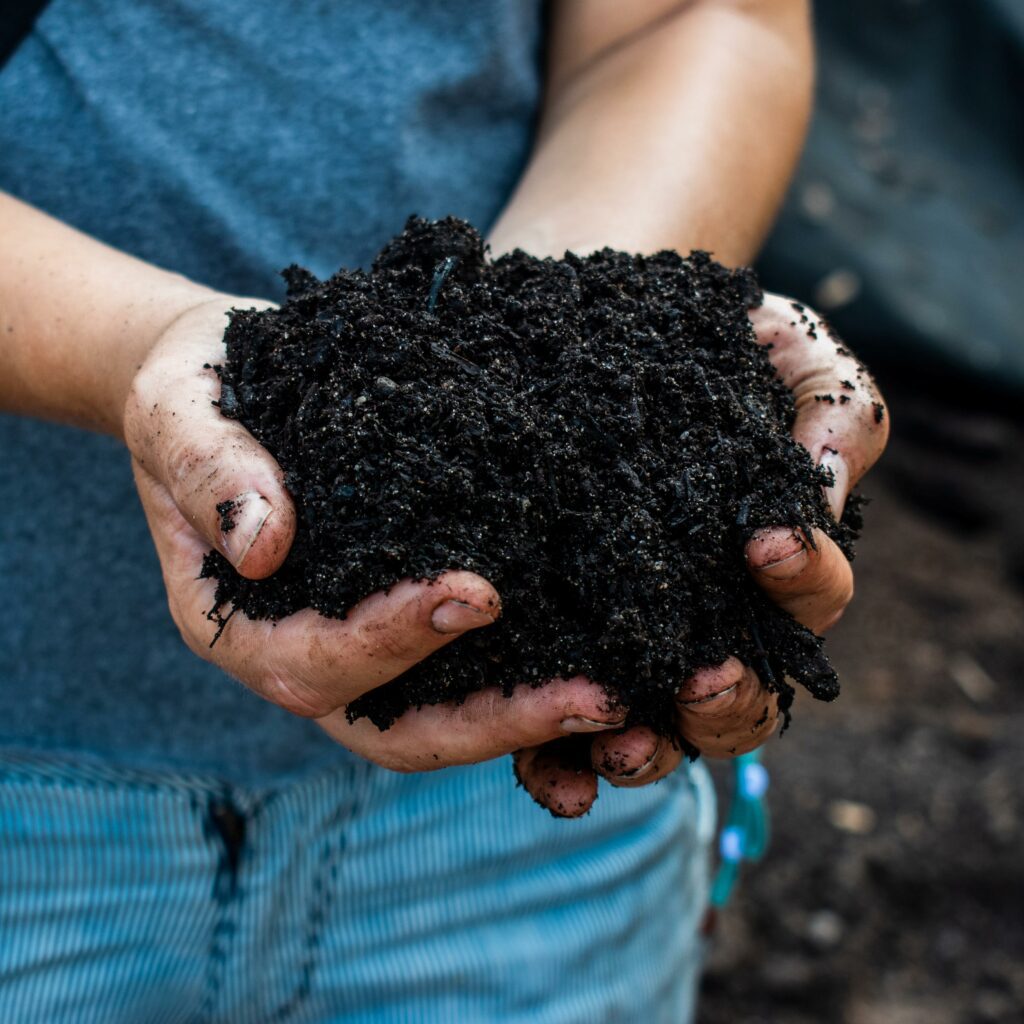
Bacteria and organisms in the pond work tirelessly with the pond plants to help keep our water clean. Adding supplemental aerobic and anaerobic bacteria to any pond will help to speed up the process of breaking down the debris in the pond, which will, in turn, make those nutrients available for the plants. The bacteria, enzymes, and other microscopic pond inhabitants consume nutrients to live.

Balance

As we have described above, the natural ponds can only maintain themselves if they are in balance. A proper measure of water, plants, and wildlife will allow a natural, biological pond to balance itself without the interference of humans. Any chemicals added to the pond will affect this balance and disrupt the natural processes that are helping to keep the pond clean.

Case study related to Biological Ponds

A Large natural pond will have the highest Biodiversity present in an area. The Global Conservation Policy to protect biodiversity promotes all kinds of ponds, either large natural ponds, small backyard ponds, or constructed wetland filtration systems. 

The relationship between size and diversity for 80 ponds in Switzerland using aquatic plants, aquatic animals, and their richness (number of species) and conservation value (no. of species and their rarity) were studied.

It has been found that the small biological ponds contain more species and higher conservation values than a single large pond. (Oertli et al., 2002). I would surmise that this is due to the relatively larger amounts of plants in small ponds. 

Types of Natural Ponds

There are multiple natural pond types that are all more similar than different. They all rely heavily on biological processes and balance to maintain themselves.

Waste Stabilization Ponds

These ponds do their work through the natural water treatment process involving the ultraviolet radiations in sunlight, high temperature, pH fluctuations (due to algal photosynthesis), and plant biome to inactivate the pathogens, reduce the BOD, stabilize the pollutants present in wastewater. (Ho, Van Echelpoel, & Goethals, 2017)

Existing wastewater cleaning technologies and equipment are costly and require a large amount of energy to run the pumps, agitators, and mixers. 

By utilizing the natural processes described, the stabilization ponds can safely and economically turn chemically laden and polluted water into water suitable for irrigation and to release back into the groundwater if given enough time.  

When cleaning water without any circulation or agitation, the process simply takes longer, but this is not a reason to avoid using these ponds; it is merely necessary to realize and acknowledge that mother nature takes time to fix our imbalances.  

Importance and Applications

This wastewater treatment strategy is widely practiced in countries that have warm climates. Anaerobic ponds (removes almost half to 2/3 of BOD), Facultative ponds (maximum decomposition of organic matter and removal of other pollutants), and Maturation ponds (placed in series only when highly efficient removal of pathogens is required) are designed in series for the efficient treatment of wastewater. (Coggins, Crosbie, & Ghadouani, 2019)

These ponds help mitigate the increase in the level of diseases caused by drinking unhealthy and heavy water due to the improper disposal of human and animal wastewater and the dumping of industrial pollutants.

Rather than these contaminated waters being dumped directly into lakes and rivers, they can instead be diverted to the treatment ponds to allow the needed time for them to regain their biological balance.

Waste stabilization ponds require large areas and hot climates. They are most often used in the Southwestern US or hot areas of other countries. 

It is a time-tested process that cannot be established in towns or cities but instead requires more rural settings for their installation.

Waste stabilization ponds can treat sewage, industrial, and almost all kinds of wastewater.

During the treatment processes, nitrogen, phosphorus, heavy metals, suspended solids, and pathogens are removed to a level that makes the water safe for use as irrigation water. 

Retention ponds

These ponds are man-made and are natural bottomed. They are strategically placed near developed areas to alleviate storm runoff and flooding concerns. These ponds take in the runoff water, which may contain sediments, fertilizers, and various hazardous chemicals given off by industry, automobiles, etc. The water is held in these ponds and allowed to slowly be treated by plant material, bacteria, and other pond organisms, just as with any other natural pond.

Sometimes these ponds are helped along in the process by first allowing the water to run through or over constructed wetlands.

Constructed Wetlands are shallow water biofilters that use the natural potential of hyper-accumulator plants and either surface flow or sub-surface flow to clean water. Rooted plants along with gravel and sand are used to absorb, stabilize, evaporate, or degrade the pollutants in wastewater. The water slowly passes through the media, allowing the suspended solids to settle out and the contaminants to get absorbed and remediated by the plants. These constructed wetland systems are often used to clean greywater, Industrial-waste-water, Municipal-waste-water, and storm-water runoff.

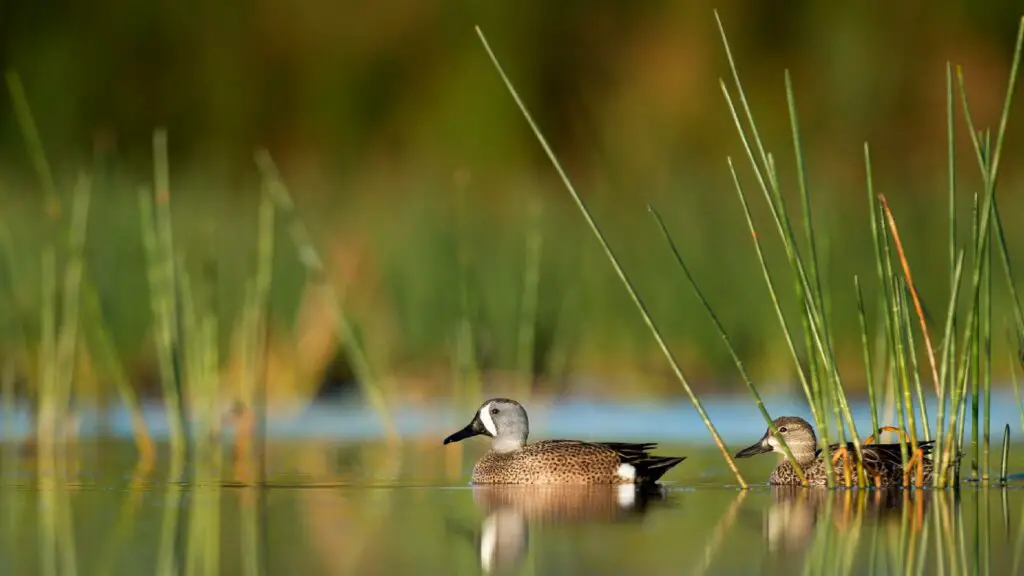
Natural Wildlife Ponds

These are ponds built specifically to encourage animal inhabitants, creating a more biodiverse environment. “Nature will grow under Natural conditions” is the phenomenon behind every natural wildlife pond. This is a pond in which no chemicals, filters, or pumps will be used while supporting the growth and development of animal and plant life at the same time and a low cost. (McCance et al., 2017)

Once again, the pond’s health is mainly dependent on aquatic plants. The pond plants provide oxygen, absorb carbon dioxide, phytoremediation pollutants, and provide cover for animals of all types.

Selecting Native plants, especially the Native Grasses, is often a great way to get the ecosystem of a new pond started. The native grasses establish quickly and help to encourage further plant growth and minimize erosion. Examples would include; Feather-grass, Zebra-grass, Silky-thread-grass, Ruby-grass, Northern-sea-oat, etc.

A wildlife pond is helpful in the conservation of urban and suburban biodiversity by providing food, shelter, breeding habitat, and food-chain sustainability.

Shallow regions are planted with marsh and littoral plants (Spiny-rush, Cattail, Fat-hen, Bullrush, Alkaliweed, etc.), while the Creeping Phlox, Kangaroo raw, Blanket-flower, Sedum, Columbine, etc. These are good all-around pond perimeter plants to attract wildlife. 

Natural Fish Ponds

The difference between a wildlife pond and a fish pond may be nothing at all except that some natural ponds are built and maintained specifically to raise fish.  

A fish pond will usually have some deeper areas for the fish and underwater structure to encourage spawning and provide cover.

In natural fish ponds, fish will eat, live, poop, and die, all in that one body of water. For any of you who have had a fish tank, you realize that this is no small feat.

The dead bodies of fish, their excretions, and any debris that falls in the pond add nutrients to the water. The only way to control the water quality in natural fish ponds is through the use of aquatic plants and proper fish stocking.

Algae grow by utilizing these nutrients from the pond water, and if left unchecked, may tend to take over the pond. Selecting bottom and vegetation feeding fish will help nature take care of some of the algae, but the heavy lifting, as with all of the other biological ponds, is always done by the pond plants.

Historically, fish ponds were a way that a family or community could raise more livestock for human consumption that is easy to maintain and readily available for harvest, no matter the season of the year.

Some examples of large fish ponds which were used to compensate the food needs of local inhabitants as well as to earn profit by selling the aquaculture are listed below:

  • The Fish pond of La Cambre Abbey in Brussels.
  • Chinese Garden of Friendship in the Sydney.
  • Hawaii, USA, native Hawaiian used them extensively.
  • Coarse Fishing pond in England

The question is how to maintain a balance between the number of nutrients and algae growth? The answer is “through the wise selection of pond plants.” They will take up the excessive nutrients from pond water before being taken up by the algae through their extensive root system and efficient phytoremediation properties. Microorganisms, also called Biofilters, play an essential part in keeping the pond water clean and clear. (Thi Da et al., 2020)

Koi Ponds

Koi ponds are often built specifically for Koi fish. The Koi is a Japanese relative to the common carp. People enjoy their mellow and relaxed demeanor as well as their bright and flashy colors. While constructed specifically for the fish, most of these ponds end up being naturally maintained biological ponds as well. It is undoubtedly true that Koi purists may believe that the Koi require a smooth-sided, man-made, mechanically, and chemically treated pond; it is certainly true that these fish can live quite happily in natural biological ponds as well. They simply aren’t as easy to see and interact with in natural ponds due to the plant cover.

Due to the pond owners ‘ lack of education and impatience, many mechanically and chemically maintained ponds are simply over-complicated and over-treated. Humans are often too impatient to wait on mother nature to balance their ponds, so they go to great lengths installing mechanicals and dumping in chemicals in an all too often futile attempt to clean their pond. This is really too bad because nature will gladly do all of the heavy lifting if we just give it time.

Some examples of Mechanical Systems used in Koi ponds:

  • Biological filters: Sand filter, Trickle filter, Crossflow filter, etc.
  • Ultraviolet light: Used to sterilize the water from free-floating bacteria, pathogens and eliminate the algae by breaking it into clumps and then removing it using the mechanical filters.
  • Install a Bog into the Pond: This is a manufactured solution that is almost natural and should be used in virtually any pond with water quality issues. Floating natural bogs do an excellent job filtering water and removing nutrients and contaminants. In a koi pond, we can float man-made plant islands in the water, which mimic the natural bog and may contain plants such as Holy rope (Eupatorium cannabinum), Bead-fern (Onoclea sensibilis), Water Iris (Iris pseudacorus), Horsetail (Equisetum arvense), Day lily (Hemerocallis spp.), etc. (Nordbakken, Ohlson, & Högberg, 2003)

References

Coggins, L. X., Crosbie, N. D., & Ghadouani, A. (2019). The small, the big, and the beautiful: Emerging challenges and opportunities for waste stabilization ponds in Australia. Wiley Interdisciplinary Reviews: Water, 6(6), e1383.

Ho, L. T., Van Echelpoel, W., & Goethals, P. L. (2017). Design of waste stabilization pond systems: A review. Water Research, 123, 236-248.

McCance, E. C., Decker, D. J., Colturi, A. M., Baydack, R. K., Siemer, W. F., Curtis, P. D., & Eason, T. (2017). Importance of urban wildlife management in the United States and Canada. Mammal Study, 42(1), 1-16.

Nordbakken, J., Ohlson, M., & Högberg, P. (2003). Boreal bog plants: nitrogen sources and uptake of recently deposited nitrogen. Environmental Pollution, 126(2), 191-200.

Oertli, B., Joye, D. A., Castella, E., Juge, R., Cambin, D., & Lachavanne, J.-B. (2002). Does size matter? The relationship between pond area and biodiversity. Biological Conservation, 104(1), 59-70.

Thi Da, C., Anh Tu, P., Livsey, J., Tang, V. T., Berg, H., & Manzoni, S. (2020). Improving productivity in integrated fish-vegetable farming systems with recycled fish pond sediments. Agronomy, 10(7), 1025.

Is an Outdoor Kitchen Worth Adding to Your Landscape?

outdoor kitchen

We have all been looking for new ways to enjoy our living spaces, and there is something just so inviting about dining al fresco. For starters, you get to be outside in the sun and fresh air, and you get to enjoy the scenery and share a meal with your loved ones. You also have more space to do some on-the-spot cooking like Korean Samgyeopsal or barbecues, and you don’t need to worry about greasing up your kitchen. 

To make this type of dining possible, you could have a simple grill and a picnic table, but if you enjoy the finer things in life, you absolutely must have an outdoor kitchen situated in your yard. Of course, it must be equipped with the right features and appliances so it can serve both you and your guests.

In this article, we will cover the benefits of building an outdoor cooking space and some valuable tips on building one. If you are undecided about whether you should start building, consider this as a sign. After all, I’m here to help you get started.

What is an Outdoor Kitchen?

An outdoor kitchen is an area outside your house where you can prepare a meal and dine with other people. It is mainly composed of a heating element like a grill, a stove, or an oven, and it offers more room for movement and activities since it is located in an open space.

Most people find it more enjoyable to dine outside, especially when the weather is hot. This is especially true for tropical areas which experience a humid climate all year round. The outdoor kitchen doesn’t always need to be especially grand, but it must be appointed well enough to serve its purpose of making preparing and serving the outdoor meal a pleasurable experience.

Another great reason to build an outdoor kitchen is to alleviate some of the closed-inclosed-in feeling of life during this awful pandemic. Sure, maybe you should stay home, but wouldn’t it be nice to get outside and enjoy a bit of fun with your dinner?

No matter what your reason for getting interested in outdoor kitchens is, the process of building one can be tricky. Prepare your notes or bookmark this page since this guide offers everything you need to know about this essential addition to your landscape.

13 Benefits‌ ‌of‌ ‌Outdoor‌ ‌Kitchens‌ 

If you aren’t convinced yet that adding an outdoor kitchen to your backyard is one of the best decisions you’ll ever make, take a look at its long list of benefits:

  1. It can be built to fit your specific needs and wants. A simple Google search will give you an idea of the number of designs available for your kitchen project. Pinterest and Instagram also offer a lot of unique “inspos” you can choose from.
  2. It‌ ‌can‌ ‌reduce‌ ‌your‌ ‌power‌ ‌consumption. You might be confused— is it possible that adding another feature to your home reduces energy consumption? Well, yes, it is! Outdoor kitchens help you save on utility bills, especially during the summer months. Instead of kicking your AC into overdrive, choosing to cook outside in the open air is more practical. Remember that when you bake or make anything that generates heat, your house temperature elevates, making your AC work twice as hard to cool the space down.
  3. It’s‌ ‌easy‌ ‌to‌ ‌manage‌ ‌and‌ ‌clean. Of course, I’m not saying that you won’t have to clean at all. But having an outdoor kitchen significantly reduces the time you spend cleaning. If, for instance, a bit of food falls on the ground, you don’t need to worry about it. Heck, it will just be a bit of fertilizer for the lawn.
  4. Outdoor kitchens can make use of the yard space to‌ accommodate ‌large‌ ‌crowds. It might be a bit uncomfortable moving around in a crowded indoor kitchen filled with guests. Now imagine them all out in your yard with plenty of elbow room. Go ahead, invite the neighborhood!
  5. You‌ ‌can‌ ‌work‌ ‌on‌ ‌it‌ ‌without‌ ‌rushing. Outdoor kitchens are simply an extension of your living space. That being said, if you want to start your project and build it slowly because you want to do it yourself or you’d rather do it a bit at a time to fit it into the budget, it won’t be a problem. You can work on it anytime you want and still use your indoor kitchen and be completely comfortable in the meantime.
  6. It keeps an unwanted smell outside. I alluded to this in the first paragraph. Sure, coming home to the smell of dinner being cooked is usually quite pleasing, but there are some dishes that tend to really stink up the kitchen. Wouldn’t it be nice to have the option of cooking them in the great out of doors so that your entire house doesn’t smell like greasy cooked pork bellies? Outside, the scents will simply drift away on the breeze. Although, you may find yourself with some extra guests when the neighbors catch a whiff of what you’re cooking.
  7. It reduces the trips in and out of the house. My least favorite part of having an outdoor meal is carrying everything out of the house, out to the patio, and then bringing it all back in again. It really gets a bit frustrating. If you build it correctly, you can have most of your supplies on hand in your outdoor kitchen. Cabinets, drawers, and a fridge are common additions to the outdoor kitchen. 
  8. The value of your home will likely increase with the installation of an outdoor kitchen. If you plan to sell your property in the future, adding an outdoor kitchen will surely increase its value. The investment you’ll make in building or remodeling this area of your landscape can benefit you greatly since homes with outdoor kitchens have reportedly sold for almost 30% more than houses without outdoor kitchens. I believe that it is the functionality of the outdoor kitchen and the aesthetic appeal of having the extra structure and intrigue in your yard versus the flat patio with surrounding gardens.
  9. It helps expand your living space. With the current tiny living trend, more and more houses are built with limited space. Of course, this can get tiring over time, especially since we are all required to stay at home due to the Covid situation. By extending your home through an outdoor kitchen, you have more space to move around and do some activities that cannot be done inside, like grilling or making smores.
  10. It may help you save money on dining out. I know it’s not the same, but having a great outdoor kitchen with everything you need close at hand may encourage you to use it rather than go out. Dining in restaurants can be extremely pricey, and cooking a meal right outside your house can save you a few bucks, not to mention that it’s an excellent spot for a special meal without needing to brave the crowds or wait for a table.
  11. Your quality of life will improve. We all need a bit of sunshine and fresh air, and too much time indoors robs us of both. Having a few meals a week outdoors could really increase your time out in nature. Cooking is a form of bonding for many families. Creating meals with our loved ones while enjoying some fresh air and a beautiful landscape puts us in a good mood, and our lives become a little bit less stressful.
  12. The food you cook becomes tastier and healthier. One of the mainstays of outdoor kitchens is, of course, the grill. If done properly, you may be able to grill more of your food which will lessen the need for oils and frying, not to mention that the fats from your steak will end up on the grill rather than n your belly.
  13. Cooking can be more diverse. Your indoor kitchen may not allow you to create certain meals that your outdoor kitchen can. Outdoor kitchens can have open flame areas, smokers, pizza ovens, and almost any type of specialty cooking item that you might be lacking in your existing kitchen.

Materials

Since these kitchens are constructed outdoors, building them using anything other than the most weather-resistant materials would be foolish. Here are the most common materials chosen.

  • Poured concrete is a very versatile material that can be used for patios, seat walls, cabinets, countertops, and even roofs. While most of us consider concrete to be relatively industrial and not particularly aesthetically appealing, in the hands of an experienced artisan, this extremely durable material can be rock solid as well as beautiful.
  • Concrete brick and block are used to build the majority of outdoor kitchens that I see. It is attractive, durable, and easy to use. There are many color and size choices, and contractors or skilled do-it-yourselfers can install them.
  • Natural stone is again very durable and probably the most visually appealing choice. Stone is most often used for countertops and walls.
  • Wood is a very versatile building material that can be used for all aspects of the outdoor kitchen, but it is flammable, can be chewed by animals, and does decay over time when left out in the elements. Wood is usually only used for structures such as pergolas or gazebos.
  • Steel can be used to build all aspects of the outdoor kitchen, with stainless steel being the most popular choice for its weather resistance. A custom-designed outdoor kitchen constructed entirely of stainless steel would be pretty pricey, so it is typically used for doors, appliances, and sometimes countertops. 

12 Considerations when Building an Outdoor Kitchen

Before you go ahead and contact a masonry expert or a landscape professional, you first have to look at some essential factors that can directly affect how your kitchen will look or what appliances it will contain.

  1. How you are going to use your outdoor kitchen
    • Take some time and reflect upon who you are and how you might use the outdoor kitchen. There is no sense in building a huge area if you aren’t the type that enjoys entertaining, and maybe it just needs to be big enough for the family.
    • On the other hand, if you love to have a home full of guests, you will want a much more expansive outdoor kitchen with plenty of room to work.
  2. It should fit
    • You want it to suit the size of your home and your needs. A vast, sprawling outdoor kitchen may look out of place next to a tiny house, but it might be just right for you if you spend all of your time outdoors.
    • A large house with a tiny outdoor kitchen may not look balanced and might not sell for as much on the real estate market as it would if it were in fitting with the house size. Scale is important.
  3. The area where you live
    • Let’s face it, some parts of the world just lend themselves to outdoor dining, while others, not so much. You will want to design and build your outdoor kitchen in a way that fits your climate.
    • If you are in an area that is warm and comfortable most days of the year, you are in a great position to build your kitchen with all of the amenities and in just about any style that you want. You will likely get plenty of use out of it and your money back, plus some when you go to sell your home.
  4. Should it be covered?
    • If you live in a very dry and hot location, you will almost certainly want to include some sun shade elements and maybe even fans to keep yourself and your guests comfortable. A big fabulous outdoor kitchen doesn’t do much good if you are in the house in the air conditioning.
    • If you are in a place where it is raining many days of the year, you might be better off building a roof over your outdoor kitchen and even a covered walkway leading to the kitchen rather than an extensive outdoor kitchen that doesn’t get used due to the weather.
    • In the northern regions where the cold wind drives you inside many days of the year, you will want to build your kitchen with some structure to block winds and give you some nice cozy areas where you can install some outdoor heaters to make your new kitchen more user friendly for a better part of the year.
  5. Appliance and fixture choices
    • The climate in your area will also influence some of your appliance choices. Things like refrigerators and wine coolers don’t do as well in freezing temperatures or may need to be moved indoors for the winter months. 
    • Water lines and sink traps will need to be drained for the winter months if freezing occurs in your area. Tropical climates or places on the sea will undoubtedly require appliances made from marine-grade stainless steel for longevity.
  6. The frequency of its usage
    • When you build an outdoor kitchen, it should not only serve as an aesthetic addition to your backyard but should also be very much functional. 
    • If you think you will be using the new kitchen for most meals, you will want to buy higher grade, more industrial appliances. If you like the idea of having the outdoor area but don’t like to cook and think it won’t be used often, put your money into the structure and get decent, but maybe not top-of-the-line appliances.
  7. Storage
    • As previously discussed, your outdoor kitchen will likely include some storage areas. How you use these storage areas will depend significantly on their construction. For a good reason, most outdoor kitchens are built using concrete or stone products and stainless steel. This kitchen will be out in the elements and must be rodent resistant.
    • Whether you see them or not, I can guarantee that you have some little sneaky chewing, nibbling, and pooping critters in your area. The last thing that you want is to give them great places to make their homes and then stock them with edibles. Remember, rodents classify edibles very differently than we do. You will be surprised at the wide range of things they’ll chew on.
    • While wooden facias and features might soften the look and feel of your outdoor kitchen, they certainly won’t help with rodent-proofing. All storage areas must be built so that mice can’t get in. Remember that these little critters can go anywhere they can fit their heads, so even tiny little holes will be enough to invite the mouse family in for the winter. Make sure that your kitchen is well built and has latching doors so that even the crafty and curious raccoon won’t be able to gain access.
  8. Access to your house 
    • No matter how well thought out and appointed your outdoor kitchen is, you will still want it reasonably close to the house because you will surely be running back and for some of the stuff. Make it convenient to encourage your family to use it more.
  9. Layout is important
    • Just because this kitchen is outdoors doesn’t mean that it can be built however you want. Be sure to follow good kitchen layout practices when laying out this outdoor area. Once again, if it is not convenient, you will use it less. If you put all of the money into building it, make sure that it is an excellent place to cook a meal. 
  10. Distance from the outdoor dining or entertainment area
    • In every gathering, whether it is for the family or friends and colleagues, It may go without saying, but we’d better say it anyway. The cooking and entertaining areas should be all located centrally, so that everyone, including the cook, can be part of the party and enjoy themselves. Remember, this is all about enjoyment. Make sure it is for everyone.
  11. Function and the Future
    • When laying out and building this outdoor kitchen, be sure that you have thoroughly thought out and planned for all possible conditions. This will likely be a sizable construction project that will require trenching to the house for electrical wires, gas lines, and water pipes. You don’t want to build all of this only to find out that you should have run one additional water pipe or electrical line. Even if you don’t think you will need them at this time, installing an extra electrical circuit and a water supply and drain to accommodate future needs will be a small expense compared to trying to do it later.
  12. Location and Position
    • Be sure to position the kitchen, seating areas, and dining areas to face a great view and also be sure to position them to take advantage of the sun and to help block the prevailing winds.

Outdoor Kitchen Zones

It’s about time we get to the technical side of things. An outdoor kitchen is not just composed of a grill and a countertop for food prep. It is composed of four zones, and each has a purpose. They are discussed in detail below:

Preparation Zone

Before the meat hits the pan, it is cleaned, cut, and seasoned by the designated cook or chef. There should be a wide counter space to do all of this prep work.

The prep zone, as most people call it, is usually composed of a countertop, a sink, and a fridge. Other items that should be found in this area to make the food preparation hassle-free are cutting boards, knives, food processors, and cooking utensils. Ingredients that are needed for additional flavors are also commonly found here.

Cooking Zone

The cooking zone is obviously where the magic happens. This is where you’ll usually find the grill, the pizza oven, the smoker, the side burners, etc. Apart from all these appliances, you can also find cooking accessories in this zone, such as tongs, spatulas, and ladles.

The most used feature of the cooking zone is the grill. Therefore, paying attention to its location and its ventilation should be one of your top priorities.

Serving Zone

Right after the food is cooked, it is brought to the serving zone or a kitchen island for plating and serving. If the guests are only a few, they may be able to dine here, so adding a few barstools might be a welcome addition.

If your budget doesn’t allow for a separate kitchen island, you can certainly use the dining area as the serving zone.

Entertainment Zone

The fourth outdoor kitchen zone is dedicated to entertainment. This is where the people can lounge and have some drinks without getting in the way of those who are preparing for food.

The primary appliance that should be found in this area is a refrigerator for refreshments, and this is different from the one situated in the prep zone. Some people also choose to add a keg fridge or a wine cooler. You will also want to have a selection of drinkware readily available for your guests.

Depending on your intentions, this area could include lounging areas and even a television or hot tub.

‌Outdoor‌ ‌Kitchen‌ Layout ‌

Your outdoor kitchen’s configuration or layout will greatly depend on the available space, design, and budget. Below are your common layout options once you start planning:

Linear

As the name suggests, this is the simplest and easiest to achieve since it does not take any shape. 

For many homeowners, their outdoor kitchen may be connected to the house with countertops flanking the grill. However, freestanding linear kitchens can also be an option if attaching them alongside the owner’s home is impossible.

Galley

Similar to indoor galley kitchens, outdoor galleys have a central walkway, and the cabinets and countertops on both sides are facing each other. This forms a narrow rectangular work area, which saves on space but makes it difficult for any more than one person at a time to work in the kitchen.

This layout is much more appealing for some people since it is very ergonomic. All the essential services are clustered in a small space, making everything easily accessible. 

L-Shaped

L-shaped counters are quite popular for both indoor and outdoor kitchens since they feature more moving space. It is also ergonomic like the galley, so the cooking workflow is efficient.

Since this is a classic configuration, it allows for a lot of flexibility. You can add an island to the open space, or you can place a central dining set, and you can even add both if there is enough room since the L-shaped counters do not take much space.

U-Shaped

As you could probably imagine, this kitchen layout is composed of cabinets, counters, and appliances arranged in a U-shape. It has an open space in its center which can offer a lot of movement.

This is ideal even for a small outdoor kitchen because it capitalizes on the counter space. Meanwhile, you can add a dining table or an island for large kitchens to maximize the layout further.

Outdoor‌ ‌Kitchen‌ ‌Cover‌ ‌

There is no doubt that outdoor kitchens can be functional and fun to use; mother nature can certainly have her way with our dinner plans if we don’t build our outdoor kitchens to defend against her sometimes sudden and unexpected onslaughts.

There are countless ways to design your kitchen to protect it from the weather to some extent. A few examples are listed below.

Gazebo

You’ll often hear the words gazebo, pavilion, or pergola used interchangeably, but the two are distinct from each other.  

Gazebos and pavilions will typically be round, square, or rectangular and have a weather-tight roof.

Gazebos are traditionally built using lumber, but there are certainly many that have masonry bases. Many pre-built metal or PVC gazebos can be purchased at big box stores and assembled at home.

Pergola

Pergolas consist of columns that serve as the support for beams and rafters. One distinguishing characteristic of this type of outdoor covering is its Italian feel which can be attributed to the fact that they were first designed during the Italian Renaissance. 

Pergolas do not have a weather-tight roof; instead, the beams or rafters offer dappled sun protection and a handy place to grow vines.

They can be almost any shape, although they are often rectangular or square.

These are traditionally wooden structures, but other pre-built options are available at retail locations like gazebos.

Canopy

Among the three types of outdoor kitchen covers, canopies are the least expensive and the easiest to install. There are different sizes and designs to choose from, which makes them very versatile, but most must be fastened to the house, limiting their use for some people. Some are permanent structures, while others can be rolled up when not used.

Must-Have Outdoor‌ ‌Kitchen Appliances and Accessories

This article would not be complete without the list of appliances and accessories you have to purchase to make your outdoor kitchen functional. These items aren’t exactly cheap so prioritize the ones you will be using more often.

  • Grill: Whether your outdoor kitchen is large or tiny, you will definitely need a grill. The choice of whether to install a gas, charcoal, or wood-fired grill could fill an entire article, so let it be said that this topic is very personal for some folks, and you need to decide which you enjoy the most. Or, if cost is no object, maybe install all three.
  • Side Burner: This, of course, makes your outdoor kitchen much more versatile and more similar to your indoor kitchen. A side burner or cook space has a multitude of uses.
  • Traditional Oven: This might not be a common choice, but it greatly expands the versatility of your outdoor kitchen and can significantly expand your ability to prepare full meals for large groups.   
  • Refrigerator / Freezer: Your refreshments need to be chilled, and your food needs to be cooled or frozen if you plan to store any in your outdoor kitchen. Many outdoor kitchens will do well, with one fridge in the prep area for the food and another fridge in the entertaining area for drinks.
  • Trash Bin: This might seem unnecessary, but if you are truly going to use your outdoor kitchen as a kitchen, you will undoubtedly need a trash bin of some sort to make clean up easy and convenient. Make sure that it is rodent and weatherproof.
  • Pizza Oven: Who doesn’t love pizzas, right? Here you can go all out and install a brick pizza oven to create fire-cooked pizza creations, or you can just install an electric drawer style oven to cook the frozen pizzas quickly and easily.
  • Flat Top Griddle: This one depends entirely on your needs and wants. Some people may never use a griddle in an outdoor kitchen, and others might use it more than the grill. You know which one you are.
  • Power Burner: Again, will you use this or not? It can be gas or electric and makes your outdoor kitchen much more like your indoor kitchen. Some people will love it while others will never use it.
  • Sink: I believe a sink is a must-have item for all but the smallest outdoor kitchens. You will have trouble cooking serious meals in your outdoor kitchen without a sink for food prep and cleaning.
  • Warming Drawer: This low-heat cooking device ensures that your food stays heated if you will not consume it immediately. Wonderful if preparing large meals for many guests, probably overkill for small gatherings.
  • Mixer/Food Processor: A good quality blender can often come in handy for food prep or frosty drinks.
  • Television: Many weatherproof choices can give you more reason to stay in the great outdoors.
  • Speakers/Music: You can either install an entire sound system or simply a Bluetooth exterior grade speaker so that you can enjoy some music in your entertaining area and kitchen.
  • WiFi:  Maybe your house WiFi will reach the outdoor kitchen, but if not, you might want to install an extender.
  • Lighting: There are many lighting options for your outdoor kitchen, including color-changing and lights that will change with the music if you are so inclined.
  • Outlets/Charging Stations: If you want the kids to use the space, you better have extra plugs around so they don’t need to run back in the house to plug in.
  • Pool/Hot Tub: Okay, this might be going a bit far, but if you want the ultimate outdoor entertaining space, a hot tub or pool might just be the icing on the cake.
  • Bar Stools: If your outdoor kitchen includes a built-in bar or island, then you will need some stools.
  • Patio Dining Set: Well, they are all going to need to be able to sit down and eat this fabulous meal that you created for them, aren’t they?
  • Seating / Lounging: Aside from the chairs included in the dining set, you should also consider adding some lounge chairs in your kitchen’s entertainment zone so your guests will be more comfortable.
  • Fireplace: The addition of a fireplace can really make this an all season entertainment zone and will add more beauty and structure to your site.
  • Wine Cooler: This keeps wine bottles chilled to a specific temperature. This also allows self-serving, so that’s less work for you.
  • Ice Maker/Ice Storage: If you don’t want to run out of ice during a party, then an ice maker is a worthy purchase.
  • Shelves/Cabinets: Tidying up your outdoor kitchen starts with a clean countertop. You might want some shelves or cabinets to help with storage.
  • Glassware Storage: A functional storage area or glass rack where your guests can serve themselves will be invaluable at large gatherings.
  • Fire Pit: Parties don’t have to end at sundown, so I strongly suggest that you add a fire pit to your entertaining area.
  • Patio Heater: A great alternative to fire pits and a must if you are in some of the colder areas of the world and you want to get the most out of your outdoor kitchen.

Final Thoughts: Should You Start Working on Your Outdoor Kitchen?

Adding an outdoor kitchen to your property is a wise investment. As established in this article, there are a lot of benefits that you can enjoy once you decide to build one. But, you need to make sure that it is functional and that it fits your house and your budget. 

Don’t rush into an outdoor kitchen project. If you don’t do your planning, whether you choose to do it yourself or to hire it done, you may end up with a less than ideal outdoor kitchen.

Hopefully, this article can help you decide if an outdoor kitchen would be an advantage for you and your family.

Detention Pond and Retention Pond: What Are They?

Retention pond after a rain

Detention ponds (dry ponds) and retention ponds (wet ponds) are two different types of water management ponds. In summary, both ponds aid in flood control and stormwater runoff treatment. They collect excess water and hold it for a period of time to help control erosion and water quality. 

 Sediment and bacteria, metals, nutrients, and other suspended solids settle out of stormwater in the ponds. These ponds can restrict and prevent the transport of pollutants to lakes or streams during storms.

 The Difference Between Detention and Retention Ponds

 The most significant distinction between a retention basin and a detention basin is whether a permanent body of water or pond is present.

 Retention ponds

  • These ponds typically hold water all year round.
  • Always contain a riser to allow for excess water to flow out during rain events.
  • Always have an emergency overflow area where the water can rush out without eroding to pond edge in the case of an extreme storm event. 
  • Water levels fluctuates due to water runoff and precipitation from the surrounding areas.
  • Keeping a pool inhibits resuspension and maintains accumulated sediments on the floor of the holding area.

 Wet retention ponds are a form of stormwater management that collects and treats polluted stormwater runoff. They regulate the quality and quantity of stormwater through the retention and storage of stormwater runoff. By holding the water, the pond’s natural mechanisms then remove pollutants.

 Properly graded pitches and a system of underground pipes links storm drains and divert the water to a wet retention pond. These structures direct significant quantities of water to the pond, while the outlet releases lesser amounts of water as required to keep the water level at the optimum level.

 Standing water is still a source of concern from a health perspective. Standing water can be a potential drowning risk, especially for children. Mosquitoes can breed in the stagnant areas of any pond, which can lead to mosquito-borne diseases. When designing retention ponds, developers should always plan for safety ledges, circulation, and maintenance plans to avoid these pitfalls. 

It is important to remember that each new retention pond creates a new habitat and haven for animals. If appropriately designed, they will improve water quality, reduce flood concerns and erosion, and raise surrounding property values. 

Too often, wet retention ponds are installed with the right intention but then never maintained or maybe over-maintained, leading to an unhealthy environment.

The retention ponds that exist in more wild settings that are allowed to grow beneficial aquatic and surrounding plants do an excellent job of filtering and cleaning water.

When the retention ponds are located near subdivisions, they are all too often mismanaged, which leaves them full of fertilizer runoff, void of beneficial plants, and chemically treated in an attempt to eliminate the symptoms caused by the mismanagement.

Detention Ponds

  • These ponds are dry for the majority of the year.
  • Always have outflow pipes and chutes to allow for storm water to flow through.
  • Will always have protected emergency spillways to avoid erosion and failure during extreme weather event.
  • Water will slow and stand in them during storm events.
  • They are used more to control and slow stormwater runoff than to retain it.

In dry areas, detention ponds (or dry ponds) are more prevalent and function as significant flood control structures. They are normally dry, save for times when snow is melting or rain is falling.  

Their main objective is to slow down the water flow and hold it for a limited time—at least 24 hoursThis allows enough time for soil particles and related contaminants to settle out. These systems are used in urban environments to minimize peak runoff levels caused by storms which will help to alleviate flooding.

Dry ponds may be developed to accommodate a wide range of storm occurrences and uses. Designers will consider slopes, watershed areas, plant material, etc., when specifying the layout and size of a new detention pond. In addition, an emergency spillway is typically needed to ensure protection during floods.

The basins are essential for storing and controlling stormwater runoff velocity from surrounding areas, especially in places where asphalt or concrete construction occurs. Stormwater runs much more quickly from these surfaces than from the naturally vegetated ground, so it must be diverted and slowed down to prevent excess sediment transportation and erosion. 

The amount of water that can be cleaned and treated is dependent on the size of the basin. Only flood flows are regulated by dry basins (detention basins). By eliminating contaminants and sediments, a retention pond can help to improve water quality.

 Dry detention ponds are most effective in locations with ten acres or more of land. The large expanses of land will collect more runoff and make a detention pond more of a necessity. 

Dry retention ponds typically have a very minimal slope to divert water. The inlet must be no more than fifteen percent higher than the outlet to ensure the proper amount of water flows into and through the system.

This facility functions by providing a large space for water collection. The water eventually flows out the bottom of the structure through the outlet or soaks into the ground. Concrete and other objects may be used as buffers to slow the flow of water and collect debris. 

Dry detention basins are advantageous as stormwater control devices for many reasons. They are less expensive to install than a wet retention pond since they occupy less space than other solutions, and they are fairly straightforward when it comes to design. When properly positioned and built, they can efficiently minimize peak rate and volume to pre-development levels.

 It is important that the plants in and around the detention basins can tolerate both dry weather and standing water for a while so that they can survive the environmental extremes that these basins encounter.

The downside of detention basins would be that they take up a considerable amount of real estate that can’t really be used for any other purpose other than maybe nature walks. The built structures may make the land they are on less desirable for sale and limit the potential for development. Many people will see this as a downfall, not understanding the valuable service they provide, ensuring the long-term stability of the area. 

While different in function, people often prefer a retention pond that holds water and provides a valuable water body. 

 General Maintenance and Problem-fixing Tips

 One of the most important things for both basins is to ensure that the overflow and outflow devices do not get clogged or blocked. This is one of the most critical maintenance tasks since the ponds and basins will work effectively only if the pipes are kept free of debris. Ensuring regular upkeep for detention and retention ponds will save money in the long run.

 Vegetation

The type of vegetation in the basin’s surroundings will significantly affect the level of maintenance required. Too often, surrounding homeowners who don’t understand vegetation’s role in water filtration will mow their lawns right to the water’s edge. This encourages more debris and pollution entering the pond and promotes fertilizer runoff into the pond.

Some Maintenance Tips for Retention Ponds

  • Retain and encourage a band of tall un-mowed vegetation surrounding the pond to aid in the filtering and cleaning of water.
  • Remove any trees or saplings that may obstruct outflow structures.
  • Never fertilize the lawns in the ponds’ watershed. Chemical fertilizers are certainly not natural to pondwater and will upset the pond’s balance, always resulting in an algae-laden pond.
  • Aquatic plants and terrestrial plants are essential for water cleaning, but the introduction of invasive plants such as cattails can lead to increased long-term maintenance as some of these plants will grow out of control and end up filling in the pond over time.
  • Be sure that native or easy-to-maintain species are planted in slopes, banks, and other vegetation-friendly areas. 
  • Maintenance must always include repairing any areas that have experience soil erosion. Look for gullies and other problems on the bank a few times a year and after severe storms.
  • Reseeding areas with exposed soil, particularly on slopes around the site, will help to prevent erosion.
  • In areas where erosion seems to re-occur, rip rap and sediment barriers should be installed to prevent future erosion events.
  • Always remove debris and sediment from pipes to maintain their satisfactory operation.
  • Remove the debris or prevent debris from entering the pond to help alleviate outflow clogging problems.
  • In the case that excess sediment has changed the ability and function of overflow structures to function correctly, it must be physically removed. 
  • Fertilizers, pesticides, or herbicides should not be used in or around the facility. Chemicals pollute the water and may encourage the growth of undesirable plants.

A Note on Algae

 As temperatures rise and the nutrients in the water increase, algal blooms become more frequent. Nutrient levels rise when manure, pollution, and runoff enters the water.

 There are potential toxic algae blooms, but these are very rare. For the most part, excess algae is simply a symptom of an unbalanced pond.

Humans tend to believe that the algae needs to be killed when it actually needs to be controlled, not killed.

Algae is a natural part of the pond ecosystem that can easily be controlled naturally, using proper maintenance as listed above and potentially increasing water flow and oxygenation using aerators. 

Mosquitoes

 Mosquitoes prefer to lay eggs in and near standing water; Aedes aegypti (a mosquito that spreads the Zika virus) is regarded as a “container-breeding mosquito.”

 To minimize the mosquito breeding areas, the introduction of aeration and water circulation is suggested.

According to studies, female mosquitoes tend to lay eggs in collected water or water in human-made containers.

REFERENCES

https://www.lccdnet.org/wp-content/uploads/Ponds.pdf

 scdhec.gov/sites/default/files/docs/Environment/docs/wqc-dryPonds.pdf

https://webpages.uidaho.edu/larc380/new380/pages/detBasin.html

https://extension.psu.edu/pond-ecology

https://www.cdc.gov/healthywater/emergency/extreme-weather/floods-standingwater.html

https://www.cdc.gov/niosh/topics/outdoor/mosquito-borne/default.html

https://kingcounty.gov/services/environment/animals-and-plants/noxious-weeds/weed-identification/english-ivy.aspx

https://www.fs.usda.gov/Internet/FSE_DOCUMENTS/stelprd3828954.pdf

https://science.jrank.org/pages/1282/Cattails.html

https://letstalkscience.ca/educational-resources/backgrounders/needs-plants

https://www.waterboards.ca.gov/lahontan/water_issues/programs/storm_water/docs/Chapter06.pdf

https://www.cdc.gov/habs/be-aware-habs.html

https://blogs.cdc.gov/publichealthmatters/2016/03/zikaandwater

https://www.ncbi.nlm.nih.gov/pmc/articles/PMC4576013/

Walkway Design A Comprehensive Guide

Brick Walkway Under Construction

An often overlooked aspect of the landscape plan is the walkway design. Our attention is often focused on the main attraction – be it a pond, a swimming pool, a garden, a patio, or anything else of interest in the yard. We might take the walkway for granted because we think we just need a simple path or sometimes no path at all to get from point A to point B. The correct way to design a walkway would be to lay out all of the hard surfaces prior to designing the landscape so that the softscapes can accent the hardscapes, not the other way around. You need to get the main skeleton in place before you start dressing it up. 

By neglecting the walkway design, we may unknowingly risk the following:

  • The garden may become disjointed or may lack cohesion with the house. 
  • Access to the house or the yard may be inconvenient or even cumbersome.
  • A simple path may become unsafe. 
  • The trail may become muddy and uninviting.
  • You may end up needing to remove some landscape elements to install a new walk.

If the path is well thought out, there will be benefits to be enjoyed:

  • Well-defined walking areas.
  • A clear path of travel through the yard.
  • A cohesive and comfortable garden and landscape. 
  • An inviting and easily accessible path to key areas of the yard.
  • Advanced planning and doing things in the correct order will always save time and money in the long run.

To help you develop a good walkway plan, we’ve listed some essential guidelines. On this page, we will be covering the following topics that contribute to the creation of a good walkway design:

  • Materials
  • Width Guidelines
  • Budget and Cost
  • Helpful Tips
  • Design Ideas

Design Considerations

Here are some of the most important points to consider when planning your walkway.

Function – What is the purpose of the walkway?

When planning a walkway, the first question is; what is the purpose? A walkway to welcome guests from the road to your home will be much more grand in both design and size than a simple path back to the herb garden. 

The walkway going to the house’s front door will likely have much more foot traffic than the path into the backyard. Also, this front walk will be used by delivery people, movers, friends, and family, so it needs to be designed to suit all types of visitors. A primary walkway’s design needs to be sturdy, solid, wide, and smooth to accommodate a wheelchair, persons carrying or rolling heavy objects, and to prevent people from tripping.

It is often wider to allow at least two people to pass simultaneously or wide enough to be carrying grocery items or other stuff going to the house. The choice of material will be driven by its purpose as well as its aesthetic value. You will typically be choosing a very hard, solid surface such as concrete or stone. 

For the path that leads to the garden, the foot traffic and its usage will be considerably less. This is called a secondary walkway or an auxiliary walkway. This pathway may branch out from the primary walk, or it may be entirely separate. Its purpose is often a route for a casual stroll through the yard or garden, but it could also be used for utilitarian reasons such as yard work and maintenance. Its width and material requirements are usually much more flexible than the front walk. It can be a simple gravel path, a wooden walkway, or even a casual stepping stone trail through the garden. While this path is typically more narrow, keep in mind that it may need to be wide enough for garden carts or wheelbarrows.

Aesthetics – How do you want the walkway to look?

When planning a walkway, consider choosing a design and material that will complement and blend visually with the style and architecture of the house. This will help create cohesiveness in the overall theme of the property. For example, if you have a modern-looking home, you don’t want a traditional or historic-looking brick-layered pathway to go with it as it will look off-sync. But matching it with a geometrically shaped walkway design may be more appropriate as it complements the house design better.    

When planning a walkway, consider whether you would like to create a formal or informal feeling. A straight line type of walkway evokes a formal mood or works well if you want to get to a particular destination quickly or conveniently. This works well with the primary walkway, where you prefer a quick walk from the driveway to the house’s front door. An informal or casual walkway uses curves and makes for a more relaxing walk. Bends in a curved path allow for opportunities to place interesting plants or statues along the way. An informal walkway works best in a secondary path where the goal is not only to get to your destination (perhaps a pond, a fountain, a patio, or even a garden plot) but to enjoy the journey getting there. The opportunity to stop now and then to enjoy an interesting plant or feature along the way is often a good excuse for a widening of the path to accommodate a small bench or chair.

Safety – Make this a priority.

Consider also the safety aspect of the walkway. Make sure a smooth walkway has proper drainage and does not collect water. For example, in a primary walkway, because of the amount of traffic and frequency of use, a smooth and non-slip surface would be recommended. It is less of a concern for a secondary pathway, but you should still make sure there are no protruding roots or uneven tripping obstacles. Also, consider the placement of lawn sprinklers so that they don’t overspray the walks and create slippery or stained spots.

Another thing to consider would be the placement of walkway lights in the design. Make sure the path is well lit and does not have dark spots on the path. This will make for a very pleasant stroll through the garden regardless of the time of day.

Budget – How much do you intend to spend?

Knowing the budget for your walkway project means you will be able to accomplish what you envisioned without going overboard. Having a clear and concise budget will help you decide on materials as well as the overall scale of the project. It will also help you determine whether you will be able to hire a contractor or if this will need to be a do-it-yourself project.

 Materials

Having considered the critical points in a walkway design, we can now consider material choices. By knowing the pros and cons of each type of material, we will better understand which option to choose.

Turfgrass

While turf is never a good choice for the main front walkway, it is often a reasonable choice for some backyard paths. Walking on a turfgrass surface is like strolling on a golf course; it’s comfortable, looks neat, and blends well with flowering plants. It seamlessly unites your garden areas into one single garden rather than separate areas of the yard. It’s also easy to install using seed or sod and can be formed to almost any size and shape. Just make sure the path is wide enough to be able to use the mower.

A turfgrass path is relatively high maintenance when compared to many other surfaces, but the installation costs are very low. Turfgrass needs sufficient sun and nutrients to grow, so it will be a challenge in some of the yard’s more shaded and poor soil areas. Lastly, it’s not suitable for high-traffic areas as the soil tends to compact, and the turf will tend to thin with extensive wear.

Mulch

Mulch is one of the simplest and easiest ways to create a path. It makes use of natural waste products such as wood chips, cocoa beans, and bark which can often be obtained at very low or no cost. Contact your local tree trimming service, a lumberyard, or a woodwork shop to find out if they have excess wood products to dispose of.

Mulch is light and very easy to spread. A layer of 3 or 4 inches may be enough to create your path and to block most weeds and turf, but be aware that this mulch will decay rather quickly, resulting in the need to replenish it every couple of years.

The upside of this, when used for a garden path, is that it replenishes nutrients in the soil as it decomposes. 

Mulch is easily moved by high winds and water flow, as well as just being kicked around by foot traffic.

Mulch paths should never be used for front door walkways or too close to formal yard areas and are better suited for woodland paths where they blend in seamlessly.

Lumber

Nothing compares to the feeling of walking on wood nor to its flexibility of design options that blend well with the outdoor landscape. A wooden walkway never fails to evoke a certain charm. Wooden walkways or boardwalks consistently rank high on the wish lists of homeowners. Depending on the design, they are attractive, fairly durable, and can be formal or casual. Another positive aspect of a wooden walkway would be that many people may feel more comfortable working with wood rather than stone or concrete products. They can be designed to work in almost any situation, bridge wet areas, include steps and handrails for sloped areas, and have a host of other design options. 

Keep in mind that we are once again talking about wood, so it will be nowhere near as durable or long-lasting as stone or concrete walkways. We would typically not use a wooden walkway for a front entrance, but it is often used in backyard settings and goes well with wooden decks. A wooden walkway is susceptible to moisture, sunlight, and termites, so it needs to be treated well and often. Lastly, it can be slippery after rain, and cleaning the mud from its grooves can be challenging.

Gravel and Crushed Stone

Gravel or crushed stone is a popular choice of material because of its functionality, practicality, durability, and cost. Stone products for walkways are often ordered in bulk by the ton and can typically be delivered right to your home and dumped in the driveway for you to apply at your leisure. The good thing about stone is that it is very durable, easy to install, and will practically last forever. The downside is that it is stone, so it is heavy to move and place. Gravel and stone paths offer good drainage, have low-maintenance requirements, and can withstand heavy traffic. While the path material will last a very long time, it will still need some maintenance. 

On the downside, because the gravel pieces are loose, they can spill out into garden areas and get tracked into the house, so don’t use them near entryways. Also, it can pose a problem when placed in areas where you need to shovel snow. You should plan to order a bit of extra stone every few years to replenish low spots and to rake it smooth.  

I would always recommend installing landscape fabric below any loose stone path to prevent the gravel and dirt from mixing and prevent weeds from popping through the walk. You should also plan to skim off a bit of topsoil if your walk is to be installed through soft fertile ground.

Flagstone or Stepping-stones 

Flagstones or stepping stones are typically made of stone that naturally breaks out of the quarry in layers, such as limestone, bluestone, and some sandstones. It is typically 1-2 inches thick and durable, yet relatively easy to cut or fracture to shape.

It can be purchased in specific patterns or shapes to be laid in a more formal pattern, or it can be purchased in randomly broken pieces that can be used individually as a stepping stone path or can be pieced together like a puzzle in a detailed walkway.

There is little need for any prep or excavation when used as a random stepping stone path through a garden. Simply flatten out the area beneath each stone and lay them down. Any number of different materials or plants can fill in the gaps in a walkway like this. Common materials are turfgrass, mulch, gravel, sedum, mosses, etc.

When installed in pattern, it is advisable to first excavate to hardpan, prep a crushed stone base and lay the stone on that. The stones are durable enough to handle heavy foot traffic, but depending on the installation, they may move and create tripping hazards, especially in areas prone to freezing ground.

Flagstone has long been used for both formal, grand front walkways as well as meandering random garden paths. The difference is typically installation method more than stone variations.

Poured Concrete

If you are looking for a walkway material that’s relatively affordable and very durable, concrete might be the answer. Concrete is a very durable and low-maintenance pathway solution but possibly not the most aesthetically pleasing choice. It is no longer limited to a solid gray, monotonous color but can be shaped, stained, colored, etched, or engraved with a bit of imagination. This makes it versatile and popular for DIY projects.

Like any walkway material, concrete does have some issues. Some cheaper colored concrete products may chip or fade over time, making for a more dull or less desirable surface. Sealants can help prolong the color, but this can be an added maintenance procedure. 

Concrete requires curing time upon completion, so it cannot be used immediately, and once it is cured, it may require a jackhammer to remove it, so you had better be sure that you have all of your design decisions figured out prior to pour day. It is one of the most durable products you can choose, and when poured thick enough, it can be almost timeless. It will crack over time in frost-prone areas and when not installed correctly. It is hard to repair if it does crack or chip, and the repaired area will never look the same as the original. When pouring and finishing concrete for outdoor paths, be sure to leave a brushed surface for traction rather than a smooth polished surface like what might be used indoor.

Clay Brick 

Brick is a relatively durable material with great design flexibility and options. It is well suited to grand front walkways as well as quaint garden paths. It is made from clay, so it looks very natural and can be laid in countless patterns. It will hold up well to heavy traffic and ages nicely when installed correctly.

Like most hard surface materials, base preparation is the key factor in the long-term quality of the walkway. Brick is typically laid in one of two ways.

Dry laid – this requires excavating to hardpan and preparing a compacted base of crushed stone on which to set the brick. The walkway would be typically edged with mortar, plastic or metal, to keep the brick in place. This can last many lifetimes if done properly, but it will move a bit with the freeze and thaw in areas prone to this.

Wet Laid over slab – in this method, the brick is mortared down to a poured concrete base, making it very durable and long-lasting but prone to cracking like a poured concrete slab would be.

Brick can be more expensive and tedious to install than concrete pavers or other materials due to its small size and the need for proper prep and alignment. Some brick can be prone to cracking in wet areas that are prone to freezing, as moisture can seep into the clay brick and force a crack when it freezes.

Pavers 

The term pavers typically refers to any shape of man-made concrete products manufactured to look like clay brick or stone. They can be almost any size or shape and come in a vast range of colors and patterns. It has become a favorite walkway choice because of its diversity, durability, and economical cost.

Because they are made out of concrete, they are very durable and long-lasting. They can be purchased in interlocking shapes that are great for heavy-use areas. 

Once again, these pavers can be installed in the same fashion as listed above with clay bricks. The casual onlooker may not know the difference between some brick pavers versus clay bricks or natural stone. 

Mixed Materials

You can combine different materials and techniques to create pathways to meet almost any aesthetic desire or taste. Many have combined stone, gravel, brick, and concrete to create one-of-a-kind walkways that are both unique to their property and very durable and timeless.

Mosaic Walkway

Walkway Width Guidelines

How wide should a walkway be? The width of a walkway will usually depend on its purpose, where it is located, and what it leads to and from. A primary front walkway needs to accommodate passing foot traffic as well as package carts, furniture dollies and all sorts of different transportation devices. The rule of thumb for a primary walkway is to be four feet wide, which will allow two people to walk comfortably side-by-side, but you will often see three-foot-wide primary paths that do the trick.

A secondary pathway is narrower and usually wide enough for a single person. These secondary walks can be almost any width but are generally more narrow than the primary walkway and sometimes as sparse as a slight path of stepping stones. A comfortable walking path through the backyard is often two feet wide.

Walkway Budget and Cost

When installing a new walkway, the cost depends on several factors, such as the size of the path, the material you will use, and the complexity of the design. The price will also vary depending on your state and the contractor you will use if you choose to do so. 

Budget numbers are always tricky, and they often come down to the contractor. If you are lucky enough to find a seasoned crew that takes its time with installation and prides itself on quality, you may pay more than any of the costs listed below.

If you find yourself someone new to the business, you may find it cheaper than what is listed below, but you probably don’t want that contractor installing your walk. Corners will need to be cut, and those corners are usually cut in the base prep, which will result in a good-looking walk for the first few months that will deteriorate soon after.

To know the approximate cost of your walkway, you can use the following figures for your budget computation.

  Material Price Per Square Foot:

  • Wood: $3 – 22
  • Gravel: $1 – 5
  • Flagstone: $15 – 30
  • Poured Concrete: $5 – 16
  • Stamped Concrete: $8 – 20
  • Clay Brick: $10 – 30
  • Pavers: $8 – 30

With a budget on hand, you can ask at least three contractors for an estimate. Compare the three professional estimates to get a fair price for your walkway project. Please keep in mind that the most challenging part of the installation is the base, so the cheaper bids will undoubtedly have less base work figured into the price. Less base will result in less long-term quality. With the professional estimates on hand, you will see if the cost is within your budget, or you may need to revise your plan to fit your budget. 

You can save on the cost if you make it into a DIY project, but this will depend on your skillset and willingness to work and learn. DIY doesn’t need to mean low quality. The right DIY project can be much cheaper and often better quality than the cheap contractor options simply due to the homeowner’s commitment and willingness to do the work when it gets hard.

Helpful Tips

Now that you have an idea of what is needed to design a proper walkway, there are some things to keep in mind.

Don’t hesitate to seek advice from pros early in the planning stage. Contractors and landscape architects will gladly answer questions specific to your site as they stand to gain, should they be awarded the project. You need to have clear specifications and designs if you expect to get comparable bids.

When interviewing and choosing contractors, it is often better to go with the person who seems more trustworthy and knowledgeable.

When making your walkway design, sketch out a layout plan on a piece of paper and mark it on the ground using twine, hoses, flags, or paint. This way, you will be able to visualize the walk and figure square footage accurately.

A curving path is more interesting than a straight path but always more challenging to install and thus more expensive. 

Most paths would require a crushed stone base to stay level for years to come. This base is anywhere from 4 inches to a foot or more, depending on the ground below. Laying any sort of base on top of soft friable topsoil will result in a walkway that moves over time.

For walkways to have proper drainage, they must be pitched. The pitch should not exceed more than 2% for primary walkways, or it will become a safety hazard when covered with water or ice. Secondary walkways can pitch with the ground or be stopped, but both types should be designed and installed to shed rather than collect rainwater and runoff.

When adding steps to offset the slope difference or to bridge height differences in the garden, keep all the steps’ height consistent; the suggested height is 6 to 7 inches. Anything less than 4 inches or above 7 inches can be a trip hazard, especially for older adults. If you break up the steps with landings, the landings should be around 4 to 5 feet to allow for a rhythm of movement.      

 Sprinklers near a sidewalk or walkway should be installed in an alternating pattern. This will provide complete coverage without overspray that may cause slippery walkways or unnecessarily wetting cars or pedestrians. 

 Before embarking on a project that will affect the frontage of your property, check with your local planning department or homeowners association for zoning laws. 

Take your time with all aspects of your walkway project. From the initial concept and design to the setting of the final stone, there is no need to rush. A walkway will be part of your property for generations to come, making it worth the effort.

How to Get Rid of Chiggers in the Garden and Yard Naturally

Chigger Bites Itch

Do you have a chigger infestation and need to get rid of chigger bugs as soon as possible? Do you need a natural solution to your chigger problem? This informative article will tell you everything you need to know.

Consider this as your all-in-one guide for chigger control. We will first discuss what chiggers are, where they live, and their life cycle before getting to the juicy part—how to get rid of chiggers.

You’ll also be delighted to know that we’ve answered common questions about chiggers!

What’s a Chigger?

Chiggers are microscopic pests that resemble tiny spiders. They’re members of the Trombiculidae family, and their larval stage causes a lot of itching.

Most people often think of chiggers as blood-sucking insects like ticks, mosquitoes, and fleas. Let’s debunk this viewpoint. First, chiggers aren’t insects. Second, they aren’t after your blood. Chiggers are harvest mite larvae that feed on their hosts’ skin cells.

Most folks recognize chiggers in their nymph form, as they are parasitic and attach themselves to a host as a parasite would. These are the ones that give us that itch.

They use strong jaws to dig into your skin to melt your flesh for drinking. This is where you have chigger bites, and likely, it’s the only effect chiggers have on you.

Once they are in the adult stage, chiggers no longer use human beings and other mammals, such as cats and dogs, as a food source. Therefore, all we have to do is keep an eye out for chiggers when they’re in their larval stage.

Chiggers are known by several different names, including jigger bug, berry bug, red mites, spider mites, red bugs, grass mites, harvest mites, and clover mites. It’s important to note that clover mites are confused with chiggers, but they are not chiggers.

Chigger Anatomy

The adult mite has eight legs and lives in vegetation, but the parasitic six-legged chigger larvae are the ones that feed on mammals (including humans, dogs, and cats) and birds. In the late summer and fall, the larvae consume tissue fluid and cause localized skin irritation and itching.

The yellow/orange larvae are about 0.2mm (0.008 inches) long and can be found in many parts of the world, but they are not found in all climates or areas. Larvae are hardly visible to the naked eye at first, but once they have completed feeding, they swell to around thrice their initial size.

 Life Cycle of a Chigger

The six-legged larval stage is the first active period in the life cycle of Trombicula, and it is the only stage when it targets animals. These larvae live on vegetation and are active during the day, especially when the weather is dry and sunny.

When they’re larvae, they seek out a host and introduce enzymes into the skin, which break down the skin and allow them to feed on the meat. Instead of “biting,” they create a stylostome (hole) in your skin and chew away at the tiny insides of your flesh, which is why they’re itchy and uncomfortable.

They drop to the ground after consuming your flesh, developing into nymphs before maturing into adults with eight legs. They’re now harmless to humans and animals when they reach this stage. Chiggers, unlike ticks, do not cause Rocky Mountain spotted fever or Lyme disease.

They are not parasitic in the post-larval stage, and they consume plant materials. Females produce three to eight eggs in a clutch, generally on a plant leaf or under the roots, and then they die in the autumn.

Where do Chiggers Live?

They are mainly located in the South, the Southeast, and the Midwestern part of the United States. They are absent or scarce in far northern regions, high lands, and deserts. 

Chiggers live in woods and grasslands and low, humid areas with rank vegetation, such as berry patches, lake shorelines, along streams, woodlands, orchards, and even drier areas with less vegetation, such as deserts.

 How to Know If There Are Chiggers in Your Lawn

Since you can’t see chiggers with the naked eye, it’s hard to spot them. 

Here’s a well-known fact: chiggers like damp, shady areas with dense vegetation, so concentrate your search on these areas of your yard. Do not look for chiggers in places that get direct sunlight or where the grass is kept very short.

To know if there are chigger hotspots in your area, get a six-inch by six-inch square of black cardboard. Then, place it on edge in the grass.

Return a little later, then use a hand lens to inspect the upper edge. If there are chiggers, you’ll see that they climbed to the top of the cardboard—you can identify them by their tiny reddish or orange bodies, which are visible against the black surface.

Alternatively, you can place a shallow bowl of water on the ground for a few minutes. Chiggers can gather along the rim, so keep an eye out for them. Like the cardboard method, you’ll need a magnifying glass to spot them.

How to Protect Yourself from Chiggers

Of course, the first move is to check if you have a chigger infestation in your yard. You can determine the answer by doing the steps in the previous section (the cardboard method) or simply recalling your experiences in your yard. If you’ve often felt continuous itching after going outside, these are most likely a sign of chiggers.

It’s best to hide as much of your skin as possible. The best shirts and pants are loose-fitting and made of tight-woven cloth. You should also wear thick socks, so you have something to tuck in your pants into. Furthermore, wear tall boots or shoes. 

Always use a DEET-based insect repellent on your skin and clothes. DEET is an ingredient used to repel pests, and it does not kill them; instead, it makes it difficult for the pests to smell us. A word of warning here, there have been reports of some folks being sensitive to DEET, so use it sparingly and watch for skin irritation. 

Wash When You Get Back Indoors. After being outside for a while, it’s a great idea to shower when you get back inside immediately. It takes a bit of time for chiggers to penetrate the skin, so you take a hot shower as soon as you can. Use lots of soap to clean your skin.

Wear panty hose under your pants. Since chiggers cannot bite into this material, it is a practical, common technique to keep chiggers away. This may seem a bit odd for our male readers, but it may be better than chigger bites.

How Do Chiggers Latch onto a Host?

According to Tim Gibb, Purdue University’s extension diagnostic entomologist, chiggers climb up to the highest point on a plant and wait for animals or humans to come past. They then drop onto a human, typically landing on the shoes or lower part of the leg, and crawl up the body looking for a bite spot.

Do Chiggers Stay on the Skin?

Chiggers do not burrow in the skin. Instead, they use their mouths to pierce a skin cell. The enzyme in their saliva liquefies the skin cell wall. The body’s immune system responds to the foreign enzyme, forming a rigid, red wall at the bite site. The chigger takes advantage of this by using this round wall (stylostome) as a straw. 

The chigger then drops to the ground after consuming its fluid meal.

Since we don’t have fur, chiggers have difficulty clinging to humans. They must get into places where clothing fits tightly, such as the groin area, the top of the socks, the armpits, or the waistband if they want to avoid falling off.

Chiggers are easy to remove because they don’t have a strong grip. You can get them off by taking a shower with lots of soap.

How To Get Rid Of Chiggers In The Yard: The Natural and Not So Natural Alternatives

You can do many things to get rid of chiggers in your yard naturally. Find out what works best for you!

Maintain Your Lawn

Chiggers like to stay in tall grass and weeds. You can avoid chigger infestations by keeping the grass mowed as short as possible. If you have tall plants, you’ll also want to cut them back. Frequently mowing your grass and pulling weeds are two easy but powerful ways to eliminate chiggers in your yard.

Also, prune your bushes, trees, and shrubs regularly. By doing this, you reduce the humidity around your plants, plus you’ll let in more sunshine.

These steps minimize the amount of moisture and shade in the chigger-friendly areas around your property. And chiggers don’t like dry and sunny places with good air circulation. Do these things all year round. Chiggers that have been dormant will reappear as the weather gets warmer.

Use Sulfur

A highly successful method to keep chiggers away is by using sulfur. 

Texans have a tradition of carrying an old sock loaded with sulfur around them in the pickup truck. When they get out of the truck, they dust themselves with sulfur by swinging the sock against their lower legs and shoes. Then they do what they have to do.

Here’s what you can do to protect yourself from chiggers using sulfur:

  • Sulfur Powder: Before going outdoors, dust the clothing and shoes with sulfur powder.
  • Sulfur Pellets: You can use sulfur pellets to keep chiggers away from your lawn. We recommend doing this before it gets excessively hot outside. If you have dogs, though, don’t do this.
  • Sulfur Supplements: This is something some people find effective. But if you have existing medical problems, are pregnant or breastfeeding, or are taking any prescription drugs, please ask your doctor before taking any sulfur pills.

Diatomaceous Earth

Diatomaceous earth (DE) comes from the fossilized remnants of diatoms, tiny aquatic creatures whose bones are composed of silica. Silica is this natural material that makes up 26% of the weight of the Earth’s crust. Diatoms are collected in the sediment of rivers, streams, lakes, and seas over a long time.

Diatomaceous earth extracts fats from the exoskeleton’s cuticle, causing pests to die by drying out. Because of its pointy bits, it is abrasive, which speeds up the process. It’ll keep working as long as you keep it dry and untouched.

Just use food-grade DE (fancy term for purified DE) on your clothes and lawn for this approach. Chiggers despise DE. Dust food-grade DE on your sleeves, the bottom of your pants (about six inches high), and on your socks before going outside.

To keep chiggers away from your grass, use a little bit of food-grade DE. The rule of thumb is five pounds per one thousand square feet for this method.

Essential Oils

Various pesticides based on essential oils or essential oil components have hit the market in recent years. Essential oils are highly concentrated, volatile liquids obtained from plant parts. The Environmental Protection Agency (EPA) decided in 1996 that some ingredients that pose a low risk to consumers do not need EPA clearance to be sold as insecticides.

Essential oils, such as cedar, clove, citronella, cinnamon, citrus, eugenol (a clove oil component), mints, garlic, rosemary, etc., make up a variety of these ingredients. These insecticides usually serve only as contact-killing agents, so repeated treatment may be necessary.

Here’s a great essential oil-based chigger repellent recipe:

  • 4 tbsp water
  • 2 tsp witch hazel
  • Five drops of essential oil (tea tree, lavender, lemongrass, or thyme will work)
  • Spray straight onto the skin after thorough mixing.

Insecticidal Sprays

Insecticide sprays can decrease chiggers but only temporarily. From an environmental standpoint, insecticides are never the answer. They are typically very short term in their effectiveness and they kill many species that they are not intended to kill. Liquid insecticide sprays such as bifenthrin can be used to help keep chiggers under control, but this should be a lsat resort.

If you have to use pesticides to manage your chigger problem, it is best to use the least toxic pesticide that can do the job properly. While all pesticides are harmful to some species by design, there are now a lot of less toxic pesticide solutions available.

Many of them degrade quickly and do not build up in the body or the environment. Some are pest-specific and do little or no harm to other living things. Others, such as bait stations, reduce chemical exposure to humans.

Pyrethrum

Pyrethrum is a natural insecticide that comes from the chrysanthemum flower. Many such pyrethroid pesticides based on the structure of the pyrethrum have been produced in recent years. 

This compound class is highly active, has a high insect/mammal toxicity ratio, and has no environmental persistence. As a result, these compounds are commonly used for organic farming.

Pyrethrum compounds are also eco-friendly since light, oxygen, and temperature easily degrades them.

Pyrethrins, which are purified pyrethrum, have been shown to be very effective in pest control. It destroys many mites and insects, forcing them off plants in a matter of seconds. Pyrethrins are still widely used today for this purpose and their low toxicity to humans.

REFERENCES

Easy to Grow Dwarf Fruit Trees

Dwarf Fruit Tree

Growing fresh fruits at your own home can be incredibly satisfying and can provide you with a powerful sense of sustainability. It will lower your carbon footprint, not only because you are planting more trees but also because you will be saving trips to the market. 

Imagine eating that first piece of juicy, delicious fruit from your very own tree. Imagine the peace of mind that you will have knowing exactly what went into it and knowing that it hasn’t been moved across the country in a truck.

The advantage of growing dwarf fruit trees comes when the great outdoors gets cold. In many climates, your choices of fruit trees that you can grow are severely limited by your cold winters. If you choose to plant dwarf fruit trees and plant them into pots, you will be able to move them indoors at the first sign of cold weather. This will allow you to have a wide variety of fruit trees in both summer and winter.

Perhaps you have limited space or just an apartment. You still have the ability to have fruit trees, as long as you choose dwarf varieties. Be aware that different types of dwarf trees grow differently, so choose your plants wisely.

What is a Dwarf Fruit Tree?

A dwarf tree fruit will have a similar appearance to the full-sized version. The dwarf trees often produce proportionally greater yields when compared to the standard varieties.

If you can grow other plants at your home, you should not have a problem growing dwarf fruit trees. These small trees produce an abundant supply of full-sized, organically grown fruit that you can pick right off the tree!

How are these dwarf fruit trees made?

Plant breeders have brought to life so many possibilities for gardeners by introducing naturally dwarfing fruit trees. Fruit tree breeders also found a way to cultivate dwarfing and semi-dwarfing rootstocks making it possible to graft any varietal.

There’s no genetic engineering involved in dwarf fruit trees. In reality, it’s an old, manual technique that entails carefully grafting or budding fruit tree varieties with ideal fruit characteristics onto a suitable rootstock. Grafting is a method of propagation that has been there for millennia.

The toughness, soil adaptation, tolerance to drought, resistance to diseases, and size of rootstocks are all factors in their selection. The roots can only allow the fruit tree to expand as much as they can; mixing a scion with a particular rootstock enables the grower to regulate the tree’s size.

How do Dwarf Fruit Trees Stay Small?

The fact that they are grafted to be dwarf will undoubtedly help them to remain smaller than the full-sized trees, but with proper pruning, you should be able to keep the dwarf trees to whatever size you wish. 

How a tree will react to pruning will largely depend on the time of year it is pruned. The best time to prune a tree for growth and fruit is late winter before spring warms the tree. If you want to slow a tree’s growth and don’t mind missing the fruiting season, you can prune in spring after the growth occurs.

There are several benefits to keeping the trees small. Since the fruit is at a lower picking height, it is easier to collect, and smaller plants are easier to care for, prune and move if you need to.

Advantages of a Dwarf Fruit Tree

The pros of owning a dwarf fruit tree outweigh the cons. Here are some good reasons to have a dwarf fruit tree in your landscape.

  • You Can Get Fresh Fruits Even in a Small Space!
  • Growing a dwarf fruiting tree has its benefits: you can grow your fruit tree in smaller landscapes where a huge hulking tree will be too large, and you’ll still have good access to healthy, delicious fruits. 
  • You can even find fruit trees with multiple grafts that can produce a variety of fruits on a single tree. Talk about conserving space!
  • Dwarf fruit trees also allow for easy upkeep, treatment, and harvesting from the ground. You won’t need any ladders or special equipment to pick the fruits.

Disadvantages of Dwarf Fruit Trees

  • Their smaller root systems are more susceptible to drought, diseases, and pests, and they anchor the trees less effectively than larger root systems.
  • It is a good idea to stake most dwarf trees until their roots get well established.
  • Thinning heavy loads of fruit is necessary to avoid limb and stem distress, as well as alternate bearing (heavy crops one year and little or no crop the next).

Peach and Apricot Trees

Peach and apricot trees are becoming increasingly common container plants. They bear fruit easily, generally within 1-2 years of planting, and are very pleasing to the eye.

Growing a peach or apricot patio tree in a pot has the added advantage of allowing you to carry them indoors if a late frost is about to happen. This will safeguard the sensitive flowers allowing them to bear fruit eventually.

Dwarf Peach Tree

Dwarf peach trees mature to around 8-10 feet tall, but you can keep them to a more moderate height with careful pruning. A freshly planted dwarf peach tree can yield three to four bushels (1 bushel = 8 gallons) of fruit in a couple of years, depending on the variety and the climate.

Small peach trees are relatively easy to grow but only mildly cold-resistant. USDA plant hardiness zones five through nine are best for peach tree dwarf cultivars, though some are hardy enough to survive cooler winters in zone 4.

Here Are Some Great Dwarf Peach Trees to Plant:

  • O’Henry are little peach trees with big, firm fruit—ready to harvest in the middle of the season. Peaches are a lovely yellow with red accents on them.
  • El Dorado is a medium-sized peach with lush, yellow flesh and attractively red-blushed yellow skin. It is harvested in the early summer.
  • Donut, a.k.a. Stark Saturn, produces medium, donut-shaped fruit (sunken in the center) early in the season. These unique freestones, white peaches have a gorgeous red blush on them.

Here is a Great Dwarf Apricot

Blenheim Apricot

Blenheim Apricot tree grows many apricots of moderate and large sizes. The fruits are really sweet and juicy. 

Professional chefs worldwide consider Blenheim apricots to be the finest, best-flavored apricots perfect for fresh consumption. They have the perfect sweetness and acidity balance, resulting in a classic and flavorful apricot taste. Since it blooms later than other apricots, the Blenheim tree has a larger growth variety than other apricots.

USDA zones 4 to 9 are suitable for these apricot trees. This disease-resistant tree tolerates sunshine and shade and can be planted in the fall and spring.

Dwarf Orange Trees

Orange trees are available in a variety of sizes. Standard orange trees reach a height of around 20 feet, while dwarf orange trees in nurseries reach six to twelve feet high. 

Dwarf citrus trees are similar to standard citrus trees except for their height. Dwarf orange trees are simply regular fruit trees that have been grafted onto smaller orange tree rootstock to stunt their growth.

Calamondin Orange Trees

For new gardeners, the calamondin orange is probably the best choice. These glossy trees grow fragrant flowers regularly, which mature into tiny, round fruits that make excellent, tangy marmalade. Just keep in mind that these taste too sour to eat on their own. You can also add these juicy oranges into cool beverages.

Self-fertile Dwarf Calamondin orange trees will grow six to ten feet tall in zones nine to eleven. Citrus lovers will enjoy growing them in patio containers, but their fruit is less tasty than the more popular oranges. Even so, they are stunning, and you can even grow them solely for their aesthetic appeal!

Dwarf Tangerine Trees

Tangerines are a better choice than actual oranges if you want juicy, orange-tasting fruit from a dwarf tree. Citrus reticulata grows in zones 9-11. This variety produces fruits that taste similar to oranges but are relatively easy to peel and consume.

Dwarf Grapefruit

Dwarf grapefruit trees grow to be around twelve feet tall at maturity, but they produce the same big fruit as their standard versions. You can grow a dwarf grapefruit tree in a wide container or the garden, making nutritious grapefruit for consuming and drinking.

One variety is the Dwarf Redblush Grapefruit. It is a dwarf grapefruit variety with fewer seeds and a deeper blush-red flesh and rind color. Fruit ripens from winter to spring on the tree, which lasts a long time. It’s an evergreen tree that can grow from eight to twelve feet high.

Dwarf Apple Trees

Dwarf apple trees produce full-size apples despite their diminutive size. These trees, which grow to be 8-10 feet tall, bear fruit faster than larger apple trees.

Fuji Apple Trees

Are you looking for an exotic tree that bears fruit speedily? The Dwarf Red Fuji Apple is a good one. Commercial farmers like these trees because they yield sweet, delicious apples quickly.

They’re also straightforward to maintain. Dwarf Red Fujis bloom in the mid-to late-spring and bear fruit in October, making for a convenient fall harvest. They also survive in a wide range of soil conditions, flourish in partial or full sun, and are smaller in size than other apple varieties, making them ideal for small spaces and harvesting fresh fruit.

Honeycrisp Apple Trees

Mini Dwarf HoneyCrisp Apple Trees can grow up to five feet tall, while Dwarf versions can reach eleven feet.

This one is an incredibly crisp, juicy red apple. When picked early, Honeycrisp has a delightful sweet-tart flavor, but it ultimately develops a full-bodied aromatic taste when allowed to ripen in the mid-late season. 

The University of Minnesota developed Honeycrisp Apple. This tree is one of the most winter-resistant apple trees, surviving temperatures as low as -40°F.

Dwarf Pear Trees

You can plant dwarf pear trees with as little as 10 to 15 feet of space, whereas regular pear trees need at least 18 to 25 feet of space.

Perhaps better, they can be maintained to a height of 10 to 12 feet, a height that makes picking, pruning, and keeping it easy.

Dwarf Lime Trees

Standard lime trees can reach a height of 15 to 20 feet; therefore, bringing them indoors would be impossible. Dwarf lime trees, on the other hand, grow to be around six to ten feet tall. Still, they grow shorter in pots, and you can get them from legitimate nurseries. 

Certainly, you can fit dwarf lime trees within your home and be astounded by the fantastic blooms, gorgeous canopy, pleasant citrus fragrance, and fresh lime fruits within reach, even if you have limited room.

A dwarf lime tree, unlike other varieties, has minimal needs and does not require significant care and attention.

Dwarf Cherry Trees

Cherry trees, which are grown for their beautiful spring flowers and fruit, are another rose family member that can survive in containers. Sweet and sour cherry trees are the two most common varieties. 

Sweet cherries are the ones you’ll usually find in the supermarket. Snacking on sweet cherries is a great idea. On the other hand, Sour cherry trees are easier to grow, and they tolerate shade better than sweet cherry trees.

Get a Stella graft with a Colt rootstock if you want a cherry (semi-dwarf) tree (Prunus avium). The tree can grow up to ten feet tall when fully developed. This plant thrives in zones 5 through 9, and the fruit is sweet and dark red.

Since cherries are self-fertile, you won’t have to think about finding a pollinator. Because of this, they are much more suited to small spaces than fruit trees that need a specific pollinator.

Dwarf Pomegranate Trees

Unlike other pomegranate trees, which can grow up to 30 feet high, this smaller indoor variety can only grow to three feet tall! Pomegranate fruits are followed by fringed, sweet-smelling, trumpet-shaped flowers in vibrant orange-red that take 3-4 years to emerge. This plant prefers warmth and direct sunlight; bring it outside in late spring and summer but leave it indoors in the winter.

It’s best to put it in front of a clear window, and it grows well in a pot of well-drained sandy soil. This shrub is shaped like several narrow branches with long, shiny, green leaves before and after the flowers bloom, making it a pleasant complement to any interior.

Dwarf Lemon Trees

The dwarf Meyer lemon tree is an ideal dwarf tree if you want to grow fruit in a limited space. Its fruits do not look like store lemons (Citrus limon): their lemons look rounder than regular lemons and have a hint of orange blended in with the yellow. What’s important is they got the tangy taste that lemons are known for. Zones 9–10 are ideal for this tree. 

The white flowers’ scent is an added benefit. It can grow to about four to six feet tall and yield lemons without needing a different pollinator in your yard.

Dwarf Fig Trees

Isn’t a spreading, fan-trained fig tree in a jar a glorious sight? It’s further enhanced by the hand-shaped leaves that release a distinct fig fragrance when brushed on warm days. Then there are the extremely juicy fruits, which swell all summer until they almost break open to expose their soft flesh.

One hardy variety of purple-fleshed fruits that are tasty is Brown Turkey, and Panache and Black Mission are two more good ones to try.

Cover the baby fruits during the winter by placing loose sleeves of bubble wrap around them, making sure to leave the ends open to maintain air circulation. This would guarantee a crop in a cold environment.

Since figs like to have their roots constrained, they’re perfect for growing in containers, and you can easily train them into fun shapes by attaching branches against a warmer surface.

Since they take up very little space, fan-trained trees are attractive, productive, and yield valuable fruits. While initial preparation is time-consuming, the benefits are well worth the effort.

To make a fig fan, follow the same steps as most other fruit fans, except considering the size of the fig leaves, you’ll need a much bigger structure for training since you’ll need to space the branches farther apart.

Stone fruits, which are not ideal for training as espaliers or other restricted types, are usually grown in fans. Fruits can be fan-trained in a variety of ways. The fruits that are commonly fan-trained are:

Apples, almonds, cherries, figs, gooseberries, peaches, pears, apricots, nectarines, redcurrants, and plums.

Dwarf Banana Trees

While it’s widely known that the banana plant is called a banana tree, it is not a tree, but a big herb since its stem isn’t woody but succulent.

Want to blow your mind even more? Bananas are berries! (and strawberries aren’t).

Anyway, let’s go back to the topic. Gardeners short on space don’t need to be concerned: Small banana plants (Musa spp.) are suitable for small gardens.

The dwarf Cavendish banana tree has a self-fertilizing capacity, and you can grow this plant indoors.

It grows up to 8-10 feet in zones nine to ten. The sweet fruit can be anywhere from three to six inches long. Your landscape’s scenic value would be enhanced by the broad, tropical leaves of the banana plant.

Dwarf Plum Trees

You can find dwarf plum trees in abundance. There are also edible plum-bearing shrubs if you want to get something very short.

The natal plum (Carissa macrocarpa) is one specific tree that can grow in zones nine to eleven. It usually grows to around eight feet high.

It’s ideal to plant the beach plum (Prunus maritima) in colder climates since it’s hardy to zone three. Many inhabitants of the northeastern United States will know the beach plum as the fruit-bearing plant that grows in the dunes, mainly in the Atlantic Ocean.

Prunus domestica ‘Johnson is an example of a dwarf plum tree cultivar. You can plant it in zones 5 through 9, and they grow up to ten feet tall. Johnson has sweet red flesh and red skin, and however, it needs pollination. If this is a problem for you, plant the self-fertile Damson plum tree instead.

Dwarf Nectarine Snow Queen

The most pleasant, sweet taste of any variety to date comes from this self-fertile white nectarine! The Nectarine Snow Queen grows up to 8-14 inches tall, and it requires full sun to thrive. 

The red-tinged fruit has sweet white flesh produced by beautiful pink spring flowers. The dark green leaves turn a beautiful shade in the autumn. When the fruit is fully ripe, it turns a light yellow hue with a candy red blush.

 This nectarine makes a great visual element in desserts and cocktails with its white color. The fruits are also usually added to soaps, scents, essential oils, and candles due to their floral notes and delightful fragrance.

It likes a mild, dry climate with little humidity; it grows exceptionally well on the west coast.

 One of the most pleasant things about the Nectarine Snow Queen is its self-pollinating nature.

 How to Choose a Dwarf Fruit Tree

 How do you choose which dwarf fruit tree is perfect for your patio, inside your house, or on your landscape? Here are some tips.

 Always Choose the Fruits You Love

  •  First of all, grow just the fruits you love eating. Fruit trees are an important investment in terms of money, time, and space. So why start growing fruit you don’t care for when you know it’s going to take up a special spot in your landscape? 
  • Think of which fruits you frequently buy at the grocery. What fruits do you crave the most? These questions should help you decide which dwarf fruit tree to add to your garden.

Choose Fruit Trees Appropriate for Your Space and Climate

  • Secondly, choose fruit trees that will be well-suited to your area. 
  • There are many fruit tree varieties that you can choose from, but your specific environment is one of the most important considerations.
  • If you know your area is going only to have a few hours of sunshine per day, you’re going to have fewer fruit options than if you get 6-8 hours.
  • Most fruit trees need at least some sunlight to yield high-quality fruit, and the majority require full sun. However, certain fruits can thrive in partial shade, so don’t be discouraged!
  • Find out what grows nicely in your area by contacting local nurseries, talking to neighbors, visiting community centers, or visiting local farms.

Choosing the Right Dwarfing Rootstock

It’s ideal to choose dwarfing rootstock depending on your soil and the tree size you like. Pixy for plums, M9 and M27 for apples, and Quince C for pears are the rootstocks that grow the smallest trees. They’re just fit for high-quality loam soils with plenty of nutrients.

Other Important Things to Keep in Mind

Check that the fruit tree you purchase meets all of the following criteria:

  • Get it from a legitimate nursery, either in your neighborhood or online.
  • Unless you have enough space for two or more trees, make sure that your tree is self-fertile. 
  • It’s a good idea to ask your supplier if you’ll need more than one tree to ensure proper pollination.
  • We don’t recommend buying fruit trees from seed, and your tree should be a live one already grafted onto a dwarf rootstock.

How to Care for a Dwarf Fruit Tree

Indeed, caring for a dwarf fruit tree is much easier than caring for a full-sized tree. But, they still require basic upkeep to ensure they bear high-quality fruits!

Planting Dwarf Fruit Trees in Containers

Keeping your dwarf fruit trees in a simple pot or container is necessary. Your trees can flourish in your climate if you follow a few tips.

Also, choose a container that drains well. For a year-old tree, choose a pot measuring 8- to 10-inches in diameter and at least 24 inches in height. You should plant two- and three-year-old trees in a 12- to 14-inch pot. Note that when the roots of dwarf citrus trees are somewhat constricted, they bloom better.

Start with a simple potting mix (no wetting agents or fertilizers). At the bottom of the container, don’t add any small rocks or gravel.

Water the tree appropriately: thoroughly at first, and every five to seven days, add a fourth to a half-gallon of water. Provide plant food according to the instructions on the plant tag.

Locate a suitable spot for the tree. Make sure your tree receives at least eight hours of full sunlight every day. Temperatures between 55 and 85 degrees Fahrenheit are ideal for citrus growth.

Place the pot on a small dish filled with pebbles and apply water to the dish if your home becomes dry during winter. Allow your pot to adapt outside in a wind-free, sunny area during warm weather.

Planting Dwarf Fruit Trees in the Ground

Look for a spot that gets 6-8 hours of sun a day. Then, dig a hole measuring 12-18 inches in depth and width. Place the tree in that spot, but keep the grafted joint two inches above soil level (you’ll see this joint at the tree base). 

Cover the tree with dirt and compost. Afterward, put some mulch around it to keep it moist. Ensure that you water it regularly.

Watering

We don’t recommend overwatering young potted trees. Keep close tabs on the tree when it’s in the container, and just water it when necessary. It’s possible that daily watering isn’t required, but don’t let the soil dry out entirely. 

If the soil feels somewhat dry a few inches under the surface, you should water it.

 Since the sun will be a huge determining factor in drying it out, please pay attention to where the pot is placed and how much sun it receives regularly. While they are in full leaf, mature trees in containers outdoors consume a lot of water and benefit from frequent watering, at least before the temperature becomes cooler.

Pruning

 Since dwarf trees occupy less space than standard trees, they need less maintenance. Even so, when the trees are dormant, you’ll need to prune water sprouts and suckers, weakened, diseased, and dead branches, limbs moving inward and around a third of the new growth.

 A study shows that you should prune during the late winter or early spring to decrease the risk of infection.

Preparing the Trees for Winter

 Frozen roots will die, and the tree loses its ability to receive nutrients and water.

 Mulching the fruit tree with straw is one way to prepare it for the winter. This will protect the roots of your fruit tree, keeping them from freezing in the winter.

It’s best to use mulches that take a long time to decompose, such as straw or composted wood chips. Avoid using manure or compost on your tree because it can give it a load of energy which can cause dormancy to delay.

Staking

When you acquire a dwarf tree, what you’re getting is a generic dwarf rootstock with a fruit tree grafted on top. The dwarf rootstock will have a dwarf root system and may be unable to anchor properly.

Since their roots are fragile and can’t support themselves yet, most dwarf trees need stakes for at least two years, particularly in windy environments. Dwarf trees, such as cherries and apples, have particularly thin roots and need staking. The trees can die due to breaking or falling over if you don’t stake them.

Fertilizing / Feeding

Feeding dwarf fruit trees does not have to be a chore; you can use a foliar feed (applying fertilizers to the leaves) if you want, but you need to apply it every two weeks or so. The simplest feeding method is to add osmocote granules once a year in the spring. This form of fertilizer is slow-release, so you’ll get a steady stream of nutrients all season long.

Full Sun

Fruit trees thrive in the sun, particularly the smaller growing ones and patio varieties. The more sun they have, the better the fruit quality will be: sweeter and more colorful upon ripening. 

Some types, such as the cooking apple varieties, Morello cherry, damson, and quince, can survive in a more shaded place.

Finally, place them somewhere that isn’t too windy since nothing is more annoying and frustrating than having to reposition trees in pots that have fallen over constantly.

REFERENCES

Easy Fragrant Flowers to Grow

Fragrant Flowers

Sweet-smelling flowers offer an additional delightful fragrance to the garden, with scents that can trigger memories and signal the arrival of summer or spring.

 When planting flowers for their smell, remember that some flowers have a soft, light scent and must be enjoyed close range. In contrast, some will envelop the whole yard in their fragrance. For instance, in the spring, lilacs would be lovely! And Jasmine would be such a pleasant, floral scent at nighttime.

 Fragrant Flowers that will Grow Easily in Your Garden

 Floral fragrance plays a crucial role in many plants’ reproductive processes and has significant economic importance in ensuring crop yield and quality. It also improves the visual attributes of cut flowers and ornamental plants.

 However, due to the genetic modification that has gone into their development, several modern plants are no longer fragrant. According to David Clark, an environmental horticulture professor, they’ve been engineered to have bigger or showier flowers, be disease-resistant, more vibrant in color, and constantly blooming—all of which come at the expense of fragrance.

 Heirloom flowers are always the perfect choice for a scented landscape, and you will need to plant them from seed to grow them.

 How to Make the Most Out of Easy-to-Grow Fragrant Flowers

If you want to add some fragrance to your yard, here are some simple things that help you get the best out of your scented flowers: 

  •  Plant them along a pathway, balcony, open window, or in a pot you can carry around conveniently so you can appreciate their scent more often.
  • So that various scents don’t clash with one another, scatter different fragrant flowers all around the yard.
  • For a more intense fragrance, plant in big clumps. Their scent can dissipate if flowers are grown in a windy, outdoor environment.
  • Search for scented ground covers and lawn options you can walk over. The scent becomes more robust when plants with fragrant leaves are squashed underfoot.
  • Scented species also attract the attention of insects. The butterflies would be acceptable, but you should keep scented flowers out of reach of children’s areas and far away from people with bee sting sensitivity.
  • Evenings are the best time to smell certain flowers, such as Jasmine. Place them near the dining or gathering spots on your landscape.
  • The scent of flowers will change slightly during the day as the temperature and growth conditions change. You’ll have to test fragrant flowers to see which ones thrive in your environment and which variations you enjoy. The same smells do not appeal to everybody.

Many Excellent Choices

There are several excellent choices to get you started if you want to introduce some fragrance to your property. Remember that bloom times will differ depending on the local environment and microclimates on your land.

Honeysuckle (Lonicera periclymenum)

According to Tankersley, director of living plant documentation at the Chicago Botanic Garden, this showy, lively perennial vine spreads wonderfully over a fence line. Pollinators adore it. 

Search for natural or newer varieties that aren’t invasive like Japanese honeysuckle; full sun is preferred.

Mock Orange (Philadelphus)

If you’ve never seen a mock orange before, as it blooms, you might think you’re in a citrus garden. The tiny white flowers have a stunning fragrance similar to that of oranges.

Mock orange gets its name from the flowers, which look like orange blossoms. They have a lot of nectar, which draws pollinators, including butterflies and bees. Mock orange shrubs grow quickly, gaining a height of around two feet each year. 

Plant them in the early autumn or spring (USDA Hardiness Zones 4 to 8).

Anise Hyssop (Agastache foeniculum)

Hyssop has a heavy anise scent in the leaves and the delicate, spiky blue-purple flowers. It belongs to the mint family, and the leaves and flowers are also edible.

This aromatic herb is also known as Blue Giant Hyssop or Fragrant Lavender. The leaves have a soft, sweet, refreshing taste and smell similar to licorice, anise, and mint.

Its upright appearance and spikes of lavender blossoms make a remarkable statement in any garden, and it has long been used in medicinal and culinary applications.

USDA Hardiness Zones 5–9: Summer Bloomer

 Sampaguita (Jasminum sambac)

The Sampaguita (a woody vine or shrub) has long been revered in music, tales, and folklore for its sweet-smelling white flowers. They’re originally from India, where their essence is used to make perfumes. Their pretty flowers are also made into garlands. When the flower buds open at sunset, the tiny flowers reveal their innocence.

Orange Jasmine (Murraya paniculata)

Orange Jasmine is a moderately sized shrub with a thick crown of shiny, waxy green leaves and an upright, sprawling, compact habit. Its flowers have a pleasant scent.

It can withstand light frost and some drought. Orange Jasmine is also quite pretty when pruned to a short, single, or multi-trunked ornamental plant.

Ylang-Ylang (Cananga odorata)

The yellow, star-shaped flower of the Cananga tree is known as ylang ylang (Cananga odorata). This tropical species is native to India, Malaysia, Indonesia, the Philippines, and some Australian areas, near the Indian Ocean. Ylang ylang has a delightful, floral fragrance that’s rich and fruity.

The Ylang Ylang flower oil is often used as an essential raw material in the fragrance industry.

It thrives in the USDA Hardiness Zone 11, blooms repeatedly, and grows outdoors all year long.

Sweet Pea (Lathyrus odoratus)

Sweet peas make a lot of cut flowers. Sadly, breeders have been concentrating on increasing the number of blooms, not so much the scent. Opt for older sweet pea varieties with the spicy aroma that made them famous for fragrance.

Sweet pea is grown as an annual, and it’s a spring bloomer.

Daphne

Daphne is a lovely little shrub with shiny green leaves and flowers with a perfume-like scent with earthy undertones and sweet florals.

Many species are cultivated as ornamental plants in gardens, and people often use the smaller species in rock gardens. The entire plant, especially the berries, is poisonous.

However, having this plant in your garden has some advantages: beneficial insects are attracted to it, as are hummingbirds. It is also drought tolerant and deer resistant.

Daphne is a spring bloomer, and it can grow in USDA Hardiness Zones 5 to 8.

 Scented Geranium (Pelargonium graveolens)

While these pretty flowering plants are known for their lovely blooms, the scented geranium leaves give them their distinctive fragrance. Glands produce the odor at the base of the plant’s leaf hairs. When you break the leaves, the oil and fragrance are released. Some suggest it smells like apple, apricot, citrus, strawberry, or mint, depending on the variety.

 Jasmine (Jasminum)

Your whole yard can be fragranced by only one jasmine plant. The lovely evergreen leaves and star-shaped flowers, combined with their spicy, sweet smell, will undoubtedly make your garden incredible.

Jasmine flowers can grow in USDA Hardiness Zones 7 to 10 (Repeat Bloomer)

Peony (Paeonia)

Peonies are lovely enough to keep in your garden for their flowers alone, but the rich blooms still have a pleasant, clean fragrance that reminds you of roses. As cut flowers, they last a long time. 

Peony is a spring bloomer, and they grow in USDA Hardiness Zones 3 to 8.

 Heliotrope (Heliotropium)

Heliotrope has a delectable, almond, sometimes cherry vanilla smell, earning it the nickname “cherry pie flower.” To enjoy the heliotrope’s scent to its fullest, you’ll need a large clump of plants, but it’s well worth it. In colder climates, heliotrope is commonly grown as an annual.

Heliotrope is an annual plant that enjoys full sun, but it can accept afternoon shade if cultivated in a hot climate. They bloom from summer to autumn and bring a lovely splash of color and scent to an annual garden.

Butterfly Bush (Buddleia davidii)

This tough little shrub in white, purple, or pink, also known as summer lilac, endures drought, blossoms all season, and draws pollinators. It comes in dwarf varieties that won’t take up much space, and the newer ones aren’t invasive. Plant these in borders or large groups. This plant likes as much sunlight as possible.

Sweet Alyssum (Lobularia maritima)

The tiny plant is so densely coated with flowers that it resembles a cushion. The scent is one-of-a-kind, with a honey-like aroma and a floral touch. Sweet alyssum flowers bloom at the start and end of summer.

Gardeners grow Sweet alyssum as an annual, and it’s a repeat bloomer.

 Flowering Tobacco (Nicotiana)

Because of its strong, sweet smell, Nicotiana is often referred to as jasmine tobacco. For a scent that will permeate the night air, use the tall Nicotiana sylvestris. Many newer, shorter Nicotiana alata species have only a slight smell. Nicotiana is commonly cultivated as an annual.

Nicotiana will grow in the USDA Hardiness Zones 10 to 11 (Summer Bloomer).

 Paperwhites (Paperwhite narcissus)

Paperwhites have delicate, star-shaped flowers that last for weeks. White outer petals (perianths) with light yellow cups in the center are present in some, while others are pure white.

Paperwhites are a controversial bud because of their strong scent: you either like or dislike this kind of narcissus. These flowers should be planted as bulbs and bloom in early spring or late winter. It is then time to determine whether the musky smell is pleasant or unpleasant.

Most garden shops sell paperwhites that have already been potted; all you have to do now is add water! 

 Stock (Matthiola incana)

This spicy-sweet-scented annual flourishes in cold weather, thus plant it as soon as the weather cools in the spring. This plant will be fine in partially shady conditions up to the full sun.

These hardy flowers have a pleasant, clove-like smell. Stocks survive well as cut flowers, which is why florists like them. These flowers can make the loveliest bouquets! They come in various colors, including pink, white, purple, red, and yellow; they’ll provide you with lots of blooms during the season.

Stock can thrive in the USDA Hardiness Zones 7 to 10.

Freesia

Freesia is a common wedding flower, but it is seldom seen in gardens since it grows in the tropics. You can, however, grow freesia as a houseplant. Fruity, floral, fresh fragrance emanates from the tubular flowers.

Freesia is a spring/summer bloomer. It grows in USDA Hardiness Zones 9 to 11.

 Lavender (Lavandula spp.)

Lavender is one of the most distinct flower scents. The musky floral scent lingers on your palate when you cook with lavender. 

Lavender thrives in low to slightly fertile soils, so there’s no need to add organic matter to the earth before planting.

Lavender is a summer bloomer. It blooms in USDA Hardiness Zones 5 to 9.

Butterfly Ginger (Hedychium coronarium)

Butterfly Ginger is invasive in shallow water, waterways, and waterlogged areas in the tropics and subtropics. It’s hard to control once it’s introduced because it reproduces vegetatively. It is a popular ornamental plant due to its beautiful flowers.

The plants are vulnerable to frost damage. You can grow it in upland gardens and indoors as a cultivated plant. Plants prefer partial to light shade, but they can handle a lot of shade and even full sun if there is enough water. It can withstand seasonal droughts and more or less boggy environments once developed.

In Japan, the fragrant flowers of H. coronarium are commonly used to make garlands.

Carnation (Dianthus caryophyllus)

Carnations have a robust and spicy scent that is one of the most distinct flower fragrances. Be sure you buy a variety that claims it’s fragrant since certain types have been bred for bigger flowers and prolonged blooms but lack fragrance. It’s worth noting that not all carnations are perennial.

The flowers grow singly or in clusters of up to five in a cyme, are 1 1/4 in diameter, and have a sweet scent. The natural flower color is a vibrant pinkish-purple, but varieties of other colors, such as red, yellow, white, green, blue, and white with striped variants, have been produced. The hermaphrodite flowers are fragrant and are radially symmetrical.

Carnation can grow in USDA Hardiness Zones 6–9 (Summer Bloomer).

 Bearded Iris (Iris germanica)

Bearded irises, which beautify spring gardens with their colors and fragrance, come in almost all colors of the rainbow. The scents of iris flowers can be anise, fruity, or floral. With its cocoa smell and dark purple hue, ‘Dusky Challenger’ sets the bar for dark iris to new heights. ‘Belgian Princess’ charm comes from its big, heavily ruffled flowers and sweet perfume.

Meanwhile, ‘Variegata’ has fragranced purple flowers and yellow beards that remind you of grape soda.

Chamomile (Chamaemelum nobile)

Chamomile has a nice, grassy smell comparable to the scent of a cup of hot chamomile tea. Since it has a relaxing quality when inhaled, it is often used in aromatherapy. Chamomile’s dried flowers are high in flavonoids and terpenoids, contributing to its medicinal properties. The plant’s essential oils are also used in cosmetics. 

Chamomile’s ideal growing conditions are in cold, shady environments. If you have dry soil, this plant should grow very easily.

Chamomile grows in USDA Hardiness Zones 3 to 9.

Brugmansia or Angel’s Trumpet

Brugmansia is a big, woody, flowering plant that produces 8- to 9-inch upside-down blooms with the most potent citrus-floral fragrance at night. In colder conditions, bring indoors to overwinter. 

The huge, pendulous, trumpet-shaped flowers are the reason for its name, “angel’s trumpet.” Brugmansia flowers come in various colors: yellow, white, pink, green, orange, and red.

Flowers can be single, double, or can come in multiples.

USDA Hardiness Zones 9 to 11: Summer Bloomer

Hyacinth (Hyacinthus)

Nothing tops hyacinths in the greenhouse for an early spring scent. Plant them in well-drained soil in the fall to reap the benefits of their strong fragrance the following season. 

Hyacinths can grow up to a foot tall. Its flowers come in various shades, including red, purple, pink, yellow, and white. You can grow hyacinths near edges, in rock gardens, mixed borders, and even containers. Its bulbs can also be made to thrive indoors during winter.

Sweet Autumn Clematis (Clematis terniflora)

The sweet autumn clematis blooms in a cluster of tiny white flowers in the fall. Aside from their charm, the flowers have a subtle vanilla fragrance amplified if you step under the plant. In certain areas, this plant is intrusive.

This plant is a fall bloomer, and it grows in USDA Hardiness Zones 4 to 9.

 Gardenia (Gardenia jasminoides)

Gardenias are among the most fragrant flowers, and some people are sensitive to them. These plants should be cultivated indoors, where they can be transported and appreciated from multiple rooms, despite their tenderness.

Gardenia is a summer bloomer. Its USDA Hardiness Zones are 7 to 10.

 Lily of the Valley (Convallaria majalis)

With their lush, sweet scent, the lily of the valley flower is a common addition to perfume. This is a fast-spreading plant, so plant it anywhere you don’t mind it spreading, and then relish in the fragrance as it wafts through your yard.

It is a spring bloomer (USDA Hardiness Zones 3 to 7).

 Lilac (Syringa)

Lilacs have a wonderful fragrance and are easy to cultivate, making them a common shrub in gardens. They’re available in a multitude of colors, but the most common are white and purple. Lilacs are low-maintenance shrubs that are hardy and easy to plant. 

The fragrant flowers are attractive to butterflies and make excellent cut flowers. You should plant lilacs in direct sunlight in fertile, well-drained, humus-rich soil neutral to alkaline.

Magnolia (Magnolia grandiflora)

Magnolias have a strong, sweet, honeysuckle smell that can instantly transport you back to the first time they enchanted you. The Magnolia is a delicate tree that’s closely connected with the South. In cold climates, search for cultivars that have been specifically bred for the area.

Magnolia is a Spring Bloomer. It can bloom in USDA Hardiness Zones 4 to 9.

 Rose (Rosa spp.)

Without a rose, you can’t get a fragrant garden! It’s a widespread myth that roses’ scent has been “cultivated out.” While most roses were bred solely for shape and color, there has been a revival of interest in scented rose species, resulting in increased abundance in most garden centers. The scents may be musky, anise-like, or fruity, depending on the variety.

Rose can grow in USDA Hardiness Zones 3 to 11 (Summer Bloomer).

Roses come in a wide range of different colors, growth patterns, and temperature tolerance; there’s one for every yard. 

Look for “own-root roses” in Zone 3 that die back to the root in the winter and regenerate from the same rootstock. Look for species that don’t need a winter freeze to flower the following year in Zones 10 and 11. Roses enjoy the sunlight (at least six hours a day), as well as lush, adequately drained soil.

Garden Phlox (Phlox paniculata)

From middle to late summer, phlox produces large clusters of candy-colored flowers on long stems, making it one of the most ornamental plants. These flowers have a nice scent that is most noticeable on hot, sunny days. Butterflies and hummingbirds are attracted to this perennial boundary staple.

Wisteria (Wisteria sinensis)

Wisteria is a long-lived vining plant that produces purple/blue flowers in the spring and early summer. These cascading flowers appear stunning, hanging from a pergola or walkway. This vine grows quickly and aggressively, sometimes reaching a length of 30 feet or more, and is considered very strong.

Grow while the plant is inactive in the spring or autumn. 

You can grow Wisteria from seed, but it takes a long time for seedlings to attain maturity and bear flowers. It’s best to buy wisteria plants already grown or start from a cutting.

Even though Wisteria can flourish in partial shade, it is unlikely to bloom. The need for sunlight is critical.

Flowering Crabapple (Malus)

Hardiness Zones 3–8 are suitable for the prairiefire flowering crabapple. This tree thrives in full sun, which means it requires at least six hours of clear, unfiltered sunshine each day.

Some crabapple blossoms are fragrant, while others aren’t. Others have an apple blossom scent, and some have an exotic Oriental scent that smells like cinnamon or cloves.

Many people love the prairiefire flowering crabapple because of its showy red to dark pink flowers. And understandably so. Spring blossoms are a beautiful sight to see, with their breathtaking, long-lasting aesthetics. The prairifire flowering crabapple is disease-resistant and adaptable to various site environments, making its aesthetic appeal merely a bonus.

However, with its changing leaf color, this plant provides year-round allure. The leaves are deep green with purplish-red veins in the summer, lovely bronze color in the fall, and glossy maroon or reddish-purple in the spring.

Viburnum

Its blossoms have a scent that is a mix of lilac and vanilla. When spring arrives, Viburnum burkwoodii puts on a spectacular display of flowers. In warmer environments, the leaves are evergreen.

Add viburnum to your garden for year-round attraction and pleasant scents. Many sweet-smelling viburnums bloom in the spring, bringing with them a smell that can surround an entire yard. 

The Korean spice viburnum is perhaps the most well-known among the fragrant viburnums. Viburnum bodnantense and Viburnum odoratissimum are two other fragrant bloomers.

You can perfume your property all season long by selecting fragrant viburnums that bloom at various times in the spring.

Osmanthus fragrans

Teas and other drinks made with the flowers of the Osmanthus fragrans (commonly called sweet olive, fragrant olive, or sweet tea) are common in the Far East.

This flower’s extracts are immensely beneficial, and they’re used in some of the most costly perfumes.

It yields apricot-scented clusters of flowers that aren’t especially showy. It is a short, upright, evergreen tree or large shrub that can reach ten to fifteen feet tall in cultivation but can grow 20-30 feet tall in Asia’s natural environment (China, Japan, and the Himalayas).

It is drought-tolerant, deer-resistant, and moderately salt-tolerant.

 Night Scented Stocks (Matthiola longipetala)

In the landscape, night-scented stocks are a sensory delight. Night scented stock, also known as evening stock plant, is an older annual that produces a strong fragrance at dusk. These make superb cut flowers since they’re blowing beauty in muted pastel hues. 

Evening stock plants are straightforward to grow and flourish in various soil conditions as long as they get enough sunlight.

The fragrance of these blooms, on the other hand, is a major appeal. To reap the benefits of it, what you have to do is wait outside until the evening. The scientific name for the plant is Matthiola longipetala. The common name, which refers to the flower’s deeply sweet nighttime smell, is more explanatory.

REFERENCES

Pond Water Aquaponics – Growing Food in Your Water Garden

pond water aquaponics

What else could be more beneficial than growing vegetable/food crops using the water existing in your own backyard? This smart technique is known as Pond Water Aquaponics. You do not need to fertilize your crops or water them periodically because they will receive the nutrients and water from the pond. The most important output of small-scale aquaponics production is vegetables.

Over the past 30 years, the use of pesticides and synthetic chemicals has increased so much that it seems the growers have started thinking it’s impossible to grow something or anything without applying chemicals. This makes it hard for folks to even purchase vegetables without wondering whether they are poisoning themselves in the process. Luckily for us, it is possible to grow our very own vegetables in our yard by using our pond or water garden.

The System Required For Pond Water Aquaponics:

People having backyard ponds are rarely aware of the concept of growing veggies using that pond water. Ponds are the ideal source of nutrients, especially if they contain freshwater fish. 

To have a successful pond aquaponics system, you need two parts:

  • Aquaculture for aquatic animals – if you have a pond with any animals, you already have this part. This is where we will get the needed water and fertilizer for the plant.
  • Hydroponics for growing plants – This is the part where we need to get creative and find a way to grow food sources in the water from our pond.

Typical Components of an Aquaponics System: 

  • Rearing tank – This is traditionally where the fish are raised. For us, it is the pond.
  • Settling basin – This area is used to collect the uneaten fish food and remove biofilms and any other kind of sand, rock, or waste in the water. For us, the pond bottom or perhaps an intake basin will do.
  • Biofilter – A system that uses living elements like nitrifying bacteria to decompose the pollutants and nutrients and convert them into food for the plants. This might be a wetland filter, floating island, or any sort of strata that will encourage bacteria colonization.
  • Sump – The last and the lowest part of the system collects the additional water to recirculate it back to the tank or pond.

Typical Components of a Hydroponic System:

  • Media bed using cotton wool –  Often used by home gardeners. It contains a rectangular tray with compartments and holes at the bottom. The spaces are covered with wet cotton wool to conserve moisture. These are often used to start seeds inside the home or a greenhouse before it is warm enough outside to plant. Although the root areas will overgrow the containers, they can also be used as long-term planting structures for this system.
  • Nutrient film technique – This consists of a net cup filled with gravel or any other growing media, an extender, and a grow tube. The system works well for ponds and streams because it is easily installed, provides proper air and water circulation, and produces healthy plants.
  • Deep water culture – Utilizes no medium, just a mesh cup or pot with gravel to support the seedling. This can be used individually or within a tray system for multiple plants.

The Potential of a Constructed Wetland Filtration System:

Constructed wetland filtration systems are typically installed in or near bodies of water to utilize marginal aquatic plants to filter and clean the water. Water is pumped from the body of water, and either pushed up through the filter from the bottom or simply ran over the system’s top. We can utilize the wetland filter model to grow our vegetables rather than merely cleaning water using pond plants.

  • The pond water cleaning plants are now your vegetables
  • You might want to continue to use aquatic plants and simply add your vegetables to areas not already crowded with aquatic plants
  • You may need to clear aquatic plants and their roots out of the areas where you would like to grow your vegetables
  • Wetland filters are typically already in full sunlight areas, so they are great for vegetables
  • The vegetables never need water and get their fertilizer from the pond water.
  • They work very well for leafy vegetables like Lettuce, Spinach, Cabbage, Kale, Coriander, etc.
  • Wetlands are typically topped with small gravel just below the water level. For growing vegetables, you will likely need to add more gravel. The system is areas to create growing conditions suitable for your veggies. Aquatic plants typically like 1 “-10” of water over their roots, which is not the case with vegetables.
  • For the best results, you will want to start with seedlings rather than sow seeds into the gravel.

The Potential to use the Pond Edge or Border

Not every pond will have a constructed wetland filter, and not every homeowner will want to spend the time and money to build a wetland filter, so the previous section may not apply to you. One thing that every pond owner has is a pond edge or border. 

  • You will want to start with seedlings rather than seeds.
  • You will need to use some sort of container or gravel to hold the seedlings at the proper level at the edge of the pond.
  • Different plants will tolerate different exposure to water, so this is something that you will need to experiment with.

Vegetables and Herbs that are Good to Grow In and Around Ponds:

  • Lettuce, Tomatoes, Basil, Spinach, Okra, Coriander, Cucumber, Red Salad Onion, Peas, Cauliflower, Cabbage, Eggplant, Parsley, Sweet Potato, Kohlrabi, Reddish, Turnips, Melons, Capsicum, etc.
  • Basil (Ocimum basilicum), Chamomile (Matricaria chamomilla), Hedgehog coneflower (Echinacea purpurea), Feverfew (Tanacetum parthenium), Johnny Jump-up (Viola tricolor), Parsley (Petroselinum crispum), etc.

Benefits of Pond Water Aquaponics:

  • Sustainable integrated aquaculture and food production –  The world population is increasing at the rate of 1.05% annually, and freshwater availability in every region of the world is decreasing day by day. Using the pond aquaponics technique, you are conserving water, and you can grow protein-rich fish and organic veggies simultaneously.
  • Increased productivity and efficiency – You can produce everyday food in your place, saving trips to the market and using the existing water at your home to create edibles. The plants growing in your pond system are also helping to take nutrients out of the pond water, which will decrease the unsightly algae growth in the pond.
  • Organic Food – The vegetables and fish in your pond are entirely under your control. You will be able to ensure that no chemicals or additives are in your water, so you will never need to question the quality of the food you produce. Be sure not to use chemicals anywhere in the watershed of the pond, and you are all set. Gowing your own organics will be very invigorating and will save you money. The prices of organic products are 100-600% higher than the inorganic ones. It could be a profitable business at the same time as you might be able to sell some of your edibles.

Water Conservation:

Pond aquaponics is a new technique in Olericulture in terms of the use of minimum water instead of flood irrigation. Water resource shrinkage is one of the major global issues. Pond aquaponics and wetland-associated food production are conserving the water and purifying the used water. 

Aesthetic Value and Monetary Opportunities:

Almost one century back, there were no supermarkets where fresh fruits, vegetables, or ornamentals were available for sale. Everybody was dependent upon the food they used to grow on their land, the climate was the healthiest, and the pollution was minimum. Pond aquaponics provides the same opportunity with the least effort.

Additional Benefits of Constructed Wetlands:

“Plants will clean the water to be used for other plants” this is the formula behind growing food crops in the constructed wetland filtration system in your garden. There will be no need to add fertilizers to your plants as the water will supply all they need. Constructed wetlands are the absolute best water filters that we can have for our pond. Using them to grow some veggies is a no-brainer.

Control of Soil-Borne Diseases:

Growing your veggies in your aquatic environment will remove the need for any pesticides or insecticides as there will be no soil-borne diseases to disturb your crop.

Closed-loop, Low Maintenance System:

A well-thought-out and constructed pond aquaponics system can be the ultimate closed-loop, low-maintenance growth system that you can find. Over time, with a bit of upfront experimentation, you can develop a system that pretty much takes care of itself other than planting and harvesting.

Research-Based Evidence Regarding Pond Aquaponics:

  • Experiment for Nitrogen Transformation in Aquaponics using the two plants: Tomato (Lycopersicon esculentum) and Pak-Choi (Brassica compestris subsp. Chinensis). The Nitrogen Utilization Efficiencies (NUE) of both plants were compared symmetrically. The tomato plant NUE was 41.3% (due to the higher root surface area), and that of Pak-Choi was 34.3%. The abundance of the Nitrifying Bacteria in Tomato-plant aquaponics was 4.2 folds higher than Pak-choi. The third parameter measured was water quality. The water quality of tomato-based AP was better. The contribution of the tomato-based aquaponics into the environment, in the form of N2O, was 1.5-1.9%, determining the potential anthropogenic (N2O emission into the atmospheric) ability of aquaponics. (Hu et al., 2015)
  • A 54 days experiment was conducted at the “AIT, Thailand” to determine the impact of pond-water filtration effect on the following:
    • Growth media: lettuce grown on sand media followed by gravel was found to have the highest yield and head weight compared with the control treatment.
    • Yield of Lettuce: the partially filtered pond water supports an 87% higher yield compared with that of unfiltered water. (Sikawa & Yakupitiyage, 2010)

References:

Blidariu, F., & Grozea, A. (2011). Increasing the economical efficiency and sustainability of indoor fish farming by means of aquaponics-review. Scientific Papers Animal Science and Biotechnologies, 44(2), 1-8.

de Farias Lima, J., Duarte, S. S., Bastos, A. M., & Carvalho, T. (2019). Performance of an aquaponics system using constructed semi-dry wetland with lettuce (Lactuca sativa L.) on treating wastewater of culture of Amazon River shrimp (Macrobrachium amazonicum). Environmental science and pollution research, 26(13), 13476-13488.

Hu, Z., Lee, J. W., Chandran, K., Kim, S., Brotto, A. C., & Khanal, S. K. (2015). Effect of plant species on nitrogen recovery in aquaponics. Bioresource technology, 188, 92-98.

Palm, H. W., Knaus, U., Appelbaum, S., Goddek, S., Strauch, S. M., Vermeulen, T., . . . Kotzen, B. (2018). Towards commercial aquaponics: a review of systems, designs, scales, and nomenclature. Aquaculture International, 26(3), 813-842.

Pantanella, E. (2008). Pond aquaponics: new pathways to sustainable integrated aquaculture and agriculture. Aquaculture News, May.

Rakocy, J., Masser, M. P., & Losordo, T. (2016). Recirculating aquaculture tank production systems: aquaponics-integrating fish and plant culture.

Salam, M., Asadujjaman, M., & Rahman, M. (2013). Aquaponics for improving high-density fish pond water quality through raft and rack vegetable production. World Journal of Fish and Marine Sciences, 5(3), 251-256.

Sikawa, D. C., & Yakupitiyage, A. (2010). The hydroponic production of lettuce (Lactuca sativa L) by using hybrid catfish (Clarias macrocephalus× C. gariepinus) pond water: Potentials and constraints. Agricultural water management, 97(9), 1317-1325.

Somerville, C., Cohen, M., Pantanella, E., Stankus, A., & Lovatelli, A. (2014). Small-scale aquaponic food production: integrated fish and plant farming. FAO Fisheries and Aquaculture Technical Paper(589), I.

The Complete Beginner’s Guide to Soil Augmentation

Soil Augmentation

The sad state of soil is the common cause of failure in vegetable gardens, herb gardens, secret gardens, and even rain gardens. So whether you are a gardener, a professional landscaper, or a farmer, improving the soil is your number one priority in growing a healthy garden or maintaining an attractive landscape. The soil is the lifeblood of your plant’s health. Though not everyone is blessed with good soil, everyone can improve their soil fertility.

Soil augmentation, soil amendment, or soil conditioning are synonymous and mean the same thing. If your goal is to recover or improve the soil quality, structure, nutrients, and pH by adding organic and inorganic materials to make it fertile and conducive for growing plants, you’ve come to the right place. That is the true definition of soil augmentation. This article will teach you all you need to know to get your soil back into tip-top shape. We will use soil augmentation to describe this action throughout this article for commonality.

Before diving right in on what organic and inorganic materials we can use, let us first cover soil basics. By having a basic understanding of soil, we will know how to augment or treat our soil to bring it back closest to its ideal condition. But if you are already familiar with soil, feel free to skip this section and jump right into the soil augmentation topic.

In this article, we will talk about:

  • What is ideal soil?
  • Understanding the properties of soil
  • Soil Augmentation: The secret to regaining your soil’s fertility
  • Types of Soil Augmentation
  • Soil Augmentation Application

Shall we dig in?

What is an Ideal Soil?

The soil is the foundation of every successful sustainable garden, and it’s also the key to the most successful and breathtaking landscapes. Vegetables, perennials, shrubs, and trees grow best when the soil is fertile.

The soil supports and creates an environment for plants to grow by providing:

  • water to carry nutrients to the plants
  • air needed by the roots for respiration
  • nutrients such as Nitrogen, phosphorus, potassium, sulfur, calcium, etc.
  • microbes that feed on water, air, and nutrients and in-turn aid the roots in absorbing the nutrients
  • serves as a base or anchor for the plants

For optimum plant growth, the soil should ideally contain 50% solids and the remaining half a combination of air and water. The solids contain 45% minerals: sand, silt, or clay or their combination, and 5% organic matter, which is residue from plants, animals, and other organisms.

The other half, consisting of 50% water and 50% air, creates the “pore space.” The pore space affects the plant’s ability to take up nutrients and grow its roots. For example, the pore space is compressed if the soil is compacted, limiting the roots’ movement, which affects their ability to get nutrients from the soil. Understanding the concept and their relationship will help us balance what contributes to healthy plant growth.

In reality, most of us don’t have this ideal soil mixture due to topography, climate, existing soil texture, and even soil management practices. Soil texture refers to the size of the particles that make up the soil and determines whether it is sandy, silty, clayish, or loamy. Soil management may refer to tilling practices that increase pore space or poor drainage, leading to soil compaction and reducing the pore space.

Understanding the properties of soil

Soil has several properties such as its physical makeup, chemical and biological content, color, etc. But our focus will only be on properties that influence plant growth. This will help us understand and appreciate the areas where we can intervene and help restore the soil’s fertility through soil augmentation methods.

Physical Properties

This is the physical makeup and attributes of soil. The essential characteristics that contribute to plant growth can be classified under soil texture and soil structure. Soil texture influences its nutrient contents and ability to hold and drain water. Soil structure also affects the soil’s ability to hold and drain water, the movement of air and water, its ability to absorb nutrients, and how easy it is for the plant roots to grow.

Texture

As mentioned, soil texture pertains to the relative size of the particles that comprise the soil’s minerals, which also determines the soil type.

  • Sand (2.0 to 0.05mm in size) – is porous (water and air can pass easily), cannot hold nutrients, is light, and feels gritty when rubbed between fingers.
  • Silt (0.05 to .002mm in size) is more fertile than sand and clay, adds body to the soil, and feels smooth to the touch like flour.
  • Clay (less than 0.002mm in size) – is heavy and retains nutrients and moisture (and does not drain well); it is sticky to the touch and can be molded.
  • Loam – the combination of sand, silt, and clay that offsets their adverse effects. This is the type of soil every gardener would like to achieve because it is fertile, easy to work with, and has good drainage.

Structure

Soil structure describes the soil particles’ arrangement how they clump together and form aggregates. The aggregates are held together by organic matter such as decaying plants and animals. The arrangement of the soil particles creates spaces or pores in between. The pores’ size influences air and water movement in the soil structure. This movement is also called “aeration.”

A well-structured soil is friable or crumbly to the touch, and it is easy to work with. The well-structured soil is perfect for seedlings as it allows the tender roots to establish a robust rooting system. A well-structured soil can be achieved by the proper mixture of solids (sand, silt, and clay), good tilling practices, and soil augmentation.

A poorly structured soil is compact and tends to collect water. Because the pores are tight, it creates poor drainage and aeration. The result is soil that stunts or prevents plants from growing.

Chemical Properties

The soil’s chemical properties are essential to soil fertility and plant growth, and it influences the soil’s capacity to store and release nutrients such as Nitrogen, phosphorus, potassium, etc.

The soil’s pH level determines the soil’s chemical property, and the soil pH affects the availability of nutrients to the plant. The soil can be acidic (pH less than 7), neutral (pH of 7), or alkaline (pH more than 7). While most plants grow best in a neutral pH environment, certain plants still prefer an acidic or alkaline habitat. To know which plants grow at a particular pH level, you may download The pH Reference of Plants by the Hawaii Cooperative Extension Service of the University of Hawaii.

The soil’s pH level may change over time as minerals are leached away.

When this happens, the soil may become more acidic. Or because of conditions where the soil is often dry, high soluble salt content develops, making the soil alkali. In both cases, soil augmentation comes in to correct the pH imbalance.

Biological Properties

The soil’s biological properties cover the microbes and other living organisms in the soil’s organic matter. The organisms break down the organic matter, the decaying plants, and animals and make the nutrients available for uptake by the plants. The soil organisms also store the nutrients in their bodies, preventing nutrient loss by leaching. Other organisms, such as the earthworm, help rework the soil through burrowing, ingestion, and defecation of sediment grains.

Soil Augmentation: The secret to regaining your soil’s fertility 

Soil degrades and loses its fertility over time due to excessive rainfall that causes flooding or erosion, drought, improper use of pesticides or fertilizers, and unsustainable farming practices that deplete the soil nutrients or affect the soil structure. The soil’s pH may also change, which affects the type of plants that can grow in your landscape or garden.

This is where soil augmentation comes in. Adding organic and or inorganic material to the existing soil will improve soil properties such as:

  • water holding capacity
  • drainage
  • aeration
  • availability of nutrients and
  • living conditions of soil organisms

All these contribute to plant growth. Almost all types of soil can be made fertile using this method. The amendment factors can be applied to the soil locally and by anyone who can handle a shovel.

Types of Soil Augmentation

Soil augmentation can either be organic or inorganic matter. Sometimes it can be a combination of both.

An organic matter comes from something living, such as a decaying plant, animal, or organism. This can be humus, compost, mulch, aged manure, biosolids, peat, wood chips, hardwood bark, sawdust, shavings, and wood ash.

Inorganic matter is mined or man-made. This includes sand, profile soil conditioner, peat gravel, lime, sulfur, vermiculite, and perlite.

Organic Augmentation

Organic matter is the most effective and practical remedy for improving soil conditions. A small part of organic matter can significantly impact the soil’s physical, chemical, and biological properties. It provides aeration, better drainage, holds water well, and can keep nutrients. It addresses a lot of soil issues.

Humus

Humus is the black, spongy, and jelly-like carbon matter that remains after dead plants and animals have decayed and microorganisms have completed processing and breaking down the organic matter to its final state. This process takes a considerable amount of time or years to complete. Humus has many mineral nutrients that aid in soil health and fertility. Since hummus is rich in carbon, this makes it ordinarily acidic.

Benefits of hummus:
  • it retains the nutrients in the soil like Nitrogen, phosphorus, calcium, etc.
  • improves moisture retention making it more drought resistant
  • traps oxygen needed for respiration by the roots and microorganisms
  • feeds and protects microbes
  • prevents erosion by helping bind the soil particles
  • helps root structure by improving soil porosity
  • stabilizes temperature and
  • corrects soil PH.

Compost

Also called “black gold,” compost is decomposing organic materials recycled from kitchen waste or plant scraps, dried leaves, branches until it is crumbly and looks and smells like soil and not rotted vegetables. Compost adds nutrients and aids in microbes’ activity to release more nutrients to the soil, and compost can balance the soil’s pH level.

Benefits of compost:
  • retains moisture
  • encourages microbial growth that produces humus
  • suppresses plant disease and pests with the help of beneficial microorganisms
  • Reduces the need for fertilizers

Mulch

Dried leaves or cuttings, shavings, or any organic material placed as a layer or covering on top of the soil. Realize that when applying fresh cuttings, they will compete with the plants in taking up the Nitrogen in the soil as the cuttings decay. To address this, supplement the soil with Nitrogen. Most mulches tend to raise the pH level of the soil slightly.

Benefits of mulch:
  • improves soil moisture by reducing evaporation and water run-off
  • regulates soil temperature
  • reduces soil erosion and compaction
  • helps in soil nutrition as it decomposes
  • acts as a weed control

Aged Manure and Biosolids

Aged manure is animal dung from cows, horses, goats, sheep, chickens, and even bats composted for 4-6 months. Aged manure is a good source of Nitrogen, Phosphorus, and Potassium, and it is also sometimes mixed with the compost. Animal manure tends to raise soil pH because it contains calcium and magnesium.

Fresh manure is not advisable as it contains high uric acid levels, which may burn the roots. It may also have pathogens that may contaminate the plant and make it harmful for human consumption, especially when eaten raw.

Biosolids are sludge recovered from sewage treatment plants that have been physically and chemically treated. Biosolids are often high in salts and may have the potential for heavy metals, and it is not advisable for use in the vegetable garden. Biosolids also have a high chance of raising the soil’s pH level, especially with those treated with lime at the processing stage to stabilize the organic matter and reduce pathogens.

Benefits of manure and biosolids:
  • adds nutrients such as Nitrogen, phosphorus, potassium, and other micro-nutrients
  • conditions the soil by loosening compacted soil
  • reduces run-off or leaching of nitrates

Peat

Peat is known as “turf,” which are brown deposits of partially decomposed organic materials formed in wet, acidic conditions of bogs, peatlands, mires, moors, or muskegs. It is acidic (low pH level) and ideal for acid-loving plants like blueberries. It is an excellent amendment for sandy soil because of its water-retention property.

Benefits of peat:
  • helps in nutrient retention
  • increase in water retention makes it ideal for sandy or rocky soil; also stabilizes clay soil
  • provides good aeration

Wood Chips, Hardwood Bark, and Shavings

Wood chips and shavings are the small excess pieces or waste materials resulting from cutting or chipping trees, branches, lumbers, or other wood materials. Hardwood barks are the outer covering of hardwood trees discarded when cutting tree logs to make lumber.

Wood chips, hardwood barks, and shavings are applied as layers over the soil top like mulch. But they are denser and take longer to compact and break down. Note that wood chips, hardwood bark, and shavings need Nitrogen to decompose. Because it is competing with the plant in using up this nutrient, this may result in nitrogen deficiency to the plant. To avoid this, a nitrogen supplement may be required. Like mulch, it tends to raise the pH level of the soil. But using pine bark may cause it to be more acidic.

Benefits of wood chips, hardwood bark, shavings:
  • improves soil moisture
  • regulates soil temperature
  • reduces soil erosion and compaction
  • helps in soil nutrition
  • acts as a weed control

Inorganic Augmentation 

Because inorganic matter is extracted or processed, they are not as sustainable and more expensive than organic augmentation. They also need large volumes to make significant changes to the soil’s physical properties. Inorganic matter is used to increase aeration and drainage, decreasing the water-holding capacity.

Sand, Profile Soil Conditioner or Pea Gravel

Sand is a granular mineral particle in size, profile soil conditioner is a ceramic-type particle that is porous, and pea gravel is a smooth small rounded stone the size of a “pea” vegetable.

Benefits of sand, profile soil conditioner, or pea gravel:
  • improves water and nutrient holding capabilities at the root zone
  • improves aeration
  • reduces compaction

Lime

There are two types of lime used for soil augmentation, agricultural lime and dolomite lime. Both limes contain calcium, with dolomite lime having extra magnesium. Lime is generally used to correct the pH of acidic soil.

Benefits of lime:
  • improves pH of soil by making them less acidic
  • aggregates soil particles and improves aeration

Sulfur

A mineral that, when in contact with soil bacteria, changes to sulfuric acid and lowers the pH of the soil—used to either bring soil with an alkaline pH to neutral levels or make a neutral pH soil become acidic.

Benefits of sulfur:
  • makes the soil more acidic
  • reduces the sodium content of the soil

Vermiculite

A mineral that resembles mica in appearance that is dark brown to golden brown in color. When heated, it forms flakes with a pH of 7.0 and can soak up 3-4 times its volume in water, making it ideal for water-loving plants. It is generally used with potting-mix soil.

Benefits of vermiculite:
  • Improves aeration
  • aids in water retention
  • increase oxygen levels at the root zone
  • reduce compaction
  • ease drainage when soil is saturated

Perlite

Perlite is an amorphous volcanic rock which when heated, expands like popcorn. It is whitish in color with micro air bubbles making it light and able to keep moisture. It has a pH of 6.6 to 7.5. Best for indoor cactus plants. It cannot be used with garden soil since it will be crushed. Best used with a potting mix like peat moss.

Benefits of perlite:
  • improves aeration and drainage
  • keeps the soil loose
  • prevents compaction

Soil Augmentation Application

It is not realistic to change the texture of the soil. A large volume of a soil type (sand, silt, or clay) will be needed to achieve an ideal soil condition. Focus instead on improving the soil structure. Do this by addressing the organic content, which will impact the soil’s porosity. Soil porosity is ideal at half pore space and half solids, with the pore space being filled by half air and half water. This change will also influence the nutrient uptake and microorganisms living in the soil.

Of the organic matter mentioned, humus, compost, aged manure, and biosolids are often used to condition the soil and bring it to its fertile state and neutralize the pH. Do not use peat, sand, vermiculite, or perlite. Peat makes the soil acidic; sand will harden the soil like concrete, and vermiculite and perlite are expensive. Most inorganic matters are generally used in potting mixes or seedling beds.

When doing soil augmentation, work on the top 6 to 8 inches deep of your soil. Place 2 to 3 inches of organic matter or 1 inch if it’s manure or biosolids and thoroughly mix into the soil to distribute evenly. Simply dumping or burying it in the soil will not work, and it may interfere with air and water movement and root growth. It has to mix with the existing soil to allow the organic matter to clump and achieve aggregation. If mulches, wood chips, hardwood bark, and shavings will be used as an organic matter mix, it must be composted first. Otherwise, it is suitable for surface application only.

Because organic matter such as compost, humus, and manure breakdown easily, it is best to apply and till the organic matter yearly at the start of the planting season. This ensures that your soil maintains its fertility throughout the season.

To get a clear picture of your soil’s health, you may conduct your test based on the Soil Testing Methods Manual by FAO. Or, for a more thorough analysis of your soil pH and nutrients, you may take a soil sample and send it to the nearest soil testing lab.

The pH level can be corrected using lime or sulfur following the procedure used when applying the organic matter. Note that it may take six months for the lime to react to the soil. The best time to apply lime is during fall. For nutrients lacking in the soil, this can be supplemented by applying the corresponding fertilizer. It is recommended to do a soil test at least once every 2 to 3 years.

With these recommendations and incorporating soil augmentation into your workflow, you can provide a healthy environment for your vegetables, perennials, shrubs, and trees to grow. This also raises your chances of success in any garden or landscaping project you plan to undertake.

Edible Landscape Design

Edible Landscape Start

Gardeners used to keep their edible plants—vegetables, fruits, and herbs—separated from the rest of the landscape. Too much healthy, fertile land gets used for shrubs and lawns nowadays. Why not use that soil for growing your food? You can turn your garden into something more than a beautiful space if you know proper edible landscape design.

Why Should You Landscape with Edibles?

Less than two percent of the U.S. population are farm and ranch families. People in the suburbs usually spend their days tending to an ornamental lawn and pointless house plants. Why do all of this when edibles are more appealing, provide an edible harvest, and need no additional upkeep?

 A productive landscape is lovely, but a scenic one that draws in beneficial insects and is wildlife-friendly and tasty to eat is even better.

 Edible landscaping is a healthier, gentler approach that blends conventional landscaping with row cropping to produce an aesthetically appealing and environmentally sustainable landscape.

 The Purposes of an Edible Landscape

 Your edible front yard doesn’t have to be purely practical—it can also be a creative, beautiful sight! Although cultivating and preserving a lawn is mindless (and polluting), tending to an edible, intentional landscape will be more engaging and fulfilling.

 It Adds Something Interesting to Your Entire Landscape

 When your apples, strawberries, or raspberries ripen, it’s an inspiring and exciting time in your yard! In contrast, a conventional landscape will not be as remarkable and doesn’t change that much. Believe me, when harvest time comes, you will have your neighbor’s attention. Finally, you can gain something from your yard rather than just put it into your yard. 

You Can Enjoy Fresh, High-quality Food

 Did you notice the slight difference in the flavors of some vegetables and fruits? This is because most products you buy undergo different treatments to promote their growth and travel from afar on ships and trucks to get to your table.

 When you grow your own, you will experience flavors and colors like you likely havent\’t seen before. You will know everything that went into your edibles and be very proud and confident when serving guests. 

Since you are in charge, you can ensure that your edible garden plants will be 100% organic, free of chemical fertilizers and commercially used pesticides. You will finally know exactly what went into your food. 

You Can Spend Less on Groceries 

You can save money by planting an edible garden. You want to be economical, and gardening allows you to live that way. Why are you paying so much for market fruits and vegetables when you can have cleaner, fresher, healthier alternatives in your yard? 

Not only will you be sure of what you are eating and save money on food, but you will also save money on transportation since you will surely cut down on your trips to the local marketplace. 

If you have a large yield, you can freeze or can your excess fruits and vegetables to use year-round. 

You’ll Be Healthier Since It Is a Form of Exercise.

 Are you looking to burn some calories? Do you need physical activity to break the monotony of sitting at home or in the office all day? Maybe it’s time to get your hands dirty with gardening; it is a great way to burn calories and get some sunshine on your face!

 Gardening is a moderate-intensity activity. According to the Centers for Disease Control and Prevention (CDC), completing an hour of light planting or yard work burns about 330 calories—better than walking slowly for an equal number of hours.

Moreover, you can prevent high blood pressure with only 30 minutes of moderate-intensity physical exercise several times a week. According to the National Heart, Lung, and Blood Institute, gardening or raking leaves for half an hour to about 45 minutes are two examples of meeting the prescribed amount.

When your skin gets sun exposure while you’re outside, your body produces vitamin D. According to the National Institutes of Health, this vitamin, present in milk and fish, aids in absorbing calcium, a mineral necessary for healthy bone formation.

You Are Helping the Environment

By not using commercial fertilizers, pesticides, and insecticides, you help maintain the soil’s natural, healthy state. 

 By growing your fruits and vegetables, you help minimize carbon emissions and waste from getting food from commercial farms. 

 When purchasing food from grocery stores, keep in mind that they travel a thousand miles before being served. This affects the food’s freshness and taste, but it also releases toxic levels of greenhouse gases and pollution associated with air freight (and other modes of transportation) into the atmosphere.

 Plus, you’ll be cutting down on waste from packaging like plastics and cardboard.

With all of the good you alone can do for our environment, just imagine if everyone who owned a piece of property or had access to one would plant some fruits and vegetables. Not only would this have a significant impact on their neighborhoods, but it might also force the big commercial food producers to change their ways and become more environmentally conscious. 

Tips on Designing an Aesthetically Appealing Landscape

 To plan your edible garden, you don’t need to be an artist or know how to draft a landscaping blueprint. Some people sketch thorough plans, while others scribble notes on a scrap sheet of paper and then wing it when they’re in the yard.

 An excellent approach to creating an edible landscape design is to take a traditional landscape design and replace some of the plants with edible plants. Varying colors and textures of edibles can have a very similar effect to planting perennial gardens.

Remember, there are annual edibles and perennial edibles. Plant-like lettuce, carrots, kale, peas, and beans will only be a one-year plant, while strawberries, blueberries, raspberries, apples, pears, and cherries will be long-term perennial plants. 

 This doesn’t need to be a change your world tomorrow sort of activity. Start small and choose one problem area or one annual flower bed and turn it into a food-producing space this year. See how it goes; maybe you will be inspired to do a bit more each year until you find yourself handing out veggies all around town. 

Factors to Consider When You’re Landscaping for Edibles

There is a technical side of edible landscape design in addition to the creative side. When it comes to preparing the edible landscape, there are five main factors to keep in mind:

 Microclimates

 Identify which regions of your yard get the least and most sunshine. Use a compass or enter your address into suncalc.net, and be sure to include shade-casting items like buildings and trees.

Most fruits and vegetables need a minimum of six hours of sunlight a day. That said, many edible plants can thrive in the shade.

Some edible plants can survive in almost any condition. For example, when grown in a fully shaded, damp location, ostrich ferns yield delightful fiddleheads in the spring. And in partial shade to full shade, various edible greens will grow well, like kalevitamin greens, lettucechervil, spinach, chicory, and more. These are called cool-season plants.

Existing Soil Condition

Where in your landscape do you have less-than-ideal soils? Too muddy, too dry, too rocky, too sandy, too contaminated, etc.? 

You should take each area into account. You can plant your edibles into the best soil areas this year and compost and mulch the less desirable locations for a year to improve soil quality.

 Water Sources

 Where does your garden get its water? During the very dry spells, you may need a hose or two to keep some of the edibles alive. You could always carry a bucket to the far reaches of the yard, but it’s easier to prepare ahead so that you don’t have to, and your edible landscape will thank you for planning ahead.

 Possibility of Stepping

 It would be best to minimize the compaction in your newly planted edible areas. Walking and running equipment over the ground compacts the soil and makes it less desirable for any plant. Heavily compacted soils are less porous, have smaller pore sizes, and have a higher density.

 Water drainage and infiltration will decrease in compacted earth because larger pores transfer water through the soil more efficiently than smaller pores.

 Single-reach beds (around two feet wide and used against walls or fences) or double-reach beds (about four feet wide or as far as the arm would stretch to the center from all sides) can work if you want to avoid stepping in your plant beds.

 For large planted borders larger than 4 feet, you should have hidden pathways or stepping stones with double or single-reach distances so you can navigate every part of the landscape for upkeep without stepping on and compacting the soil and crushing tiny plants. You want to find and use your defined stepping sites, so you aren’t encouraged to walk on your bed.

 Type of Plants

 What plants would you like to grow? 

 It’s time to pick the plants for your landscape layout. Now is when your creativity can really shine. First, create a list of the edibles you enjoy the most and then figure out how and if you can get them to grow in your yard. Once you have determined that they will grow in your area, now you must figure out the best location on your property to ensure they do their best. Consider the shape, size, and leaf color, as well as the flowers or fruit they grow (if any).

 Many edible plants prefer a meadow style (mostly annual vegetables developed from seeds) or a forest (understory perennials and woody shrubs).

 It’s worth noting that many forest plants thrive well when a tree falls, and the resulting gap provides them full access to sunlight for a few years.

 Continue reading to find out more about planting edibles.

 Foundation Planting for Edibles

 Foundation plantings are essentially beds of plants (shrubs) planted along with house foundations. You can categorize them into three sections: A planting for the entrance, the corners, and plantings that link them.

For foundation planting, we recommend black and red currants, black raspberries, gooseberry, bush cherry, and rugosa rose. These can take the place of your traditional spirea, barberry, juniper, and yews.

 Currants grow quickly, tolerate moderate shade, have lovely fruits (red currants), and are fragrant (black currants).

 Why Planting Berries Are a Great Idea

 Black raspberries are perfect for the spot under the windows due to their shade tolerance. They’re also straightforward to maintain, and lastly, the fruits look and taste amazing!

 Strawberries deserve a spot in your front yard because they are highly nutritious, productive, take up little space, are a pleasant ground cover, and have deep roots that support a slope and slow drainage.  

Keep in mind that strawberries tend to send out runners, and raspberries tend to spread rather aggressively, so don’t plant them near more delicate plants.

 In 1992, the University of California breeding program produced Seascape strawberries. Since they don’t produce runners, they won’t look messy. They’ve proven to be much more effective in the edible landscape, where you want plants to stay put. 

 Plants for Privacy Screening

When we live in an urban or suburban setting, we often need to build a privacy buffer. Edible plants may serve as a living screen that can last even longer than a fence while increasing biodiversity.

For instance, a thick canopy of dwarf cherry trees will provide a gentle barrier between your front yard and the street. These will have lovely white flowers, beautiful fruit that resembles Christmas tree decor, and a fascinating bark in the spring.

Some great privacy-screening plants are shrubby and herbaceous varieties like elderberry, asparagus, serviceberry, Nanking cherry, gooseberry. And if you have a lot of space, hickory, chestnut, persimmon, and pawpaw are large trees with thick foliage.

 Edible Landscaping with Vegetables

 So, which vegetables are suitable for edible landscaping? There are so many.

When adding vegetables and inedibles in the same garden space, use your best judgment and creativity to achieve the aesthetic you want in the gardens around your property.

Vegetable Color Selection

I’ve enjoyed giving my edible front yard a unique style by selecting an annual color palette. You have plenty of options, so you can mix and match depending on your mood!

You can plant oregano, garlic, turnips, sweet alyssum, and cauliflower for white.

 Some purple vegetables are beetroot, red kale, ‘Purple Beauty’ bell pepper, eggplant, red cabbage, and chives.

 You have plenty of options for yellow ones: yellow bell peppers, yellow chard, yellow cherry tomatoes, yellow California poppies, sunflowers, and calendula.

 Similar to yellow, you have lots of choices for red edibles! Red bell pepper, cherry tomatoes, red California poppies, red chili pepper, red leaf lettuce, red chard, and nasturtium would give your garden a splash of red.

 You can plant butternut squash, tomatoes, pumpkins, and papaya for your orange group.

 As for green, it’s the easiest color to find in any edible garden. But if you’re looking for specifics, broccoli, basil, kale, parsley, collards, sweet potato, and zucchini are great.

Landscaping with Flowers and Herbs

Among the most straightforward edible garden additions are flowers and herbs. You can have elegance and functionality by simply replacing an ornamental flower garden with nutritious herbs and flowers. 

Some favorites are bronze fennel and white cosmos, dill with pink cosmos, and basil with many other flowers.

If you want fragrance, lavender, chamomile, lemon balm, sage, and rose are great, especially surrounding the walkway.

Some edible flowers are zucchini blossoms, calendula, anise hyssop, hibiscus, chives, lavender, elderberry, nasturtium, pansies, Johnny-jump-up, and runner beans. 

Common Problems in Edible Landscaping

The most challenging aspects of creating an edible landscape are the sunlight conditions and animals like rabbits and deer. You can effectively manage deer by netting or at least an eight-foot fence, which is difficult to do in many front yards. There are organic deer repellant options that work fairly well.

A three-foot-tall chicken wire fence with a one-inch or one-and-a-half-inch mesh will keep rabbits out. It’s also a good idea to bury a few inches underground to discourage rabbits from getting in your garden. 

Dogs and motion-detecting sprinklers can be good deterrents as well.

Deer-proof Edibles

Unfortunately, there aren’t many edible landscaping choices in deer country. Hungry deer are erratic, consuming even the most “deer-resistant” foods. 

Consider more drastic deer defenses such as walls and fences if planting resistant crops do not keep deer out of your backyard. The use of tall deer fencing somewhat counteracts the visual charm of the scenery. Even then, here are some plants to consider.

 It’s safer to start with plants that deer don’t want if you want to keep deer away from your open garden. When wild food options are scarce, deer can “browse” on almost everything. However, some garden edibles are less appealing to these insatiable eaters than others.

Some plants, like rhubarb, have toxicity that deer avoid. Root vegetables (that need digging) and prickly vegetables (e.g., cucumbers and squashes with hairy leaves) are unappealing to deer. Strong-smelling cultivars like garlic, onions, and fennel are unpalatable to deer.

When it comes to deer, it’s preferable to landscape with perennials because even deer-resistant annual crops can become irresistible to them for some reason.

Please remember that none of these are deer-proof when young, so you should keep them safe.

Deer-resistant perennials include fig, asparagus, goumi, pawpaw, and rhubarb. While, for culinary herbs, you have dill, chives, fennel, lemon balm, lavender, mint, parsley, oregano, rosemary, thyme, and sage.

Some preferred plants for the medicine garden are fennel, lemon balm, lavender, and thyme. 

Finally, you can plant cucumbers, onions, eggplant, and tomatoes for deer-resistant vegetables.

Light Conditions

Walk around your landscape at the start of each growing season to see if the changing growing conditions fulfill the needs of your vegetables, fruits, and herbs. 

Changes in sun-shade patterns, low-water zones, poorly drained areas, overcrowded garden beds that need expansion, and plants that need division are all things to look for. 

Most vegetables would not thrive in the dry areas under your eaves or near trees, where their roots will struggle to get water. 

Most edible plants are vulnerable to disease, so pay attention to them and address any problems as soon as they arise. One of the most effective ways to prevent diseases from spreading is to remove diseased vegetation.

Money

Perennials can make up the majority of a long-term landscape, but plants are costly. Buying seeds is much less expensive if you don’t mind bare soil for a bit. 

You can purchase plants over many years if you want to distribute the high cost. You can often plant quickly-growing annuals to fill up the vacancy before your perennial plants mature.

However, there’s also a bright side: in a limited, nice space, you can produce an incredible amount of food to save you money for groceries.

Time

Are you willing to spend time maintaining your edible landscape? Taking out the grass and replacing it with something else would need more maintenance to keep it clean. If you’re short of time, try substituting edibles for the existing landscaping plants while keeping the lawn untouched. You can always mulch over some lawn to kill the grass and prepare it for next year.

 Annuals require more care than perennials to maintain their aesthetic quality. It takes a lot of time to keep annual vegetables clean and weed-free. 

 If you don’t plan how to fill the spots after reaping, you’ll end up with empty spaces. This is what fast-growing perennial plants and mulch are good for! 

 Conclusion

 We hope you find this article inspirational and informative when you start planning your edible landscape design. Once you prepare your garden space, it will soon produce an incredible amount of fresh, organic, delicious food!

REFERENCES