Windmill Pond Aeration a Comprehensive Not-so-breezy Guide

windmill for pond aeration

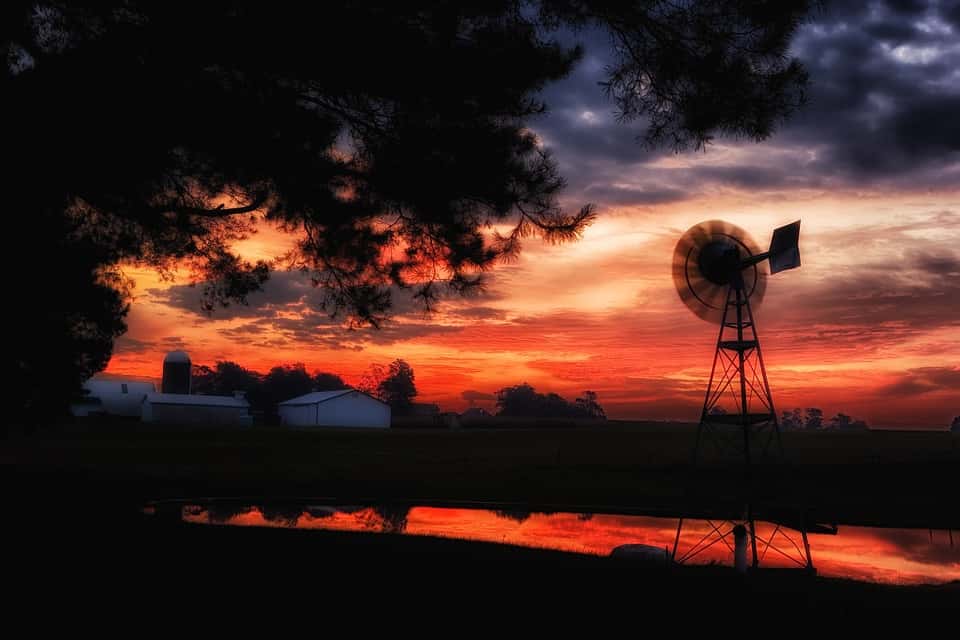
Windmill pond aeration is the best solution to improve the quality of water in your rural pond. Simply put, water needs oxygen to keep ponds clean and preserve ecosystem equilibrium. We’ll explain how windmill pond aeration works, why you’ll benefit from it, its pros and cons, and some things to keep in mind when getting one. 

This article will tell you important information about these energy-efficient means of pond aeration. We can say you’ll be blown away by the things you learn here!

Why You Need Windmill Pond Aeration

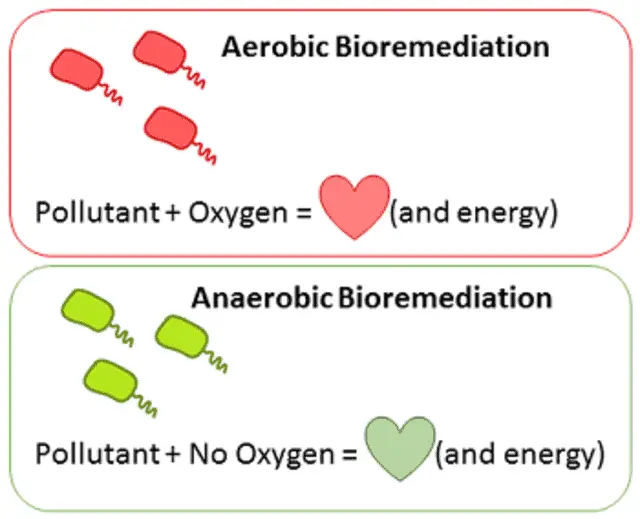
Oxygen is a natural cleaner— the key ingredient in maintaining water quality. To further explain: An oxygen-rich pond is more capable of getting rid of waste. The pond’s waste contains “deposits” from animals, such as fish and geese, and additional waste material that comes from stormwater runoff and animals and plants that perish in the pond. When it comes to breaking down waste and bringing it into solution, aerobic bacteria (oxygen-utilizing bacteria) perform almost 20 times faster than anaerobic bacteria. These broken down wastes can be flushed out or used to grow new life while in solution.

This maintenance system is operational all year round and provides your pond with a continuous oxygen supply.

During summer, oxygen is supplied by surface winds. However, these winds supply only the upper part of the water with oxygen. What happens is that the water separates into two layers and the lower layer remains suffocated.

The rising air bubbles of a bottom aeration system effectively move the water to the top. By aerating the pond’s bottom during the winter period, you allow continuous circulation and maintain a level of oxygenation that ensures fresh water all year round. 

Windmill aeration is a cost-effective solution for providing bottom aeration to your natural bottomed, large pond, which will significantly improve your pond’s water quality.

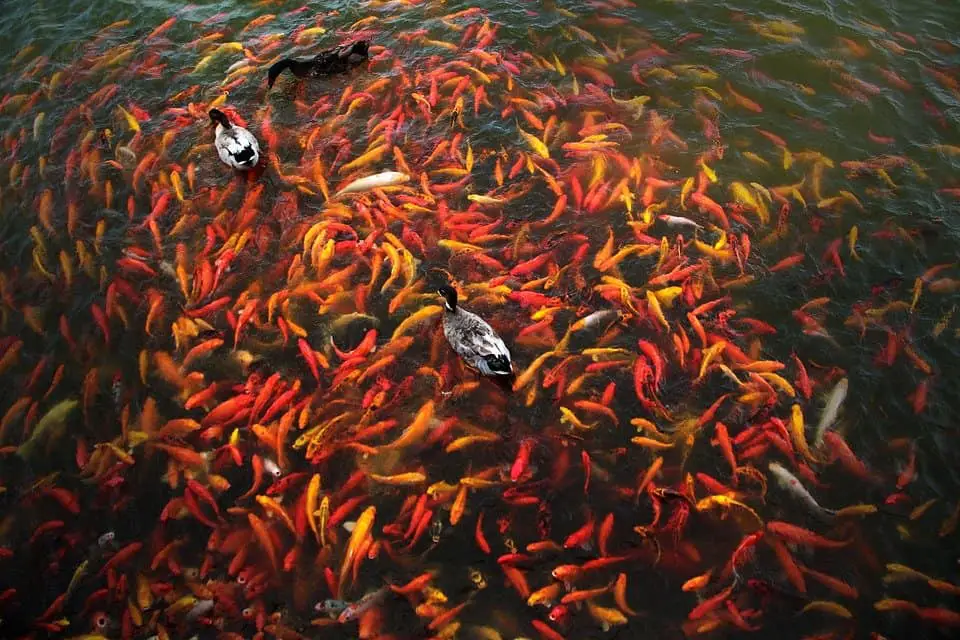
Aeration will be beneficial to all ponds. Since all aquatic life use dissolved oxygen in surface water, oxygen levels are commonly used to determine the “health” of ponds.

What is Windmill Pond Aeration?

Windmill pond aerators can be your way of letting nature do all the work of aerating, circulating, and destratifying your pond.

Wind-powered aerators take the place of electric aerators, which can cost anything from thirty to fifty bucks a month to run. These windmills will pay for themselves in just a few years, and these are ideal for aerating faraway ponds without access to electricity!

Windmill aeration adds oxygen to all of the water, including the bottom. This is very important because once the lake has oxygen near the bottom, new larvae of insects, snails, fish, and beneficial bacteria can start living there.

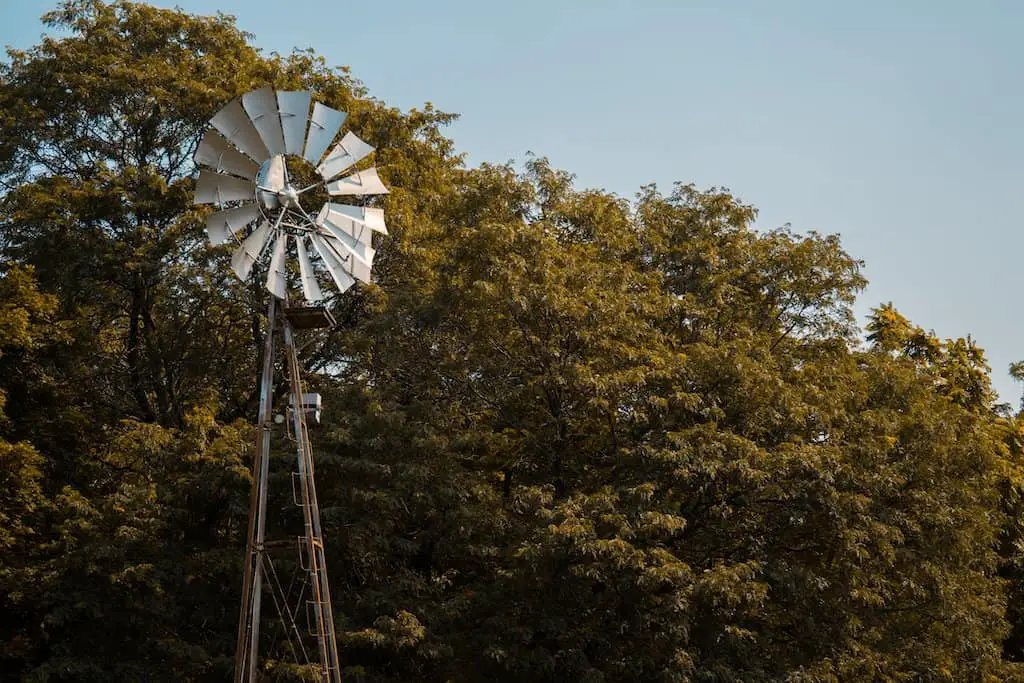
For the past 20 years or so, the most typical windmill tower has been a three-legged, twenty-foot, galvanized metal structure. A 20-foot windmill’s average footprint varies between 84 and 100 inches, based on the specific model bought.

There are also four-legged windmills, such as the Outdoor Water Solutions Windmills and Mescan Windmills, that include a square-based footprint of varying sizes depending on the height required.

How Do Windmill Pond Aerators Work?

Bottom aeration is achieved simply by using air compression through an airline connected to an aeration diffuser at the pond’s bottom. The production of air bubbles at the bottom releases oxygen that moves the water from the deepest part of the reservoir up into the atmosphere.

Therefore, the large volume of water moved to the surface by increasing air bubbles makes the water remove toxic gases from the atmosphere, and the water picks up more oxygen while it is on the surface. Aeration accelerates the process of oxidation or burning of pollution in the water. The result is fresh, clear, and bright water with a sweet aroma that supports the abundant life of fish and eliminates algae and excessive weeds.

What Are the Types of Pond Aerators?

How else can you introduce dissolved oxygen into a pond? Some ways to do that are through wind, mechanical aeration, and diffused aeration.

The type of aeration used in a pond will directly impact the pond treatment process. What mixture of aeration methods depends on the form of a pond, organic loadings, surface area, and depth.

  • Wind-driven surface aeration: when a breeze blows over the pond, oxygen is dissolved into it. This is a natural, small-scale version of mechanical agitation systems.
  • Mechanical aeration systems disturb the water surface, making spray and waves, allowing oxygen from the air to be captured into the pond. Surface fountains, paddle wheels, and rotating brushes are examples of such mechanical machines.
  • Diffused aeration is when a blower system is used to disperse air through the water. Fine bubbles are formed in the air stream; the smaller the bubbles, the more oxygen is transferred.

Solar Power vs. Wind Power for Aeration

Both wind and solar power are excellent choices for pond keepers trying to save bucks in the long run or if a remote water garden needs aeration. Despite both being renewable energy sources, their aeration capacity is not always comparable.

Solar energy, for example, is a much more readily available renewable energy source that is often less costly and simpler to install for standard garden ponds. Unlike the wind, which can be uncertain, you can usually rely on at least a little sunlight every day as long as trees don’t shade your solar panels.

If you don’t need a lot of aeration, a good solar-powered aerator might be a better choice than wind power.

Wind-powered aerators are unmatched in airflow vs. energy efficiency if you have a massive pond in a remote area. The top-of-the-line models can easily offer aeration at least six CFM suitable for ponds greater than 30,000 gallons or bodies of water larger than 1 acre.

You’d have to buy a much larger solar panel (which will set you back a great deal of money) to get something close to this level of CFM with solar power.

Not only that, but top-of-the-line solar panels also necessitate specialized repairs if they have problems, leaving you without aeration until you can hire a professional.

In contrast, you can easily manage windmills with a bit of DIY and a manufacturer’s extended warranty for repairs.

Advantages of Windmill Pond Aerators

Cost-effective, Renewable Energy

Wind power, like solar power, is an environmentally sustainable and green energy source that allows you to be entirely off the grid. You won’t need a power supply (electrical outlet), and the only expense would be the original buying price, which will save you a lot of money in the long run.

Getting Rid of Algae

Aeration reduces algae growth by removing their food (nutrients), nitrogen, ammonia, and soluble phosphates from the surface and out of the pond. Iron and manganese oxidize and leave the solution at the pond’s bottom. Once the oxidation of these metals begins, they no longer dissolve again. 

Aeration increases aerobic bacteria that consume the other nutrients that algae and weeds need to grow. Aerobic bacteria eat these foods before weeds and algae can, forcing them to starve and die.

Aerobic bacteria are the good guys: they breathe in oxygen and breathe out CO2 like us. They have a massive appetite for devouring any organic item. Aerobic bacteria begin to eat the organic sediment at the bottom of the pond and continue to eat as long as they are given oxygen. 

The more aeration in the winter, the fewer algae in the summer.

Removes Unwanted Waste and Odors From the Pond

Aeration also removes ammonia, hydrogen nitrate and sulfide gases, and foul odors from the pond. These chemical compounds are the byproducts of natural biochemical processes in living organisms.

Potential for Massive Aeration (Airflow)

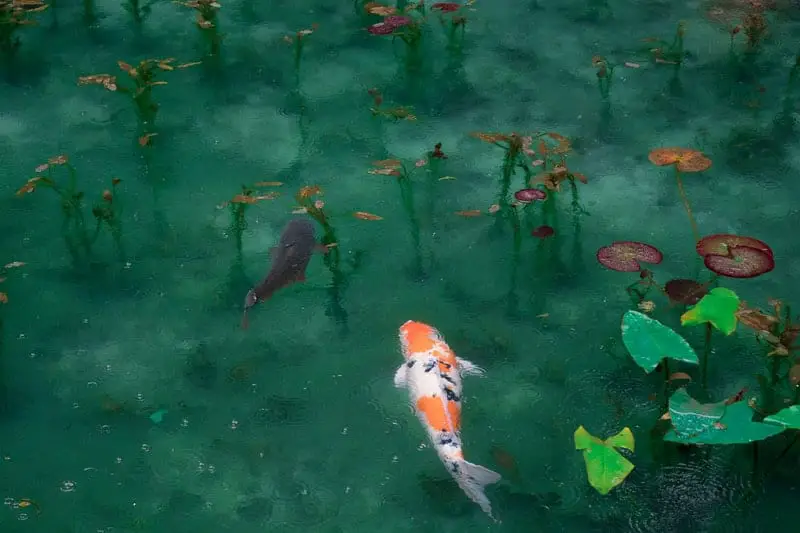
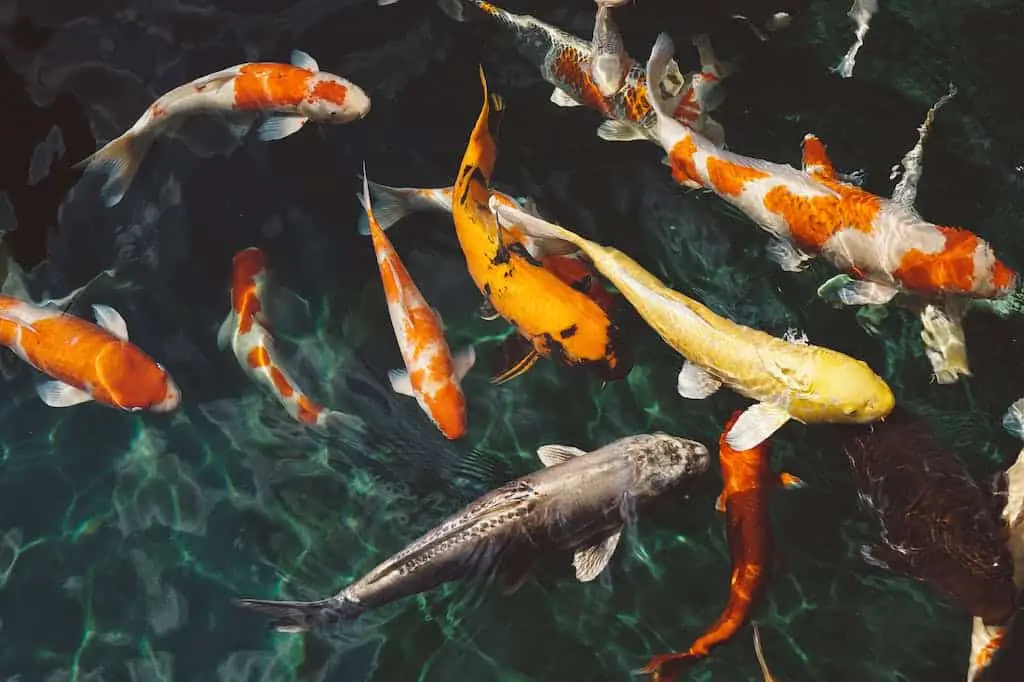
Wind-driven aerators are highly suited for generating a good amount of airflow, which can oxygenate waters ranging from one to twelve acres. Smaller aerators can oxygenate koi ponds in the garden, while higher-end models can aerate even the most extensive natural ponds.

It’s possible to install it in a remote area.

Windmill aerators can be positioned entirely off the grid—in fact; they work optimally in this setting. 

You’ll need as much exposure to air currents and as much height as possible to get the most power out of your windmill. This requires minimum obstructions—two aspects that a remote installation will always offer.

Disadvantages of Windmill Pond Aerators

It can be unsightly in your landscape.

Windmills will undoubtedly stick out in your landscape, especially if the area is small. Be prepared for a change in the pond’s surrounding area’s aesthetics if you want to get a windmill pond aerator.

Furthermore, many neighborhoods might not allow them, so they are likely only suited to rural or industrial settings.

Unpredictable

The disadvantage of windmill pond aerators is that the air pump compressor is driven by wind. Most windmill aeration systems can work with wind speeds as low as five miles per hour, but if the wind is slower than that, there will be no aeration.

Well, what can you do about it?

Depending on your pond’s size and depth, a wind and solar power mix could be the best choice. When the wind blows, a wind-powered option will provide the aeration and oxygen, and in less windy conditions, a solar-powered pump will provide the backup aeration. Both are environmentally safe and cost-effective ways to aerate your pond, and neither uses electricity.

Things to Consider When Choosing Wind-Powered Pond Aerators

These are some things to keep in mind when you’re about to purchase a windmill pond aerator.

Airflow & Aeration Potential (CFM)

Ensure the windmill you buy will give the right amount of airflow (oxygen) for the amount of water you have. If this will be your primary source of aeration and you don’t have a backup system, we still suggest getting a slightly bigger model that can deliver more CFM even in low wind conditions.

The air volume that can come from a pressurized storage container using an air compressor is measured in cubic feet per minute (CFM). Top-of-the-line wind-driven aerators would be capable of producing at least three CFM of airflow, which will be sufficient for ponds larger than an acre or with a capacity of 30,000+ US gallons.

Also, realize that you may need more than one bottom diffuser if your pond is not circular.  Bottom aeration works best in deep, circular ponds.  The deeper the pond, the more pressure it will take to push air to the bottom, so you will need to check the psi rating on your windmill.  Diffusers are more effective in deeper ponds because the air bubbles spread out wider in the water column as they raise to the surface, turning more water.

If your pond is more shallow or you have an oval or oddly shaped pond, you may want multiple diffusers to be sure that you are turning the water sufficiently.

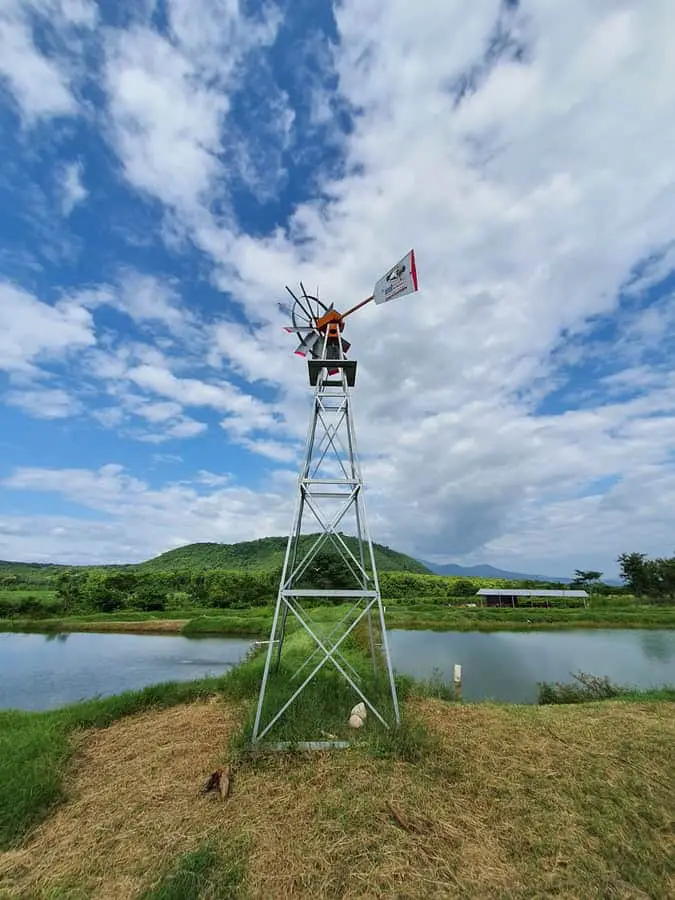
Height of Tower & Blade Length

Windmill aerators come in many sizes, from nine-foot towers for backyards to larger than 30-foot towers for big outdoor ponds. Finding a sweet-spot for optimal aeration is critical because air currents’ intensity increases with height when there are fewer ground-level blockages.

For instance, if you’re putting a smaller tower in your garden and have a seven-foot-high enclosing wall, you’ll need a tower that’s at least seven feet tall to capture upper-level air currents. This is why windmills are very well fitted to remote sites, where height is less of an issue, and you can go even bigger to improve aeration capacity without bothering the public.

So, what’s the sweet spot for height? The head of your windmill needs to be higher than any visible barriers and as far away from structures that would possibly impede incoming winds.

Additionally, you can also consider the tower head where you’ll find the moving blades—the bigger the blades, the more energy you’ll produce. However, you’ll need significantly more wind, as a general rule.

If your blades are too big, they’ll need lots of wind to work and might even stop working entirely in light winds. Similarly, if they’re too small, they may not be able to generate enough energy to allow for proper airflow. 

While fan head sizes vary by manufacturer, for higher remote towers, we suggest a fan head size of 60-80 inches, and for backyard towers, a fan head size of 30-60 inches.

Bearing Fatigue and Reliability

Bearing fatigue is the primary weakness of wind-driven windmills and turbines. This is a problem for all existing turbines around the world!

Bearings support the turning shaft that the turbine’s blades are attached to. You can expect bearings to last around ten years until you need to replace them. And larger bearings usually last longer than small pieces. If you’re lucky (or you nailed the installation and maintenance), they can last twenty years.

But you should understand that larger bearings decrease total machinery reliability by increasing friction, whereas smaller bearings are more efficient but can fatigue faster.

Take your time to research windmill manufacturers and find one with a good track record of bearing stability and durability. Make sure the windmill is engineered against bearing fatigue, which ensures bearings have been custom sized for that model for greater durability.

As with purchasing any large piece of equipment, it is advisable to find a manufacturer with a good reputation for customer support, and that has experts who are willing to help, should you run into trouble in the future or if you have questions during installation.

MYDC0204.JPG

FAQ About Windmill Pond Aeration

What are possible problems you can have with windmill pond aeration?

It changes the overall look of your landscape.

One of the most glaring issues that can arise after installing a windmill pond aerator is transforming your landscape’s general appearance. Windmills need complete access to the wind for peak efficiency, which implies a windmill would be the most prominent element of your landscape. A windmill would better blend in larger landscapes since there is more space for other features.

Stormy weather

Although windmills are built to harvest the wind’s energy, too much wind will destroy and ruin them. Extremely strong gusts can endanger the windmill and residents in the surrounding area, as dropping blades can be fatal. Checking the windmill pond aeration system’s wind rating will help you avoid damage from storms and strong winds.

Insufficient wind

One of the most serious issues with a windmill pond aerator is that it operates only when there is wind. Because of this, windmill aerators can only be used in locations where there is a consistent supply of wind. You can go with mechanical or electric aerators for better pond circulation if it is located in a low-wind environment.

Clogs

Similar to other forms of pond aeration, the windmill pushes air through tubes that feed the diffusers. Debris and particulates present in the pond water may clog this diffuser, as well as the tubing that feeds it, over time. Cleaning is expected regularly to ensure that the air supply system is in good working order.

Leaks

Animals, and other general wear and tear, can cause aeration tubes to leak in a windmill aerator. A leak reduces the pressure pushing air into the airline diffuser, which decreases the amount of oxygen incorporated into the pond. Leaks may be reduced by burying or sealing above-ground parts of aeration tubing.

What size of windmill compressor is right for my pond?

Like electrical aerators, you’ll want to ensure the optimum CFM of a windmill aerator is appropriate for the scale and volume of your pond. Blade length and tower height are critical factors to consider, but they won’t matter if your aerator doesn’t supply enough air circulation for your pond.

While there is no definite formula for measuring CFM to water volume, the list below gives a rough guide.

  • 1000-4000 US Gallons: 0.50-0.80 CFM
  • 4000-8000 US Gallons: 0.80-1.20 CFM
  • 8000-16000 US Gallons: 1.20-2.00 CFM
  • 16000-32000 US Gallons: 2.00-4.00 CFM
  • 32000 US Gallons or more: 4.00 CFM and more 

Is wind power acceptable for backyard ponds?

Wind power is ideal for huge open areas where you can catch lots of air currents without being obstructed by walls, trees, or nearby structures since they can quickly minimize winds. Installing turbines in backyards has the downside of needing additional height for maximum airflow, which can turn them into an unsightly feature in your landscape.

There are smaller-scale windmill solutions available that can provide aeration even without much height if you’re trying to push aeration for a smaller pond and don’t need huge air pressure quantities. Some of these are repurposed ornamental windmills attached to an aeration device to provide adequate airflow for backyard ponds.

That being said, a word of caution: any form of turbine aerator is far more challenging to set up than a solar-powered or electric-powered aerator. To complete the extra measures required to get the equipment together and in proper working order, you’ll need some DIY experience.

What about low wind speed conditions? Will I still have aeration?

Wind-driven pond aerators typically do not have any backup, so you have no aeration if there is no wind. 

There are ways to combine electric and windmill aeration systems so that you can have the electric aerator work if the wind stops, but this would require access to electricity.

If you have a pond that needs continuous aeration, such as a giant koi pond, a backup aerator is often recommended in case the primary one fails. A standard electrical aerator can be kept on hand to use as a manual backup device should your primary aeration fail.

A healthy pond will not deteriorate quickly if the wind stops blowing for a bit.  The real concern would be that if you are in a hot location, your pond is shallow, and you have many fish, the warm, shallow water would not hold much oxygen for the fish if the windmill stopped for a long time.

If you don’t have access to a power supply, a solar-powered device can be used as a backup to a wind-powered system – but depending on the size of your pond, this may be very costly.

But don’t worry: even in extremely low wind conditions, the top-quality windmill models will still have excellent air capture. In conditions with winds as low as seven to ten MPH, most will manage to provide aeration, albeit at a decreased rate.

Your windmill’s minimum running speeds are a significant measure of efficiency since better-optimized blades and designs can generate power even in low pressure.

Conclusion

Hopefully, this article has helped to inform you about windmill pond aeration. If you have a large pond that does not have electricity nearby and you live in a rural area, then windmill aeration might be perfect for you.

Pond aeration is the single best thing you can do to improve your natural bottomed pond’s water quality, so installing a windmill will definitely help. Windmill aeration is also safe and very eco-friendly, so not only are you helping your pond, but you are also helping the environment.

REFERENCES

[1] Usgs.gov. 2021. Dissolved Oxygen and Water. [online] Available at: <https://www.usgs.gov/special-topic/water-science-school/science/dissolved-oxygen-and-water> [Accessed 17 March 2021].

[2] Michiganseagrant.org. 2021. Dissolved Oxygen and Lake Stratification | Teaching Great Lakes Science. [online] Available at: <https://www.michiganseagrant.org/lessons/lessons/by-broad-concept/physical-science/dissolved-oxygen-and-lake-stratification/> [Accessed 17 March 2021].

[3] Clemson.edu. 2021. Aeration, Circulation, and Fountains | College of Agriculture, Forestry and Life Sciences | Clemson University, South Carolina. [online] Available at: <https://www.clemson.edu/extension/water/stormwater-ponds/problem-solving/aeration-circulation/index.html> [Accessed 17 March 2021].

[4] Module 19: Treatment Ponds And Lagoons. 2021, https://files.dep.state.pa.us/Water/BSDW/OperatorCertification/TrainingModules/ww19_ponds_wb.pdf. Accessed 17 Mar 2021.

[5] “Windexchange: Small Wind Guidebook.” Windexchange.Energy.Gov, 2021, https://windexchange.energy.gov/small-wind-guidebook.

[6] “Pond Ecology.” Penn State Extension, 2021, https://extension.psu.edu/pond-ecology. Accessed 19 Mar 2021.

[7] Glaze, William H. et al. “The Chemistry Of Water Treatment Processes Involving Ozone, Hydrogen Peroxide, And Ultraviolet Radiation.” Ozone: Science & Engineering, vol 9, no. 4, 1987, pp. 335-352. Informa UK Limited, doi:10.1080/01919518708552148. Accessed 19 Mar 2021.

[8] “Iron And Manganese In Private Water Systems.” Penn State Extension, 2021, https://extension.psu.edu/iron-and-manganese-in-private-water-systems.

What is Hard and Soft Landscaping?

Landscaping is the act of transforming our outdoor spaces to suit our individual needs. The entire landscaping process uses many different materials, but they all can be classified as either hard or soft. Many people ask What is Hard and Soft Landscaping and this article will try to explain this concept a bit further and provide you with some examples.

Hard vs. Soft Landscaping

I’m not sure when this hard and soft landscaping concept came about, but it’s simply people trying to categorize things as we are apt to do. It’s a fine idea, but not always very useful or clear. Everyone probably has their favorite, but it’s a lot like apples and oranges when comparing the two. Hardscapes are generally easier to maintain, while softscapes are prettier, more environmentally friendly, and harder to maintain. But, it probably doesn’t matter, since you need both to have a great landscape.

Any landscaping that you do will include both aspects. You will need to blend the two components to give your yard a balanced and integrated look and feel. Having too much of either will significantly affect the appearance of your property.

Hardscapes

hard and soft landscaping
hardscapes

In general, hardscapes are all of the unchanging, nonliving things in your landscape: hard, inanimate objects made of rocks, bricks, concrete, plastic, or metal. Hardscapes can be natural or man-made materials.

Do not go overboard with hardscaping, or your yard will start to look like rigid, lifeless architecture. In

Examples of hardscape materials:

  • Brick (actually made of clay or concrete)
  • Block (concrete)
  • Rock
  • Asphalt (tar and rock)
  • Concrete (actually just a mix of rock and minerals)
  • Gravel (really just broken up rock)
  • Edging (plastic or metal, stakes, spikes)
  • Wood? (more later)
  • Pumps
  • Piping
  • Wire
  • Clamps
  • Hardware
  • Draintile (clay, concrete, plastic)
  • Landscape fabric (plastic)
  • Furniture (fabric, metal, plastic, concrete)

Hardscaping Features

masonry buildings

In landscape architecture, hardscaping refers to hard components—tough, long-lasting, large, and stable materials that give structure, add height, or define a path. Hard landscaping is important because it retains the parts of your property. Hardscaping is like the bones of your landscape. It’s the starting point; it is the foundation upon which everything else is based.

Examples of hardscape features:

  • Outdoor Kitchens
  • Pools
  • Patios
  • Walkways
  • Stairs
  • Decks
  • Stepping Stone Paths
  • Gazebos
  • Driveways
  • Fountains
  • Decorative walls
  • Statues
  • Retaining Walls
  • Irrigation Systems (piping, clamps, plastic heads, timers, etc.)
  • Landscape Lighting Systems (transformers, wire, fixtures, etc.)
  • Fencing
  • Decking
  • Pergolas
  • Arbors
  • Gazebos
  • Grottos
  • Ponds and Waterfalls? (more later)
  • Fireplaces
  • Benches

Sometimes, hardscaping can be multipurpose. You can build a small retaining wall to act as additional seating space, or you can install flat stone pieces to act as stepping stones through a garden and to keep down weeds in blank spaces. Hardscape features can also affect the environment in both good and bad ways. Paved surfaces prevent the soil from absorbing runoff, but paving and stone can also protect the soil and prevent erosion.

Maintaining Hardscapes

patio at night

For the most part, hardscapes take care of themselves; that’s the beauty of them. They are not living and typically don’t change a heck of a lot. Your hard surfaces may need some cleaning over time, and patios and walkways tend to need some re-grouting or sanding, but if installed correctly, they should last a lifetime.

I believe that rocks and boulders are the stars of the landscape world. They come in a wide range of sizes, shapes, and colors, they last forever, they can be used to decorate or to retain, you can walk on them, sit on them, drive on them, run water over them, etc. The possibilities are endless; rocks are fantastic!

If you’re a fan of low-maintenance landscaping, weed barrier covered with gravel or washed stone is some of the most maintenance-free bed treatment you can get.

Softscapes

front yard hard and soft landscapes
plants are softscapes

Softscapes are all of the living and changing things such as trees, grass, water, flowers, mulch, etc. If you go too crazy with softscapes, your yard will look like an overgrown mess.

Examples of softscape materials:

  • Flowers
  • Trees
  • Shrubs
  • Grasses
  • Vines
  • Herbs
  • Aquatic plants
  • Soil?
  • Mulch?
  • Water? (we will address these three later)

Soft Landscaping Features

mostly softscapes

In landscape architecture, softscaping refers to all of the pretty plants that fill out our gardens, cover our bare ground and help to soften our hardscapes. If hardscapes are the bones, then softscapes are the skin. Softscaping elements are all of the living plants in your landscape. Softscapes bring life and natural beauty to your landscape and are an essential component.

With softscaping, the possibilities are almost endless. The vast quantity of plants available to us, each with its own individual appearance and characteristics, can make your head spin.

Add to that the potential combinations of plants, and deciding on a few plants for your front yard, can turn into a two-day event. Add to that the fact that softscapes change with time, and it becomes a real live puzzle.

Sofstscapes are continually changing, from month to month and year to year; they just don’t stop. Until they do, and then it is time to find yourself some new softscapes.

The advantages of softscapes are their beauty, adaptability, and environmental value Plants are the only thing saving our earth from destruction. Plants are cleaning our air, our water, and our soil. Plants can shade us, block the wind, hide a fence, block sound and provide us with a dazzling display of beauty.

The downside to plants is that they will likely need to be maintained and that one day, they will die. Softscapes, unlike hardscapes, typically only do well in certain zones and conditions, whereas hardscapes don’t care where you put them; they will likely remain unchanged.

Maintaining Softscapes

front yard softscapes

Unlike their hardscape counterparts, softscapes need our attention. At least most of them do. Most softscapes are plants, and plants need water, nutrients, and air to live. Most plants also need pruning over time. They just keep growing and changing, so you need to keep an eye on them.

Most softscapes are alive, which is their benefit and their downfall. They help us maintain our environment, and in return, we must help them. They also, in a roundabout way, lead to pollution.

We humans tend to dump tons of harmful chemicals on our lawns and garden beds every year in an attempt to care for our precious plants. We wrongly assume that these plants need to be doused in chemicals to survive.

More to Discuss?

I know that this article is all about soft and hard landscapes, and I think that we have pretty well covered that, but there are a few more topics that I think we need to address. I’m sure that these are not right there at the top of your list, but having been in the industry for so long, I have given them a bit of thought.

Blankscaping / Airscapes?

some blank spaces

I feel that this is the part of landscaping that many homeowners and landscapers alike have trouble with. It is a fairly basic concept, but it seems to get lost over time (literally). What I am referring to is the hallowed blank space or separation.

Most landscapes start with plenty of separation and blank spaces, but people forget about its importance over time.

Don’t get me wrong; I love having my flowers hang down onto my patio, I love how a creeping juniper will trail down into a waterfall, I love the way that a clematis will cover and hang from an arbor.

All of these things are great, and there is a time and place for everything, but when that everything starts growing into everything else and overtaking all of the blank spaces, we need to acknowledge it and fight back. Once everything is allowed to grow together, we lose the distinction and importance of the individual features. Rocks and fountains get buried, edging gets hidden, the lawn is growing into the beds, and the beds grow into the lawn.

It is not all about the materials, hard or soft; it is also about how they work together and apart to create a pretty and functional landscape. I have seen way too many over-planted and overgrown yards over the years. They might have looked nice for the first year or two, but now they are a mess.

Please find some time to pull out the pruning shears and the edging shovels and reclaim some of that precious blank space that has been lost over the years. One good long day of separating things that used to be separate and uncovering features that have been hidden will bring your landscape back to life. Believe me; it will be time well spent.

The Gray Area

Okay, now we step into the gray area. I want to discuss the materials that may or may not fit into either category of hardscapes or softscapes. You may have noticed above that some of the listed materials had question marks behind them. These and others are the ones in question.

Hardscapes and softscapes are fine, but are they classified by how they look, how they feel, or what they are made out of?

Here are the Gray items:

  • Wood Mulch, bark chips, etc. – most people consider mulch to be a softscape, and I’d somewhat agree because it comes from plants and is light and biodegradable, but what about wood for other uses?
  • Wooden Fencing – I guess it is a hardscape made out of a softscape material?
  • Timber Retaining Wall – another hardscape made from a softscape?
  • Water – seems like a softscape, but a pool seems like a hardscape?
  • Pond – seems like a softscape if it is unlined and natural, but lined with rubber and rock, it seems hardscape-ish.
  • Waterfall – again, if all that I see is water flowing through plants, I think softscape. If it’s water rolling over rocks, I think hardscape?
  • Rubber pond liner – it’s soft like a softscape, but EPDM is entirely synthetic, so I guess it would be a hardscape?
  • Soil – Many classify this as a softscape, but then is a berm considered a softscape?
  • Clay Bricks – Bricks are hardscapes, but clay is a type of soil, so is it a hardscape made from a softscape?
  • Sand – sand is technically very tiny stones, so it must be a hardscape, but when I see it in a landscape, it sure looks like a softscape.
  • Rubber Mulch – okay, we are calling wood mulch a softscape, but wood timber a hardscape, and we are calling rubber a hardscape, so I guess rubber mulch can be a softscape?

Alright, maybe I’m splitting hairs here. We can leave these gray areas alone and call them whatever we want.

Conclusion

a mix of hard and soft landscapeing
hard and soft landscape from above

I guess when it comes down to it, the hard and soft designations come more from how the product or material makes the landscape appear to you. What sort of feel do you get from it? If I see a line of rock in a wall or a pond, I want to add some plants to soften the feel of it. If I see a large bed of plants, I’d love to add a boulder or three to give it a bit of structure. I often look at the softscaping as the glue or the paint that blends the hardscapes into one another and softens the entire look and feel of an otherwise rigid structure.

What is Bioremediation?

Biological treatment is possible by harnessing plants and microbes’ natural ability to absorb phosphorus, nitrogen, and other nutrients to break down contaminants through a biological process known as bioremediation.  Bioremediation is used to capture and remove contaminants using wetlands and is practiced worldwide.

Biofiltration for Wastewater Treatment

Biofiltration was introduced in 1893 in England as a filter for wastewater treatment. Since then, it has been successfully used to treat different types of water. Biological treatment has been used in Europe since the early 1900s to filter surface water for drinking purposes and is receiving more worldwide interest. Biofiltration is common in wastewater treatment, greywater recycling, and aquaculture to increase water quality while minimizing water replacement.

A bed of media, a biofilter, is the material in which plants grow to form a biofilm layer. Biofiltration is commonly called a fixed-film process. The biofilm is formed by different microorganisms, such as yeast, bacteria, or fungi, macro-organisms such as insects’ larvae, protozoa, worms, and extracellular polymeric substances. The biofilm is slimy and muddy.

The water that is to be treated can be intermittently applied or continuously applied over the media, using upflow or downflow. Usually, a biofilter has two or three phases depending on the feeding strategy.

  • A solid-phase — media
  • A liquid phase — water
  • A gas-phase — air

Organic matter plus other water components are distributed into the biofilm as the treatment happens. Biofiltration processes are aerobic, which means that microorganisms require oxygen for metabolism. Oxygen is supplied to the biofilm with water flow. Aeration passively occurs by the natural flow of air or by forced air provided by blowers.

The activity of the microorganisms is a vital part of the performance process. The influencing factors are water composition, type of media, feeding strategy, biofilter hydraulic loading, age of the biofilm, temperature, aeration, etc.

Biofilters

Most biofilters use media such as river gravel, sand, crushed rock, or some form of plastic or ceramic material resembling small rings and beads.

Although biological filters have simple superficial structures, their internal workings, biology, and ecology are complex and variable. The process can maintain its performance or return to initial levels following a period of no flow, intense use, media backwash, toxic shocks, etc.

The biofilm protects microorganisms from demanding environmental conditions and retains the biomass even when conditions are not optimal for its growth. The advantages of the biofiltration process are:

  • Biofiltration allows the development of microorganisms with low growth rates because they are retained within the biofilm.
  • Biofilters are less subject to intermittent or variable loading or hydraulic shock.
  • Operational costs are usually lower.
  • The final treatment result is less influenced by biomass separation.
  • The attached biomass becomes more specialized at a given point because there is no biomass return.

Because filtration and biomass growth leads to an accumulation of matter in the filtering media, this process is subject to flow channeling and bio-clogging. Bio-clogging can be controlled depending on the type of application and the media used for microbial growth with chemical or physical methods.

Drinking Water

For drinking water, biological water treatment involves using naturally occurring microorganisms in the surface water, improving the water quality. Under optimum conditions, such as high oxygen content, the organisms break down the material in the water, improving its quality. Sand filters or carbon filters can be used to provide support for the microorganisms to grow. These systems effectively reduce diseases that are water-borne, improving water quality.

Bioremediation is Important

Clearly, bioremediation is very important for treating water.  Any time we can find natural ways to clean our earth’s water, we must use them.  Creating wetland filters, filter beds, filter swales, rain gardens, and floating plant islands are all ways that we as homeowners can use biological means to help clean the water on our properties.  While these homeowner solutions aren’t as complex or detailed as wastewater biofiltration systems, they use many of the same principles.

What is Pond Water Ecology?

Pond water ecology is the circle of life within your pond.  Natural pond balance works, but most people do not have the patience to wait for nature to take its course. Many companies promote needless monthly chemical applications to maintain ponds. This chemical burden is entirely unnecessary and detrimental to your pond and the environment as a whole.  Their job is to sell you products, pure and simple.  They are not concerned for the health of your pond.

It’s About Balance not Chemicals

When naturally balanced, the pond will eventually do very well on its own without help from us or chemicals.

With chemical use, it is a vicious cycle of killing algae with chemicals. The dead algae go to the bottom and create more nutrients for the next algae bloom as the chemicals wear off. Therefore, most natural bottomed retention ponds are a nightmare for their owners, as chemical treatments result in thick muck at the bottom and recurring algae blooms.

Pond ecology is the interaction of the life in the pond with the existing environment. A shallow pond that is nutrient-rich will be filled with algae and aquatic plants if exposed to the sun with little water flow through it. It has little animal life because of the low oxygen levels.

In contrast, a newly created spring-fed pond may have little life of any kind due to low temperatures and lack of food supply.

A healthy freshwater pond has the following layers:

  • Bottom:  There is very little sunlight or oxygen at the pond’s bottom. Decomposition occurs, and scavengers live here to feed on dead materials, such as water worms and grubs.
  • Midwater:  Fish are the main predators. Food is found on the surface of the pond or the pond bottom. Animals found here breathe through their gills or skin, for example, dragonflies, water fleas, or stickleback fish.
  • Pond surface:  Animals found here breathe through their lungs, gills, or skin. There is enough light and oxygen here. Animals found here include tadpoles, ducks, or midge larvae.
  • Pond margin:  Plants provide a sheltered habitat for insects or small animals, such as frogs. Oxygen and light are abundant, so plants such as marsh marigolds and other marginal aquatics can thrive.
  • Above the pond’s surface:  Insects such as dragonflies and birds such as kingfishers are prevalent here.

A Pond’s Life

A pond begins with mostly water, a few nutrients, and limited aquatic life. As the pond ages, the pond gathers nutrients. This process of enrichment is eutrophication. The addition of nutrients stimulates the growth of aquatic life. The organisms live, grow, then die.

Their remains and whatever else falls into the pond like leaves and debris decay in the pond. The nutrients in the plant debris are released back into the pond to keep the cycle going. With time, there will be an accumulation of material that resists decay. The pond will fill up, become a bog, and someday resemble dry land. This process of returning to dry land can occur in a decade or take centuries.  It is the pond owners’ job to slow down this process as much as possible.

How to Slow Down the Process

Exclude the Basic Elements Needed to Make Aquatic Organisms

There are four essential elements needed to make aquatic organisms – carbon, nitrogen, oxygen, and phosphorous. These materials are required in abundance, along with other factors. To prevent the rapid aging of a pond (eutrophication), exclude the introduction of phosphorus and nitrogen. There are three methods helpful in slowing the aging process.

Buffers

We need to limit the nutrients coming into our pond, so animal access to streams or ponds should be restricted, and runoff controlled to limit phosphorus and nitrogen inputs from the waste.

 Maintaining vegetation buffers in the areas where water must flow through to reach the pond is beneficial. Buffers slow down the water and filter it. Slow-moving water permits sediment to drop out of the water. Phosphorus attaches to soil particles, so sedimentation helps keep phosphorus out of the pond. Keeping sediment out of the pond prevents it from becoming shallow.

This directly contributes to the primary goal of keeping the pond from returning to dry land. A deeper pond will also be cooler. One of the general principles of biology is lower temperatures slow the growth of organisms, so the buffer area contributes to conditions that help slow the pond’s aging process.

 Sedimentation

Providing a shallow pool at the pond’s inlet is another method of keeping sediment out of ponds. Water that passes through the pool will drop sediment into the pool on its way to the pond. The pool should be of a dimension enabling it to be easily cleaned with a backhoe from the shore. A sedimentation pool will help the pond in a similar way to buffer strips, but sediment ponds work well if the water’s inflow is too much and too concentrated for buffers.

Limit the Use of Fertilization

flamingos in a pond

If it is possible to decrease fertilizer use on crops or turf grown in the pond’s watershed area, it will benefit. We can assume that anything applied to the ground anywhere within the watershed will eventually make its way to the pond.

Plants are never 100% efficient in their use of fertilizer elements. So, even at appropriate rates, applying fertilizers results in excess nitrogen getting into your pond.  Also, any animals that use the watershed will leave waste, increasing nutrients in the pond.

Maintaining Ecological Balance

frog and butterfly in a pond
koi in a pond

Ponds are most effective when there is a balanced and complete food web in place. This means that planktonic algae are present in sufficient quantity to feed zooplankton. The zooplankton then becomes food for aquatic insects and the smallest fish. These will then become prey for larger fish, finally to be food for heron, mink, raccoons, bears, or fishers.

Another part of maintaining ecological balance involves the higher plant community. Some pond owners are discouraged by too many plants in their pond.  While a pond full of vegetation is not recommended, a nice balance of pond plants is required to maintain balance. From some pond owner’s viewpoint, a pond with vegetation along the shore is unsightly, so they often eliminate all pond plants and buffer plants and mow lawn right up to the shore.

The Clean Look?

Many like the “clean” look, so they kill plants with herbicide, fertilize their lawn right up to the waters’ edge, and then complain when their pond is overgrown with algae.  This eventually leads them to dump chemicals in the pond to kill the algae and restore the “clean” look.  Unfortunately, a pond like this is the opposite of clean.  It is dead to most pond life and full of nutrients, just waiting for the chemicals to wear off to start another grand algae bloom. 

Aquatic Plants

lilies on a pond

Aquatic plants can provide shade, places for small fish to hide, habitat for aquatic insects and animals, and food sources for some animals and fish.  They are a vital part of the pond ecosystem, and they compete with the algae for nutrients, keeping it in check.  It is about balance, not a clean look.  A balanced pond is very clean and healthy.

There are certainly examples of too much vegetation in the pond.  A pond completely covered with lotus or water lilies shade the pond so no other vegetation will grow under the water. There will not be enough light to grow planktonic algae, resulting in a pond that will be unproductive for anything besides lily growth.

Another example is the excessive growth of Watermeal or duckweed. When the entire pond surface is covered with these plants, the light is restricted, and the pond will contain little life beneath the surface. These plants virtually eliminate oxygenation of the water by maintaining the separation of the water surface from the atmosphere. As a result, the pond becomes deficient in oxygen to the extent that any fish present are killed.

You will notice that these are problems of extremes.  Just like the extreme of too many plants results in negative consequences, so do too few plants.

Maintain Water Flow

A pond with continuous water flow will be more well-balanced than a pond with an intermittent flow.  Water flow increases the water’s oxygenation and helps to reduce stratification.  Also, new water entering the pond is important. While fresh water does indeed bring more nutrients, it also brings more oxygenation.  A pond will lose significant water due to evaporation during the summer months. Ponds with sufficient inflow will stay full and refreshed, while the water levels of ponds without inflow will decline, resulting in lower oxygen levels in the water and less life.

Aeration

The pond’s overall health is dependent on oxygen in the pond water. Its value to the fish is obvious. Less obvious but essential is the pond’s ability to eliminate waste. The waste that happens in the pond includes waste from animal life such as geese and fish and the waste that falls into the pond like leaves, debris, and grass clippings. These waste materials can enter with stormwater runoff, wind, and along with animals and plants that die in the pond.

Bacteria and enzymes are needed to break down and consume all of this debris.  Aerobic bacteria perform twenty times quicker than anaerobic bacteria to break down the waste. It can then be flushed out or is available to grow new life. The oxygenation of a pond is quite interesting. It occurs in two primary ways.

Photosynthesis

Algae and plants do photosynthesis during the day, with the wind adding oxygen at night. The oxygen that plants produce is released into the pond, helping maintain water oxygen levels. Conditions that prevent light and oxygen from entering the pond need to be monitored. A pond completely covered with watermeal can be in trouble in a hurry. All of the oxygen produced by the Watermeal is released into the atmosphere rather than into the pond.

Any part of the pond that is too dark for photosynthesis is likely oxygen-deficient unless the water column is circulated. Scientists use a Secchi disk to measure water transparency.  The level at which they can no longer see the disk from the surface is the depth to which the pond will be oxygenated through photosynthesis.  Anything below that level needs to be circulated to receive oxygen.

At the Surface of the Pond

the pond surface

Another method of getting oxygen into the pond water occurs by an oxygen exchange with the atmosphere at the pond’s surface. The rougher the surface is, the more rapid the exchange. Also, the more deficient the oxygen supply is in the water, the faster the exchange will occur.

This process is critical at night and essential for a pond with a heavy load of animals and plants. During the night, plants perform respiration rather than photosynthesis. The pond could be oxygen-deficient by morning if atmospheric aeration has been impeded by lack of wind or a covered surface.

We can significantly increase our ponds aeration by installing a bottom aeration system.  Pumping air bubbles to the bottom of a pond will increase oxygen levels and circulate water, providing a better balance.

Pond Ecology in Winter

In the winter, as the water gets much colder, with ice covering the top of the pond for an extended period, the pond ecology changes.

Amphibians such as turtles, frogs, and fish have adaptive features that enable them to adjust to this less friendly environment. Their body temperature will drop with the water temperature, decreasing their energy requirements and respiration rate. Turtles and frogs burrow into the mud at the pond’s bottom and hibernate.

Ice prohibits oxygen entry into the pond through the surface; however, sunlight that gets through the ice will allow for some photosynthesis by the aquatic plants. An entirely snow-covered pond can quickly become depleted of oxygen, killing frogs, turtles, and fish.

A smaller, more shallow water body is more susceptible to this than a larger, deeper body of water simply due to the quantity of water.  We can help this problem in our small ponds by providing bottom aeration, which will pump oxygen to the bottom of the pond all winter long to keep the water oxygenated.  If we can’t aerate and if the ice is safe to walk on, we can clear lanes across the pond to remove some of the snow to let in the sunlight. 

Changes to a Pond’s Ecosystem

Ecosystems are sensitive to change. Human or natural factors can alter the system’s living and non-living components.

Natural factors which cause adverse changes to the ecosystem can include:

  • Disease
  • Drought
  • Fire
  • Flood
  • Heat
  • Debris
  • Ice and Snow cover
  • Excessive plant growth (invasives)
  • Excessive animal use (geese, ducks, etc.)

Human factors which cause adverse changes to the ecosystem can include:

too many fish in a pond
  • Adding too many fish
  • Adding fish that carry disease
  • Altering the drainage of the land, which can influence the quantity of water
  • Altering the nutrient levels of the water with fertilizers, resulting in eutrophication.
  • Chemical pond additives destroying the aquatic balance
  • Mechanical sterilizers destroying the aquatic balance
  • Allowing heavy debris loads into the pond
  • Removing too many plants from a pond
  • Electric current entering the pond
  • Excessive livestock use of the pond
  • Pumping from a pond for irrigation

 Summary 

Long pond life is best achieved by maintaining a healthy ecosystem.  Your pond’s ecosystem is all about balance.  When any one of the above factors gets out of balance, there will be consequences.  Humans are the biggest disruptors of pond balance.  When we see a pond with excessive algae growth, we shouldn’t ask, “what’s wrong with the pond?”  we should ask, “what have we done to the pond to push it out of balance?”

By limiting the input of nutrients into the pond, taking nutrients out of the water with plants, adding bacteria to the water to aid decomposition, and providing aeration through continual water flow and mechanical aeration, we can do our part to get our ponds ecosystem balanced.  Once balance has been achieved, the pond will care for itself with very little human input.

Using Yarrow in Your Garden

Are you looking for the perfect plant to fill in the borders of your garden and brighten it up with colorful, showy blossoms that are dummy-proof to maintain and super resilient? Look no further; the Yarrow plant is virtually care-free and produces hundreds of radiant flowers throughout the spring and summer months. They look great in the garden and make an excellent addition to any bouquet. Maybe you should consider Using Yarrow in Your Garden.

This beautiful flower will look like a large circular bloom showing off to the summer sky from a distance. However, at a closer look, you will note that the Yarrow flower is a cluster of tiny flower heads all packed together, standing tall on a long sturdy stalk with soft feathery leaves.

Variety

Yarrow comes in almost every color in the rainbow, with the most common colors being white, yellow, pink, purple, red, or rose.

As an added bonus, the yarrow plant is a deterrent for insects and mosquitos as well as rabbits and deer, so they can be used throughout your landscape to help deter these pests.

These blooms are perfect pollinators, so be ready for the influx of bees and the added magical touch to your garden with all the butterflies they attract.

For hundreds of years, the yarrow flower has also been used for its medicinal properties, cosmetics, and sometimes even magic.

Beware that the yarrow grows so well it can be invasive and take over, so be conscious of what you are planting it next to and be ready with your shovel if it starts to overstep its boundaries.

Although there are over 100 species of the genus Achillea, the most common yarrows grown are:

  • A. clypeolata (moonshine yarrow).
  • A. filipendulina (fern leaf yarrow).
  • A. millefolium (common yarrow).
  • A. ptarmica (pearl yarrow).
  • A. taygetea (Egyptian yarrow).

Wild yarrow

You can find this popping up in meadows, along country paths, and even the backyard. Yarrow growing in the wild can have large flower heads with clusters of either white or yellow tiny flowers. This is technically the same plant as common yarrow; it is just listed as wild due to where it is located.

Common Yarrow

Derived from the group Achillea millefolium are many different types of what are known as the common yarrow. The rainbow of colors that you can find in this group is endless. From the bright, vibrant reds, like paprika and rust, to the soft pastel shades of apricot and salmon, there is something for everyone in this group of multiple cultivars. Perfect for cut flower enthusiasts because it compliments any flower arrangement.

Dwarf Yarrow

Unlike its peers, the dwarf yarrow (dwarf woolly yarrow, Achillea x lewisii), as its name suggests, lies closer to the ground and is perfect for rock gardens or to add some color to the edge of a path or driveway. This version of the yarrow has light yellow, low-lying flowers.

Hybrid Yarrows

Named after Queen Elizabeth’s coronation, the award-winning Achillea ‘Coronation Gold’ is a spectacular yarrow that is extremely easy to grow and produces excellent results even if you neglect it. From late spring to late summer, the pleasantly aromatic three feet in height, Coronation Gold is a gardener’s favorite, boasting bright yellow flowers.

Fernleaf Yarrow

Another significant aspect of the yarrow is its feathery light green-grey foliage, which the Achillea filipendulina yarrows are noted for. These yarrow flowers can be as tall as five feet. Some popular varieties include; Cloth of Gold, Parkers Variety, and Gold Plate.

How to Grow Yarrow Plants

The Yarrow plant needs little preparation, and once you have germinated the seeds, it’s a matter of raking some soil and popping them in the ground to watch them grow.

Yarrow plants bloom from June to September, so the ideal planting period is early spring, just after the last frost.

Growing from Seed

The yarrow plant is very easy to grow; you are in for a treat from planting to maintenance.

If you choose to grow from seed, the best way would be to start the seeds indoors, 6-8 weeks before you plant them outside.

Plant them in a seed tray, right on the top of the soil.

The optimal soil temperature is 15 to 18°C (60 to 65°F).

Be sure that the soil is not too damp to avoid any roots rotting.

Observe the germination process, which should take about 1-2 weeks. You can cover the seeded area with plastic wrap after the first week to speed it up.

Transplant

You can either transplant these seedlings into pots until they are larger using high nitrogen fertilizer, or you can plant the seedlings straight into the ground about ½ an inch deep. Be sure that the last frost has well and truly passed.

They love dry sandy soil with clay for ideal results. This hardy plant will even cope with being beside the sea; the salty ocean air can’t faze the yarrow. Yarrow plants can handle drought, but they will not tolerate wet soil.

They are not thirsty little flowers and only require about ½ an inch of water a week. Depending on the area, you could potentially go an entire summer without having to get the hose out, but a little water will keep them vibrant and looking fabulous.

Diseases

Yarrow plants are not likely to catch diseases; this is a sturdy plant and unlikely to become affected by disease or pests.

If you cut the ‘deadheads’ off the flowers in mid-summer, it will likely produce a whole other set of blooms before the season is out.

You can head to the garden center at the end of summer and pick up some post-bloom yarrow plants on sale. Bring them home and chuck them in the garden, and low and behold, with zero maintenance, you will have flowering blossoms come next summer.

Final Words

The Yarrow plant represents everlasting love, and who doesn’t want a bit of that in their world? Plant any of the vast number of yarrow species in your garden, and you will surely be happy with the vibrant, cheerful results year in and year out.

.

Trees and Landscaping

flowers under trees

Large trees are a significant feature in any landscape. Each tree is unique, and they add a great deal of natural aesthetic appeal to our landscapes. But, they do so much more than that.

Trees shade our earth, help prevent erosion and clean our air, soil, and water. Trees and landscaping go hand in hand. Plant a tree today in your landscape.

Shrubs, flowers, and groundcovers are nice, but somehow, a landscape doesn’t look complete without trees.

What Are Common Problems for Trees and Landscaping?

Although large trees provide cool, shady areas and beautify the scenery, they can cause a few minor problems for the area below.

Since these big, mature trees shade the ground, absorb water and take in nutrients, it can be challenging for some plants to grow below them. Often, it’s the dense shade that these large trees provide that causes the most problems for plants below.

I have worked in yards where the homeowner adds topsoil and re-plants grass under a large tree for many years in a row in an attempt to keep his lawn alive below the tree. It’s not the tree’s fault that your grass won’t grow there. It’s just doing what trees do. You need to stop fighting mother nature and treat this area differently.

No matter which mix of grass seed you buy, grass just doesn’t grow well in the shade.

You can paint a beautiful scene with your trees and plants with a little know-how. Your tree doesn’t have to be alone in your landscape!

Some Big Tree Solutions

Some clever tips for landscaping around trees are: adding mulch (there’s a proper way to do this!), incorporating bold color using flowers, mixing up the plants underneath, and putting in pretty garden accents. By doing simple things such as these, you can do so much to “dress up” trees for your landscape. We’ll elaborate on each tip in the following section.

But there are some things to keep in mind and avoid when landscaping around trees. Aside from advice, we’ve included some common mistakes people make when landscaping with trees and how to steer clear of them.

Grow Plants Under the Trees

When planting under trees, you need to choose plants suitable for the light conditions. Knowing the different types of trees and the varying amount of shade they provide is important for choosing plants to add to the surrounding area.

Trees such as maple, dogwood, magnolia, and flowering cherry allow for dappled sunlight to reach the plants underneath, making them ideal for plant growth. You can easily grow a shade garden when you have these beautiful trees! Plants like Pachysandra, Periwinkle, Ivy (watch out that this one doesn’t climb too far up the tree and cause trouble), and Coral Bells should all do fine under these trees.

Most evergreens have a high density of leaves and branches, which means sunlight won’t reach the area below them as much. Almost no sunlight reaches the tree trunks. Ferns, Dead Nettle, and hostas are all shade-loving plants that will grow well under evergreens. You can typically plant right up to the trunk, but be aware that they probably won’t get much rainfall down there, so you may need to water them now and then to get them started.

Don’t be afraid to experiment with some sun-loving plants around evergreens; just make sure to plant them near the drip line on the Southside.

Be Careful

When working beneath large trees, be aware of the roots.

Removing some turf and loosening up the ground a bit with a digging fork is okay as long as you are careful, but using a mechanical tiller, edger, or sod cutter is certainly not advised. You can do a lot of root damage if you are not careful.

The last thing you want is a big dead tree in your yard!

To amend the soil under your large landscape tree, you can certainly add a bit of light topsoil or compost, just don’t pile it thick. Tree roots need oxygen, and piling the ground too high below them can cause problems. Not to mention that soil piled around the trunk will promote rot. The damage won’t be immediately apparent, but over the course of a year or so, you will notice the decline in the health of your tree. Instead, keep the soil level near the base of the tree.

Plant Annual Flowers Around Your Trees

Creating annual flower beds around your trees is an effective way to add color to your landscaping. It can add quite a flair if you use colors and patterns to highlight your new beds.

Before planting flowers around your trees, you should manually remove the grass and prep the soil, just like suggested above.

Some folks like to set an edge or boundary around their bed. You can cut a natural edge (carefully, by hand, of course), use rocks, or even brick.

Depending on the setting, it is likely pretty shady, so pay attention to the annuals you choose. You want annuals that thrive in partial shade or even in full shade. Some examples are Impatiens, Hellebores, Bletilla (ground orchid), and Torenia. These flowers are stunning and don’t require much upkeep!

With an annual flower bed beneath your large trees, you will be able to change the look of your yard every year to suit your fancy.

Add Mulch Around the Trees

Many people like to mow the lawn right up to their trees’ trunks. They plant grass right up to them and then spin that zero-turn mower around the trunk once a week for the rest of the short and damaged life of that tree. The root zone gets compacted, and the trunk gets scarred.

You may not realize it, but any scar you create in the trunk of a tree makes it harder for that tree to thrive. Also, the root zone on a large tree is very wide.

A Good Rule of Thumb

A good rule of thumb is to assume that a tree’s roots extend out at least as far as its furthest branches reach. Where the branches end is called the drip line.

The area where the water will drip when it rains.

Whether or not you create a planting bed beneath your trees, you will want to consider mulching them. Considering your trees’ huge water requirement, it will benefit the tree and other plants below it to have a two to three-inch layer of mulch. This will help retain moisture in the soil, resulting in less watering. It will also keep that mower off the roots and away from the trunk.

Never Pile Mulch at the Trunk

When mulching below a tree, never pile the mulch around the trunk.

Mulch piled at the trunk promotes rot and provides a lovely home for rodents to spend the winter and chew on your tree trunk. Instead, lay the mulch nice and thick from the drip line to within about six inches of the trunk and then taper it down to nothing as you approach the trunk.

I have seen many people use heavy plastic sheeting under the mulch around their trees. This is never a good idea as it will prevent water from getting to the tree roots and make life miserable for your trees. I wouldn’t even suggest weed barrier. While it will allow the water to pass, the barrier may eventually end up wrapped up in tree roots, making it hard on the tree and almost impossible to remove.

Add Garden Accents and Decor

What else can you put around the base of a tree aside from plants?

You have plenty of choices for garden accents and decor, such as beautiful boulders, small statues, garden benches, fountains, flowerpots, a small chair to rest on in the shade, a fairy garden, or toad house, or maybe even a rope swing!

Rocks

Plants are pretty high maintenance with their need for watering, trimming, and fertilizing. If you want alternatives to plants, you can always use strategically arranged, decorative rocks. Aside from being low-maintenance, rocks are an excellent choice for trees with roots that come above the surface. A well-placed rock or three can help protect the roots that come up out of the ground beneath the tree. Set your decorative boulders to protect the roots first and then garden or mulch around them.

Trees and a Hanging Chair

The shade from a tree can provide quite a relaxing, quiet spot. You can use the space under the tree by placing a wooden bench, stone bench, or hammock.

A hanging swing can accentuate your tree’s big, strong branches while providing a place to sit at the same time. It’s not only a nice place to read a book or relax on a windy day, but it can also serve as decor in your yard! Especially when you add plants, grass, or flowers around that special place.

Be aware that hanging too much weight on a small or dead branch can certainly cause it to break and fall from the tree. Not only would this give you a sore bottom when you swing hits the ground, but it may also give you a sore head when the branch lands on your head.

Make it Safe

Make sure to choose a big, heavy branch that doesn’t flex much under your body weight. Also, look for a branch that will get you away from the trunk so that you aren’t swinging into it.

If you will hang a swing, make sure to use a sturdy rope or chain, and please protect the tree branch. Rope, wire, chain, or cable will all cut into the bark of a tree. If you don’t protect the bark, you will eventually have a dead branch. The goal is to protect the bark without holding moisture against it. The larger the protector is, the less force per square inch you will be applying to the bark. Most people choose to use rubber hosing of some sort. Even with protection, the rope may still do damage, so be sure to check them often and maybe move them a bit so that the bark does not get damaged.

The ideal trees for hanging chairs and swings are hardwood trees. Oak, hickory, and cherry are some of the best sturdy trees that can support your swings and chairs.

Build Your Deck or Patio Around a Big Tree

Building anything around or under a tree is not ideal for the structure or the tree. I have seen many people try to save trees when building their house. They ask contractors to watch out for the trees, but equipment drives over roots and compacts the soil, materials get stacked beneath the tree, etc. Any time that you stack on build in or disturb the ground above tree roots, you risk irreparably damaging the tree. Most of these trees will eventually die unless an area at least as wide as the drip line is cordoned off and nothing is put there, no soil is added, and the surrounding grades aren’t changed significantly, leading to extremes in moisture.

Having said all of that, If you only have limited space and you need a patio or deck, and you would like to save the tree that currently resides in that space, maybe you can build around it. If you have another choice, take it. But, if the choice is to cut down the tree or build around it, it might be worth giving it a shot.

Given a choice, I’m sure the tree would vote that we try to build around it. I’m sure that a tree would also prefer that a deck be built around it rather than a patio. Either way, always plan for the tree’s future growth and give it room. I would also recommend that you plan out your deck or patio so that if the tree does not survive, you can easily cover the space so that you aren’t stuck with a blank hole in the middle of your deck or patio.

A deck would be preferable. A Careful crew can place footings and complete deck construction while minimizing any impact on the tree. On the other hand, a solid-surface patio might be much more disturbing to the tree as it would involve prepping a base over the roots and then placing the patio material that will inevitably damage and restrict water flow to the roots.

Add Landscape Lighting

Don’t forget about those trees at night! You didn’t spend all that time beautifying your trees and landscape just for them to disappear once the sunsets.

A few well-placed up lights below a tree can really highlight its features and the yard at night.

Or, a few well-placed downlights up in the crown of a mature tree can give the illusion of a soft moonlight glow coming through the branches. Landscape lights are worthy of a whole new discussion, but they help with safety in the evening and accentuate your trees and landscape.

A Note on Planting Trees

So far, we have assumed that you have trees in your yard. But what if you don’t have any, or don’t have enough. What can you do about that? Well, quite a bit.

If you are thinking about planting some trees in your yard, you’ll first need to do some research and find trees that are well suited for your plant zone and well suited for the area in which you want to put them. Pay attention to sunlight and water requirements and the final size of the tree when fully grown. You will want to make sure that you plant it in an area where it will be happy and have plenty of room to grow.

You have many choices for where to get the tree or trees. I’m going to start with the most economical choice and move up to the most expensive.

DIY Tree Transplant

Okay, I know, any tree that you plant will be transplanted, unless, of course, you plant a seed. This is an option, but you need to be a really patient sort of person to grow trees from seed. So, we will go right to transplant. It is certainly possible for you to transplant your own tree. Trees would rather be transplanted while they are dormant, so late fall is probably the best, and mid-spring, when they are pushing new growth, is the worst time of year.

Maybe you have a neighbor or a parent who has a few saplings growing where they don’t want them, and perhaps they’d let you dig them up and move them to your property. Transplanting is relatively straightforward and easy; it will just take a bit of work.

Digging it Out

You will want to prepare the hole for the tree ahead of time so that the tree doesn’t sit out of the ground for any longer than necessary. Dig out a wide, round dish-shaped hole in the approximate size you think you will need.

As you dig, pile the ground around the perimeter of the hole. This will make it easy to backfill the tree when planting, and the excess soil will act as a soil ring to retain water for the first year or so.

Next, go dig out the tree. Trees with shallow fibrous root systems like the Arbor Vitae are much easier to transplant than trees with deep root systems like an Oak, so choose wisely. When digging out your tree, your objective is to damage as few roots as possible and to get it back into the ground quickly.

Pick Your Day

It would be best if it were not a blazing hot and sunny day. Overcast, moist, foggy days are great for tree transplanting. While it is important to damage as few roots as possible, you will be damaging roots; there is no way around it. Ideally, the tree is small enough that you can get the majority of the root system and the soil surrounding them dug out in one neat and tidy ball.

Well, I hate to burst your bubble, but that is not likely to happen. I’ve been in the industry since 1987, and I’ll tell you that more often than not, you retain some of the soil, you cut more roots than you plan to, but the tree still lives. It is rare to get just the right type of soil and just the right tree to get it just right.

Add to that the fact that if you are still reading this, it is likely your first time, and your goal should not be perfection but simply to keep the tree alive.

Get it Planted

On that note, pick a tree that is small enough to handle. You will need to be able to lift it and transport it. Once you begin, don’t stop until it I back in the ground, fully planted and watered. I guarantee that you won’t get it perfect, so just make it quick. The more time the tree spends out of the ground, the more likely it is to die.

Dig quickly, wrap it in wet towels or blankets, transport it and get it into the ground, standing upright, backfilled, and water the heck out of it. You want to make sure that it is planted to approximately the same depth as it was where you dug it out. Don’t bury it really deep. Then check on it every day and water accordingly. You just cut a bunch of roots, so water it deeply for several weeks.

Alternatives to DIY Transplant

The above description is the cheapest route.

The following are all options that get more costly as we go. The steps are slightly different, but many of the concepts are the same. Don’t mess around and disturb roots, do it on a cool day, plant it at the same height, and water it well applies to all of the alternatives below.

Buy a Tree and Plant It Yourself

Go to your local garden center and buy a tree.

This is relatively cheap and is more likely to be successful than digging one out yourself, since presumably, either the plant was grown in the pot you purchased it in, or it was balled-and-burlapped by professionals who know what they are doing. Many garden centers even warranty their trees to live for one year.

When buying a tree, keep in mind your site restrictions and physical restrictions. Once again, you will be taking this home and planting it. Choose one that you or you and your helper can lift.

Hire a Landscaper to Plant a Tree for You.

You can certainly hire a landscaper to plant a tree for you. The landscaper should be willing and able to come to your house, give you some suggestions and bring in a lovely, properly planted tree with a warranty. This will cost you a bit more, but it should be nice and easy.

Using a professional landscape company will likely open up many options for you regarding the tree’s size and species. The bigger you go, the more costly it gets, but having a huge, expensive tree in your yard can be instant gratification and can make a surprising difference to the look and feel of your yard. It all depends on how thick your pocketbook is.

How to Maintain Your Trees

Trees take a long time to grow and will live for generations! Please make sure that you take care of these precious trees. Although they are hardy, magnificent living creatures, that doesn’t mean that you shouldn’t keep an eye on their health.

Here are some of the things that you can do to help your trees:

Water

When newly planted, water frequently, but once they are established, they really shouldn’t need your help. Unless, of course, the tree isn’t suited for your planting zone, in which case it will require a bunch of help.

Walk around your yard every once in a while and look at the trees. Are the colors looking gray and drab? Are the leaves wilting or curling? If so, the tree needs water. Please give it a good soak. Tree roots are deep, so a long slow soak is always better than a quick blast of water.

Fertilize

Once again, if the tree is native to your area and your soils are decent, it shouldn’t need much. Your best bet will be to spread a really thin layer of aged and organic compost over the roots in the spring if the tree is relatively newly transplanted. Mulch them nicely, let their leaves fall below them and leave them there, and the tree should do just fine.

Pruning

In most cases, less is better than more. Once again, most trees don’t need our help. If you notice branches rubbing on each other or dead branches, then you can cut them off using a clean and sharp pruning saw or shears.

Otherwise, just leave them alone.

If you have ornamentals that you need to keep in a particular shape, then prune them when they are dormant and do it yearly so that they don’t get a chance to get out of shape.

Conclusion

Trees can be the gems in your landscape. They can set the stage for all other landscaping, and they can be where the important life events happen. They provide a more welcoming, natural atmosphere, cool down the place, and provide shade. It’s always worth our while to care for and plant more trees.

We hope our guide gave you helpful tips on working with trees in your landscape.

Top 10 Lawn Care Tips

A lush, well-maintained lawn is the ideal green fill for our colorful herbaceous borders, a fantastic setting for summer picnics as well as a foraging area for native birds and animals. Keeping your lawn looking beautiful may be a problem sometimes, especially when you are new to gardening, but if you follow our Top 10 Lawn Care Tips you will have it under control in no time.

Once you’ve built your dream garden space and installed the area’s best soil and grass, how are you going to keep it looking its best? We’re going to teach you how to keep your yard looking good throughout the year. The ultimate goal is to create an environment that allows your lawn to take care of itself (other than mowing, of course).  To avoid getting a dull, weed plagued lawn, follow these easy measures.

Top 10 List

Mow Your Lawn Regularly

mow the lawn

It is best to cut just one-third of the length of the grass when mowing your lawn. The time of year and current weather conditions will decide how often you need to trim, but you will likely need to cut the grass in summer at least once a week and once every two weeks in spring and fall.  Regular trimming facilitates the spreading of the roots, which will help to fill spaces and obstruct weeds.

Never cut your lawn shorter than three inches.  Grass height of three inches keeps the ground shaded, the grass healthy, and the weeds down.  Cutting it shorter makes it harder on the grass and easier on the weeds. Make sure that the mower is well balanced and the blades are clean and sharp.

Don’t mow when it is wet, as this will cause more damage to the blades of grass.  Use the lightest mower that you can deal with.  The trend has been toward large, high-powered, zero-turn riding lawnmowers that compact the ground and tear out the grass at each turn.  If you Cn get away with a small mulching walk behind mower, do it. 

Always alternate your directions of cut so that you don’t wear the same pattern into the lawn week after week.  Always use a mulching mower and mulch leave right into the lawn.  Leaving the clippings in the lawn will make for a stronger lawn with better soil.

Edge Your Lawn

Edging a lawn is a fresh, trimmed lawn’s final touch. To delineate your lawn after each mowing, use a string trimmer turned on its side like the professionals, or you can do it by hand with any sort of shears.  Once a year, grab an edging shovel and re-cut the natural edge wherever the lawn is creeping into the beds.

Remove the Weeds

weed free lawn

Weeds can appear anywhere in your lawn and come from many different sources.  The exact type of weed is not as important as your response to it.  Your best weed defense is a healthy, tall lawn with deep roots.  Your second line of defense is using an organic fertilizer that contains corn gluten which helps discourage weed growth.  Your third line of defense is to pick the big weeds when you see them.  If you pick a handful every time you mow, you will stay on top of the problem.

Don’t use chemical weed killers as they destroy beneficial soil microbes and contaminate your groundwater.

Relieve Compacted Soil

meticulous lawn care
pretty front lawn

Compacted soil is the result of heavy equipment use, overwatering, and chemical fertilizer use.  Hard, compacted lawn soil will make it more difficult for your lawn to thrive and take care of itself.  To alleviate compacted soil, you have a couple of choices. 

If your soil is compacted, I’m guessing that you have been neglecting it and treating it poorly for a bit, so I’m going to suggest core aeration.  A core aerator is a motorized piece of equipment that rolls across the lawn and digs out cylindrical soil plugs.  You can rent these machines at most local rental places. 

If you don’t want to spend the money on the rental, but you have a digging fork, you can use that to loosen up the top couple of inches of soil.  The trick is to push the fork in, wiggle it a bit and pull it out.  You are not trying to pry out chunks of lawn and till the site.  This would be disturbing too many grass roots.  You are just loosening soil and leaving the root intact.

Once you have aerated, you will want to spread a thin layer of well-aged organic compost onto the lawn and water it deeply.  The aeration will allow the water to carry the soil amending compost down into the ground.  In time, with proper care, your lawn soil will loosen up and be rich and dark with nutrients.

Water Your Lawn

watering the lawn

The amount and frequency of irrigation in your area will depend on the type of soil and weather conditions. The goal is to have a healthy lawn that never needs watering, but if you are in a very arid region and want a lawn, you may need to water it.  It is best to water grass in the early morning before it gets hot to get the best results.

Always water new, young lawns, but once they get established, only water a few times a year during the driest time and always water slowly and deeply when you do.  Slow and deep watering encourages roots to grow deeply, which will produce a healthier lawn.  Sprinkler systems are unnecessary, expensive and create a lawn that is shallow-rooted and dependent on the sprinkler to survive. If you are in an area where there are no wild grass areas, and lawns shouldn’t grow because it is basically a desert, then you will need an irrigation system, but really, you might want to consider xeriscaping instead.

Feed Your Lawn

feed the lawn

If you have been applying weed and feed several times per year and irrigating every other day with an irrigation system, then you will need to ween your lawn off slowly.  But, if you have been organic for years, you should be able to take care of any fertilization by simply applying organic compost once or twice a year.  Remember, if we do this correctly, our lawn can practically take care of itself.  I haven’t watered or fertilized my lawn for many years, and it is green and lush each season because it is deep-rooted, organic, and diverse.

Fill Bare Lawn Patches

Over time, if you follow all of the recommendations above, you won’t have any bare patches to fill, but right now, if you are just starting out and you’ve just aerated and top-dressed with compost, this would be a great time to get a hardy mix of grass seed and fill in any thin or bare spots.  More grass equals fewer weeds, so keep that grass strong, tall, and thick.

Over-Seed Your Lawn

If your lawn has been abused for years and is really short and thin and seems almost hopeless, a good plan might be to over-seed the entire lawn.  In this case, you could over-aerate it to loosen it up, then spread compost over the lawn, but not so deep that you cover all of the grass.  Then sprinkle a hardy mix of grass seed over the entire lawn and rake it all smooth to ensure contact with the ground.  Water this lawn as if it were new, and you will have a nice thick lawn in no time.

When purchasing grass seed, don’t get the most expensive golf course mixes.  Golf courses love to have very select, fine grasses and then irrigate and fertilize continually.  You want to get the hardy grass mix #2 or whatever might be the favorite of the guys that seed the big expanses along the roads and large yards.  This seed can be purchased from the local feed mill, and it will be hardy and will grow well in your area.

Ignore the Pests

My advice is not to look for pests and ignore them if you do see them.  Lawn pests will not wipe out a robust, healthy lawn.  These creatures love the weak and pampered chemical lawns.  Your healthy organic lawn will take care of itself as long as you stick to the organic treatment.

Get Your Soil Tested?

I would always vote no.  Once again, if you follow the steps above, you should have no need to test your soil.  If you have other plants growing throughout your yard, the soil is fine.  Wean your lawn off of the chemicals and start dressing it with organic compost, and it will be fine.

Conclusion

Follow these suggestions to manage your lawn organically, and in a few years, you won’t believe how easy it is.  Below are a few more suggestions related to specific issues:

Frequently Asked Questions

I have a shady spot in my yard that just won’t grow grass.  What should I do?

If your grass just isn’t growing in a few spots because it is too shaded, either give up and plant a flower bed or cut down some trees to let in more sun.  That’s it.  Don’t bother with shade seed, etc.  Grass just doesn’t grow well in the shade.  This is a fact.

We are having a drought in my area; what should I do to save my lawn?

In a drought, even the strongest lawn will brownout.  Don’t sweat it; this is fine.  This is how grass reacts to severe drought.  It will jump right back when it starts raining again.  Unless, of course, you’re in a dust bowl type of drought that lasts for years.  In this case, forget grass altogether; it is the least of your worries.

I have an area in my lawn that is always wet, and it just won’t grow grass.  What should I do?

if you have wet areas in your lawn that just won’t grow grass, you have three choices.  You can re-grade the area to allow the water to drain out; you can install a French drain system to drain the water or give up and plant some plants there that like wet soil.  That is it, no other options.

What should I do if my soil is really sticky and clay-like and my grass doesn’t grow well?

If your soil is very stiff and sticky like clay, you can aerate more and top dress with a sand and compost mix.  Eventually, it will come around, but it may take several years.

What should I do if my lawn has a lot of thatch?

Thatch only occurs on pampered and chemically treated lawns.  A healthy organic lawn has enough bacteria and microbes in the soil to break down thatch, so it just isn’t a thing.  Treat your lawn organically as suggested above, and that will be a thing of the past.

Top 8 Best Firewood Racks for 2021

Whether it’s indoors or outdoors, enjoying warm fire is one of the best ways to relax and unwind from daily stress. To have as few interruptions as possible to your zen time, make sure you have a proper firewood stack ready. This way, you’ll keep the fire going way longer before having to go to your firewood storage. Firewood racks are a great accessory to keep your firewood nicely stacked, reduce mess, and can even add to your household design. These days you can find racks of various sizes and designs, and the best part is they don’t cost a fortune. Today, we’re giving you our Top 8 Best Firewood Racks for 2021.

What to Consider When Buying a Firewood Rack

Size and Capacity

Best firewood racks
Large hoop rack

Before buying a firewood rack, think about what size would best fit your fireplace surroundings, how often you use the fireplace, and how long your sessions are.

If you like to keep your fire going for a long time, or even the whole day, pick a bigger rack so you won’t need to run to the firewood storage every couple of hours. 

However, make sure to keep in mind your fireplace area size. Some fireplaces are quite small, so a big firewood rack might look very bulky or even get in the way for people to move around.

A 16 to 26-inch firewood rack should be more than enough for small to medium fireplaces.

Material

built in rack

Most firewood racks are made from wrought iron, stainless steel, or other hard metals. Anything weaker than that, and you might end up with a flimsy rack that is prone to bending or even collapsing. We would suggest staying away from anything plastic; it’s just not durable or sturdy enough for firewood. 

It’s also important to mention that racks made from heavy metals can have a hollow inside; this makes the rack lighter, cheaper, but not as sturdy. We personally like the non-hollow ones if the price is not too steep.

Indoor or Outdoor 

best firewood racks
indoor and outdoor rack

You’ll have no trouble keeping any of the racks indoor or outdoor as long as they can resist outside weather. If you’re planning to keep your rack outside, make sure it’s powder-coated to reduce paint flaking, rusting, and corrosion. Additionally, think about getting a rack cover to keep your wood dry and prolong your rack’s lifespan.

Most of the smaller racks are designed to be indoors; they’ll have a smaller capacity to fit near a fireplace, have a hanger for fireplace tools, kindling, and fire starters.

Design

designer firewood rack

No matter if you’re looking for a modern minimalistic rack or an old rustic one for country houses, there’s a variety of different designs to fit any fireplace and house vibe. If you don’t have any fireplace tools, you can also find racks with tools included. Some racks even have separate shelves for fire starters or small kindling, but these extra accessories usually come with a higher price.

Best Firewood Rack Reviews

PHI VILLA 17 Inch Small Firewood Log Rack

Phi Villa is a small firewood rack measuring 17 x 13 x 16 inches for someone with a small fireplace for an occasional relaxing evening by the fire. 

The rack is straightforward to assemble and comes with a detailed manual; all you need is a wrench and a screwdriver.

The Phi Villa rack is sturdy since it’s made from thick steel tubing to hold a maximum of 150 lbs. of firewood. Honestly, you probably couldn’t even fit that much firewood on this rack. You can also leave this rack outside because of the double powder-coated finish that heavily increases durability and longevity. 

This is just a great simple small firewood rack with a classic but sturdy design.

Key Features:

  • Thick steel tubes make it sturdy and durable.
  • Double powder-coated finish
  • Easy to assemble
  • Portable
  • Fit for outdoor use

Weaknesses:

  • It might be a bit small for medium-large fireplaces.

Everflying Fireplace Log Rack with 4 Tools

The Everflying log rack is a perfect option for an indoor fireplace if you are tight on space. The rack is much taller instead of being wider, measuring 28.7 x 15.7 x 11.8 inches. This allows you to store more wood vertically and fit the rack into smaller spaces near your fireplace.

The steel black powder-coated rack is easy to assemble and features two shelves, with the bottom one having a steel plate to reduce rubbish on the ground. You can use the bottom shelving for magazines, fire starters, or as extra space for firewood.

The rack comes with four tools (poker, shovel, broom, and tongs) that can be hung on the side of the frame. If you don’t mind the higher price point, the Everflying Fireplace Rack Set is the best small firewood rack on our list to keep your fireplace tidy, neat, and good-looking.

Key Features:

  • Four tools to keep fireplace organized and tidy
  • Space-saving horizontal design
  • Easy to assemble
  • Sturdy steel tubing

Weaknesses:

  • A bit expensive

DOEWORKS 23 Inches Solid Steel Log Hoop

DOEWWORKS firewood hoop rack is a stunningly beautiful, probably the best-looking firewood rack on our list, yet a very minimalistic product. Made from solid steel and finished with a black powder-coat, it is extremely sturdy, despite the steel hoops looking thin.

This firewood hoop rack can be used indoors and outdoors since it’s sprayed with anti-rust oil to prevent rust, corrosion and extend lifespan.

The 23-inch width rack is perfect for small-medium fireplaces and can keep 15-20 medium-sized logs. Additionally, It comes as a single piece, with no assembly required. Just unpack, fill it with firewood and enjoy the view.

Key Features:

  • Minimalistic design
  • Suitable for indoors and outdoors use
  • No assembly required
  • Very sturdy build
  • Portable

Weaknesses:

  • None

Weven Industrial Heavy Duty Firewood Log Rack

If you’re looking for something heavy-duty, high quality, and also good looking, check out the Weven firewood rack. This industrial-style log rack is truly a stunning piece that will not only keep your firewood in place but will also add a sophisticated touch to your fireplace.

You’ll have no trouble assembling this rack with just a wrench and a screwdriver. The sturdy firewood rack measures 19.7 x 13.8 x 37.4 inches and can hold up to 300 lbs. of firewood. Compared to other log racks, the Weven rack has more depth, so even when it’s packed up to the brim, it stays very stable.

Known for excellent rust and corrosion resistance, the Weven Industrial firewood rack can be used indoors and outdoors. However, we always advise covering your metal firewood racks if you want to increase their life span.

All in all, this is probably the best firewood rack if you want something sturdy to hold more firewood.

Key Features: 

  • Very sturdy
  • Heavy duty
  • Industrial-style look
  • Suitable for indoor and outdoor
  • Rust and corrosion-resistant
  • Vertical build holds more and takes less space.
  • Adjustable floor mats

Weaknesses:

  • The rough industrial look might not fit every fireplace.
  • Not very portable

Patio Watcher 3-Foot Firewood Rack Wood Storage Log Holder

Patio Watcher firewood rack is the best firewood rack for indoors on our list. It’s an excellent product that comes with additional accessories to facilitate maintenance of the fireplace and space around it. The 33 x 13 x 30 inches 25 lbs. frame is made from heavy-duty, durable steel and a double-coated finish to protect from rust or corrosion (can be used outdoors).

As mentioned above, this firewood rack is very versatile as it comes with four tools (poker, broom, shovel, and tongs) to help maintain fire and space around it. Additionally, on the other side of the rack, you have a fire starter or small kindling holder to have everything organized and still on one rack. The rack is also raised 4 inches from the ground to allow better airflow to keep the wood dry or protect from insects if kept outside.

If you have enough space near your fireplace, the Patio Watcher is a versatile firewood rack with a beautiful classic look and a versatile design.

Key features:

  • Sturdy build
  • Versatile design to hold small and large kindling
  • Beautiful classic look
  • Four tools included
  • Large capacity
  • It can be used indoor and outdoor.

Weaknesses:

  • Required a bit of assembling

Firewood Rack Log Rack 24 Inch

The Ucared 24-inch firewood is perfect for small fireplaces and tight spaces. The minimalistic durable steel construction firewood rack is very sturdy yet weighs only 11 lbs. Its weight and size make it portable and easy to relocate to your patio or back inside. If you decide to keep it outside, a black powder-coat will protect the rack from rust and corrosion during rainy or snowy weather.

This small firewood rack is easily assembled with a provided tool and measures 24 x 11.8 x 24 inches when built. It can hold enough firewood for small to medium fireplaces or shorter bonfire sessions.

The Ucared small firewood rack is well built, portable, and has a very unintrusive, minimalistic design. The only downfall we see is the higher price compared to similar size log racks.

Key features:

  • Easy to assemble
  • Heavy-duty sturdy construction
  • Perfect to use inside or outside
  • Minimalistic design

Weaknesses:

  • Quite small
  • A bit expensive for a 24-inch rack

Ucared Firewood Racks Heavy Duty Log Rack 47 Inch

Here we have another Ucared product.  This time, it’s a large firewood rack, primarily for outdoor use. The 47 x 11.8 x 24 inches heavy-duty log rack is excellent for large fireplaces or long evenings by your fire pit. By no means are we claiming that it’s for outdoor use only; if you have enough space indoors, you can use it there as well!

The construction is made from the same powder-coated durable steel as the 24-inch version. The rack is easily assembled in around 10 minutes, and we love that the rack feet have adjustable mats so you can adjust individual feet for uneven surfaces.

The minimalistic industrial look can be tailored to most classic and modern exteriors without standing out too much.

If you don’t want anything fancy or sophisticated, the Ucared 47-inch rack is the best large firewood rack on our list that doesn’t cost a fortune while still being sturdy and long-lasting.

Key features:

  • Easy to assemble
  • Perfect for large fireplaces or fire pits
  • A clean, minimalistic industrial look
  • Adjustable floor mats
  • Heavy-duty construction
  • Great price

Weaknesses:

  • None

SnugNiture Firewood Log Storage Rack Bracket Kit

Looking for a cheaper option and don’t mind some DIY work? The SnugNiture firewood rack bracket kit allows you to customize your log rack to precisely the size you want. The kit includes 2x brackets and 25x screws. To build the rack, you need to purchase your own 2 x 4s. 

The assembly does require some work but is pretty straightforward. Measure and cut your 2 x 4s in whatever length and height you want your rack to be, insert into the brackets and attach with the provided screws. 

We love that you can customize the size of the rack to your needs. You can build a small 24-inch rack for indoors or a large up to 10 feet length outdoors firewood storage rack.

SnugNiture also paid a lot of attention to details. The brackets are not only powder-coated to last longer but also have holes to drain water and seal strips to hold the 2 x 4s tightly.

This bracket kit should last you a very long time. Even if your 2 x 4s break, rot, or wear out, you can change them with new ones, and the rack will be brand new!

Key features:

  • Sturdy and long-lasting brackets
  • Customizable rack size
  • It can be used indoors and outdoors.

Weaknesses: 

  • Requires some DIY work
  • It could be a touch higher off the ground.

Frequently Asked Questions

How deep should the firewood rack be?

Usually, the depth of the firewood rack depends on the length of firewood you use. The standard average firewood length is 16 inches. If you use a small firewood rack with a depth of 10 inches and stack it with 16-inch logs, you run the risk of the rack tipping over. We advise using 12-inch and deeper racks for standard logs for safety reasons, especially if you stack them relatively high.

Do I need to cover my firewood rack?

Yes and No. In general, firewood needs to dry out when it’s fresh and stay that way to avoid rotting. If your firewood rack is indoors, you don’t need a cover; however, it’s unavoidable you’ll have rain or snow when the rack is outside. Some rain or snow is ok since wood dries pretty quickly, but if precipitation is frequent, a cover is advised to keep your firewood dry and prolong your rack’s lifespan.

Top 7 Best Firewood Carriers in 2021

If you ever owned or wood-burning fire pit, a chimenea or a fireplace, you know the hassle of carrying kindling from your storage back to the fireplace. Leaving your cozy and warm seat is bad enough, but on top of it, you get all your clothes dirty while leaving a trail of dirt, leaves, or crumbs from the wood when carrying it by hand. Keep your house and clothes clean and enjoy longer fires with a firewood carrier! Check out our Top 7 Best Firewood Carriers in 2021 to make wood carrying less of a chore and keep the fire blazing longer.

What to Consider Before Buying a Firewood Carrier?

Length of the Carrier

man using a firewood bag
firewood basket

You’ll find that there are different length carriers ranging from 20 to 30 inches in length. Think about what kind of logs you usually use. If you’re stocked on 8 – 10 inches kindling for a very small fireplace or a mini chiminea[1] , then probably a shorter carrier makes more sense. Standard or bigger logs will need a longer carrier; of course, anything around 25 – 30 inches in length should be plenty. If you’re not sure what size logs you’ll be using, just go for a bigger firewood bag; the price difference is usually very minimal.

Size and Capacity

small mesh carrier

But we already talked about length? Yes, but the carrier’s size and how much firewood it can carry depends on the height and width. Large firewood carriers are great because you need fewer trips to the storage during those long evenings by the fire. You can also just use a large log carrier instead of a firewood rack and just keep the firewood inside. Large carriers are great for long sessions, but small ones are usually more convenient to carry and don’t take up a lot of space.

Material

firewood in white bag

You can find firewood carriers made from leather, canvas, cotton, or a mixture of all of them. Which one to choose? Well, it’s honestly up to your liking. Leather is usually more expensive, has great durability, and looks fantastic. Cotton is probably the cheapest but not as durable or nice. The heavy-duty waxed canvas is an excellent option since it’s not that expensive and made to last while very easy to clean.

Accessories

mesh firewood bag

To make firewood log carrying easier, look for a bag that has handles along with shoulder straps to distribute weight to the upper body. Secondly, a firewood fastener is an excellent accessory, so your logs don’t slide around or fall out. Some carriers also feature a pocket to store your gloves so you won’t misplace them.

Best Firewood Carrier Reviews

Amagabeli Firewood Carrier Bag

This beautiful brown firewood carrier is 18 inches in length and 38 inches wide when unfolded. You’ll have no trouble fitting standard 16-inch logs. A very wide bag allows packing as much firewood as you can carry, while the waxed canvas is adequately secured with straps going around the carrier to avoid ripping or tearing.

The waxed canvas is water-resistant and dirt-proof, so it won’t need frequent cleaning since any liquid will just run down most of the time. However, if you want to extend the bag’s longevity, avoid leaving it outside in moisture or rain.

This firewood carrier’s only downfall is the double D ring strap to secure firewood. It’s a hassle to secure it properly, especially with gloves. Other than that, Amagabeli is a stylish one of the best firewood log carriers for its price.

Key features:

  • Good size and capacity
  • Nice brown waxed canvas
  • Water-resistant and dirt-proof
  • Cheap

Weaknesses:

  • D ring strap not practical

BONTHEE Extra Large Waterproof Firewood Log Carrier

If you hate making multiple trips to get firewood during long sessions by the fire, we suggest getting Bonthee extra-large firewood log carrier. This carrier is 23.6 x 11.8 x 19.7 inches in size and can fit even 20+ inches length logs if you have a big fireplace. If needed, you can fit up to 15kg of firewood.

Besides the huge capacity, we love the design of the bag. You have a regular handle and an over-the-shoulder strap for a more ergonomic carrying of heavier loads. The straps also go all the way around the bag, making it more robust.

Bonthee’s extra-large firewood carrier is waterproof so that you can use it during any weather or with any type of wood. If the bag gets stained or soiled, the heavy-duty canvas can be easily cleaned with a brush and some soap. This is definitely one of the best firewood carriers for large loads.

Key features:

  • Extra large
  • Over-shoulder straps
  • Waterproof
  • Rivet reinforced
  • Wall pocket
  • Easy to fold

Weaknesses:

  • Canvas not waxed

Stanbroil Firewood Carrier & Log Tote, Log Holder

You’re at the bottom of your budget but hate carrying wood by hand? Stanbroil log holder is the best budget firewood carrier on our list. For an extremely low price, you get a 35-inch length and 17.5-inch height firewood tote that is made from a durable waterproof canvas. This large bag can fit different firewood log sizes and is fully enclosed to protect any scraps, dirt, or water from spilling on the floor.

The canvas does look a bit thinner and maybe not as nice as most other bags, but you can’t ask more from a firewood carrier for such a price. Stanbroil even gives a 1-year warranty if the log tote is not up to standards.

Key features:

  • Budget price
  • Strong canvas
  • Easily folded
  • 1-year warranty

Weaknesses:

  • It might not last as long as other bags.
  • Not very pretty

Cougar Outdoor – The Ultimate Log Carrier

Cougar Outdoor company should already give it away that this log carrier will be heavy-duty and able to hold heavy loads. The 24 x 17 x 12 inches 1200 denier canvas is very sturdy and built to last. There are also double-stitched external trims around every seam to provide more robustness.

You can use this not only for firewood carrying but any other gardening or household chores. If it gets dirty, just spray it with a hose or scrub with a soapy brush and leave it to dry.

This firewood carrier isn’t made for people who want a beautiful bag to sit as a decor piece by the fireplace. The looks are pretty plain and indistinguishable. Another weakness of the bag is that it doesn’t stand well when empty, even though it’s advertised that it does.

Despite these minor disadvantages, it’s definitely one of the best large firewood carriers if you don’t care about the looks and want something heavy-duty. The budget price is also a bonus!

Key features:

  • Heavy duty
  • Great price
  • Extra large
  • Water-resistant
  • Two handles

Weaknesses:

  • Plain looks
  • Doesn’t stand up when empty

LogOX WoodOX Sling – The World’s Most Ergonomic Firewood Log Carrier

Have a weak back or just want to avoid bending and kneeling as much as possible while on firewood duty? LogOX has manufactured an unconventional firewood carrier which they call the world’s most ergonomic carrier. We haven’t tried many other ergonomic carriers, but the WoodOX sling is extremely easy to load and unload.  You put one strap over your shoulder and slide one hand into the loop. This way, all the weight is distributed to the upper body while eliminating the need to bend and load the carrier.

The patented firewood carrier is made from natural cotton canvas and strong nylon straps to last numerous seasons. If you need to carry firewood at night, there’s even an LED light to illuminate the surroundings.

The WoodOX Sling does come at a high price but is a fantastic carrier for more ergonomic and faster firewood trips.

Key features:

  • Very ergonomic design
  • Natural cotton canvas
  • Very easy to load and unload
  • LED light for night trips
  • Made in the USA

Weaknesses:

  • Expensive

INNO STAGE Waxed Canvas Firewood Log Carrier

The Inno Stage firewood carrier could probably be mistaken for a stylish duffel bag, at least from afar. The beautiful design with scratch-resistant waxed canvas and leather-like handles will tempt other household residents to take over the firewood carrying chore.

The Inno Stage log carrier is 23.4 x 10 x 11.4 inches in size and can easily fit any standard size logs. The 16oz waxed canvas and reinforced handles make the bag sturdy even when holding heavy loads. One of the main disadvantages is that the bag doesn’t stand when empty and makes it a touch harder to load.

If you want to look stylish on firewood duty, the Inno Stage log bag is made for you. It is undoubtedly the most beautiful firewood carrier on our list and probably on the market in general.

Key features:

  • Stylish design
  • Large capacity
  • Comfortable handles
  • Water-resistant
  • Waxed canvas
  • Very durable

Weaknesses:

  • It doesn’t stand well when empty.

Snitsla Carrywood – A Firewood Log Carrier

The Snitsla firewood log carrier is a versatile bag that can be used not only for kindling carrying but also for various other gardening or landscaping chores. Three side pockets allow you to hold gloves or various tools.

Use a comfortable shoulder strap for a more ergonomic carry or short handle if the load is lighter. If needed, you can fit even 18-inch logs into this attractive bag. The 16 oz waxed cotton canvas is durable, water and dirt resistant, but most importantly, comfortable.

Our only frustration is with the double D rings for the fastener strap; it takes too long to secure the load and sometimes just doesn’t work at all. Other than that, it’s an excellent firewood carrier that can be used for various other chores around the house or backyard.

Key features:

  • Beautiful design
  • Shoulder strap
  • Water-resistant
  • Side pockets
  • Multi-purpose
  • Strap to secure firewood
  • 1-year warranty

Weaknesses:

  • A bit expensive
  • Double D rings are a hassle.

Frequently Asked Questions

Can I leave my firewood carrier outside?

Yes, you can; most of the firewood bags are made from robust canvas, which is water and dirt-resistant. However, leaving your carrier wet for a long time is not advised. The moisture on the canvas combined with various pieces of wood chips, leaves, and dirt will start growing mold and will ruin your carrier. As a general rule, keep your firewood carrier dry, whether it’s inside or outside.

Can I store wood in my firewood bag?

Of course! The carrier is not only to transport the kindlings but also to keep them by the fireplace. If you don’t have a convenient firewood rack[2]  nearby to nicely stack your logs, just leave it in the carrier to avoid making a mess on the floor or hearth.

How to clean my firewood carrier?

If your carrier got some mold on it from wet firewood sitting in there for a long time or it just got really dirty, you can easily clean it. If your firewood carrier is made from leather, just grab a wet cloth, add a couple of drops of dish soap and scrub the stains; just make sure to rinse with hot water and dry thoroughly so no soap residue is left.

If it’s a cloth canvas, then just grab a scrub brush, wet the canvas with some warm water, add a few drops of dish soap and scrub until the stains are gone. The harsh scrub brush usually does the trick and doesn’t damage the carrier since most of them are made from a heavy-duty waxed canvas. As always, make sure to dry the carrier before storing it away.

Top 7 Best Fire Pit Mats in 2021

So you’ve bought your wood-burning fire pit and are enjoying cozy evenings by the fire, but are you protecting your deck? Flying sparks, embers, or the heat from a metal fire pit itself can damage, melt, or even set your deck on fire if it’s not heat resistant. Hot charcoal can be up to 1,200 degrees Fahrenheit, so if your fire pit bowl is stationed on the deck or close to it, you can expect severe damage in the long term. Fire pit mats or protective padding is a cheap way to protect your deck and an extra step to make your household safer. Today, we’re giving you our list of Top 7 Best Fire Pit Mats in 2021 to protect your deck and backyard from damage.

When Do I Need a Fire Pit Mat?

hot fire
coffee over a fire

If you’re placing your wood-burning fire pit on a combustible (vinyl, wood, PVC, etc.) deck, you’ll most likely need a fire pit mat underneath it. A short base fire pit or fire bowl that sits directly on the deck can get very hot and may melt, damage the finish, or burn your deck. If you’ve positioned your fire pit on the grass, a fire pit mat can be a great way to protect it from burns and having scorched grass patches in the backyard. 

If you have a propane gas fire pit that sits quite low on the deck, you might also need protective padding underneath it. Gas fire pits don’t create as much heat as wood fire pits, but if they sit low enough on the deck, they might damage it. If you want to keep your deck in pristine condition, think about getting a heat-proof fire mat for your gas fire pit too.

Fire Pit Mats and Pads Materials

fire pit mat and supplies

Most of the fire pit mats are made from fiberglass or fire-retardant film. They are good enough to protect the underneath surface from flying embers, ashes, and heat from the pit itself if it does not directly sit on the mat. The majority of these mats will warn that there should be at least 6 to 10 inches of space between the mat and the fire pit bowl.

If your fire bowl is not standing on any legs and directly sits on the ground, you should look into firmer pads made of volcanic rock fiber or a thicker metal heat-resistant shield.

Best Fire Pit Mat Reviews

Fireproof Pros 36″ Fire Pit Mat

US-based FireProof Pros released a series of next generation fire pit mats for under your firepit. Unlike other fire pit pads, this flame retardant heat shield is over 6mm thick with a vast mix of materials to give more heat protection for your grass, patio, concrete, wood deck, and other areas. 

This is a true 3-layered fire pit mat, which can block heat transfer from fallen embers for up to two minutes, where this is not possible with the thinner mats or lesser quality materials.

  • The top layer is a heat reflective and blocking aluminum and fiberglass/silica mix that has been made more peel resistant so your mat will last long.
  • The middle layer of this mat was designed for flame resistance and to slow heat transfer through that mat. 
  • The bottom layer is made of more non combustible and non-slip material so the mat does not slide when used.

The three layers are bound together with a fireproof Kevlar thread that is also treated with heat resistant coatings to help keep this mat together and lasting longer after many uses. This is not something you see with most other self proclaimed “protective mats.”

It comes with a convenient weatherproof storage/carrying case that allows you to store this mat away or take it with you.
This fire pit mat is designed for fire pits with legs with at least 4″ of height between the metal bottom and the mat. So you will not want to use fire pits made completely of metal with a solid metal base of fire bowls or grills where the heat source is directly above the mat within the recommended 4 inches. 
With all these features, this is the highest quality fire pit mat on our list giving longer protection from intense heat, longer lasting for many uses, and higher heat blocking materials. 

Key features: 

  • Incredible quality
  • 6mm thick
  • Fire resistant stitching
  • More peel resistant
  • Better ember protection
  • Weatherproof carrying case
  • US based customer service and support

Weaknesses:

  • The one downside would be the aluminized top which may not be as attractive as you’d like. 

Uterstyle Fire Pit Mat

Here we have a 36 x 36-inch fire pit mat from Uterstyle. This large fire pit mat is made from high-quality fiberglass that lasts a long time. The flexible and large mat can be used under any fire pit, bbq, or chiminea to protect from stains or heat as long the fire source is not sitting directly on the mat. 

This large fire pit mat can be used on any deck, patio, and grass. We would advise being cautious when using it on the grass. Thin fire pit mats may not be enough to protect the grass if your fire pit bowl is very close to the ground. You could fold the mat in half and double it as an extra precaution to keep the grass from getting burnt.

Considering the low price, the Uterstyle fire pit mat is the best budget fire pit mat on our list. It is very versatile, easy to fold and store, and doesn’t cost a fortune. The only disadvantage we can think of is the plain white/cream color, which might not fit with everyone’s backyard style or color scheme.

Key features:

  • Great price
  • Versatile
  • Easy to fold
  • Large coverage

Weaknesses: 

  • Plain color

Fireside Outdoor Ground Ember Fire Mat

Fireside Outdoor is a well-established brand specializing in portable fire pits, protective mats, and fire covers to keep campers and nature safe from fire hazards. The Ground Ember Fire Mat is probably their best product in terms of quality and heat protection. 

The large 67 x 60-inches mat will protect from even furthest flying embers or grease splashes. It comes with a 1-year warranty and meets all USFS & BLM fire blanket regulations.  The mat is coated in food-grade silicone, making it easy to handle, won’t cause itching, and won’t transfer fibers if food is dropped on it. 

Ground Ember Fire Mat is designed to stay in place even in windy conditions. There are eight stainless steel edge grommets to keep it in place during high winds. Additionally, the reflective edges make it easy to see at night time.

This fire pit mat comes at a higher price compared to other mats, but high quality, versatility, and large size make it the best fire pit mat on our list.

Key features:

  • Great quality 
  • Very large
  • Versatile
  • Coated with food-grade silicone
  • Grommets to secure to surface
  • Reflective edges for night use

Weaknesses: 

  • High price

Newtex Fire Pad Deck Protector 24-inch

This small fire pit mat is great if you want to be extra careful on your wood, PVC, or vinyl deck. The Newtex 24-inch fire pad will fit underneath most small to medium-sized fire pits. The Z-flex aluminized fabric technology can reflect up to 95% of radiant heat and stay cool to the touch. The multilayer of industrial-grade high-quality fibers used in this military-grade fire containment cover provides an impenetrable fire barrier to protect your deck or grass.

The company claims that this USA-made product is 3x better at keeping the temperature under 200 degrees Fahrenheit compared to the competition. 

Being made and tested in the USA, the mat comes at a higher price but is still affordable to anyone. If you want to take extra care of your deck, consider the Newtex fire pad as it is the best small fire mat on our list.

Key features:

  • Aluminized fabric to reflect heat
  • High quality
  • Made in the USA
  • Portable and easy to store

Weaknesses: 

  • High price

WELLUCK 40 Inch X 40 Inch Ember Mat

Here we have a square fire pit mat from WELLUCK that is 40 x 40-inches in size and is perfect even for large fire pits or BBQs. 

You’ll find that the middle of the mat has a reflective layer to reflect the majority of radiant heat. Additionally, this fire pit mat also uses dual-aluminized technology designed to protect from the heat of up to 1,800 degrees Fahrenheit.

The mat can be secured to the deck or ground using the stainless steel grommets in the corners. This will keep the mat in place during strong winds and protect people from tripping over the mat.

If the sand color doesn’t bother you, then the WELLUCK Ember Mat is a great cheap pick for a large fire pit mat. It will cover a large area from sparks and embers and can be easily secured. Finally, the thin mat is easy to fold and store away when not in use.

Key features:

  • Dual aluminized material to reflect most heat
  • Very large
  • Cheap
  • Easy to fold and store
  • Grommets to secure to the surface

Weaknesses: 

  • Dull colors

ROLOWAY Fire Pit Mat

Here we have a 36-inch round mat from ROLOWAY, a company specializing in fire-resistant and safety products. The 3-layer heat-resistant mat is designed to withstand up to 2000 degrees Fahrenheit heat. 

The design of this mat consists of three important layers. The 1st layer of aluminized fiberglass reflects radiant heat (up to 95%).  The 2nd layer of thermal insulation cotton slows down the heat transfer and isolates it.  Finally, the 3rd layer of silicone-coated fiberglass adds extra protection to the surface underneath it.

Light and easy to fold, this mat is perfect for camping and storing. The aluminized front and silicone back are very easy to clean from grease or other food drippings. The mat is also waterproof and is not afraid of moisture.

The aluminized front does make it stand out and probably won’t go with most deck or patio designs; however, the budget price cannot be overlooked if you want extra protection for your deck or grass.

Key features:

  • Cheap
  • High-quality three-layer design
  • Lightweight and portable
  • Easy to clean
  • Waterproof

Weaknesses: 

  • Aluminized front is too eye-catchy

Huttoly Fire Pit Mat 67 x 60 inches

Hate those little sparks and ember pieces that fly out of the fire pit and ruin your deck finish? Have really dry grass most of the year and want to be extra safe around the fire? Then check out Huttoly mat, one of the best large fire pit mats on our list.

The 67 x 60-inch deck protector is large enough to catch flying sparks even from larger fire pits or BBQ grills. 

The three layers consist of a fiberglass middle layer and thick silicone-coated outside layers. Compared to aluminized coatings that reflect the heat radiation, liquid silica gel doesn’t reflect the heat or let it through and can withstand heat up to 1,800 degrees Fahrenheit.  This is enough when using most fire pits or grills as long as they stay 10-inches above the mat.

The Huttoly fire pit mat is great for camping and even everyday use since it is very easy to fold and unfold. If you like to stay by the fire at night, there are reflective strips and holes to fasten the mat to the ground for extra safety.

Key features:

  • Extra large
  • Sturdy 3 layer mat
  • Portable and great for camping
  • Grommets to fasten the mat to the surface
  • Reflective strips for night use

Weaknesses: 

  • Aluminized front is very eye-catchy

Northland Online Deck Defender & Grass Guard

If you have a wood-burning fire bowl pit that sits very low to the ground and is not elevated enough, almost none of the fire mats will be helpful. The extreme temperature from hot charcoal will burn through the mat and damage your deck or grass. Therefore, you need a heat shield like the Northland deck defender and grass guard.

This shield made in the USA by Northland Metal Industries is 100% fire-proof aluminum metal construction and comes with a 2-year warranty. The two-piece construction is designed to create air space between the layers for a better insulation effect. 

The sturdy and stable construction allows placing it on any patio, deck, or even uneven surfaces like grass or gravel. This 26 x 26-inch sized platform will fit most regular fire pits and requires them to stand no lower than 2-inches.  This is significant since most fire pit mats require at least 6 to 10-inches of space between the mat and fire bowl.

If you don’t mind the heavier weight and are looking for a sturdy option, then the Northland Online Deck Defender & Grass Guard is a great fire pit shield for you. Long-lasting, sturdy construction, and a great warranty make up for the heavier price.

Key features:

  • 100% fire-proof aluminum construction
  • Heavy duty
  • Long-lasting
  • Made in the USA

Weaknesses: 

  • High price

Frequently Asked Questions

Do I Need a Fire Pit Mat on a Wood Deck?

Fire pit mats protect wood decks from radiant heat coming down the pit, shooting sparks, embers, grease, and food drippings. If you have a fire pit that can stand 20-inches or higher from the deck, you most likely don’t need heat protection.

However, the mat also protects from flying sparks and embers that could leave small burn marks in just a few seconds. Finally, most fire pit mats are easier to clean than wood decks if any oil or food drips out of the pit.

Do I Need a Fire Pit Mat on Grass?

Not necessarily, but a fire pit mat will protect your grass from being damaged. Fire pits can easily scorch the grass if they have short legs, and you’ll end up with a yellow patch of burnt grass in your backyard.

If your grass is constantly dry, then having a fire pit with no protection is a real fire hazard. A large fire mat covering as much area as possible would be best for dry grass to avoid sparks and flying embers igniting the grass.

What Size Fire Pit Mat Do I Need?

If you need a fire pit mat only for heat protection, then you can go for a smaller 24 – 26-inches mat to place directly under your fire pit. As long as they are the same size and not smaller than your actual fire pit, your deck underneath should be protected.

However, if you want extra safety from sparks, embers, or oil and food drippings, go for larger mats. The more area you cover, the safer your deck base or grass will be. Anything over 36-inches should do the trick.

Be aware that a fire pit mat is not a guarantee that you will not cause a fire.  Wind can carry hot embers a very long distance, so you must always keep your fire under control and pay attention to weather conditions that may prove hazardous.

Do I Need a Fire Pit Mat for a Chiminea Fire Pit?

Yes, even though chiminea fire pits create less heat than wood-burning fire pits, they still should have a protective heat-resistant mat if they stand very close to the grass or combustible deck. Remember, chiminea fire pits are much heavier and should be set on a very stable base.