Best Time to Plant a Garden

Planting a Garden

Knowing the best time to plant a garden to ensure it thrives throughout the growing season can make the difference between an mediocre garden and a great garden. Determining when to plant and what specific plants to grow in your vegetable, herb, fruit, or flower garden are two of the most crucial parts of gardening. If your gardens aren’t doing as well as you’d like, changing your planting schedule might be the answer. We’ll provide some helpful advice for growing your preferred fruits, flowers, vegetables, and herbs. You’re on your way to becoming a year-round (not quite) gardener!

Things to do before planting a garden

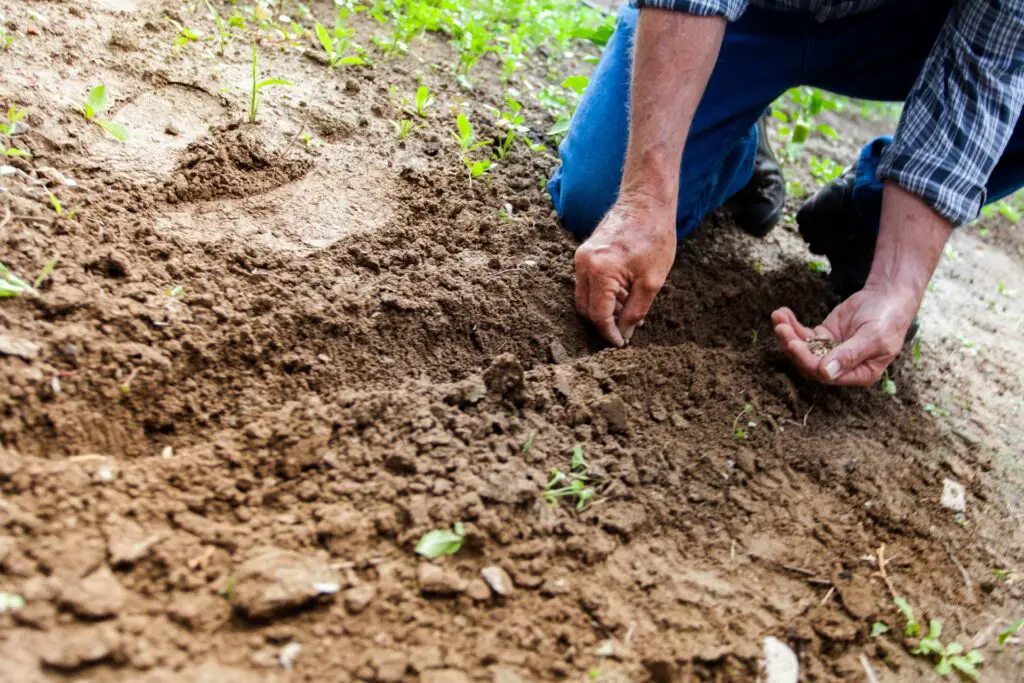
It’s necessary to plant at the correct time of year if you want your garden to flourish, but it’s not only about timing. There are a few other things that we need to address.

Locate your Zone

Knowing which USDA planting zones you live in can make all the difference in your garden’s success or failure. Planting flowers, vegetables, and other plants that are suited to your growing zone in the United States help ensure that your garden thrives year after year.

Take a look at the USDA Hardiness Zone map to determine your zone. The answer to the query “How can I discover my hardiness zone?” is as simple as locating your location on a map. Look for your state, and you’ll find the U.S. growth zones.

The USDA Zones are also important for figuring out when your first and last frost dates are.

  • Zone 1
    • Last frost May 22 – June 4
    • First Frost August 25-31
  • Zone 2
    • Last frost May 15-22
    • First frost September 1-8
  • Zone 3
    • Last frost May 1 – 16
    • First frost September 8 – 15
  • Zone 4
    • Last frost April 24 – May 12
    • First frost September 21 – October 7
  • Zone 5
    • Last frost April 7 – 30
    • First frost October 13 – 21
  • Zone 6
    • Last frost April 1 – 21
    • First frost October 17 – 31
  • Zone 7
    • Last frost March 22 – April 3
    • First frost October 29 – November 15
  • Zone 8
    • Last frost March 13 – 28
    • First frost November 7 – 28
  • Zone 9
    • Last frost February 6 – 28
    • First frost November 25 – December 13
  • Zone 10 – 13
    • No Frost (typically)

Once you find out your hardiness zone, it’s time to choose your plants.

Select your Plants

Regardless of your zone or when you are reading this article, there is a bit of general plant knowledge that you should have before going any further. You may not know this, but there are cool and warm season plants. Sure, you thought all plants were warm season plants, didn’t you? To get the most out of your growing season and the plants that you are trying to grow, it is important to understand their seasonal preferences.

Cool Season

For most spring plants, we typically wait until the chance of frost has passed. Here in Wisconsin, that is usually some time in early May, but if you want to play it safe and you are going to the garden center to lay down some hard cash on annual flowers, I would wait until closer to the end of May. I have learned that lesson the hard way. This is not the case with cool season plants. If you are waiting until all frost has passed to plant your cool season plants, you are not getting the best from them.

  • They like to grow when the temps are a bit cooler. Usually in the 50-60 degree Fahrenheit range.
  • They can be planted as soon as your ground thaws enough in spring
  • Light frost won’t damage these plants, so plant early
  • They can also be planted in the fall, but give them enough time to mature before a hard freeze occurs.

Here is a list of some cool season veggies

  • Peas
  • Asparagus
  • Brussel Sprouts
  • Cauliflower
  • Broccoli
  • Kale
  • Lettuce
  • Carrots
  • Beets
  • Radishes
  • Rudabegas
  • Turnips

Warm Season

These are the plants you need to wait to plant until you are sure that you wont have anymore hard frost. They love the warm weather and warm soil. If you are planting your warm season plants too early, you may be stunting their growth.

  • They should only be planted after the threat of frost has passed.
  • They require warm soils and air temperature for growth and fruiting.
  • They grow best with long warm days and mild nights.
  • The growing season in some areas is too short to allow for some warm season crops to be directly seeded in the garden.
  • In colder regions, these plants should be started indoors for best results
    • For example, in my area of Wisconsin. we typically either buy small tomato plants or start them from seed in the house to ensure that they have adequate time to mature in our short warm season.
    • Also use this method to stagger your harvest time for some of the warm season vegetables.

Here is a list of some warm season veggies.

  • beans
  • corn
  • cucumbers
  • eggplant
  • melons
  • peppers
  • zucchini
  • summer squash
  • pumpkin
  • winter squash
  • sweet potato
  • watermelon
  • tomato

All vegetables require either a cool or warm growth season to be healthy and productive. It’s critical to understand your right grow zone/location if you want a plentiful yield.

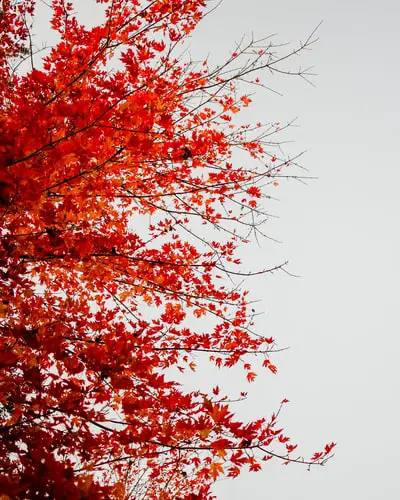
Why Frost is So Important

Why do gardeners spend so much time worried about frost? People will go to great lengths to protect their delicate plants from the early frost of winter, but why are some plants so sensitive?

Plants fall into four categories depending on how sensitive they are to frost and freezing.

  • Tender – these are the most sensitive plants and are often the tropical plants. Even a very light frost can kill these plants.
  • Slightly Hardy – these are the subtropicals that can take abit of cold, but a hard frost will surely do them in. Many veggies fall into this group.
  • Moderately Hardy – These plants can resist freezing damage even in temperatures as low as 10-20 degrees Fahrenheit.
  • Very Hardy – These are the plants that we can grow all year-rpund here in Wisconsin. These are the plants that either die back to the ground and come back the following spring or they can simply retain enough heat or avoid desiccation.

When plants are exposed to extremely cold conditions, something dangerous happens at the molecular level. You probably know how it feels when your fingers begin to get numb in the cold. Well, it is similar for plants. We are not particularly cold hardy, humans can’t spend too much time outside in freezing temperatures before our cells begin to freeze. When a cell freezes, that is when we get the dead skin associated with what we call frostbite.

Have you noticed how frost damage in sensitive plants looks a bit like frost damage to human skin?

Several destructive processes occur when a plant is affected by a killing frost, no matter what its hardiness classification is. The production of ice crystals in the gaps between their cells is one of the most impactful processes. When the water in the intercellular cracks freezes, it moves out of the cells and into the intercellular spaces, where it freezes. As more water leaves the cells, the amount of ice in the intercellular gaps grows quickly. Water loss from cells, if left uncontrolled, can lead to serious dehydration and death.

Some or the hardiest plants and animals have learned to prepare themselves for the cold. This is what we call cold hardening in the plants.

As the temperatures get colder, the plants allow less and less water up into the stalks and retain more moisture in the roots. This hardening off will help the plant survive the very cold temperatures. This is why deciduous trees lose their leaves in the fall. This is also why many plants will be damaged when we get an unsuspected early frost. If the plants haven’t had time to prepare themselves, the hard early frost can do damage to cells that would otherwise have hardened off.

Frost damage will also occur even in hardy plants when we have several warm days in spring. When the temperatures begin to warm, the plants think that spring is here and the fluids start to flow. If we get hit by a frost after this spring flow starts, plants cells will be damaged.

Generally speaking, winters that get cold and have a good snow cover are easier on plants than winters with temperatures that fluctuate above and below freezing with little snow cover.

Planting Times – These Depend on your Zone!

  • Spring (the 1st of March to the 31st of May) – It’s time to sow carrots, radish, lettuce, broccoli, turnips, spinach, kohlrabi, cabbage, collards, asparagus, Brussels sprouts, peas, cauliflower, and herbs like parsley, dill, and cilantro in the early spring.
  • Summer (the 1st of June to the 31st of August) – Plant summer classics like peppers, tomatoes, eggplant, melons, squash, onions, potatoes, leeks, herbs, and maybe a few more leafy greens and root crops before the weather becomes too hot. Summer is the best time to cultivate mint, basil, chives, and lemongrass if you want fresh herbs.
  • Fall (the 1st of September to the 30th of November)Garlic is, without a doubt, the crop that most gardeners look forward to growing in the fall. Drop your preferred soft or hard neck types as long as the soil is passable (usually between September and October for most people). Potatoes will thrive well in the ground if planted early enough before the first freeze. Furthermore, onions do best when planted in mid to late October. Blueberry bushes are also nice to plant in the fall, as long as you do soil prep in the summer. It’s also a good idea to plant root crops such as radishes, carrots, turnips, parsnips, and beets for the fall season. Do you enjoy salads and leafy greens in your sandwiches? In the colder autumn weather, your favorite greens, like arugula, will grow.
  • Winter (the 1st of December to the 28th of February) – Winter is an excellent time to start growing your favorite summer crops inside the house. Tomatoes, eggplant, peppers, and other vegetables should be planted right before winter ends. Sprouts and microgreens are easy to grow! The vast majority of your favorite spring and summer veggies grow nicely as sprouts, so start planting a few of them beside a south-facing window to get a source of nutrients. If you like cooking, herbs may be grown in small containers, provided they get sufficient light.

What is a planting calendar, and why should you use one?

When is the ideal time to plant spring crops in most of the United States? Use this helpful calendar to receive more precise planting suggestions depending on your location.

Planting calendars are used to obtain the appropriate time to plant a garden and start seedlings. The first and latest frost dates are used to time all planting. In hardiness zone 5, for example, the final frost date is usually between the 1st of April and the 15th of April, while the first frost date is generally between the 16th of October and the 31st of October.

These dates will help determine when the ideal time is to plant.

How it works

Planting dates are calculated differently for each plant. It’s determined by the plant’s maturity date and requirements and the growing zone and frost dates.

Identify the earliest frost date and then work backward to construct a planting timetable. Doing this will assist you in determining the optimal planting date for whatever it is you’re growing. The objective is to allow adequate time for a plant to grow before the first frost of the year.

Assess the growth and maturity periods for each plant or vegetable you want to plant once you have this information.

The Best Time to Plant Your Garden

When is the best time to plant a garden? Like soil, water, sunshine, and other growth factors, plants can have a wide range of requirements for the optimal time to plant.

When is the best time to plant vegetables?

It’s critical to plant vegetables at the correct time of year while growing them in your garden. While certain vegetables grow in the spring and summer, others prefer the cooler weather of the fall. For us in Wisconsin, we start our warm season plants in the house and then plant everything just before Memorial Day.

I typically don’t go through the process of staggering planting times to maximize harvest, but it is surely a good way to have the fresh veggies that you want all summer long. My reason for not doing this is simply time. Taking the time to plant my veggie garden once is fine, but being a landscaper, planting again later and mainteining different crop calendars takes a bit more time than I have during my busy season.

You should definitely check out the growing calendar listed above to figure out how to maximize your garden this season.

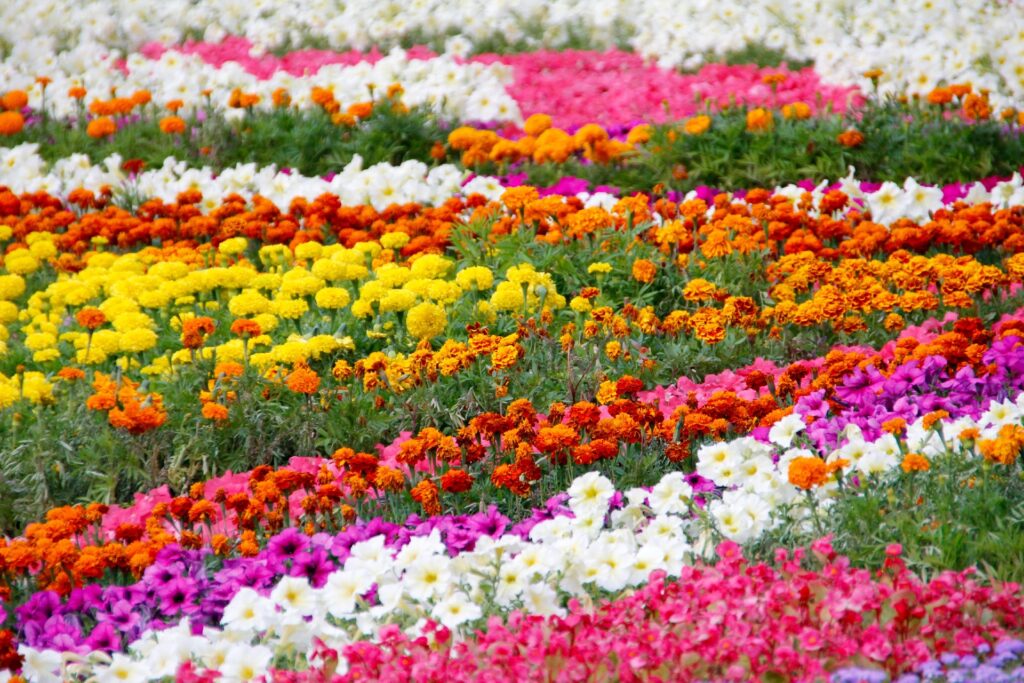
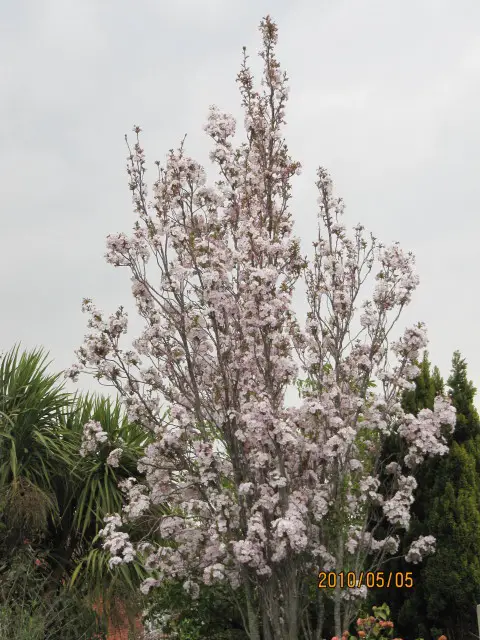
When is the best time to plant flowers?

Knowing when to plant flowers is simple if you know your zone’s first and last frost dates. Zones can be separated even within themselves, causing advised planting dates to shift by a week or two.

Always check the flower’s kind to determine whether it can withstand your zone and frost dates.

Hardy flowers, such as alyssum, dianthus, and pansies, can withstand minor frosts, but sensitive flowers, such as nasturtium, petunias, and dahlias, require warm soil to thrive.

Consequently, the type of flower paired with the frost dates will serve as the final guide in establishing a garden calendar that will yield the most stunning flowers and richness.

When is the best time to plant herbs?

A large number of herbs may be grown from seed either inside or outdoors. Some examples of herbs you can grow indoors are dill, chives, mint, oregano, basil, thyme, rosemary, coriander, dwarf garden sage, and creeping savory.

You can plant young starting plants in the ground right away. Often, all three approaches will produce excellent results. When to start or plant an herb relies a lot on your climate zone and the sort of herb you wish to cultivate.

Some herbs, such as chives, can be started inside 8–10 weeks before the last frost or outdoors 3–4 weeks before the last frost.

When should you plant fruits?

If you want to plant fruit trees in the ground, planting them in the early springtime or late winter is usually good. Generally, fruit trees need a lot of sunlight.

When planted between September and May, container trees grow nicely. Wait till the weather warms up if you’re going to plant in the dead of winter.

Strawberries, for example, can be planted as early as six weeks before the latest average frost date in a given location.

REFERENCES

https://planthardiness.ars.usda.gov/

https://letstalkscience.ca/educational-resources/backgrounders/needs-plants

https://extension.psu.edu/cool-season-vs-warm-season-vegetables

https://extension.illinois.edu/blogs/good-growing/2020-03-27-starting-garden-warm-season-vegetables

arnoldia.arboretum.harvard.edu/pdf/articles/1985-45-4-what-determines-a-plant-s-cold-hardiness.pdf

https://extension.umn.edu/vegetables/growing-radishes

https://content.ces.ncsu.edu/lettuce

https://extension.psu.edu/broccoli-production

https://academics.hamilton.edu/foodforthought/our_research_files/turnips.pdf

https://horticulture.oregonstate.edu/oregon-vegetables/spinach-0

https://gardeningsolutions.ifas.ufl.edu/plants/edibles/vegetables/kohlrabi.html

https://www.sciencedirect.com/book/9780080408262/genetic-improvement-of-vegetable-crops

https://content.ces.ncsu.edu/collard-greens

https://extension.umn.edu/vegetables/growing-asparagus

https://www.sciencedirect.com/topics/agricultural-and-biological-sciences/brussels-sprouts

https://ag.umass.edu/home-lawn-garden/fact-sheets/peas-growing-tips

https://ohioline.osu.edu/factsheet/hyg-1613

https://www.rhs.org.uk/advice/grow-your-own/herbs/parsley

https://www.canr.msu.edu/news/strawberries_and_the_science_behind_them

https://www.extension.uidaho.edu/publishing/pdf/BUL/BUL0864.pdf

https://cals.arizona.edu/maricopa/garden/html/pubs/0203/eggplant.html

https://extension.umd.edu/resource/melons

https://pss.uvm.edu/ppp/articles/squash.html

https://www.extension.iastate.edu/news/2007/mar/071601.htm

https://edepot.wur.nl/411163

https://gardeningsolutions.ifas.ufl.edu/plants/edibles/vegetables/leeks.html

https://aces.illinois.edu/news/root-vegetables-underground-garden

https://gardeningsolutions.ifas.ufl.edu/plants/edibles/vegetables/mint.html

https://libguides.nybg.org/basil

https://extension.illinois.edu/blogs/2019-09-17-growing-garlic

https://aggie-horticulture.tamu.edu/plantanswers/publications/onions/ONIONGRO.html

extension.msstate.edu/publications/publications/establishment-and-maintenance-blueberries

https://extension.illinois.edu/blogs/good-growing/2018-11-07-arugula-new-trendy-green-old-world

https://www.sciencedirect.com/topics/agricultural-and-biological-sciences/microgreens

https://extension.illinois.edu/blogs/good-growing/2015-04-09-growing-herbs-containers

https://ipad.fas.usda.gov/ogamaps/cropcalendar.aspx

https://www.almanac.com/gardening/planting-calendar

https://edis.ifas.ufl.edu/pdf\4H\4H36000.pdf

https://www.fs.fed.us/wildflowers/ethnobotany/food/vegetables.shtml

https://extension.oregonstate.edu/news/these-cold-hardy-vegetables-may-stick-it-out-through-winter

https://content.ces.ncsu.edu/kale

https://ag.umass.edu/vegetable/fact-sheets/broccoli-summer-heat

https://extension.umn.edu/corn-planting/planting-date-considerations-corn

https://gardeningsolutions.ifas.ufl.edu/plants/ornamentals/sweet-alyssum.html

https://gardeningsolutions.ifas.ufl.edu/plants/ornamentals/dianthus.html

https://www.uaex.edu/counties/white/news/horticulture/201810_All_About_Pansies.aspx

extension.msstate.edu/publications/protecting-plants-cold-temperatures

https://pss.uvm.edu/ppp/articles/nasturtium.html

https://www.sciencemag.org/news/2017/05/how-transgenic-petunia-carnage-2017-began

www.uvm.edu/pss/ppp/articles/jun02tip.html

https://www.canr.msu.edu/news/grow_herbs_indoors_for_a_winter_school_garden

https://www.sciencedirect.com/topics/agricultural-and-biological-sciences/salvia-officinalis

https://www.missouribotanicalgarden.org/PlantFinder/PlantFinderDetails.aspx?taxonid=366948&isprofile=0&

https://extension.umn.edu/vegetables/growing-chives

https://news.psu.edu/story/186967/2000/04/03/planting-and-nurturing-fruit-trees-requires-skill-and-science

https://edis.ifas.ufl.edu/publication/MG243

https://chatham.ces.ncsu.edu/2016/02/will-my-vegetable-seedlings-survive-this-weekends-cold/

https://www.nationalgeographic.org/encyclopedia/frost/

https://www.dnr.state.mn.us/climate/summaries_and_publications/freeze_date.html?__cf_chl_captcha_tk__=pmd_6fb94d207242a5447214e3fe0fb295249976f64d-1627862259-0-gqNtZGzNAyKjcnBszQi6

https://www.sentinel-echo.com/community/what-is-the-difference-between-cool-season-and-warm-season-vegetables/article_722c365d-ba45-5a88-b751-e49b25aa908e.html#:~:text=Examples%20of%20cool%20season%20vegetables,of%20frost%20of%20has%20passed.

How to Install Stone Landscape Edging

Stone Edge Along Walkway and Bed

Patios, pathways, gardens, and other landscape components may all benefit from the installation of stone landscape edging. It may be used on its own or as a companion to walls and pavers. Stone borders last a long time, are low-maintenance and are a wonderful addition to your gardens and landscape.

Overview of Stone Landscape Edging

Edging stones are simple to set up, but there is a proper method to do it. Simply setting stones on the existing ground will result in an uneven and unstable edge that will move out of place over time.

We will show you how to avoid these issues by properly preparing for and installing your stone.

Different people in different areas of the world will picture an entirely different edge when you say stone landscape edging. Many of the differences will be due to local differences in the easily available stone. Historically, people used whatever stone was native to their area. Now we have access to stone from around the world, so you have many choices.

The techniques in this article can be applied to any type of stone, brick or concrete paver, just be aware that the more that your chosen stone is in the shape of a square or rectangular block, the smoother and more formal your edging can be.

We prefer to create stone landscape edging using granite cobbles like these below.

Granite Cobbles

The color of your stones is not important to the installation, but the shape and composition are important.

Square or rectangular pieces are the easiest to work with and will result in the most uniform edge, but any shape can be used as long as it fulfills your needs.

If you live in a freezing zone like we do, it is vital that you choose a hard stone that will not crack over the winter. Using a sandstone in our area would result in the edging breaking apart and crumbling after a few years. Edging stone is partially buried in the ground, so it will absorb moisture and crack when it freezes if it is a porous stone.

Keep in mind that the size of stone that you choose will greatly affect your project. Larger stones have the advantage of moving less, simply due to their weight. The downside to using larger stones is also their weight. Larger stones are heavier to carry around your yard and since stone is sold by the ton, they will cost you more.

Most of the stone edging in our area is installed using 4 – 6 inch cubes or 4×6, 6×8 or 6×10 inch rectangular blocks.

We have certainly seen and installed plenty of natural boulder edges using the random shaped natural rocks similar to the picture below, but this is a much less formal installation that typically doesn’t require any sort of extensive prep due to the random shape and sizes of the stone.

Natural Boulder Edging

One of the downsides to any stone edging that borders turf grass is that it will require you to use a string trimmer to cut down the grass that borders it in order to get a clean look. One way to avoid this is to install the edge low enough to cut over with the mower, or to make it a double edge with one low to cut over and one raised to hold back mulch or bedding materials like in the example below.

Easy Cut Stone Edge Example

Before you dig, be sure to have all buried utilities marked on your property. Also, since your edging may span the entire yard, it is important to know where any private irrigation or electrical wires are buried.

Border Installation

No matter what type of stone you choose to use or whether it is a two stone edge or single stone, the installation process is the same. If you follow the steps below, you are sure to have a high quality stone edge installation when you finish.

Plan out The Edge

If you are taking on the task of installing stone edging in your yard, you need to decide exactly where you want it to be, because you don’t want to do this twice.

Stone landscape edging can be used to edge any of the following:

  • Walkways
  • Driveways
  • Planting beds
  • Lawns

Walk through your yard and determine where you want or need the edging. The vast majority of stone landscape edging that we have seen is in a transition area, where the height of the ground transitions from one height to the next. Most often, we see it used along a walkway or along the lawn where the lower lawn surface meets a higher planting bed.

A stone landscape edge raised up a few inches can really help to define your edges and to keep the soil or mulch where it belongs, rather than out on your sidewalk or grass.

If your stone edging will be along a walkway, you don’t need to mark it out as it will just follow the edge of the walk.

If your edge will follow the edge of the lawn, you will want to paint it out in nice flowing curves, using a paint wand. Make sure that you make nice flowing curves that have a reason to be there, and not just wavy lines for no reason. Quite often, the difference between professional looking edges and homeowner edges is the smoothness and length of the curves. You should never have quick abrupt curves, they look unnatural.

The secret to making nice smooth lines using a paint wand is to walk your curve rather swiftly while painting a dotted line so that you can easily change it if you want. With a bit of practice, you will be painting curves like a pro. Once the curves are all painted, walk the yard and think about how and where each curve will end and how the yard will look with the new edging.

Now is the time to make changes, like I said before, this is alot of work, you want to get it done correctly the first time.

Dig a Trench

To prepare to set your stone edge, you will first want to dig a trench along your painted bed lines so that your stone edging will sit level and the top edge of the stones will all line up with each other and look nice and smooth. Only dig as deeply as you need to. Over excavating will only be more work and will leave soft ground below the stones which will cause them to move more over time. I would probably use an edging shovel to get nice clean lines and a flat bottomed trench.

The width and depth of your trench will depend on the size of your stone. You should have the stone on site before you begin any digging. Lay the stone out right on the lawn in one area so that you can get a feel for how well it will fit together and how deeply you may want to cut it into the ground. You may want to do a rough layout on your tightest curve to see how the stones will fit together in the curve. It is easy to smooth the curve out a bit before you begin digging. Make the trench a few inches wider than your stone to make setting curves easier.

I would recommend placing your excavations into a wheelbarrow for the time being so that you don’t get a bunch of dirt stepped down into your grass. Keeping it in the wheelbarrow will allow you to use what you need to backfill along the stone once your curve is right. It will also make it easy to haul it to a low spot in your yard if you have extra fill to get rid of.

One of the secrets of doing a professional job, is to minimize the amount of work by minimizing the amount of mess that you make. Dumping your excavations in the grass. walking all over them and then needing to rake them all out, is definitely extra work that doesn’t need to be done.

Keep in mind that if your stone is rectangular in shape, you can always stand it up tall if you need to hold back higher ground. The reason for digging the trench is to give yourself a smooth base to work with and to help lock the stone into the ground. This is always a compromise. You want the stone set high enough to hold back the ground behind it, yet deep enough to tie it in well.

If it is tough to get the bottom of your trench smooth, you may want to use a bit of sand or fine gravel to make smoothing it out easier. Remember, we aren’t necessarily leveling this edging, we simply need it ot flow smoothly with the contours of the lawn in front of it. It is a good idea to use a hand tamp or a sledge hammer to compact the base where the stone will be set. A firm base will result in less settling.

If you are setting your stone landscape edge along any hard surface walkway or patio, there is a good chance that you will find some sort of plastic, metal or mortar edge holding the brick or stone of the walkway in place. Because you will be setting your new stone edging right along the edge of the walkway, your new stones will serve to hold the walkway in place, so you should be okay removing the old edging.

Position the Stones

Line up your edging stones in the trench, setting them tightly together. You will likely want to use a rubber or wooden mallet to tap the stones in place to be sure that they are set firmly. Start at the most visible end or corner of the area so that any edgers that need to be cut are at the far end where no one will see them.

Set the stones all the way from one end to the other and then stand back and look at your curve from several angles. Stand far across the lawn also and look at the edging from a distance. This will help you to see any height inconsistencies. Chances are that you will need to make some curve and height adjustments to make it look right. Another secret of doing a professional job is to always check and recheck your work so that when your client looks at it, there are no mistakes to see and no changes to make.

Don’t be afraid to make some minor adjustments and look at it again. Many people try to hurry though their landscape work, just to get it done, but this stone will be here for a very long time, so you want it to look nice. On the other hand, we are setting stone edging into dirt, so it is going to move over time. If you live in an area where the ground freezes, the stones will heave with the freezing ground, but they should go back into place as the ground thaws.

My point is that you should make it nice, but it doesn’t need to be perfect, because nature is going to move it around a bit over time. What is important is that when you walk through the yard, it looks good.

If Necessary, Cut the Stones

I would work my way to the end of one edge and then cut the stone if necessary to complete that edge. I think it is best to complete one area before moving on to the next for a few reasons.

  • The first reason is that you may run out of time to finish the entire project in one day and it will be better to have only one area torn apart at a time incase it rains.
  • The second reason is that working through the entire process end to end on one section may give you some ideas on how to streamline your process for the next section. Professionals are always looking for ways to improve their process.
  • The third reason is that it will allow you to clear a bunch of excavated dirt out of your wheelbarrow by backfilling the stones which will make room for the excavations from the next trench.

I would not cut stones to make curves, I would simply fit them as tightly as possible. Gaps at one edge to make a curve won’t be a problem and will look just fine.

There are several ways that you can cut stone. (always wear safety glasses whenever you are cutting stone.)

Old School

The old school and economical method is to use a chisel and heavy hammer. I would use a pencil and a straight edge to roughly mark both side of the stone where it should be cut.

Lay the stone down on a fairly solid surface such as a heavy piece of wood. Make sure that the stone piece is flat and solid and set your chisel blade on the line with the angled edge facing away from the piece you are keeping. Strike to chisel firmly and squarely and then move it a few inches one way or the other and strike it again. Go back and forth several times on each side of the stone equally.

This will take some time, don’t expect or even try to get it to break quickly. You are trying to create a crack in the stone so that it breaks evenly. Even and consistent strikes on each side will get the job done. Don’t be surprised if some of the stones just don’t break the way you want them to. You shoul dhave afew extra stones so that you can try again.

Rent a Saw

If old school isn’t your style, or if yu have many cuts to make, you can rent a diamond blade saw to cut the stones. Call up or go to your local equipment rental store and tell them what you are cutting. They will be able to guide you to the right saw and blade to rent. Did you know that diamond is the hardest naturally occurring mineral? These diamond blade saws let you cut through stone with minimal dust and without overheating the blade. When working with saws, always eye protection and be careful not to cut yourself.

If you are considering a sizeable job or maybe multiple jobs, click Here to see an electric version of the one I use.

Complete the Job

Now that all of your stones are in a beautiful, smooth curve and they are all at the correct height, it is time to backfill. Use the dirt from your wheelbarrow to fill in any voids in front of and behind your new stone edging. Take the e time to pack it in nicely and be sure to backfill the low side first to help keep the stone in place when you backfill the high side. If your high side is a mulched bed, it is a good idea to cover the bare dirt an that side bit a bit of mulch to help it all blend in.

Finally, take a step back and enjoy your accomplishments! Installing beautiful stone, cement, or paver edging around your planting beds helps keep your grass and mulch in place while also giving your beds a distinct, clean appearance. With just a little bit of patience and a bunch of hard work, you’ll have great curb appeal.

REFERENCES

How To Grow A Moss Lawn

Moss Lawn

Do you want to have a beautiful, year-round moss lawn? With the right mix of a suitable location, adequate preparation, the right moss, proper planting, and diligent upkeep, you can. We did all the research for you!

This article will teach you the best practices to grow a moss lawn. By the end, you should have enough information to create a very unique lawn area.

Instead of grass, try moss lawns.

Moss lawns are a popular way to save on water, time, and fertilizer. The moss grows quickly and is easy to care for. Moss (Bryophyta) is nature’s carpet, and when the appropriate circumstances are met, it can be a pleasant alternative to the conventional turf.

In order to grow a moss lawn instead of turf grass, your yard will need to meet certain very specific criteria.

  • The soil must be acidic
  • The soil must be compacted
  • There must be part-sun to semi-shade conditions
  • There must be constant hydration of some sort.

Types of Moss

There are various types of moss, including clumping acrocarps and spreading pleurocarps.

What is the difference between acrocarps and pleuocarps?

Acrocarpous mosses grow vertically, yield sporophytes at the terminals of main stems, and often have sparse branches. On the other hand, pleurocarpous mosses expand horizontally, generate sporophytes on the sides of their stems, and are more heavily branched.

  • Acrocarps, overall, thrive in drier areas and are more drought tolerant. Broom moss (Dicranum scoparium) and heath moss are excellent alternatives for your lawn if you live in a dry environment.
  • Pleurocarps are a better choice if you live in a damp, colder environment since they do not perish in excess moisture. They like to remain in the shade, but they can withstand moderate sunshine as well. Species such as hypnum moss and fern moss provide excellent coverage and can withstand cooler, wetter temperatures.

The best part is that moss lawns can be grown nearly everywhere. Moss may grow all year and can be found all over the world. While certain species thrive in specific temperatures, most moss species thrive in hardiness zones 3 to 9.

Choosing moss varieties that are endemic to your area is the best method to install moss as a lawn. You won’t be going against nature because the plants are designed to thrive in the environment where they’re planted, taking less time to establish and much less time to maintain.

Weeding and watering are all that are required after the plants have established themselves.

Pros and Cons of Moss Lawns

Moss lawns are an attractive landscaping choice that will stay stunning all year. Moss thrives in situations that aren’t conducive to typical grass growth, making it an excellent alternative for lawns where the grass is difficult to grow.

Furthermore, moss lawns are low-maintenance, as they don’t require mowing or reseeding to maintain their appearance.

However, moss lawns require specific care to grow. Moss lawns can’t handle a lot of foot traffic, so you might find them hard to keep if you have dogs or children.

If you reside in a drier environment or if drought conditions happen, you may need to water your moss frequently, depending on the specific moss you chose to grow.

Find the Perfect Spot for a Moss Lawn

The quality of your moss lawn is dependent on the area you choose. Sun exposure is an important factor to consider while picking a location.

The majority of moss species prefer locations with low to moderate levels of sunshine. This permits them to keep the moisture they need to survive while still getting the sunlight necessary for photosynthesis.

While certain moss species may thrive in direct sunlight, most mosses will benefit from some shade during the day. If your yard lacks shade, consider growing trees or shrubs in the area to provide the mosses with the necessary shade.

How to Grow a Moss Lawn

The most crucial stage is site preparation. Strip away any plants from the area and rake it to make it smooth and debris-free. The pH of the soil should be about 5.5. If the pH of your soil is too high, use sulfur as instructed to lower it. After you’ve modified the earth, press it down to a firm surface. Then it’s time to start planting.

Harvesting mosses from nature is not advised since they are vital elements of the ecosystem and will take forever to restore in the environment. You can obtain mosses from nurseries or propagate by producing a moss slurry using moss found on your property.

  • How to create a moss slurry: Mix some moss, water and beer or buttermilk using a power drill or a blender and then spread this slurry over your prepared area,

The latter approach takes longer to complete, but it has the advantage of letting you choose a native moss from your region to use as a moss lawn substitute. This is advantageous since you already know that moss thrives in your site conditions and is a wild moss, so the plant has a greater chance of surviving.

The Best Time To Plant Moss

You can perform moss transplanting at any time of the year. However, the ideal time to plant moss is in the spring (from late March to mid-June) or fall (September to November), when the weather is typically cooler. This will keep your new moss plants from drying out during the summer heat.

Moss Lawn Maintenance

If you’re not the best gardener, you’re in luck, for moss lawns require relatively little maintenance.

Generally, you should give them a couple of inches of water daily in the morning or evening during hot, dry times, especially during the first five weeks. Observe the margins of the moss as they fill in, as they can dry out rapidly.

It would be best to water your moss lawn every day for the first two months if you planted an acrocarp. Do not water your acrocarp if it rains heavily; excess water in the early stages might drown it.

In contrast, if you’ve planted a pleurocarp, make sure to water it every day. Pleurocarps can withstand more water than acrocarps. Therefore the major concern should be keeping it from drying up.

Make sure you’re not trampling on the moss frequently. It can withstand mild foot traffic, but stairs or stepping stones should be placed in more trafficked locations.

To keep rival plants at bay, weed moss as required. Aside from that, moss lawn maintenance is as easy as it gets, and you can finally put your lawnmower away!

You may see weeds growing on your moss lawn as it matures. Because moss can withstand modest foot movement, you can take care of these weeds by walking out on your moss lawn. The stress of leaping, sprinting, or sliding, on the other hand, is too much for moss to take, so avoid upsetting it with abrupt movements.

 A Word of Caution: Children and Dogs

If you’re worried about dogs or children always being around, consider making a section of your yard moss-free. Dog paws will readily rip through the moss, making upkeep more difficult. Kids running through the moss, like dogs, may cause tears and damage, making care more time-intensive.

REFERENCES

New Phytologist Foundation

Western New Mexico University

Britannica

inaturalist

efloras

Britannica

Oregon State University

Annual and Perennial Flowering Plants

Colorful Flower Bed

 Annual and perennial flowering plants are like the icing on our landscape cake. Once you’ve planted your trees and your shrubs, it’s time to give your yard that splash of color and texture that will really make it pop. This article will supply you with all you need to know when planning and planting your yard with annual or perennial flowers.

Annuals and Perennials can be planted through seeds or by buying immature plants and planting them. Proper site selection, soil preparation, pre, and post-transplant care will make the planting successful. Tilling the soil, adding organic matter, seeding or transplanting, and watering are the few essential steps in flowering plant establishment.

So What is the Difference?

Annual and perennial flowering plants are different depending on where you live.

An annual plant is one that will only survive for one season. This is good in some ways because it allows you to dramatically change the look of your yard by choosing different varieties of annuals each year.

A true annual plant will grow one season, drop seeds and then die. The seeds will regrow the next season if given the right environment.

Some plants that are considered annuals in colder climates because they will only survive one year are actually perennials. Plants such as Geraniums, Dahlias, and Impatiens are perennials in the warmer areas but are strictly annuals here where I live in zone 5. The freezing temperatures will kill the roots, causing the death of the plant, not because they have dropped seeds and died.

Perennial plants will typically die back during the colder portion of the year and then re-sprout the following spring. These plants are usually used in groups in your yard’s more consistent and non-changing areas. Because they grow for many years, perennials will get larger and spread over time, so it is common practice to dig up sections of plants and transplant them to a different part of your garden or maybe to a friend’s house.

The fact that they grow and spread can be a blessing or a curse. If these spreading perennials are grown in a border or more wild areas, their tendency to spread can be welcome because they will often crowd out unwanted weeds.

On the other hand, when you take the time to layout and plant an elaborate perennial garden with many different textures, layers, and colors, all planted in perfect portions, this spreading tendency can ruin the look of your garden. Avid perennial gardeners understand that regular dividing and transplanting is just a normal part of perennial maintenance.

The Planting Process

Site selection

Site selection will depend upon the types of flowers you want to plant and their tendency to do better when grown in certain conditions. Always be sure to check the tags of purchased seeds or plants to ensure that you are planting them into an area where they will thrive. If you are transplanting your perennials from a neighbor’s yard, take note of the sun and water conditions where they were dug out and choose a similar spot in your yard.

When planning your annual and perennial flower planting, you can either choose a specific area of the yard and buy plants to fit that area or buy the plants you like and then find areas of your yard where they will grow.

Most people start with an area in mind and plant perennials as the backdrop with a splash of annuals in front or scattered in between to add a bit of instant color and interest.

Flower Selection

This is the hardest part. When planning a perennial garden, you need to understand when each flower will bloom and fit with the other plants to truly understand how your finished garden will look throughout the season. If planting annuals, assume that they will bloom most of the season and mix colors according to your preferences.

To decide on your flowers, arrange a visit to the local garden center and choose your favorite flowers to add a beautiful appearance to your garden. Seeds, bulbs, potted plants, or cuttings, will all have similar planting requirements. The important part of this step is to find things that you like that will grow well in your yard.

The plants at the garden center are likely small and immature, but you need to consider how they will look when flowering and mature to truly understand how they will fit your plan.

The shape, growing habit, texture of foliage, bloom period, and mature height are all very important factors to consider.

Soil Preparation

Whether planting annuals or perennials, you will want the entire area to be prepared before planting. You will want nutrient-rich, well-drained soil, so dumping some black, organic topsoil and creating a raised bed is probably the easiest way to go.

If you want to do this without additional costs, you will want to go through and dig or till the entire planting area at least one shovel deep, turning over the clods of dirt as you go. Then, mix in some aged compost, break it all up, and mix it with a tiller or a digging fork.

Once it is all broken up and mixed, you can shape it with a rake and begin to layout your plants.

Plant Layout

If you are seeding your garden, take your time to mark out areas with string so that you can keep straight where you should sow the seeds.

If you are planting immature plants, I suggest laying them all out in the bed prior to planting. This will give you the opportunity to stand back and look at your bed before planting everything. This will also allow you to space things out to make the best use of the space and your plants. Remember that you need to layout the bed based on the mature sizes of the plants, not the size that they are now.

It’s Time to Plant

When planting from seed, I like to place the seeds and then just push them in a bit with my finger and cover them up, making sure to somewhat follow the recommended planting depths on the packet.

For planting immature plants, carefully step into your bed and work from one side to the other, making sure not to crush any plants as you work. Gently pull the plants from their pots by gripping the stem and tipping them upside down or pushing in the bottom of the pot. If the plant is root bound, cutting the pot might be the only way to get it out. If the roots are bound up in the pot, massage them a bit with your fingers to help loosen them slightly before planting. If your soil is well prepared, you can just scoop out the soil with your hand and plant all in one motion.

Once your bed is planted, be sure to water it thoroughly. If you have purchased a bunch of annuals or perennials and they are all sitting in your yard on a hot sunny day, you may need to water them prior to planting or maybe plant half the bed and then water. You don’t want to allow these tender flowers to wilt prior to planting. Keep them moist and cool.

After You Plant

Dead-heading or pinching off the spent blooms will always encourage more blooms, so the amount of this activity that you choose to do will affect how your beds look throughout the summer. Removing the spent blooms will ensure that the flowers don’t go to seed; this will keep them blooming more and longer.

Many people like to use synthetic fertilizers for their flower beds because they can be easily applied with a hose-mounted applicator. I never recommend chemical fertilizers and would instead suggest the application of aged compost to increase soil fertility.

The watering requirements of your bed will largely depend on the location and the plants’ needs. Beds in the hot sun will dry more quickly, and shady areas will hold moisture longer. You will need to keep an eye on your bed and make sure that it has all the water it needs. Use your finger to judge soil moisture in several areas of the bed.

Here is a list of some flowering favorites:

  • Hibiscus
  • Baby’s Breath
  • Dianthus
  • Zinnia
  • Phlox
  • Amaranths
  • Celosia
  • Gomphrena
  • Cosmos
  • Rosa Hybrid
  • Sweet Allysum
  • Pincushion flower
  • Calendula
  • Pansy
  • Forget-me-not
  • Petunia
  • Snapdragon
  • Marigold
  • Coleus
  • Nasturtium 
  • Dahlias
  • Iris
  • Marigold
  • Lavender
  • Bachelor’s button
  • Impatiens
  • Daylilies
  • Coneflowers
  • Daisy
  • Chrysanthemum
  • Tulip
  • Carnation
  • Blanket Flower
  • Hostas

Best time of day to water landscape plants

Watering Landscape Plants

When it comes to watering plants in the yard, there is a lot of conflicting advice, which can be perplexing for a gardener. We’ll answer the question, “When is the best time to water plants?” by explaining the science behind it.

You will also learn if you can rescue wilting plants.

When to Water Your Landscape Plants

It is common knowledge that plants need regular watering to survive. But very few people know the specific functions of water for the health of plants.

Why do plants need water?

Many chemical processes involving water are directly involved in the construction and breakdown of key cell components.

Photosynthesis, the process in which plants produce sugars for all living things, necessitates the presence of water. Water also aids in the formation of bigger molecules in cells. In biology, water plays a vital structural role. Water fills cells to help them keep their shape and structure.

Fresh water is an essential need for terrestrial plants. And, seed germination is made possible by water. Its inorganic mineral nutrition is facilitated by its absorption from the soil, and its flux via the plant’s vascular tissues distributes nutrients and minerals all over the plant.

Watering plants is best done in the morning.

The best time of day to water landscape plants is early in the morning while it’s still cold, preferably between 5 AM and 9 AM. This is especially true if you’re watering your plants with a garden hose, sprinkler, or other things that will make their leaves wet.

When you water plants in the morning, you ensure fast drying of the wet foliage, which prevents fungal disease. Furthermore, applying water in the morning lets the water get absorbed into the soil with minimal evaporation.

What about watering plants in the afternoon?

Watering your plants during midday can be less effective because of faster evaporation, and because water droplets that sit on leaves in the hot midday sun can cause the leaves to burn. Also, if you’re relying on a sprinkler for afternoon watering, you may find that the increased wind might carry some of the water onto the patio, driveway, or other surrounding areas.

What about watering plants in the evening?

In the evening, when you’re watering plants with your sprinkler or garden hose, your plants have a higher risk of getting diseases because the plant leaves will likely stay moist all night.

What if you’re not using a sprinkler or something that will wet the leaves?

When utilizing a soaker hose or a drip irrigation system, watering gardens in the mornings and evenings is ideal. Because these approaches don’t make the plant leaves wet, watering in the evening isn’t an issue.

A plant needs more water if there’s heat and dry soil.

With only a few caveats, plants need water when the soil is dry to the touch. As a result, the frequency of watering will depend on how quickly the soil dries up. Push your finger about an inch deep into the dirt to ensure it’s dry underneath the surface as well. This simple method is particularly useful if it’s your first time growing plants, as it will get you accustomed to how your soils hold water.

Deep watering is the best for your plants. Watering a plant deeply will allow the water to soak deep into the soil which will encourage the roots to grow deeper, increasing the drought tolerance of the plant.

Most people don’t water deeply enough because it takes more time. You need to apply the water slowly, so that it will soak in, rather than run off. A well placed soaker hose is great for this. Be sure to soak the entire root area of the plant for maximum water intake.

You need to be aware of your soils absorption capabilities. If you have heavy clay soils that hold water for a long time, you need to give the soil time to dry out a bit in between watering. Plants that sit in a pool of water for long periods can’t get enough oxygen and will drown.

This is why it is so important for you to actually insert your finger into the soil near the roots so that you can feel the moisture. Automatic watering systems will often over-water the plants, which can be as damaging as under watering them.

The age of a plant matters.

To build a healthy root system, young and freshly planted plants require an adequate amount of water. To enhance root strength and growth, shallow and weak roots need extra water. Mature plants don’t require as much water as younger plants; instead, they require more water every time so that their deep roots may grow.

It might be tough to determine when to water because there are so many different plant types, but look for the obvious indications, such as wilting leaves.

When a plant is adequately hydrated, the water pressure inside the stems and leaves is sufficient to keep the leaves healthy and sturdy; when a plant is not properly hydrated, the pressure inside the stems and leaves decreases, causing the leaves to wilt.

If your plant’s health is deteriorating, the flowers refuse to blossom, the leaves are wilting, yellowing or browning, or the petals and leaves are falling off, the plant may be receiving too little or too much water.

Can you save overwatered or underwatered plants?

Did you know that overwatering also causes plants to wilt?

The very first step in rescuing your overwatered or underwatered plants is determining whether they are over or under watered. Once you have determined that, just remedy the situation and the plant should recover.

If you had been checking the soil moisture with your finger, this wouldn’t be likely to happen unless you live in an area with prolonged rain events or the plant is in an area that simply remains too wet at all times, in which case it will need to be moved to a new location or raised up higher to get it out of the water.

Because various plants require varying quantities of water, it’s important to test each one separately.

Conclusion

As you can see, caring for our landscape plants isn’t hard, it just takes some common sense. Far too often humans over complicate things when the simple answer is the best one. You don’t need moisture sensors and rain gauges, you just need to stick your finger into the ground like your ancestors would have done.

Walking through your yard with a clear mind, taking note of the conditions of the ground and the plants should tell you all that you need to know about the health of your yard. This isn’t a high tech or high stress situation, this is nature.

REFERENCES

Smithsonian Science Education Center

NCBI

Oregon State University

University of Vermont

UCSB Scienceline

Britannica

University of Vermont

New Mexico State University

Top 14 Shrubs and Planting Techniques

Planting Shrubs

Everyone loves a beautiful, large tree placed perfectly in the landscape or a vibrant, colorful perennial bed bordering the patio, but I feel that sometimes we overlook the shrubs. The shrubs may not be the shining stars of the landscape, but they certainly are part of the complete structure.

Landscape shrubs line our walkways and edge our beds. Tall shrubs will help blend tall trees and tall roof edges down into the beds and lawn. Shrubs may be overlooked, but they are the filler plants that bridge the gap between the very short and the very tall plants.

Shrubs come in a vast array of sizes, shapes, and colors, so they are a very versatile group of plants to work with. Shrubs can lead the eye from one lawn area to the next, and shrubs tie our foundations to the yard.

I would suggest that shrubs may just be the staple plant that holds all other plants together in our landscape and allows us to create smooth and flowing sightlines. This article will dive into a bit of shrub information and shrub planting techniques for gardeners of all types.

I will guide you through selecting the appropriate shrub species (various American native Shrubs), soil preparation (including enrichment), drainage, shrub bed preparation, transplanting, Irrigation, and handling/care.

What is a Shrub

A shrub is a deciduous or evergreen woody plant that can range from inches in height to thirty feet or more in height. Shrubs are opposite to trees in that they specifically do not have one dominant stem; they will always have a few stems and will often have many stems.

Some shrubs are considered suckering shrubs which send up many new stems every year, while others start with a single stem and branch out from there. In between these two types, you will find everything under the sun. Some shrubs grow very slowly and require little pruning and maintenance, and others that grow like crazy and are hard to keep in check.

It is also important to note that shrubs, like other landscape plants, will vary in their performance and growth depending on how well suited they are for their environment.

For instance, here in Wisconsin, we see many boxwood hedges that are maybe one or two feet tall and pretty much stay that size with little to no pruning, while in other parts of the world, you can find boxwood hedges that are six feet tall. In tropical zones, plants like hibiscus are hacked back with hedge shears and machetes because they grow so vigorously, while here at home, we are lucky if we can even get them to survive the summer.

How to Choose your Shrubs

When choosing shrubs for your site, don’t press your luck. Always choose plants that will do well in your climate zone. Check out this interactive zone map to help you decide what zone you live in.

These native shrubs will be much easier to grow and will already be naturally resistant to your local pests. Pressing your luck and planting a shrub that is not recommended for your zone is simply asking for trouble.

Sure, if you are a very avid gardener who looks forward to caring for and protecting your shrubs from the elements, go ahead and give it a try. But, if you are like the rest of us who just want to plant a shrub that will thrive and grow without a lot of input from us, then choose a native one and save yourself some headaches and extra work.

Some Favorite, Easy to Grow Versatile Shrubs

  • Roses – There are many types of roses, and some are very delicate and difficult to grow. All roses love the sun, so only plant them if they can get plenty of sunlight. I have them listed here because some are very easy to grow. Some of the nearly wild roses, such as the Virginia Rose and the Caroline Rose, are rated for zones 3-9, so they will do well in almost all areas of the United States. I’ve got a few of these on my property, and I can tell you that they grow very well with no input from me whatsoever. There are other roses that are relatively hardy, such as the Floribunda, which is considered hardy in zones 5-9. I can tell you from experience that I live in zone 5, and these roses do reasonably well here, but they do better if planted in a very protected area and shielded from the bitter winter cold.
  • Bush Honeysuckle – The common bush Honeysuckle thrives in zones 3-7 and does well in almost any sunlight level, so it is a very easy to grow shrub.
  • Hydrangea – This is another plant that has many varieties, some much tougher than others. The Smooth, Panicle, and Climbing Hydrangea all seem easy to grow and thrive in zones 4-7. These plants like to have partial sun, so the North side of the house or under some larger trees are often good choices. I like these plants for their great blooms and ease of care.
  • Viburnum – Viburnum are a group of shrubs with great diversity and beautiful blooms and fall color. There are varieties that grow in zones 4-7, and they will thrive in almost any soil and in almost any light conditions.
  • Dogwood – This is another group of shrubs with great diversity and can grow almost anywhere. These come in different stem and leaf colors and grow in zones 3-7.
  • Spirea – These plants are loved for their many varieties and ease of maintenance. They grow well in zones 4-8 and can take quite a bit of abuse and varying conditions.
  • Arborvitae – These shrubs come in various sizes, but all have the same evergreen foliage. These plants grow very well in zones 2-7, but they need the sun and are a favorite of hungry deer in the winter months. The deer will rarely kill them, but they will thoroughly prune them up as high as they can reach.
  • Juniper – The juniper is another hardy evergreen shrub that comes in many shapes, from ground-hugging creepers to tall and slender trees. Their colors range from blue-gray to dark green, and these plants can tolerate many soil types but prefer the sun. They thrive in zones 3-9, so they can do well in most parts of the US. The foliage is a bit prickly, making them deer resistant and a bit human resistant.
  • Serviceberry – This is a popular front yard shrub that is larger than most and can grow to 25 feet tall. The bark is grey, and it blooms white. These plants do well in zones 4-9 and are a great tall shrub to use to bridge the height gap between some of your shorter shrubs and your tall trees.
  • Barberry – The Barberry is one of my least favorite plants, but not because it is hard to grow; it grows quite well in zones 4-8 and has long been chosen as a great red-colored shrub to plant when you want to make sure no one is walking through your yard. These small shrubs are jam-packed with very sharp thorns that easily get stuck in your hands and can remain for days if you are the lucky landscaper who is hired to prune or plant them. Pretty and hardy, but good luck working with them.
  • Bayberry – Not to be confused with the thorny barberry, these shrubs are great to work with, hardy in zones 3-9, and can tolerate almost any harsh conditions that you can throw at them. They have excellent fall color and berries that the birds love.
  • Yew – The Yew is a medium-sized evergreen shrub that has long been a staple of the landscape and does well in zones 4-8. One of my favorite characteristics of the Yew is that it can be grown in partial shade, unlike other evergreens.
  • Witchhazel – This is another versatile medium-sized shrub that can be grown in the sun or partial shade and will thrive in zones 3-8.
  • Chokecherry – This is another excellent shrub that is versatile and very wildlife-friendly. The mid-sized shrub is hardy in zones 2-7 and loves the sun.
  • Lilac – The common Lilac has long been a favorite of homeowners and landscapers. This shrub has beautiful blooms, a fantastic aroma, and thrives in zones 3-7. This plant is very easy to grow and transplant and provides excellent bird cover.

If you stick to this list or shrubs with similar hardiness traits, you really can’t go wrong throughout most of the United States. Of course, if you are in an extreme climate zone, you will need to search harder for great shrubs for your yard.

Three Ways to Get Shrubs

  • Container Grown – These shrubs are planted in the same pots they are sold in, so the roots do not get cut in the planting process. This is a significant advantage, but you can only get smaller plants that are container grown. Be aware that if plants stay n these containers too long, they can become root-bound, so avoid plants that appear to have very hard, distorted pots because this is an indication of a plant whose roots have severely overgrown the pot.
  • Ball-and-Burlapped – B&B shrubs are plants that have been grown in the field of a nursery and dug out and wrapped with burlap and twine. These plants had had their roots cut when dug out of the ground, so they will have a recovery period when they will require more care than once they have re-established their roots. Oftentimes, soil is piled over the top of the roots of these plants, so be sure to clean off the top of the root mass before finishing planting.
  •  Self-Transplanted – Many shrubs are fairly small and easy to transplant on your own, so don’t be afraid to transplant these from a friend’s house who has too many plants or from a part of your yard where they have grown too thickly. The key to successfully transplanting any plant is to have a sharp shovel and dig a deep trench around the plant, cutting as few roots as possible while still being able to work with the root mass. Dig deeply, and don’t try to pry the shrub out until you are sure that you have cut the roots. Planting the shrub as soon as possible after it is dug out is important, so I would recommend digging the hole before digging out the shrub.

How to Minimize Damage

One of the biggest challenges when transplanting shrubs is the same no matter what type of plant we are transplanting. We need to take care to minimize the damage that we do when we handle the plants. Any leaf or root damage that we cause will only make it that much harder on the plant. Remember, this poor plant just had its roots chopped and is heading to a new home. Let’s be a bit gentle with it.

  • Don’t transplant in the open wind. Most plants will not do well in wind speeds over about 40 mph, so never put them in the bed of your truck and head down the freeway. The leaves will be destroyed, and the plants will likely die. Always cover the plants or drive very slowly.
  • Don’t leave them under the tarp too long. Plants under a tarp on a hot, sunny day can die really quickly. Once you get to your destination, untarp them immediately.
  • If at all possible, use a plant tarp to minimize transplant damage.
  • Taller shrubs will need to be laid down for transport, but they should be stood up as soon as possible. Plants are constantly adjusting to their surroundings, so leaving them on their side not only heats the root balls in the sun but also forces the plant to start trying to grow back toward its natural vertical state.
  • Don’t let the shrub dry out too much. Dry roots can die and take the shrub with them. Allowing a plant in a black plastic pot to sit in the sun and bake is not a good start. Keep the roots cool and moist.
  • Be sure to choose a shrub with a firm root mass to be sure that you are starting with a healthy plant. Plants that are wobbling around in the pot or roots ball will not do as well when planted.
  • Don’t pry on the shrub’s stems, which could cause roots to twist and crack.
  • Be careful not to cut or scar branches, stems, and leaves while planting. Any damage you do will need to be healed, making the transplant harder on the shrub.
  • Don’t drop the shrub. Shrubs can be heavy, and I’ve seen people unloading shrubs from a truck and just dropping them on the ground, which can break roots.
  • Don’t leave roots exposed to the open air. Get the roots backfilled with soil and watered thoroughly as quickly as possible.
  • If you are transplanting your own shrub, use a sharp shovel. Clean cuts are easier for a plant to heal.
  • Prune off any broken branches, but otherwise, don’t prune the plant while transplanting. Shaping can wit until it is nicely established in its new home.

 Shrub Planting Techniques

The site and ground in which you are planting your new shrub will have much influence on its lifespan and growth. Be sure to choose a spot in your yard that will suit its needs. Find out if your new plant likes sun or shade and find out how wet it likes to be. These are probably the two most significant considerations after ensuring it will survive in your zone.

Next, consider your ground. Once you have chosen a spot for your shrub, consider the ground where it will be planted. Is it hard and compacted, soft and friable, or hard and rocky?

If the ground you are planting into isn’t nice and soft and dark in color, it probably needs some amendment. Consider where these shrubs would grow naturally. Out in nature, these shrubs would likely be growing in a woodland setting or possibly a field of other plants.

The ground surrounding many of our homes, especially if yours is in a subdivision and recently built, is often severely compacted by vehicles and construction equipment, so it will likely need amendment.

Checking for Soil Compaction & Drainage

How can you tell if your soil needs amending? Well, common sense will tell us that soft, easily tillable soils that are black in color must be pretty good to plant into. If you were a plant trying to spread your roots, you would want the soil to be relatively soft, full of nutrition, and containing enough moisture. Typically, soil with 50% pore spaces and 50% solid soil is good for proper plant growth.

Here is a good test to see how compacted and dense your soil is.

  • Dig a hole of 12×12×12 inches depth, width, and length and fill it with water.
  • If the water drains in less than 2-3 hours, the soil has excellent drainage
  • If the water drains in less than 12 hours, the soil has good drainage.
  • If it takes longer than 12 hours for the water to soak into your hole, you’ve got some pretty dense ground, and you will want to be sure to consider this when planting.

If your ground at home is soft and black like the forest floor and drains well, you can likely plant right into it with no amendment whatsoever. Keep in mind that a bit of well-aged, natural compost is always welcome for any new plant and will only help.

Never use fresh manure or compost as it can burn roots if not aged nicely.

On the other hand, if your ground is light brown and fairly stiff, you will want to do a bit of amendment. How you amend the soil to prepare it for your new plant is up to you, and you have a few different choices.

Soil Amendment Options

Sure, you could till your entire yard to a depth of about twelve inches, mix in some well-aged compost, and then till it again. This would make your entire yard ready to plant just about anything, but who has the time or energy for this.

For those of us who are on a schedule or just don’t want to work that hard, here are some of the ways that the pros do it.

Raised Bed Preparation

Sometimes, rather than till and amend a bunch of hard soil, and if it fits into the landscape design, landscapers will build a raised bed to plant into. This allows for plenty of soft black topsoil for the shrubs to thrive, provides adequate drainage, and you don’t need to till a bunch of hard soil.

Order some black plant starter topsoil or black organic or whatever they call it in your area and have it dumped near your planting area. Spread 6-12 inches of this new black soil into the area where you want your raised bed, use your shovel and rake to smooth and shape it to look nice, and then plant into it. Now top it with a light coat of mulch and water the entire area thoroughly.

Individual Plants

Sometimes a raised bed just won’t fit your yard, or maybe you are just planting one shrub. In this case, you will want to simply amend the hole you are planting into.

Start by digging a hole about a foot wider than your root ball in all directions and a bit more shallow than your root ball is tall. Most shrubs that are balled and burlapped have soil piled on top of the roots, so we would rather start with it a bit high. If you are transplanting your own or a container-grown plant with the roots at the surface, you can dig the hole at the same depth as the top of the roots.

How deeply you dig your hole will also depend on how well your soil drained in the above soil drainage test and how wet your plants like to be. If you have loose soil with much gravel, plant with the top of the roots even with the adjoining ground.

If your soil doesn’t drain so well, always plant a bit higher than the surrounding soil and blend it in. This way, the plant’s roots have rooms to grow and spread, and the plant won’t drown every time it rains.

Plant roots not only take in water and nutrients, but they also need oxygen to survive, so leaving them in a hole full of water for long periods of time will cause plant death. The majority of landscape plants I see dead have died from being planted too deeply in poorly drained soil.

Planting a bit high is always a good idea unless your ground is really sandy or gravel-like or if you are planting a semi-aquatic plant that just loves to be wet.

As you dig your hole, pile the excavations around the edge of the hole and don’t walk on them. Walking on your excavations will only make your job harder. Once the hole is dug, place the shrub in the center and make sure that it is at the correct height and straight.

Now, mix some of your excavations with some well-aged compost and backfill the plant. This will provide some nice fertile and light soil for the plant to grow into. If your excavated soil is in tight clumps, break it up while mixing it in with the compost.

Create a small dike around the plant hole using the excavated soil and then water the plant until all of the soil and compost mix is thoroughly soaked. Now, check for any sinkholes and fill them with more friable soil until the entire hole is full of nice wet friable soil with no sinkholes. Leaving sinkholes open is inviting air down to the roots, which will cause root death.

Once the plant is well watered, cover the area with a thin layer of mulch. You will want to keep your eye on the weather and check the soil with your finger now and then to see if it is still moist. There is no need to water if it is, but if your finger comes out dry, give the plant some water. You will want to monitor the plant for the first year or so unless you get some droughts in the second year, in which case you may want to check it.

A Word on Mulching

Adding compost and, or mulch over the soil is a great way to keep the roots cool and help to keep down unwanted weeds. This can be done annually, for sure if each layer is thin. Use common sense and look to nature for guidance. In the forest, the leaves and sticks fall and decay every year, and this natural process keeps the soil soft and nutrient-rich. If you treat your plants the same way, they will be very happy and healthy.

While often well intentioned, the landscape industry has gotten a bit off track. Many professional landscapers will encourage clients to have all of the leaves and twigs removed from their yard each fall and then encourage them to mulch all of the planting beds each spring.

While this is a great way to keep the cash flowing into the landscapers’ pockets, it isn’t the best for your yard or plants.

You would be best off simply allowing your leaves to remain in all of the planting beds so that they can decompose naturally. If you do this, you will have little need for mulch. When you apply leaves or mulch to your plants, be sure that you don’t pile mulch or debris right at the plant’s stem. Thick mulch at the stem will encourage animals to burrow in and chew on the trunk and will also hold moisture against the trunk, which can cause the bark to rot.

Should You Stake Your New Shrub?

If you are planting taller shrubs, you may wonder if you should stake them. I typically don’t stake any shrubs or trees unless they are very loose in the ball and they wobble around. Some landscapers will stake every tree they plant to ensure they never need to return due to trees or shrubs leaning. Staking a tree is an unnatural thing. Trees and shrubs left unstaked will better adapt to their environments and develop a stronger root system. Let the plants grow the way nature does.

Final Thoughts

Trees are often harder to plant, and perennials seem to take a lot of maintenance. Some of my favorite plants are shrubs. They are easy to plant, easy to maintain, and with the incredible variety of shrubs available, you can really liven up the look of your yard.

Go out and plant some shrubs this weekend and see how much fun it can be.

Tall Skinny Trees for Landscaping that Make Quite an Impact

Tall Skinny Tree

Choosing the correct trees for your landscape can be a challenge. This is especially true if you have a tiny yard space to work with because you need to make the most of every foot of gardening area you have. When the space is limited, a tall skinny tree for your landscape will often be perfect solution.

Even if you aren’t short on space, planting multiple tall, skinny trees either evenly spaced alongside a driveway, as privacy screens, or planting just one or two as accent can change the look of your yard. It lends a touch of elegance to the seemingly dull regions of your property.

Choosing a tall, skinny tree for landscaping that won’t occupy much horizontal space is a wonderful way to achieve this. We present excellent trees that will instantly beautify your outdoor space.

Tall Narrow Trees For Your Landscape are often refered to as columnar trees because they grow in a column like fashion. Continue reading to learn more about these remarkable tight-space trees. You’ll know about their benefits, and you’ll get a glimpse into each tall, skinny tree!

Advantages of Skinny Trees

Tall trees with narrow forms, such as those you’re about to see, are ideal for small landscapes. Because of their compact, skinny growth pattern, they don’t take up a lot of horizontal space while providing the kind of looks that only a tree can provide. Often a tall skinny tree can be planted where no standard tree would fit.

Yes, some of these types grow rather high, but the sky is the limit even in the tiniest areas!

Most of the time, maximizing vertical space is the best option. So, if you’re looking to expand your landscape’s reach and add plants with interesting shapes, tall, narrow trees are the way to go. These trees even give your landscape a strong but still natural vibe.

These thin trees can also help in a variety of different ways in small gardens and yards. Not only do they offer visual interest to tiny gardens, but many of these trees also produce delicious fruits and seeds that birds and other living creatures appreciate.

Some flowering trees produce tiny blossoms that supply nectar and pollen. The pollen gives protein and other nutritional substances, while the nectar offers energy. Bees utilize most pollen as larval food, but they also transport it to another plant, making pollination possible for plants and therefore bettering nature in general.

Ginkgo Biloba

Columnar Gingko Biloba

The Columnar Gingko Biloba Tree is a tall and thin tree that can grow up to fifty feet high. Despite it being quite tall, it won’t take up much space in your landscape, for its spread is only ten feet. And when you look at its crown, you’ll love that it has a nice flame shape.

It has distinctive, fan-shaped green leaves that turn a brilliant, golden buttery yellow shade in the fall and a unique winter silhouette that would look eye-catching in even the smallest of yards.

The leaves, unaffected by urban pollution, will help eliminate air pollution, providing you with access to fresh, good-quality air. This slender Gingko will give shade and a lovely deep green theme against which other plants may stand out.

Did you know that Ginkgo biloba, one of the world’s oldest surviving tree species, has a significant history in Chinese medicine? For senility, royal court members were fed ginkgo nuts. Ginkgo has also been used to treat asthma, bronchitis, and renal and bladder problems.

Port-Orford-cedar (Chamaecyparis lawsoniana)

Chamaecyparis lawsoniana is a big evergreen tree that may grow up to 197 feet tall, with trunks 4–7 feet in diameter and feathery leaves in flat sprays that are typically glaucous (blue-green). Its common name is Port-Orford-cedar, and it is a member of the family Cupressaceae.

According to Krusmann’s “Cultivated Conifers,” approximately 300 cultivars have been developed from this species, far more than any other conifer. As cultivators get older, their distinguishing features fade, making them hard to spot.

Chamaecyparis lawsoniana grows best on damp, well-drained soils in a protected spot in a full sun area. Hundreds of cultivars with different crown shapes, growth rates, and leaf colors have been chosen for use in parks and gardens. One such interesting cultivar of this tall, skinny tree is ‘Wissel’s Saguaro.’

Chamaecyparis lawsoniana’ Wissel’s Saguaro’ is a thin tree that is straight out of a Dr. Seuss story! It is a slow-growing tree that you’ve never laid eyes upon before. The cultivar Wissel’s Saguaro’s erect branches resemble those of a saguaro cactus, thus the name. This evergreen faux Cypress grows to a height of approximately 10 feet with a spread of just 6 to 8 feet. It is quite an interesting garden tree, and it thrives in zones 4-9.

Sky Pencil Holly Tree (Ilex crenata’ Sky Pencil’)

Photo by David J. Stang, CC BY-SA 4.0, via Wikimedia Commons

As its name, ” Sky Pencil, ” indicates, this Japanese holly tree has a restrictive, upright, pencil-thin growth habit, as its name, “Sky Pencil,” suggests. This thin, shrub-like, columnar evergreen plant’s modest growth makes it ideal for compact gardens.

The Sky Pencil Holly tree reaches a height of 6 to 10 feet in full sun. And with its fastigiate, vertically growing branches and smooth leaves, it’s sure to be an exciting piece in your landscape. Even more so when a pollinating male plant of this species is present, for when that happens, the females produce small purple berries.

Late in the summer, this tall, thin tree blooms with tiny white flowers. The ‘Sky Pencil’ trees are ideal for creating a narrow hedge or screen (when planted in a row). Columnar plants such as the Sky Pencil Holly tree are great for highlighting borders, container gardening, and growing along roads and walkways. It will live perfectly fine in zones 6 to 8. This plant is an appropriate distinct vertical accent for your landscape.

Red Maple ‘Walters Columnar’ (Acer rubrum ‘Walters Columnar’)

One of the most ubiquitous trees in eastern North America is the red maple.

The most notable characteristic of red maple is its spectacular fall coloration. Its brilliant red leaves stand out against the dark green conifers and the yellow foliage and white bark of the paper birch trees in the northern woodland. The red maple is a popular landscaping tree.

Scarlet maple, soft maple, swamp maple, Drummond red maple, Carolina red maple, and water maple are all names for red maple (Acer rubrum).

The ‘Walters Columnar’ cultivar is an excellent option if you want a tall, erect, columnar red maple tree. This fastigiate tree, sometimes known as scarlet maple, grows vertical, tall, and relatively thin. This maple tree produces beautiful red blossoms in the spring, and the rich green foliage becomes a stunning, intense red hue in the fall.

Columnar red maples are great trees for creating a strong vertical accent on your property. You may also make a screening hedge by planting trees together. Pruning is essential to keep the columnar maple under control because it can grow to be 60 feet tall. Zones 3 to 9 are where red maples thrive.

Some notable columnar red maple cultivars include the fastigiate ‘Scarlet Sentinel,’ the slender upright ‘Columnare,’ and the silvery bark and red fall leaves of the ‘Armstrong’ columnar maple tree.

Swedish Columnar Aspen (Populus tremula ‘Erecta’)

Columnar Aspen

The Swedish Columnar Aspen’ Erecta,’ also called Upright European Aspen, is a beautiful columnar tree because of its pole-like growth. When grown as a specimen tree, its tall, thin form provides an appealing visual height.

This tall, slender aspen tree can grow up to 40 feet tall. This pillar tree’s narrow spread—as little as 10 inches across—allows it to be grown in smaller spaces. Its growth habit resembles that of a candle flame.

In the fall, the emerald green leaves become a lovely golden yellow. These thin trees can also be planted in a row to make high, decorative screens. They can also work as a windbreak!

Lombardy Poplar (Populus nigra)

Lombardy Poplar

Numerous poplar cultivars are fastigiate trees, with branches that grow almost parallel to the trunk. The Lombardy poplar is one such deciduous tree that grows quickly in warmer regions, with annual growth rates of around 3 feet. These magnificent, upright trees may reach a height of 50 feet and live for 20 years.

You’ll love poplar trees for their thin, cylindrical flowers, too, which are called catkins.

Lombardy poplar trees provide great windbreaks, screens, and driveway ornaments. They thrive in zones 3 to 9 and require full sunlight to thrive.

Because its natural environment is steadily being whittled down by anthropogenic activity and readily hybridizes with other species (especially P. x canadensis), P. nigra can be considered at risk of extinction. That holds true in a significant portion of its native range, particularly in the west and central Europe.

Columnar Arborvitae (Thuja) Trees

Columnar Arborvitae

Thuja is a genus of coniferous trees belonging to the Cupressaceae family (Cypress). The genus has five species, two of which are endemic to North America and three of which are native to East Asia.

Arborvitaes are excellent if you’re searching for a quickly growing, low-maintenance evergreen tree to use as a hedge or privacy screen. Plant many of them in a row, and the thick, heavy foliage will fill in in a year or two, making the perfect natural fence.

However, don’t ignore the numerous ways arborvitaes may be used in formal and casual landscape designs.

You can know an arborvitae’s mature size by knowing the species and cultivar. Low-growing shrubs are those that grow to be less than three feet tall, and massive trees can grow to be 70 feet tall and 25 feet wide. Meanwhile, the tree’s shape (conical, mounded, rounded, pyramidal, or pendulous) depends on the cultivar.

As for the foliage, the flattened, lacy fragrant needles of most arborvitaes range in color from emerald green to gold. Early in the summer, clusters of rosebud-like cones measuring approximately half an inch long emerge, changing from green to brown.

Again, there is a wide range of zones where you can find arborvitae trees. It depends on the variety, but it thrives within zones 2 to 8.

Columnar White Spruce (Picea glauca ‘Pendula’)

Photo by David J. Stang, CC BY-SA 4.0, via Wikimedia Commons

The columnar white spruce, or weeping white spruce, is an outstanding tall, thin evergreen tree. The slim, quickly growing spruce tree has pendulous hanging branches that give it the appearance of a pole. This cascading white spruce grows anywhere between 12 and 40 feet tall in full daylight.

The downside is that the Columnar White Spruce is only hardy in Zone 2 – 7. This plant thrives in rich, damp environments with acidic soil.

This specimen evergreen tree will give the perfect vertical highlight in a compact yard.

Tsukasa Silhouette Japanese Maple (Acer palmatum ‘Tsukasa Silhouette’)

Silhouette Japanese Maple

Acer palmatum is a woody plant native to Japan, China, Korea, eastern Mongolia, and southeast Russia.

The popular Japanese Maple tree ‘Tsukasa Silhouette’ (Acer palmatum ‘Tsukasa Silhouette’) is the first columnar variety of the Japanese maple tree. You’ll like to use this 15-20 feet tall, skinny tree as an excellent decorative hedge or a lovely garden focal feature. The foliage is bright lime green in the spring, which changes to deeper green in the summer and a beautiful red shade in the fall.

Many Acer palmatum variants will grow successfully in containers, and almost all of them can sit nicely with your companion plants. And because the trees’ root systems are small and non-invasive, they’re ideal for borders and decorative pathways.

It likes being in part sun, and the recommended zones are 5-9.

Japanese Flagpole Flowering Cherry Tree (Prunus’ Amanogawa’)

Japanese Flagpole Marshallsgarden.com photo

Prunus ‘Amanogawa’ is a tiny, narrowly columnar deciduous tree with abundant, semi-double light pink flowers clinging to the upright branches in mid to late spring. This plant, a member of the Rosaceae family, is ideal for relatively small areas.

Cherry blossoms rise erect at the side of the trees, and you’ll notice that they’re sweetly scented. The enormous saucer-shaped blooms, about two inches wide, open from pink buds and have 6-15 petals.

As they grow, they turn nearly white and have a purple-pink heart right before dropping. The leaves start bronze-green, then become semi before becoming orange and red in the fall. It’s a popular tree for small gardens since it’s healthy, resilient, and easy to grow.

Prunus’ Amanogawa’ is the perfect skinny tree if you want a specimen plant to stand out in your landscape. Of course, you can also plant several of these where you wish to have colorful flower borders.

This plant likes full sun, and they grow best in well-drained, fertile, slightly damp soils.

Italian Cypress (Cupressus sempervirens)

Italian Cypress

First, it’s nice to have some background on the Italian Cypress’s scientific name, Cupressus sempervirens:

The most well-known tale that explains the link of the Cypress with sadness is written by the poet Ovid, who authored during Augustus’ reign.

Apollo’s favorite, the most handsome young man Cyparissus, unintentionally murdered a cherished tame stag. His remorse and sadness were so unbearable that he begged to be allowed to weep eternally. He was then transfigured as Cupressus sempervirens, with the tree sap acting as his tears.

The classic, interesting story certainly adds a magical element to this beautiful tree. When you have guests over, consider striking up a conversation about the Italian Cypress! A little mythology is nice here and there. To learn about the scientific facts about this tall tree, keep reading.

Italian Cypress is a tall, thin, evergreen conifer with rich dark green foliage that grows quickly. It’s often known as the pencil pine because of its tall, narrow shape that resembles a massive column that converges to a point.

Fastigiate species of this tree have upright and vertical branches that form close to the trunk. Italian cypress trees make a striking impression wherever they grow because of their unusually tall, slender look.

Typical cypress trees can reach 115 feet, while some dwarf varieties only grow up to nine feet tall (and 1-2 feet wide). You can still have an Italian Cypress tree if you have a small space, and it will instantly elevate the look of your landscape!

But wait, there’s one last fun fact about the Italian Cypress:

In July 2012, a five-day forest fire in Andilla, Valencia, destroyed 20,000 hectares of woodland. But, a big, dense group of 946 cypress trees (22 years old) was found almost undamaged within the scorched scene, and just 12 cypresses were wrecked. The CypFire European Project, which researches many characteristics of cypresses (droughts, frosts, production of wood and pollen), planted the Andilla cypresses.

Slender Silhouette Columnar Sweetgum (Liquidambar styraciflua ‘Slender Silhouette’)

Columnar Sweetgum

As its name implies, the narrow silhouette sweetgum is a tall and skinny tree belonging to the Liquidambar genus.

The top of the columnar sweetgum tree is roughly the same size as its base. The tall, thin tree resembles a bushy utility pole with its star-shaped glossy green leaves. These trees may reach a height of 50 feet and a spread of only five feet.

Due to their slender profile, Sweetgum trees are ideal for small and medium-sized yards that require a strong vertical focus.

Slender Silhouette is sometimes described as a plant variety that doesn’t bear fruit, although this is likely pure speculation than fact. The tree will yield fruit, but the output of gumballs will be more irregular than that of ordinary wild trees.

You may plant these columnar trees in groups in your garden to create a towering privacy screen. Full sun and consistent watering and fertilizing in zones 5 to 9 are ideal for these trees.

Kindred Spirit Oak (Quercus x warei ‘Nadler’)

Kindred Spirit Oak

The ‘Kindred Spirit’ cultivar is another magnificent example of a compact columnar oak tree. This tall, vertical tree’s fastigiate narrow growth makes it ideal for small areas.

Meanwhile, the glossy, deep green leaves develop a beautiful crimson hue in the fall, spicing up an autumn garden scene.

The oak tree’ Kindred Spirit’ is more compact than the oak tree ‘Fastigiata.’ This fast-growing deciduous tree usually grows to a height of 30 feet and a width of four feet. Plant a bunch of them in a group to make a tall hedge or plant one as a single specimen.

In zones 4 through 7, you should plant this erect thin tree in full sun.

Despite being a hybrid, it still produces acorns, which offer food for tiny animals. Once developed, it is tolerant to drought and accepts clay soils and salt well.

Skinny, Tall Juniper Cultivars

Junipers come in various sizes and shapes, ranging from 66–131 ft tall trees to columnar or small shrubs with long, hanging branches. These are evergreen and have needle- or scale-like leaves.

Some Juniper cultivars are ideal for landscaping if you’re looking for tall, relatively thin trees. The Blue Arrow Juniper, Skyrocket Juniper, Brodie Eastern Red Cedar, and Pencil Point Juniper are some fantastic options that we will discuss here.

Other much rarer, tall, skinny Juniper cultivars you might consider are the Moonglow Juniper (Juniperus scopulorum ‘Moonglow’), Spartan Juniper (Juniperus chinensis’ Spartan’), and the Blue Heaven Juniper (Juniperus scopulorum ‘Blue Heaven’).

Blue Arrow Juniper

This is an enhanced variety with tight, vivid blue leaves and a very thin, upright shape. A tall, narrow screen made of these trees is ideal when space is at a premium. Thanks to its bright steel blue foliage, it adds a splash of color to the garden. From late spring through late winter, this plant produces silvery blue berries.

The Blue Arrow Juniper is considered the Italian Cypress of colder regions (they both have a distinct columnar shape). This juniper lends a strikingly formal or Mediterranean flavor to landscapes. You can plant this as a hedge for a tall, thin privacy barrier, or these trees can serve as a lovely dark green backdrop for beds and borders. Pair them up to flank a piece of art, a gateway, or a fountain.

This evergreen tree lives in zones 4-9 and likes fully sunny sites.

Skyrocket Juniper (Juniperus scopulorum ‘Skyrocket’)

Skyrocket Juniper Texas Tech University Photo

Skyrocket Juniper (Juniperus scopulorum ‘Skyrocket’) is a slender, columnar Juniper that fits into tight spaces like side yards between houses. Planting many ‘Skyrockets’ produces an excellent windbreak in both cold and hot regions. This plant’s vertical shape makes it an excellent accent plant in a mixed conifer landscape.

The fastigiate leaves form an elegant columnar tree with a narrow growth pattern. Meanwhile, its attractive, overlapping, scale-like bluish-green foliage looks nice up close. Indeed, it will pack a punch in your landscape!

It likes to be in full sun and lives in zones 4-9. You can expect it to reach 15 to 20 feet of height but only occupy a span of 2-3 feet.

Finally, you’ll be pleased that there are currently no reported pest issues for the Skyrocket Juniper.

Brodie Eastern Red Cedar (Juniperus virginiana ‘Brodie’)

Photo by David J. Stang, CC BY-SA 4.0, via Wikimedia Commons

Brodie cedar (also known as Brodie Juniper) is an even tinier, more compact cultivar of juniper that grows as a thin evergreen pyramid. These junipers are sometimes known as pencil junipers because of their tall, skinny genetic structure.

These slender columnar conifers thrive in a wide range of environments. They are drought-resistant, non-invasive plants that grow up to 25 feet tall in bright sunlight.

To make a privacy screen, arrange several Eastern red cedars close to each other.

Pencil Point Juniper (Juniperus communis ‘Compressa’)

Pencil Point Juniper

Pencil Point Juniper, or Noah’s Ark juniper, is a relatively shorter tree on this list. But it is a slender evergreen with lovely blue-green leaves that will sparkle in the sun. Pencil Point Juniper is an excellent choice for narrow gardens with limited space, reaching a height of six feet and a width of one foot.

Pencil Point juniper likes to be in well-drained soil and forms a good screen or small hedge. Even though it’s not the tallest, this evergreen is a durable, drought-tolerant, and cold-hardy choice for even the most challenging environments. You can have this in your landscape as long as you’re in zones 3-8.

Conclusion

All in all, this selection of tall, skinny trees for landscaping should convince you to get one (or more, or all of them)! They will undoubtedly add dramatic aesthetic appeal to your garden or yard due to their upright, narrow form.

Not only that, these columnar trees, with their dense foliage, can make excellent privacy screens and windbreaks. Even just planting one on each side of a porch can instantly level up the look of the vicinity.

REFERENCES

https://www.usgs.gov/faqs/do-bees-feed-both-nectar-and-pollen?qt-news_science_products=0#qt-news_science_products

https://www.nccih.nih.gov/health/ginkgo

https://www.fs.fed.us/database/feis/plants/tree/chalaw/all.html

https://landscapeplants.oregonstate.edu/plants/chamaecyparis-lawsoniana

www.pnwplants.wsu.edu/PlantDisplay.aspx?PlantID=717

https://www.uaex.edu/yard-garden/resource-library/plant-week/holly-skypencil-6-4-10.aspx

https://www.fs.usda.gov/treesearch/pubs/13731

https://www.srs.fs.usda.gov/pubs/misc/ag_654/volume_2/acer/rubrum.htm

https://searchworks.stanford.edu/view/1235642

https://landscapeplants.oregonstate.edu/plants/populus-tremula-erecta

www.pnwplants.wsu.edu/PlantDisplay.aspx?PlantID=434

https://www.cabi.org/isc/datasheet/43535#tosummaryOfInvasiveness

www.conifers.org/cu/Thuja.php

https://web.archive.org/web/20071029202830/http://www.hort.uconn.edu/plants/t/thupli/thupli1.html

https://landscapeplants.oregonstate.edu/plants/picea-glauca-pendula

www.pnwplants.wsu.edu/PlantDisplay.aspx?PlantID=150

https://npgsweb.ars-grin.gov/gringlobal/taxon/taxonomydetail?id=1187

https://edis.ifas.ufl.edu/publication/ST023

https://www.rhs.org.uk/plants/95518/Prunus-Amanogawa/Details

https://ovid.lib.virginia.edu/trans/Metamorph10.htm

https://english.elpais.com/elpais/2012/08/14/inenglish/1344943477_469339.html

https://www.uaex.edu/yard-garden/resource-library/plant-week/Liquidambar-styraciflua-Slender-Silhouette-Columnar-Sweetgum-06-15-2018.aspx

https://plants.ces.ncsu.edu/plants/quercus-x-nadler-kindred-spirit/

pnwplants.wsu.edu/PlantDisplay.aspx?PlantID=450

https://www.rhs.org.uk/Plants/57480/Juniperus-scopulorum-Blue-Arrow/Details

https://www.depts.ttu.edu/plantresources/Pages/Landscape_Information_Sheets/Woody_Info/Juniperus_scopulorumSkyrocket.php

www.pnwplants.wsu.edu/PlantDisplay.aspx?PlantID=503

https://edis.ifas.ufl.edu/publication/ST327

https://plants.ces.ncsu.edu/plants/juniperus-communis-compressa/

Best Trees to Plant in the Front Yard

Front yard trees

Front yard trees can make or break the look of your landscape; it’s the first thing anyone sees when they come to visit and the last thing they see when they leave. The best trees to plant in a front yard leave a good impression on anyone who takes a look.

What qualities do you value in a front yard tree? Should it have amazing seasonal colors? Do you want it to have showy, eye-catching flowers or a unique form? Or perhaps a basic, fruit-bearing tree will suffice for those days when you crave a healthy, tasty treat.

Whatever it is, you can benefit from reading all about these wonderful trees that are perfect for your landscape.

Best Front Yard Trees

Have a look at these beautiful, interesting, sometimes functional front yard trees. Planting even just one of these can switch up the look of your landscape.

  • ‘Sun Valley’ Maple (Acer rubrum ‘Sun Valley’) – ‘Sun Valley,’ a quickly growing red maple, which adds great color to a front yard in the fall. It’s a dependable shade tree that’s resistant to leafhoppers. The tree reaches a maximum height of twenty to twenty-five feet. This is a male variety, so there are no seeds to collect. Its unique features include fast growth, cold-hardiness, symmetrical crown, upright growth habit, stunning red fall color, and adaptability to any soil type. In early spring, you’ll be greeted by the sight of red flowers. You’ll be happy to have this in your front yard; it deserves to be seen!
  • Red Buckeye (Aesculus pavia) – Red buckeye (Aesculus pavia) is a deciduous clump-forming shrub or small tree with an uneven rounded crown. Its height can get up to 10 to 20 feet. Expect to see showy, orange-red flowers and shiny, deep green leaves in spring. But in drier, hotter times of the year, its foliage will appear to scorch, understandably so because this tree prefers some shade.
  • Apple (Malus) – You don’t need a large, fancy yard to produce apples: Dwarf trees are compact enough to fit in an average front yard. Malus pumila Honeycrisp is one among those. Its name accurately describes the fruit. Honeycrisp is a cold-tolerant apple, surviving in zones 4 to 7. This dwarf apple tree grows eight to ten feet tall and wide. Having an apple tree in the front yard harkens back to days of old. If you want to add a bit of nostalgia to your front yard, try planting an apple tree. Late in the spring, apple trees produce showy, five-petaled, white blooms with a touch of pink. Bees pollinate the flowers. During the summer, the pomaceous fruits develop, ripen, and become edible in the fall. Ripe apples can be red, green, yellow, or a combination of these shades.
  • Crabapple (Malus) – On the other hand, if you want less mess in the fall and aren’t particularly concerned about harvesting apples to eat, then the crabapple might be perfect for you. Crabapple trees are not only beautiful in the spring, but they may also pollinate apple trees and other plants that attract wild birds. That’s a great thing if you want wonderful company in your front yard! Spring Snow and Prairie Fire (both appropriate for zones 4 to 8) are two cultivars to consider. Prairie Fire plants are magnificent blooming trees with vibrant pink blossoms that mature into deep red crabapples. These plants reach a peak height and width of 15 to 20 feet. Spring Snow features fragrant white blooms, but it does not bear fruits. It grows 20 to 25 feet high and 15 to 20 feet broad when fully developed.
  • Saucer Magnolia (Magnolia × soulangeana) – Saucer Magnolia is a hybrid plant belonging to the Magnoliaceae family and genus Magnolia. It is a deciduous tree well-liked for its big, beautiful, pink, white, or purple flowers that look like saucers or goblets. You’ll love the flowers’ aesthetic appeal and fragrance. Meanwhile, the leaves are generally a dark green shade in the summer, but they turn an appealing brown color in the fall. Saucer magnolia is hardy in zones four through nine, and it prefers full sun to part shade and well-draining, slightly acidic soil. Saucer magnolias are generally found in clumps with several stems, although single stem types make excellent display trees in yards. They can get 20-30 feet tall and spread 20-25 feet at maturity, and you can expect 1-2 feet of growth each year.
  • Palm Trees (Arecaceae) – Palms feature huge, evergreen leaves that are compound and spirally placed at the top of the stem, either palmately (fan-leaved) or pinnately (feather-leaved). At the base of the leaves is a tube-like sheath that breaks apart on one side when mature. Tropical and subtropical regions are home to the majority of palms. Palms flourish in humid, hot temperatures, although you may find them in various environments. Their variety is greatest in lowland, wet forests. In warm areas, palm trees are attractive foliage plants. Coconut palms (Cocos nucifera) are a palm that does not survive freezing temperatures. However, some varieties are extremely resilient in the winter. Temperatures as low as 18°F will not kill date palms (Phoenix dactylifera). It’s a “pinnate” palm, which means the leaf resembles a feather. The “palmate” is the second major class; the leaves on this variety resemble a human hand.
  • Fringe Tree (Chionanthus virginicus) – Chionanthus virginicus is called multiple names: Fringetree, American Fringetree, Old Man’s Beard, Grancy Greybeard, White Fringetree, and Sweetheart Tree. The name “fringe tree” comes from the clouds of soft-looking, fleecy, bright white, lightly scented blooms that dangle from the branches in spring and summer. Male and female Fringe trees are both available. Males have bigger, more showy flowers, but females produce appealing dark blue or purple fruits that birds enjoy. Because fringe trees are just 10 to 20 feet tall, they will fit just fine in most yards. They can serve as specimen trees and look good in groups or shrub borders. But the fringe tree is more than just a beautiful sight. Native Americans utilized it as a disinfectant and a dermatological treatment. For optimum results, this plant should be grown in zones 3 to 9, which covers most of the United States.
  • Paper Birch (Betula papyrifera) – The dazzling white paper birch (Betula papyrifera) may conjure up memories of beauty and love in the minds of many people. You’ll love to see its distinctive, thin, white bark (which peels away in paper-like layers) and stunningly golden fall color in your front yard. The Paper birch tree is native to North America and may be found in Hardiness Zones 2–7. When fully mature, the paper birch reaches a height of around 66 feet and a spread of approximately 35 feet. This tree loves full sun and moderate shade, with at least four hours of direct sunshine every day.
  • Sugar Maple (Acer saccharum) – Beauty and practicality don’t have to be mutually exclusive. Acer saccharum is known for its yellow-orange fall color and maple syrup. Sugar Maple is also known as “sugar tree,” “rock maple,” “birds-eye maple,” “curly maple,” or “sweet maple.” When talking about its wood, though, it’s called “hard maple.” Sugar maples serve as shade trees and noise blockers due to their size, which can reach up to a whopping 80-115 feet tall. Maintain a safe distance between their root systems and septic tanks. Mohegans got some use out of the sugar maple. The inner bark is used as a cough medicine, while the sap is used to sweeten food and produce maple syrup.
  • Minnesota Strain Redbud (Cercis canadensis) – In the northern setting, the Minnesota Strain Redbud is one of the best specimen trees. Cercis canadensis is a magnificent and resilient spring bloomer with brilliant, pea-like, purple, or pink blooms kept close to its branches. This perennial tree’s distinct, heart-shaped foliage that becomes bright yellow in fall is hard to miss! Its rounded form and coarse texture will stand out in your yard. Despite its attractive, almost fake-looking appearance, it’s relatively low-maintenance. If you’re wondering when to prune it, do so after it flowers. And you’ll be happy to know that deer won’t disturb this plant. This tree can grow up to 25 feet high and can spread up to 30 feet. It likes partial shade and full sun, as long as it receives enough water.
  • Sunburst Honey Locust (Gleditsia triacanthos ‘Sunburst’) – Sunburst Honey Locust is a hardy and adaptable shade tree in gardens and parks. Seeing its lacey, bright, glowy, yellow leaves will certainly make springtime in your yard cheerier. And in summer, you will still enjoy its cool green foliage. Its overall vibe makes you want to curl up under it and read a book or drink something cold. It is an excellent yard tree since it lets just enough filtered light hit the grass. It grows up to forty feet high. It can withstand strong winds and scorching heat while requiring little water and will not do well in deep shade. It’s a great tree if you want dappled shade instead of the full, dark shadow that many other landscaping trees provide. And it’s also not a pain to maintain since this cultivar does not produce fruit pods.
  • Golden Chain Trees (Laburnum × watereri) – Laburnum × watereri only blooms for a short time, so it doesn’t have much to show the remainder of the year. It’s also picky, only growing in hardiness zones 5–7. Even so, it’ll thrive in locations with mild, humid summers. However, if you are lucky enough to be located in one of its favorite zones, don’t allow these reservations to deter you from getting one. Most people would overlook its short show of beauty in exchange for planting something that will turn everyone’s head for a couple of weeks in late spring. The golden flower racemes are quite striking.
  • Mountain Ash (Sorbus americana) – Mountain Ash is a specimen tree prized for its beautiful yellow-orange leaves in the fall, red/orange berries that birds and small mammals love, and showy white flowers. Although, the flowers have quite a strong scent. Because its compound, serrated leaves, mimic ash (Fraxinus) species, this tiny tree of cold regions is named American mountain-ash. But, unlike ash, the leaves of American mountain ash are alternating rather than the opposite. You can expect this easy-to-grow shrub tree to reach 10-30′. It prefers well-drained, acidic, loamy soil in full sunlight to part shade, and it will grow in zones 2-5.
  • ‘Little Volunteer’ Tuliptree (Liriodendron tulipifera’ Little Volunteer’) – Because it’s not so big, the tiny Tulip Poplar is perfect for landscaping in your front yard or garden. You’ll like how it doesn’t overwhelm the overall view of your house. You’ll get all the greatest qualities of a huge tree modified to a smaller, well-proportioned size regardless of where you plant the Little Volunteer. This tree is also perfect for your walkway or driveway because of its neat, upright branching habit. ‘Little Volunteer’ Tulip Tree grows nicely in moist, well-drained soil in zones 4-9. In the fall, the rich green leaves become a beautiful buttery yellow. You’ll enjoy your Little Volunteer tulip poplar when the leaves begin to fall throughout the fall months because raking is not a big deal when you’re tidying up after a little tree!
  • Crepe Myrtles (Lagerstroemia) – Crepe myrtle (sometimes spelled crape myrtle) is an excellent front yard tree hardy to zone 6. It’s more abundant in the south, and up north’s winters can really affect its growth, only getting to the size of a shrub. However, in the sweltering American Southeast, this drought-tolerant tree is common. But, no matter where you find the crepe myrtle, you’ll always be amazed by its long-lasting crepe-textured red, pink, or white flower clusters. Several of these fabulous trees placed side by side to form a large hedge or screen in your front yard will look amazing! Or a single tree can serve as an eye-catching accent near your entrance.
  • Serviceberry (Amelanchier spp.) – The Serviceberry (also known as juneberry, Saskatoon berry, or shadbush) is a small tree (15 to 25′) that you’ll love for its stunning red and gold fall color foliage and its white flowers that bloom in March and April. These delicate flowers give rise to fruits that birds will love! Serviceberry trees are utilized as specimen and focal plants in group plantings, landscapes and borders, sceneries, and screens. Planting even just one Serviceberry will do wonders to your front yard. It thrives in hardiness zones 2-8, with full sun or partial shade. Ideally, this tree should get four hours of direct sunlight every day.
  • Silk Trees (Albizia julibrissin) – The genus name of the Silk tree (also called Mimosa), Albizia, comes from Filippo degli Albizzi, an Italian nobleman. He introduced it to Tuscany, Italy, in the mid-eighteenth century. That explains why its name, Albizia, is misspelled on occasion. Although these are beautiful front yard trees, here’s one thing to remember: silk trees are invasive, more so in warmer areas. Silk trees can live in zones 6 to 9. Its flowers are one-of-a-kind, looking like silky, pink strands in powder-puffy clusters. And with its leaves resembling ferns, you’ll like this tree because it stands out. But its appearance isn’t the only unusual thing about this tree; its leaves and flowers close overnight. This brittle-stemmed tree produces plenty of fertile seeds for a long time. Each pod contains about eight seeds. Forceful winds cause the pods to break, and the seeds go a great distance, but water and animals are also capable of dispersing the seeds. The legume or bean from a silk tree contains a neurotoxin that can be harmful to animals.
  • Beech Trees (Fagus) – Beech (Fagus) is a tall, deciduous tree genus originally belonging to Asia, North America, and temperate Europe. This shade tree is a member of the Fagaceae family. Beeches are monoecious, which means that a single tree produces both male and female flowers. No matter what beech tree variety you get, you’ll find tiny clusters of yellow-green blooms succeeded by fruit or beechnuts. Are you amazed yet? Wait for fall when you see its glossy green foliage turn a stunning yellow, orange, and golden bronze. Beech is more than just a beautiful tree in anyone’s yard. It represents a significant boundary between the northern pine forest zone and the European deciduous forest zone as a naturally occurring forest tree. And did you know? When conventional woods such as walnut are few or inaccessible, beechwood is utilized for the stocks of military rifles (or as a cheaper option). Beech trees are low-maintenance, adaptable trees that flourish in various environments. Beech trees thrive on rich soil with great drainage and reside in warm areas in Europe and North America. At this point, you might already love beech as a landscaping tree, but keep in mind that beech bark disease is a significant problem for beech trees.
  • American Holly (Ilex opaca) – Also known as Christmas Holly, White Holly, Evergreen Holly, Prickly Holly, and Yule Holly, American Holly is another excellent addition to your front yard. It’s a well-known festive tree that can grow up to 25-60 feet tall, and it’s pretty well-liked for its glossy, spiny, evergreen leaves and bright red berries that are attractive to birds. Aside from its fruit and leaf color, you can recognize it by its upright, pyramidal form.
  • Citrus Trees – Having a citrus tree in your front yard or back yard is so convenient (and good for your health). When you want fresh oranges, limes, or lemons, you won’t have to travel to the grocery store! It’s much better when life gives you lemons… fresh from your yard. Citrus trees are beneficial, adaptable plants. Your citrus tree may thrive in your front yard, on your patio, in a container, or even indoors when you know how to take care of it. Citrus plants want all the sun exposure they can get per day (8–12 hours is the recommended duration) and thrive in a southern climate. These trees are native to tropical and sub-tropical zones. Citrus trees make nectar and have tiny white or purple blooms that are pleasantly fragrant. Scent and nectar are both characteristics that attract insects, pollinators of citrus flowers. Your citrus tree needs light, well-draining soil and fertilization every couple of months to thrive. It can live in zones 8-11.
  • Pineapple Guava (Feijoa sellowiana) – Pineapple guava is a beautiful, versatile, low-maintenance evergreen. You’ll like Feijoa sellowiana in your yard for its delicious, tropical fruit, attractive, edible flowers you can toss into a salad, and an interesting, upright branching pattern. The beautiful crimson highlights on the thick white flower petals appear even more striking against the oblong, gray-green leaves. Eventually, in the fall, you’ll notice a luscious guava-like fruit ripening. You can place this specimen tree in your yard, in a container, as an espalier, or a hedge. Pineapple guava thrives in zones 8 through 11. They prefer full sun, but if you live somewhere exceptionally hot, midday shade is required.
  • Dogwood Trees (Cornus) – One of the most beloved trees in the country, the dogwood, provides an unrivaled four-season show of scenic beauty. The beautiful white or pink, leaf-like bracts that look like flowers signal the coming of spring and are the most outstanding sight. Meanwhile, like other deciduous trees, its leaves are green in the summer and turn a lovely reddish-purple in the fall before falling to the ground. Dogwood is a low-maintenance plant that grows in your yard quickly (over a foot a year). It survives in zones 5-9, and it likes part shade (and full sun as long as you water it well). Ensure that its soil is rich with organic matter, well-drained, slightly acidic, and moist.
  • Northern Red Oak (Quercus rubra) – You’ll usually find Northern red oak in big gardens and parks as a specimen tree. It will be a beautiful sight in your yard, too! Quercus trees or shrubs can be evergreen or deciduous. Sometimes the foliage will have a stunning fall color (at least Quercus rubras turn red or brownish-red). However, these trees have unremarkable, greenish flowers succeeded by acorns. This is a deciduous tree that spreads quickly. Grow in soil that is deep, rich, and well-drained. Additionally, it necessitates soil that is devoid of lime.
  • Fastigiata Blue Spruce (Picea pungens var. glauca ‘Fastigiata’) – Also known as Columnar Blue Spruce, Fastigiata Blue Spruce is a tall, conifer, evergreen tree perfect for your front yard. Yes, orange or yellow foliage will look amazing on your landscape, but if you want even more color, this tree will not disappoint. As its name suggests, Fastigiata Blue Spruce’s new growth will be a silver-blue. But its beauty doesn’t stop there; its form is also quite interesting since even its leaves all point upward. But, the downside is its growing zone. It’s only hardy in USDA zone 2-3, which explains its outstanding cold tolerance.
  • ‘Kwanzan’ Flowering Cherry (Prunus serrulata’ Kwanzan’) – The ‘Kwanzan’ Flowering Cherry is one of the best-looking trees to include in your front yard. It’s a spectacular sight in the early season due to its big, showy, pink flower clusters with bronzy red fresh growth. Additionally, its upright branching makes it suitable as an accent around your driveway or walkway. This tree can be 15-25 feet tall and wide. It’s got a satisfying, smoothly outlined, symmetrical canopy. It likes to be in full sun, and it lives in USDA hardiness zones 4-8. It would be best if you watered it regularly, though.
  • Weeping Cherry (Prunus subhirtella ‘Pendula’) – Prunus subhirtella ‘Pendula’ is a Japanese ornamental weeping cherry tree that’s been grown for generations. Their thin, adaptable branches cause them to “weep” delicately, drooping to the ground. Weeping cherry branches grow strong and rigid as they mature. When fully developed, these trees can measure 20-30 feet high and 15-25 feet wide. They are covered in light pink or white flowers in the spring, usually before the leaves appear. The flowers are grouped into two to five flowers and are tiny yet tantalizing. And with its dark, hefty limbs holding up a stunning crown of blossoms resembling an umbrella, weeping cherry trees provide a fantastic centerpiece in the yard.

Final Thoughts

Choosing a specimen tree or two for your front yard is very much a personal choice. These trees will set the tone of your yard, and we all know how important first impressions are! This list contains everything from some of the more dainty ornamentals like the crabapple or dogwood to the large towering oaks and beech.

There is no right or wrong choice other than zone, sunlight, and space requirements. Don’t make the mistake of choosing a tree that won’t do well in your climate or that will run out of space in your yard or not get adequate sunlight to thrive. You want this tree to stand and grow proudly for generations, so choose wisely.

REFERENCES

https://www.missouribotanicalgarden.org/PlantFinder/PlantFinderDetails.aspx?taxonid=263793&isprofile=0&

https://www.missouribotanicalgarden.org/PlantFinder/PlantFinderDetails.aspx?taxonid=281049

https://www.cabi.org/isc/datasheet/31973

https://www.nps.gov/shen/learn/nature/apple_tree.htm

https://www.lakeforest.edu/academics/majors-and-minors/environmental-studies/magnolia-x-soulangeana-(saucer-magnolia)-magnoliaceae

https://web.archive.org/web/20060424052701/http://www.botany.hawaii.edu/faculty/carr/arec.htm

https://plants.ces.ncsu.edu/plants/chionanthus-virginicus/

hort.ufl.edu/database/documents/pdf/tree_fact_sheets/chivira.pdf

www.efloras.org/florataxon.aspx?flora_id=1&taxon_id=233500260

https://books.google.com/books?id=_9vNAAAAMAAJ&pg=PA283#v=onepage&q&f=false

https://books.google.com/books?id=yjc5ZYWtkNAC&pg=PA24#v=onepage&q&f=false

https://web.archive.org/web/20071109224350/http://www.biosurvey.ou.edu/shrub/acsa3.htm

www.northernontarioflora.ca/description.cfm?speciesid=1000053

https://archive.org/stream/folkmedicineofde00tant_0/folkmedicineofde00tant_0_djvu.txt

https://plants.usda.gov/home/plantProfile?symbol=ceca4

www.pnwplants.wsu.edu/PlantDisplay.aspx?PlantID=406

https://doi.org/10.1016/S0140-6736(79)92963-5

https://www.fs.fed.us/database/feis/plants/tree/sorame/all.html

https://gobotany.nativeplanttrust.org/species/sorbus/americana/

https://plants.usda.gov/home/plantProfile?symbol=SOAM3

https://trees.umn.edu/tulip-tree-liriodendron-tulipifera

hort.ufl.edu/trees/LAGINDA.pdf

https://extension.umn.edu/trees-and-shrubs/serviceberry

https://plants.ces.ncsu.edu/plants/albizia-julibrissin/

mdinvasives.org/iotm/may-2009

https://www.illinoiswildflowers.info/trees/plants/am_beech.htm

https://www.worldcat.org/title/rifles-of-the-world/oclc/67543348

https://www.michigan.gov/invasives/0,5664,7-324-68002_71242-370913–,00.html

www.missouribotanicalgarden.org/PlantFinder/PlantFinderDetails.aspx?kempercode=k640

https://science.jrank.org/pages/1507/Citrus-Trees-Biology-citrus.html

plantsoftheworldonline.org/taxon/urn:lsid:ipni.org:names:596467-1

https://www.uky.edu/hort/Flowering-Dogwood

https://www.rhs.org.uk/plants/14305/Quercus-rubra/Details

https://landscapeplants.oregonstate.edu/plants/picea-pungens-fastigiata

hort.ufl.edu/database/documents/pdf/tree_fact_sheets/pruserb.pdf

https://www.bellarmine.edu/faculty/drobinson/WeepingCherry.asp

https://edis.ifas.ufl.edu/publication/st519

Tree Planting Techniques

Tree Planting

Planting Native Trees is a huge contribution to the restoration and maintenance of native wildlife as well as biodiversity. Planting any trees helps to offset the deforestation and clearing of our land. The more trees we have growing on this earth, the better off we will be. In this article, you will be provided with a complete guide on choosing, planting, caring for, and maintaining the US native fruit, phytoremediator, and ornamental trees.

Site Selection

Site selection is very important for the long-term health and prosperity of the tree. Some trees can adapt and grow almost anywhere, but choosing a good spot to plant for optimal, long-term growth is very important. Most trees prefer sunlight and deep, fertile soils, but trees can thrive in most areas as long as they are native to the climate. Choosing a tree that is native to your environment is likely the most important step.

One problem we often see with tree site selection is placing the tree where it looks nice now but not planning for its future growth. Far too often, we see very large trees planted too closely together so that they never reach their full potential due to crowding, or we see them planted too close to power lines or structures which means that someone will end up cutting them down long before they die of old age.

Having trees compete for resources is typically not a problem if you intend to replant a forest; that is the natural state, but some trees survive and thrive in the forest while others don’t. If you are paying for and planting trees in your yard, you probably want them all to survive, so you should take care to plant them in a suitable spot.

Consider their mature height and width. Some trees can be planted very close to one another, while others need room to spread out. For example, in the case of a fruit plant (apple, pear, peach, or pomegranate), you need to select a wide-open space to allow its canopy to spread. On the other hand, an ornamental tree such as a Palm tree or Sourwood grows erect, and the canopy is limited.

Steps to Planting a Tree:

1. Dig the Hole

  • The size of the hole that you dig will depend on several factors.
    • The size of the root mass of the tree you intend to plant. Always dig your hole at least one foot wider on all sides than the tree’s existing root mass(ball). This means that if you measure across the ball of the tree and it measures 2 feet, you should dig a hole with a 4-foot diameter. This will give the tree roots space to grow and make planting and leveling it easier for you. Of course, if you are planting a very small tree, you won’t need this much space. Do not dig the hole deeper than the ball of the tree; you need a firm, stable base that the tree will sit on.
    • The type of soil that you are planting in. If the ground you are planting into is very sandy, gravely, and dry, you will want to make sure to plant the tree as deep as it grew in the nursery to maximize its ability to get moisture. If you are planting into heavy clay soils that will hold any water that flows into them, you will want to dig a more shallow hole so that part of the ball of the tree can be above the surrounding ground to allow it to get the oxygen that it needs.
    • The moisture content of the ground you are planting in. How wet is the area? Regardless of the soil type, if the area is consistently wet, you may need to plant the tree a bit higher in the hole so that it can get the oxygen that it needs. Most dead, recently transplanted trees that I see have died because the tree was planted too deeply in the hole.
    • The condition of the tree ball. Every tree has a depth in the ground at which it naturally grows. Tree roots don’t only take nutrition and moisture from the ground to feed the tree; they also need oxygen to grow. If the tree roots are planted too deeply in the ground, they will not have access to enough oxygen, and the tree will die as a result.
      • It is always important to inspect the top surface of the root ball of a tree prior to its final planting. Where the roots grow from the tree’s trunk is called the root flare. The roots flare out from the base of the trunk. You must dig down gently to locate the root flare and the top of the roots to understand the depth at which your tree should be planted. Be careful not to scar the roots when you expose them.
      • Most container-grown trees will not have this problem, but many balled and burlapped trees will have a thick layer of soil built up over the top of the tree roots. These trees are grown in a nursery where the rows are cultivated multiple times per year, which tends to push soil up onto the top of the roots. Then, when it comes time to dig the trees, more soil is piled on top of the roots, and the entire ball is covered with burlap. If you simply plant these trees at the height of the top of the burlap wrapping, many will be too deep and will die. It is not uncommon for a balled and burlapped tree to have 4-6″ of extra soil on top of the roots. The proper height of the tree is the most challenging and most crucial part of the planting. You cannot untie the twine or burlap from around the tree’s trunk until it is standing in the hole and you are done pushing on the tree trunk. Otherwise, you will push the tree right out of the root ball. So, for now, you need to give it your best guess.

2. Create a Dike

  • As you dig the hole for your new tree, pile all of your excavations around the perimeter of the hole equally, and don’t step on them to compact them.

3. Put the Tree in the Hole

  • Once the hole is complete, place your tree into the hole and stand it upright. If your tree is too heavy to lift, leaning the tree to one side and supporting the trunk as you roll the ball into the hole is a good way to get it where it needs to be. Use caution when placing and handling the tree, as it is easy to break branches and stems if mishandled.  

4. Level the Tree

  • Stand back and look at the tree from several different angles to ensure that it is planted straight up and down. Adjust the tree as necessary to make it appear straight from all angles.

5. Remove the Twine

  • Once the tree is straight, and you are done pushing on the trunk, remove the twine and burlap from around the trunk and above the roots to ensure that the roots will be at the proper height. If the tree appears too low or high, you may need to re-wrap some of the twine or burlap to allow you to raise or lower the tree.

6. Backfill the Hole

  • Once you are sure it is at the proper height, backfill the hole with a mix of organic material and friable soils from the excavation.

7. Finish the Dike

  • Once the tree is backfilled, finish contouring the remaining excavated soils into a small dike around the hole that is slightly higher than the root ball and will help to hold in the water when you water the tree.

8. Water the Tree

  • Next, slowly fill the hole with water, watching for areas where the water washes the soil down and causes a sinkhole. If this happens, add some more friable soil as you are watering to fill all sinkholes. Fill the soil ring up to the top of the dike and let the water soak in.

9. Mulch the Roots

Once the water has soaked in and there are no sinkholes, lightly mulch the top of the tree roots with wood mulch to help keep the soil and roots moist.

10. Monitor the Tree

  • Monitor the tree for the next year by sticking your finger into the soil where the roots are. If the ground feels moist, the tree does not need any water. If the soil feels dry, the tree needs water, and you should once again fill the hole up to the top of the dike and let it soak in slowly. After the tree has grown for a year, it is not likely to need watering unless there are periods of drought.

Natural Soil Amendments:

Soil amendment is very important to improve drainage, water holding capacity, and soil nutrient availability. Amendments can be added to the hole as you backfill, along with some of the excavated soils. Amendments can also be added to the soils around the tree, outside of the hole, to encourage root growth. Always use organic soil amendments, as the chemical fertilizers are rapid action and less beneficial to long-term soil quality.

  • Compost: well-rotten/partially decomposed organic matter of “Greens” and “Browns.” Greens include the grass, leaves, and food scraps to provide the “nitrogen,” while Browns include the woody remnants to make the compost “carbon-rich.” Compost nourishes the soil and provides spaces for the beneficial bacterial colonies to grow, die, and add humus to the soil.
  • Sawdust: is a good soil nourishing material for acidic-soil-loving trees like Conifers, Rhododendrons, Blueberries, etc. It decomposes very slowly, so adding it to clay and moist soils will assist in speeding up the decomposition.
  • Peat moss: is an expensive but very effective and compact natural amendment that lasts longer in the soil. It helps to improve the nutrient and water holding capacity of sandy soils while improving drainage in the clayey soil.
  • Leaves: these are suitable for the entire yard. You can always add a layer of leaves over any garden to allow them to break down naturally and decompose, but if you want to use them for planting trees, it is recommended that you pile them with other organics and allow them to break down and begin to decompose.

Amendment of Problematic Soils:

  • Poor/less fertile soils: urban soils are usually not very fertile, so they require some nutrient-rich organic treatment to improve the soil’s health and help increase the water-holding cation exchange capacity of the soil. Any of the above-listed organic amendments will help this type of soil.  
  • Silty soils: Unlike clayey soils, silty soils have severe water erosion problems in high rainfall areas. Removal of the nutritious layer of soil, larger deeper gullies, and exposed roots are the problems associated with silty soil.
    • Solution: yearly addition of organic compost, leaf manure, or farmyard manure on the surface is good to avoid water erosion. Organic Mulching is the solution to silty soils.
  • Alkaline/Acidic Soils: high and low hydrogen ion concentrations are problematic for plants. In highly alkaline soils, plants cannot absorb the nutrients, especially micronutrients, while in Acidic Soils, the trees would suffer from severe calcium, phosphorus, and sulfur deficiencies.
    • Solution: Alkaline soil is treated with Gypsum/Lime solution to remove the exchangeable sodium ions with calcium. In Acidic soils, it will increase the soil pH and improve its cation exchange capacity.
  • Heavy/Clay Soils: have compaction problems due to tiny soil particle sizes, resulting in poor drainage, oxygen depletion, dying of roots, and in the end, the death of the plant.
    • Solution: It is recommended to add compost to the clay soils and to till it into the top 6 inches. Doing this every few months for a year before planting your tree would be a great way to loosen up the heavy clay soil. If you don’t have time for that, tilling organics into the clay around a newly planted tree will encourage root growth and help to break up the clay and improve the oxygenation of the soil. Depending on the density of the clay, cutting a smooth-sided hole, planting a tree, and backfilling with the organic matter may cause the tree roots to stay in the excavated hole as if it were a pot. The roots will simply circle due to the organic nature of the backfill and the density of the surrounding earth. This would not make for a stable root structure over time and is more likely to result in a root-bound, girdled tree. Breaking up the surrounding clay soils and adding organic matter, even if only in a few select areas, will get the roots started growing in the right direction and encourage the roots to penetrate the clay soil.

General Tree Planting Guidelines:

These are the general rules applicable to all types of tree planting:

  • Tree selection: Type of tree (fruit or ornamental), its canopy size when fully mature, and sunlight requirement should be considered as tree planting is a long-term investment. 
  • Annual Nourishment: Add compost or kitchen waste (prepared by decomposing the daily kitchen waste) every year during Feb- Mar. No need to provide any synthetic fertilizer.
  • Shaping/staking: every tree has its natural shape it attains when it matures. However, you can also choose to attempt to control the shape and size of a young tree through shaping and staking. Many professional tree planters will simply stake all newly planted trees, so they don’t need to come back to straighten a tree. For the tree’s health, it is better not to stake it as the movement of the trunk will help it grow deep and strong roots. The exception would be a tree that is very loose in the dirt ball, in which case it should be staked to prevent root breakage. 
  • Annual Pruning: When considering whether or not to prune your tree, it is important to ask yourself how much maintenance you want to sign up for. Most trees do just fine without pruning and can be left on their own to assume their natural shape. You can certainly choose to prune a tree to any shape that you would like, but it will add new growth every year, so keeping a particular shape or size will prove to be much work. In general, choosing a tree that is well suited for its location and allowing it to grow to its natural size and shape is the best scenario, both for the tree and you.
  • Annual Mulching: Many landscape services try to sell their clients on the idea of freshening up their mulch beds every year by adding more mulch. Adding more mulch over a weedy patch of garden bed is a fine idea, but adding mulch on top of tree roots every year is not such a good idea. Always be sure to inspect the tree’s root flare before adding more mulch. You only want a very thin layer of mulch over the area of roots near the trunk. Thick mulch in this area may result in trunk rot and may encourage animals to live in the mulch and nibble on the bark. A couple of inches of mulch over the remaining tree roots away from the trunk is fine, but you surely don’t want it to be 6″.

Tree Planting Techniques and Types:

Container-Grown Plant:

Container-grown plants have been grown from either a tiny shoot or seed and are grown directly in the container they are sold in. This gives them the advantage of not having their roots cut when transplanted. You simply remove the tree from the pot, maybe loosen the root mass a bit if it appears to be root bound, and then plant it into the ground. These trees can be planted at any time of the year since they do not undergo root pruning at the time of planting.

Limitation: container-grown plants that have been in the container too long will have roots that are very tight in the pot and that can curve back around themselves and end up girdling other roots or the trunk. If you come across a densely packed root mass, loosen up the roots with fingers or a pruning tool before planting.

When removing a tree from a container, it is best not to pull and twist on the tree’s trunk to get it out of the container. It is better to lay the tree on its side and slide or cut the container off the roots.

Balled and Burlapped (B&B) Plants:

“Balled” for the “ball of soil and roots collectively” and “Burlapped” refers to the “material used for safely wrapping the plant balled area with.” The American Nursery Standards are the best standards for B&B. Balled and burlapped trees have long been the industry standard for larger tree transplants. Balling trees can be done by hand or with a machine. There are specialized machines that will dig out a tree and drop it into the burlap and wire sack to support it through transport and sale. Also, field workers will trench around the root mass of trees, tightly wrap them in burlap and then break them off of their pedestal, complete the burlapping and tie the ball in a criss-cross fashion with jute twine.

A properly balled and burlapped, hand-dug tree is a thing of beauty, and the quality can be felt by the tree’s stability in the ball and the tightness and precision of the burlapping. Machine B&B trees are fine but usually have a wire basket and are generally not as tight and well supported as a hand-dug tree.

In any event, the burlap will stay on the tree when planted as the burlap is biodegradable, and the roots will undoubtedly work their way through the material. Even wire basket trees will typically be planted with the basket intact, as this will tend to rust over time, but this wire basket may also prove to be somewhat detrimental to root growth. It is important to note that it is crucial to cut away any non-biodegradable twine that might have been used. Too often, with machine dug trees, you will find plastic twine used around the tree’s trunk. This will kill the tree over time if left intact, as it will not degrade.   

Limitation: B&B plants can be moved only in the fall, winter, or spring when the transpiration rate is minimum, and the root growth is maximum. It takes about three years for the roots to establish correctly and start to regenerate to balance the root to shoot ratio.

Bare-Root Plants:

Easiest to plant, transplant, and least expensive are bare-root plants. Planted in the dormant season and staked as the landscape-sized bare-root plants are thin and elastic stemmed. This is a great way to get bulk tree saplings shipped to you very economically. Because they have no dirt, these tiny trees should be planted as soon as possible. Create a hole and hold the sapling at the correct level in the hole while it gets backfilled with a slurry of soft, friable topsoil and water, being sure to eliminate all air pockets as you work.

Environmental Benefits/Objectives of Tree Planting:

A mature leafy tree can produce enough oxygen for18 people to inhale throughout the year. The urban trees in the US produce approximately 61 million metric tons of oxygen annually, enough for two-thirds of the population of the US to inhale for the entire year. (Nowak, Hoehn, & Crane, 2007)

Plants absorb pollutants from the air, water, and soil as well. Either directly or indirectly, trees are helping in the removal of hazardous contaminants.

Plants absorb carbon dioxide, ozone, and other volatile organic compounds responsible for ozone layer depletion and global warming.

Trees’ extensive fibrous root system helps keep soil in place by minimizing soil displacement and preventing soil erosion.

Trees can be food sources for humans, animals, and wildlife and provide shelter to the animals; thus, they help conserve and increase biodiversity.

Trees are likely the easiest and cheapest way for us humans to reverse the climate change issues that our overpopulation and land abuse have caused.

Social Benefits:

At the start of spring, tree planting campaigns, projects, and activities become the source of building a community’s unity and spirit.

The experts arrange seminars school activities to highlight and remind the benefits of Tree Planting.

Plants improve mental health. Improves Mental health, stress and depression reduction, and psychological effects of plants are scientifically proved. (Kim, Lim, Chung, & Woo, 2009)

References:

Kim, W., Lim, S.-K., Chung, E.-J., & Woo, J.-M. (2009). The effect of cognitive behavior therapy-based psychotherapy applied in a forest environment on physiological changes and remission of major depressive disorder. Psychiatry Investigation, 6(4), 245.

Nowak, D. J., Hoehn, R., & Crane, D. E. (2007). Oxygen production by urban trees in the United States. Arboriculture & Urban Forestry. 33 (3): 220-226., 33(3).

The Uses Types and Costs of Landscape Fences

Landscape Fencing

As the adage goes, good fences make good neighbors. While this generally refers to perimeter fences surrounding a home, fences also play an influential role when it comes to landscaping.

Keep in mind that getting the perfect fence isn’t as easy as copying the design, size, or materials used for someone else’s enclosure. Each home and yard is unique, and the same goes for your family’s needs and preferences.

To ensure that your fencing will serve you well and last for many years, you should plan wisely and consider it an investment in your future. Spend plenty of time researching your options before you make a decision on which type of fence is ideal for your yard.

In this article, I’ll help you deal with your new fence installation, giving you a general idea of landscape fencing and its many uses.

What is Fencing in Landscaping?

As the name suggests, landscape fencing refers to design ideas for enclosing your landscape or property. These fences also benefit you beyond beautification reasons, as they also help define space, control views, and improve homesite safety.

Any kind of fencing is considered an integral feature of a landscape, which indicates a private possession as opposed to a public space. These landscape fences are also commonly called “partitions” since they work like indoor walls enclosing an area such as a backyard garden.

In addition to creating borders and separations, many fences are designed to be more of an aesthetic landscape feature. Detailed fences such as picket or split rail fences will add a certain feel and identity to our property.

Factors to Consider in Choosing the Perfect Fence for Your Yard

Nowadays, there are various types of fences in many different materials, colors, and styles. Many of which do not require painting, saving you the labor and additional costs incurred. The wide range of choices may prove to be a challenge to many, particularly new homeowners.

If you’re thinking about getting landscape fencing, here are some factors to consider in your decision-making process.

Rules and Regulations

It’s crucial to consult with the local governing bodies before you dig too deeply into this fence idea. Most areas will require a building permit, and most will have specific guidelines regarding property line offsets and height, design, and material restrictions depending on the location in the yard.

It doesn’t pay for you to start envisioning your newly fenced-in yard until you figure out what the powers that be will allow you to do.

Fence Types

Privacy

Many people are interested in fencing for privacy and safety reasons, and some fences are both. I told you this fencing stuff was a bit tricky.

It seems that most folks interested in fencing are interested for privacy reasons. Maybe they want to keep their yard private from the neighbors’ yard or just want to keep their pets and children privately enclosed in the yard so that there will be no worries. Wait, is that privacy or safety? A bit of both, I guess.

With the population rising and land prices increasing, privacy fencing is growing in popularity as an affordable way to get the privacy that a larger piece of land in a less populated area might get you. Privacy fences are often too tall to see over and often use side-by-side or overlapping boards to keep prying eyes out.

Usually, privacy fences along a property border must be installed so that the attractive side faces the neighbors’ yards. This is one reason why the shadow-board fences have become so popular since they look the same on both sides.

Of course, privacy fencing can be made from a multitude of materials and in as many styles as we can dream up. The most crucial factor here is just a bit of privacy.

Access

If you want a bit of privacy but still want to cross through with ease, you may want to consider an access fence. The access fence is just offset fencing sections that effectively block the view while allowing easy access to both sides of the fence. Access is a big deal when you are considering fencing your yard. Will you need multiple gates, or maybe an entire fence built for easy access?

Security

Security or safety fencing is a very popular category. A good strong fence can keep out wandering neighborhood kids and pets as well as would-be criminals eying up your belongings.

If you aren’t concerned about privacy and only safety, you might be interested in the industry-standard chain-link fence. These have been used for a long time to keep things, people, and pets where they belong and not where they don’t. If you are concerned about safety and privacy, a tall chain-link fence with slats might be just the thing for you.

Many industrial buildings are surrounded by chain-link fencing, gates, and barbed wire as an actual crime deterrent. Barbed wire may be a bit too industrial for most residential neighborhoods, but a good chain link fence and gate have saved a lot of headaches by keeping pets and kids in and keeping strangers out. Or at least significantly slowing them down.

If the old chain link look doesn’t do it for you, there are many security fences made with more attractive materials such as wood, steel, iron, aluminum, iron, or even PVC.

Aesthetics

Sometimes, it’s not so much about what you are keeping in or out, nor is it about blocking the view. Sometimes the fencing is meant to simply be attractive. Many a split rail, white picket, or ornamental iron fence section have been installed for no reason other than to beautify the property.

Curb appeal definitely matters when it comes to fencing. A tall ugly fence blocking out the sun will not be too attractive from the road, nor will a chain-link fence that makes your yard look more like an impound yard. Property value is a big deal. In the long run, you will likely be selling your house, so build a fence that suits your needs, but keep in mind that the curb appeal might be what sells the place.

Animals

Fences are an excellent way to keep pets, and other animals contained. Having a nice safe, fenced-in yard can be a great comfort to the homeowner letting their pet out back for a bit of exercise. When considering a pet fence, you need to consider the countless hours this new fence will save you. This will be all of the time spent watching, following, and picking up after your pet on all of those walks around the block and backyard visits. That fence is sounding more attractive already.

Be aware that certain fences may be hazardous to your pets, especially if they wear collars. Pet collars can sometimes get stuck on fences, resulting in the pets suffocating themselves with their own collars. Pets have also been known to get into trouble with fences that have gaps large enough to allow them to stick their head through the opening. Be sure that your fence design won’t let either of these tragic events happen to your pets. This is not a one size fits all category. Fencing a yard for a cat or small dog is entirely different than fencing your yard for a large dog.

Many fences are built to keep animals out as well. A well-constructed fence might just keep the bunnies and deer away from the veggie and flower gardens. Keep in mind that deer are fantastic jumpers and can clear tall fences. Depending on your location and how hungry they are, your deer fence may need to be 8-10′ tall if you want to be sure to keep them out.

On the flip side of that, the fence must be tight to the ground when trying to keep out rabbits. Those little bunnies can get into very small holes. Sometimes, burying a section of chicken wire or hardware cloth around the bottom of the fence and digging it into the ground might be the only way to keep them out.

Some animals, we really can’t fence. Squirrels, chipmunks, gophers, and mice are a few. These pesky critters can get through almost any sort of fencing that we can muster.

Climate

Before having a fence erected, you will need to consider the weather conditions of your area. Doing so will help you install the right fence to fit your needs.

For instance, if you live in a coastal area and choose to have a metal or wooden fence, be prepared to contend with rot or rust often. Sea breezes can be very destructive, and salt is not friendly to many materials.

Choose a fencing system that can survive the various weather conditions of your environment– rain or shine. Aluminum and PVC fences prove to be excellent choices in this respect. In particular, PVC materials can withstand both harsh ultraviolet rays and moisture.

Materials

Many different materials are available for your fencing needs, from wood to aluminum PVC to steel. To determine the best material type for your home, you must carefully weigh your options and ensure the pros outweigh the cons.

Some fence materials are cheap, easy to install, and resilient to different weather conditions. Meanwhile, others come at a hefty cost, require a lot of maintenance, and are prone to rust or decay.

I will discuss the pros and cons in detail in a later segment. Nonetheless, it’s best to take your time in deciding the appropriate fencing arrangement for your property.

Maintenance

In erecting a fence, you will need to consider the maintenance you need to do after its initial installation. Determine the amount of time you can commit to tending to your fence and maintaining its proper condition.

Typically, you get what you pay for, so cheaper upfront costs may result in more expensive and time-consuming repairs down the road.

Not all materials that would appear to be the same are, in fact, the same. Be very careful of your choices. A wooden fence built from pine is quite different than a wooden fence made from pressure-treated pine, cedar, or redwood.

Stainless steel is very different from standard steel. When dealing with metal fencing of any kind, the thickness of the material will make a huge difference in its durability, weight, and cost.

When considering some of the plastic (PVC) fences on the market, considering the grade of the fence will significantly affect its durability. You can find PVC fences that are very lightweight and flimsy and others that are very well built and durable. Once again, the UV resistance and thickness of the PVC material will make a big difference, as well as whether it is reinforced or not.

Having painted post and rail horse fencing as a kid, I will tell you that I would certainly choose a fence material that does not require painting as that can be a very time-consuming yearly task.

What is the Best Fence For You?

How do you decide which fence material is the best fit for your needs? For starters, you need to understand the pros and cons of various fencing materials.

Here’s a brief rundown to help you select the best fence material for your property:

Wooden Fence

  • Average Cost of Materials: $10 to $20 per linear foot
  • Uses: Wooden fences can serve different uses, such as privacy or security fences and landscape beautification. Ornamental picket fences are popular front yard choices. Meanwhile, board-on-board, dog-ear, horizontal slats, and stockade are famous styles for backyard fences.
  • Advantages: Wood is considered the most popular fencing material, given that it’s affordable compared to other options. It’s also one of the easiest fences to build on your own, allowing you to save money on professional installation. Given proper care, a wood fence can last for many years. As stated above, the wooden fence category is a complicated one. Do your research and find the type of wood that will best serve your needs.
  • Disadvantages: Wooden fences generally require more maintenance, given that it is susceptible to pests, rot, and water damage. You may need to repaint and give your wood fence a power wash every few years if you choose some of the lower-cost alternatives, while a redwood fence can go many years with no trouble at all.

Aluminum Fence

  • Average Cost of Materials: $7 to $32 per linear foot
  • Uses: Like wrought iron fences, aluminum fences are available in varying colors and styles. These fences are ideal for backyards and front yards, and they are also excellent choices for poolside fences.
  • Advantages: If you’re into personalized designs, aluminum fencing is the best choice as it is highly customizable at an affordable price. The material also doesn’t rust, so it doesn’t demand that much maintenance on your part.
  • Disadvantages: Aluminum is a weak material, making it prone to damage in harsh weather and harsh use. If your fence may encounter rough-housing teenagers, falling tree limbs, or large breed dogs, aluminum will not hold up well.

Wrought Iron Fence

  • Average Cost of Materials: $24 to $35 per linear foot
  • Uses: This material is used mainly for decorative and beautification purposes. Hence, they are available in a wide range of designs. You can choose to include spiked railheads for added security. Wrought iron fences are very popular as decorative front yards and entrances due to their ornate features.
  • Advantages: Both beautiful and durable, this material is perfect for those seeking to erect decorative or creative fences in their yards. This material is also strong and resilient, so you can count on it to last for years.
  • Disadvantages: Since most wrought iron fences are custom-made, prepare to shell out a hefty sum since these may get quite expensive. The material is also prone to rust and will typically need a fresh primer coating at least once every five years.

Vinyl Fence (PVC)

  • Average Cost of Materials: $18 to $40 per linear foot
  • Uses: This material makes for perfect, low-cost privacy fences, post and rail fences, and picket fences. It can also provide excellent security, beautiful landscape decoration, and pool or pet fencing. A vinyl fence can be used for both front or rear yard fencing as it can be constructed to look just like painted wood, and PVC and vinyl are essentially the same material.
  • Advantages: Generally affordable and weather resistant. This material is available in different UV resistance levels, different thicknesses, and price ranges. Be sure to get the variety that will serve your needs. Warping, rotting, and painting are not an issue with PVC as long as you don’t paint it. Most vinyl fencing can be easily snapped together, making the installation process a breeze even for first-timers. Commercial grade PVC will tend to be quite nice and durable.
  • Disadvantages: Buying cheap PVC fencing will give you a cheap-looking, not-so-sturdy fence. Cheap fencing in this category will be prone to breaking in frigid cold weather and may sag and discolor over time. PVC fencing will not do well with rough treatment, such as kids climbing, dogs jumping against the fence, or limbs falling on the fence.
  • Average Cost of Materials: $5 to $40 per linear foot. Note that higher prices may be applicable for thick-gauge, high-security chain-link fences.
  • Uses: If your main priority is to add an extra level of security to your front yard or backyard, a chain-link fence is a perfect choice. It keeps intruders (such as wild animals) off your private property. Its open design doesn’t give a lot of privacy, but you can buy attachable plastic privacy slats if you have the extra budget. Some homeowners also opt to include a barbed wire top for the additional sense of security.
  • Advantages: This fencing material is generally cheap, durable, and maintenance-free. DIY homeowners can install it, but unless the homeowner is in the construction trades, I would suggest leaving it to a professional who installs these fences every day.
  • Disadvantages: It contributes minimal visual appeal to a landscape. When buying a fence material without a protective coating, the metal can corrode over time.

Bamboo Fence

  • Average Cost of Materials: $3 to $6 per linear foot
  • Uses: Generally, bamboo fencing adds privacy to a backyard. You can erect a bamboo fence in two ways: growing live bamboo in clumps or buying rolled bamboo fence panels.
  • Advantages: This fence material is an eco-friendly option, which will be a delight to environmentally-conscious homeowners. Bamboo is also cheap and easy to install, making it a great pick for those who want a fence without breaking the bank.
  • Disadvantages: Given that Bamboo is a type of wood, it’s naturally prone to rot and pests such as roaches. It is also considered an invasive plant; hence live bamboo can take over your yard or quickly spread beyond your property lot. If you purchase rolled bamboo panels, it’s crucial to apply the protective coating and install them a couple of inches above the ground to prevent early decay.

Composite Fence

  • Average Cost of Materials: $15 to $45 per linear foot
  • Uses: These solid panels offer security and privacy and provide a safe containment if you have pets and toddlers at home. Composite fencing usually blocks views given its tall height, so it’s ideal to use for backyards rather than front yards.
  • Advantages: Composite fence material comprises plastic, resin, and wood pieces– making it a durable mix. It is also available in various colors and designs that imitate the look of natural wood, minus its vulnerability to rot and pests. Some manufacturers also offer composite fencing that takes on a natural stone look. This fence is generally low-maintenance and requires occasional water spraying to look appealing.
  • Disadvantages: Given their durability and premium quality, composite fences are more expensive than other options. It will also be challenging to install on your own and may sag or fade over time. Composite is a very loose term, and lesser costs mean lesser quality, so buyers beware.

Masonry fence

  • Average Cost of Materials: $10 to $80 per square foot. Its price may vary based on the stone quality and fence thickness.
  • Uses: Typically, brick, concrete, stucco, or stone fences increase curb appeal and add heightened security to your home. If you install them high enough, they make for private outdoor spaces. Meanwhile, low masonry fences are perfect for boosting the appeal of your front yard landscaping. Taller versions are an ideal fit for the backyard.
  • Advantages: A masonry fence, when properly installed, can stand the test of time and harsh weather conditions with little to no maintenance.
  • Disadvantages: A high-quality stone fence is a very expensive option. This type of material is already pricey, and it also requires professional installation.

Invisible Dog Fence

  • Average Cost of Materials: $200 to $2,500. The price depends on your yard size and the number of your dogs or other pets.
  • Uses: Also known as an electric fence, this material consists of an underground barrier activated by a receiver in your pet’s collar. It’s a great pick if you want to keep your furry companions in the yard without obstructing your view. Invisible fences can be erected in the front yard, backyard, or both and can cover areas in any form or size.
  • Advantages: Invisible fencing is less expensive and easier to install than other types of fences, and it also won’t get in the way or block your views.
  • Disadvantages: Pets will be contained in your yard with the help of electric fencing, but they cannot keep other animals out. For instance, wild animals like Raccoons or Coyotes may still enter your property unannounced, and this leaves your pet with no method of escaping them. Also, invisible fences stop working if the power goes out as they are powered by electricity. The static shock that keeps your dog from crossing the boundary may also pose unintended consequences.

Wire Fence

  • Average Cost of Materials: $3 to $5 per linear foot
  • Uses: Hog wire works as an excellent fence for gardens, as it keeps intruders away from your flowers, vegetables, and other plants. In general, wire fencing plays a huge role in rural and urban settings. It serves agricultural, industrial, and aesthetic purposes.
  • Advantages: This fencing material is relatively cheap and easy to install, so you can skip paying labor fees from a local contractor. Aside from making occasional repairs, your new wire fence is expectedly maintenance-free.
  • Disadvantages: Wire fencing can be visually unflattering to many and can sag and decay over time. Hence, consider this for practical fencing purposes rather than for landscape beautification.

Steel Fence

  • Average Cost of Materials: $17 to $90 per linear foot
  • Uses: Steel fencing primarily serves as a protective barrier on your property.
  • Advantages: Undoubtedly, you can count on the strength of your steel fence, given its power and durability. High-quality steel fencing also has a long life expectancy.
  • Disadvantages: This material can be quite expensive, lacks versatility, and is difficult to install due to its heavy weight.

LLDPE Fencing (SimTek)

  • Average Cost of Materials: $70 to $90 per linear foot
  • Uses: Linear Low-Density Polyethelyne is a durable fencing material that will be low maintenance yet perform better than PVC.
  • Advantages: A combination of galvanized steel and recycled polyethylene plastic, this material type is resilient and can withstand strong impact, and it is also UV light-resistant. SimTek fencing is available in various styles and sizes, giving you plenty of options for your home.
  • Disadvantages: This material isn’t widely accessible, as opposed to other fencing types. Simtek Fences are more expensive than wood or vinyl, so it takes a particular buyer to afford this fence.

Glass Fence

  • Average Cost of Materials: $70 to $100 per linear foot
  • Uses: This material is mainly used for pool areas or scenic views. Not only does it offer attractive benefits, but it is also a unique safety barrier. It is perfect for homeowners with stunning waterfront or bush locations, considered a stylish alternative to traditional wood or aluminum fence.
  • Advantages: This high-end fencing option offers a sleek, elegant aesthetic. It will also provide you with an uninhibited view of your surroundings. Glass fencing can be considered an investment that adds value to your property. Any deck, patio, or terrace transforms into an attractive focal point that can belong in a lifestyle magazine.
  • Disadvantages: Like most premium fences, this material can be expensive. It also requires high maintenance and may feel a bit risky around playful little kids or pets.

Now that you’ve acquainted yourself with the basics of different fence materials for your property, you can now make an informed decision on which one is the right fit for your needs!

Low-Budget DIY Fencing Options

If you want to erect a boundary around your property on the cheap, you certainly have multiple options to choose from. Check out these DIY cheap fence ideas for your next project:

Simple Pallet Fence

As the saying goes, simplicity is beauty. Even for beginners, a simple pallet fence is a quick and easy DIY project, and it only takes a few hours to install and is a considerably low-cost option.

The construction is relatively straightforward: pallets are stacked one on top of the other, with T-posts placed between the pallet boards and hammered into the ground to maintain the fence upright. Screws are also used to secure the pallets as they are added. Apply a coat of paint to make it look visually appealing. For a beautiful vertical garden project, consider planting herbs or flowers.

Split Rail Fence

This historical fencing option requires no special tools, as long as you have wood logs split into quarters or eighths. Rails are placed in an interlocking zigzag manner to ensure sturdiness. Generally, split rail fences are constructed so that they are simple to build and dismantle when needed.

Fence posts can be installed at the joints to improve stability, and quality woods can be used that resist rot. A truckload of this fencing material can be delivered, and the fence installed the same day. It is very easy to move around.

Wattle Fence

Another ancient yet simple building method, wattle fencing, requires no hardware or tools upon installation. It is completely made out of wood and relies wholly on tension to keep it upright.

For the posts, you’ll need pieces of thicker wood. Each one to two feet apart is hammered into the soil to a depth of one foot. Keep them close together if you want a sturdy finished product.

This fence has a lovely rustic appearance. You may create a live wall by planting clematis or other climbing plants along with it.

Corrugated Fencing

To build cheap fencing that is visually appealing, you can consider recycling old materials or buying new ones. Who knows, you might already have all the materials you need in your storage, especially if you happen to have torn down an old metal shed. Just sink some posts and fasten the corrugated panels.

Brush Fence

This type of fence is constructed by piling cleared brushwood (small trees or twiggy vegetation) until a broad structure several feet tall is formed. It is nearly impenetrable due to the dense thicket of twigs and branches. Steel posts can be used at intervals to make this fence more sturdy.

Hedging

If you’re looking for a living fence that offers seclusion, acts as a windbreak, and provides a habitat for birds and beneficial insects, you might want to consider installing a hedge. They are aesthetically pleasing and environmentally friendly. Just choose some thick, hearty shrubs that grow the height you are looking for and plant them in a tightly spaced line. Hawthorn, hemlock, prickly ash, barberry, boxwood, arborvitae, and privet are popular hedge plants. If you want the fence to be effective in winter, choose an evergreen plant.

Dry Stacked Stone Wall

This wall is made from stones of various sizes, without any mortar to hold them together. Building this wall is simple to pick up, but mastering it will take some time. Consider it a labor of love that necessitates a great deal of improvisation. You may be able to find the stone for free or cheap if you can find a farmer with fencerows full of stone. If you have a strong back and a bunch of patience, you can certainly build this wall cheaply. The taller it is, the wider the base needs to be as it is entirely held together by gravity.

Horizontal Plank Fence with Metal Posts

Any wooden design undoubtedly adds a rustic appeal, but adding the metal posts provides more sturdiness. The design is ideal to ensure security purposes and give better anchoring. Frequently, homeowners in windy or storm-prone areas have their fences torn up since they aren’t appropriately anchored. Layered slats of wood give the design a visual texture, and the placing also improves the home’s privacy.

Recycled Fence

Your next DIY fencing project doesn’t have to be expensive. Expect to spend nothing but some nails and fresh paint to build a recycled fence. This is an excellent fit for many environmentally conscious homeowners since they can use recycled materials free of cost. If you can find someone who is getting a new fence or wants to get rid of their fence, they may give you the materials in exchange for taking down and hauling away the fence. Then, simply take it to your house and rebuild it. Consider your skill level and available tools before choosing a DIY fencing project. Keep in mind that even a basic wooden plank fence can be functional.

Frequently Asked Questions

What is the best backyard fence?

If you browse the internet, there is no definite answer regarding the best fence for your backyard– but the wooden fence usually tops most of the lists out there. Wooden fences are very popular because of the wide range of choices available and the fact that most homeowners understand a bit of wood construction and can likely install them with much trouble.

What is the cheapest fence to build?

The cheapest fence to build is most likely the PVC fence. You can get cheap PVC fences, but I wouldn’t install them as they aren’t likely to last long. I would probably look for used high-quality fence material before choosing cheap new material.

Is it cheaper to build a fence horizontal or vertical?

This all depends on what you mean by this. A horizontal two rail post and rail fence goes in rather quickly. If you are asking about post and rail vs. pre-built panels, that is another question entirely. For the most part, the conditions of your ground and the tools available to you will generally have the most significant effect on your fence building timeline. Digging and setting the posts is always the most challenging part. Of course, the horizontal split rail fence is the quickest to install since it requires no tools and no digging.

What height is a fence allowed to be

There is no set standard height for a residential fence; the locale will have its own set of rules that all residents must adhere to. The most common height being regulated for front yard fences are around 3 feet, while for backyard fences is between 6 and 8 feet.

How do you build a fence without digging holes?

Building a fence without digging holes may be done in various ways. One of the most common methods is attaching a concrete block to a bracket that is heavy enough to carry the materials you will use to build a fence. Instead of digging holes, mount the posts in the bracket, and you can finish building your fence from there. Another alternative for a no-dig fence is purchasing a fence with driven steel posts. Of course, you can always build a split rail fence as mentioned above, but that is a very particular type of fence and may not suit your site.

What can I plant on a fence line?

If you want your newly installed fence to have some greenery growing on it, here are some recommended fast-growing and ornamental plants that you can install.

Annual Flowering Vines

  • Passion Flower
  • Hyacinth Bean
  • Morning Glory

Perennial Flowering Vines

  • Wisteria
  • Honeysuckle
  • Clematis

Evergreen Plants

  • Creeping Fig
  • English Ivy
  • Boston Ivy

Foliage Pants

  • Variegated Porcelain Vine
  • Silver Fleece Vine
  • Virginia Creeper

What can I use instead of a fence?

You are not limited to using a traditional fence, given that there are many alternatives out there you can consider. For instance, you can choose a hedge, stonewall, brushwood, bamboo, corrugated metals, and a vertical garden for when you need to create a perimeter around your yard. Often, your options for fencing materials will be limited by the local authorities, so always check before you put in a bunch of work.

Final Thoughts

In summary, landscape fencing is crucial as it adds value to a property and provides other benefits to the owner and the neighborhood. Be meticulous in choosing the best fencing configuration for your home and check your local regulations before beginning.

If you have little to no prior experience in fence construction, consult with a professional fence builder to get a bid on your project. An experienced builder from your area will also be knowledgeable regarding rules, regulations, and material choices, so don’t be afraid to ask many questions.

I hope this guide helped you understand all you need to know about landscape fencing. If you need other informative guides like this, please browse our other articles!