Sowing a seed with your hands, watching it grow to maturity, and ultimately harvesting the fruit of your efforts is a genuinely down-to-earth type of inner satisfaction. If you have ever experienced farm-fresh vegetables, you may already know that they are exceptionally sweet, juicy, and flavorful. Vegetable gardening can be your source of exercise, hobby, and food for the table. A small backyard vegetable garden containing a nice mix of seasonal vegetables can be more than enough for you and your family. If your garden space is large enough, you can also convert your excess harvest into a small home-based business by selling fresh vegetables to nearby grocery stores or neighbors.
Tips for planning your vegetable garden:
Choose vegetables that your family already likes and consumes on a daily basis.
Determine how much you might consume per month to know how much to plant.
Choose plants based on growth and maturation times to ensure a steady supply throughout the season.
Select viable, true-to-type seeds having a 100 % germination rate.
Plan to monitor the garden for adequate water and plan to thin, harvest, and pull weeds as needed throughout the season.
How to start your vegetable garden
Selecting the right site
Location is a significant factor to consider before planting. Sunlight hours/day, site drainage, wind pattern, soil fertility, etc., are essential factors in site selection.
Sunlight hours/day: Sunlight is directly related to the success or failure of your crop. Most of the fruiting vegetables require 6-8 hours of continuous light every day, while the others, like leafy vegetables, are not as dependent on sunlight and can tolerate a bit more shade.
Drainage: Improper drainage will lead to water pooling and root rot. It is best to ensure that excess water drains away from your garden and that your soil is friable and drains moisture well. However, if the area is a bit wet and the soil is not as well-drained as it should be, you can plant vegetables on ridges or in raised beds or containers.
Container Garden: In a container garden, annual and biennial (mostly root vegetables) vegetables are planted as the containers are not deep enough to support the root system of perennial vegetables. Many vegetables like carrots, beets, lettuce, coriander, spinach, eggplant, etc., will do well in containers. Container vegetables are quite easy to grow and maintain and can be protected from several soil-borne diseases and climatic severity.
Raised-bed Garden: Raised beds or ridge planting can be used very successfully in vegetable gardening. Realize that any sort of container or raised bed will require more frequent watering. Source: Heflebower, R. (2012). Raised Bed Gardening.
Soil Fertility: a healthy soil will produce healthy plants and vice versa. Always use organic, well-aged fertilizers and compost for your home garden. They will keep your soils nutrient-rich and help you to produce healthy vegetables.
Choosing Vegetables
Not all vegetables are easy-to-grow. For example, cooler climate vegetables cannot be grown in the hotter areas unless they are provided special care. Therefore, as a beginner, you should start with easy-to-grow vegetables that are well suited for your climate. It is not a bad idea to consult the experts when you are just starting out. Contact the Cooperative Extension Services (https://www.almanac.com/cooperative-extension-services); they will guide you to make the best choices for your garden according to the climate and other related conditions.
Following are some of the easiest vegetables for the Beginners in Gardening:
Pees
Lettuce
Carrots
Radishes
Tomatoes
Zucchini
Green beans
Peppers
Broccoli
Spinach
Kale
Potatoes
The vegetables above are very good choices for the beginning gardener and can provide you and your family with lots of tasty food. Some of your veggies may occasionally be bothered by insect pests or diseases, but these are not very common and relatively easy to overcome using biological controls.
How much and when to plant?
For the beginning gardener, it will be helpful to always plan and label your garden, allowing plenty of space for the plants to grow and thrive and also leaving plenty of room for you to work between the rows. A very typical beginner’s mistake is to plant rows and plants too closely together, making them hard to tend and necessitating thinning of plants which wastes your valuable seeds.
Also, don’t overwhelm yourself with your first garden. Planting is the fun part, and it is very easy to go too big. Weeding is the hard part, and it is very easy to let a large vegetable garden get away from you. Allowing your vegetables to be overgrown with weeds can cause severe stunting and even plant death, so it is better to go a bit smaller to start.
Now the question is how to arrange your vegetables? Let’s discuss:
You should plant the cool season and warm season vegetables according to their sowing dates. For example, lettuce, peas, and broccoli will be sown in early spring, while warm-season crops like cucumber, pepper, and tomatoes are not planted until the soil warms up a bit later.
Tall and vine-making plants (needing support) should be planted either in containers or along the edge of beds where support structures can be installed without impacting the other garden plants. If you have some shade-tolerant plants, the vining structures can provide a bit of shade from the hot summer sun for these more shade-tolerant plants.
If planting perennial plants, choose a spot in the garden that will remain permanent and group these plants together since the spring preparation will be much different.
Plant slowly but surely: do not plant all of the cucumber or lettuce or any other vegetable seeds all at once but in gaps of one or half months. In this way, you will have fresh food to consume throughout the season as your plants mature in stages.
Two methods of vegetable planting:
Seeds: Seed sowing is a relatively inexpensive and easy method of planting as they are available in bulk, and they are easy to store and sow as you see fit. You can also harvest seeds from your own plants; just let them finish the reproductive stage, followed by the seed forming stage. You can also grow your own nursery stock from the seeds. This is a relatively inexpensive and healthy way to ensure an ample supply of seeds for next year’s garden, and you will be more self-sufficient.
Nursery planting: For many warm-season vegetables, it is necessary to raise nursery plants first, transplant them, and then flowering and fruiting will take place. For example, tomatoes, chilies, eggplant, capsicum, cabbage, onion, kohlrabi, etc., will need to be started early if you are in a cooler climate.
Raising early seedlings has advantages:
They can be raised in trays, making them easy to care for indoors to protect the tiny, delicate seedling from harsh climatic conditions.
The seeds and seedlings can be protected from birds and other animals.
You will have the choice to transplant only healthy and vigorous seedlings.
It is possible to provide uniform, controlled conditions to all the seedlings until favorable climatic conditions exist outdoors.
It allows you to plan your plant growth and timing even more accurately to ensure a balanced harvest all season long.
The following links are the Garden-Expert’s transferred knowledge about home gardening:
Marsh, R. (1994). Nutritional benefits from home gardening. ILEIA Newsletter, 10(4), 14-15.
Marsh, R. (1998). Building on traditional gardening to improve household food security. Food nutrition and agriculture, 4-14.
Woodhead, E. (1998). Early Canadian Gardening: An 1827 nursery catalogue. McGill-Queen’s Press-MQUP.
Blakstad, M. M., Mosha, D., Bellows, A. L., Canavan, C. R., Chen, J. T., Mlalama, K., … & Fawzi, W. W. (2021). Home gardening improves dietary diversity, a cluster‐randomized controlled trial among Tanzanian women. Maternal & child nutrition, 17(2), e13096.
The best water-absorbing plants for the yard are useful if your area floods easily or if you happen to have a spot that just doesn’t dry out too well. These trees, shrubs, and plants love moisture-rich soil and will be of tremendous help for those places in the landscape prone to poor drainage.
These water-absorbing plants are also excellent if you plan to construct a rain garden.
If you have a section of your landscape that seems to collect stormwater runoff consistently, the area will benefit from having water-absorbing plants installed. You can often find such spots at the base of a sloping area or in a depressed zone, and it would be helpful to place plants in those areas to tidy up the site while also soaking up the extra water.
Plants are nature’s water filters and have been cleaning the earth’s water since the beginning of the planet. We need to take advantage of the incredible power of plants to filter our water by adding more and more lush green plants to our landscapes whenever possible. That wet spot in the backyard is the perfect spot for a few water-absorbing plants.
Shrubs That Like Being Hydrated
Take advantage of these water-loving shrubs to build a visually stunning landscape that does not suffer from water runoff problems.
American cranberrybush can take on a fully branched, thick shape. It’s got stunning orange-red fall foliage and vibrant red fruits.
Buttonbush (zones 6-9)
Buttonbush
Buttonbush is an excellent plant you can rely on to beautify wet areas. Aside from its pretty, scented, white flowers, you’ll also like its attractiveness to birds and butterflies.
Elderberries have been eaten for sustenance in Europe and the United States for centuries, and they were also well-used for their health benefits in ancient Greece and Rome.
The Black Chokeberry benefits the ecosystem by supplying berries for wildlife to consume and refuge and nesting spaces for tiny creatures. Meanwhile, its blooms are excellent food sources for pollinators.
Nyssa sylvatica’s affinity to moisture makes it a very attractive choice for lowland gardens. This plant with beautiful red/orange fall foliage is extremely important to wetland fauna. Its white blossoms are an important source of honey for pollinators, and its fleshy fruits supply nourishment to wildlife.
Red maple (zones 3-9)
Red Maple
Acer rubrum is most recognized for its spectacular autumn show of colorful foliage. Red maple trees may be productive rainwater absorbers in several habitats because they tolerate a wide range of soil types. Yet, it prefers wet, mildly acidic, rich soil. A single red maple tree may consume up to 10 gallons of water per week.
Betula nigra thrives in wet regions like swamps, ponds, and river valleys. It’s also known as water birch since its roots can withstand being planted in a water source or a moderately aquatic environment. If you have a yard with less-than-ideal drainage, the river birch tree will thrive in the constant wetness.
Waterways, shrubbery, and open, humid, deciduous woods are the most common places to find primrose.
Daylilies (zones 4-9)
Daylilies
These flowers are attractive, low-maintenance, and incredibly resilient. They do well in the absence of human intervention. Because they soak up lots of water, you must give them plenty of moisture. Or place them in damp sites in the landscape.
Iris laevigata is already a low-maintenance perennial, but its preferred environment is wet.
It’s nice to position the Japanese iris close to the edge of a standing water source. The roots may grow in moist, acidic, rich soil, although they don’t like their roots to be submerged in water in the winter.
Globeflower (zones 3-7)
Globeflower
Trollius sp. is endemic to the northern hemisphere. This plant thrives in humid (or wet) environments with colder temperatures and dappled shade. They can withstand quite a bit of dirt, even clay).
Globeflower gets its name from its distinctively spherical buds, which can add a splash of warm color to your landscape with dazzling yellow and orange shades.
Leopard Plant (zones 7-10)
Leopard plant
Farfugium grows well in moderate sunlight exposure to complete shade and loves damp, rich soil. It isn’t picky about pH. In our hot environment, the excessive sun can cause it to wilt, so it’s better to stay safe by giving it some shade.
Farfugium is adaptable to different soil types, but it needs constant hydration and can die if left to dry out.
Aside from being fun to bite, Cattails are helpful yard plants if you need to deal with excess moisture. They are tall and have long leaves and “hotdog-on-a-stick” flowers, and you’ll usually see them in marshy areas.
Perhaps Rosa gallica is the most exquisite, water-loving flowering plant. Its bright pink flowers scream romantic appeal.
What Is a Rain Garden?
Rain falling on a garden
Rain gardens are small, man-made depressions filled with plants (usually the plants mentioned earlier in the previous sections). They are placed in strategic locations to collect rainwater runoff from hard surfaces (like a driveway, roof, parking lot, sidewalk, or roadway).
Right after a storm, rain gardens collect a few inches of water. Instead of rushing off to the road or drainage structures, this water seeps into the surrounding soil.
The Advantages of Having a Rain Garden for Dealing with Water Runoff
If water runoff is a problem, you will benefit from a rain garden. Many beautiful plants will improve your yard’s aesthetic appeal and add functionality by helping with water absorption.
Aside from that, a rain garden also:
eliminates any standing water from your lawn,
cuts down the number of mosquitos that breed,
minimizes the risk of flooding on your property,
establishes an environment for birds and butterflies to live in, and
Front yard potted plants can look stunning and inviting, creating a lovely atmosphere for the landscape. Even the most common flowers and foliage can look sophisticated when you thoughtfully arrange them in their suitable pots.
Potted plants are simple features that can do so much for the beauty of the front yard. You can place the pots, containers, or even recycled old objects in certain spots to add glamor or hide something.
What can I do to make my front yard appear beautiful with potted plants?
Beautiful with potted plants
Potted plants bring color, depth, and intrigue to your front yard. Choose your plants like you would interior decor or artistic displays when designing the front yard. Colors and forms should blend and contrast with their backdrop to create interest.
Using potted plants to embellish your front yard requires very little effort or skill. In fact, utilizing pots or containers for your plants gives you the ability to make choices and then change your mind a moment later. Potted plants are very easy to arrange and re-arrange as you see fit.
Your landscape can have a different look every day if you take a bit of time to re-arrange your potted plants.
There are many ways to make your front yard look amazing with potted plants.
Potted Plant Landscaping Ideas
Potted plant landscaping ideas
These are our top front yard potted planting ideas to spruce up the space that should make a great first impression.
Lovely Potted Plants by the Window
Lovely Potted Plants by the Window
The window might be the number one spot in the front of the house where you can place potted plants for decoration. In France, they like to put flowers in containers to beautify their windows, which adds a romantic vibe.
Sometimes, people use planter boxes with drainage holes at the bottom, while some like to use hanging baskets for a more modern appeal.
Front Door Plants in Pots
Front door plants in pots
Even if your front door is right on the sidewalk, or if you don’t have much room or want to spice up your front door, using containers to frame your entry point is a terrific option. One method is to place a relatively large planter on each side of the front door.
Another great option is to use various-sized pots only on one side of the door to create a bit of contrast and imbalance.
Size matters as well. The size of the plants and containers should relate to the size and scale of your home and the front entrance. A big house with a grand entrance might need potted small trees or large shrubs, while a small cottage might need some delicate annual flowers.
Keep in mind that your potted plants need proper watering, especially when the weather is hot. No matter what type of pots or plants you use, the fact that they are raised up out of the ground will always cause them to dry out more quickly than a plant in the ground.
Potted Plants of Assorted Heights
potted plants of assorted heights
You certainly can take advantage of the variety in plant and container sizes. Consequently, you’ll have a proportional-looking, harmonious display that’s easy to modify when you feel like it. Taller plants can add vertical interest, while shorter ones allow the arrangement not to look too crowded.
Use a Single Potted Plant as a Focal Point in the Front Yard
Use a single potted plant
Sometimes you need a statement piece in the front yard. You can easily do that by placing your favorite potted plant near the front of the house. It can be a showy, brightly colored flowering plant or a shrub with unique foliage that stands out from the rest.
This also works pretty well if you don’t have an abundance of plants in the front area of your home but you want to start building up your softscape.
Potted Flowers as Garden Furniture Decor
Potted flowers for garden furniture
Plain outdoor furniture in the front yard could use extra help from potted ornamental plants. A couple of well-placed potted plants can add interest to a boring space. These rarely used tables or chairs outside might be the ideal stage for some artistic expression (using plants).
Even a single, well-placed potted flower at the center of the table can elevate the look of your setup. The design may be done in a variety of ways. For the most significant effect, use flowers in a single shade. Alternatively, combine different plant varieties, blending erect varieties with ones that overflow to the sides.
Square Planters (or Other Shapes)
Square planters
It’s rare to see non-circular pots, and however, the aesthetic of square and rectangular containers, especially in a modern-themed home, is pleasing to the eye. If you decide to go that route, choose a single basic color (such as black or white) for all your pots, and it will make your front yard look more stylish and uniform.
Lined Up Terra Cotta Pots
Lined up terra cotta pots
If you’re inspired by the Mediterranean landscaping style, using terra cotta pots for your front yard landscaping will do wonders for you. Terra cotta pots create a classic, sophisticated look no matter what plants you put inside them. Put several of these pots together to create a stunning, Mediterranean vibe and add definition to your front yard.
Small Front Yard Trees in Pots
Small front yard trees in pots
Small trees in the front yard already look lovely by themselves. However, the addition of a few beautiful pots provides complexity, structure, and vibrance to the most important space in the landscape. A couple of potted trees framing the door is a favorite of landscape designers everywhere. Pick a shorter tree (or a tall shrub) with a modest, controlled growth rate when planting a tree near your front door.
Recycled Plant Containers
Recycled plant pots
Here’s an easy landscaping idea for the front yard: incorporate vintage pieces as plant containers for a picturesque and personal touch. You may repurpose old items by painting, fixing, and personalizing them.
You may designate a border for your pathway with a few terracotta plant pots, a neat yard design choice that you can change as you please. It doesn’t matter if it’s a simple line of potted herbs or a vibrant display of flowers. You’re good to go as long as you don’t choose plant pots that are so big that they occupy most of the space or so tiny that they fail to make an impact.
To Conceal Unpleasant Sights, Use Containers
Conceal unpleasant sights use containers
Another use of plant pots in landscaping is for hiding outdoor eyesores. For instance, you’re looking to hide the air conditioning unit or the utility boxes. Choose fascinating plants to decorate critical sections of your yard. You can place trailing plants like petunias coupled with plants with lush foliage, such as Hostas. It’s a smart way to turn something unsightly into something chic.
Potted Succulents
Potted Succulents
Use pots with a basic form and a simple, single-colored surface that complements the succulent plants’ interesting, symmetrical shapes. If you like a well-coordinated landscape design, ensure that the appearance of the pots conforms with the front yard’s style. The best thing about potted succulents is their extremely low maintenance.
Conclusion
Planting in containers is easy to do and can easily ramp up your landscape’s creative look and feel. Treat yourself to any easy landscape upgrade by buying a few new pots and a few flats of your favorite annual flowers. These and a bag of potting soil, and you will be well on your way to a new landscape look. Don’t forget the garden hose because those plants will need to be watered regularly.
To get the most out of your front yard, you will want to ensure that you install the best possible plants that will provide year-round interest. By choosing the right trees, shrubs, ground covers, and perennials, you can make your front yard look spectacular all year. Whenever you walk out the front door and whenever your neighbors drive by, you want your front yard to look its best, so why not choose these year-round plants.
This article’s ornamental, richly colored selection of plants makes it easy to design a stunning and well-kept front yard that will shine throughout the year.
Considerations for Your Front Yard
Depending on how you landscape it, your front yard can improve or detract from your home’s overall appeal, so it’s essential to consider a few things before redesigning or adding plants.
The Activities to Do in the Front Yard
The activities to do in the front yard
Your front yard is an important showplace for your home, but it doesn’t need to be just a showplace. It can also be a gathering place for friends or a calm and relaxing place to sit outside and meet the neighbors.
You can make the front yard a wonderful, pleasing, and calming gathering place by planting beautiful and fragrant plants. Instead of spending your time indoors, spend it out in the front yard and get in touch with nature.
Your front yard gardens can become your personal hobby or art project. By using your creative mind and a bunch of long-lasting, year-round plants, you can add a personal touch to your yard that will help it stand out from the other yards in the neighborhood.
Paying landscapers to beautify your front yard is great, but it can never have the personal touch that you can get when you inject your own personality and creativity into your front yard gardens.
Maybe you’d love to have big, overbearing trees or dense, towering hedges in the front yard for shade and privacy, or perhaps you’d prefer a more formal ornamental garden that can be viewed from the street. Make your front yard fit your lifestyle and do it with year-round, beautiful plants.
Amount of Time Spent in the Front Yard
Amount of time spent in the front yard
Indeed, the front yard has always been considered an important showcase and factor in the value of your home, but lately, there has been more of a “front yard as a gathering place” attitude.
The more that you can use year-round plants, the better your yard will look and the more you will be inclined to use it. If you put the thought and effort into the front yard, it will pay off with greater home values and more front yard enjoyment.
In short, you’ll love spending time in the front yard because the year-round plants will make you smile every time you walk outside.
If you’re a landscape hobbyist, you may end up spending lots of days and most weekends outside, beautifying and polishing the yard’s look.
When designing and planning your front yard landscape, be sure to consider how it will be used, how much privacy it will provide, and what it will look like from the street. While the backyard is for gathering and fun as well, only the front yard is on display year-round for all the world to see.
However, you plan your front yard, keep in mind the amount of maintenance it will require, and be sure that you have the resources and are willing to do the needed maintenance. Too many yards have been over-planned and over-planted, only to leave the homeowners with far too much landscape maintenance to deal with.
How Much Foot Traffic There Is in the Front Yard
Generally speaking, your front yard will likely have more foot traffic than your backyard. At least when it comes to people who aren’t living in the home. Your front yard is the walking place for your home’s guests. Most people use their front yards as a public space, while their backyards are typically reserved for private use.
It’s necessary to establish boundaries on where to go and shouldn’t go in the front yard if your visitors, children, and furry friends will freely spend time there. Structure in the front yard can be had with the help of certain border plants, while lawn alternatives (ground cover plants) can help you add a characteristic look. The little details, such as the plants you decide to insert between your pavers, can impart a sophisticated look.
Increase Your Front Yard’s Appeal by Reflecting on These Design Questions
By taking some time to consider things like proportions and focal points, you can give your yard a well-thought-out makeover that will be sure to impress. So if you’re feeling excited, read on.
What are your front yard goals?
What are your front yard goals
Think of the kind of plants and flowers you currently have and want to have. Spending time looking at image boards may help you get inspired.
Moreover, what is one standout feature you treasure in the front yard? Which plants and materials reflect your style, and what impression do you want to give off? One of the best ways to increase the year-round appeal of your front yard is by using plants to highlight areas of the yard you want to emphasize. You can also achieve the same effect for spots you don’t want people to see, such as when you cover up gaps in stone paths using ground cover plants.
What is the theme of your entire landscape?
What is the theme of your entire landscape
In addition to wanting your home to look great, you also wish your front yard to make an excellent first impression on guests. To achieve that, you need to decide if the front yard needs a more coherent look. Understanding how the plants you choose will pull the look of your yard together will help you immensely when choosing the type of plants to add to the front yard.
What style do you want your front yard to emulate? A simple, sustainable style of yard, for example, might inspire a meadow garden design. You might consider native plants such as hydrangeas and dogwood.
A contemporary landscape with basic architectural elements may benefit from uniform-looking, sleek, polished lines. Hedges such as boxwood might be well suited since they can be trimmed into various shapes.
Is the soil healthy enough for your plants to thrive?
Is the soil healthy enough
An attractive home can be enhanced with plants. However, you have to give them the best growing conditions possible.
It’s a well-known fact that builders strip away the fertile topsoil to get down to hardpan to have a solid footing under your home; the question is, how much topsoil did they bring back in to top the yard. In many cases, homes are left with barely enough topsoil to grow a lawn, much less to support a thriving perennial garden.
You may need to do significant soil amendments before planting, depending on the type of plants that you are using.
If you are starting with a blank slate, it may be easiest to truck in some black topsoil before you begin your planting, but if you are re-working an existing yard, you may want to begin applying compost to the area that you will be planting into far in advance of planting.
You need to inspect your soils and be prepared to dig out or amend portions of low-quality soil and replace them with better-quality earth; this is especially critical for woody plants in the front yard. You could also use plant containers—pots, vases, or recycled items. Or you could make elevated flower beds. Whatever you decide to do, ensure you use high-quality, nutrient-rich soil.
What elements do the front yard get exposed to?
What elements do the front yard get exposed to
A lot depends on the amount of rainfall, snow, sunlight, shelter from the sun, and airflow the front yard gets.
To illustrate this point, a gorgeous accent tree that is not well suited for its environment may lose its beauty after it is weighed down by snowfall, snapping all of its delicate branches. Another example would be the tender plant that is planted on a windy and exposed site where it just can’t survive.
Choose your plants wisely, and always choose native plants that will thrive in your specific environment. Choosing the wrong plants can turn your beautiful yard plans into a nightmare experience for you, your plants, and your pocketbook.
Select appropriate plants for your geographical region, weather, and temperature to increase your front yard’s attractiveness. Also, consider the sun exposure in the front yard.
Year-Round Plants for an Aesthetically Pleasing Front Yard
Front yard plants for all year
First, consider the plants that make the most significant impact on your front yard: trees and shrubs.
Ornamental Trees and Shrubs for Exceptional Beauty All Year
Roses (Rosa)
Rose
Roses might be the best flowering shrub in the front yard that will amaze onlookers all year. The rose is such a symbolic flower, seemingly capturing the deep emotion of love.
Boxwood is another year-round staple plant for your front yard. You will like boxwoods if you’re a fan of formal hedges and crisp lines in the landscape. You can manipulate it into almost any shape you want. Its fine texture and compact form let it work flawlessly as a border plant.
Boxwood is a desirable plant for those looking to add curb appeal without sacrificing low maintenance.
Magnolia (Magnolia grandiflora)
Magnolia
Southern magnolia, a specimen tree, retains most of its massive foliage throughout the year. They are known for their attractiveness and pleasant perfume. Its cream-colored spring blossoms are lovely and would be an admirable sight in your front yard.
Arborvitae is one of the most popular year-round front yard trees due to its practicality. It’s got a distinctive look—its dense form allows it to serve as an excellent privacy hedge in the front yard. Not just that; its vibrantly colored, yellow-green foliage to dark green foliage also sets it apart from other plants in the landscape.
Flowering Dogwood (Cornus florida)
Flowering Dogwood
Cornus florida will look stunning all year round because of its showy, attractive blooms and gorgeous autumn colors. Brightly lit areas are suitable for flowering dogwood, just not excessive sunshine. It doesn’t do well in extreme heat, yet it can withstand the chilly temperatures in the winter. This specimen tree will be an excellent addition to the front yard due to its unusual, pretty look.
Bigleaf hydrangea is a decorative front yard plant known as Japanese, French, or snowball hydrangea. It is a delightful flowering shrub that will give your front yard a pop of color. You can rely on the hydrangea to have a long bloom time, enveloping the rich, large foliage in big globes of flowers that come in blue or pink in summer or fall. USDA zones 3 to 9 are suitable for bigleaf hydrangeas.
Stunning Groundcover Plants
Creeping Juniper (Juniperus horizontalis)
Creeping Juniper
Especially for the bare spots in the front yard, creeping juniper is a perfect ground cover to occupy those spaces. Why? Because of the growth habit that lets it form a dense mat. The best part is this remarkable shrubby front yard plant can thrive in sunny, arid, hot, rocky places. It also has a high tolerance to frost. So you can count on it to not be high-maintenance.
Creeping Phlox (Phlox stolonifera)
Creeping Phlox
Creeping Phlox is one of the prettiest flowering ground cover plants for the front yard. It will blanket the ground with its abundance of beautiful, bright, starry blooms scattered over fine, big mats of needle-like foliage that add curb appeal all year.
Creeping Phlox is an easy plant to grow; it does fine in plenty of sunlight exposure or partial shade. This highly decorative plant is not very picky in soil quality either, making it perfect for rocky areas in the front yard.
If you’re looking for an equally exquisite decorative plant for the front yard, creeping thyme is another excellent selection that would beautify your space all year. Its small, tubular, brightly colored pink/purple flowers would instantly make your front yard fun to look at.
Veronica prostrata is a front yard plant that looks delightful all year. Its profusion of vibrant blue flowers and its beautiful mat of serrated, deep green foliage never fails to invigorate a flat landscape.
Prostrate Speedwell is well-liked by those who prefer a cottage-style garden. You can also use it as an ornamental border plant or fill in the gaps between stones. It likes being exposed to full sun.
Gorgeous Long-flowering Perennials
Daylily (Hemerocallis)
Daylily
Daylilies can undoubtedly brighten up the front yard all year long with colors like orange, red, yellow, pink, purple, and white. Its large, brilliant flowers look great no matter how you incorporate them into your landscape.
Daylilies do well in containers, as border plants or mailbox plants. You’ll love daylilies for your cottage garden or shade garden too!
Peonies (Paeonia)
Peonies
Peonies produce large, scented, ruffled blooms in many shades (usually pink) and varieties. This perennial’s stunning looks and pleasing fragrance will entice you to spend more time out of the house and take in the scenery of your front yard.
Do you want your front yard to have a cheerful vibe? Black-Eyed Susan flowers do that best thanks to their intensely bright yellow ray blooms on stiff, erect stems one to three feet tall. Plus, these plants are tough since they’re winter-hardy in zones 3-10. Aside from using them to make your property look wonderful, you can also pick and collect them in bouquets to give as gifts.
Shasta Daisy (Leucanthemum)
Shasta Daisy
Flower beds and front yard borders look great with the fresh, elegant white Shasta Daisies. Like the Black-Eyed Susan, these daisies look amazing even in bouquets and vases due to their long and strong stems.
You can never go wrong with growing Shasta Daisies if you’re new to gardening because they’re pretty low maintenance. Although they very much prefer full sun and rich, moist soil with good drainage.
The Fothergilla plant offers a lot of interesting decorative traits. You can plant as many of these shrubs as you can. You never have to worry about colors clashing because its simple white shade can complement all the other flowers in your front yard!
Abelia
Abelia
Abelias are extremely simple to grow, and it’s mind-boggling how easy it is to have year-round interest in the front yard by adding this plant to the landscape.
Abelia has intriguing, bold, red-tinged foliage and alluring, fragrant blooms that will always catch the attention of someone who walks by. Additionally, this accent plant is tough—it will survive even in drier conditions, poor soils, and cramped spaces.
This is why Abelia is one of the most popular plants for the front yard that will stay gorgeous the entire year.
English Lavender (Lavandula angustifolia)
Lavender
Having a mass planting of English lavender anywhere in the front yard can make that space look more dreamy. Even if you place just two rows of it to frame a pathway to your front door, it will make a difference.
This finely textured plant emits a perfumey, relaxing scent that would certainly have you wanting to stay near it when you take a break from work. Keep in mind that full sunlight exposure, and dry, infertile soil, are essential for growing healthy lavender all year round.
Flowering desert plants, such as these select groups of shrubs, trees, succulents, and cacti, are highly drought resistant. Another term for plants that survive in dry areas is xeric plants.
A hardy desert landscape doesn’t need to look dull, nor just contain cacti and succulents! If you’re fond of bright, showy flowers embellishing your dry landscape (and attracting birds, bees, and butterflies), you came to the right place.
Deserts aren’t all about sand, rocks, snakes and spiders, there are actually some very pretty plants that thrive in desert regions.
Here are the most colorful, interesting, and low-maintenance flowering plants that are perfect for your desert garden.
Flowering Desert Plants
An astounding variety of low-water-use landscaping plants like living in arid areas. With a bit of creativity, you can design a planting plan for your dry desert property to fit any scenery!
Desert plants exist in such a rainbow of colors, textures, and shapes that they can turn barren areas into spectacular attractions. Some of these will get you thinking, “What? I didn’t know flowers could look like that!”
Shrubs
Desert Flowering Shrubs
A shrub is clearly defined as a woody plant with multiple stems. I bet you’re surprised that we didn’t immediately delve into succulents or cacti.
Here are some tough flowering shrubs that can add a pop of color to your desert landscape.
Chuparosa (Justiciacalifornica)
Chuparosa
Chuparosa (“hummingbird” in Spanish), also known as Beloperone or Hummingbird Bush, is a native, brightly flowering desert shrub. It is a member of the Acanthus family (Acanthaceae), which composes mostly tropical plants.
Justicia californica can grow up to six feet tall and eight feet wide. You can readily notice its profusion of tubular, red (or orange) blooms against its small, pale green leaves and dense branches. It will certainly stand out in the landscape due to its unique growth habit.
You can naturally find this plant growing in Mexico, Arizona, and California’s sandy areas. If you are lucky enough to get a Chuparosa in your landscape, you can expect birds such as sparrows, hummingbirds, and linnets to be attracted to its nectar-filled flowers.
Bougainvillea (Bougainvillea spectabilis)
Bougainvillea
Bougainvillea spectabilis is a well-known flowering desert plant for landscaping. You can usually see it in Mediterranean settings. It’s a woody, ornamental shrub that can grow quite big (15-40’ tall and wide), and its defining characteristic is the striking (usually) magenta color of the inflorescence.
This large plant will certainly stand out in the landscape and give off a tropical vibe. Its remarkably vibrant, paper-thin bracts enclosing the tiny, white flowers will unmistakably add a lot more color to your yard.
Wherever you put this plant in your landscape, you can’t go wrong. Its abundance of white blooms makes it a beautiful container plant, accent, hedge, or ground cover. It’s also really good at erosion control.
Although they will survive harsh, dry conditions, they do appreciate a drink from time to time when it gets really dry. These plants like well-draining soil.
This beautiful shrub is best pruned only to shape. You don’t want to cut off too much, especially if you want it to reach its maximum height (20 feet).
Oleander (Neriumoleander)
Oleander
The most important thing you need to know about Nerium oleander: it is a poisonous plant. Even the smoke from burning the plant can be deadly.
Oleanders bloom from early spring to late summer, bearing enormous clusters of white, yellow, red, or pink flowers at the ends of the stalks. They like full sun to develop and bloom but may accept the moderate shade.
Yellow Bells (Tecoma stans)
Yellow Bells
Yellow Bells (also known as Esperanza, a Spanish word for “hope,” Trumpet Flower, Yellow Elder, Yellow Bignonia, and Yellow Trumpet Flower) is an evergreen plant with an irregular form. It grows 3-6 feet tall in the United States. However, it can reach a height of 10-25 feet and a width of 10-20 feet. It has a lot of stems and tall, thin branches.
In direct sunlight, Yellow Bells will flower abundantly. Against the lance-shaped, olive-green foliage, clusters of big, eye-catching, trumpet-shaped yellow blooms stand out, which explains its name. And in the fall, long, slender pods appear.
Bee Brush or Whitebrush is another beautiful flowering plant. It produces torrents of small, intensely vanilla-scented blooms after rainfall during the summer months. And when it does, it attracts bees (hence the name) and butterflies. It blooms even more in full sunlight.
You can trim this plant into a tiny tree or a hedge! For most soil types, this plant makes a good backdrop or barrier plant. And if you want to encourage even more blooming and noticeably thicker growth? Just prune it.
Ocotillo (Fouquieria splendens)
Ocotillos
Ocotillos are among the most unusual-looking flowering desert plants. They look rather amusing with their long, spiny, bent sticks standing out against an arid hillside. They can be the perfect desert accent plant for many yards.
The name Ocotillo (Spanish for “small torch”) comes from the groups of brilliant, fiery red blooms that grow at the plant’s stem terminals. But it has many other nicknames: Jacob’s Staff, Flaming Sword, Candlewood, Desert Coral, Coachwhip, and Vine Cactus.
Hummingbirds and ocotillos are perfect for each other. The ocotillo blooms’ tube-like structure makes it simple for the hummingbird to obtain nectar at the bottom with its long beak. The hummingbird helps pollinate the flower as a result.
With its magnificent clusters of trumpet-shaped vibrant orange (and red) flowers and fern-like leaves, the absolutely stunning cape honeysuckle is a highlight for your yard. Tecoma capensis belongs to the Bignoniaceae (Trumpet Creeper) family, which is primarily tropical.
This woody, evergreen flowering plant makes an excellent informal hedge. It’s a nice way to add a pop of color to your dry landscape.
Baja Fairy Duster flowers are unique and will surely stand out among your desert garden plants: bunches of red stamens that look like powder puffs bloom in spring and fall! This no-fuss plant is a hit for hummingbirds.
These shrubs can reach up to five feet tall and wide, and you can easily recognize their open and upright form. It works as a wonderful screening shrub, or you can just place it against a wall.
Here are some of nature’s most beautiful desert landscape antidepressants.
Anacacho Orchid Tree (Bauhinia lunarioides)
Anacacho Orchid Tree
The Anacacho Orchid Tree, also known as Anacacho Bauhinia, Orchid Tree, and Texas Plume, is a shrub or small tree with tiny, deeply partitioned, light green leaves, and dainty, tightly clustered white (or pale pink) flowers that look like orchids.
Cascalote is a little flower-bearing tree that will beautify courtyards and open spaces, especially in the southwest. This Mexican native has beautiful, showy, yellow winter blooms, followed by brightly colored copper seed pods.
Tara cacalaco (also Caesalpinia cacalaco) works wonderfully as a winter accent. Late fall and winter bring forth a festive golden hue.
And did you know that this beautiful flowering plant has antimutagenic and antioxidant activities? Apparently, its pods are a great source of phenolic extracts responsible for that.
Blackbrush Acacia (Vachellia rigidula)
Blackbrush Acacia
The pale grey bark and lush, deep green leaves of the Blackbrush Acacia (Acacia rigidula or Vachellia rigidula) alone already make for an appealing contrast. When you add in its pleasantly smelling, cylindrical, light yellow flowers, you are really in for a visual treat.
Chilopsis linearis is a tiny tree that grows wild in the Southwest USA and Mexico. Despite its popular name, Desert Willow, which refers to its willow-like leaves, it belongs to plants’ Bignoniaceae family (Trumpet Creeper family). Thus, it is not a true willow.
You will enjoy seeing Desert Willow in your desert landscape due to its beautiful pink blooms that hummingbirds cannot get enough of. Flowers come in various hues, the most common of which is white (with a hint of purple). But its blooms can also be pink, purple, and any blend of these colors.
Succulents
Desert Flowering Succulents
Succulents can hold water inside them; that’s why you usually see either fleshy leaves, stems, or roots.
Blue Chalk Sticks can be found as a groundcover in intense sunlight in warm areas and produces a wonderfully beautiful silvery-blue coloration—a unique look for a fleshy plant. Blue and orange are opposite to each other in the color wheel, which means that Blue Chalk Sticks will look nice with orange plants.
The fresh winter growth of Blue Chalk Sticks creates a stunning starkness in form and color in the environment. But wait, there’s more; you haven’t heard of its flowers yet.
Blue Chalk Sticks’ flowers are tiny and rayless. They can be dull white or yellow, and you’ll be delighted to see them on the stems. Just when you thought you’d already seen too much of its cuteness! This can work as an interesting border plant.
Overall, you shouldn’t worry about the basic upkeep of this plant because it’s not picky! It can survive even the worst quality soil, although it favors well-draining, rich soil. It’s very adaptable to high temperatures.
You don’t have to do much to keep this plant happy, but remember that extremely cold winters will harm the plant.
Jade Plant (Crassula ovata)
Jade Plant
The Jade Plant is a South African native plant known for its unique, oval, succulent, jade-green leaves that emerge from a richly branching trunk.
But what’s up with its scientific name, Crassula ovata?
In springtime, you can expect to see tiny, pleasant-smelling, star-shaped, white, or pale pink blooms if the circumstances are favorable. Bees, butterflies, beetles, and flies can’t resist the flowers.
This drought-tolerant succulent would look amazing on your patio or porch! It’s very easy to grow and propagate. It can also be the accent plant you’re missing in your desert landscape.
Kalanchoe (Kalanchoe blossfeldiana)
Kalanchoe
Kalanchoe blossfeldiana is native to Madagascar. It is often known as kalanchoe, and it is a succulent plant with thick, scalloped, shiny, deep green leaves and huge, showy bloom umbels held over the greenery.
Kalanchoe’s flowers can be a shade of pink, red, magenta, scarlet, orange, yellow, white, or salmon. See how vibrant it can make your space?
Echinopsis bruchii plants are barrel-shaped cacti that feature showy, bright red flowers and yellow or brownish-orange spines. These cacti are an absolutely great choice for Mediterranean gardens’ rockeries and in containers for greenhouses, patios, and picnic areas.
You can successfully cultivate Echinopsis bruchii either fully exposed to sunlight or partial shade.
Hildmann’s Cereus (Cereus hildmannianus)
Hildmann’s Cereus
Hildmann’s Cereus (also known as Hedge Cactus, Column Cactus, Queen of the Night, Spiny Tree Cactus, Andes Organ Pipe, Peruvian Apple, and Peruvian Apple Cactus) is ideal if you like very elongated, skinny, columnar cacti in your landscape. And if you want to see flowers (and fruits!) on a cactus.
Its blooms are showy and white (sometimes yellowish-white), and you should start to see them growing on the cactus in October. Its flowers open at night. And when the daylight comes, the flower closes.
Beavertail Prickly Pears can live happily in pots, meaning if you aren’t getting them solely for a rock garden or xeriscape, you can totally place them on the patio.
Keep in mind that if you reside in a cold northern region, it’s best to move the plant inside come wintertime.
Rocks and stones in the landscape offer stunning color, texture, and diversity. Plus, they function as an enduring groundcover that needs little to no upkeep.
Landscape rocks are attractive for a variety of reasons, one of which is their natural appearance. They instantly make a drab view look a bit more interesting and natural. Rocks are nature’s own artistic sculptures which come in so many different shapes and sizes that you can easily find some to fit with your landscape plan
These hard elements may blend in beautifully with the plant life in your space, or offset it with striking contrast, bringing movement and texture to your yard.
How to Choose the Best Landscaping Rocks
You have so many choices! Landscaping rocks and stones come in different sizes, colors, and textures. So, before you make your choices, get to know the most common stones you can use to improve your landscape.
Keep in mind that rocks are so very common throughout the world and have so many variations, that it is not uncommon for the same type of rock to go by several different names depending on where you are. My advice to any homeowner would be to actually visit a few rock yards and see the rock up close. Don’t just assume that you and the rock supplier have the same rock in mind just because you are using the same term.
We will show you a bunch of different rocks in this article with a bunch of different names, but realize that there is no rock police going around making sure people call rocks by their proper names. Wholesalers and retail suppliers might just call a rock anything that they think will sell more rock.
You also need to be aware of forms versus names, versus types of rock. It gets a bit confusing, and is not always clear which is which.
Forms – Many rocks are labelled by their form such as slab, flag, gravel, washed, outcropping, boulder, pebble, crushed, fractured, chunk, etc.
Names – Many rocks are named for where they came from or what they look like. Names like Wisconsin Fieldstone, Colorado Mountain Boulders, Black Beauty Stone, Black Mountain Stone, River Rock, etc.
Types – Stone and rock is technically separated by specific types, but that doesn’t mean that they are selling it by type.
Metamorphic Rock – These are made of rock that has been changed by heat and pressure. Schist and Marble are common metamorphic rocks.
Sedimentary Rock – These rocks are formed when sediment settles out of water or air. Sandstone and Limestone are common sedimentary rocks.
Igneous Rock – These form when molten rock cools. Granite and Basalt are two common igneous rocks used in landscaping.
A Bunch of Examples
Pea Gravel
Pea Gravel
Pea gravel is made up of pea-sized stones that have been polished and eroded over time by the continual flow of water. These stones are can be used for various applications, including pathways, driveways, patios, flower beds, and garden borders. This is a type of washed stone, so they contain no fines. This and their smooth surface means that they will not compact and bind together, so if you are considering using them in a driveway or patio, you need to understand that they will move around.
Pea gravel is available in many earthy tones, and you can find them along streams and other naturally occurring sources of water.
The stones’ smooth texture makes them ideal for walking paths if you don’t mind the soft feel underfoot. Pea gravel will never be fun to walk in while wearing heels, so only use it in casual garden paths.
The best thing about pea gravel is its cost-effectiveness. This is one of the cheaper decorative stones to purchase.
River Rocks
River Rock
Do you want rocks that can draw attention, contrast with green grass or plants? River rocks will be perfect for the landscape.
River rocks are naturally shaped into what they are (rounded) by flowing water. When you go to rivers, lakes, or oceans, you will see many of these river rocks. They can appear in a variety of sizes and colors, but they will usually have small imperfections on a mostly smooth and even surface.
River rocks are very popular in backyard ponds and waterfalls and are often used as a long-term replacement for wood mulch on garden beds. River rock is also often used in landscaping to help control erosion and to channel excess water flow.
And, as mentioned earlier, your options for river rocks are limitless! Although, expect to pay more to get rarer colors such as burgundy, red, and green.
Lastly, river stones have long been a landscape staple due to their beautiful colors, smooth texture and long lasting durability. Whe installed over a high quality landscape fabric, river rock on your beds can last you a lifetime.
Crushed limestone is still one of the most popular landscaping stones with high reliability, accessibility, cost-effectiveness, and aesthetic appeal.
Crushed limestone is some of the hardest packing material that you can find. The sharp angles of the fractured stone along with the dusty fines will cause this stone to compact very hard over time. Often referred to as traffic bond (TB), this is a very economical stone offered in a wide range of sizes that is often used for the foundations of roads, driveways and walkways.
Property owners commonly use it in outdoor landscaping projects or as an easy to work top coat over a base of crushed limestone when installing brick paver or stone patios and walkways. It is easy to work with , yet will set up much more solid than sand. Once this material is watered down, it will become very hard. to fill in gaps.
Crushed Granite
Crushed Granite
Crushed granite, like other crushed rock, is perfect for large-scale projects. Landscape professionals prefer to put crushed granite around the margins of their paths to create a good transition between the trail and the greenery since it blends in well and compacts nicely.
Crushed granite is more expensive than some stone, but it is a very popular and long lasting alternative to the more pricey river rock. It is often used as a bed cover and also in walkways as it will compact fairly hard over landscape fabric and create a quick to install solid path.
It also has a delicate, organic aesthetic that works nicely in a relaxed setting and is simple to install by yourself! If you don’t want your landscape looking dull, perhaps don’t take these rocks for granite.
Decomposed Granite
Decomposed Granite and Outcropping Stones
Decomposed granite and crushed granite may well be the same stone, with decomposed being just a bit more fine. It is granite that got broken down to the point that it is made up of very minute and fine fragments. They are referred to as “Masado” (Japanese) and are considered unique soil. Some folks refer to this stone as rotted granite also.
You can choose from various colors, which makes it great for making your pathways and trails. But you’ll mostly see decomposed granite appearing tan with a hint of red. Anyway, it will give your landscape a warm, rustic feel.
It’s also reasonably priced, that’s why it’s among the best rocks for landscape beds!
Decomposed granite is a fantastic option to use in planting beds, as it is so fine that turning it into the ground while planting some new perennials wont be a problem like it would with other stone ground covers.
Lava Rock
Lava Rock
Lava rock is volcanic rock formed by the crystallization of actual lava after it has cooled. You can classify a lava rock as an igneous rock.
But what’s so special about lava rock? Well, I’m not really sure, but people sure do like to use them in their landscapes. They are inexpensive, lightweight, and water moves freely through them. They can be an ideal, long-lasting bed cover for homeowners who don’t want to lift some of the heavier alternatives.
Furthermore, they can hold some water in their pores and then send it to the plants over time. They’re also fantastic weed and insect deterrents.
Lava rock has also been used extensively in the water garden industry as a light and porous rock with a lot of surface areas for bacteria to collect and colonize. Mesh bags of lava rock can often be found holding down the filters in a waterfall box.
Crushed Shells (not actually Stone)
Crushed Shells
Let’s get this out of the way: by using crushed shells for your landscape, you’re helping the environment.
According to Dr. James Morris (Royal Belgian Institute of Natural Sciences), seashells are always discarded; by doing so, people throw away an astounding volume of biomaterials that may be beneficial. See how big of a deal your choice of landscape rock is?
While not technically rock or stone, this natural material sure does act like it in the landscape. For gardens, flower beds, and other spaces in your landscape, this sustainable material can be utilized as a composting type mulch. The shells will break down over time, providing important minerals and sustenance to your soil and enhancing the health of your plants.
The term flagstone can refer to almost any variety of stone that breaks out of the quarry in flat , thin slabs. They are most often used for some of the most decorative patios and walkways in upscale neighborhoods. Flagstone can be randomly shaped as it naturally broke out of the earth, or it can be pattern cut (meaning cut into a specific pattern of square and rectangular pieces).
This versatile stone can be laid over dirt in a more relaxed, stepping stone path setting , laid over crushed stone in a slightly more formal and very durable application, or wet set using mortar over concrete for a very formal, very durable patio or walkway.
Because the term flagstone is such a general term that refers more to the stones shape than it’s make-up, be sure to ask about what type of flagstone it is. Flagstone can range from very hard slate and bluestones to very soft sandstones, so one flagstone is certainly not every flagstone.
Below are examples of different stones that might all be referred to as flagstone.
Tennessee FlagstoneLarge Irregular Bluestone FlagstoneEden Limestone FlagatoneLimestone FlagstoneIrregular New York BluestoneRed Tennessee FlagstoneSmokey Mountain Flagstone and Tennessee FlagstoneLarge, Irregular Tennessee FlagstoneThere are Many Varieties of Flagstone
Slab Stone
Eden Slab Limestone used as a Patio, Seats, Steps and TableSlab Limestone in the QuarrySlab Limestone as a BridgeSlab Limestone
Another beautiful way to use stone in your landscape is to create patios, walkways and bridges using slab stone.
Slabstone is typically larger slabs of stone broken out of a quarry that is thicker than flagstone, yet not as thick as outcropping stone.
In my area, limestone slabs are the most common type, but I would imagine that there are other varieties. For a stone to be used as a slab stone like this, it needs to be strong enough to support its own weight when it is picked up. Layered stone such as this isn’t nearly as common as the smaller flagstone pieces.
Riprap
Could be Called Boulders or Rip RapLimestone Rip Rap
Riprap comes in many different shapes according to the stones used, such as limestone, trap rock (basalt and diabase), granite, etc.
It has a more even tint and is less ornamental than the other rocks mentioned, though it has a really natural look that plays nicely in various settings.
It’s usually placed only on shorelines and steep slopes due to its massive size (4 inches to 2 feet in diameter). Riprap will protect these structures from scour. So if you have a property in front of the beach, you’ll want to have these huge landscaping stones to protect it from being washed away.
Outcropping Stone
Limestone Outcropping as a WallWeathered Edge Limestone ChunksWeathered Edge and Snapped Edge Limestone OutcroppingLimestone Holey Boulder OutcroppingLimestone Snapped Edge Outcropping used as StepsLimestone Snapped Edge Outcropping used as a WallVarious Limestone Outcropping used as a Wall
Outcropping stone is typically stone that is broken out of a quarry in big, thick chunks.
This stone is usually just left with its broken edge (called snapped edge), but is also sold as weathered edge which has one side of the stone that was exposed for a very long time to the elements and has become weathered. Obviously the weathered stone is always more expensive since it is much more rare.
There are many uses for large outcropping stones, such as building walls, steps, decorative outcroppings in the landscape, etc.
Wall Stone
Cut Granite Wall StoneCut Limestone WallSchist WallWall Built of Fieldstone
Stone can be specifically purchased to make walls. These stones are usually cut to size and sometimes may then be tumbled to give them a more rustic look.
They are very popular to use in the landscape since they are easy to carry and stack together nicely.
All types of stone can be used as wall stone, even if the stones are not cut to shape and size.
Bull Rock
Bull Rock
Bull rock is a term used to describe a type of smaller stone that is often used in garden beds and fsmaller flowage ways. It is not crushed stone and it is not river rock, but it is somewhere in between. It is often found in the Southwestern United States and is somewhat smooth, but not necessarily rounded.
You can recognize bull rock by the size of the individual pieces (three to five inches) and the distinct, earthy brown tones. These rocks would be appropriate landscape edging material or included in rock gardens. Bull rock reminds me of desert rock.
Most people are afraid to get really big boulders for fear of being excessive. But you can never go wrong with a few big pieces of rock carefully positioned in your vast landscape! Once the landscape boulders are in place, the whole site will be perfect.
Even one big, irregularly shaped boulder can function as the center of attention. A boulder can be a neat accent in a small yard, where an attractive shrub may get too big or wild.
If you’re looking for nice focal points in your landscaping project, why not try the biggest rocks in existence?
Once again, this is a very general term that more refers to the size and shape of the rock than it does to its make-up. A landscape boulder can be any type of rock, so once again, use caution. Boulders can be as solid and strong as granite or as prone to wear and erosion as sandstone and everywhere in between. It is always wise to ask what type of boulders do you carry?
When people use the term boulder, they are typically referring to a large rock that is fairly rounded and natural looking. These stones can also be referred to as fieldstone since they are often naturally occuring in fields. A squared off block of stone that was blasted out of a quarry might instead be called fractured rock or block.
Here are some examples of the many types of boulders that you might come across.
Aqua Blue BouldersBlack Beauty BouldersChestnut Boulders (looks like flagstone to me)Featherock BouldersFieldstone BouldersGeo Rock BouldersHoley BouldersOntario Scarlet BouldersRodman Blend BouldersUtah Onyx and Colorado BouldersVarious Boulders Labeled Apache
Brick Chips
Brick Chips
Brick chips are tiny fragments of brick that have been disintegrated. They have a unique red shade that makes them stand out from other landscaping rocks. These are simply recycled clay bricks, so this is a great way to re-purpose the old clay bricks.
Use brick chips if you want to add a pop of color to your landscaping beds, pathways, patios, and other areas! If you decide to use them, lay down landscaping cloth first to keep the pieces from sinking into the ground and keep weeds at bay.
What’s more, is they can serve as low-maintenance mulch too. You can count on them to keep their texture and color for a very long time.
How to Use Rocks in a Landscape
Have you already decided on which landscape rocks you like? We’re sure you’re now looking for inspiration! Here are creative ways you can use rocks and stones in your landscape.
Stepping Stones for the Landscape
Stepping Stones
If your landscape needs a little something more going on, maybe it’s time to lay down stepping stones. These well-placed stones will add extra character, dimension, and color to your otherwise bare landscape!
Use them to form casual trails that wind their way around your property, link the main points of attraction, bridge water elements, and visually add a cohesive look to your landscape elements.
Crushed Stone Driveways
Crushed Stone Driveway
Crushed stone is an excellent choice for people who want to incorporate some style into their driveway without spending a fortune. It is plentiful, readily available, and reasonably priced.
Crushed stone driveways complement any setting and enhance any landscape. This is due to its adaptable look, which appeals to a wide range of tastes. It very often provides an impression of raw charm and never appears inappropriate.
Seating Areas in the Garden
Seating Area in the Garden
A sitting area decorated with beautiful rocks will always look inviting. You can start by lining the surrounding pathway with flagstones.
Of course, you should always consider the plants first. Plants with matching hues to the rocks will provide harmony.
To distinguish between the garden seating area and the rest of the garden, put together a variety of irregularly shaped stones on the ground. Lighter colors and bigger sizes will be easier to piece together and will look more lively.
Walkways with Stones
Do you want your yard to have a vintage vibe to it that harkens back to the streets of old Italy? Your best option would be to place cobblestone on walkways. These are rectangle-shaped blocks of natural stone with a surface that is mostly cracked.
You may even go for granite that is structured like cobblestone! Either way, you’re getting extremely long-lasting materials.
Dry Riverbed Landscaping
Dry Natural RiverbedDry riverbed through the TreesDry Riverbed Landscaping
Why do people choose to landscape with dry riverbeds? It’s because they reduce ruts in the grass by preventing drainage problems.
So if you’re looking for a quick way to enhance a dull space in the landscape and help control storm water flow, maybe try it!
Water Features with Rocks
Formal Water Feature Made of StoneWaterfall Made of FieldstoneWaterfall Made of Large BouldersBasalt FountainGranite FountainMarble FountainOnyx FountainSandstone Fountain
There are a million ways to design your water features with landscaping rocks! If you’re wondering where to start, you can always build a rock waterfall in your garden.
You can also make a bubbling rock water feature—the sparkle of water combined with the natural beauty of the rocks will always look delightful.
Edging Using Boulders
Edging Using Boulders
Boulders placed as edging can liven up your landscape and add more detail to it. Edging with boulders can elevate the appearance of your outdoor environment.
Surround the Edible Garden
Raise Rock Bed for Vegetables
Raised beds that house your essential edible crops can use a little style around the edges. And there’s no better way to do that than to lay uniformly sized stones along the perimeter! It’s certainly a nice approach if you want to add depth to your veggie garden.
Rustic Rock Garden
Large Rock GardenSmall Rock Garden
A rock garden might help you save up on maintenance costs. Quite often, a densely laid out and planted rock garden will fend off most weeds, so it’s a nice way to add some low maintenance interest to your yard. Rock gardens can be of any size and shape. The beauty of a rock garden is more about the various heights and textures of the rocks when planted with low growing plants.
This style of garden almost looks like a mountain range viewed at a distance.
Zen Garden Landscaping
Zen Garden
A Zen Garden can just be your ultimate place of relaxation. You can calm down for a bit and spend time with nature when you feel stressed.
You should arrange rocks in odd-numbered groups. For instance, get three stones of the same kind, but in different sizes. You can put them in a triangle arrangement. Bam! You now have an interesting detail to your Zen garden.
To explain: three-rock clusters were once utilized to represent the Buddhist trinity.
Create a Mosaic Walkway
Mosaic Walkway
Mosaic walkways are a labor of love and only really used in smaller backyard settings due to their intricacy and the time it takes to install them.
They can be installed over a gravel base, or even on the bare ground in areas that don’t freeze, but in areas with freezing temperatures, you will need to set these stones in mortar over a poured concrete base.
You can use almost any type of stone. The trick is to make it creative and find colors and textures that compliment each other.
Alpine Rock Garden
Alpine Rock Garden
Alpine plants are those that grow in mountain terrain. Water is used sparingly in rocky alpine gardening, which is nice if you’re into low-maintenance, easy landscaping. And the best thing is the rockery will last for a long time.
To give you an idea: colored gravel should be strewn around the bigger rocks. This creates a nice touch, so play around with different textures and sizes to add variety.
Having an English rock garden means mixing elaborate rockwork and beautiful shrubbery. This will give you a lovely, peaceful space in the landscape.
Use it as Bed Cover
Rock Installed Instead of Mulch
Using any type of rock as a bed cover has become a popular way to cut down on yard maintenance. Be sure to install a top quality landscape fabric under the rock to be sure the weeds aren’t going to jump up in between the rocks.
Frequently Asked Questions About Landscaping Rocks
What is the least expensive landscaping rock? – It varies by region, but crushed gravel, pea gravel, and decomposed granite are usually the cheapest. Pea gravel is tiny and lightweight, and purchasing by the pound will provide more coverage. Meanwhile, keep in mind that rarer colors of decomposed granite will cost more.
What kind of rocks are landscape rocks? – The most common rocks used for the landscape are granite, pea gravel, river rock, lava rock, and flagstone.
What type of rock is ideal for flower beds? – Lava rock is highly regarded among property owners as an excellent substitute for mulch in flower gardens. These irregular red chunks of rock are kind of pricey, but they’re great to have in your landscape.
The front portion of your house is a way of “presenting yourself” to the public. You should always ensure it’s beautiful and well-taken care of since it is the most exposed part of your property.
Front yard maintenance is no joke! The amount of time and energy that a typical homeowner commits to front yard maintenance can border on insane. If you want to portray your best image to neighbors and passers-by alike, then you will want a beautiful and flawless front yard landscape.
I know what you are thinking, “If only there were a way to have low maintenance front yard landscaping”. Well, it would be wonderful if someone could tell you how to have just that. As I will point out in this article, a low maintenance front yard is possible, but some of it has to do with perspective.
Low Maintenance Landscaping for the Front Yard
There are many elements to consider when landscaping the front yard. And you’re about to make a good impression by giving each of these things some attention.
Still wondering if your front yard matters? Here is a bit of reading for you.
Whether just starting out with a blank slate, or starting with a fully established front yard, you need to start the same way. You only have so much time in the day and assuming that you are employed, you don’t have all day to sit around and maintain your front yard landscaping, even if it is low maintenance.
So, my advice to you is always start with the portion that makes the biggest impact. For some front yards, it will be one big stately tree in the front yard. For others, it will be the way that the perennial beds flank that grand walkway up to the front door. For others, it will be how the house ties into the landscape.
Whatever it is for you, this is where you need to start for several reasons. As we have learned, the front yard is important and we are being judged by it.
Before you begin the front yard maintenance, do yourself a favor and step out into the street to see what all of the hubbub is about. Actually walk or drive past your home a few times as passers-by would to get a better idea as to what is truly important.
If your time is limited, you certainly don’t want to spend the day working on a corner that doesn’t even get noticed from the street, at least not on the first day. Go out and make a big impact. Pick the most important part and start there. This way, you have made a difference to what your neighbors see, and you will feel good about your first day on the front yard.
Perspective is Important
As I mentioned earlier, having a low maintenance front yard landscape that leaves a good impression on your neighbors is important, but some of this is perspective.
You can have an impressive looking front yard without spending your weekends out in the yard, you just need to plan it properly. Unlike your backyard, where you and your guests might be strolling around or lounging on the patio, your front yard is more of a pass-through feature.
It needs to give a nice and tidy impression from the road, but it doesn’t need to be overly detailed. It is not likely that anyone will be standing in the front yard critiquing your beds, they will give a look from the road, or maybe a quick glance on their way up the driveway, but no one is looking that closely.
Don’t go crazy with the details. The majority of folks will be judging your yard from the road. Concentrate on this, not the tiny details.
Make a Good First Impression
Mulch
In the spring it seems like our eyes are open just a little bit wider, it seems like we appreciate the outdoors more and everything just seems fresh. Well, maybe everything except that stale old mulch that you have laying on your beds.
A great, high impact way to improve the curb appeal of your home is by freshening up the mulch. You don’t necessarily even need to replace it all, it just may need a bit of touch up and raking.
Chances are, some of your front yard could use a bit of whatever mulch material you have used in the past, so order a bit and freshen the place up. Use care to spread it evenly and neatly and the mulch will provide a crisp, clean look and help to hold back the weeds.
If you live in one of those areas where consistent watering is required to maintain that lush green lawn that you love, let me offer you a bit of advice. The best and highest impact thing that you could do would be to eliminate the turfgrass. If turf doesn’t grow well in your area, then your front yard will never be low maintenance no matter what you do.
But, if turf is of great importance to you and you feel it is necessary for your home to have a turf front lawn, then installing an automated irrigation system may just be money well spent. If you are relying on yourself or your children to set up and move lawn sprinklers, you are setting yourself up for failure.
Get an automated irrigation system and you can check watering off of your list of things to do.
Get one with a rain sensor, moisture sensors and a time clock so that you can schedule the lawn to be watered only when it needs it, but at exactly the correct time that it needs it. Then, be sure to set it to water the turf deeply to encourage deep roots.
Setting an automatic sprinkler to water every day or twice a day is foolish. This will create a lush green, very sensitive and shallow rooted lawn. You want those turf roots to grow deep into the soil, so water deeply, but only when absolutley necessary.
Plants that are Native to Your Area are Easy
Even though there’s a diverse selection of plants that would look amazing for your front yard landscaping, it’s best to stick to native species. Sure, browse the web for ideas, get together a bunch of pictures of how you would like the yard to look, but then figure out how to get it close to that look using only native plant species.
Sure, if you live in Wisconsin like me, you will not be able to have the brightest colored, most astonishing landscape, but I’ll bet you can get close to the look that you want while still using native plants.
By using native plants, you are greatly increasing your chances of having your weekend time to do something other than yard work. Native plants will take care of themselves, because they are very comfortable and well adapted to their surroundings. Site adaptability is very important for the survival of plants.
I’m assuming that you would like to see some blooms in your front yard from time to time and I am assuming that you don’t want to spend a great deal of time tending the flowers. If my assumptions are correct, you had better choose some perennials to plant in your front yard.
Once again, go for native, hardy types, but take some time to stagger bloom times and plant heights and you can have a bed that looks astounding from the street, yet takes very little time to maintain.
Maybe digging and cultivating aren’t high on your list of fun activities to do around the house. If you want an easy way to add a splash of color and texture to your front yard, installing a few pots filled with dazzling annual flowers might be just the thing for you.
Your front yard will benefit greatly from potted plants. They’re a great low-maintenance, adaptable option for landscape! It is proven that having decorative plants around you improves memory recall and focus. But it would certainly be nice if these plants are arranged attractively and are hassle-free.
Of course, mobile pots standing tall in the yard will need more water than plants in the ground, but if you have your automated irrigation system, you can take care of that easily enough.
If you have any sort of eye for design, you can certainly use potted plants to make a beautiful accent border or to just create a bit of color and height in a few choice areas. The nice thing about the potted plants is that you can easily rearrange them if you don’t like the way they look the first time that you lay them out.
Succulents, Ruscaceae, Araceae, spider plants, and Commelinaceae, are among the hardiest plants that survive in pots, but don’t be afraid to go crazy with the most colorful and exciting plants that you can find at the local garden center. Sure you will need to replace them every year, but buying flowers is fun and it allows you to have a different look each season.
Plant Some Annuals
Annual Flowers
Annual flowers do need to be replaced each year, but by going to the garden center and buying a few flats of some colorful annuals, you can bring a bit of excitement and color to your yard with very little actual work.
It is fairly easy to create one of two annual areas in your front yard landscape at certain points where they are sure to draw attention and catch your eye. You can have a few larger beds, or simply plant small groups in and among the existing plants to change things up a bit.
Clumps of annuals in your groundcover beds is a sure way to liven up the look of your front yard.
Plant Some Groundcover
Pachysandra Groundcover
Rather than mulch, which needs refreshing and raking, planting groundcover plants can do a great job of filling your open bed areas. The groundcover plants will help to prevent erosion and they will crowd the weeds out over time which will really cut down on your time spent in the yard.
Try Synthetic Grass
Synthetic Grass
Okay, you might think that I’ve stepped off of the deep end here, but hear me out. If you live in an area that requires consistent watering to maintain turf, then might it not make a lot of sense to install fake grass instead?
What constitutes 80% of your front yard and requires the most attention? It’s the grass that needs regular upkeep. Watering, fertilization, mowing, thatching and aeration can all be things of the past if you install high quality synthetic turfgrass.
So why not try fake grass? Get one that’s greener than your neighbor’s. So when they see that the grass IS greener on the other side, you can tell them about the wonders of fake turf.
Today’s synthetic grass is not much like the stuff you remember sing that was all faded and torn up at the local mini-golf center. Some of today’s synthetic turf is hard to distinguish from the real stuff. Let’s see what it’s made of.
Depending on the color that you choose, your neighbors might not even know the difference until a drought or the fall comes and their lawns turn brown while yours looks as green as ever.
Instead of Grass, try Clover
Clover instead of grass
There are several reasons to have a clover lawn! If you’re tired of the expensive and time-consuming nature of the usual grass lawns, give clover a try.
Clover fixes nitrogen, which benefits plants close to it. And because clover has deep roots, it doesn’t have as high a water requirement as regular grass. It also doesn’t need fertilizer and rich soil; it’s not a very picky plant!
Clover is a sustainable lawn replacement. And if you don’t want your lawn to be completely covered (clovered?) in clover, you can gradually incorporate it into compatible grass.
This is all about figuring out how to make a beautiful front yard that doesn’t rely on you to look beautiful. This goes back to our premise that there are better things to do that labor in your front yard for the weekend. Xeriscaping isn’t any particular type of plant or look, it is simply drought tolerant choices and groundcovers that will thrive and last in your climate.
Xeriscaping in your part of the world will look quite different than the xeriscaping in another part of the world.
Lay a Strong Foundation
Good Topsoil
Low maintenance requires a strong foundation. If you are starting a new front yard landscape, don’t be a fool and skimp on the foundation. the foundation is what everything is built upon.
For your home, the foundation is likely concrete. For your driveway and walkways, the foundation is likely crushed stone and for your plants and yard, the foundation is the soil.
New or old, the foundation that you begin with will dictate the long term maintenance and feel of your finished yard.
If you skimp on the foundation of any of these areas, the features that they support above will falter given time. Driveways will crack and settle, walkways will dip and roll and garden plants and trees will lose vigor when planted into and on top of poor quality soil.
In each one of these cases, the foundation is important. If you have an existing house and landscape, then you may be stuck with what the prior owner did, but if you are planning a new front yard landscape, invest in the foundations, it will pay off in the end.
When you establish a good, sturdy foundation, you’re going to be set for decades! You can forget about mundane tasks like picking up stones, removing weeds from walks, fixing cracked driveways, filling potholes, and fertilizing plants.
Choose Some Stone
Stone Bed Covering
Stone in landscaping beds has always been common in low-maintenance front yards. Placing stones is a fantastic one-time activity. Stones do not need to be replenished after they have been set and they can last for many years with very little attention.
Adding the proper stones can make a difference! It’s a way to add a different texture and a touch of color to an otherwise lacking scenery. My suggestion would be to bring home some buckets of sample stones that are available in your area and lay them out to see how they will look in your yard.
For instance, a sprinkling of river stones creates a discreet but noticeable border between the garden bed and the grass. These stones will beautifully contrast with the green of the front yard (don’t get green rocks, though).
But when you choose stones, once again think about foundations and longevity. Lay down the best landscape fabric that you can afford underneath it and be sure that you lay down at least two inches of stone to make sure that you aren’t looking at the weed barrier in a few months.
Even though it’s a garden, the rocks won’t grow, so be sure to buy them big enough to make a statement and so that they can be seen from the road. Big rocks can really make a statement. Each one is unique and they add structure and color to a front yard landscape.
Plant your rock garden with drought resistant, creepy, crawly plants. The only maintenance that you are likely to need will be trimming away some of the plants over time to expose more of the rock.
Drought-resistant plants that don’t demand much monitoring are common in rock gardens. Furthermore, the rocks themselves are décor that does not require any watering or maintenance and nevertheless have a natural aesthetic appeal similar to plants.
Use Succulents as a Backdrop
Succulent Garden
This will only work in areas that will readily support their growth, but if you live in one such area, then succulents might just be a great way to minimize your maintenance.
And if you just can’t get enough, you can just as easily grow another one by propagating. It only takes one snip.
Even in the hottest of summers, you can count on your succulents to keep your front yard looking fresh.
Careful Plant Selection can Help Control Soil Erosion
Some areas are blessed with proper drainage and minimal runoff, so if your home is in one of these areas, then this section won’t apply to you. But, if you live in a place where storms bring erosion, then it is paramount that you find a solution to your erosion problems before you do anything else.
There is no sense in doing any of the detailed work until your erosion is under control. Having nature wash your landscaping away is definitely not low maintenance. As a matter of fact, needing to start over when it all washes away sounds like to opposite of low maintenance.
Plants with large root systems can do all of the work in controlling soil erosion. They keep the soil intact, absorb water, and protect the ground from wind and water exposure.
Add Low-Maintenance Flowers for a Beautiful Landscape!
It’s been scientifically proven that flowers are a natural and healthy mood stabilizer. Earlier, we talked about how important perennial flowers can be to your low maintenance front yard. The presence of flowers in the front yard is a must! There are many flowering plants that don’t demand a lot of care and attention, but here are a few you can get familiar with.
Lavender (Lavandula angustifolia)
Lavender
Plant lavender. This stunning flowering plant will give your front yard a splash of color and a soothing scent.
Lavender is a low-maintenance plant that needs little watering and trimming once established. You can do so much with lavender plants! You can use them as informal hedges, as a walkway border, or even as companion plants.
For example, you can strategically place lavender in front of rose bushes to cover their bare stems.
Bugleweed and Carpetweed are other common names for this plant. This would look great in your front yard with its upright growth habit gives its bloom arrangement a unique look.
Coreopsis thrives in well-drained soil and can be grown as a border plant in the front yard. You can even grow it in containers!
The only upkeep this plant needs is deadheading the blooms. If you do this, you prevent the plant from becoming weedy.
Check the USDA Hardiness Zones to determine which climate and soil are best for particular varieties.
Dianthus
Dianthus
Dianthus, also known as Carnations (D. caryophyllus), Sweet Williams (D. barbatus), and Pinks (D. chinesis), are a favorite front yard flowering plant.
They are great for your low-maintenance front yard landscape because of their wonderfully scented, fringed flowers in shades of pink, red, and white and because of their deer resistance! It’s also nice that they multiply easily.
Daylilies come in many different varieties and bloom times, they grow like crazy and can choke out weeds in your beds.
Not only do they provide great color, they help to reduce weeding. What could be better.
Hostas
Hostas
If you have some shade in your front yard, then a rich and beautiful bed of various leaved hostas can really make a profound statement.
Hostas don’t like much sun, so you do need some shade. There are hostas of many sizes, colors and leaf textures, so create a nice mix of these hardy, weed snuffing plants to help with your yard maintenence.
Roses
Climbing Roses
Now many of you will think that I am nuts for even listing roses in a low maintenance article, but that is why I couldn’t’ resist. Contrary to what you may have been taught, there are many roses, that when planted in a suitable location, can grow readily and beautifully on their own.
Be sure to pick the hardiest varieties that you can for your area and go for a nearly wild climber if you really want some fun.
Rose blooms can be wonderful if you can get the right variety for your yard.
Black-Eyed Susan (Rudbeckia hirta)
Black-Eyed Susan
It’s a great idea to plant Black-eyed Susans in your front yard. Aside from beautifying your yard with its flowers, another reason you’ll like Rudbeckia hirta is that it is native to most of the United States.
Here are some front yard shrubs you can’t go wrong within low-maintenance landscaping.
Forsythia
Forsythia
Forsythias are low-maintenance plants with yellow blooms that indicate the arrival of spring. You’ll only want to trim your forsythia shrub now and then and put it in full sunshine to keep it in good shape.
Florida is not just a state; it is a word that means “profusely flowering.” And if there’s one flower that deserves to have florida in its scientific name, it’s Weigela! You’ll be in awe when you look at your front yard and be greeted with the sight of these gorgeous pink (or white, or rose-red) flowers.
Yew bushes require very little care due to their drought tolerance and acidic soil adaptability. They’re the most basic plant to cultivate in the front yard. These plants can grow into a thick hedge that may be trimmed neatly, and it’s popular in the topiary.
Yews flourish in Zones 4to 7 in part to full sunlight and produce lovely-looking fruits early in the fall.
Rockspray Cotoneaster (Cotoneaster horizontalis)
Rockspray Cotoneaster
The best thing about Rockspray Cotoneaster is its adaptability to any type of soil. It can withstand the poorest of soil conditions! It also has a self-supporting growth habit.
Rockspray cotoneaster shrubs are easy to grow and care for. You just have to plant them in spring to let the root system fully establish.
Texas sage (Leucophyllum frutescens)
Texas Sage
This Texas native plant is sometimes known as purple sage or Texas Silverleaf. Their leaves are thickly coated with silvery hairs, giving them a gray appearance.
It is a deciduous shrub that can grow up to 10 feet in height. If you’re considering planting barberry in the front yard, there’s not a lot of reasons not to! It will look nice and lively all year because of its attention-grabbing, colorful foliage. Who wouldn’t want shades of orange, red, and yellow in their yard?
Which grasses are native to your area? Native grasses are the best choices for low-maintenance grass. It depends on your location, so doing a little research wouldn’t hurt!
Anyway, here are a few examples of nice, easy-care grasses for your front yard.
Having this grass in your front yard will ensure you don’t need to mow a lot. It won’t just look great in the front yard, though! You can spice up your rock garden or flowerbed with Mondo Grass.
Plant care and proper periodic maintenance practices are essential to keep your plants healthy and happy. In some ways, maintenance can be more important than planting. While many plants have similar needs, such as light, water, and nutrients, there are also many differing needs between different groups of plants. Ornamentals, fruits, vegetables, and grasses all need slightly different kinds of care.
This is a super broad topic upon which books can be written. We are not attempting to provide a complete discussion on all things plant maintenance-related, but instead, we would like to present you with a brief primer on the things that every home gardener should know.
1. An Eye for Simplicity
Perhaps the best advice that I can give you when planning out a garden or a bunch of gardens in the case of a landscape plan is to plan for simplicity. Time and time again, I have seen immensely imaginative and complex landscape and garden plans go to hell in a short period of time due to a lack of commitment to maintenance. It is better to start small and grow as your enthusiasm grows than it is to go big and find yourself overwhelmed.
Unless you are a very avid gardener, keep it simple. The more complex and grandiose your plan is to start, the more maintenance it will be in the end. Don’t get me wrong; you can still have a creative and beautiful backyard; just plan it out to make it as maintenance-free as possible. Using easy-to-grow and maintain plants that are well suited to your area and planting them in areas of your yard that they will be happy in will all tie into the simplicity. Your thoughtfulness while planning the garden will pay off for years to come.
2. Soil Nourishment
The “Give and Take” rule is fully applicable in Gardening. When you continuously harvest the nutrients, oxygen, and water from the soil, you will need to give it back. Organic composts, including well-rotten farmyard manure, vermicompost, biofertilizers, wheat straw, etc., are long-lasting, slow-releasing, soil and environmentally friendly materials that restore the soil fertility and also enhance soil aeration and water holding capacity.
Don’t worry if you don’t have access to commercially available compost; adding any sort of organic matter back to the soil on a consistent basis will help.
Keep in mind that some organic matter will actually pull nutrients from the soil before these nutrients are returned, so it’s best to let the stuff sit, turn it a few times and let it begin to rot before putting it on the garden.
On the other hand, if done regularly, organic matter can be lightly added to the soil at all times of the year. This is how nature works, right? Dead plant material and animal waste falls to the ground, breaks down, and nourishes the soil. We can help nature along by adding our grass clippings, leaves, kitchen scraps, etc., to the soil.
3. Annual Pruning
For some plants, pruning can be an essential part of plant maintenance, and for others, it isn’t necessary at all. Pruning is the removal of plant parts such as branches, flowers, buds, or sometimes fruits. Different pruning practices will have different effects on different plants. Sometimes pruning is important for a gardener to get the best crop yield possible, and sometimes pruning betters the health and shape of the plant.
Keep in mind that some plants, especially when pruned severely, will respond by sending out many new shoots in an attempt to recover from the perceived “injury.” So sometimes, pruning can result in more than you started with. Crab trees are notorious for this. For the most part, pruning is not normal for a shrub or tree. If the plant is well-shaped and fits its space, it may never need to be pruned.
How you Prune – Your pruning technique is important. Always use sharp cutting tools sized for the cut. All cuts should be clean and free from cracking or splitting wood. Clean cuts are easier to heal. All cuts should be just after a branch or bud. Stubs left after the bud will just die back and open up the potential for rot or disease. Never cut the leader from a tree. Trees grow differently from shrubs, and when you cut off the leader (highest central stem), it will really mess up the growth of the tree as all of the surrounding branches will now grow to try to make up for the loss, and the tree is likely to be forever misshapen.
How you prune is often determined by the type of plant you are pruning. Low-growing, multi-stemmed shrubs such as dogwood will grow tall and lanky as they would in the wilderness, but if you want them to stay small and pretty, you will need to remove several of the biggest woody stems right down to the ground. A shrub that is sheared for shape year after year will end up
Timing your Pruning – The time of the year that you prune can significantly impact how the plant reacts. In general terms, it is typically better to prune a plant when it is dormant during the colder part of the year. Pruning a plant as or shortly after it begins pushing growth in the spring will almost certainly reduce its growth for the season.
Old Wood or New Wood? – Plants that set their buds in the fall and bloom on old wood in the spring, such as lilacs, ninebark, rhododendron, azaleas, forsythia, some hydrangeas, and some roses, need to be pruned shortly after their bloom ends. If these plants don’t have at least three months of good growing weather before their next season’s bloom, they will not be able to set buds and produce blooms, meaning that pruning old wood bloomers in the spring will result in no blooms for that season. These plants tend to have more of a solid shrub structure and really don’t need to be pruned much at all unless the shape is undesirable, in which case they can be pruned back to the shape that you want over several years.
Plants that bloom on new wood can be pruned in late fall or early spring as they will send out shoots and buds to bloom as soon as they become active in the spring. These would include plants like most spirea, the spreading hydrangeas, and all perennial flowers that die back in winter. Plants such as these do really well when they are cut back every spring, and the cutting back inspires new growth and ensures full blooms.
In general, if a plant blooms first thing in spring, it is blooming on old wood, and it is likely blooming on new wood if it blooms mid-summer or later.
Pruning of Fruit Bearers – Pomegranate, Grape, Guava, Mango, Citrus, and Strawberry are easy-to-grow fruit plants that home gardeners often prefer. Pomegranate, guava, and grapes need severe spring pruning; otherwise, they will not be fruit in the next season. While mango, citrus, litchi, pear, apple, etc., do not require annual pruning, you’ll just want to remove the dead, broken, or diseased branches. Prune the young trees to give them a proper framework that will help them fit into the space and sunlight availability in your garden.
Pruning of Perennial Vegetables – for the most part, other than perhaps pinching off some buds or removing some lower foliage, vegetables are not commonly pruned. In vegetables, weeds are the primary issue. Keeping the plants at standard row-to-row and plant-to-plant distance will be excellent to avoid fungal attacks and pests attacks and reap a healthy harvest. Garrison, N. (2005).
4. Wise Water Usage
“No Water, No Life.” Wise and efficient water usage is good for the plants and the environment. The best-case scenario is that all of the plants in your yard are native to the area, and they don’t need any watering. Planting only native species severely lessens the plant’s dependence on us for survival. Native plants have developed mechanisms to allow them to thrive in your area, so it’s usually only the non-natives that need our help.
If you have newly planted plants or non-natives, grow them in a place where the soil conditions are to their liking and water them deeply for the first few months after they are planted. Once the roots establish, the non-native plant may still need some attention, but hopefully, it will be minimal.
If watering is necessary, water the plants early in the morning, before the sun rises, take care that the plants absorb every drop you are pouring, and always mulch over roots to help them conserve every drop of water they get.
5. Weed Control in the Garden
The complete removal of weeds from the garden is almost impossible, so controlling them is often the best way. Weeds compete for nutrients, space, and light and suppress actual crop growth. Organic mulching, hoeing, crop rotation, use of the pure seed, and clean irrigation water are the easy-to-do methods for controlling weeds in your garden. Never resort to damaging chemical weed killers when a hoe and a hand are all that is needed.
In ornamental landscape beds, planting density and mulching below plants will hugely affect weed growth. Densely planted perennials and mulch will drastically slow down the weeds.
6. Let the Climbers Climb
“Do not Grow Horizontally, What You can Grow Vertically.” Vining plants are stalked to save space and can be a magnificent addition to your garden. Vines will grow on almost any structure, like decorative, colorful cages, stalks, trellises, trees, shrubs, pergolas, gazebos, houses, etc.
Depending on the type of vine, you may need to nurture its growth and encourage it to climb, or you might need to fight hard to control it. Vines such as ivy and wild grape can be overwhelming and destructive to whatever they grow on, while some veggie vines like cucumbers need support and nourishment and will simply die and wilt at the end of the season.
Viney plants seem to always do better when climbing rather than simply growing along the ground. Some horticulturists claim that the stalked tomatoes and cucurbits yield double what the un-stalked ones will. When left to grow horizontally, vines are more susceptible to pests and disease.
Here is a list of plants that like to climb.
Vining Tomato
Cucurbits (pumpkins, melons, squashes, and gourds)
Pole beans and Scarlet Runner Beans
Grapes
Malabar Spinach
Ivy
Climbing Hydrangea
Clematis
Kiwi Vine
Trumpet Vine
Climbing Roses
Bougainvillea
7. Crop Rotation
Crop rotation is the sequential practice of growing different kinds of crops in the same area of land to keep a balance in nutrient restoration, weed control, improved soil fertility, and control of insect pests. For example, a crop utilizing excessive potassium from the soil that is a host of a specific insect pest, when planted repeatedly in the same area, would cause the severe deficiency of that particular nutrient in the soil, and the insect population would become uncontrollable. Ultimately, the gardener has to provide that nutrient artificially and pesticides to control the pest pollution.
By rotating our crops, the soil can be replenished, and the pests can be minimized. It is best to rotate by crop families, and it works best if you actually map out your rotations so that you can keep track of which crop goes where from year to year.
8. Companion Planting
This entails planting two crops together or planting more than two kinds of crops together, each providing benefit to each other, or maybe one providing benefit to the others. It could be simply varying plant heights so that the companion plants get the sun or shade that they need when they need it. It could be planting one crop that repels a garden pest that the companion plant is susceptible to.
This technique can be used with plants of all types. You will need to research and use some common sense when planning out your plantings to make this work, but sometimes, the most straightforward solutions are the best. Companion planting is an excellent organic garden practice in pest control by providing alternate hosts to the pests or discouraging the pests altogether.
Inter-cropping is another method of companion cropping in which the early-maturing crops are planted within the rows between late-maturing crops. For example, spinach, lettuce, beans, onion, and radishes are early maturing and maybe planting between the rows of late-maturing, i.e., cabbage, tomato, pepper, corn, etc. (Parker, J. E., Snyder, W. E., Hamilton, G. C., & Rodriguez-Saona, C. (2013).
9. Sprouted Seed Teas
Here is a little known trick that not many are talking about. SST is a liquid nutrient-rich organic food for plants, and it is easy to apply and can be used in place of chemical fertilizers. It is made of seeds of any crop, including alfalfa, corn, barley, mung, beans, pulses, or whatever you have, and you can easily prepare it at home. The most important role of SST is that it provides the growth hormones to the plants they need to develop. It is also very important to suppress fungal diseases, and it is referred to as a “Wholesome Food” for the plants.
Sprouted seeds differ from non-sprouted seeds because the process of sprouting increases the availability of the multitude of vitamins, minerals, enzymes, etc., that are present in the seeds.
The basic process is to soak your seeds for a day, let them sprout, and then grind them in a blender and mix with water to apply to your garden.
Sprouting seeds have the maximum enzymatic activity taking place in them; we use those enzymes to grow our crops. SST can be applied in the form of foliar spray as well as mixing with irrigation water. (Ilmi, M., Putri, L. K., Muhamad, A. A. K., Cholishoh, A., & Ardiansyah, S. A. (2019, June)
10. No-Waste Gardening
This concept ties in directly with what we were saying back in the nourishment section. Do not let the waste from your yard and home waste away. Instead, use the weed stems, leaves, kitchen waste, grass clippings, and other organic material to feed your garden.
You can manufacture excellent organic food for the plants. Keep 2, 3 compost containers or piles filled with the composting material so that you will never need chemical fertilizers. Turn the compost regularly to aid decomposition and use the oldest pile first. Organic compost is a long-term nutrient source for the plants and soil; every time you irrigate your soil, the water takes away the nutrients from the decomposed plant material and adds them to the roots. It provides a balance that is not provided by the chemical fertilizers. Rossow, H. (2001)
11. Native Plant Selection
As stated in the section on watering, native plants are always easy to maintain. According to the USDA Forest Service, native plants are resistant to pathogenic insects (eliminating the need for pesticides and insecticides), require fewer fertilizers, reduce soil erosion and air pollution, and are wildlife’s food and shelter source. Native plants have a special role in the conservation of Biodiversity. They are adapted to the local soil and environmental conditions and do not demand much maintenance. (Gleason, R. A., Euliss Jr, N. H., Tangen, B. A., Laubhan, M. K., & Browne, B. A. (2011)
Parker, J. E., Snyder, W. E., Hamilton, G. C., & Rodriguez-Saona, C. (2013). Companion planting and insect pest control. Weed and Pest Control-Conventional and New Challenges, 10, 55044.
Finch, S., Billiald, H., & Collier, R. H. (2003). Companion planting–do aromatic plants disrupt host‐plant finding by the cabbage root fly and the onion fly more effectively than non‐aromatic plants?. Entomologia experimentalis et applicata, 109(3), 183-195.
Ilmi, M., Putri, L. K., Muhamad, A. A. K., Cholishoh, A., & Ardiansyah, S. A. (2019, June). Use of mung bean sprout (tauge) as alternative fungal growth medium. In Journal of Physics: Conference Series (Vol. 1241, No. 1, p. 012015). IOP Publishing.
Rossow, H. (2001). Australia’s capital leads world in turning waste into resources: hospitality of cities: emerging issues.[Canberra’s Waste Management Strategy-No Waste by 2010.]. Australian Property Journal, 36(7), 619-623.
Florentín, M. A., Peñalva, M., Calegari, A., Derpsch, R., & McDonald, M. J. (2010). Green manure/cover crops and crop rotation in conservation agriculture on small farms. Integrated Crop Management, 12.
Gleason, R. A., Euliss Jr, N. H., Tangen, B. A., Laubhan, M. K., & Browne, B. A. (2011). USDA conservation program and practice effects on wetland ecosystem services in the Prairie Pothole Region. Ecological Applications, 21(sp1), S65-S81.
Cubino, J. P., Subirós, J. V., & Lozano, C. B. (2014). Maintenance, modifications, and water use in private gardens of Alt Empordà, Spain. HortTechnology, 24(3), 374-383.
The process of growing plants elevated above the surface is known as raised bed gardening. The raised beds can be created using many different types of materials and can be planted with many different plants. Keeping a raised garden bed has lots of advantages and we will tell you all about the advantages as well as the best plants for raised garden beds.
Raised garden beds make it easy to start a garden in an afternoon without all of the headaches of tilling soil and removing plant roots. It’s easy to get deep fertile soil without a bunch of backbreaking work.
With raised beds, you can plant lots of fruits, flowers, and vegetables. However, some plants are more fitted to this type of growth environment than others. And there are some things to keep in mind when planting in raised garden beds.
What is a Raised Bed?
Gardeners have been creating raised beds for many years. A raised bed is quite simply any sort of planting bed that is raised above the existing ground level. These beds can be as low as several inches above the ground or as high as several feet. They can be built right on the ground or they can be built more like an elevated planter box table.
One of the distinct advantages to creating a raised bed is that you can fill the bed with the type of topsoil that you want in your bed. You aren’t stuck with the ground that is below or the weed roots that are in that ground. Many gardeners will fill their raised garden beds with a mix of black organic topsoil and organic compost.
These beds need to be built to hold the planting soil, but which materials you choose to use to build your raised beds is entirely up to you. Here are some of the materials that can be used to create raised beds.
Lumber
Timbers
Rock
Concrete
Bricks
Blocks
Some Examples of Raised Beds
Use your imagination when building your raised garden bed. Here are a few examples to get you started.
Building a Boulder Raised BedA n Entwined Twig Raised Garden BedA Creative Rock Raised Garden BedPlanting a Timber Raised BedRaised Beds in a GardenRaised Planter Beds on a PatioTall Tomato Raised Garden BedsSmall Veggie Raised Bed
Water
Ideally, you would create separate raised beds or at least separate areas within the beds for plants that require the same volume of water to thrive. For instance, when a moisture-loving tomato shares a raised bed with a plant that likes dry soil, one of them won’t be healthy, it would be better to have two plants that require the same amount of water.
It’s always nice to look at the seed packet or plant tag, which should inform you of your plant’s water requirements. Remember that any raised bed is going to require more watering than a bed that is down in the ground, simply because it will dry out more quickly.
Most vegetables (such as squash, peppers, leafy greens), several herbs (such as rosemary, basil, lavender), and fruits (tomatoes, strawberries, and melons) require a lot of sun exposure (at least six hours a day).
Beautiful ornamental plants, including ferns, hostas, caladiums, impatiens, and caladiums, thrive in shady locations. Sunlight requirements can be found on the plant tag or seed packaging.
Rich Soil
Think of the time you could spend beautifying your garden instead of stressing about what you can and can’t grow and working to amend your existing soil and remove all of the weed roots. If you fill your raised bed with high-quality soil, you don’t need to worry about tilling, weeds and soil amendments, you can start planting right away. Your plants will have all of the nutrients they need to stay healthy and yield good flowers and fruit.
You can grow everything! Strawberries, tomatoes, eggplants, and all sorts of flowers will do well in your new raised gardens full of nutrient rich soil! Lavender, daylilies, oregano, hostas, raspberries, and rhubarb are great perennials that thrive in raised garden beds. Although, keep in mind that if you plant these perennial plants in your bed, they’ll be there for a long time (until you decide to pluck them out).
In contrast, annual plants are only there for a short time. They only survive one growing season so that you may plant something else in the same spot the next season. Basil, pansies, petunias, lemongrass, and veggies like potatoes, tomatoes, potatoes, peppers, squash, and onions are some annuals you might like to cultivate in your raised bed garden.
Spacing and Depth
How deep will you make your raised bed? It’s safe to say that most plants like to be in at least one foot of soil, but if your raised bed is on the ground, they can always grow into the soil beneath also.
However, some plants, like lettuce, rhizomal plants, vines, sweet alyssum, marigold, and pansies, can do well in less soil (six inches deep) due to their shallow root systems. Plants sown in shallow soil can’t develop deep roots, and they will dry out more rapidly without sub-soil hydration. Keep plants in shallow soil well-watered.
The finest harvests of most vegetables, such as peppers, tomatoes, and eggplants, come from soil at least 20 inches deep. Because these beds are isolated from surrounding soils, it is important that you amend your soil yearly to keep it rich and fertile. Fertilize the beds more often and nurture them like a potted garden.
Benefits of Growing Plants in an Elevated Garden Bed
Planting in raised garden beds is the quickest and easiest way to a variety of crops in less than a year! These are the reasons why.
You can plant more food in a limited amount of space – Plants can be spaced near each other so that no square inch is wasted. Methods for small-space gardening, like vertical supports and succession planting can guarantee that every square inch of available space is put to good use.
There are hardly any weeds – We can start weed free if we bring in organic topsoil and the weeds have limited room to grow in raised beds since they are thickly planted. When they find a place to call home, they’re easy to remove from the loose, fertile soil.
Good quality soil – Healthy soil is essential for a successful food garden. Even if the soil in your area is poor, you may start over with the right soil blend in a raised bed. Plus, you can easily adjust the soil according to the plant’s needs. If you’re planning to cultivate blue hydrangeas, for example, you can add a soil acidifier to the soil.
Planting can begin as soon as possible – In comparison to in-ground beds, excess water drains more efficiently in raised garden beds, and the soil warms up sooner in the spring. You can also take advantage of covers and garden cloth if you want to get started even sooner.
Controlling pests is a way simpler – Compared to wide planting fields, smaller raised garden beds make it easier to handle insects and keep animal pests out. Row fabrics or specialty covers can simply be used to cover beds.
Raised beds are easier to tend – Because they can be raised out of the ground at any height we want, a raised bed won’t require as much kneeling and bending over to plant and tend. And, because we can create them any size that we want, all of our plants can be an arms reach away, making planting, weeding and harvesting very easy.
Fruits and Vegetables for Raised Garden Bed
The following are vegetables and fruits that will grow well on a raised garden bed.
Eggplant (Solanum melongena) and Peppers (Capsicum)
Rightfully so, eggplant and colorful peppers spring to mind when we think about growing on a raised garden bed.
These plants thrive well in the warm soils of raised beds and are nutrient-hungry. Raised beds make it easier for gardeners to meet the nutritional and watering needs of these prolific growers.
Peppers thrive in the sun and heat and can be grown alongside tomato plants if desired. They are simple to cultivate and require minimal upkeep. Peppers, especially chili peppers, can be difficult to develop from seed. If you buy starting plants from a nursery, though, you may place them in your raised bed once the threat of frost has gone.
Tomato plants flourish when their roots are stretched deep into loose soil, ready to feed. They thrive in full sunlight and make excellent complements to raised garden beds.
As for the soil requirements: they need rich, well-draining soil with a pH of 5.5–6.5 (such as silt loams or clay). Acidic soils are unsuitable for these plants. For the best bulb growth, you should plant onions where there is full sun.
Buying onion sets and planting the small bulbs in early spring is the easiest way to cultivate onions.
To give onions a head start on the growing season, plant them from seed indoors eight to ten weeks prior to the last frost.
Plus, onions may act as a natural pest repellent for various crops, so pack them in among your tomatoes, broccoli, kale, cabbage, peppers, and lettuce! You can put a few extra onions in the gaps between your larger plants because onions don’t take up much room.
Mixed Greens (Lettuce, Spinach, etc.)
The warmer, well-draining soil of raised beds is ideal for spinach, lettuce plants, and mixed salad greens. You’ll like that you can make your growth season longer by planting them early and in succession through the season with adequate protection.
Why do we recommend planting these different salad greens together instead of just sticking to one? They’re not standalone vegetables. It’s a good idea to have a crop of salad greens in your raised bed! They have a short growing period, after all.
Carrots (Daucus carota)
Carrots are excellent choices for growing in raised beds. Carrots may thrive unhindered by rocky terrain in raised beds, which provide loose, well-draining soil.
They may be readily tucked in under the protection of taller plants since they grow fruit beneath the earth and have a low habit.
Varied types have different requirements, but on a square foot of area, you can plant around 18 carrots.
Carrot seeds are quite small and only need to be sown 1/4 inches deep. Water the carrots lightly, being careful not to wash away the small seeds.
Plant double the number of seeds as you anticipate growth in your place. It would help if you thinned the carrots as they develop to ensure that they have enough area to grow. Carrots may be planted in succession throughout the season for a continual yield.
Plus, peas make you think of spring, and there is never too much. Sugar snap peas, snow peas (Chinese pea pods), and shell peas are three varieties of peas that are all easy to produce.
Here’s what you need to do: sow pea seeds at the beginning of spring, around four to six weeks before the last predicted frost. Do this as soon as you can work the soil.
When you sow the seeds, plant them one to two inches apart—space double rows six inches from each other.
If you’re growing a staked variety, you should install a pea trellis or hang netting before planting.
Peas may be grown in pots and planters as well. Choose extremely dwarf cultivars like Patio Pride or Tom Thumb, for they only reach a height of six inches.
Celery (Apium graveolens)
Celery is eager to take up residence in a raised bed because they have a shallow root system. It’s a fussy plant that needs a lot of water, nutrient-rich soil, cold weather, and a long growing season to thrive. Muck soil is suitable because of its great moisture-holding ability.
Root nematodes and aphids can also be kept under control using raised beds.
You may grow them from starter plants, seeds, or even the heart of a cluster of celery you bought at the store.
Because celery likes colder temperatures, start your seeds within eight to ten weeks before the last frost date.
Legumes (Fabaceae)
Legumes incorporate nitrogen back into the soil. Thus they serve a dual purpose in the raised garden bed.
They increase the soil’s nutritional level while generating abundant crops. They are available in both freestanding and climbing types, which may be grown in raised beds.
Some great legumes to plant in raised garden beds are bush and pole bean varieties, peas, lentils, and chickpeas.
Bush beans (Phaseolus vulgaris)
You can’t go wrong with bush beans; they take less than two months from seed to maturity and provide weeks of delicate pods.
Don’t hurry for spring planting since beans need warm, well-draining soil and warm temperatures. Plant the bush bean seeds a couple of inches apart in rows spread 18 inches apart after the last frost. Thin bush beans to six inches if they’ve established a good root system.
Planting various purple, green, yellow, and red beans is one interesting way to make a rainbow.
For instance, Mascotte is an All-America Selections winner which produces a large crop of thin green beans kept high above the leaves, making harvesting simple.
The heritage bush bean, Dragon Tongue, may be used as a snap bean or a freshly shelled bean. The buttery yellow flat pods with purple lines are truly spectacular!
Squash and Zucchini (Cucurbita pepo)
Raised beds are ideal for planting large crops like zucchini and squash.
Bush variants have a more open habit and are ideal for raised beds. Allowing vining plants to spill out over the sides of raised beds or adding trellises for them to climb on are additional options.
Zucchini, as we know it in the United States, is an Italian term. In certain areas of Europe, these vegetables are referred to as “courgettes,” whereas in the United Kingdom, they are referred to as “vegetable marrow.” “Long marrow” and “garden marrow” are two other names for this vegetable.
Summer squashes like zucchini have soft, edible skin, and they grow quickly, taking 35 to 55 days to harvest.
Brassica is a plant genus belonging to the family Brassicaceae, the same family as mustard and cabbage. Crops of this genus are frequently referred to as cole crops, which comes from the Latin caulis, a plant’s stem or stalk.
In a raised bed setting, brassicas provide excellent first-round early harvests. They are prone to bolting in hot weather and thrive in the controlled soil temperatures in raised beds. The soil’s warmth is maintained, prolonging the growing season for both early and late-season crops.
They may also grow readily protected in raised beds, allowing for an autumn and winter harvest.
Examples of brassicas are cauliflower, cabbage, broccoli, arugula, Brussels sprouts, and kale.
Radishes (Raphanus sativus) and Beets (Beta vulgaris)
Beets and radishes are wonderful root vegetables that grow well in the soft soil of raised beds, especially when they aren’t competing with weeds or hampered by rocky soil. They’re great for succession planting because of their fast maturity times.
The cucumber is a delicate annual with a trailing stem that is rough and juicy. The fuzzy leaves contain three to five pointy lobes, and the stem is covered with branching tendrils that can be used to hold the plant.
Cucumbers grow well on raised beds. Let them flow over the edges of raised beds or up trellises to optimize the area for these prolific fruiting plants.
What’s nice about garlic is its resistance to disease and pests. They thrive in normal garden soil, too, so you have one less thing to worry about. But don’t plant garlic from the store since it may have been sprayed. Instead, go to your local garden center or farmer’s market and purchase garlic for planting.
Mulch the raised beds with straw after planting to keep the soil wet and weeds at bay.
Melons (Cucumis melo var. cantalupensis)
Raised beds are also ideal for large fruiting plants like melons. Melons have a wide range of beneficial characteristics in addition to their amazing scent and sweetness. One of the most significant is their capacity to produce endorphins, making them an effective treatment for depression and spleen problems. The plant’s nutritional components have a strong toning effect, and vitamin C strengthens the immune system.
The best growth environment for delicious melons of all types is warm, pH-balanced, nutrient-rich soil that offers enough drainage. To save space, allow vining plants to flow over the sides of raised beds or teach them to climb trellises or other climbing structures.
Potatoes (Solanum tuberosum)
In a raised garden bed, potatoes can grow pretty well. Growing tubers in well-draining soil minimize rot, and the loose soil enables tubers to develop fully without being hampered by thick dirt or rocks.
A primary branch emerges from a seed potato after you plant it. Rhizomes are underground stems that sprout from the main stem and generate tubers at their terminals.
This indicates that potatoes grow over the seed potato’s initial planting location. When more dirt is piled around the plant’s main stem, more tubers will grow as new rhizomes sprout below the soil level.
Swiss Chard (Beta vulgaris ssp. cicla) and Kale (Brassica oleracea var. sabellica)
In raised beds, kale and Swiss Chard are excellent late-season vegetables. They prevent soil compaction, and they may be sheltered with hoop houses or cold frames to prolong their growing season and even provide an autumn and winter crop.
Swiss chard seed is used for the establishment, and it grows in bunches, needing quick thinning. You can consume the thinnings as greens, then pick the leaves and stems after 50–60 days, retaining crowns that produce additional leaves for later harvest.
Meanwhile, kale will flourish in colder temperatures. Sow kale seeds in July or buy seedlings in August for an autumn crop. Many garden centers provide mature plants with beautiful foliage in late August and September.
Herbs and Flowers for Raised Garden Beds
When identifying what to grow on a raised garden bed, we emphasized mostly fruits and vegetables, but herbs and flowers grow very well in raised beds too!
Some flowers and herbs make excellent garden companion plants, attracting helpful pollinators, concealing the fragrance of cherished foods, and shielding them from outdoor pests. They have the potential to be extremely lovely.
Thyme is a fragrant herb that scares away parasitic worms that attack strawberry plants.
Basil can help tomatoes taste better by repelling mosquitos and flies.
Lavender, when planted near fruits, encourages helpful pollinators.
Mint is a great flea beetle and cabbage moth deterrent.
Marigolds, nasturtium, sunflower, and zinnias are all good insect repellents.
Borage repels pests while simultaneously attracting pollinators and beneficial insects.
Caraway draws in insects that feed on bugs that can harm strawberries significantly. Parasitic flies and wasps are among the insects that will defend strawberries against fruit-eating pests like mites and aphids.
Vermicomposting is a bio-oxidative, non-thermophilic process in which earthworms and soil microbes are employed to decompose the organic waste to yield the biofertilizer named vermicompost. Vermicomposting is a non-zero, non-toxic, eco-friendly, and sustainable source of organic fertilizers. Okay, so I don’t know about you, but I am no scientist, and that sounds really complex. I will try to simplify this concept a bit in the following article.
What is Vermicompost?
Earthworms eat the organic matter, partially digest it and egest it in the form of small, round balls called worm castings. These worm castings are further decomposed by the soil microbes converting them into the product named vermicompost. A well-prepared Vermicompost possesses soil reclamation, fertility enhancement, plant growth, protection from diseases, insect pests, nematodes, and agricultural sustainability characteristics. (Chaoui, Edwards, Brickner, Lee, & Arancon, 2002).
Put simply; the earthworms are breaking down and improving our soils. This is an entirely natural process that is happening all day, every day, whether we know it or not. Vermicomposting is simply us humans putting the worms into our compost to help speed up the process.
What is Needed to Vermicompost?
Composting, in general, is a very natural process that happens all around us without our help, but we can use it to help create better soils and as a way to keep yard waste in our yard and out of landfills.
Any type of composting requires the following:
Green organic material – Grass clippings, live tree leaves, flower trimmings, manure, food scraps, etc. Anything that contains a bunch of nitrogen and will break down over time.
Brown organic material – Twigs, dead leaves, mulch, cardboard, paper, etc. Anything that contains a bunch of carbon but very little nitrogen.
Mixing these two materials together and turning them every so often is the basis of composting. Even if we do nothing, the above-listed materials will turn into dirt eventually. Getting the amounts of each type of matter in the correct proportions and having them in the right environment will determine how quickly the composting process happens.
What else does composting require?
The actual process of breaking down these materials into nutrient-rich soils is accomplished by many different types of macro and microorganisms that are at work tirelessly maintaining our earth. Exactly which of these are in your compost is not important; what is important is that you treat them well and give them an environment that they can thrive in.
Macro-organisms such as worms, beetles, centipedes, and any other creepy crawlies work in conjunction with the microorganisms such as bacteria, fungi, and other tiny things we can’t see.
To make our composting as efficient as possible will take some experimenting and practice on our part. We need the correct levels of the brown and green materials and the proper oxygen, water, and heat levels.
If our compost is too dry or too wet, too hot or too cold, it will not compost as efficiently as it could. Also, if there is not enough air getting into our compost pile, it will not decompose as efficiently as it could.
This is where the experimentation comes in. We need to experiment in our yard to figure out what we can do to encourage this efficient decomposition process. Each environment will be a bit different; there is no one-size-fits-all approach.
One thing that we can do that will definitely increase the speed at which our compost is breaking down is to add more worms. Their only job is to eat through our pile of compost and poop out their casting. This process will speed up any composting operation, but we need to be nice to the worms.
Large scale Vermicomposting
Vermicomposting is successfully practiced in Canada, Japan, Italy, India, the US, and the Philippines at a commercial scale for farming, compost tea making (this isn’t the kind of tea that you are thinking about), and export purposes.
Two methods are currently being used for the commercial production of vermicompost:
The Windrow Method – The worms and compost are piled into long and tall windrows, which are periodically turned to improve the composting process. Specially designed windrow turning machines are used to manufacture vermicompost. This system is cost-efficient and easy to maintain for farmers to manage animal manure at the farm or for large-scape compost manufacturers. While this method is considered large-scale, it can be accomplished at home, given you have a bit of land and a strong back.
The Raised Bed or Flow-Through system: The earthworms are introduced from the top of the bed, eat the litter, continuously burrow the waste layers and reach the bottom where they are harvested to reuse. This system is indoor, therefore, preferred in cooler climates. This is a nicely contained way to compost that just about anyone can accomplish with a bit of ingenuity.
Small Scale Vermicomposting – Container Method
Small scale vermicomposting is well-suited to best utilize the kitchen waste, lawn waste (grass clippings, pruned stems, fallen leaves, etc.), newspaper, wooden pieces, and any kind of waste that the tiny soldiers can decompose. The example below uses a small bin which helps to keep the entire process neatly contained.
Red Wigglers and associated symbiotic microbes such as Rhizobium, Azospirillum, Clostridium, etc., are the best combos for small-scale vermicomposting.
How to Prepare Vermicompost at Home?
Select a Suitable Worm Bin: You can reuse any old container such as a drawer, fish tank, bucket, drum, etc. It must not contain any hazardous materials that may harm the worms. Depending on your home and your ambition, starting in the 10-gallon size might be good.
Prepare the Bedding: Earthworms like to live on strips of newspapers to provide air, water, and food, just as the soil provides all these to plants. Add 2-3 handfuls of rich garden soil to your container. This will contain soil microbes and create a favorable environment for the worms.
Add the Worms: Some folks who have this down to a science weigh out their worms to determine precisely how many worms are needed to compost how much material. Weighing out your worms also helps when it comes time to harvest them at the end of the process.
Add the Worm Food: Add your compost blend to the container and keep an eye on it to ensure that the worms have enough to eat. Typically, Red Wigglers caneat three times their weight in a week.
Aerate the bin Periodically: This process needs air to work. Make sure that your container doesn’t get too wet, and turn over the compost every so often to increase airflow and efficiency. This step is why many people use the commercially available composting bins, which allow you to crank a handle to turn the bin.
Harvesting the Worms or Compost: Once your compost is mostly all broken down with no large pieces of uncomposted material and the remaining soil is rich and black, you can either pull out all of the worms to use again in another bin, or you can scoop out the soil, being careful not to hurt the worms, and start a new batch of compost. By leaving some of the existing compost and the worms, it will be easy to get a new batch started. The average life span of an earthworm is 5-7 years, so you can easily get rid of a whole lot of waste and create a whole lot of rich soil in that amount of time.
Small Scale Vermicomposting – Ground Method
Above, we talked about the very small-scale process of vermicomposting in a container. If you have more space and more waste, you will likely want to try this on a larger scale.
Vermicomposting can be done almost anywhere as long as your environment is conducive to the process. In the more extreme regions, this gets more challenging.
Remember, we are not only composting anymore, but we are also keeping live animals, so we need to care for them and the process.
If your area is very dry, you may need to add moisture to your compost to get the worms to thrive and the composting process to work.
If you are in a very wet area, you may need to vermicompost on a high spot and protect the pile from rain.
If you are in a very hot location, the compost pile might need a bit of shade,
If you are in the colder regions where the ground freezes, you will struggle to keep your worms alive for the winter. Some people will bring a small-scale version of their vermicomposting operation into the basement for the winter. Other folks have had good luck keeping their vermicomposting in trenches dug into the ground or in big thick piles, which can retain heat in the center even when the outer crust is frozen.
In any event, once you have figured out the requirements of your area, you can begin your vermicomposting. In general, this will mean a pile or windrow of compost that gets turned regularly to increase oxygen levels and move some of the drier materials low and wet materials higher.
Having some organization to your method is important, as eventually, you will want to harvest the nutrition-rich soil. If you begin your pile in one area and then, over time, only add more compost to one side of the pile, the worms will tend to follow the food source. So, over time, the original pile will be all composted material ready to harvest, and the leading edge of the pile will be the actively composting side with the vast majority of the worms.
Suitable Species of Earthworms for Vermicomposting
Some earthworm species speed up the composting process and make your operation more efficient. The most commonly used earthworm species are:
Red Wiggler (Eisenia Andrei)
European Night-Crawlers (E. hortensis)
African Night-Crawlers (Eudrilus eugeniae)
Blue-worms (Perionyx excavates)
Advantages of Using Vermicompost
Restores Soil Fertility
Earthworms are often referred to as “Ecosystem Engineers” and “Nature’s Plowman.” They reduce soil erosion by binding the soil particles with their damp, mucus-containing particles. They can convert organic waste into useable compost much more rapidly than traditional composting.
Vermicompost is a partially decomposed product, i.e., the earthworms do not absorb all of the nutrients from the food they eat; instead, they egest the partially eaten food in the form of worm castings. This is useful because the nutrients are now available in the soil for our plants to absorb. Vermicompost prepared from food and animal manure is a rich source of all the macronutrients and micronutrients needed for plant growth.
When added to soil, vermicompost improves its buffering capacity, water, and nutrient holding capacity and aeration. It also enhances the soil pH through mineralization.
It improves the biological fertility of the soil. Mucus, secreted by the earthworm’s digestive system, speeds up the decomposition of organic matter and stimulates competition among the soil microbes to further perform decomposing, and the process continues.
Nutrient Status of Vermicompost:
Organic Carbon: 9.15 to 17.98 %
Total Nitrogen: 0.5 to 1.5 %
Available Phosphorus: 0.1 to 0.3 %
Available Potassium: 0.15 %
Available Sulphur: 128 to 548 ppm
Calcium and Magnesium: 22-70 mg/ 100g
Copper: 2-9.3 ppm
Zinc: 5.6-11.5 ppm
Control of Solid Waste/Biosolids:
Uncontrollable waste production is a serious challenge that every country is facing. An average family in the US creates almost 18 pounds of waste daily. This is 6570 pounds of waste annually! If we seriously want to control this mass waste production, Vermicomposting is the best way. The earthworms not only decompose almost every kind of waste (except solids like glass, plastic, etc.), but they also add long-lasting benefits to the soil.
Earthworms are capable of converting “Garbage into Gold.” Sewage sludge, biomedical waste, and biosolids could be managed and converted into Biofertilizers through vermicomposting. Earthworms surprisingly remove Salmonella spp. from 3MNP to <1 MNP/g and coliforms (39,000 MNP/g to 0 MNP/g) from the fecal matter.
Vermicomposting municipal waste with Lampoti Mauritii removes Escherichia coli and Salmonella spp. from the sludge, making it safe to use as an organic fertilizer. (Pathma & Sakthivel, 2012)
Control of Plant Diseases:
Healthy soil produces a healthy plant. Whenever soils or plants are deficient in a required substance, nutrient, or growth condition, this opens the door for disease. Earthworms release phenolic compounds that keep the pathogens and most of the insect pests away from the soil and even from the plants.
Vermicompost slowly releases the nutrients into the soil, balancing the amount of N-fixation, P, and K availability, keeping enough for the plant itself but not enough for pathogen regeneration.
Earthworms’ biochemical activities reduce the plant pathogens, especially Verticillium dahliae and Fusarium spp. These are responsible for most fungal diseases in food crops.
Earthworm’s presence decreases the root diseases of cereals and stimulates immunity in Grapes against the diseases caused by Rhizoctonia spp.
Vermicompost discourages the growth and attack of tomato fungus, i.e., F. oxysporum and P. nicotianae.
Potato and cabbage treated with a mixture of vermicompost and clay do not remain susceptible to P. infestans and P. brassicae, respectively.
Alternate Potting Material
Vermicompost has become a very popular potting material due to its all-in-one properties, containing everything required for optimum growth and development. It releases nutrients gradually, is porous, well-aerated, and possesses excellent water holding capacity. It can be used for indoor and outdoor pots, planters, and containers with garden soil or clay.
Scientific Findings related to Vermicomposting
Significant suppression in the fungal disease Verticillium wilt in strawberries has been noticed by applying 10 t/ha food and 5 t/ha paper Vermicompost. {Chaoui, 2002 #357}
The addition of vermicompost during soil preparation has been noticed to enhance the growth, disease resistance, and nitrogen fixation in Cucumber and Tomatoes. {Gutiérrez-Miceli, 2007 #362}
The addition of vermicompost (5% and 10% v/v as soil amendment and three doses of 40 mL in drench after 14, 21, and 28 days of transplant) in spinach enhanced the leaf production, delayed senescence, improved the leaf succulence, carotenoid, protein production, and reduce flavonoid content in soil balanced the antioxidant capacity. {Xu, 2016 #359}
Vermicompost addition at the rate of 20% during soil reparation enhanced the Ca and Mg concentration in leaf prompted flower production in Petunia Hybrid “Dream Neon Rose.” {Chamani, 2008 #363}
Conclusion
If there is one thing that I know about humans, it is that they typically won’t continue doing something if it isn’t in one way or another somewhat rewarding to them. If you are getting into vermicomposting, I commend you; this is an excellent step to helping balance the damage done by humans.
When you are planning out your vermicomposting operation, no matter how big or small, be sure that it is in some way rewarding to you and not overly challenging to do. It doesn’t need to be perfect; the breakdown of compost will occur any time that different materials are together outside in the dirt, whether we work at it or not.
Create your vermicomposting area so that it is easy and practically takes care of itself. This way, even if you don’t find the time to work it as often as you should, it will still function, and the worms will still be alive. In general, a larger operation is less susceptible to small changes, but on the other hand, a large operation might just be too overwhelming for you.
Build your vermicomposting operation to fit your personality and your lifestyle.
FAQs related to Vermicomposting
Q: What does Vermicompost mean?
A: Vermicompost means an organic product prepared by the earthworms by feeding upon the organic waste.
Q: Are worm castings organic?
A: Yes. Earthworms are provided with a controlled diet of organic substances. However, the readymade Vermicompost or worm castings may be organic or inorganic.
Q: Are worm castings or vermicompost safe to touch?
A: Unlike the chemical fertilizers, worm castings or vermicompost are non-flammable safe to touch, handle, and use. It is the safest soil supplement available in the market.
Q: Can I use too many worm castings or vermicompost at once?
A: No, unlike chemical fertilizers, you can’t add too much vermicompost to your garden. You can grow directly into the vermicompost since it is essentially just rich soil.
Q: What is the difference between worm castings and vermicompost?
A: Worm castings are the tiny round balls excreted by the earthworms, i.e., earthworm’s poops, while vermicompost is a decomposed organic fertilizer prepared by earthworms by feeding upon the organic matter. Castings are part of the vermicompost.
Q: Can I use Vermicompost on Flowers?
A: Of course, vermicompost is a nutrient-rich and safe product for growing any kind of plant.
References
Chaoui, H., Edwards, C., Brickner, A., Lee, S., & Arancon, N. (2002). Suppression of the plant diseases, Pythium (damping-off), Rhizoctonia (root rot), and Verticillium (wilt) by vermicomposts. Paper presented at the Brighton crop protection conference pests and diseases.
Pathma, J., & Sakthivel, N. (2012). Microbial diversity of vermicompost bacteria that exhibit useful agricultural traits and waste management potential. SpringerPlus, 1(1), 1-19.
Xu, C., & Mou, B. (2016). Vermicompost affects soil properties and spinach growth, physiology, and nutritional value. HortScience, 51(7), 847-855.
Gutiérrez-Miceli, F. A., Santiago-Borraz, J., Molina, J. A. M., Nafate, C. C., Abud-Archila, M., Llaven, M. A. O., … & Dendooven, L. (2007). Vermicompost as a soil supplement to improve growth, yield, and fruit quality of tomato (Lycopersicum esculentum). Bioresource Technology, 98(15), 2781-2786.
Chamani, E., Joyce, D. C., & Reihanytabar, A. (2008). Vermicompost effects on the growth and flowering of Petunia hybrida’ Dream Neon Rose’. American-Eurasian Journal of Agricultural and Environmental Sciences, 3(3), 506-512.
As an Amazon Associate I earn from qualifying purchases.

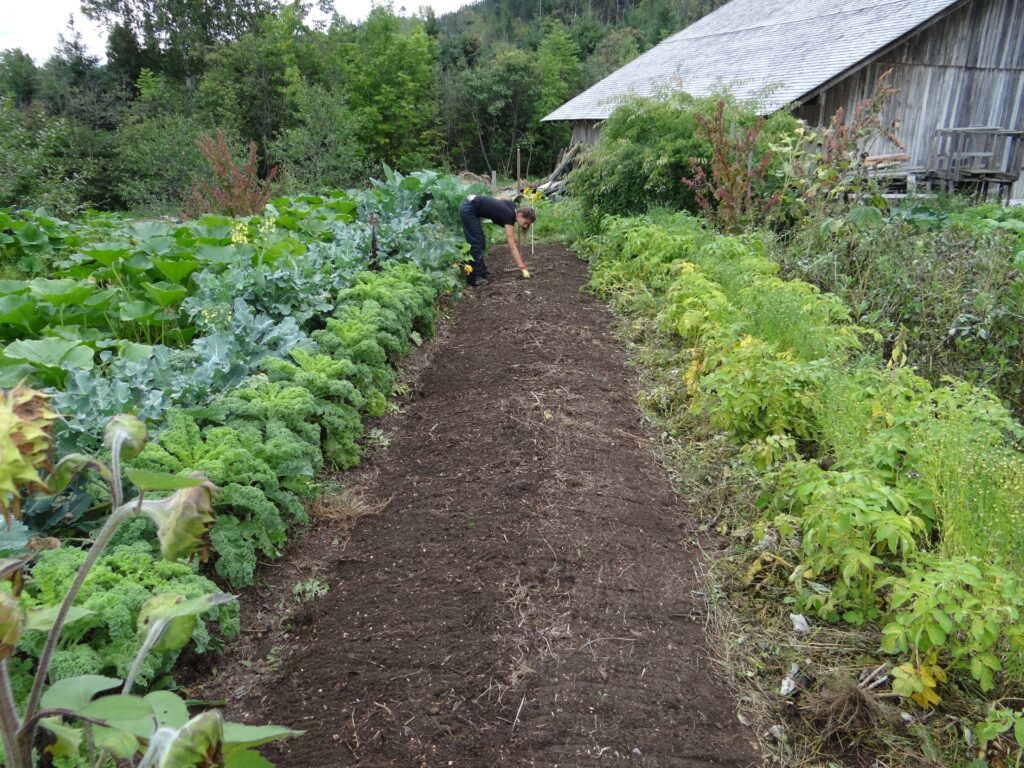
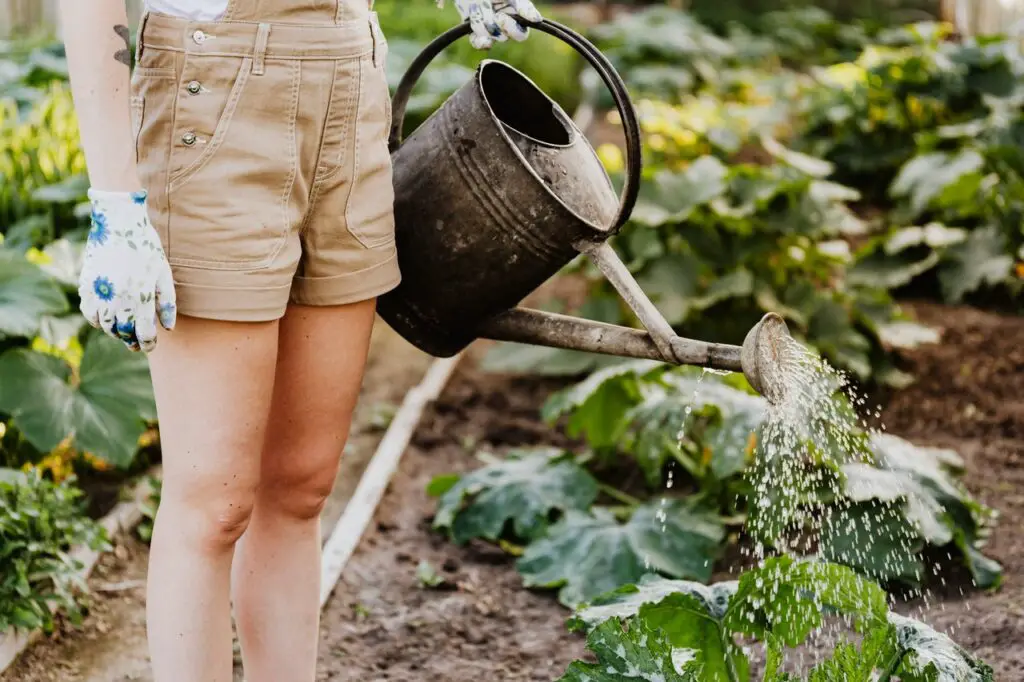

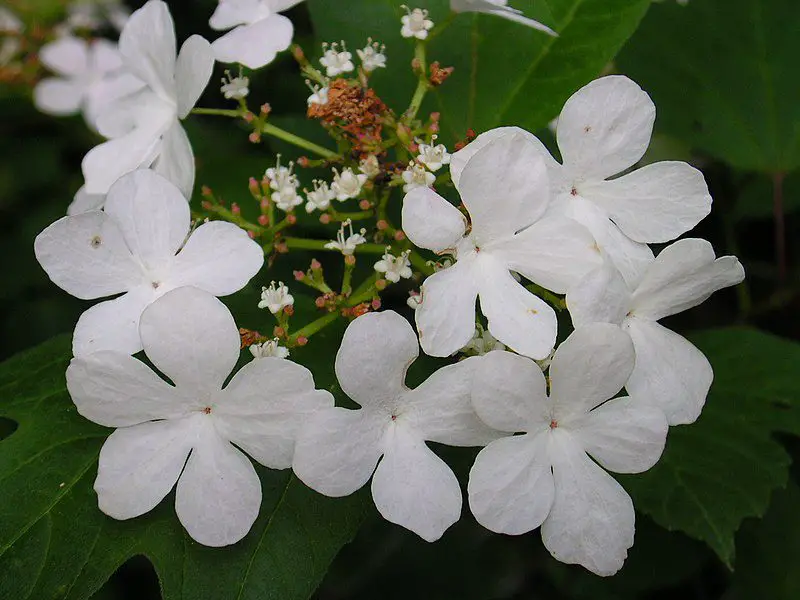
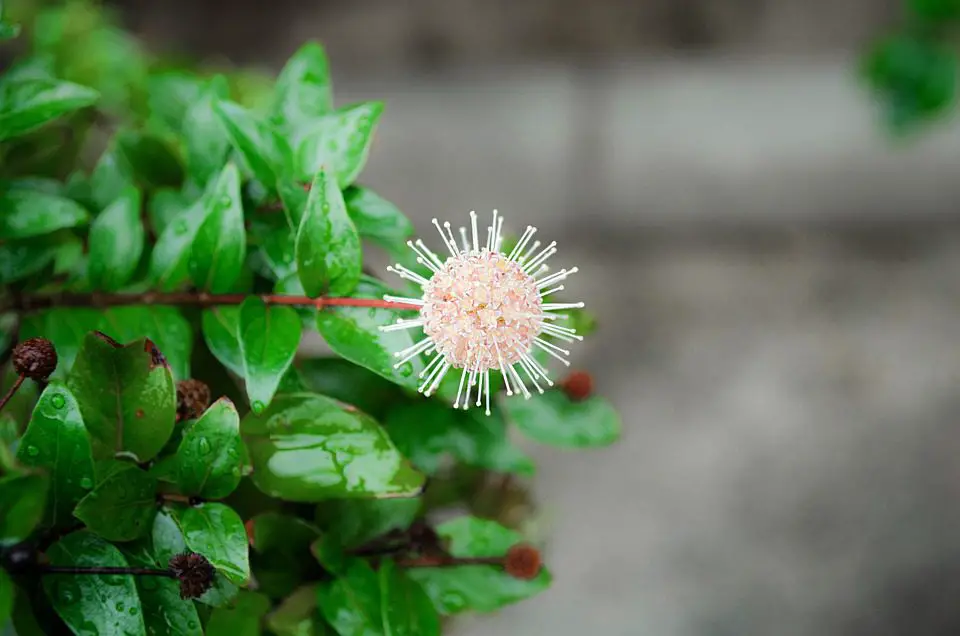
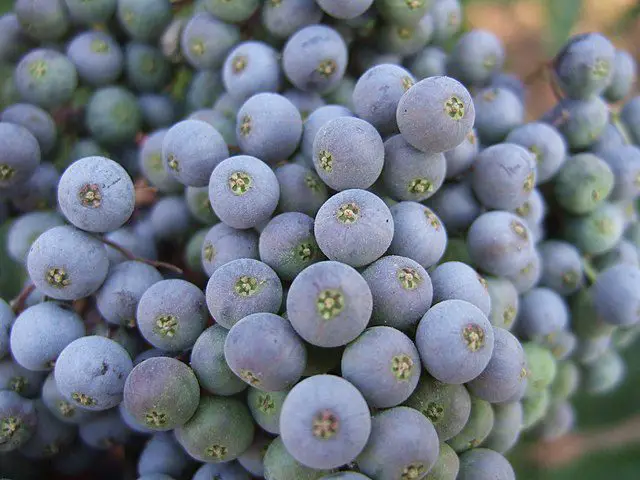
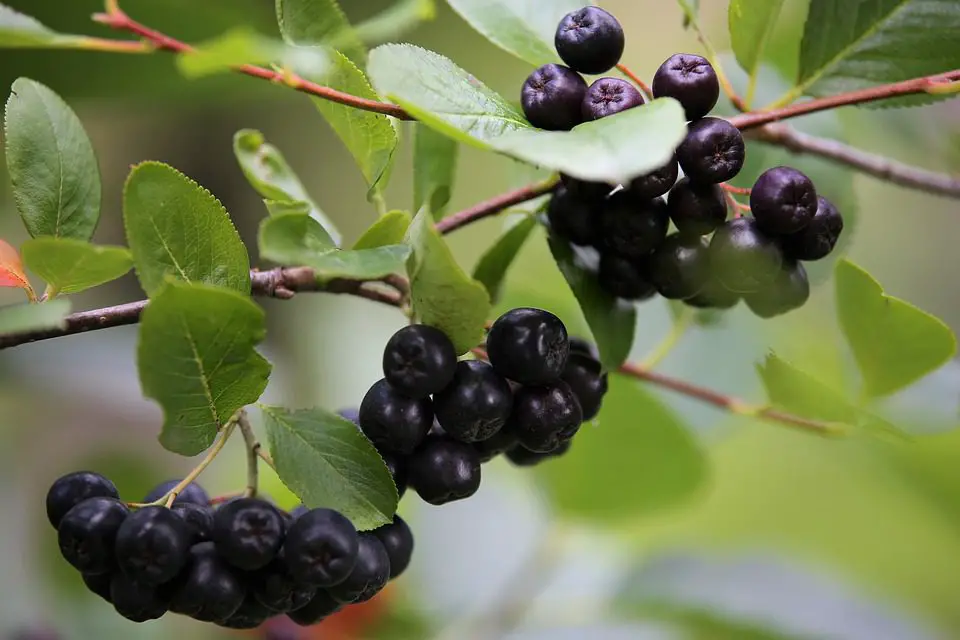
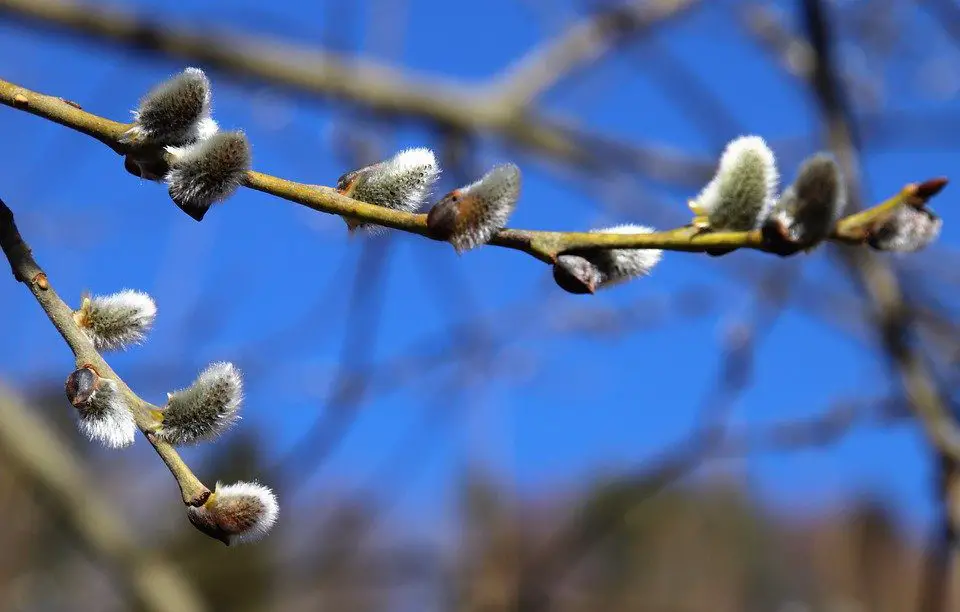
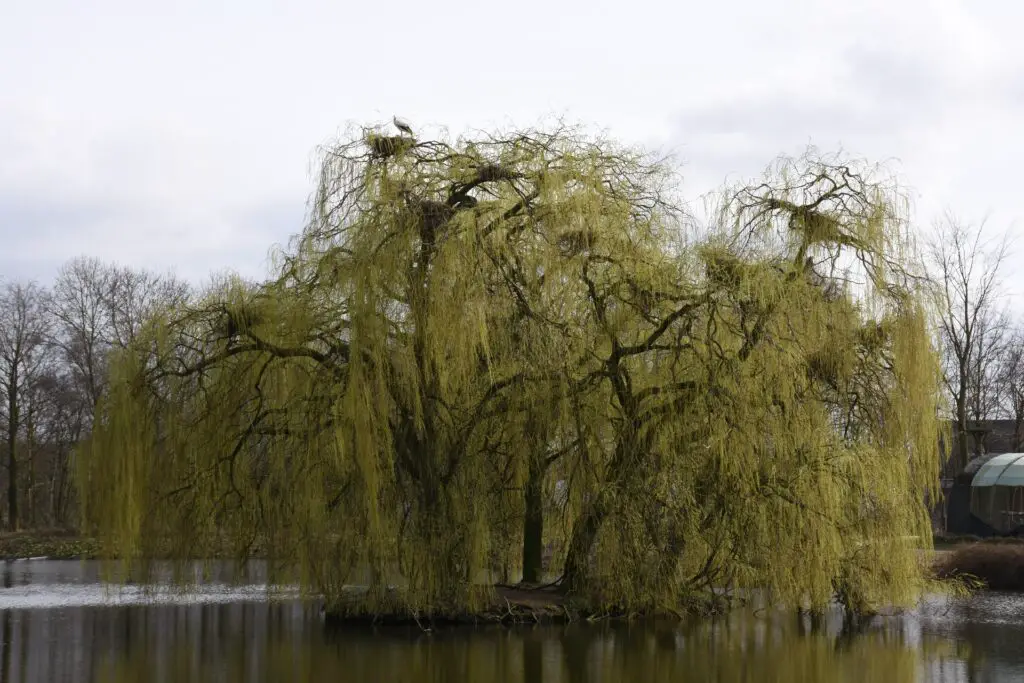
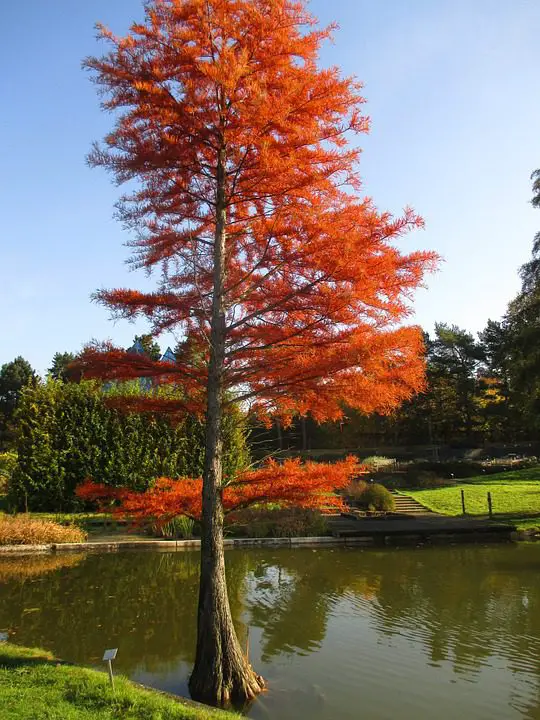
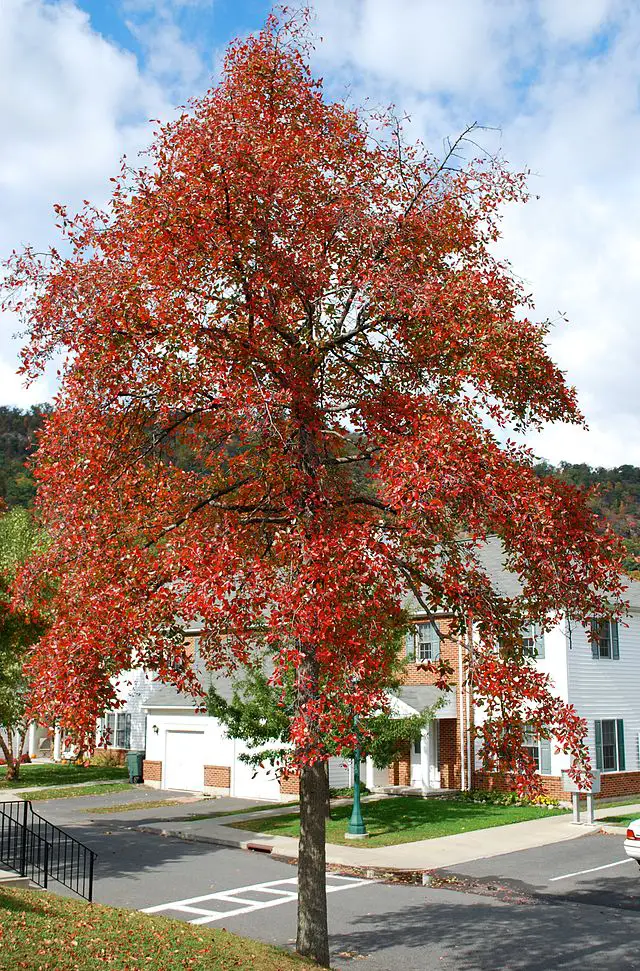
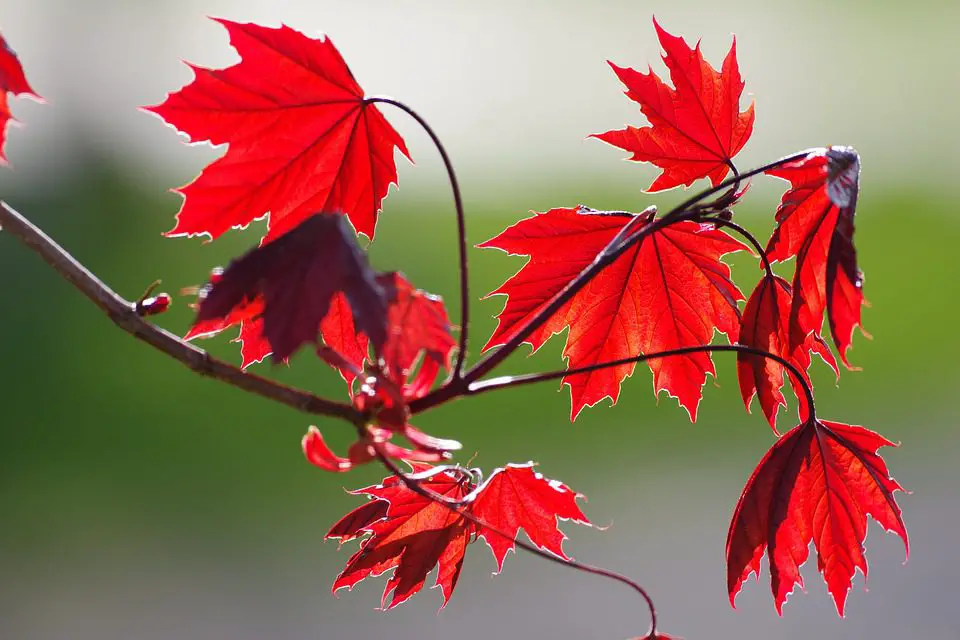
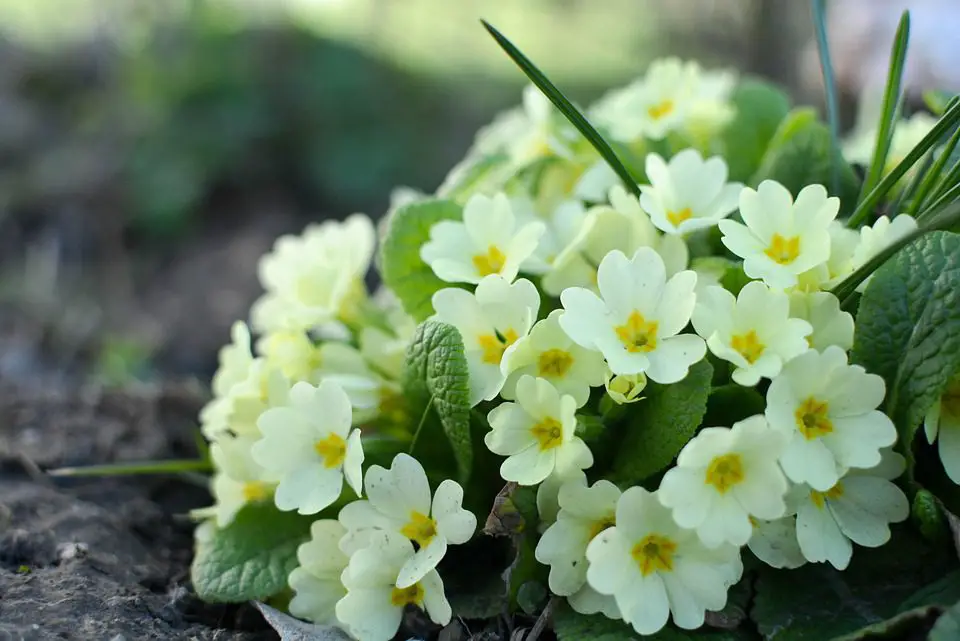
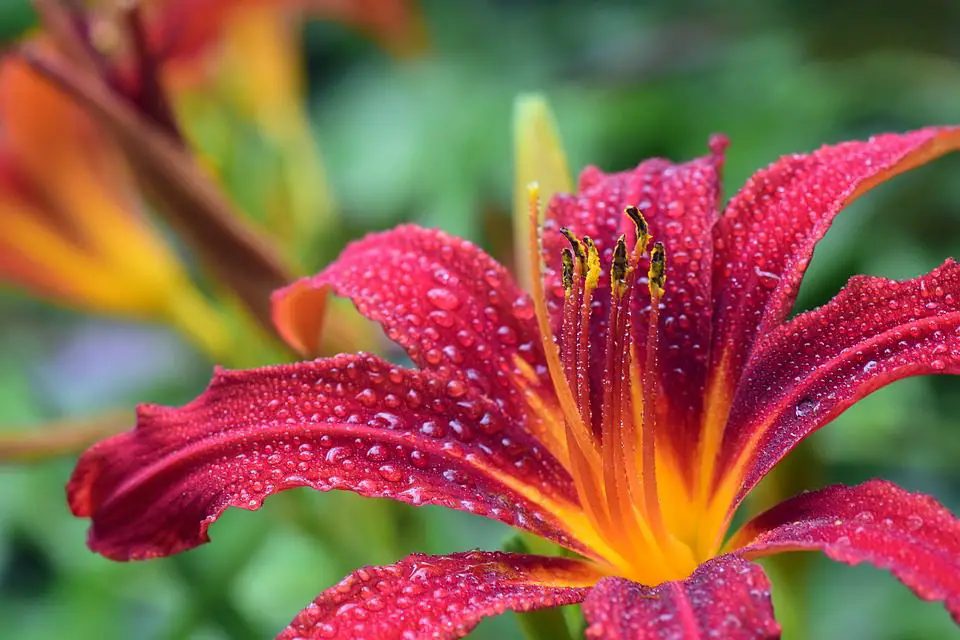

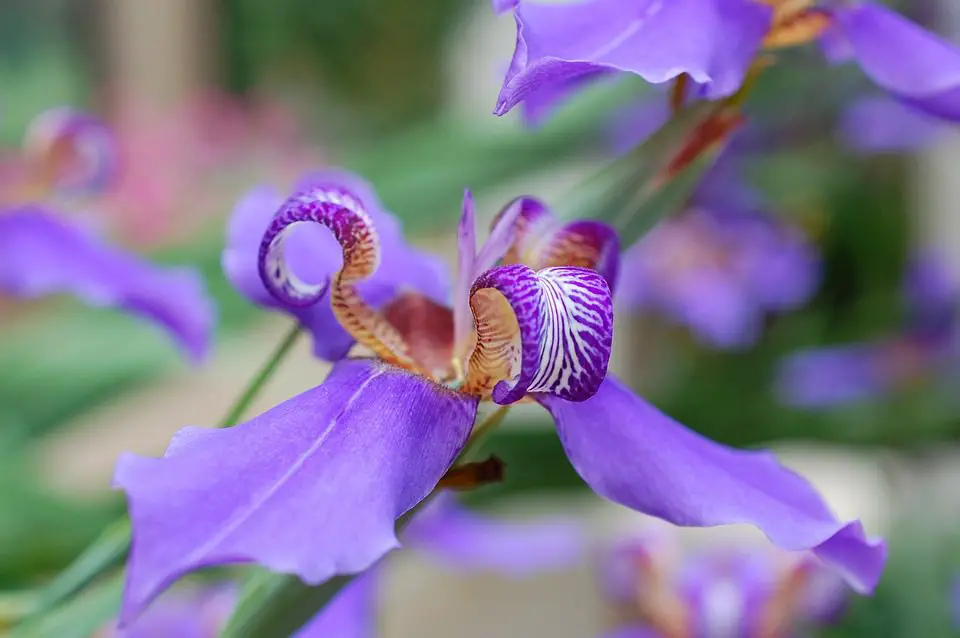

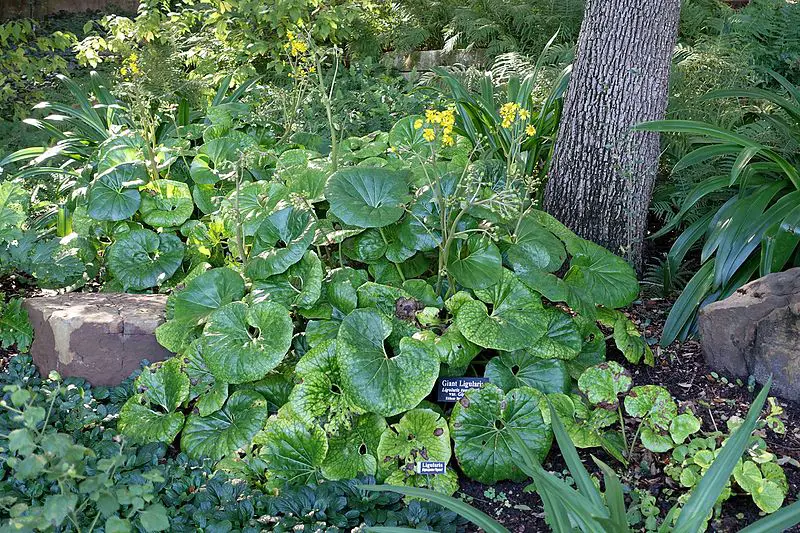
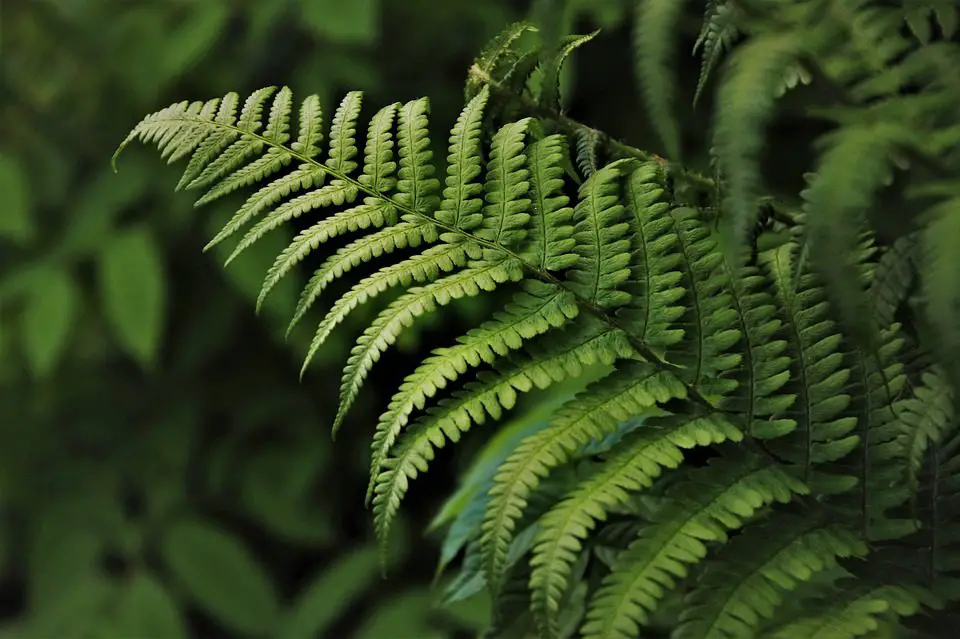

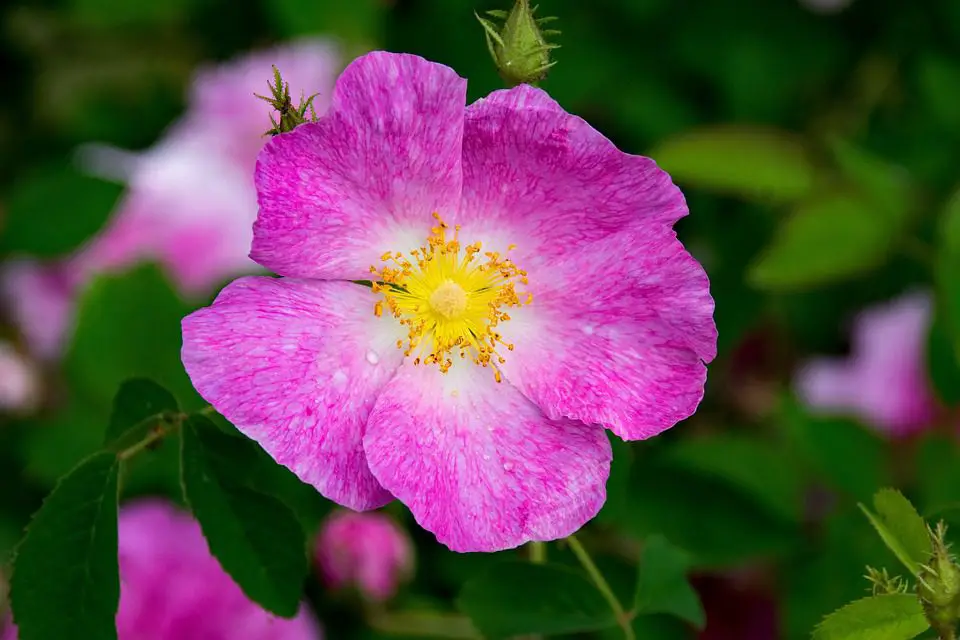
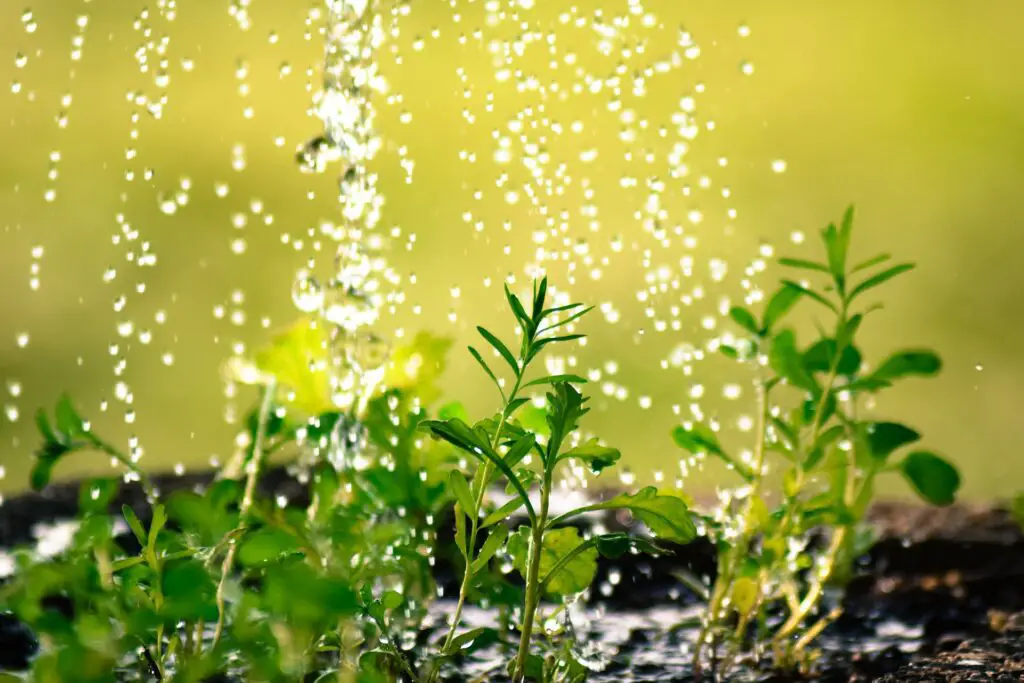

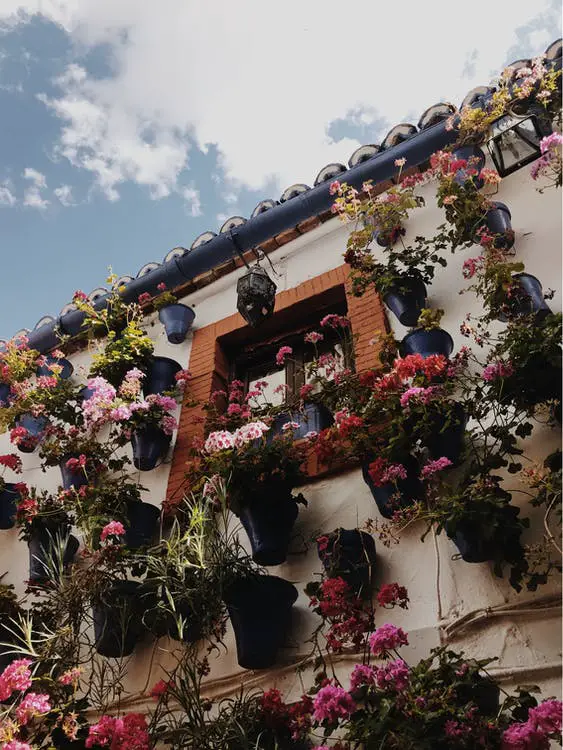
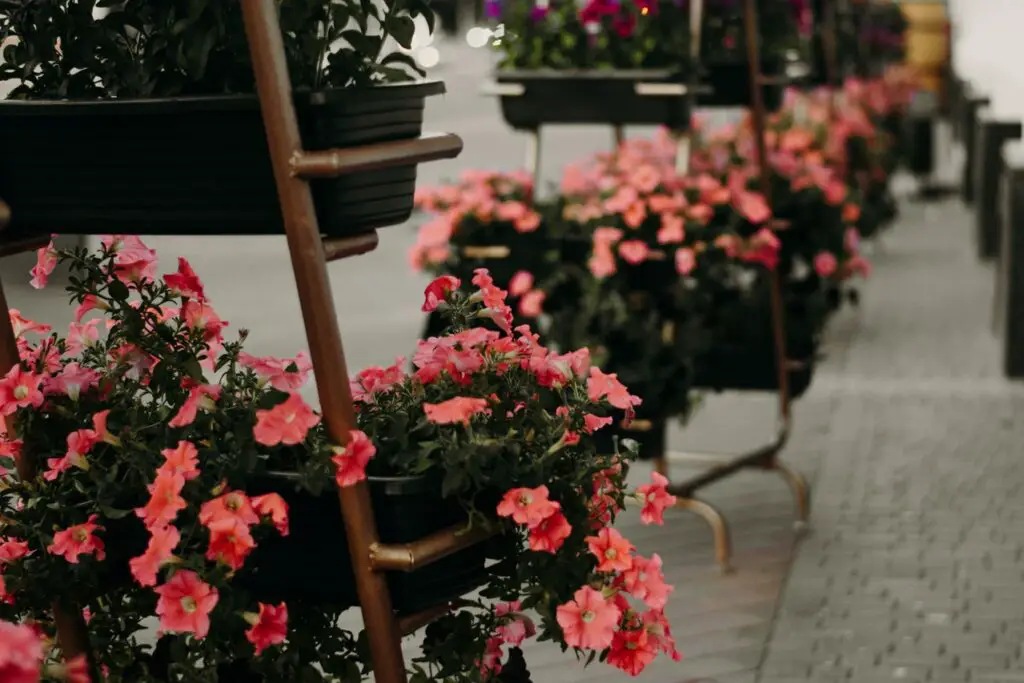

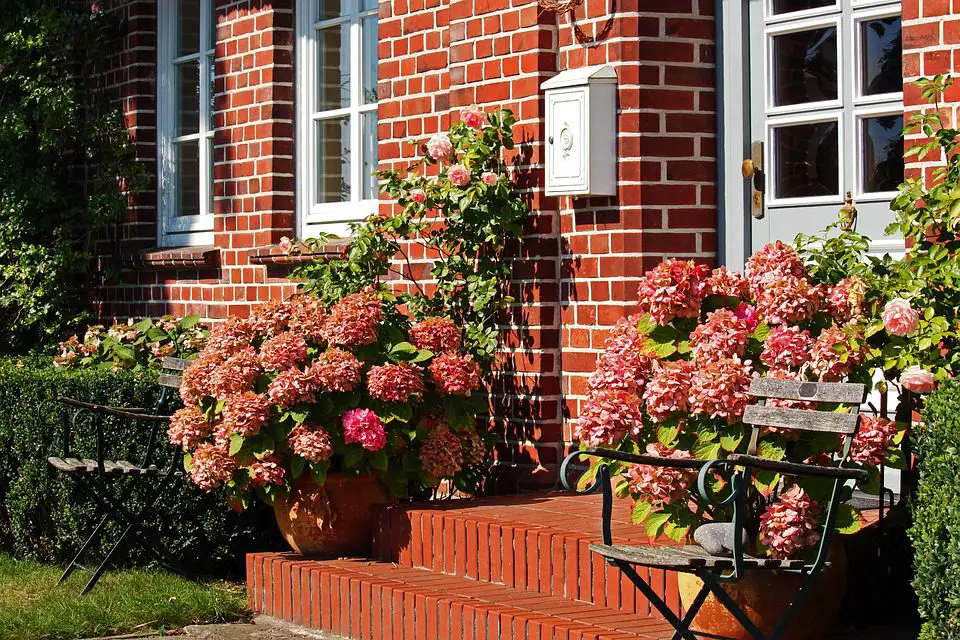


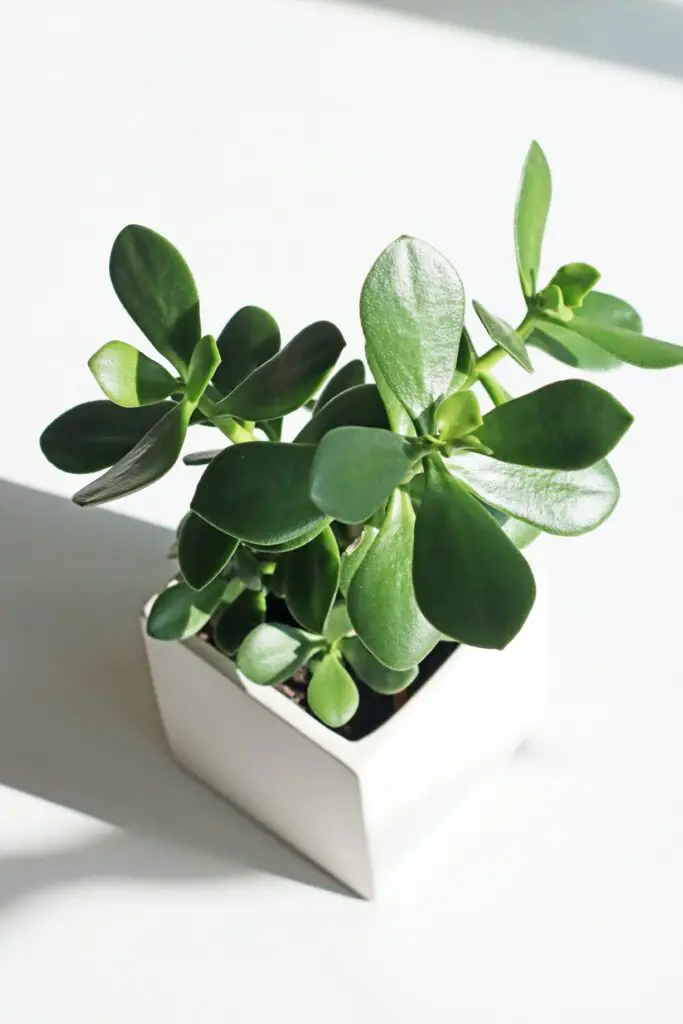
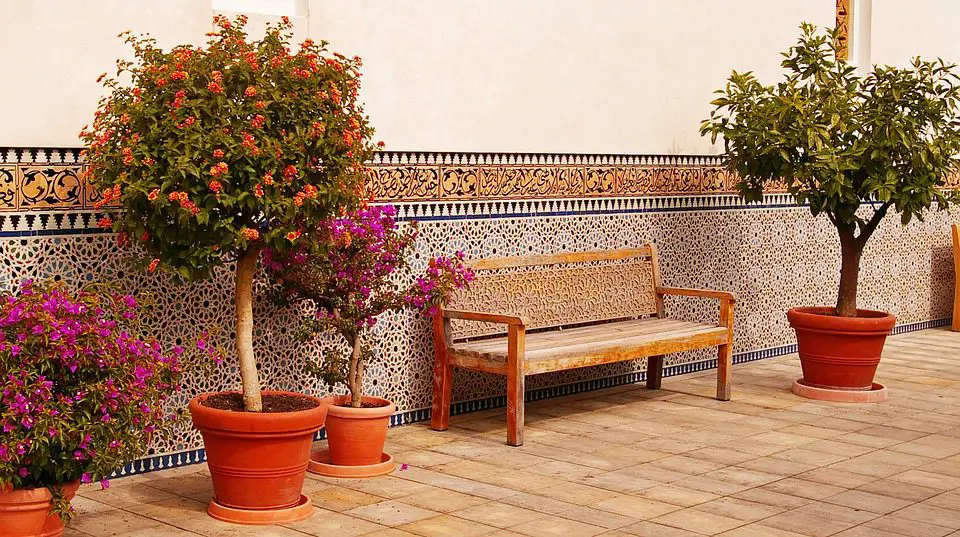

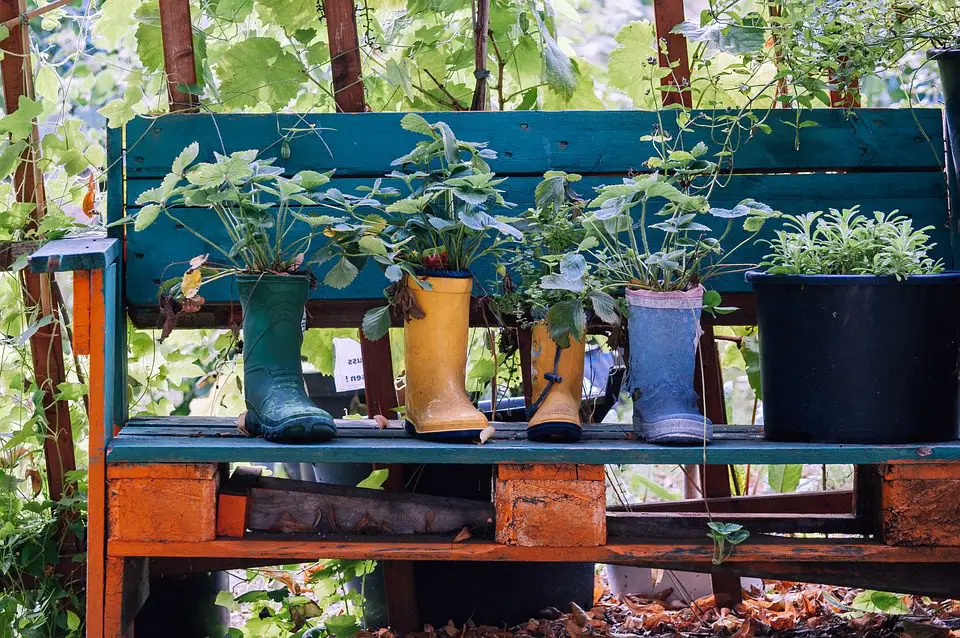


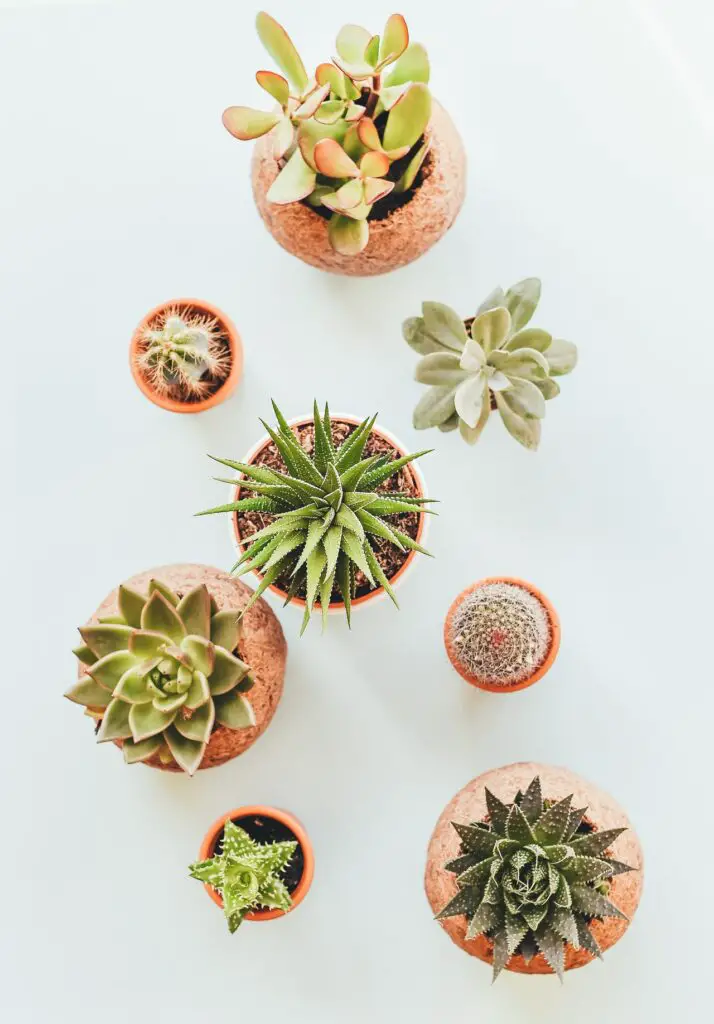


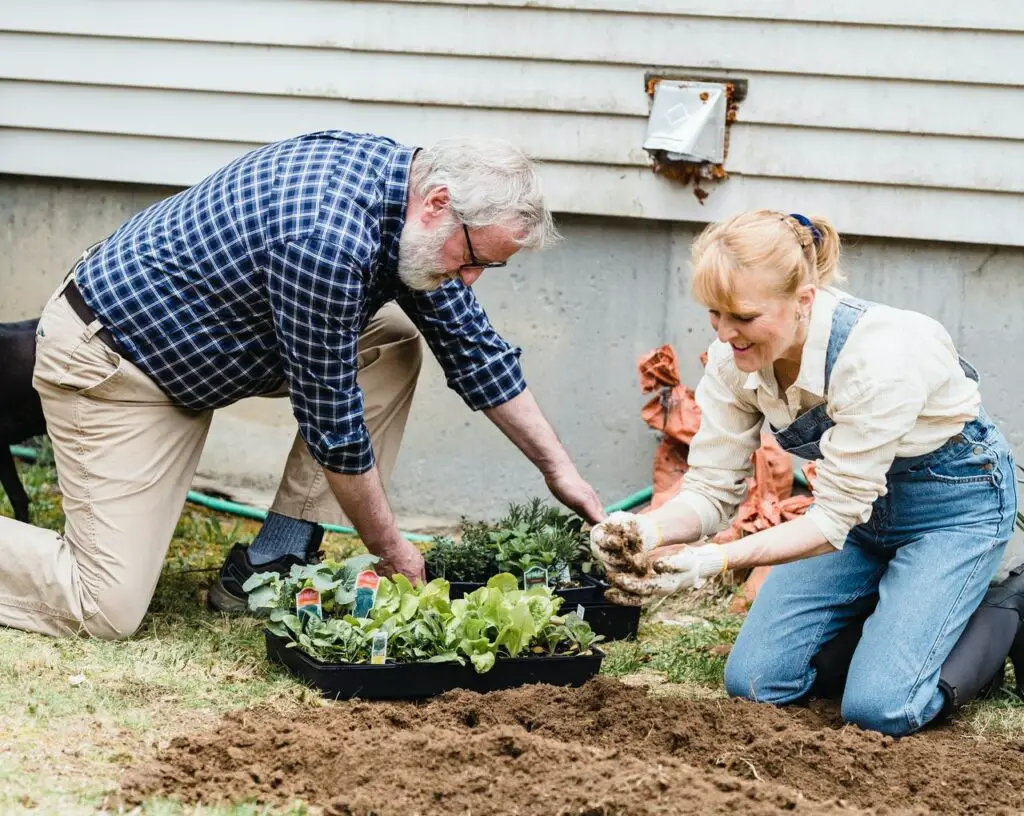

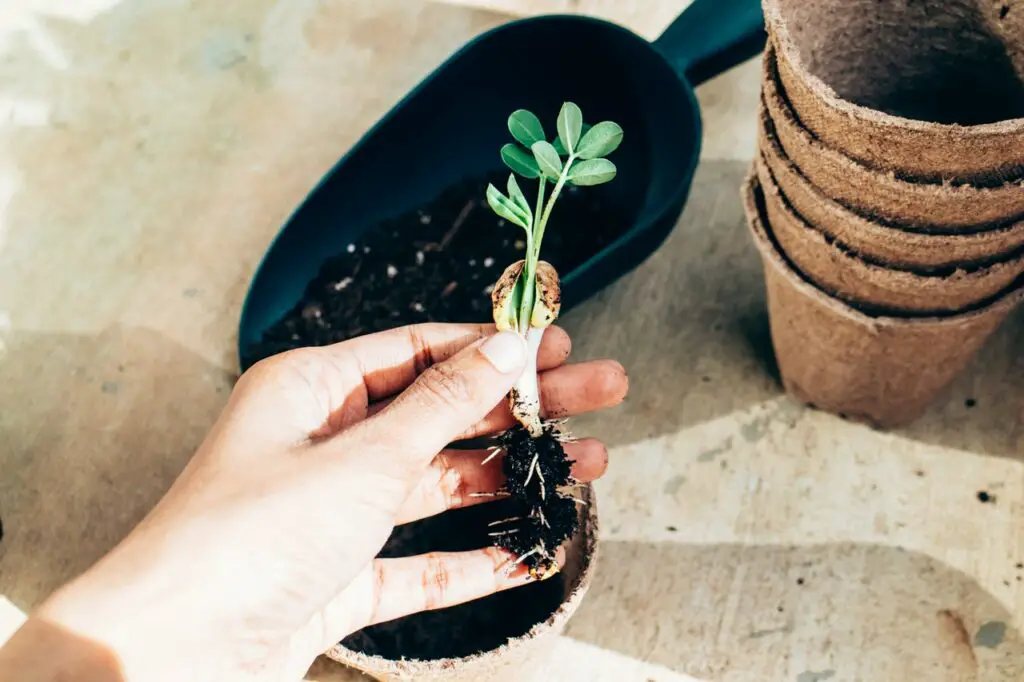
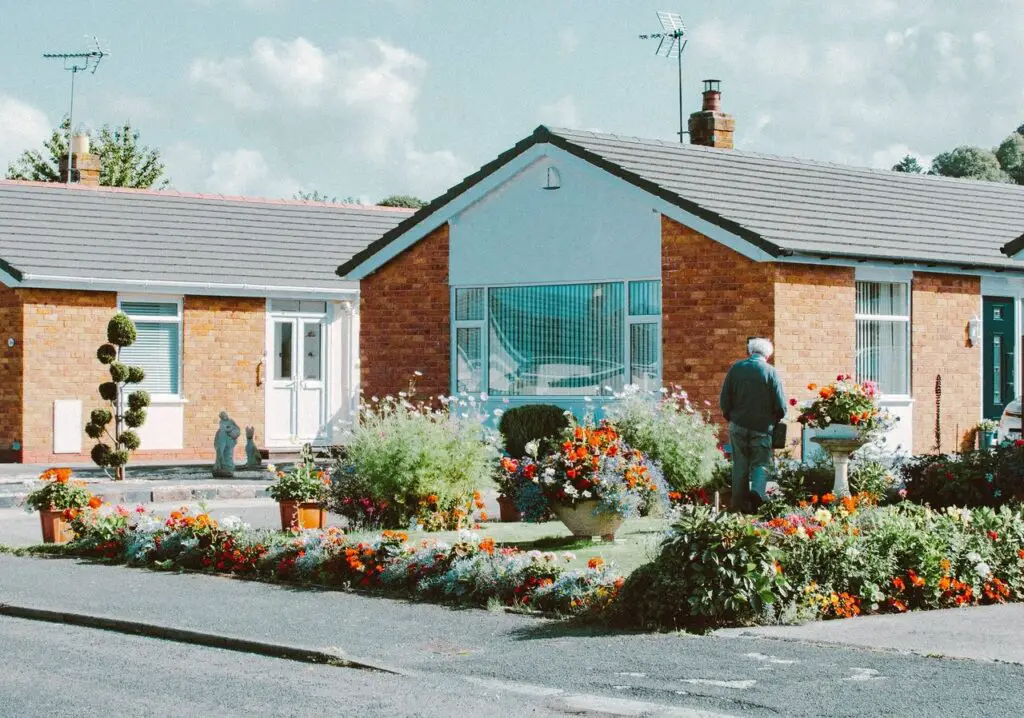


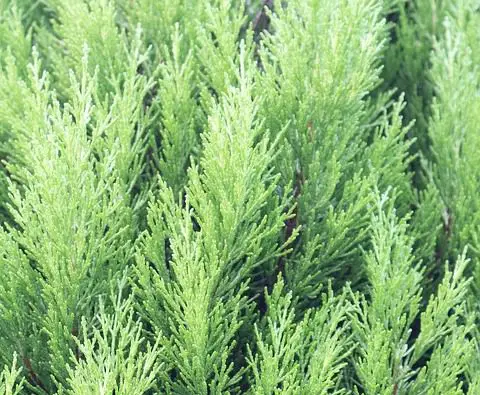
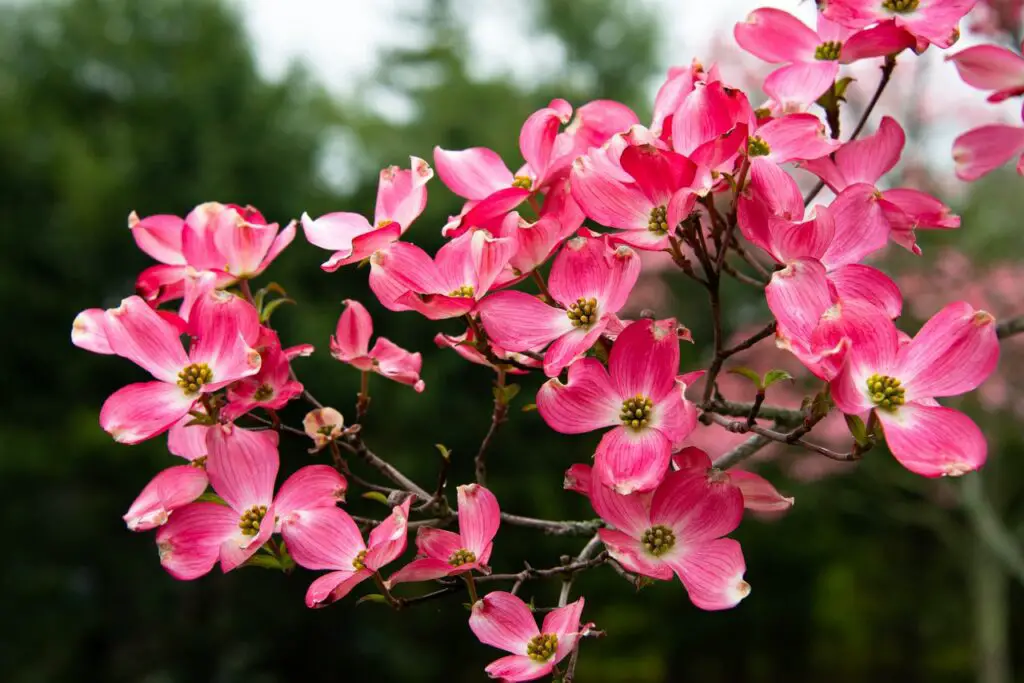

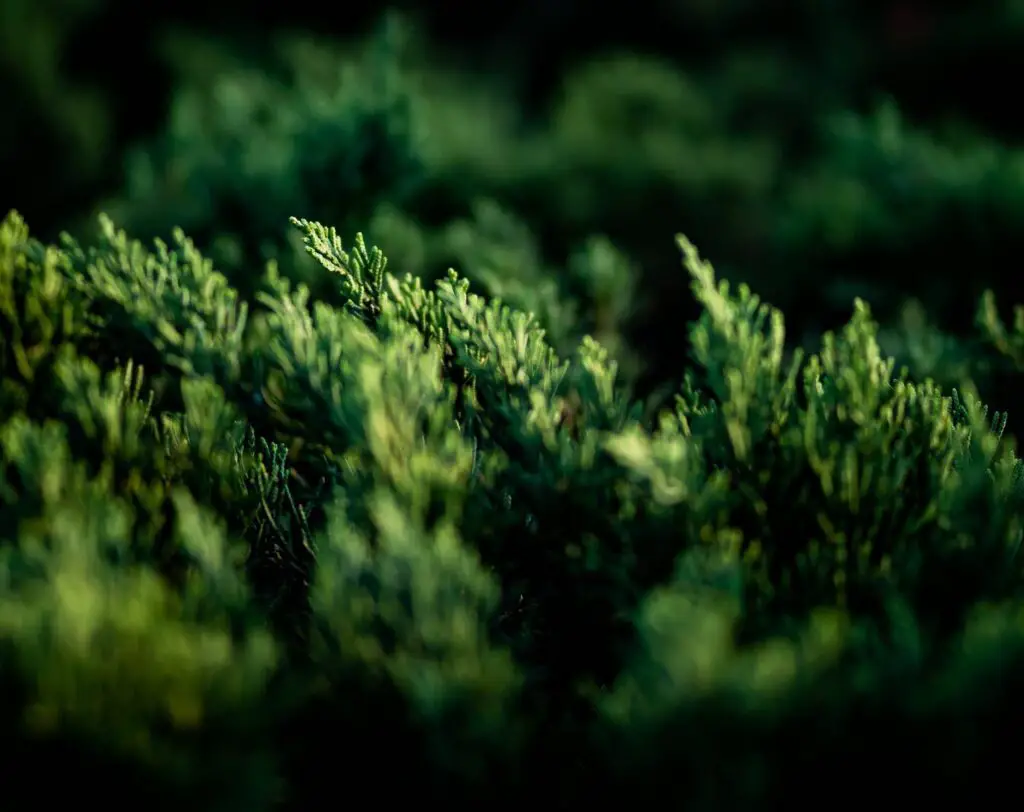
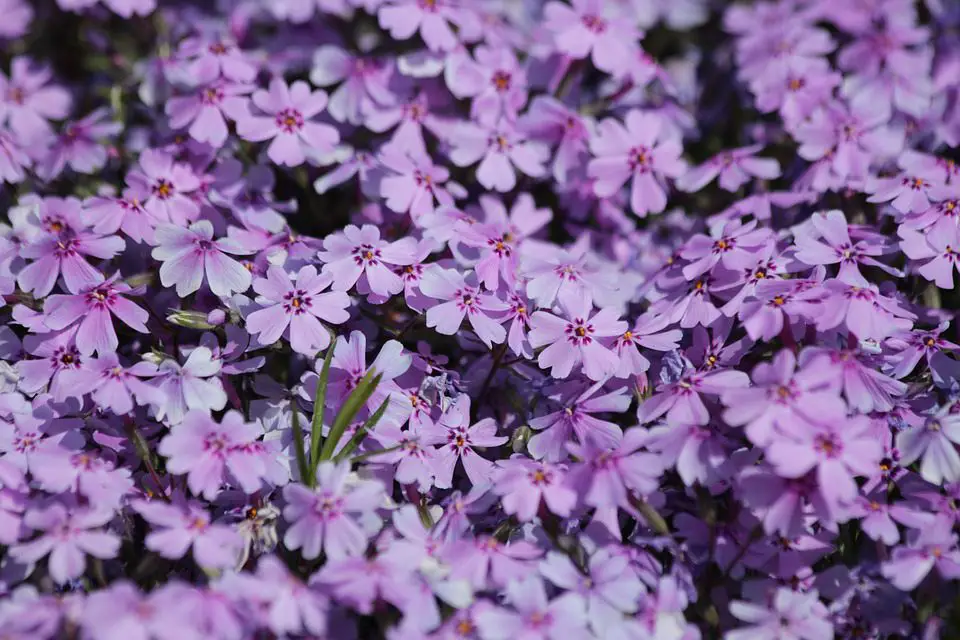
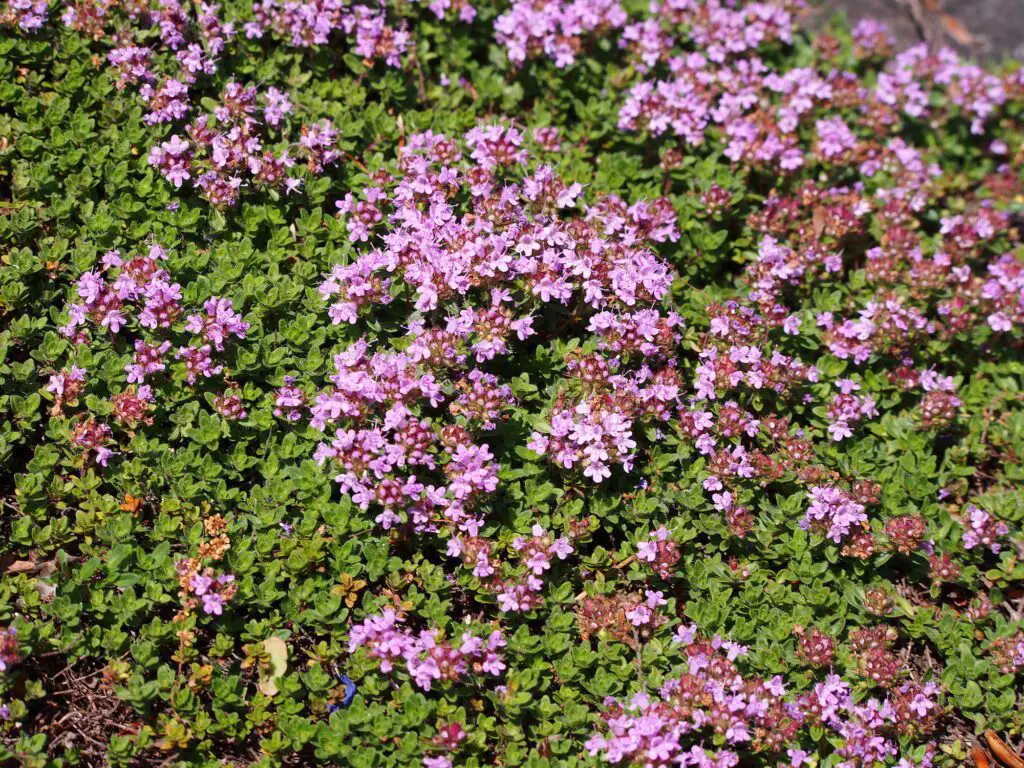


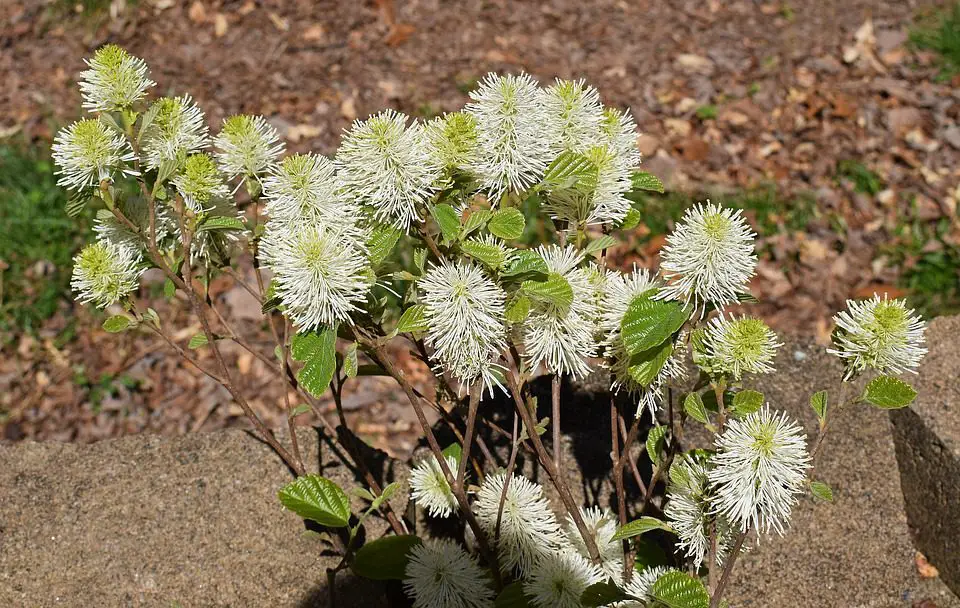
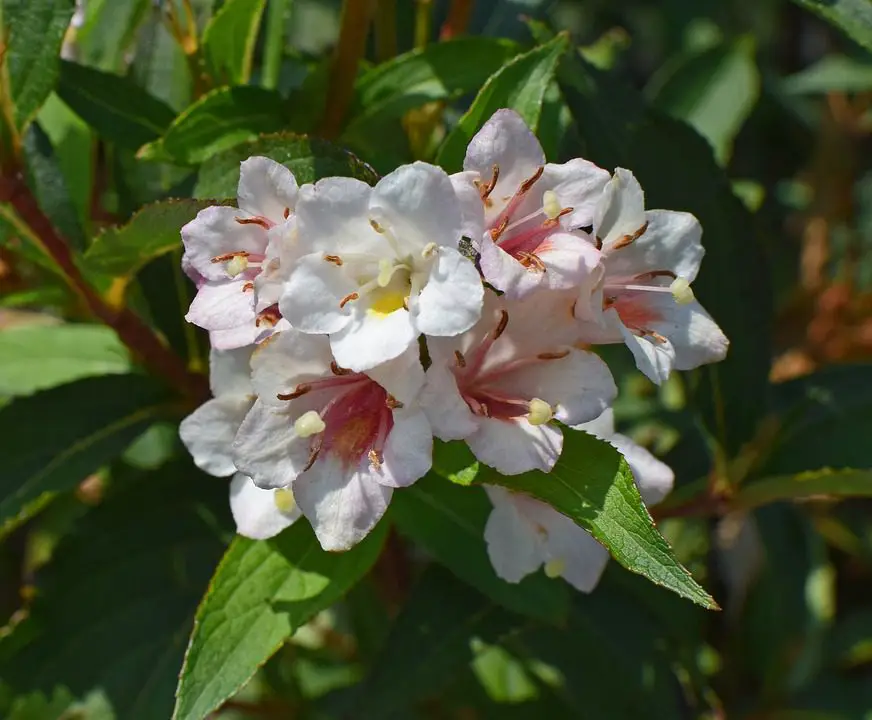

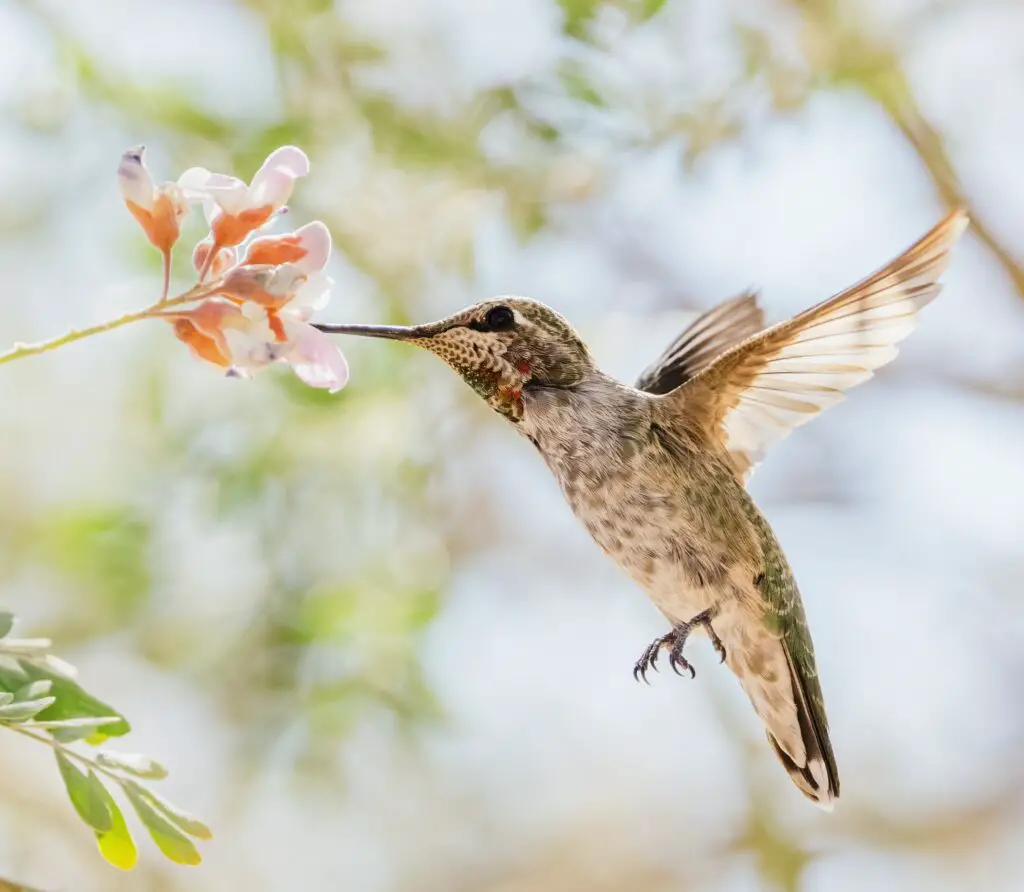

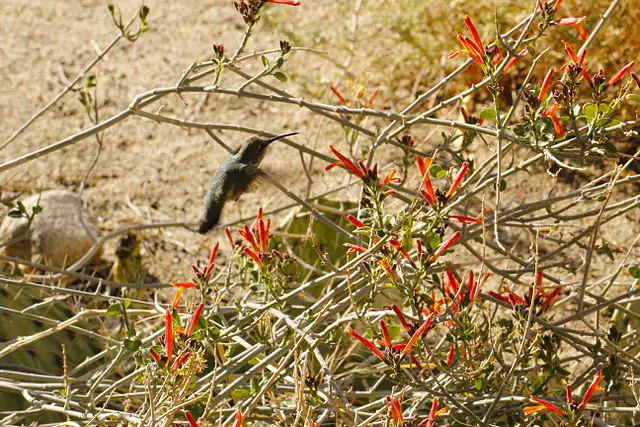


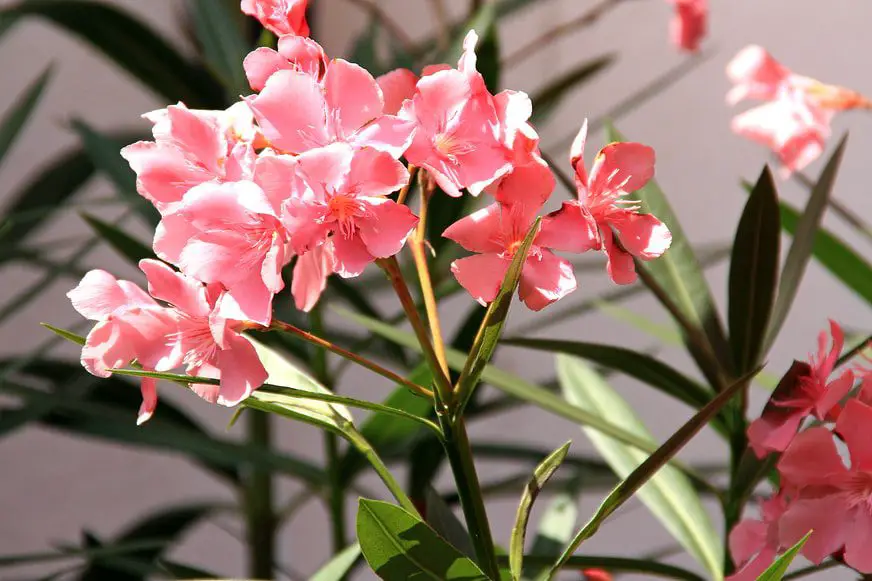

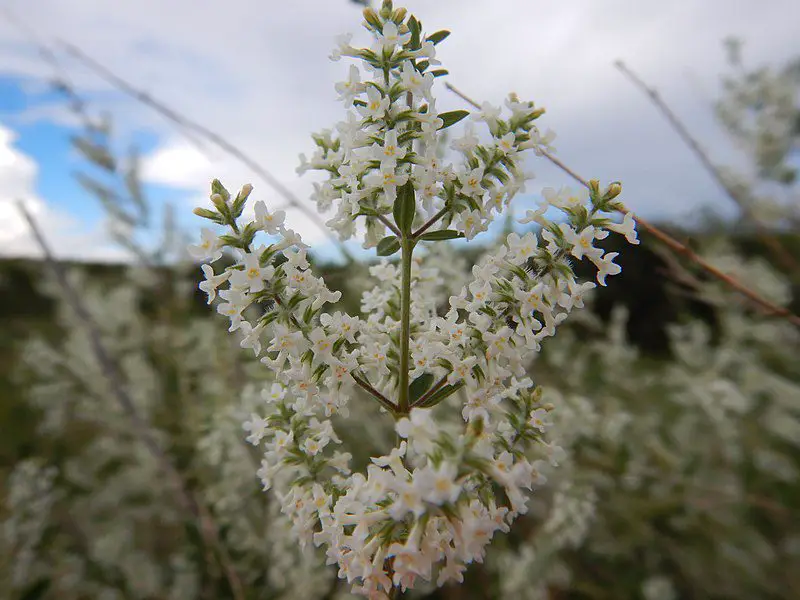


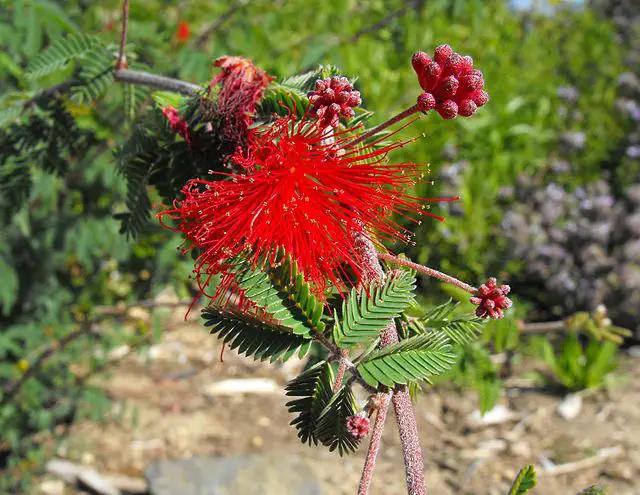

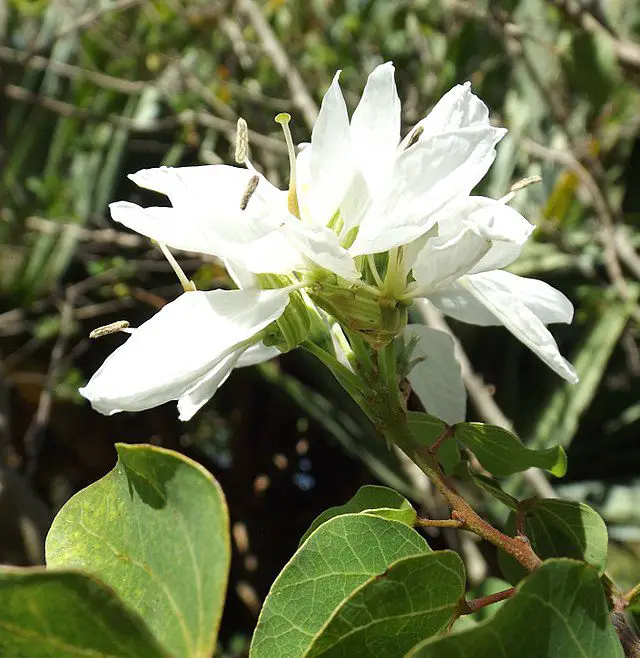
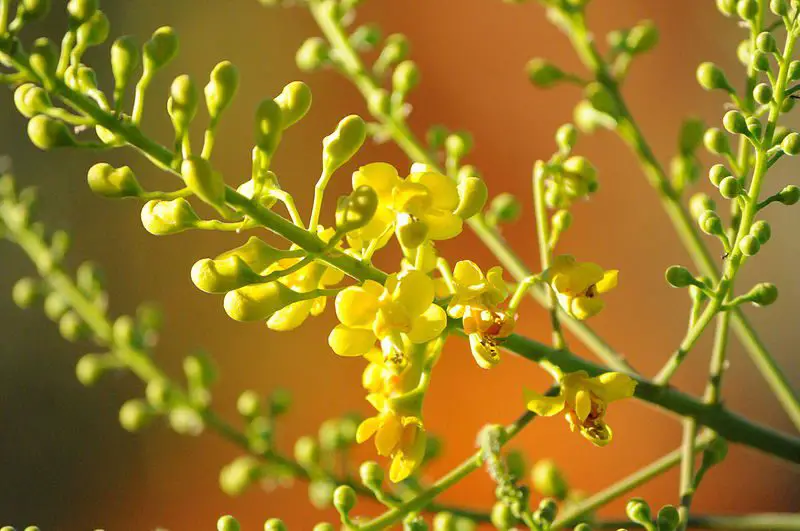

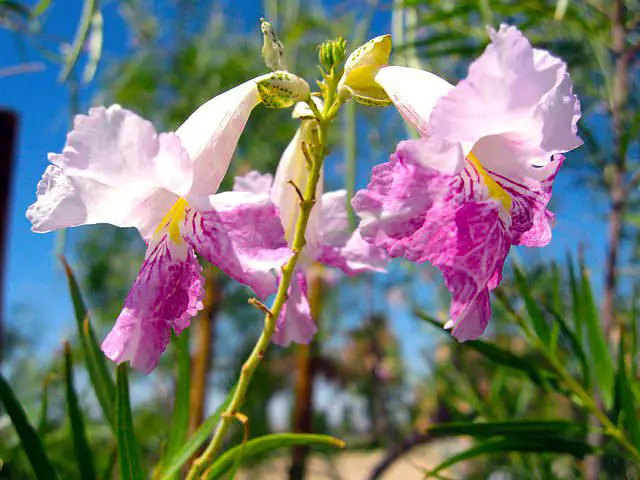
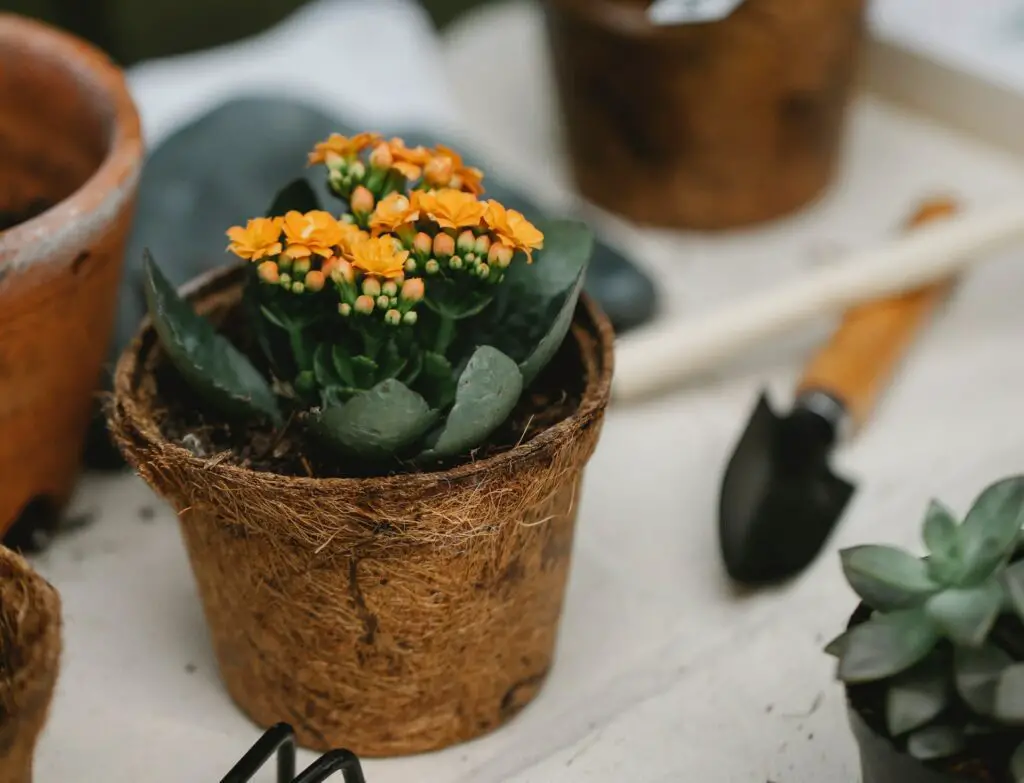
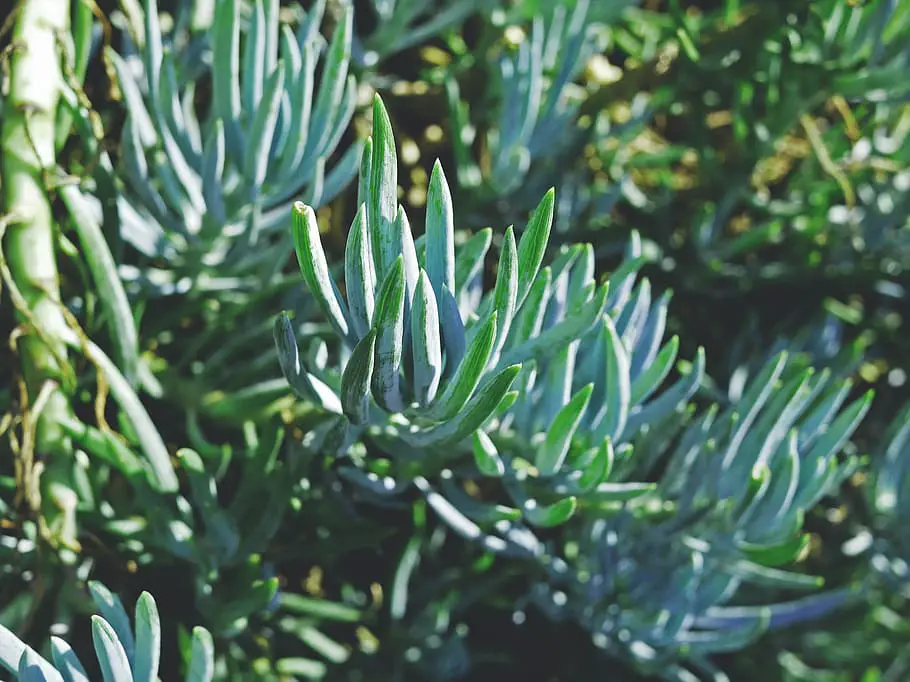
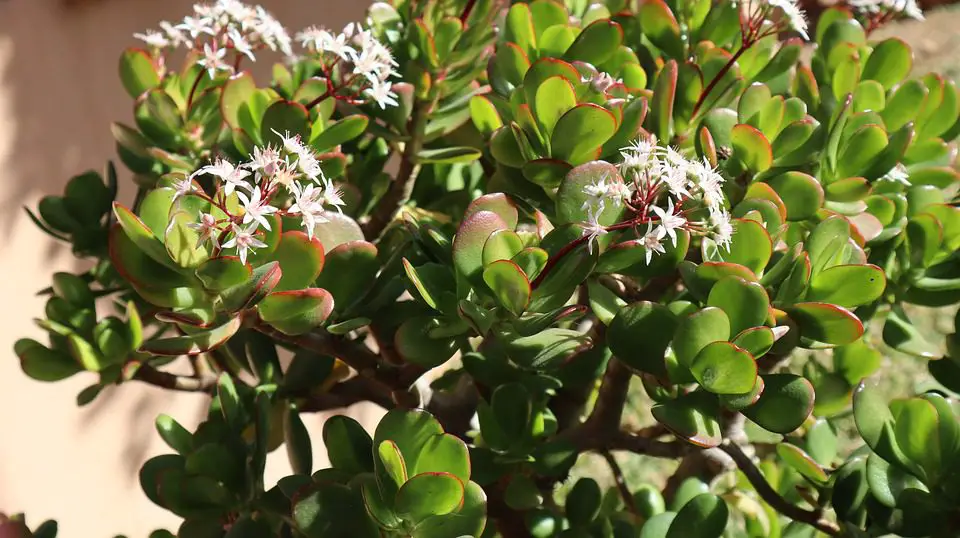


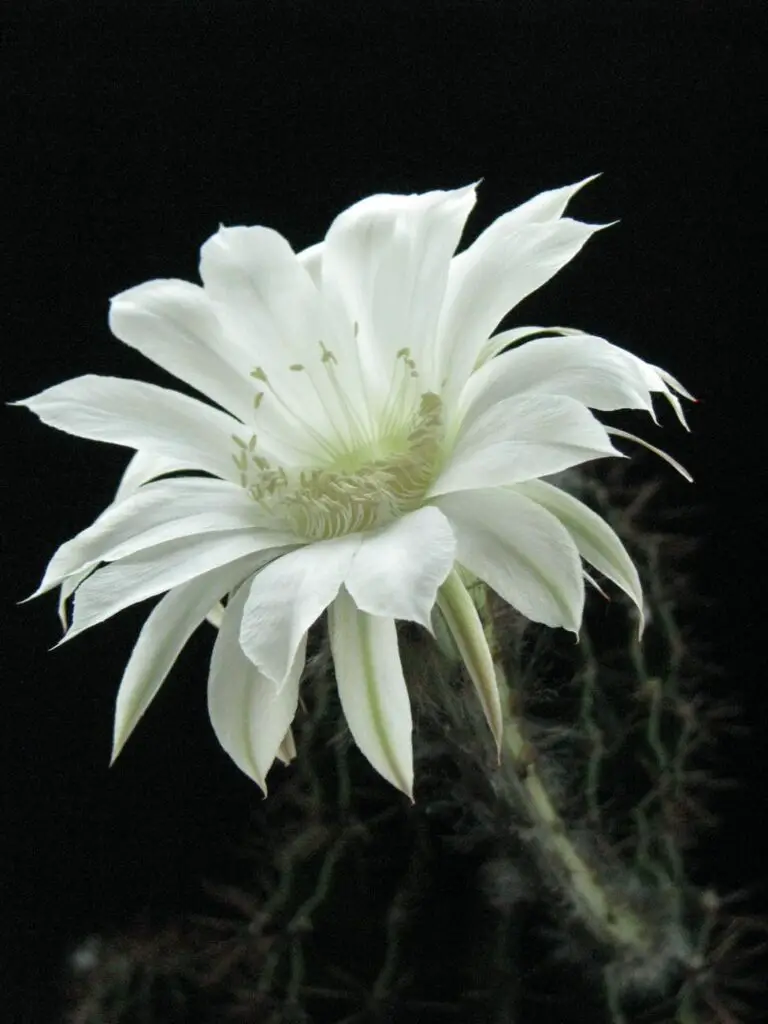
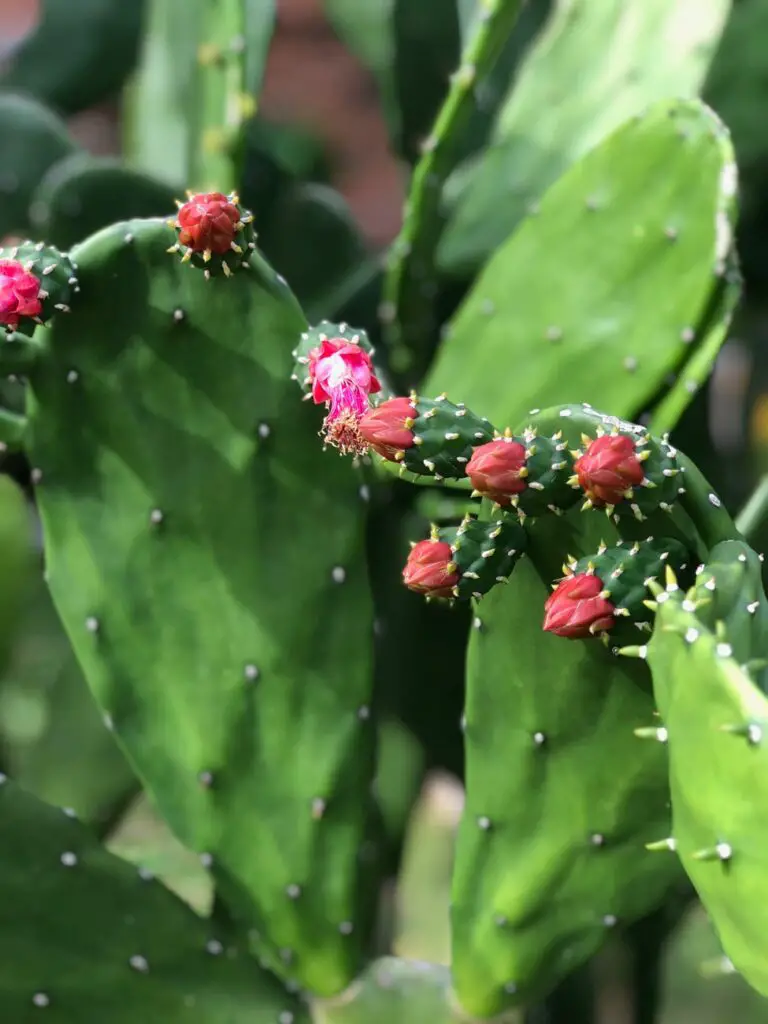
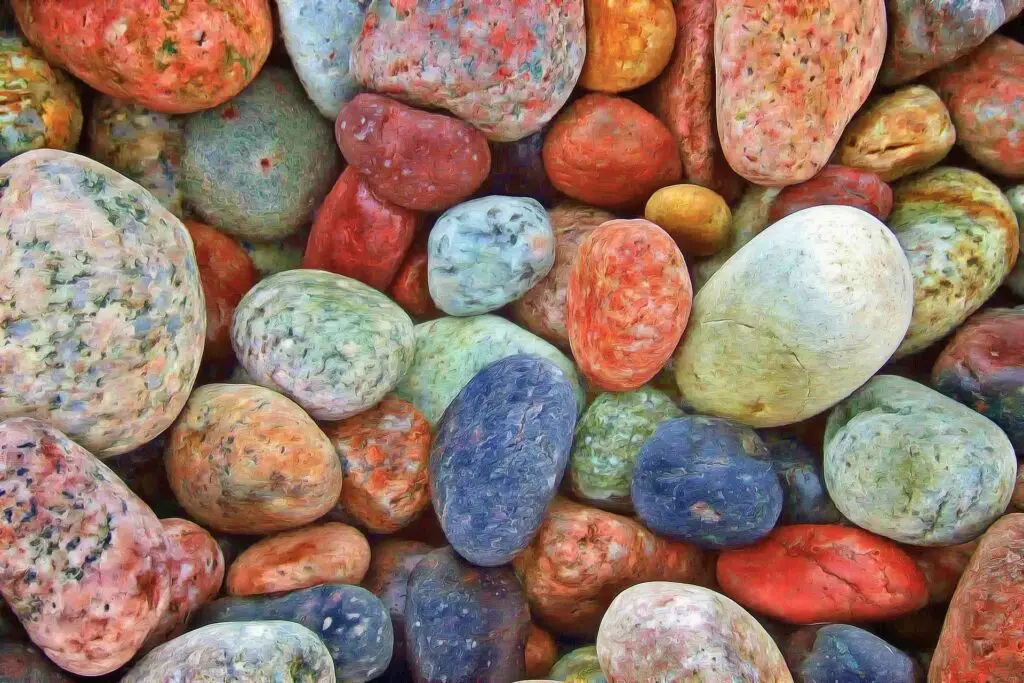
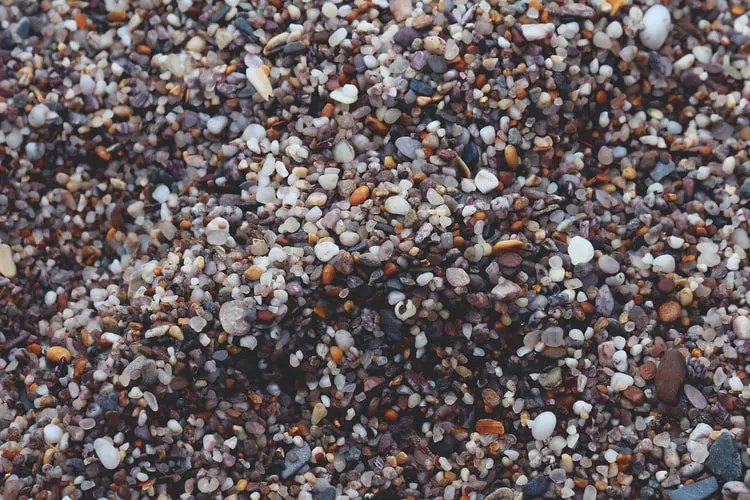
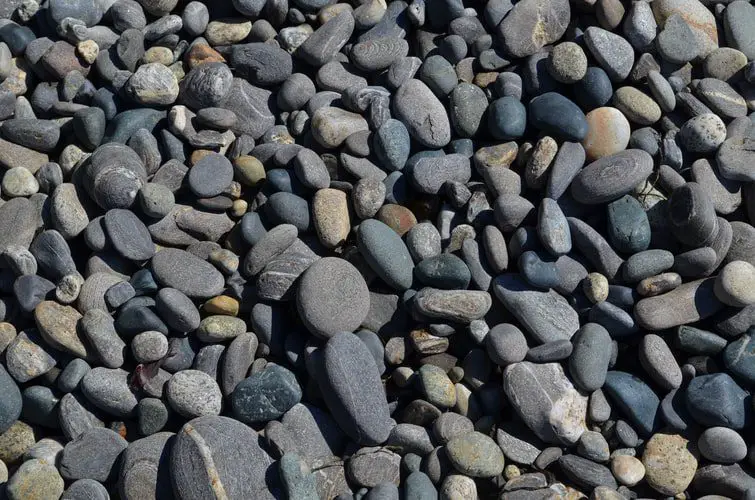
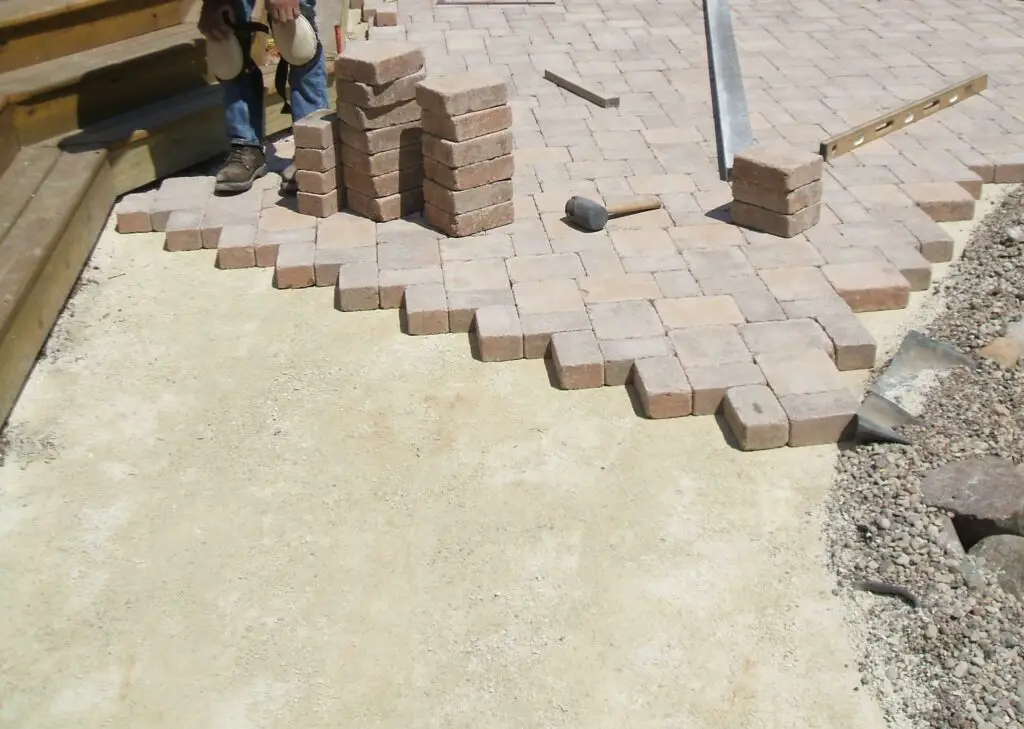
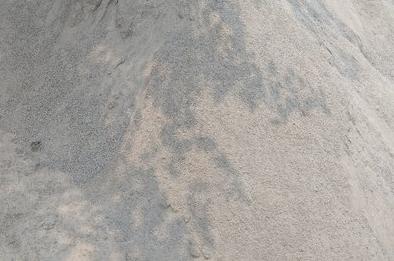
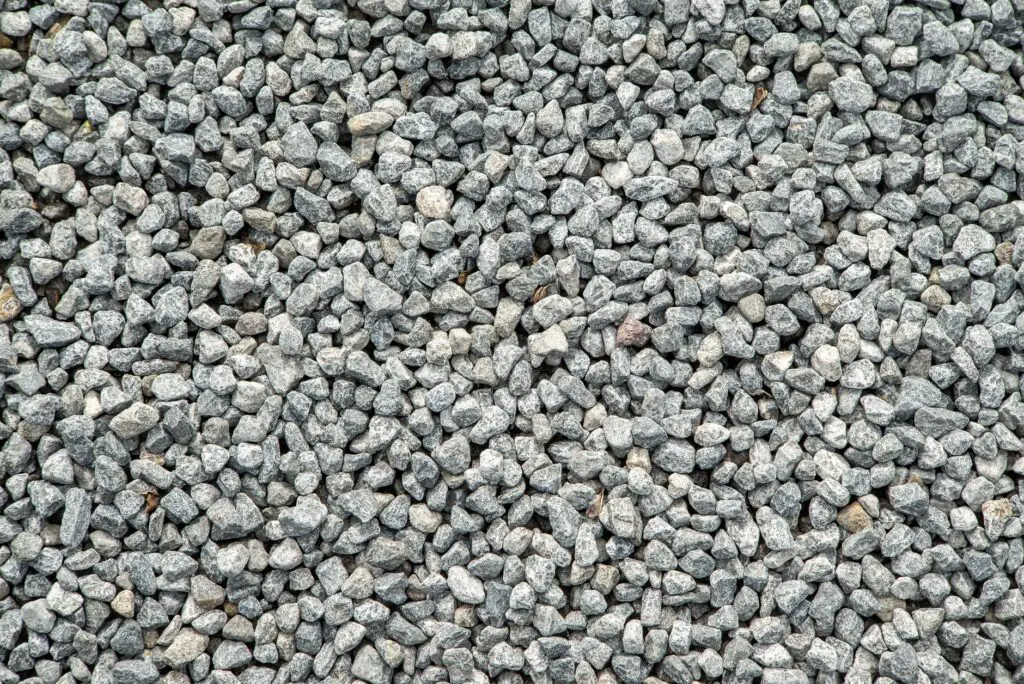
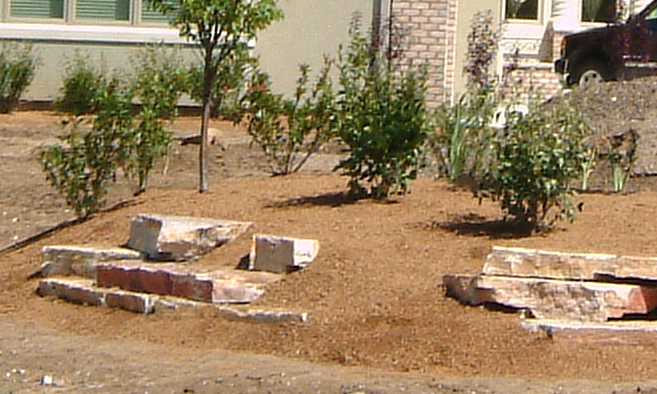
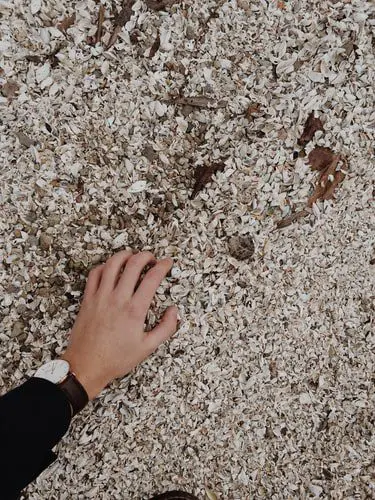
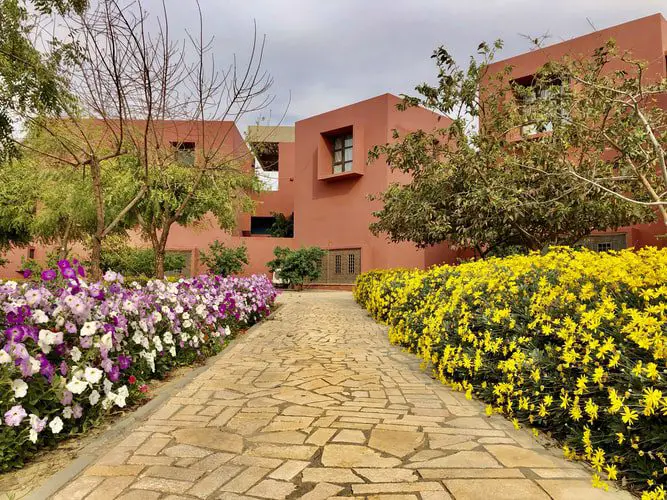
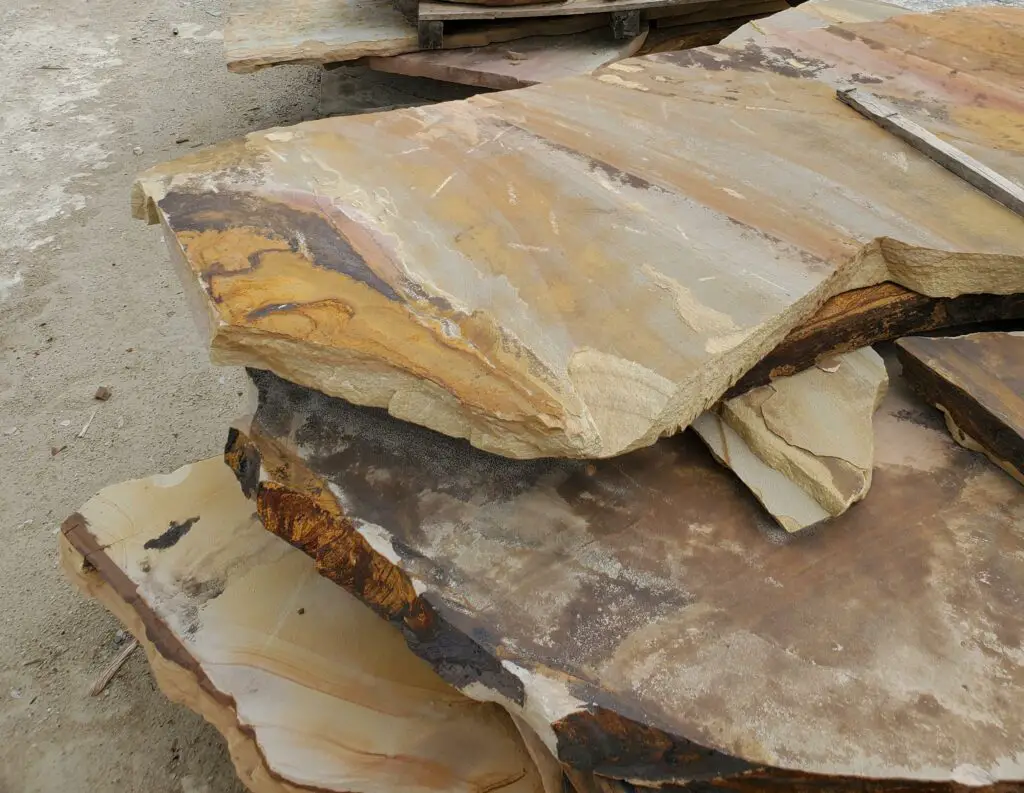
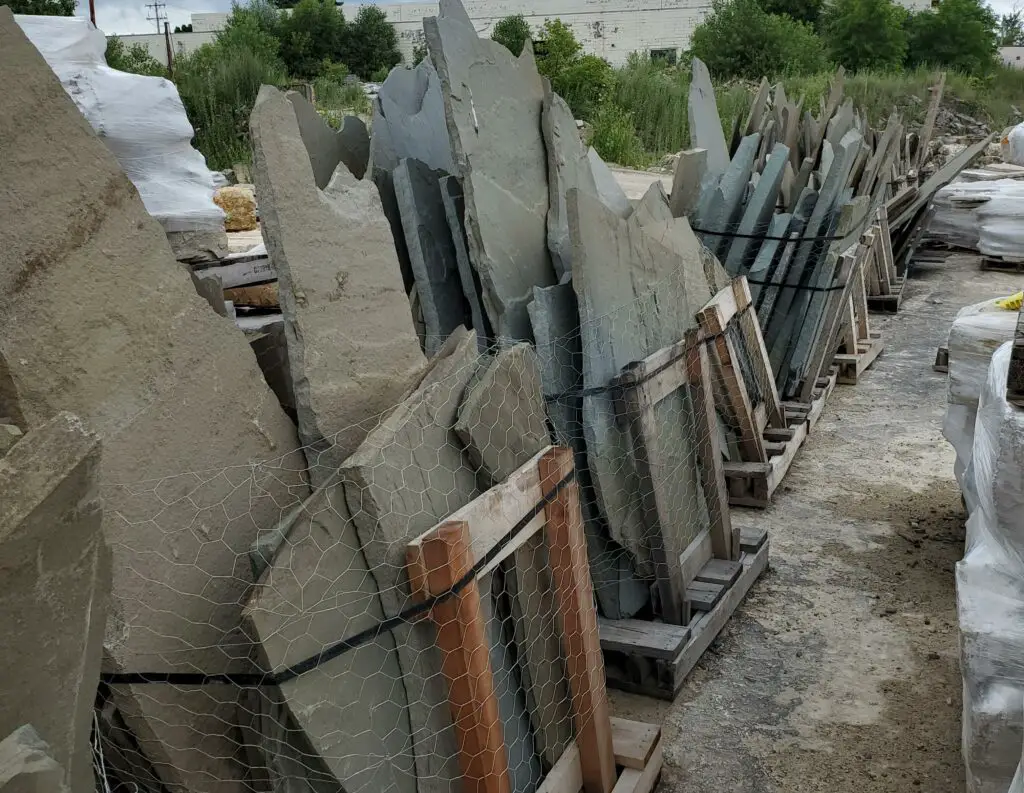
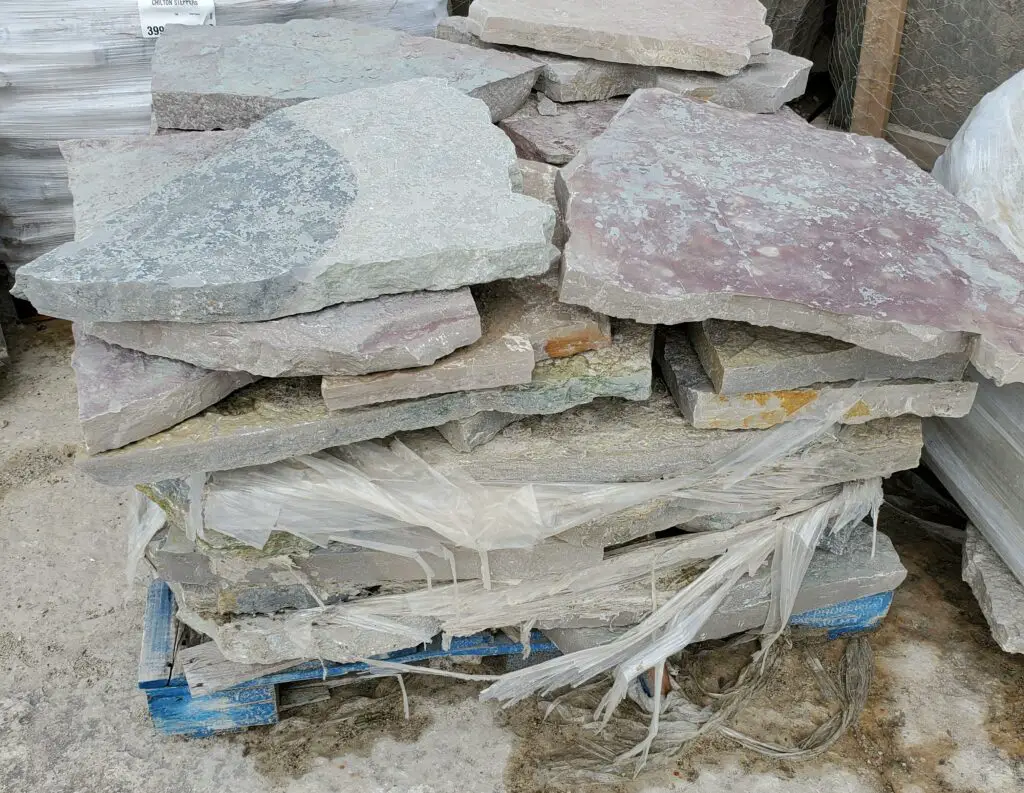
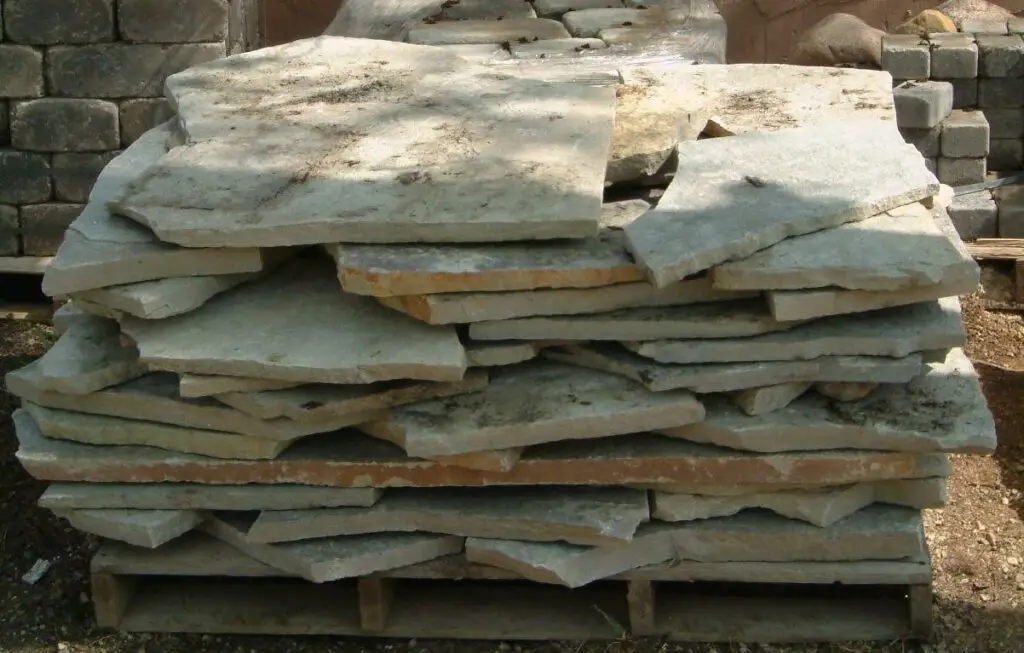
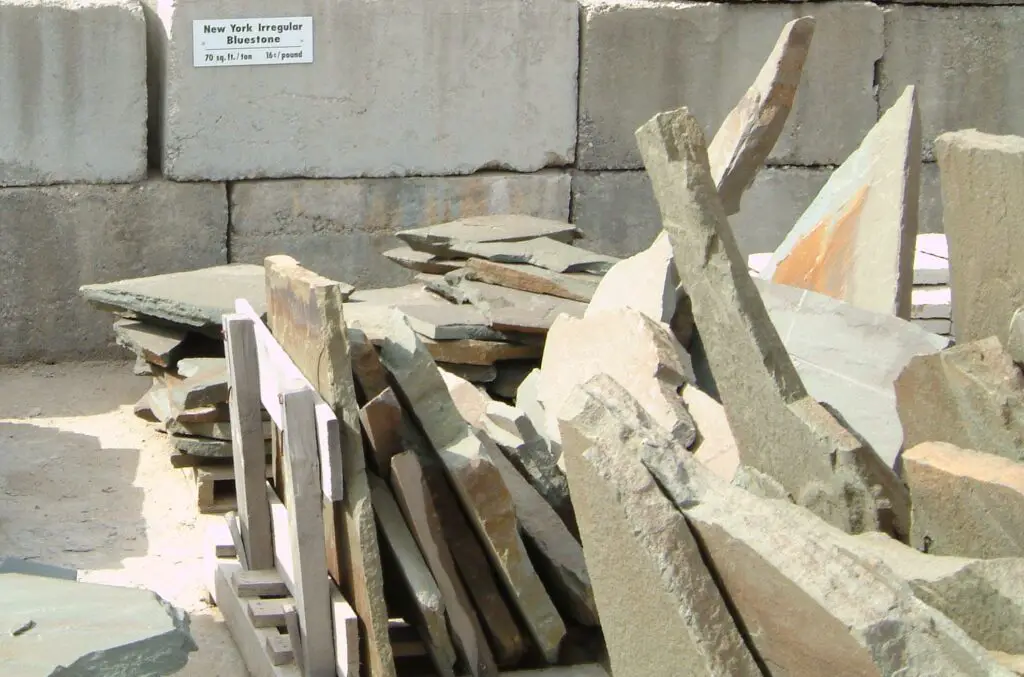
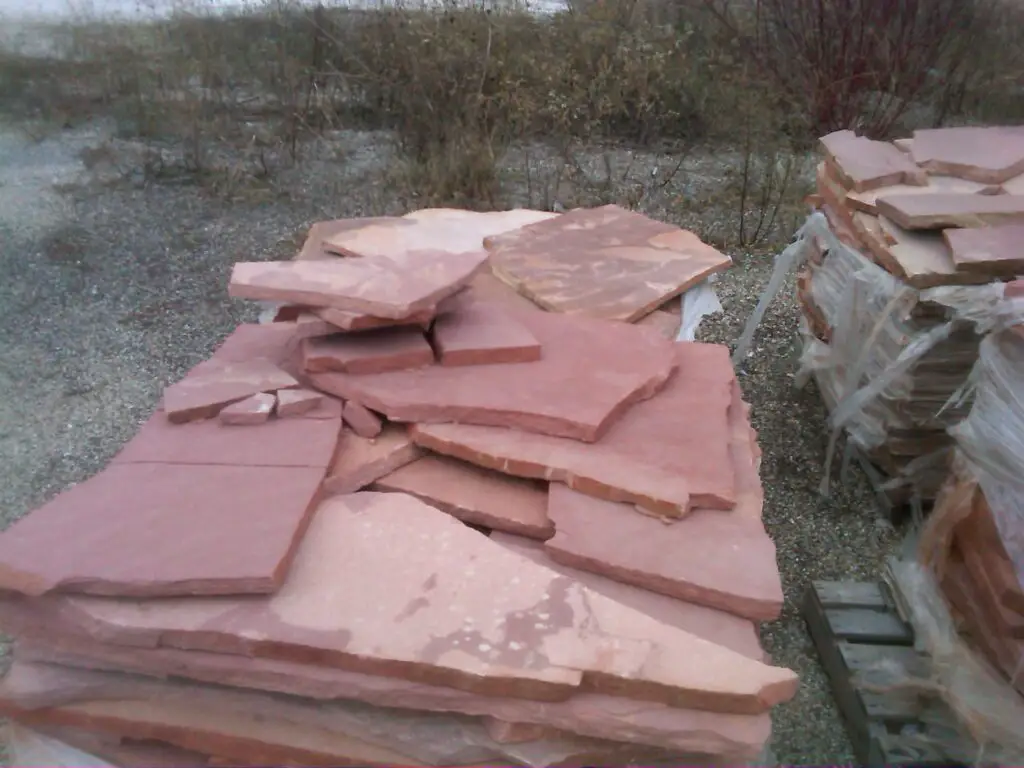
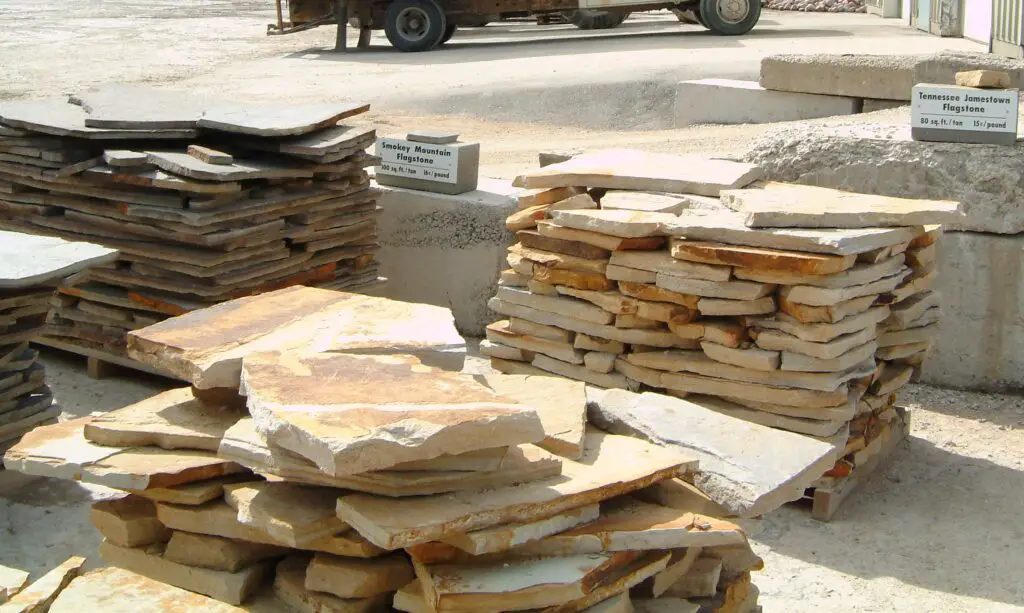
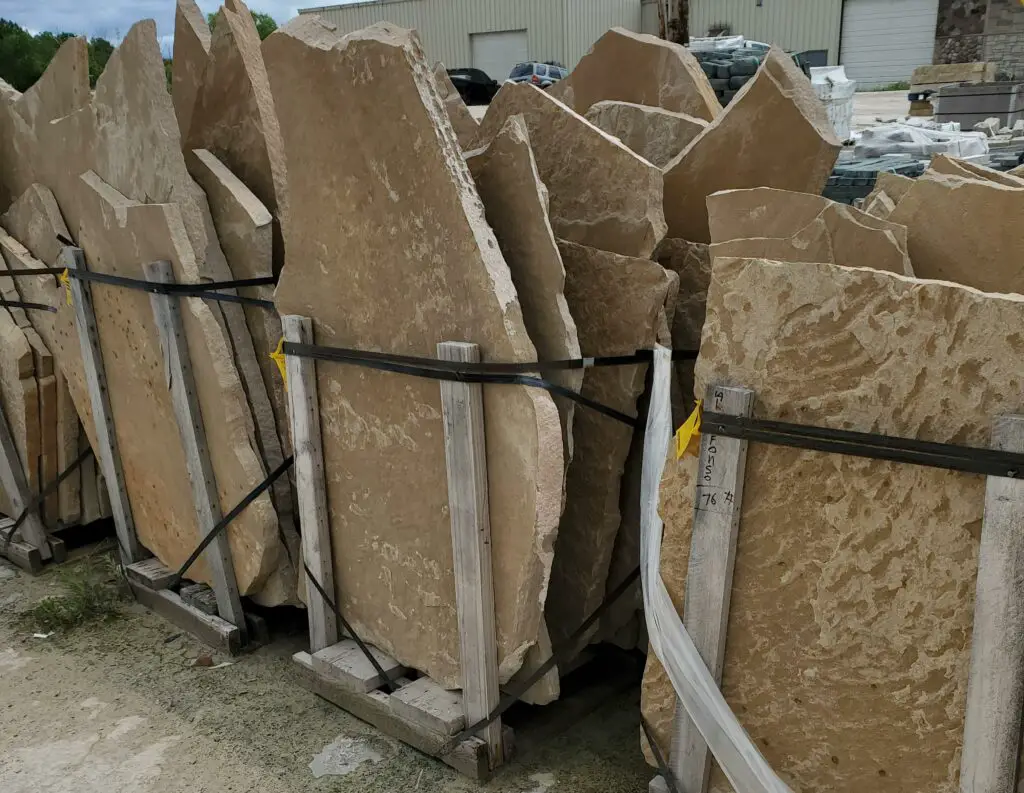
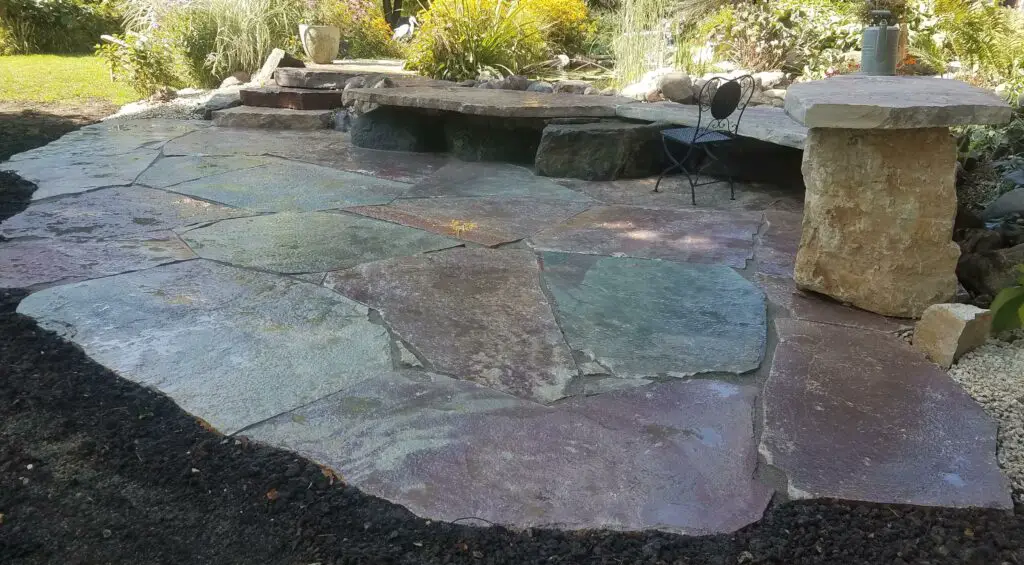
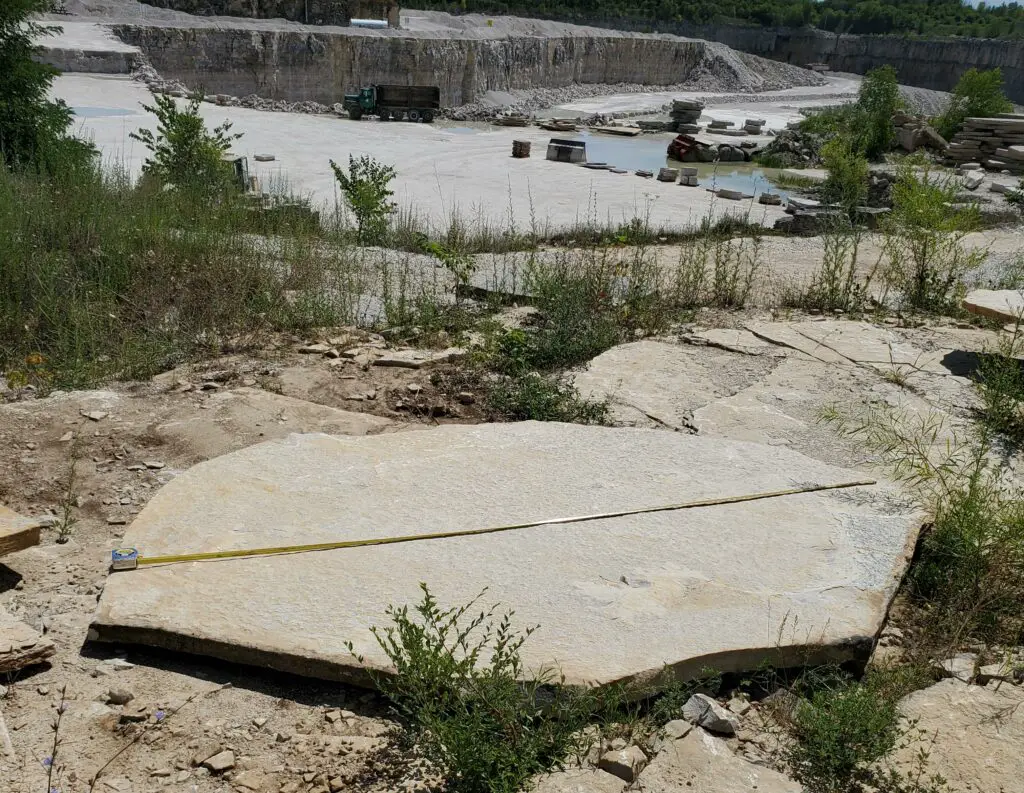
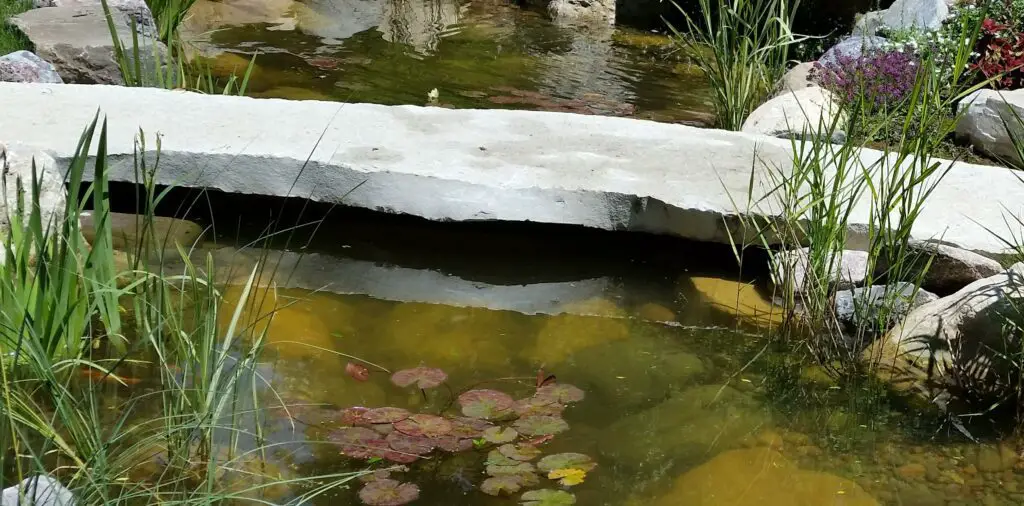
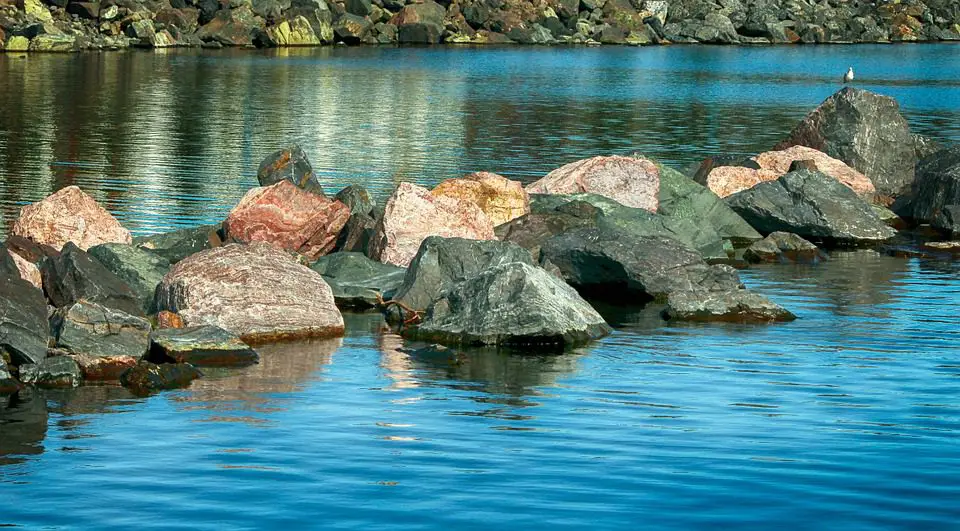
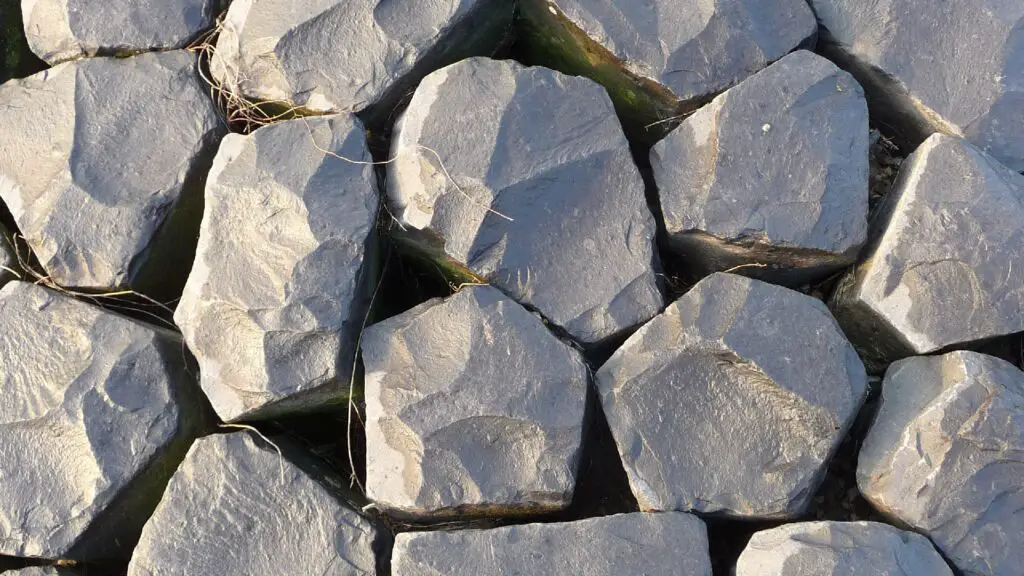
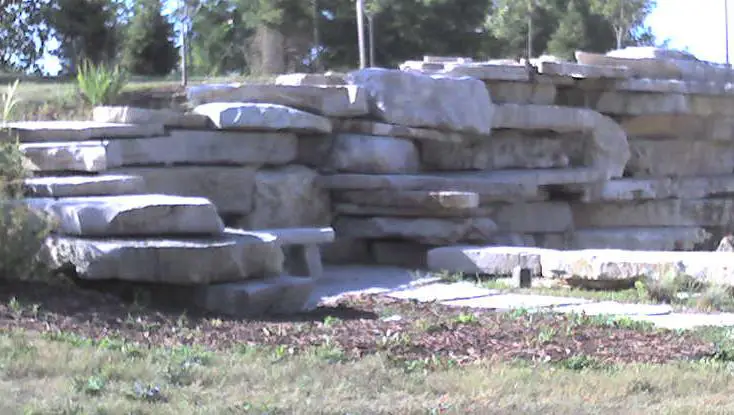
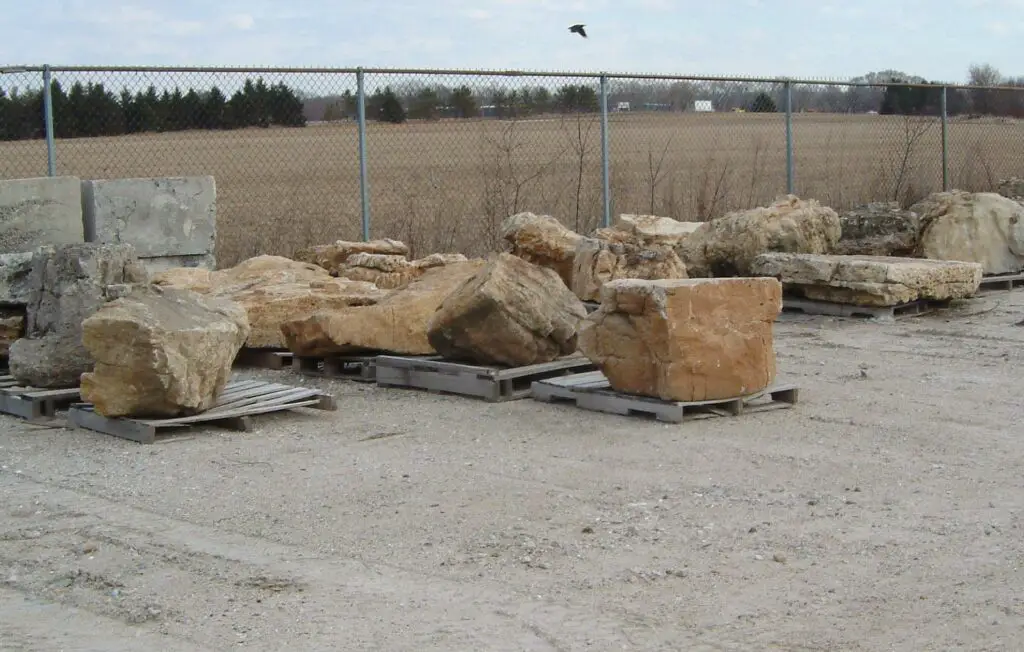
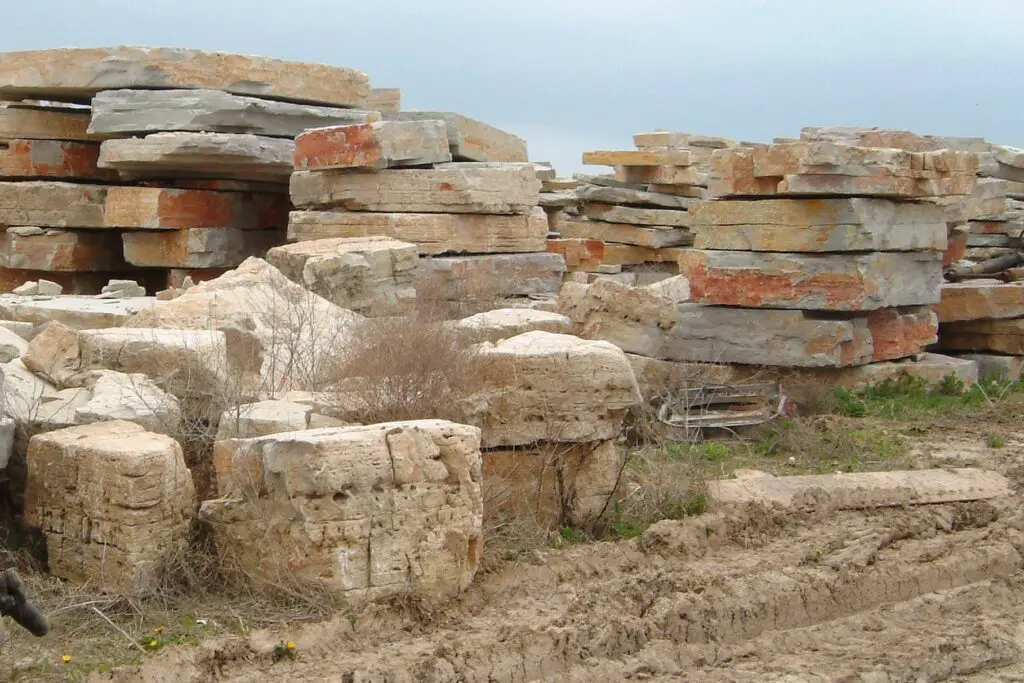


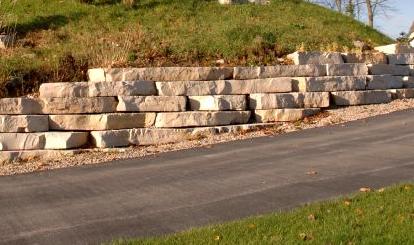

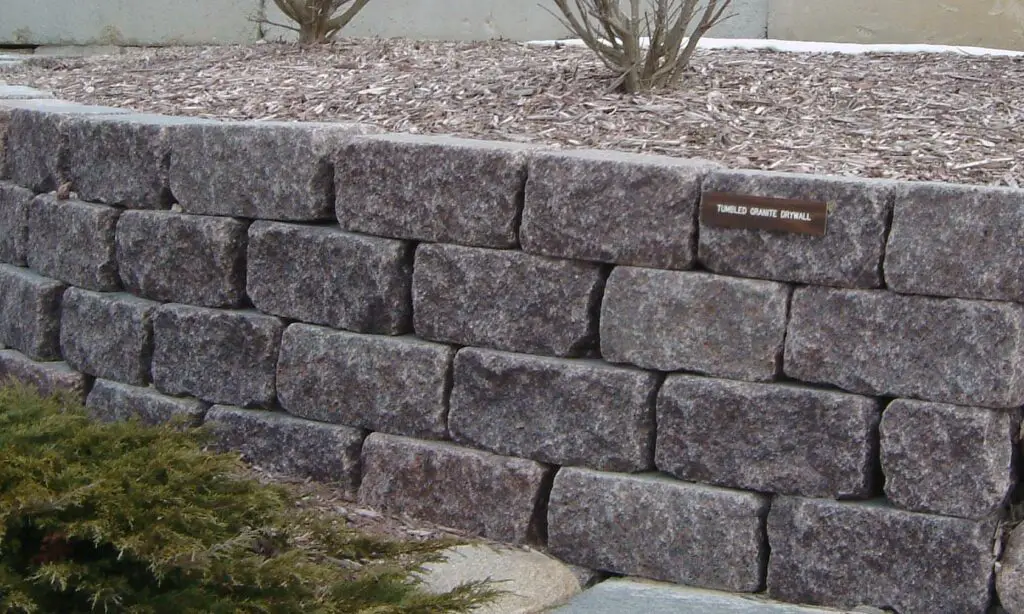
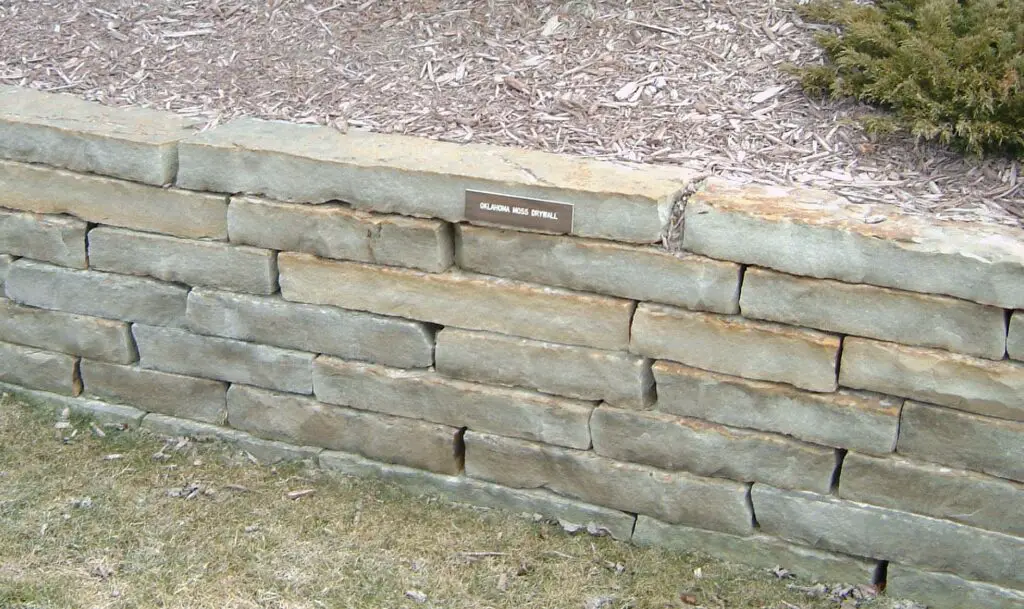
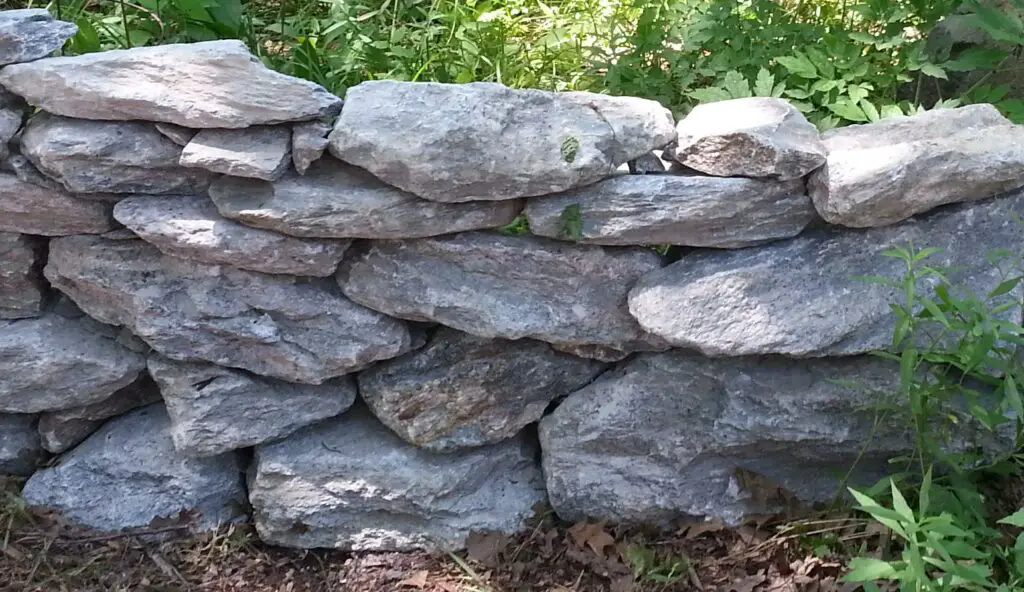
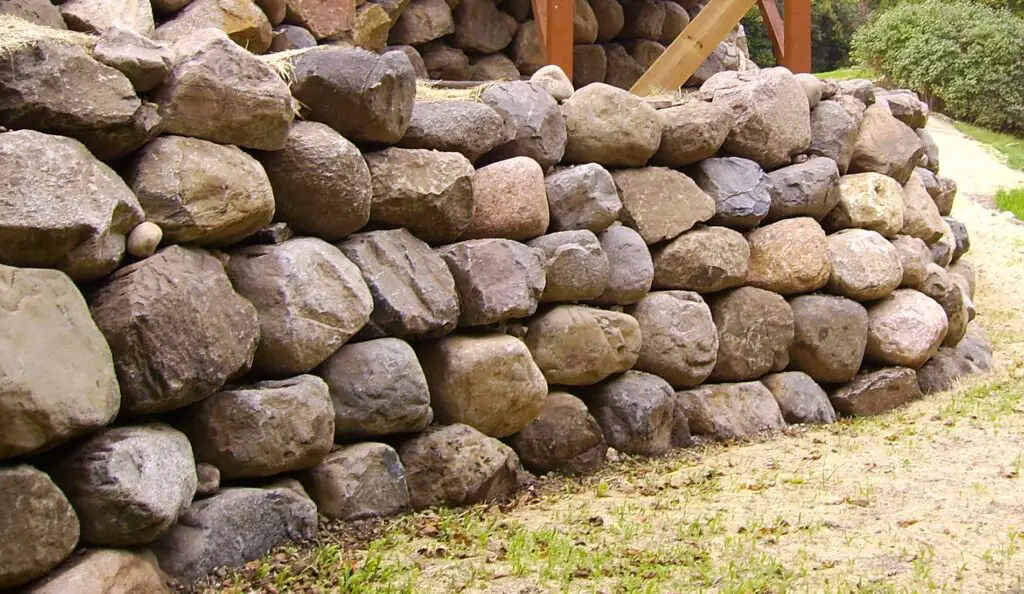
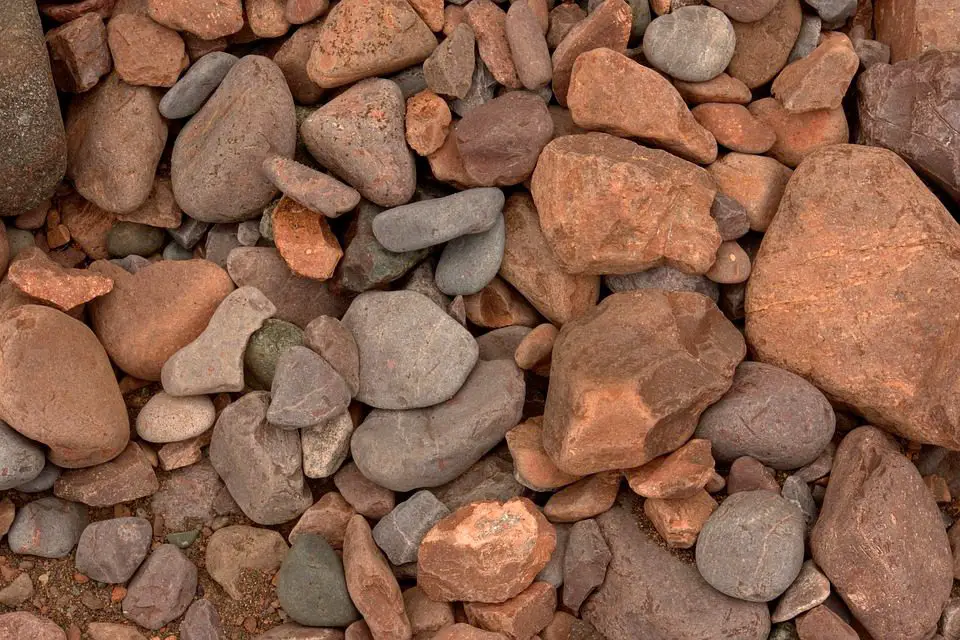
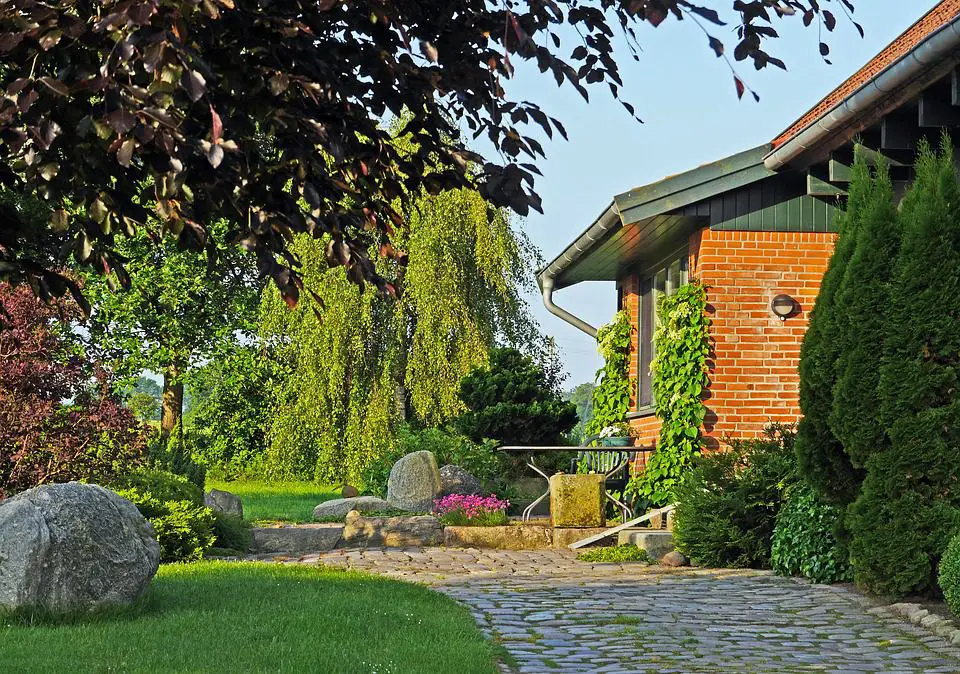
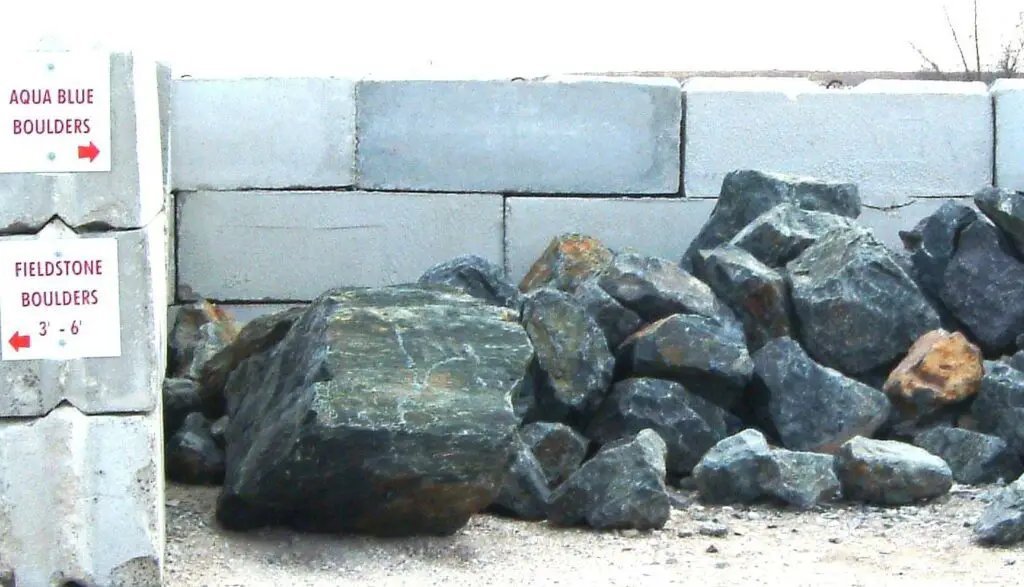
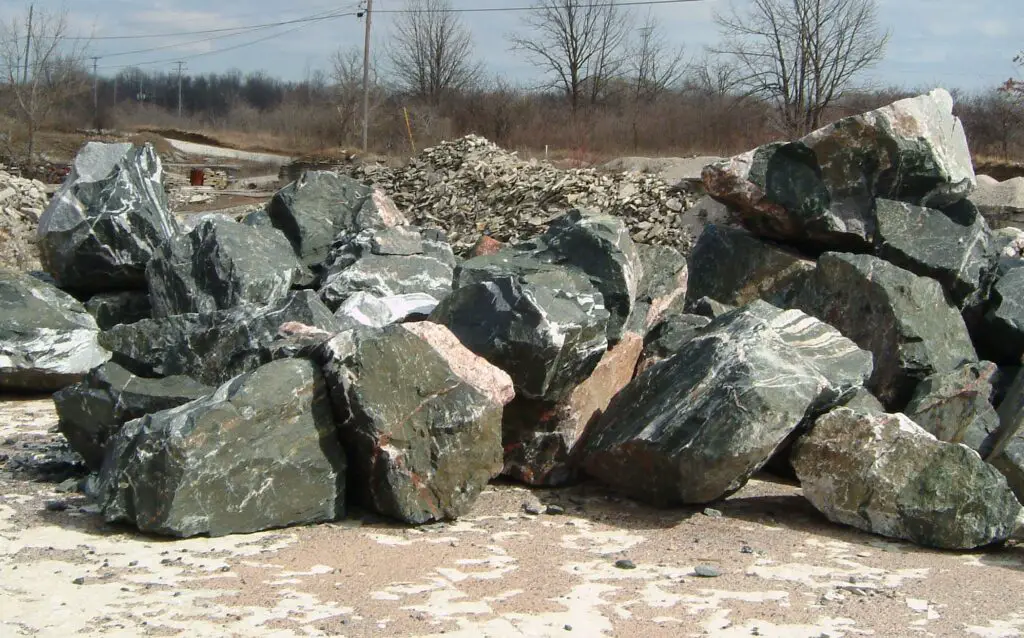

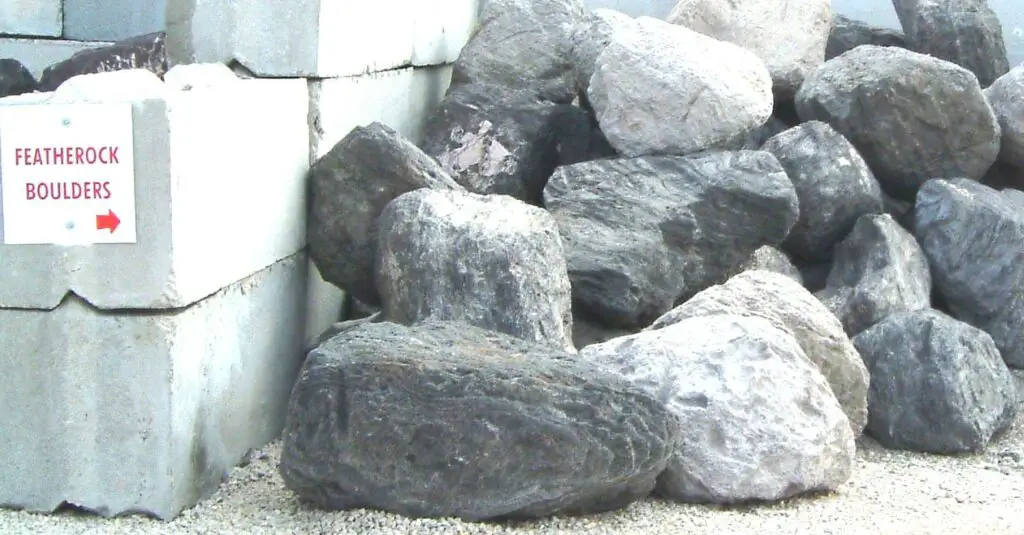
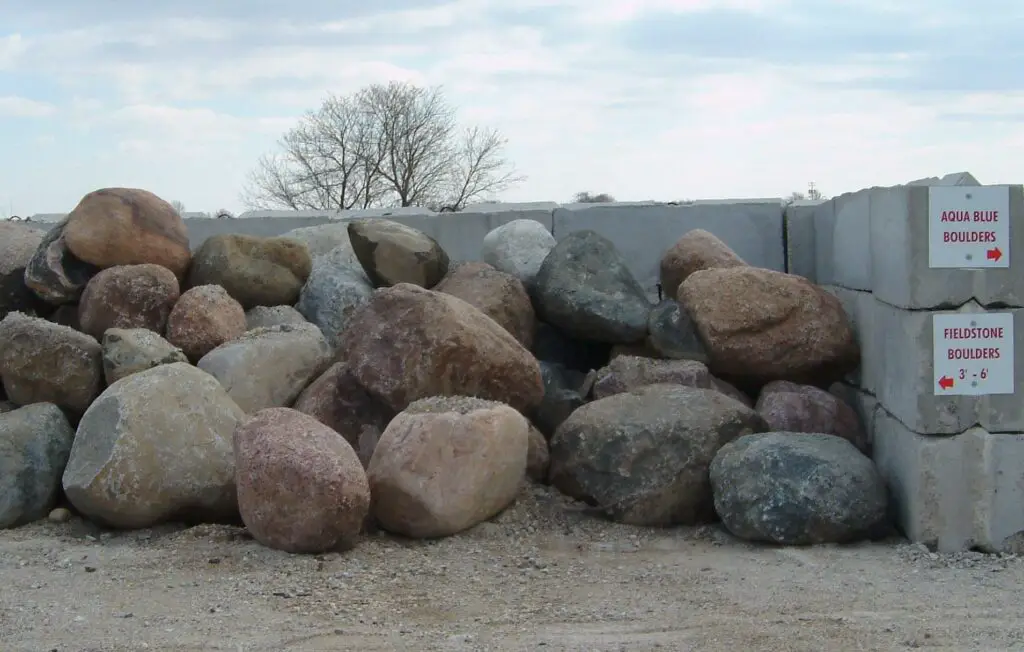
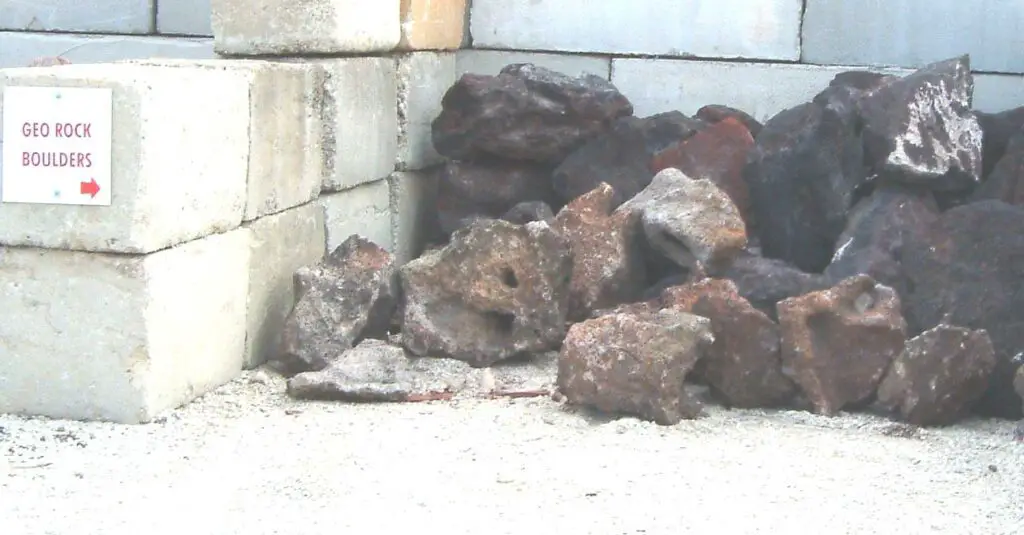
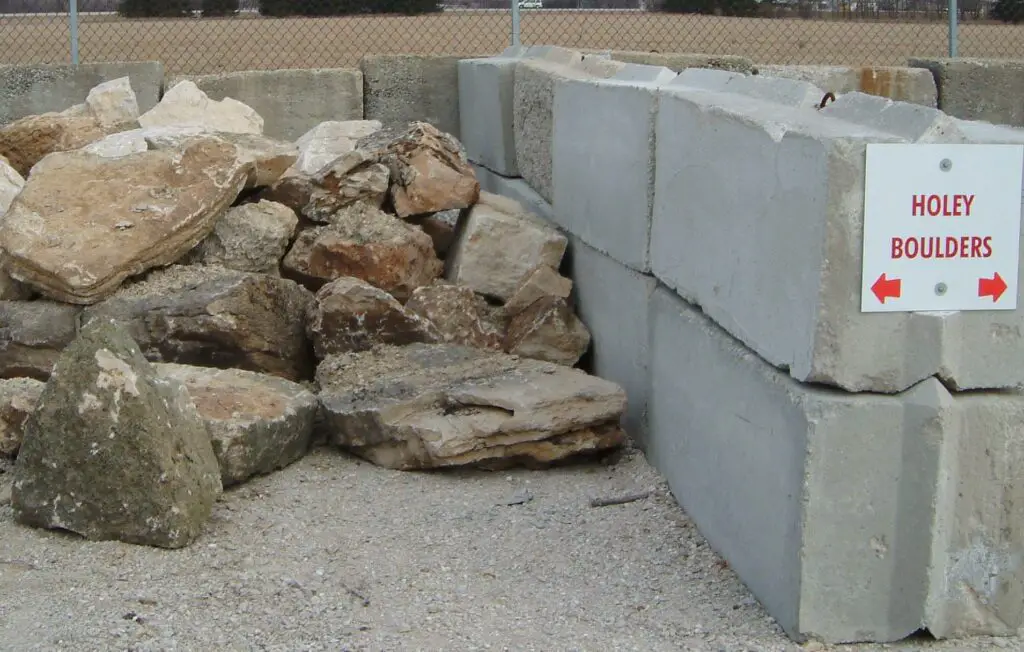
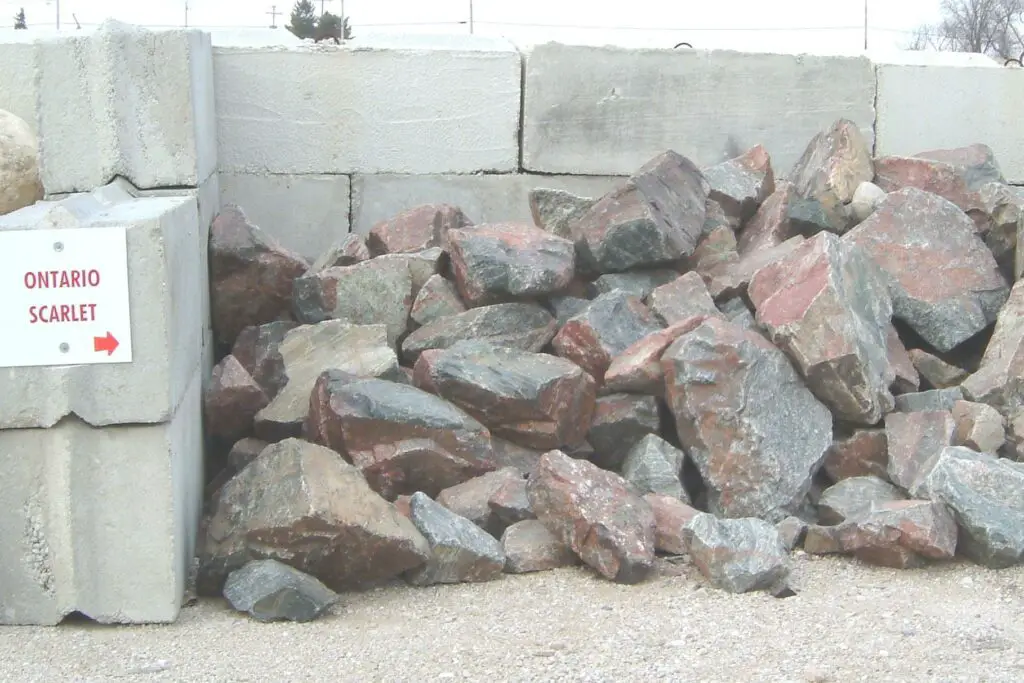
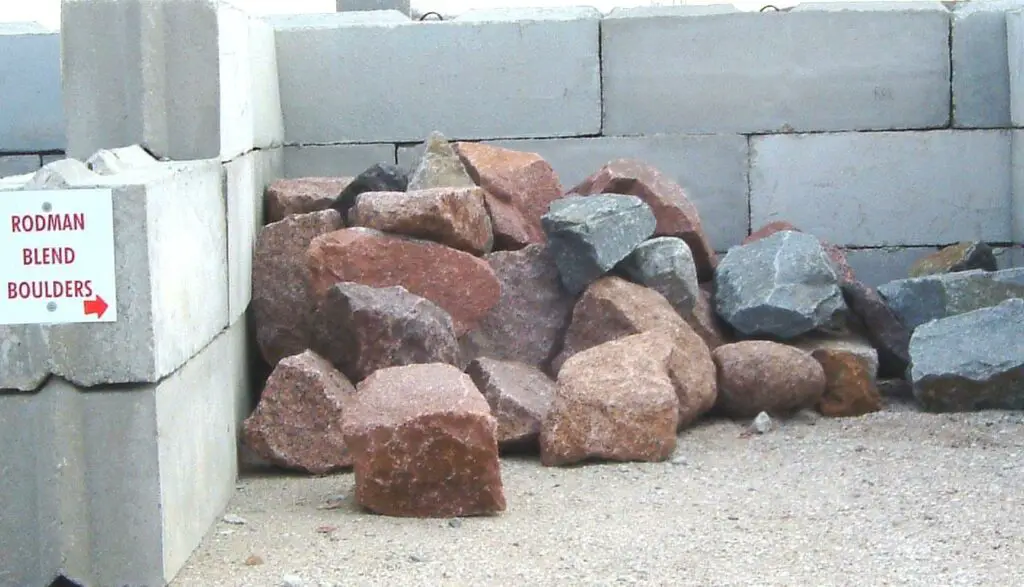

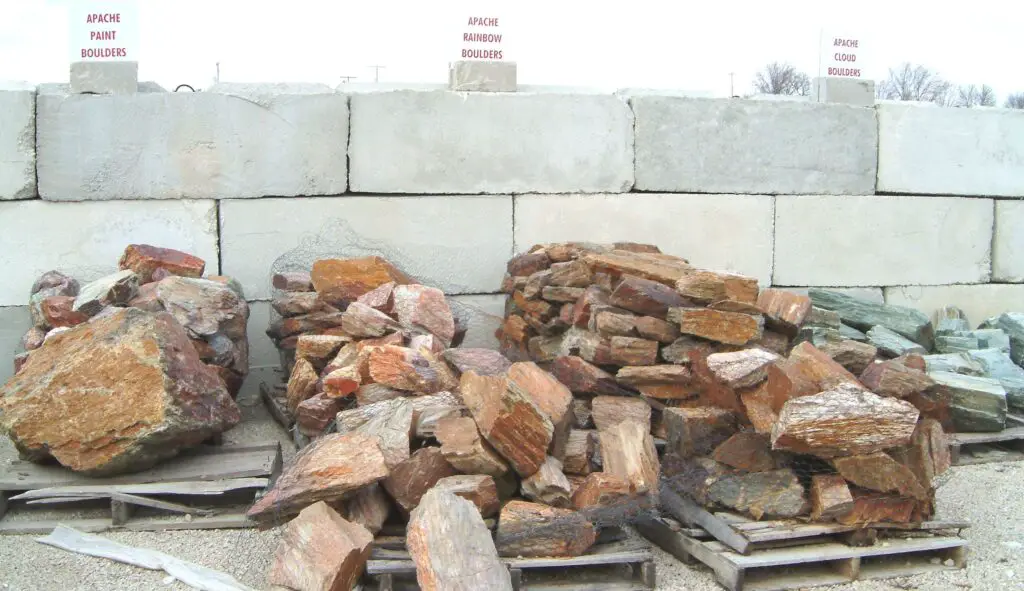

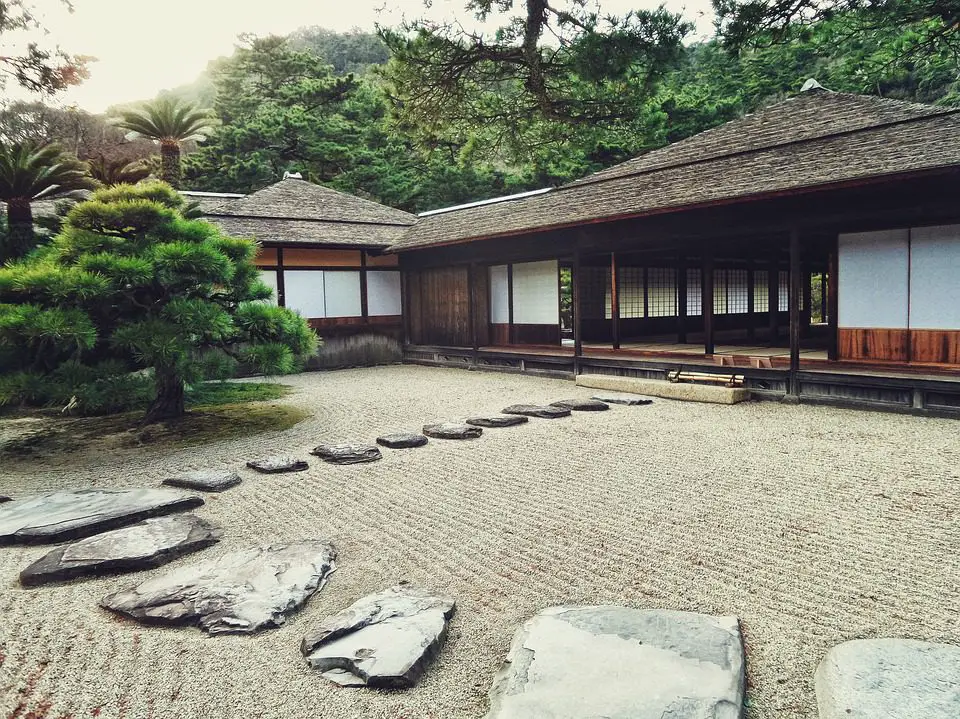

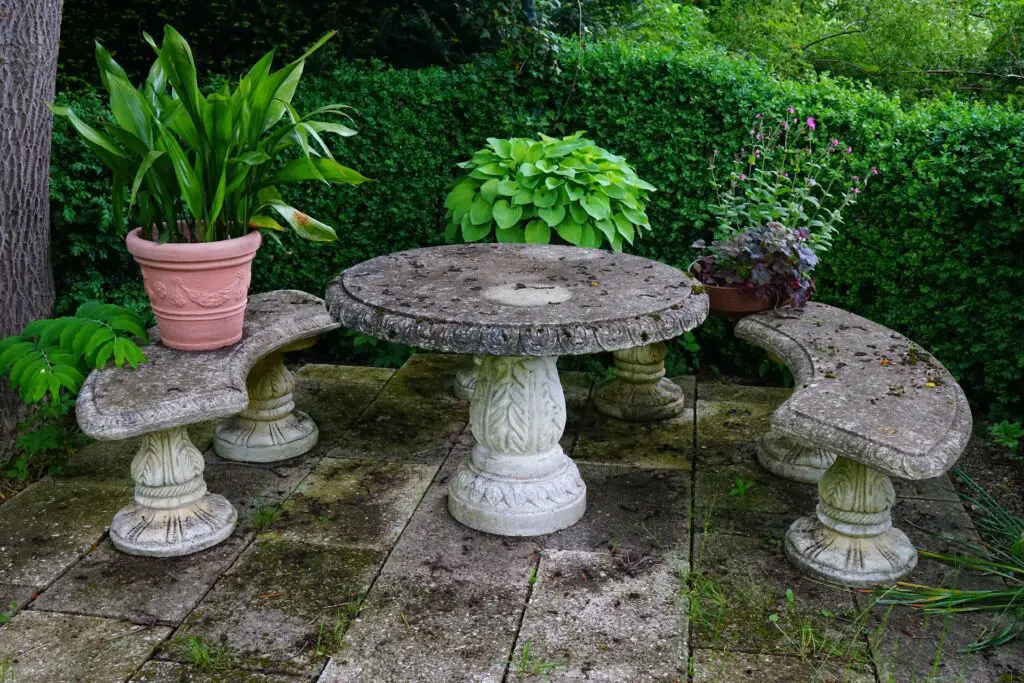
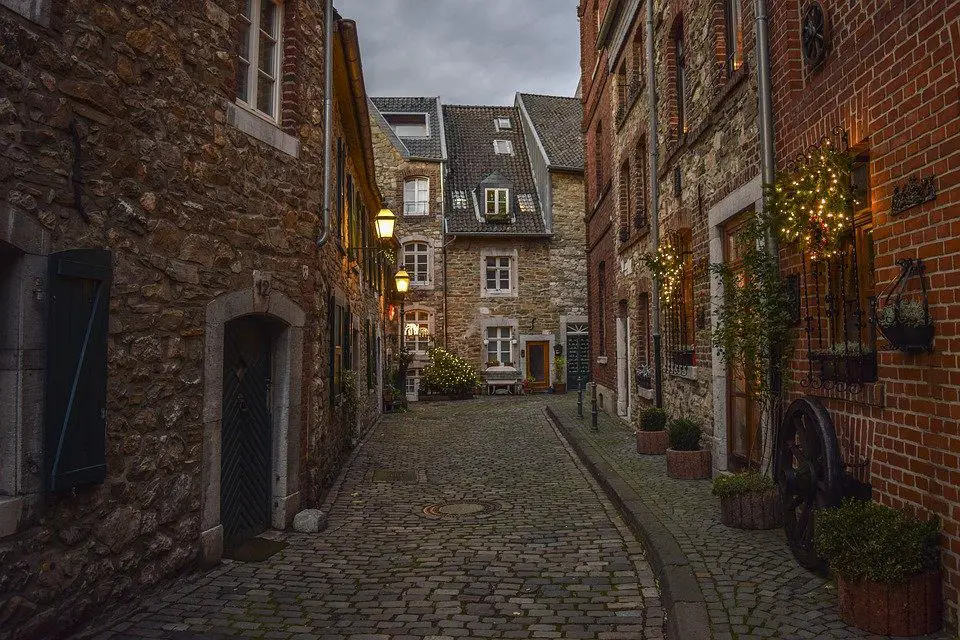
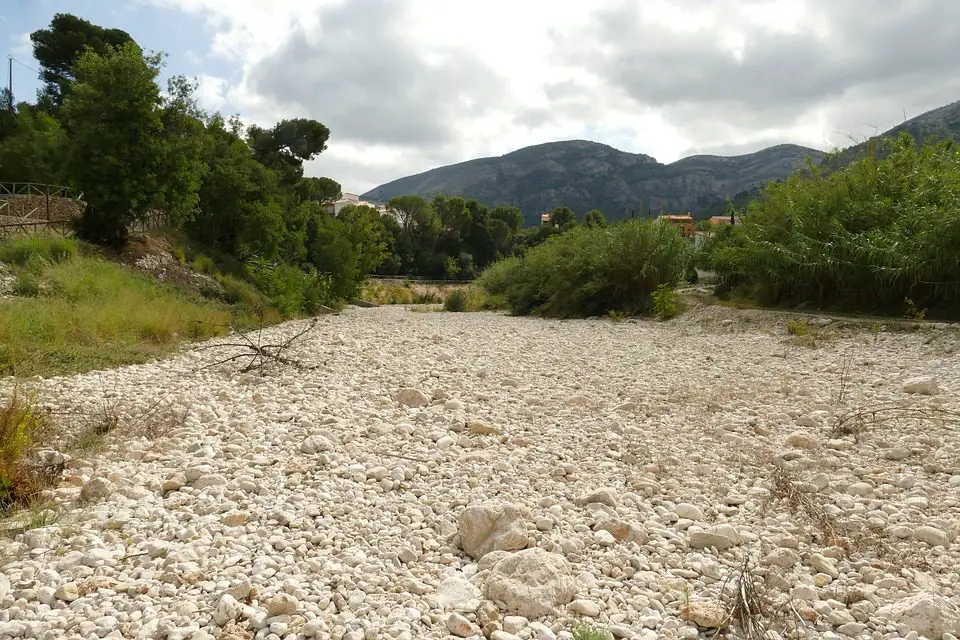
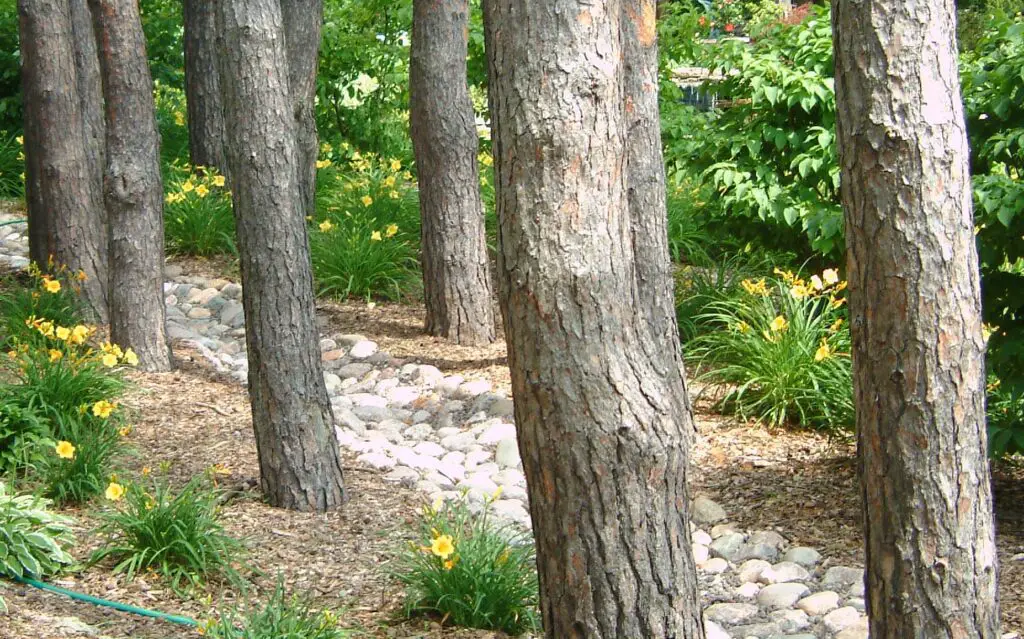

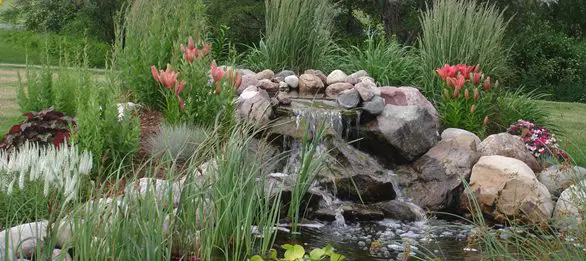
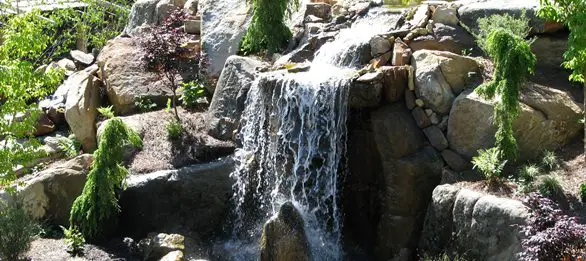
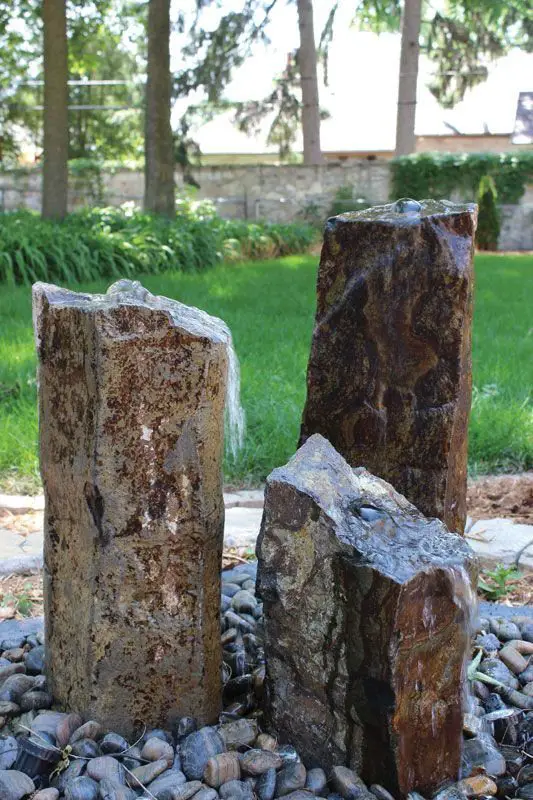

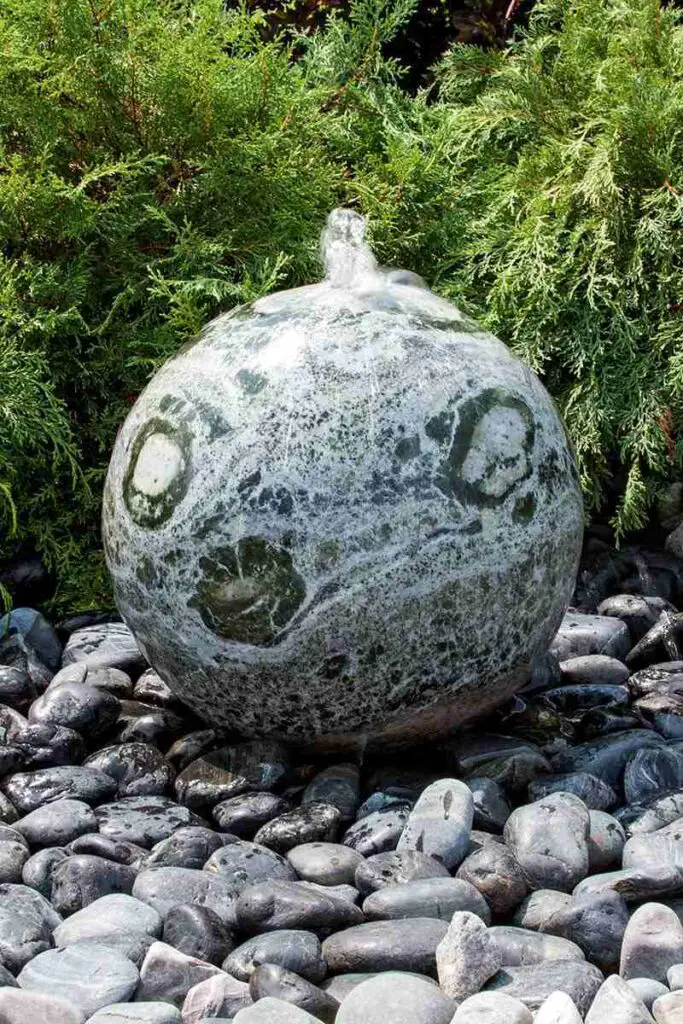
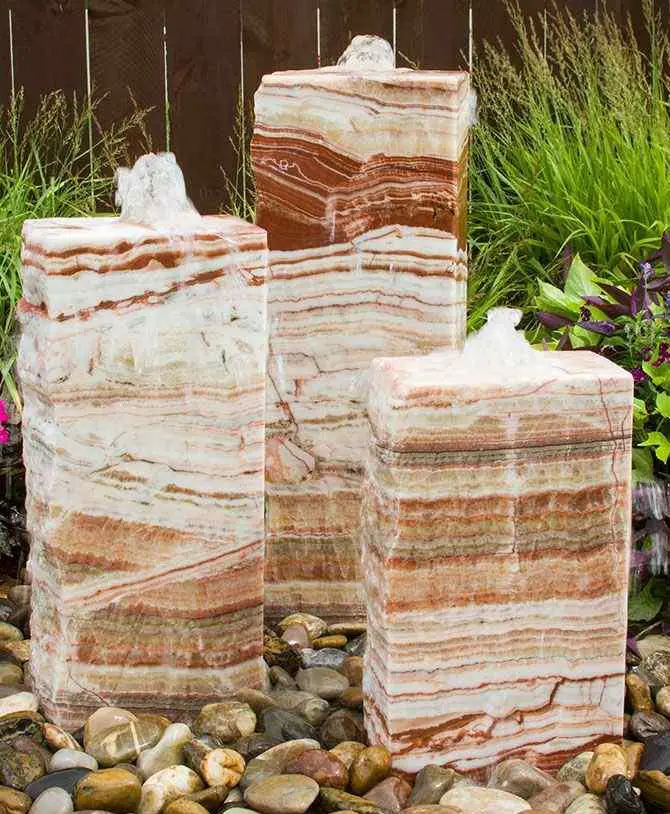
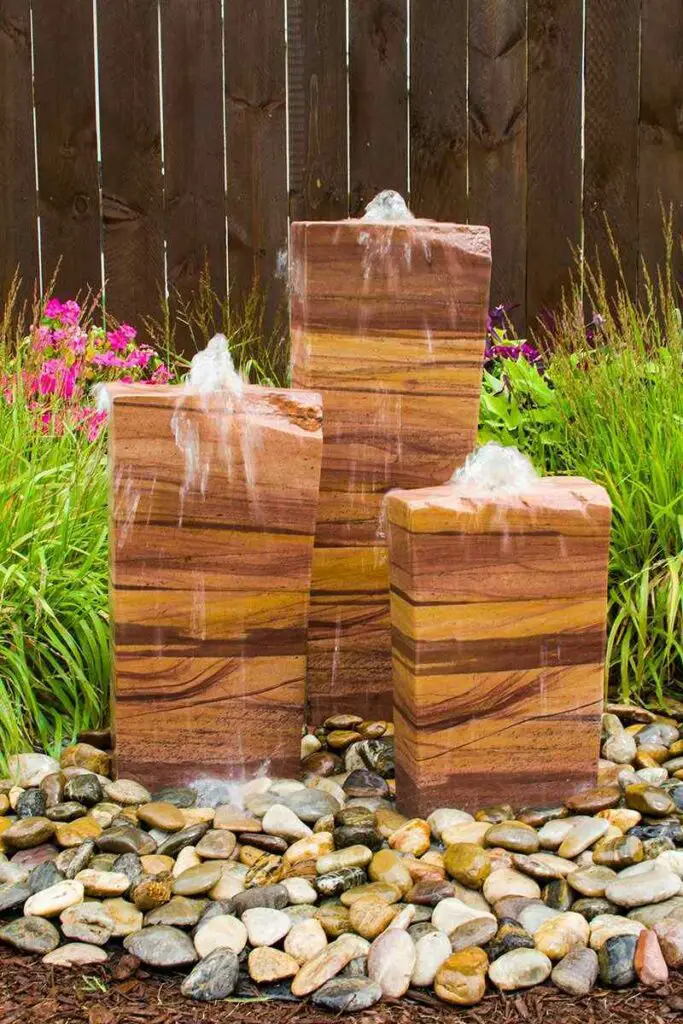

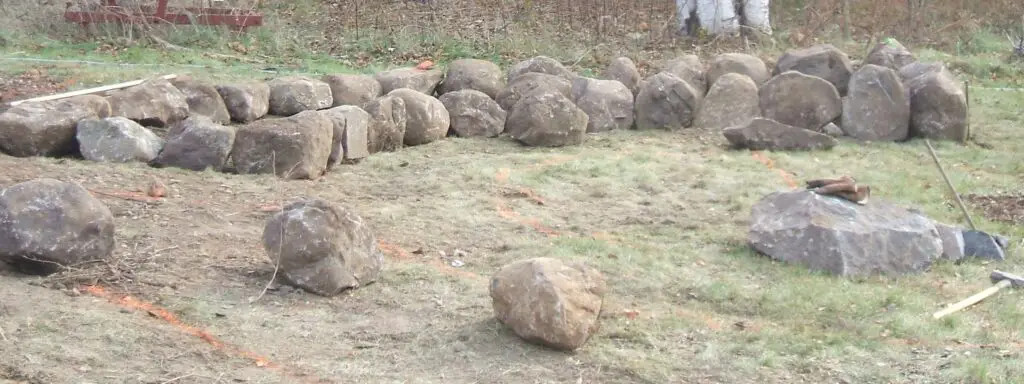
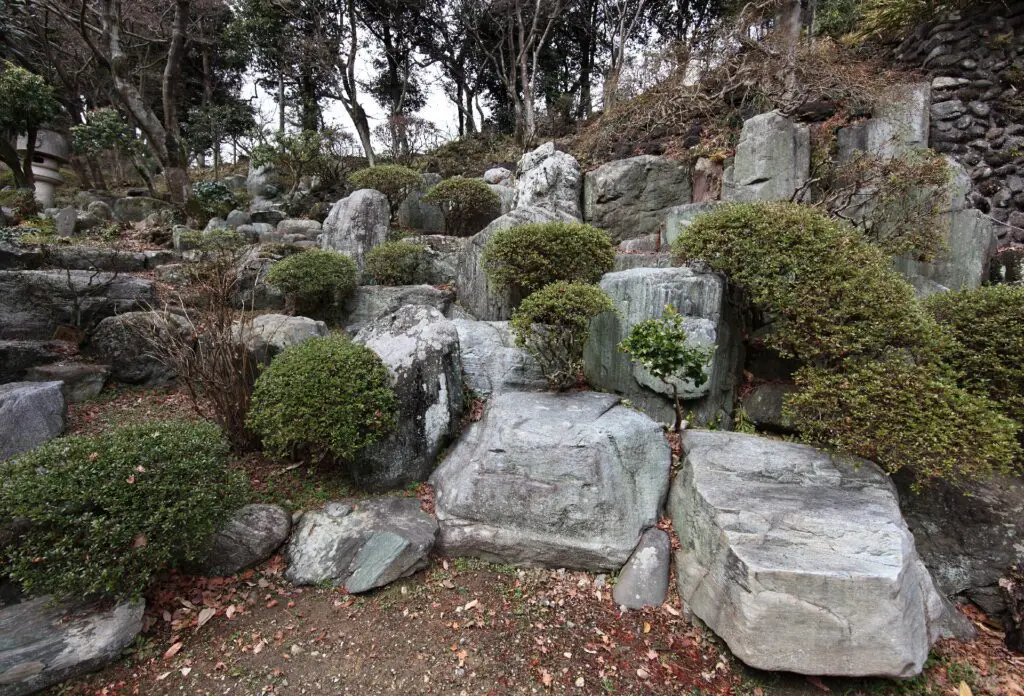
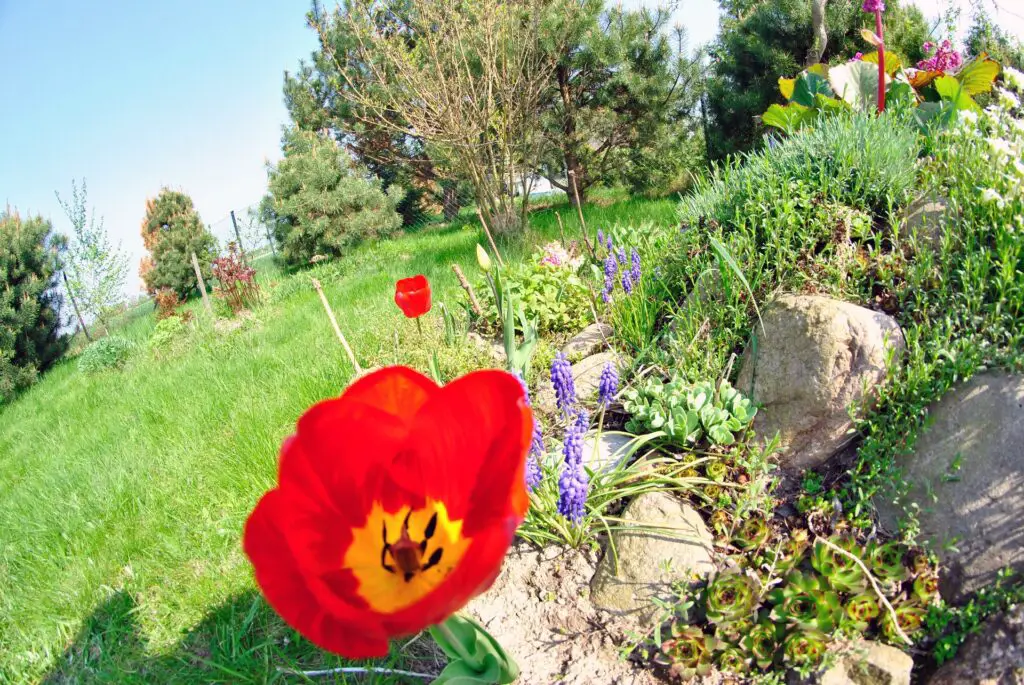
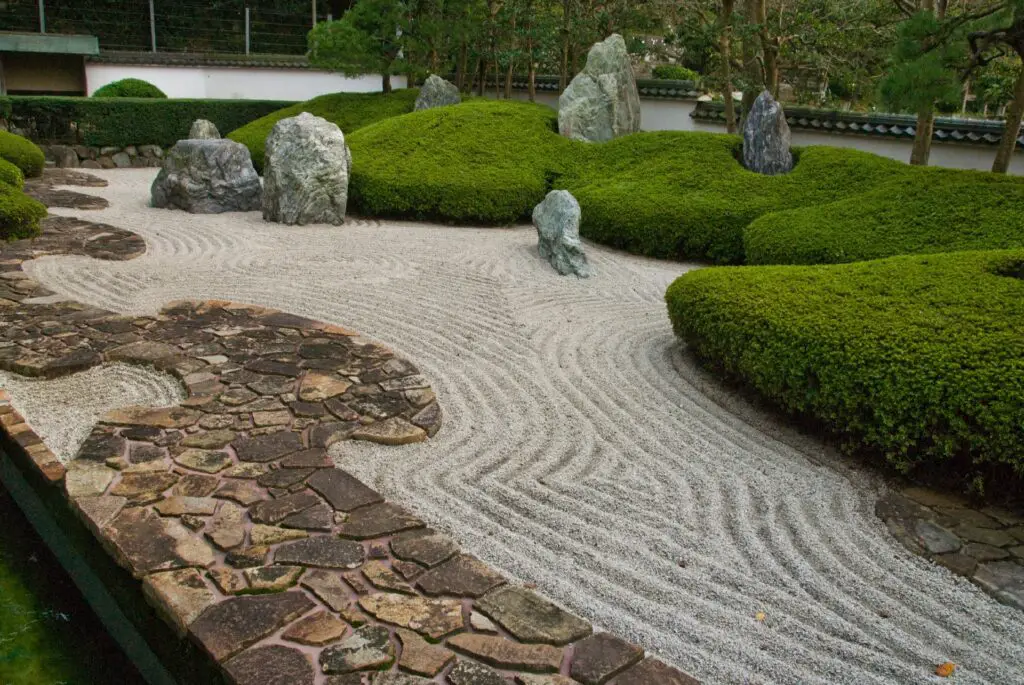
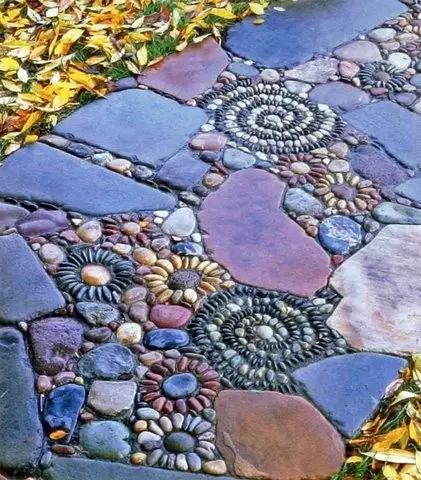
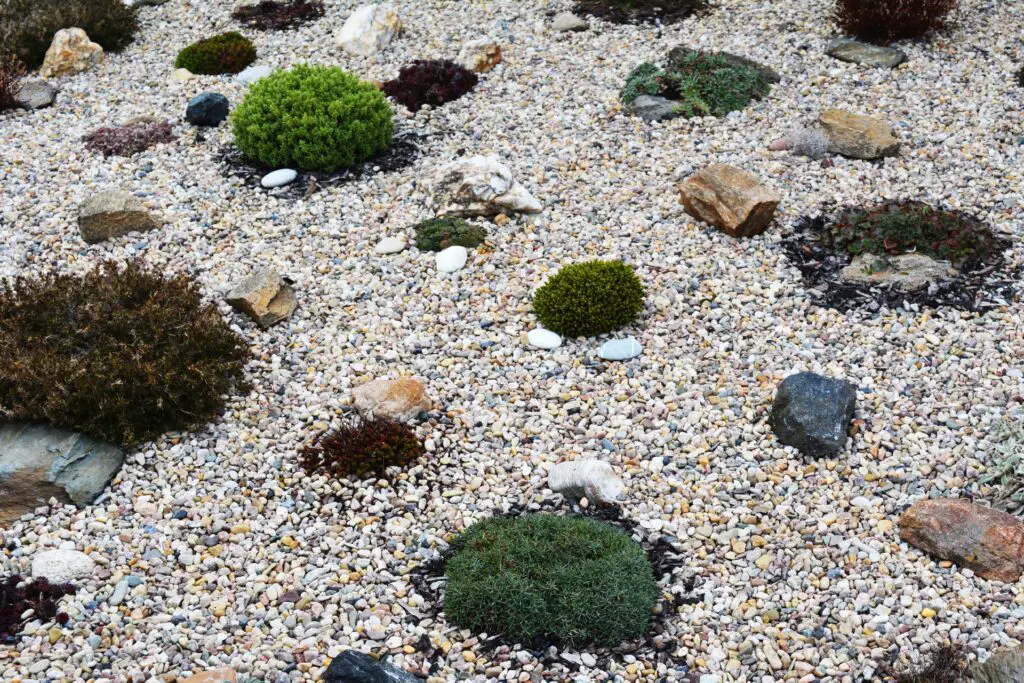
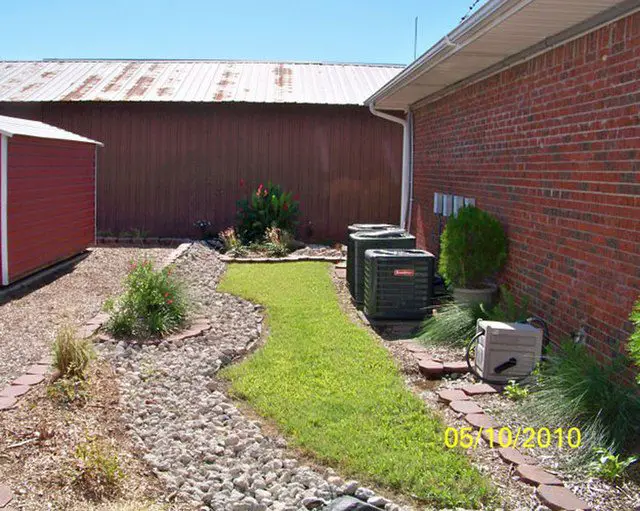
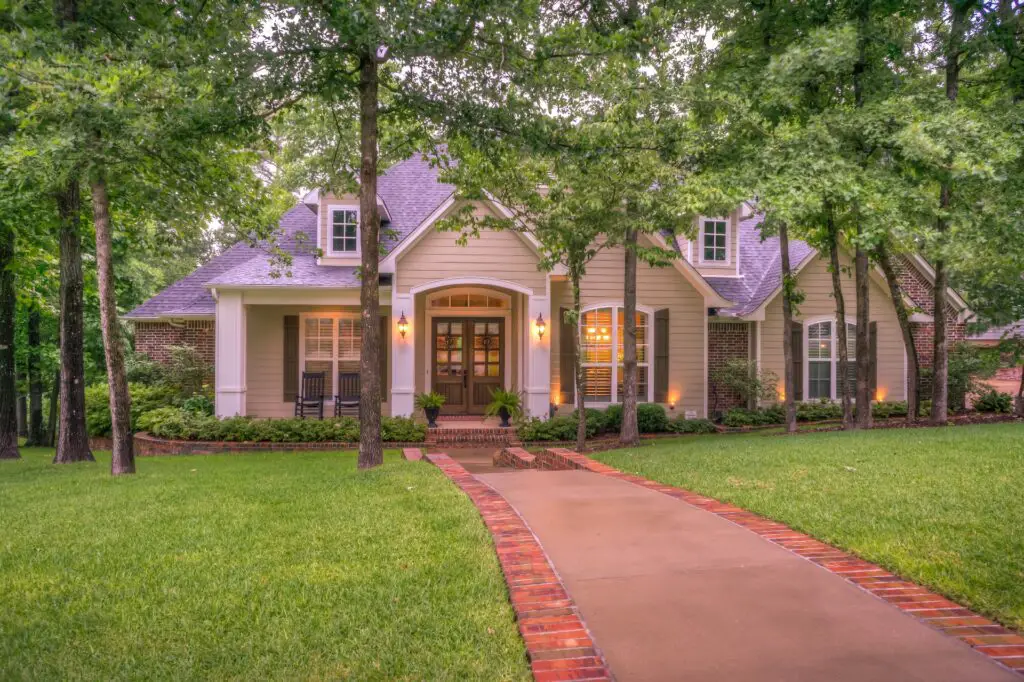
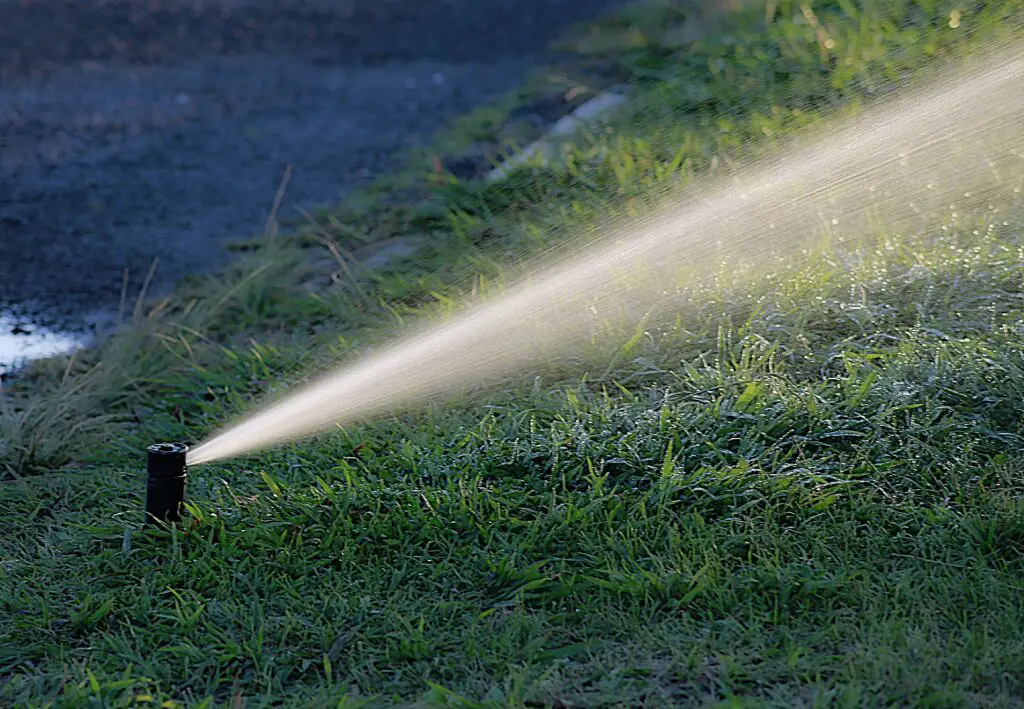
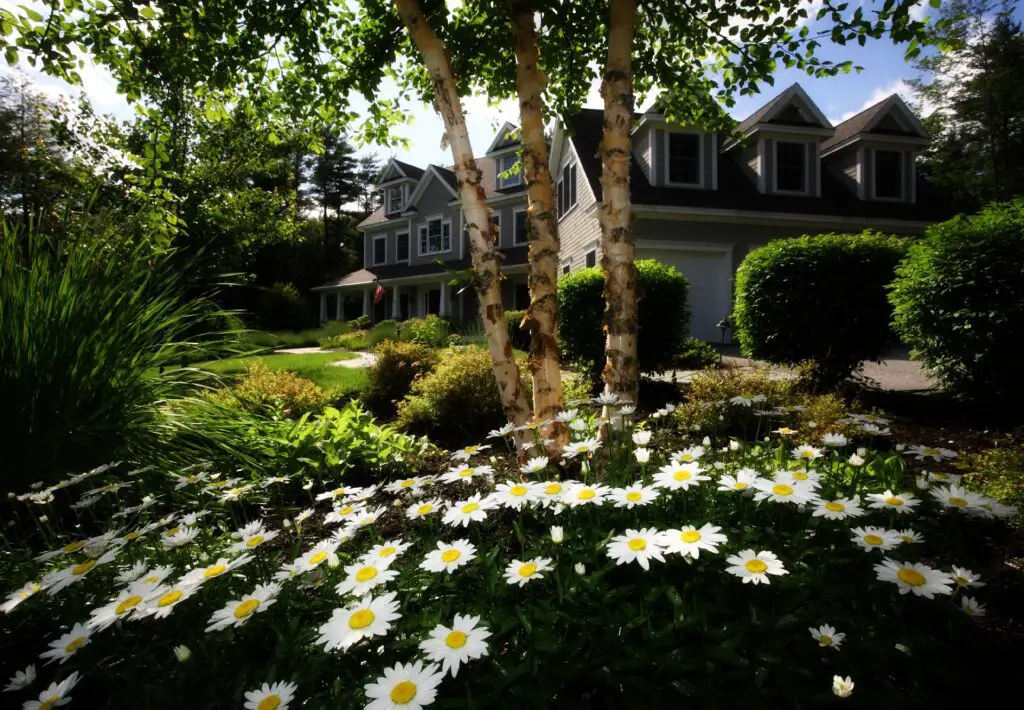
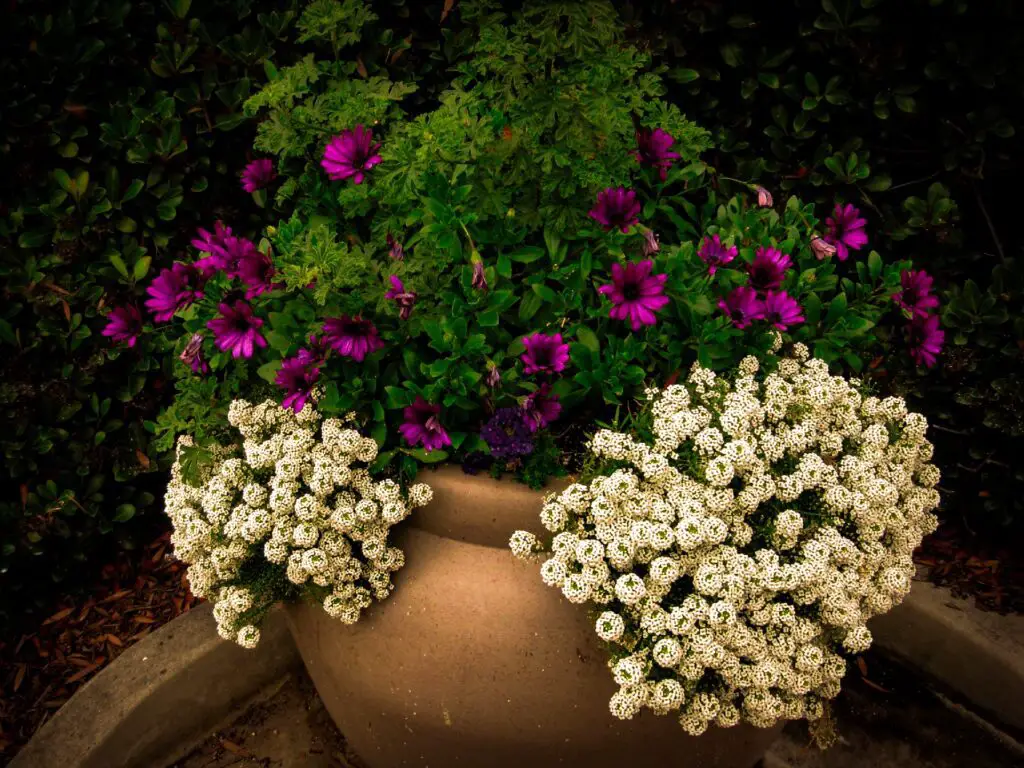
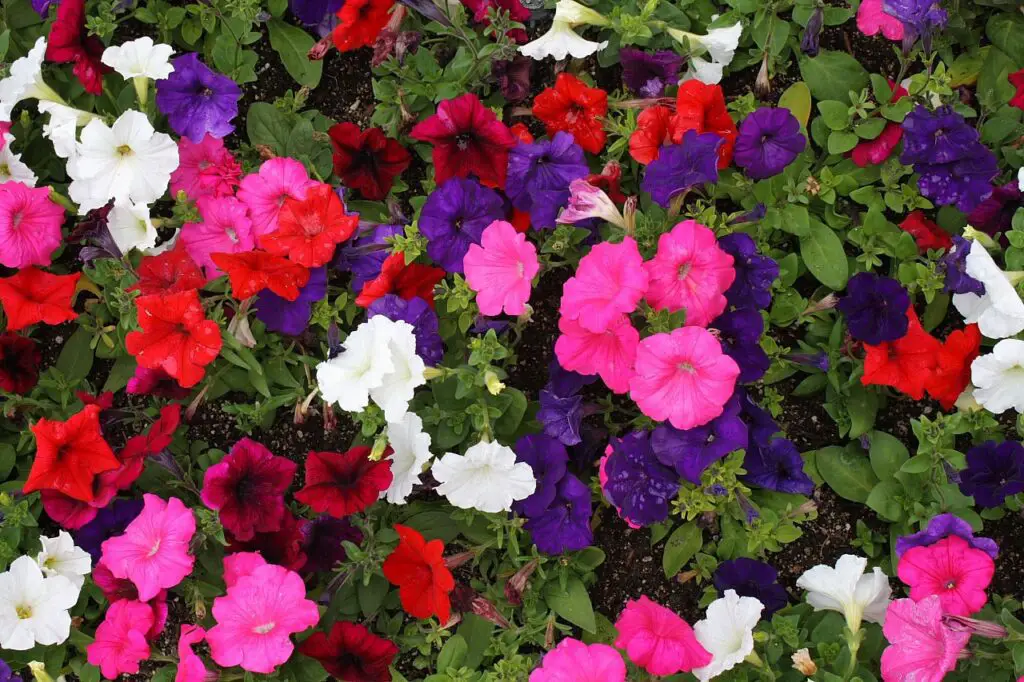
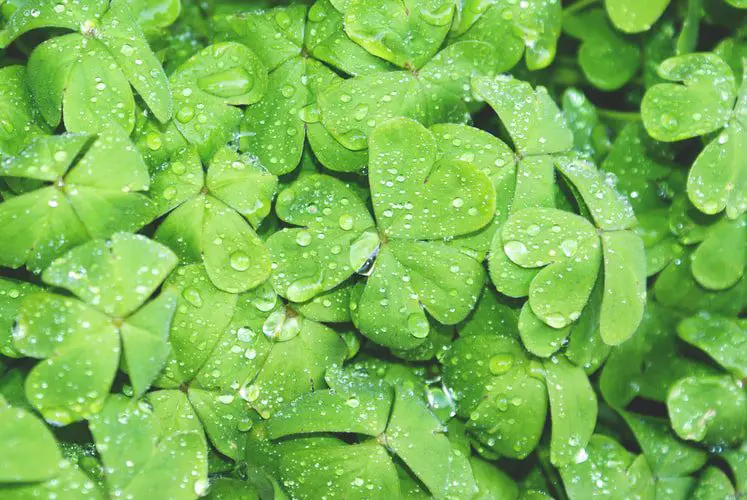

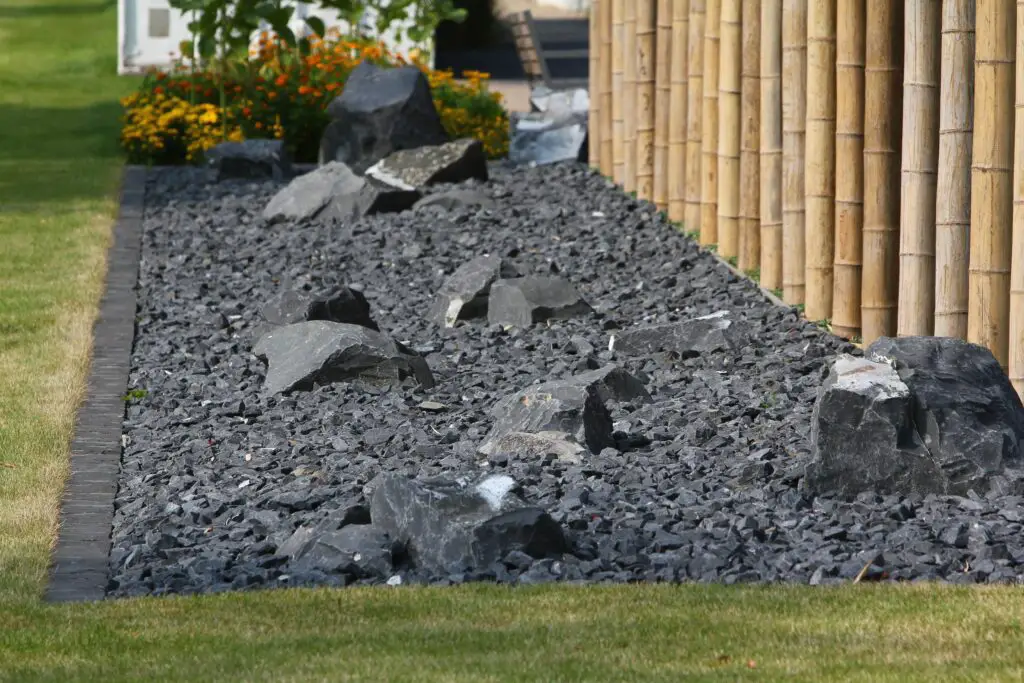
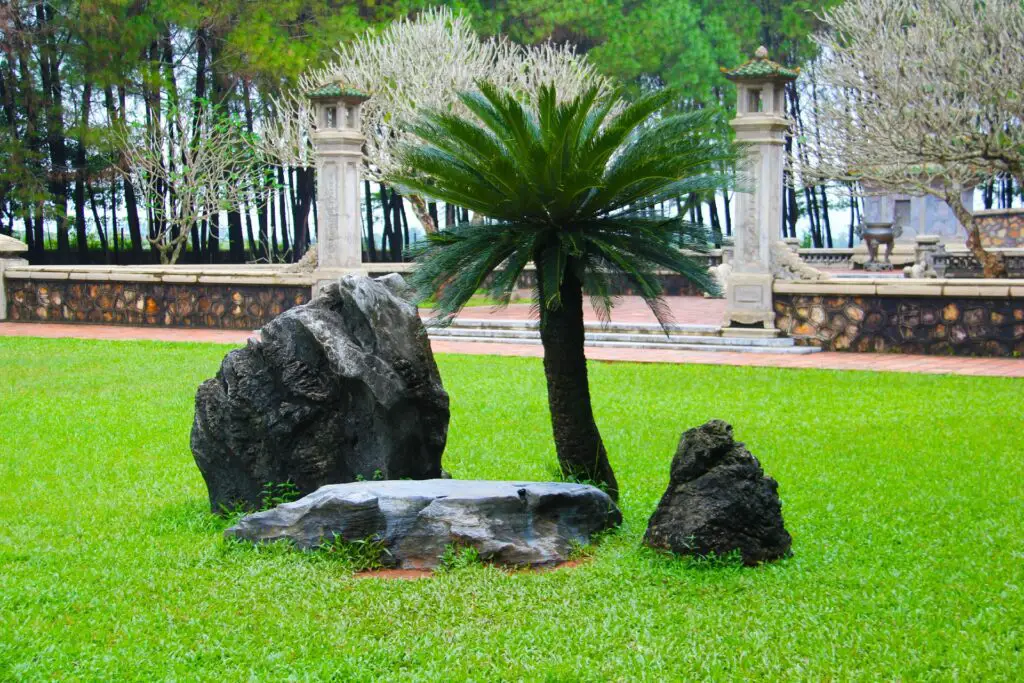
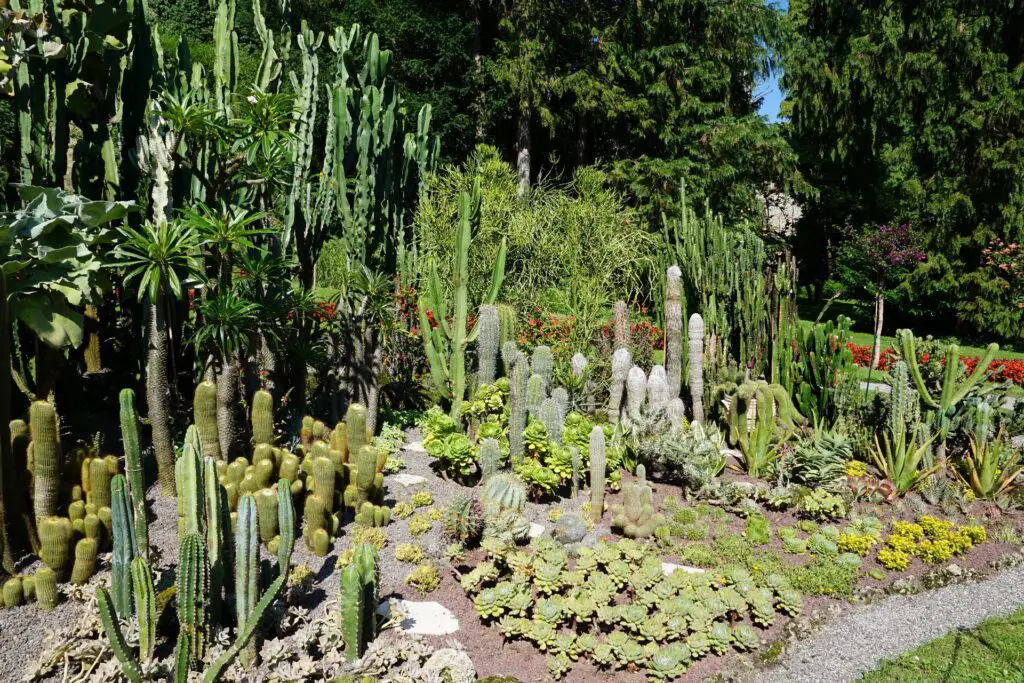

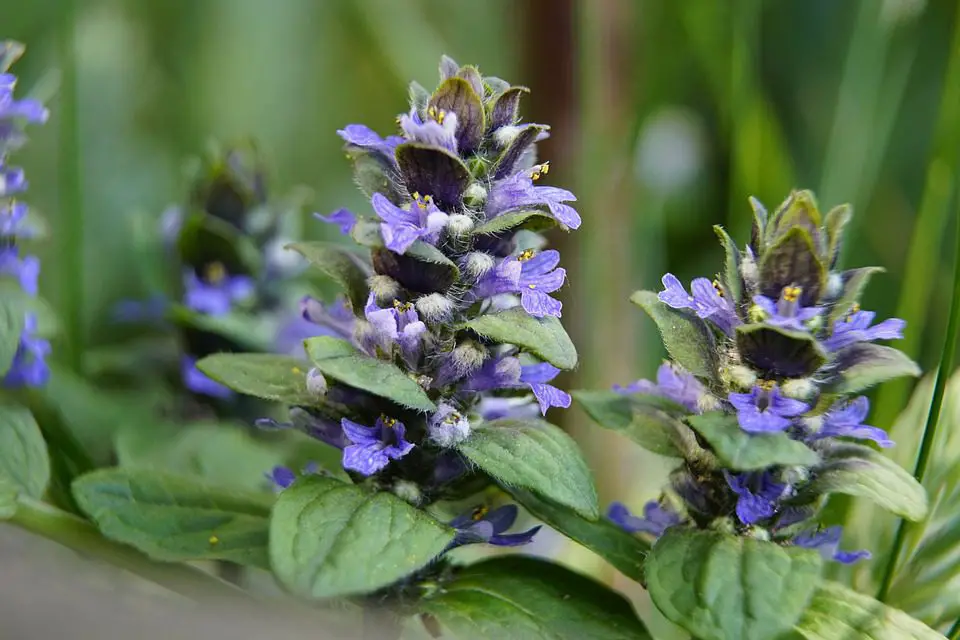
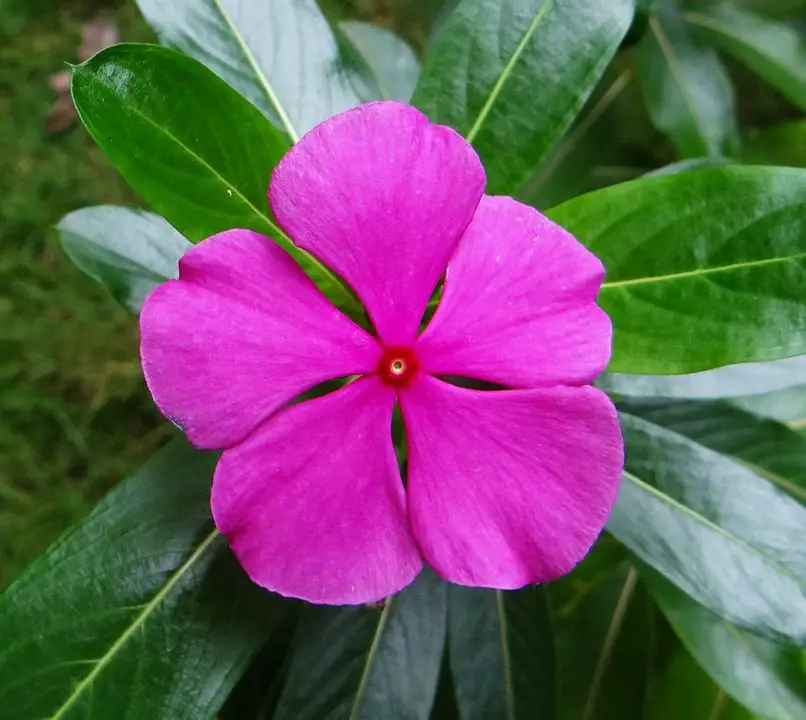

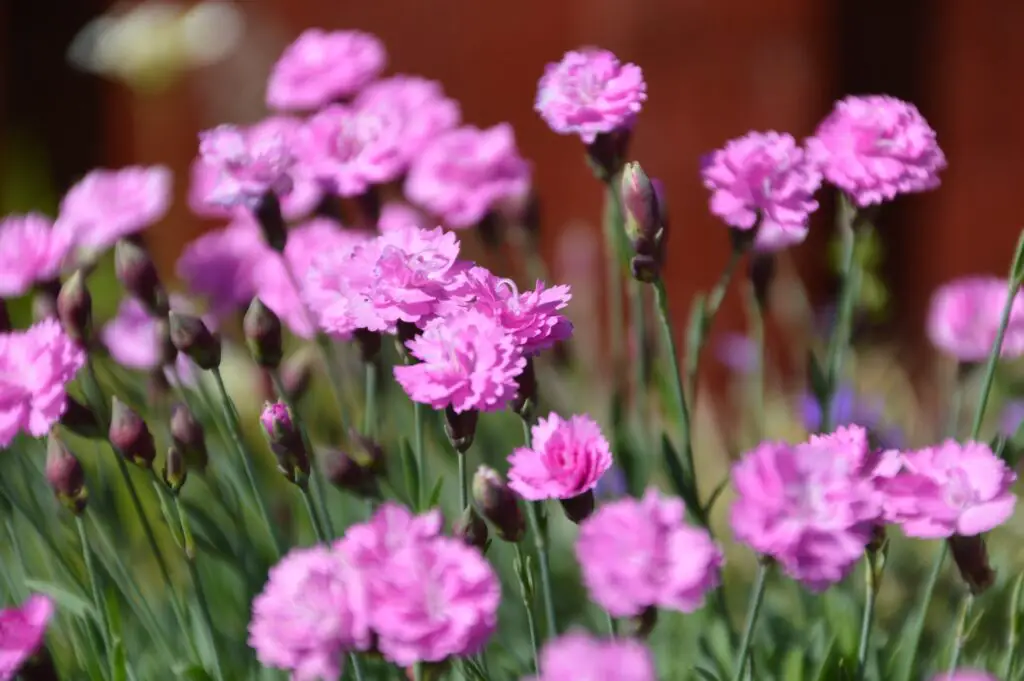

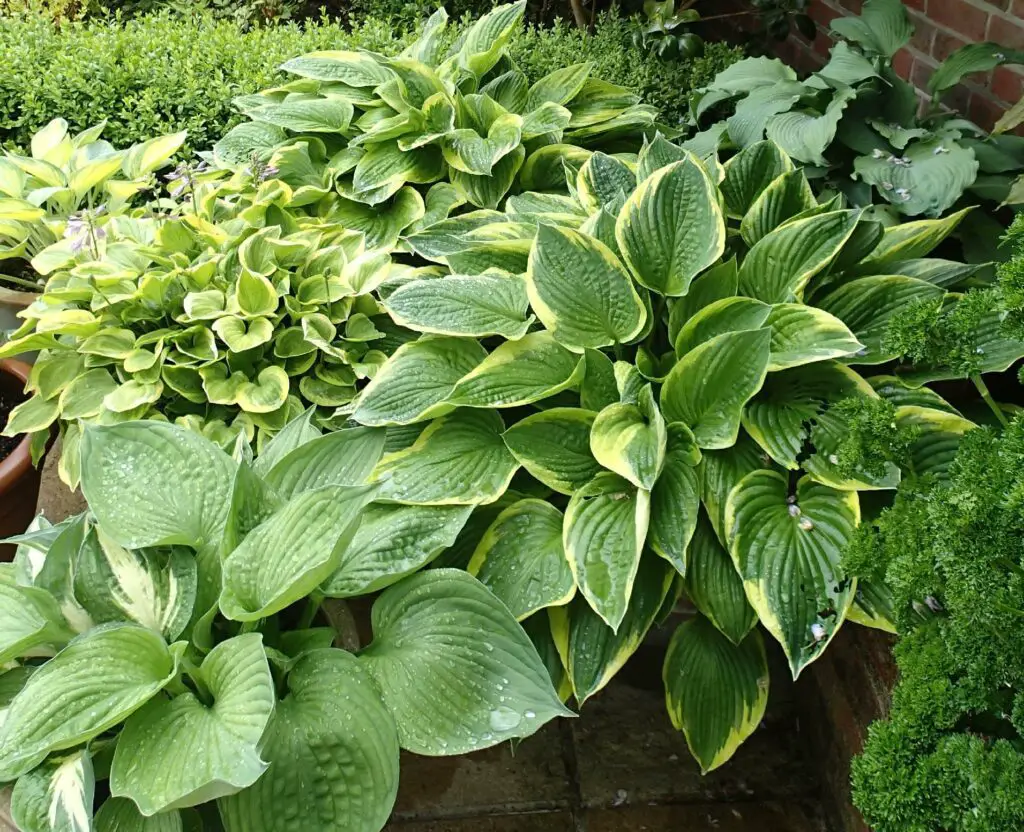
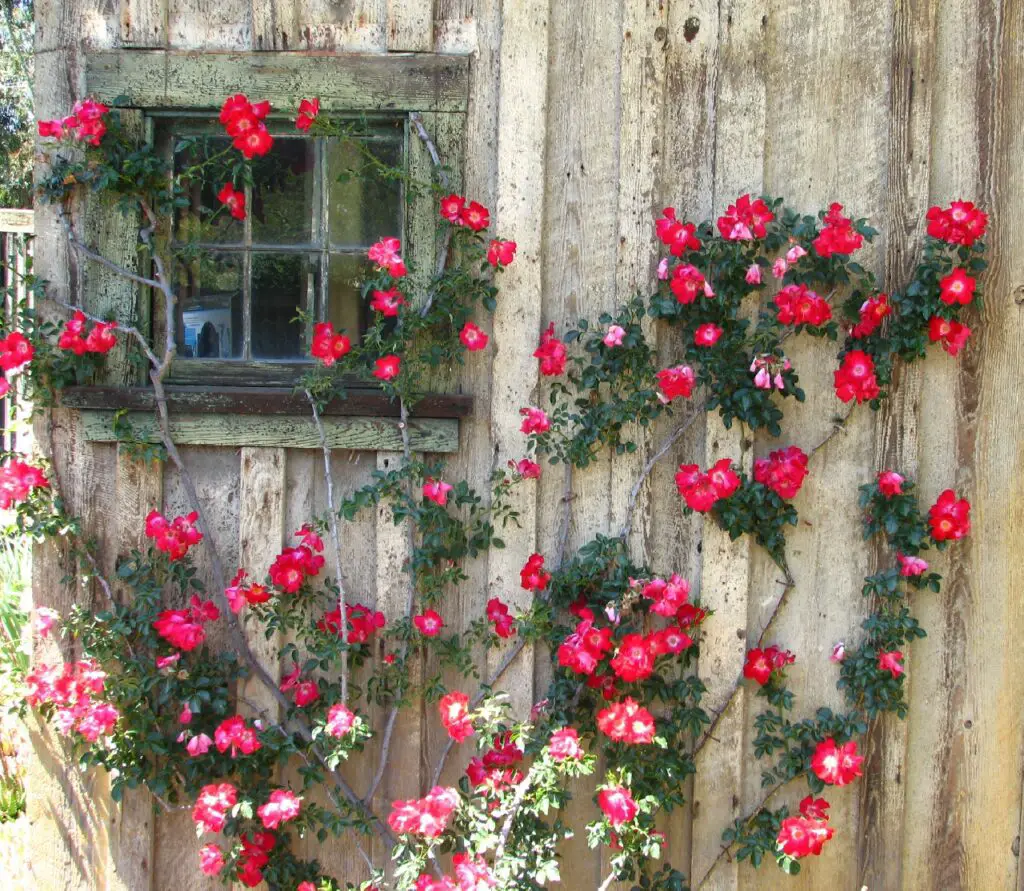

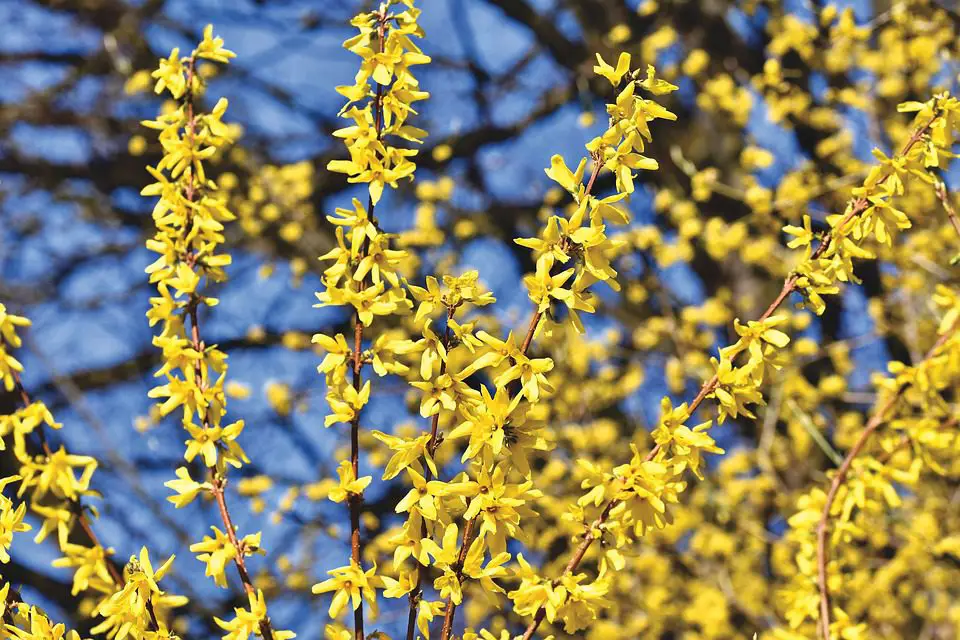
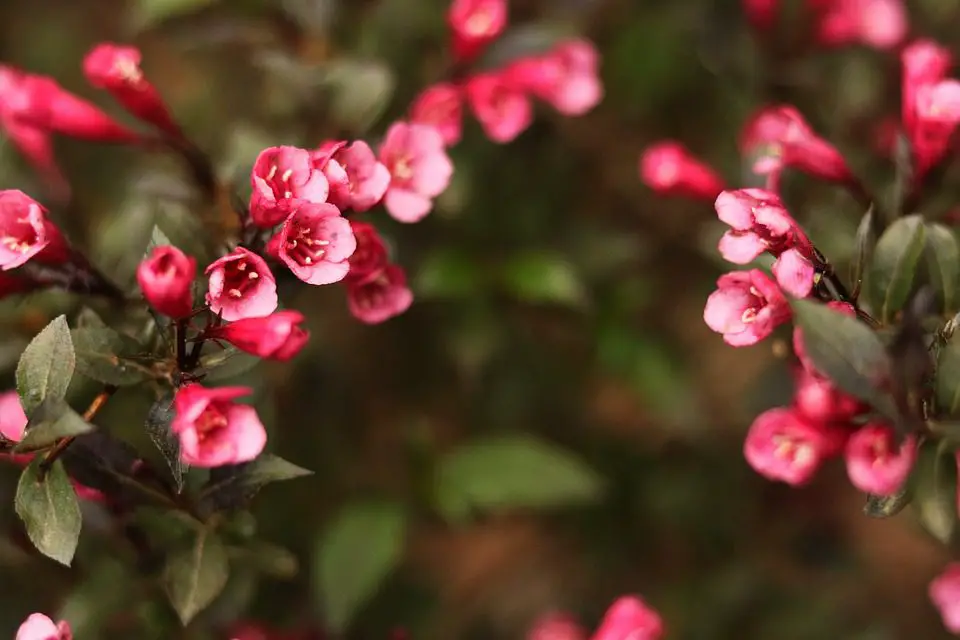
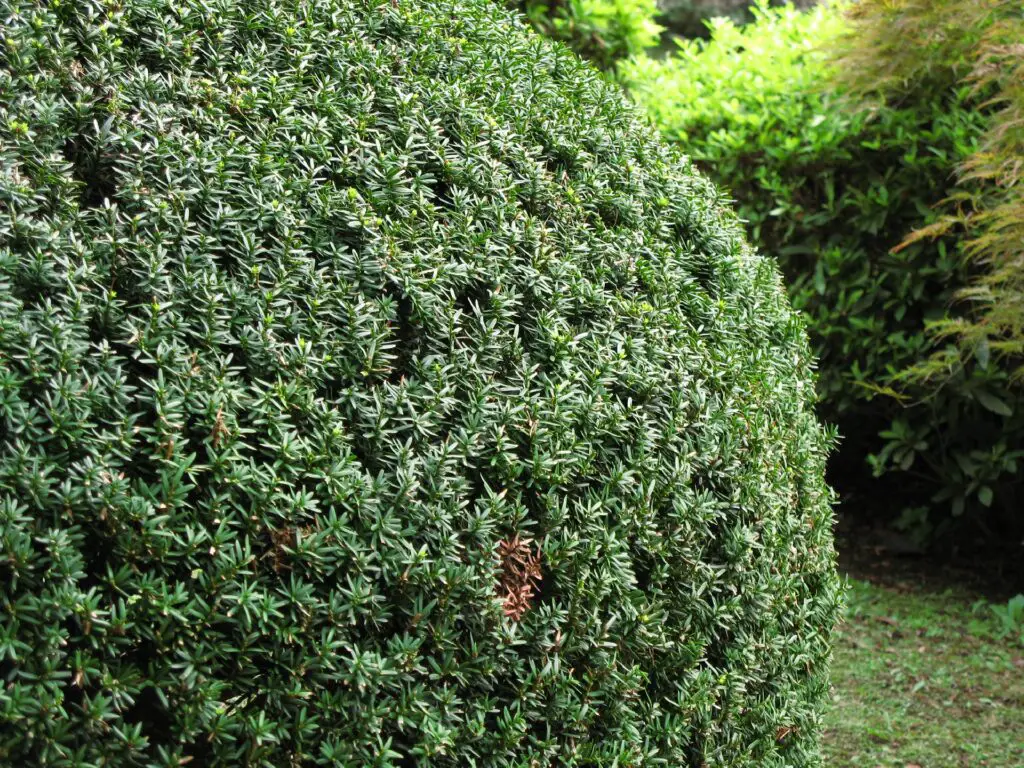
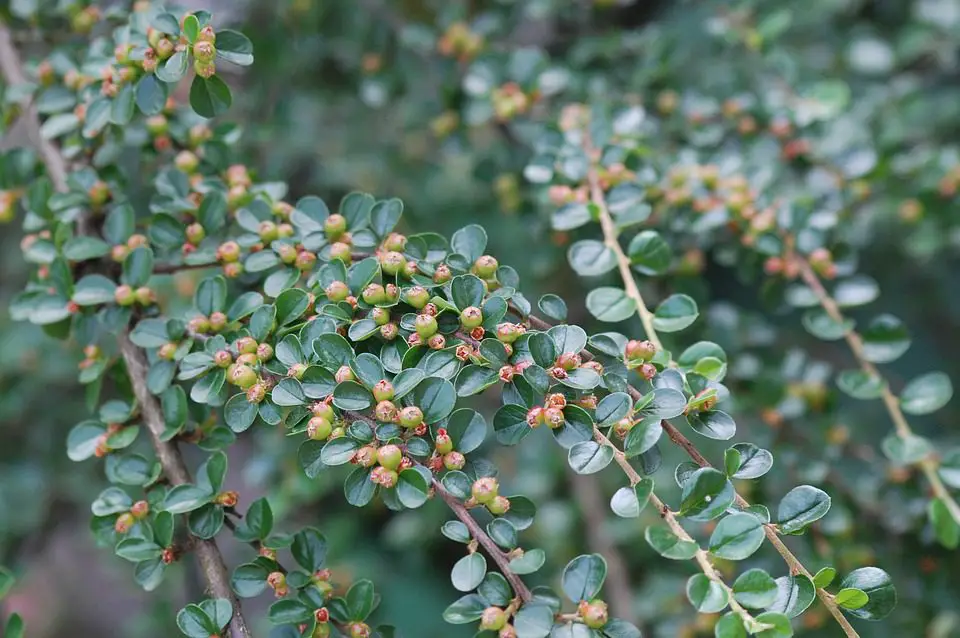


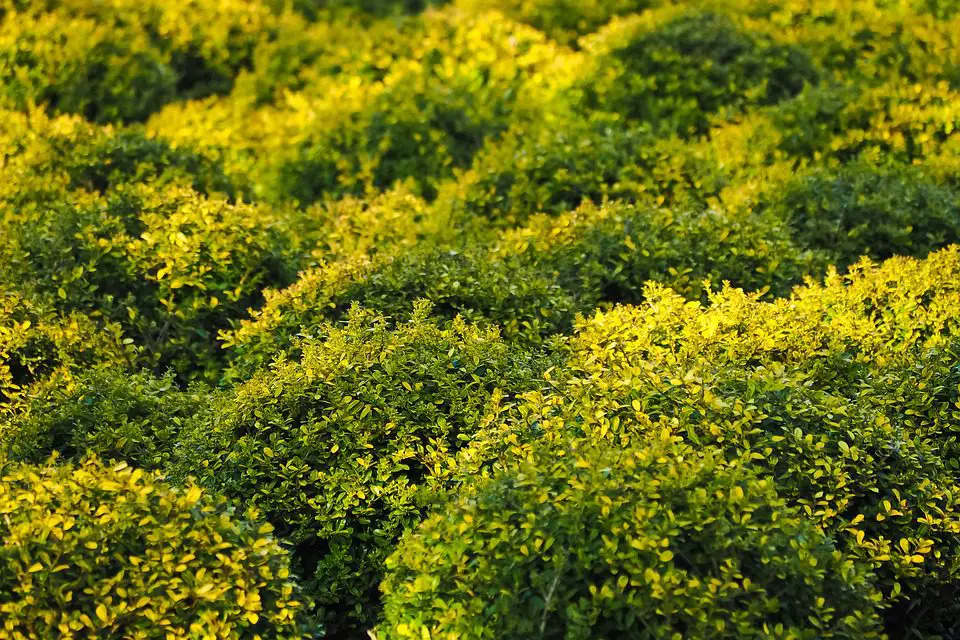
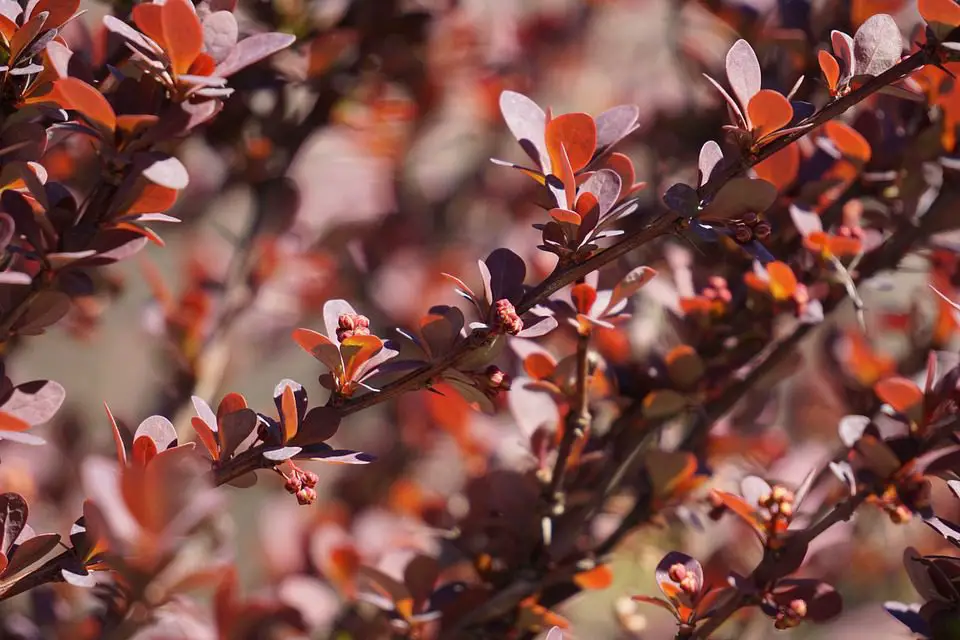


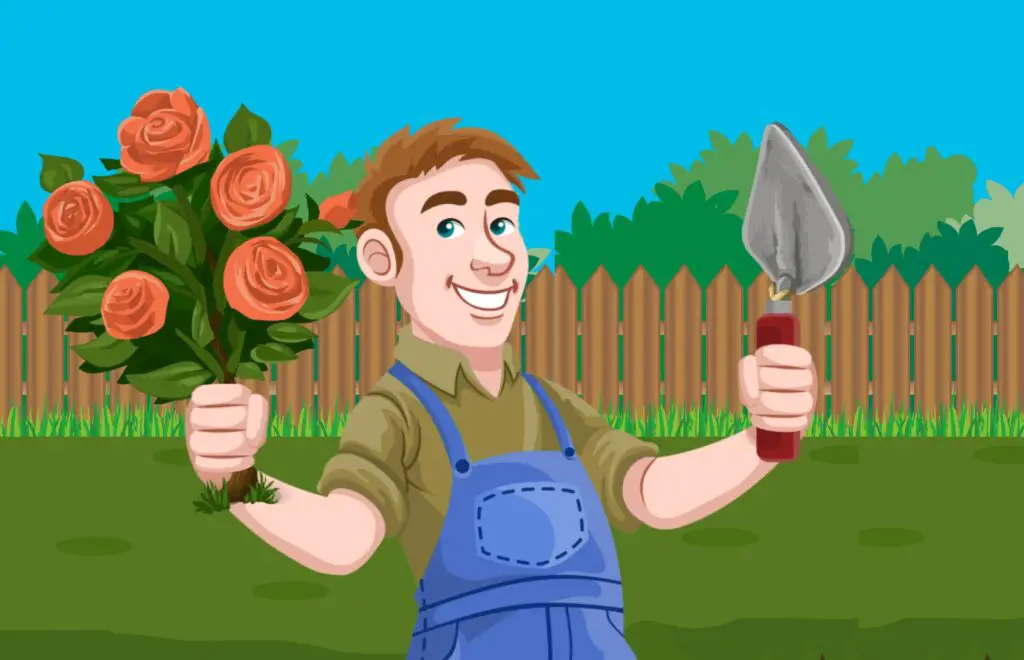
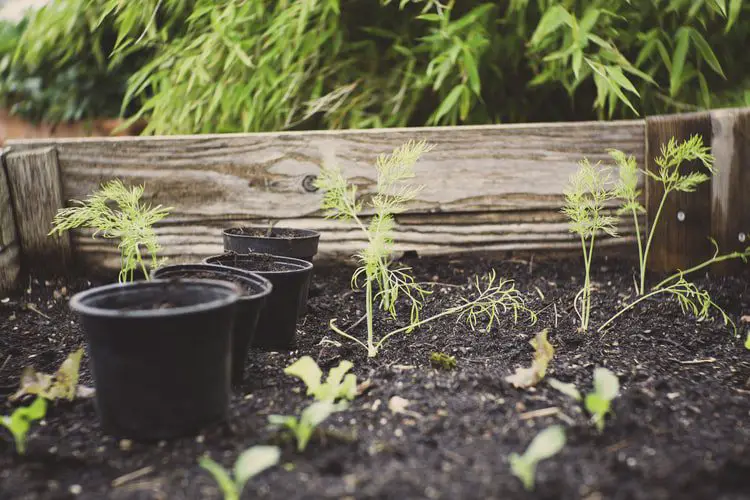
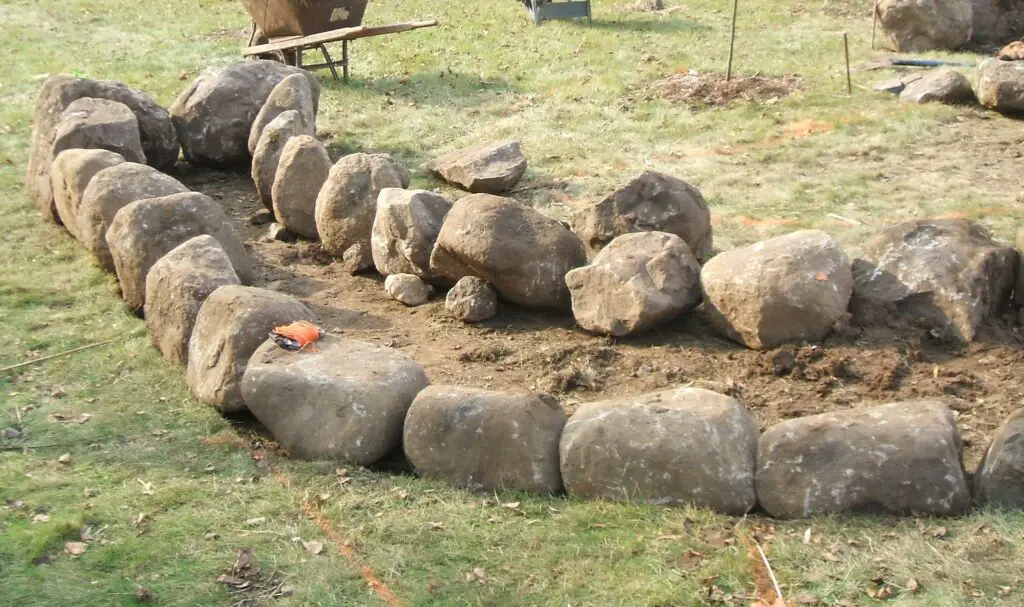
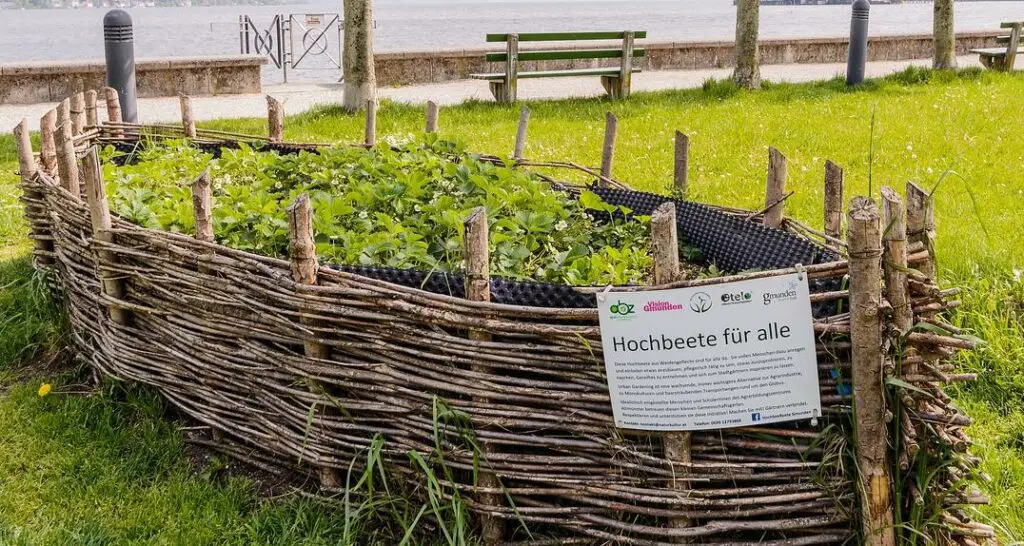
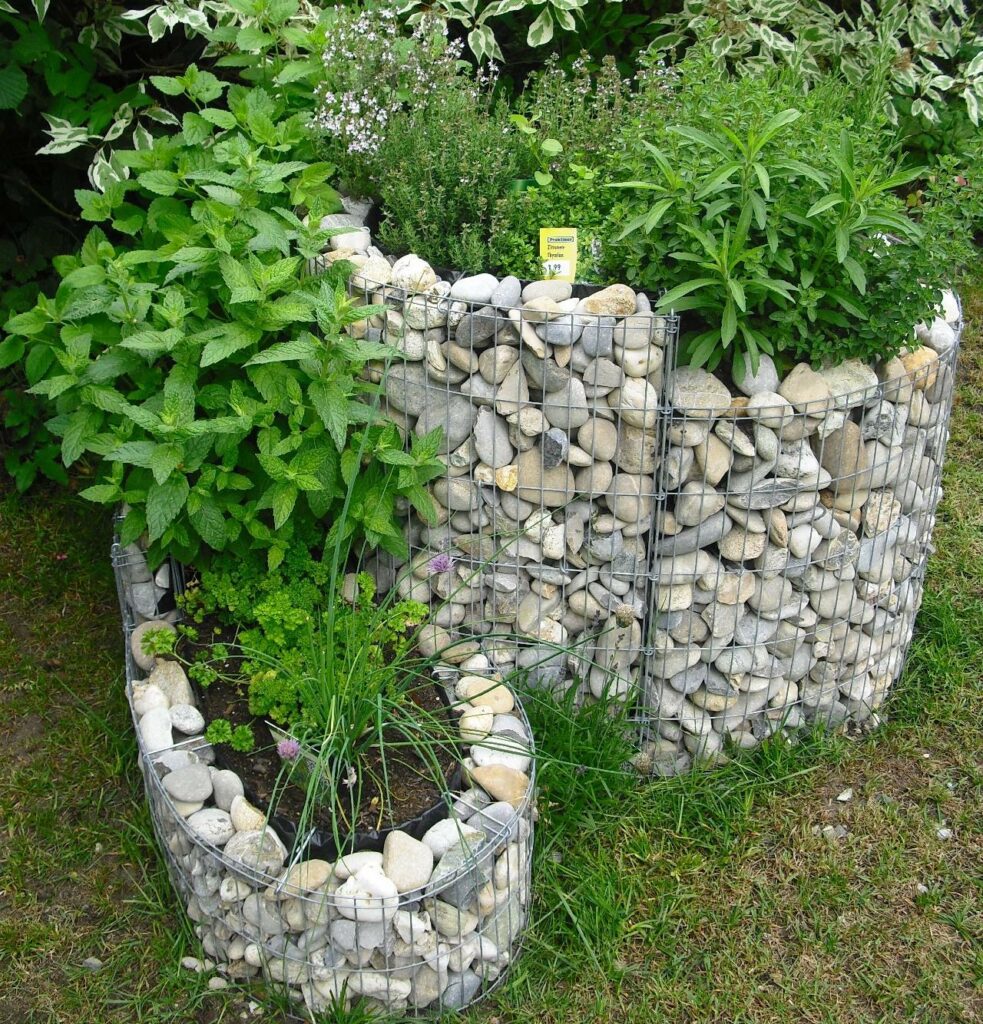

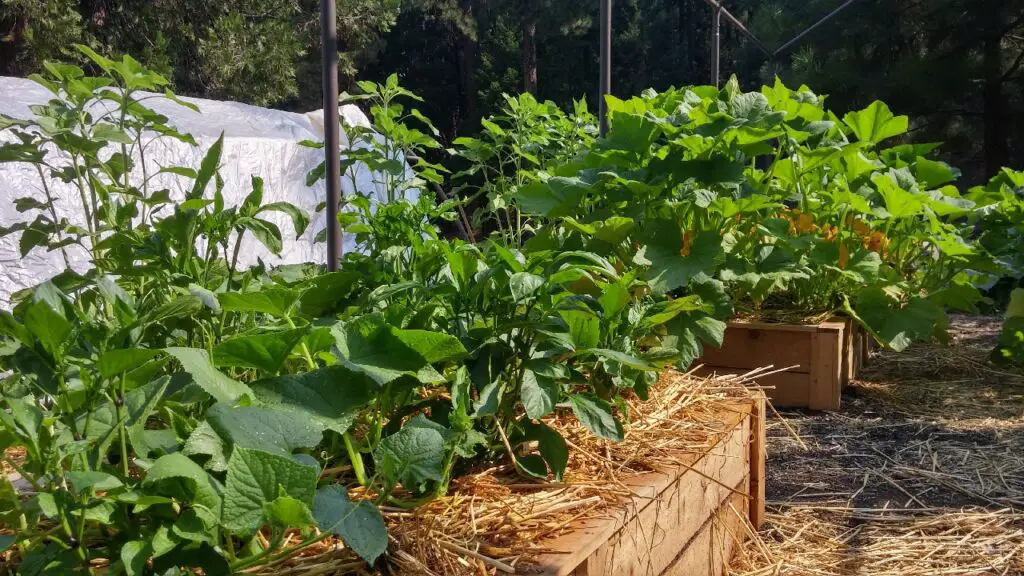
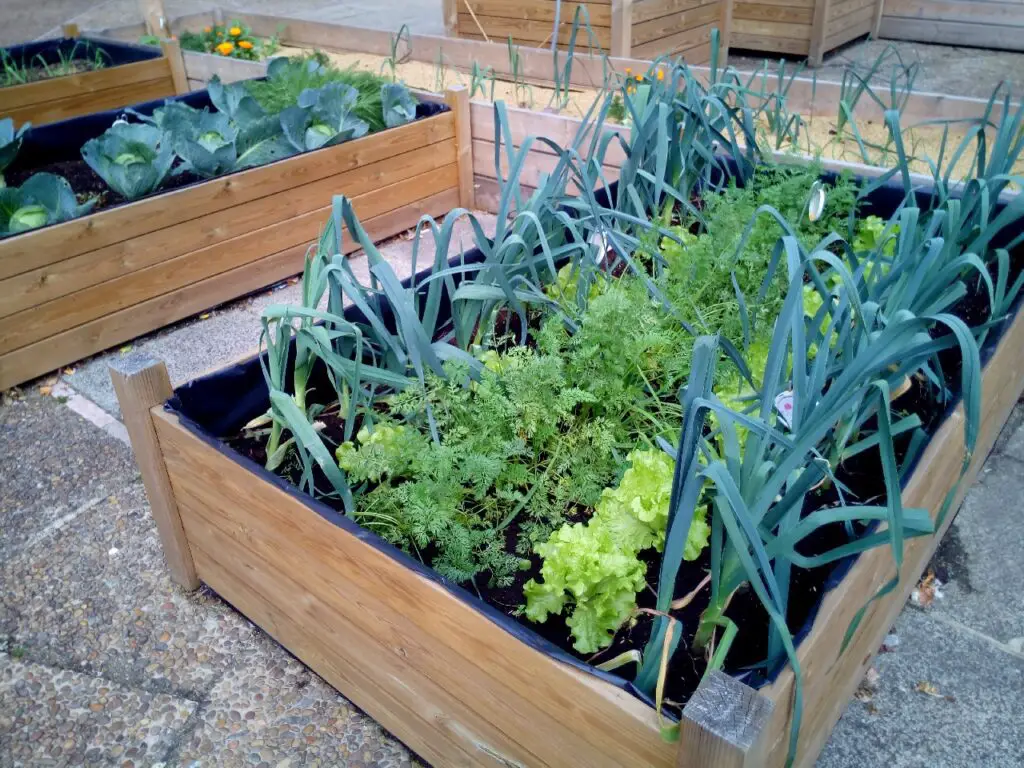
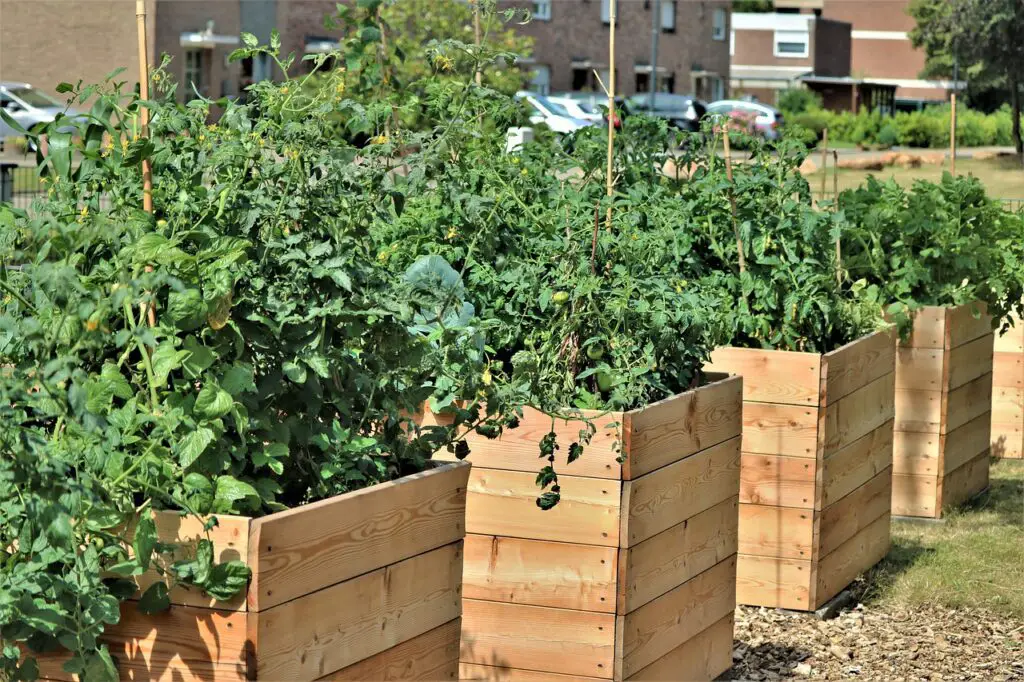
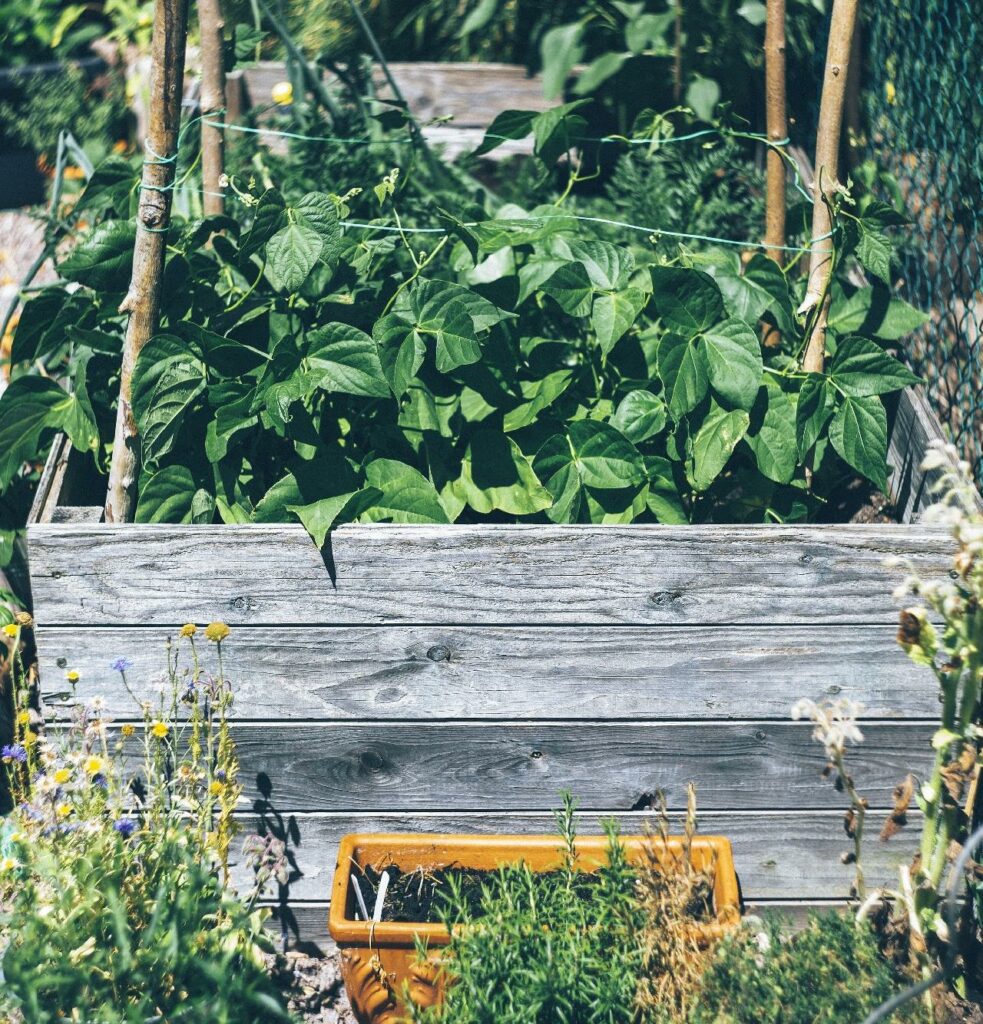
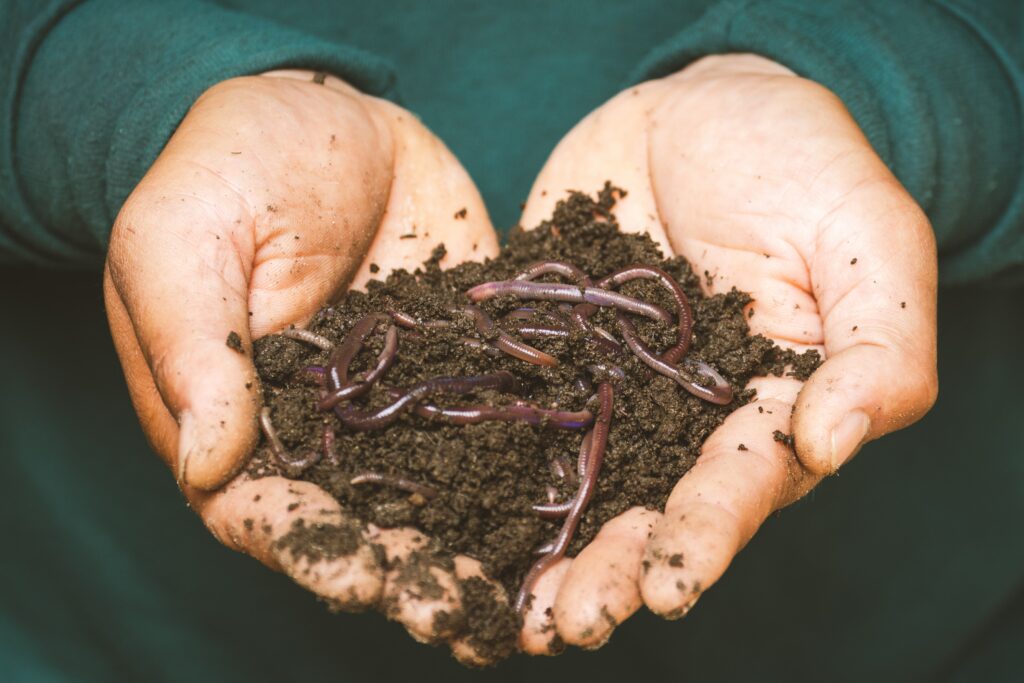
.jpg)
_(2).jpg)